Prima Games eGuides
primagames.com Browse Redeem a code Help
Darksiders II eGuide
Sign in My Guides

Sign in or create an account

We'll email you a link. No password needed, and if you don't have an account yet, the link makes one.

By creating an account or signing in, you agree to our Terms of Service and Privacy Policy.

Have a password?

Had an account on the old eGuides site, or a code from a printed guide? Help and troubleshooting

Sign in with a password

By signing in, you agree to our Terms of Service and Privacy Policy.

Check your email

A sign-in link is on its way. It works once and expires in 15 minutes. Open it and you're in, with an account if you didn't already have one.

Contents

  • Maps
    • Maps
      • Map Listing
  • Essentials
    • Exploration and Combat
      • Controls
      • Exploring
      • Combat
      • Leveling Up
      • Equipping Gear
      • Death’s Attributes
    • Skills and Combos
      • Skills
      • Moves and Combos
    • Appendix
      • Legendary Items
      • Secret Chests
      • Boatman Coins
      • Book of the Dead Pages
      • Stonebites
      • Relics
      • Soul Arbiter's Scrolls
      • GnoMAD Gnomes
      • Achievements
  • Walkthrough
    • The Keeper of Secrets
      • The Veil
      • Boss Battle: War’s Shade
    • The Fire of the Mountain
      • Forge Lands
      • Tri-Stone
      • Stonefather’s Vale
      • The Weeping Crag
      • Baneswood
      • East Trail
      • The Charred Pass
      • Passing Through
      • The Cauldron
      • Boss Battle: Gharn
    • Tears of the Mountain
      • Stonefather’s Vale
      • Shadow Gorge
      • The Fjord
      • The Drenchfort
      • Boss Battle: Karkinos
    • To Move a Mountain
      • The Nook
      • The Lost Temple
      • Boss Battle: Construct Hulk
    • Heart of the Mountain
      • The Foundry
      • The First Heart Stone
      • The Second Heart Stone
      • The Third Heart Stone
      • Boss Battle: Corrupted Custodian
    • The Tree of Life
      • Boss Battle: The Guardian
      • The Verdant Hollow
    • The Kingdom of the Dead
      • The Tree of Death
      • Leviathan’s Gorge
      • Breach
      • Breach Exterior
      • The Maw: West Valley
      • Serpent’s Peak
      • Eternal Throne
    • The Toll of Kings
      • Gilded Arena
      • The First Animus Stone
      • The Second Animus Stone
      • The Third Animus Stone
      • Boss Battle: Gnashor
    • Court of Bones I: Phariseer
      • Gilded Arena (Exterior)
      • The Maw
      • Phariseer’s Tomb
      • Boss Battle: Phariseer
    • Court of Bones II: Judicator
      • The Spine
      • Judicator’s Tomb
      • The First Soul
      • The Second Soul
      • Boss Battle: Tormentor
      • The Third Soul
      • Boss Battle: Bone Giant
    • Court of Bones III: Basileus
      • Gilded Arena
      • Psychameron
      • Boss Battle: Basileus and Achidna
    • The City of the Dead
      • The City of the Dead
      • Boss Battle: The Wailing Host
    • The Key to Redemption
      • Lostlight
      • The Crystal Spire
    • The Rod of Arafel
      • Earth
      • Boss Battle: The Noss
    • Stains of Heresy
      • The Ivory Citadel
      • Boss Battle: Jamaerah the Scribe
      • Boss Battle: Archon
    • The Lord of the Black Stone
      • Shadow’s Edge
      • The Black Stone
      • Boss Battle: Samael
    • The Well of Souls
      • Final Boss: Avatar of Chaos
    • Side Quests
      • The Crucible
      • Thane’s Side Quests
      • Muria’s Side Quests
      • Alya’s Side Quest
      • Vulgrim’s Side Quest
      • Blackroot’s Side Quest
      • Oran’s Side Quest
      • Ostegoth’s Side Quest
      • The Chancellor’s Side Quest
      • Nathaniel’s Side Quest
      • Uriel’s Side Quest
    • Side Areas
      • The Weeping Crag
      • Boss Battle: Gorewood
      • The Shattered Forge
      • The Scar
      • Boss Battle: Ghorn
    • Side Quests and Areas
      • Lair of the Deposed King
      • Boss Battle: Argul
      • Sentinel’s Gaze
      • Boneriven
      • Soul Arbiter’s Maze
      • Boss Battle: The Soul Arbiter
  • Extras
    • Behind the Scenes
      • Darksiders II Behind the Scenes
      • Creating Death
    • Behind the Scenes Videos
      • Video Interviews

Darksiders II Guide › Walkthrough › The Key to Redemption

Lostlight

Though it was not his original intent, the Horseman has purged the Forge Lands of Corruption and passed through the Kingdom of the Dead unscathed. Now, the Rider must journey to the realm of angels in search of a special key—one of two keys needed to gain entry to the Well of Souls.

Lostlight

This tranquil realm is home to angels, but it has known turmoil in recent times.

To the Crystal Spire

Chat with the Crowfather as you exit the Tree of Life, and then ride north toward a distant tower known as the Crystal Spire. Along the way, explore a side passage to your right where you can raid a chest and visit with the demonic merchant, Vulgrim. Search behind the brush near Vulgrim to discover a lost Relic.
Relic of Etu-Goth 11

Return to the main trail and notice the colorful door of a Death Tomb farther north. You don’t have enough Book of the Dead pages to open this door, but don’t let that stop you from shooting the Stonebite above it. Snag the Boatman Coin that’s tucked away behind the brush to the left, as well.
Stone of Mystics 25
Boatman Coin 72

You soon reach a long stone bridge that leads to the Crystal Spire. Collect a Book of the Dead page from the nearby ruin to your right (south) before venturing across.
Book of the Dead 26

Fallen Angels

A host of Corrupted Angels ambushes Death after he crosses the stone bridge. Beware of their vicious melee blows and ranged attacks as you fight to cut them all down. Call upon abilities and use potions as you see fit—you’ll soon be able to replenish your supply.

Enemy: Corrupted Angel

  • Class: Soldier

These once holy souls have fallen victim to Corruption and now seek to destroy anything that threatens the insidious substance’s spread. Corrupted Angels move with swift grace and strike with great fury, and they’re also able to fire from afar. This makes them particularly dangerous in groups. Stay mobile to avoid being surrounded, and focus on slaying each Angel in turn.

Angelic Aid

More Corrupted Angels appear after the first few fall, but Death is also aided by the timely appearance of a powerful Hellguard named Nathaniel. Corruption has not touched this noble warrior. Fight hard at Nathaniel’s side and slay the Corrupted host.

Speak with Nathaniel after the battle to learn more about the plague of Corruption that has befallen Lostlight. The honored Hellguard also wishes to aid Death in his quest by offering him a small selection of fine wares. Nathaniel also bestows you with a side quest that involves bringing a special scroll back to the Kingdom of the Dead.
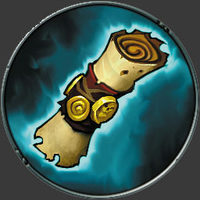
Nathaniel's Scroll

Side Quest Acquired: “The Lost Soul”

Scouring the Grounds

Begin exploring the Crystal Spire's grounds after speaking with Nathaniel. Collect the Boatman Coin that hovers close by.

Boatman Coin 73

Circle around the tower afterward, heading southeast. Shoot the Stonebite affixed to a statue's sword.

Stone of Mystics 26

Continue circling around the tower and raid the far chest. Beware: a number of Vengeful Spirits materialize after you rip the chest open.

Enemy: Vengeful Spirit

  • Class: Fodder

These small, spiteful spirits hover around the Horseman before striking with surprising speed. Keep your distance and make short work of these lowly foes with Redemption.

Continue past the chest and search the far east nook to discover a lost Relic.
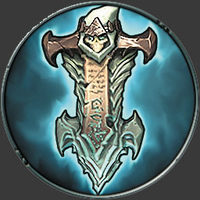
Relic of Renagoth 6

Backtrack toward Nathaniel and explore to the north. Shoot another Stonebite attached to a statue's sword.

Stone of Mystics 27

Keep reading with a free account

The first 3 sections of Darksiders II are open to everyone. An account opens the rest of it, and every other guide in the archive. It's free, and there's nothing to buy.

Bought guides on the old Prima Games site? Your account and every guide you own moved here, so there's nothing to buy again. Sign in.

Create a free account Or browse our free guides

PreviousBoss Battle: The Wailing Host NextThe Crystal Spire