
Prima Games eGuides
primagames.com Browse Redeem a code Help
Darksiders II eGuide
Sign in My Guides

Sign in or create an account

We'll email you a link. No password needed, and if you don't have an account yet, the link makes one.

By creating an account or signing in, you agree to our Terms of Service and Privacy Policy.

Have a password?

Had an account on the old eGuides site, or a code from a printed guide? Help and troubleshooting

Sign in with a password

By signing in, you agree to our Terms of Service and Privacy Policy.

Check your email

A sign-in link is on its way. It works once and expires in 15 minutes. Open it and you're in, with an account if you didn't already have one.

Contents

  • Maps
    • Maps
      • Map Listing
  • Essentials
    • Exploration and Combat
      • Controls
      • Exploring
      • Combat
      • Leveling Up
      • Equipping Gear
      • Death’s Attributes
    • Skills and Combos
      • Skills
      • Moves and Combos
    • Appendix
      • Legendary Items
      • Secret Chests
      • Boatman Coins
      • Book of the Dead Pages
      • Stonebites
      • Relics
      • Soul Arbiter's Scrolls
      • GnoMAD Gnomes
      • Achievements
  • Walkthrough
    • The Keeper of Secrets
      • The Veil
      • Boss Battle: War’s Shade
    • The Fire of the Mountain
      • Forge Lands
      • Tri-Stone
      • Stonefather’s Vale
      • The Weeping Crag
      • Baneswood
      • East Trail
      • The Charred Pass
      • Passing Through
      • The Cauldron
      • Boss Battle: Gharn
    • Tears of the Mountain
      • Stonefather’s Vale
      • Shadow Gorge
      • The Fjord
      • The Drenchfort
      • Boss Battle: Karkinos
    • To Move a Mountain
      • The Nook
      • The Lost Temple
      • Boss Battle: Construct Hulk
    • Heart of the Mountain
      • The Foundry
      • The First Heart Stone
      • The Second Heart Stone
      • The Third Heart Stone
      • Boss Battle: Corrupted Custodian
    • The Tree of Life
      • Boss Battle: The Guardian
      • The Verdant Hollow
    • The Kingdom of the Dead
      • The Tree of Death
      • Leviathan’s Gorge
      • Breach
      • Breach Exterior
      • The Maw: West Valley
      • Serpent’s Peak
      • Eternal Throne
    • The Toll of Kings
      • Gilded Arena
      • The First Animus Stone
      • The Second Animus Stone
      • The Third Animus Stone
      • Boss Battle: Gnashor
    • Court of Bones I: Phariseer
      • Gilded Arena (Exterior)
      • The Maw
      • Phariseer’s Tomb
      • Boss Battle: Phariseer
    • Court of Bones II: Judicator
      • The Spine
      • Judicator’s Tomb
      • The First Soul
      • The Second Soul
      • Boss Battle: Tormentor
      • The Third Soul
      • Boss Battle: Bone Giant
    • Court of Bones III: Basileus
      • Gilded Arena
      • Psychameron
      • Boss Battle: Basileus and Achidna
    • The City of the Dead
      • The City of the Dead
      • Boss Battle: The Wailing Host
    • The Key to Redemption
      • Lostlight
      • The Crystal Spire
    • The Rod of Arafel
      • Earth
      • Boss Battle: The Noss
    • Stains of Heresy
      • The Ivory Citadel
      • Boss Battle: Jamaerah the Scribe
      • Boss Battle: Archon
    • The Lord of the Black Stone
      • Shadow’s Edge
      • The Black Stone
      • Boss Battle: Samael
    • The Well of Souls
      • Final Boss: Avatar of Chaos
    • Side Quests
      • The Crucible
      • Thane’s Side Quests
      • Muria’s Side Quests
      • Alya’s Side Quest
      • Vulgrim’s Side Quest
      • Blackroot’s Side Quest
      • Oran’s Side Quest
      • Ostegoth’s Side Quest
      • The Chancellor’s Side Quest
      • Nathaniel’s Side Quest
      • Uriel’s Side Quest
    • Side Areas
      • The Weeping Crag
      • Boss Battle: Gorewood
      • The Shattered Forge
      • The Scar
      • Boss Battle: Ghorn
    • Side Quests and Areas
      • Lair of the Deposed King
      • Boss Battle: Argul
      • Sentinel’s Gaze
      • Boneriven
      • Soul Arbiter’s Maze
      • Boss Battle: The Soul Arbiter
  • Extras
    • Behind the Scenes
      • Darksiders II Behind the Scenes
      • Creating Death
    • Behind the Scenes Videos
      • Video Interviews

Darksiders II Guide › Walkthrough › The City of the Dead

Boss Battle: The Wailing Host

Boss Battle: The Wailing Host

A titanic fiend awaits the Horseman in the city’s final area. This great devourer of souls must be defeated before the Reaper can uncover the secrets he seeks.

The Wailing Host commonly attacks by slamming the ground with its massive fist, and then swiping back and forth with its arm. The first swipe will hit Death if he’s too close to the monster, while the second will hit him if he’s too far away. Tap the Evade trigger to backflip away from the Host and avoid the first blow, then evade into close range to dodge the second before returning to attacking the boss.

Sometimes the Wailing Host will smash the ground before it with both forearms. Again, tap the Evade trigger to backflip and avoid this punishing attack, and then quickly close in and attack the arms to score damage before they rise.

The Host will periodically vanish and summon a horde of ghostly Skeletons. This is the perfect time to fill up Death’s Wrath meter, along with his health bar if you possess gear that heals the Reaper after each kill. Slaughter all of the Skeletons to make the Host reappear, and then repeat your previous strategies.

When the Host collapses, quickly close in and press the Action button to deliver a nasty attack that rips its mask off. It won’t be long now before the great fiend meets its demise.

A Familiar Face

Having slain the Wailing Host and conquered the City of the Dead, the Rider is surprised to find none other than the Crowfather awaiting him in the following chamber. He informs the rider that two keys are needed to enter the Well of Souls—one possessed by the Angels, and the other kept by the Demons. The Crowfather also reveals information about the spread of Corruption, and tells the Reaper to meet him at the Tree of Death when he’s ready to begin his search for the first key.

When you’ve finished speaking with the Crowfather, fast travel to the Tree of Death to meet him there and speak with the specter yet again. Proceed through the northeast portal afterward to begin your search for the Angel’s key.

the crucible, part II

You receive a new Tarot Card after you defeat the Wailing Host. Use this to participate in the next 25 stages of the Crucible. Clear them all and you'll receive a special prize.
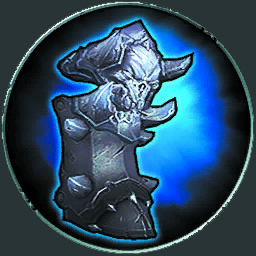
Abyssal Armor Boots

Death Tomb II

If you’ve been following this walkthrough carefully, then you’ve already acquired over 20 Book of the Dead pages. This means you’re able to trade the second Book of the Dead chapter to Vulgrim for a special key that grants access to the second Death Tomb. Obtain the key from Vulgrim, and then make your way down to the bottom of the Lair of the Deposed King by simply descending its long, spiral staircase. Use Vulgrim’s key to open the colorful basement door, enter the Death Tomb, and claim its hoard of plunder.
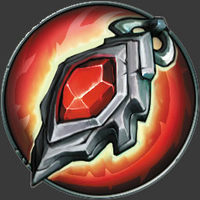
Demonheart

Keep reading with a free account

The first 3 sections of Darksiders II are open to everyone. An account opens the rest of it, and every other guide in the archive. It's free, and there's nothing to buy.

Bought guides on the old Prima Games site? Your account and every guide you own moved here, so there's nothing to buy again. Sign in.

Create a free account Or browse our free guides

PreviousThe City of the Dead NextLostlight