
Prima Games eGuides
primagames.com Browse Redeem a code Help
Darksiders II eGuide
Sign in My Guides

Sign in or create an account

We'll email you a link. No password needed, and if you don't have an account yet, the link makes one.

By creating an account or signing in, you agree to our Terms of Service and Privacy Policy.

Have a password?

Had an account on the old eGuides site, or a code from a printed guide? Help and troubleshooting

Sign in with a password

By signing in, you agree to our Terms of Service and Privacy Policy.

Check your email

A sign-in link is on its way. It works once and expires in 15 minutes. Open it and you're in, with an account if you didn't already have one.

Contents

  • Maps
    • Maps
      • Map Listing
  • Essentials
    • Exploration and Combat
      • Controls
      • Exploring
      • Combat
      • Leveling Up
      • Equipping Gear
      • Death’s Attributes
    • Skills and Combos
      • Skills
      • Moves and Combos
    • Appendix
      • Legendary Items
      • Secret Chests
      • Boatman Coins
      • Book of the Dead Pages
      • Stonebites
      • Relics
      • Soul Arbiter's Scrolls
      • GnoMAD Gnomes
      • Achievements
  • Walkthrough
    • The Keeper of Secrets
      • The Veil
      • Boss Battle: War’s Shade
    • The Fire of the Mountain
      • Forge Lands
      • Tri-Stone
      • Stonefather’s Vale
      • The Weeping Crag
      • Baneswood
      • East Trail
      • The Charred Pass
      • Passing Through
      • The Cauldron
      • Boss Battle: Gharn
    • Tears of the Mountain
      • Stonefather’s Vale
      • Shadow Gorge
      • The Fjord
      • The Drenchfort
      • Boss Battle: Karkinos
    • To Move a Mountain
      • The Nook
      • The Lost Temple
      • Boss Battle: Construct Hulk
    • Heart of the Mountain
      • The Foundry
      • The First Heart Stone
      • The Second Heart Stone
      • The Third Heart Stone
      • Boss Battle: Corrupted Custodian
    • The Tree of Life
      • Boss Battle: The Guardian
      • The Verdant Hollow
    • The Kingdom of the Dead
      • The Tree of Death
      • Leviathan’s Gorge
      • Breach
      • Breach Exterior
      • The Maw: West Valley
      • Serpent’s Peak
      • Eternal Throne
    • The Toll of Kings
      • Gilded Arena
      • The First Animus Stone
      • The Second Animus Stone
      • The Third Animus Stone
      • Boss Battle: Gnashor
    • Court of Bones I: Phariseer
      • Gilded Arena (Exterior)
      • The Maw
      • Phariseer’s Tomb
      • Boss Battle: Phariseer
    • Court of Bones II: Judicator
      • The Spine
      • Judicator’s Tomb
      • The First Soul
      • The Second Soul
      • Boss Battle: Tormentor
      • The Third Soul
      • Boss Battle: Bone Giant
    • Court of Bones III: Basileus
      • Gilded Arena
      • Psychameron
      • Boss Battle: Basileus and Achidna
    • The City of the Dead
      • The City of the Dead
      • Boss Battle: The Wailing Host
    • The Key to Redemption
      • Lostlight
      • The Crystal Spire
    • The Rod of Arafel
      • Earth
      • Boss Battle: The Noss
    • Stains of Heresy
      • The Ivory Citadel
      • Boss Battle: Jamaerah the Scribe
      • Boss Battle: Archon
    • The Lord of the Black Stone
      • Shadow’s Edge
      • The Black Stone
      • Boss Battle: Samael
    • The Well of Souls
      • Final Boss: Avatar of Chaos
    • Side Quests
      • The Crucible
      • Thane’s Side Quests
      • Muria’s Side Quests
      • Alya’s Side Quest
      • Vulgrim’s Side Quest
      • Blackroot’s Side Quest
      • Oran’s Side Quest
      • Ostegoth’s Side Quest
      • The Chancellor’s Side Quest
      • Nathaniel’s Side Quest
      • Uriel’s Side Quest
    • Side Areas
      • The Weeping Crag
      • Boss Battle: Gorewood
      • The Shattered Forge
      • The Scar
      • Boss Battle: Ghorn
    • Side Quests and Areas
      • Lair of the Deposed King
      • Boss Battle: Argul
      • Sentinel’s Gaze
      • Boneriven
      • Soul Arbiter’s Maze
      • Boss Battle: The Soul Arbiter
  • Extras
    • Behind the Scenes
      • Darksiders II Behind the Scenes
      • Creating Death
    • Behind the Scenes Videos
      • Video Interviews

Darksiders II Guide › Walkthrough › The Toll of Kings

The Third Animus Stone

Area 17: Hall of the Dead

Beware: A formidable Skeletal Champion guards the hall beyond the north door, and calls a horde of Skeletons and Skeletal Warriors forth to its aid. Stay evasive and unleash violent anti-group combos and abilities to lay waste to this fearsome horde. The Champion is much stronger than other dead soldiers you’ve faced to this point, but it can still be Deathgripped and juggled with air combos like other minion-class foes.

Enemy: Skeletal Champion

  • Class: Minion

Skeletal Champions are among the most powerful dead soldiers that Death faces. Skeletal Champions can withstand tremendous punishment, and their attacks cover great distance, landing with crushing force. Be patient and evade a Skeletal Champion’s mighty blows, dodging twice to slip their two-strike combos. Quickly counter afterward, landing your best moves while the fiend is off-balance.

Area 18: North Drawbridge

The bridge beyond the Hall of the Dead is not extended, and there’s no easy way across. Explore the east passage and take a roundabout route to the north, but beware: two more Skeletal Champions lurk in these narrow corridors.

Death faces a seemingly endless onslaught of Skeletons after the final Skeletal Champion falls. Stay agile and don’t let down your guard until the torrent finally subsides.

A Game of Throne

You've bypassed the drawbridge and reached the north side of the bridge. Stand on the nearby pressure plate to raise the bridge, and then Deathgrip a Shadowbomb from the bridge's pod.

Bring the bomb over to the north throne, stand next to the throne, and toss the bomb at the nearby switch.

The resulting blast triggers the switch, causing the throne platform to rotate and delivering Death to a new area.

Area 19: Animus Stone Chamber III

Beware: a horrific Scarab Hulk attacks you in this final cavern. Evade this brute’s attacks and counter with vicious combos. The Scarab Hulk’s a worthy adversary, but try to preserve Death’s Reaper Form ability for the coming battle against the arena’s champion. Use timely counters and wear down this overgrown insect with wrath-based skills, instead.

Enemy: Scarab Hulk

  • Class: Brute

Scarab Hulks are monstrous insects that move with frightening speed and possess lethal, far-reaching attacks. Dodging and countering effectively is vital when battling these grotesque foes. Start evading the moment you see a Scarab Hulk’s wings begin to flap, for this signals a forthcoming attack. Scarab Hulks commonly strike by dashing forward and swiping with their long claws, or by taking to the sky and divebombing Death with heavy momentum. Evade to one side to avoid these assaults, then counter with your best single-target attacks and skills.

Approach the far altar after the Scarab Hulk falls to claim the third and final Animus Stone. Excellent work! Return to the Drawbridge area by pulling the switch back near the throne, and then quickly stepping aboard the throne platform before it spins.
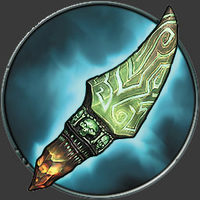
Animus Stone 3

Returning the Third Stone

Make the short jaunt back to the Arena, and place the final Animus Stone onto the altar. At last, the Arena’s champion has been called!

Keep reading with a free account

The first 3 sections of Darksiders II are open to everyone. An account opens the rest of it, and every other guide in the archive. It's free, and there's nothing to buy.

Bought guides on the old Prima Games site? Your account and every guide you own moved here, so there's nothing to buy again. Sign in.

Create a free account Or browse our free guides

PreviousThe Second Animus Stone NextBoss Battle: Gnashor