Prima Games eGuides
primagames.com Browse Redeem a code Help
Darksiders II eGuide
Sign in My Guides

Sign in or create an account

We'll email you a link. No password needed, and if you don't have an account yet, the link makes one.

By creating an account or signing in, you agree to our Terms of Service and Privacy Policy.

Have a password?

Had an account on the old eGuides site, or a code from a printed guide? Help and troubleshooting

Sign in with a password

By signing in, you agree to our Terms of Service and Privacy Policy.

Check your email

A sign-in link is on its way. It works once and expires in 15 minutes. Open it and you're in, with an account if you didn't already have one.

Contents

  • Maps
    • Maps
      • Map Listing
  • Essentials
    • Exploration and Combat
      • Controls
      • Exploring
      • Combat
      • Leveling Up
      • Equipping Gear
      • Death’s Attributes
    • Skills and Combos
      • Skills
      • Moves and Combos
    • Appendix
      • Legendary Items
      • Secret Chests
      • Boatman Coins
      • Book of the Dead Pages
      • Stonebites
      • Relics
      • Soul Arbiter's Scrolls
      • GnoMAD Gnomes
      • Achievements
  • Walkthrough
    • The Keeper of Secrets
      • The Veil
      • Boss Battle: War’s Shade
    • The Fire of the Mountain
      • Forge Lands
      • Tri-Stone
      • Stonefather’s Vale
      • The Weeping Crag
      • Baneswood
      • East Trail
      • The Charred Pass
      • Passing Through
      • The Cauldron
      • Boss Battle: Gharn
    • Tears of the Mountain
      • Stonefather’s Vale
      • Shadow Gorge
      • The Fjord
      • The Drenchfort
      • Boss Battle: Karkinos
    • To Move a Mountain
      • The Nook
      • The Lost Temple
      • Boss Battle: Construct Hulk
    • Heart of the Mountain
      • The Foundry
      • The First Heart Stone
      • The Second Heart Stone
      • The Third Heart Stone
      • Boss Battle: Corrupted Custodian
    • The Tree of Life
      • Boss Battle: The Guardian
      • The Verdant Hollow
    • The Kingdom of the Dead
      • The Tree of Death
      • Leviathan’s Gorge
      • Breach
      • Breach Exterior
      • The Maw: West Valley
      • Serpent’s Peak
      • Eternal Throne
    • The Toll of Kings
      • Gilded Arena
      • The First Animus Stone
      • The Second Animus Stone
      • The Third Animus Stone
      • Boss Battle: Gnashor
    • Court of Bones I: Phariseer
      • Gilded Arena (Exterior)
      • The Maw
      • Phariseer’s Tomb
      • Boss Battle: Phariseer
    • Court of Bones II: Judicator
      • The Spine
      • Judicator’s Tomb
      • The First Soul
      • The Second Soul
      • Boss Battle: Tormentor
      • The Third Soul
      • Boss Battle: Bone Giant
    • Court of Bones III: Basileus
      • Gilded Arena
      • Psychameron
      • Boss Battle: Basileus and Achidna
    • The City of the Dead
      • The City of the Dead
      • Boss Battle: The Wailing Host
    • The Key to Redemption
      • Lostlight
      • The Crystal Spire
    • The Rod of Arafel
      • Earth
      • Boss Battle: The Noss
    • Stains of Heresy
      • The Ivory Citadel
      • Boss Battle: Jamaerah the Scribe
      • Boss Battle: Archon
    • The Lord of the Black Stone
      • Shadow’s Edge
      • The Black Stone
      • Boss Battle: Samael
    • The Well of Souls
      • Final Boss: Avatar of Chaos
    • Side Quests
      • The Crucible
      • Thane’s Side Quests
      • Muria’s Side Quests
      • Alya’s Side Quest
      • Vulgrim’s Side Quest
      • Blackroot’s Side Quest
      • Oran’s Side Quest
      • Ostegoth’s Side Quest
      • The Chancellor’s Side Quest
      • Nathaniel’s Side Quest
      • Uriel’s Side Quest
    • Side Areas
      • The Weeping Crag
      • Boss Battle: Gorewood
      • The Shattered Forge
      • The Scar
      • Boss Battle: Ghorn
    • Side Quests and Areas
      • Lair of the Deposed King
      • Boss Battle: Argul
      • Sentinel’s Gaze
      • Boneriven
      • Soul Arbiter’s Maze
      • Boss Battle: The Soul Arbiter
  • Extras
    • Behind the Scenes
      • Darksiders II Behind the Scenes
      • Creating Death
    • Behind the Scenes Videos
      • Video Interviews

Darksiders II Guide › Walkthrough › Side Quests and Areas

Soul Arbiter’s Maze

Soul Arbiter’s Maze

An ancient maze lies at the north end of the Spine’s west valley. Normally, you’d have little hope of solving this labyrinth until you discover all of the Soul Arbiter’s Scrolls that are scattered throughout the realms. However, because you’ve wisely purchased this guide, you don’t really need those scrolls at all—we reveal exactly how to solve the maze right here.

Click here for interactive maps

Maze Entry

The Soul Arbiter’s Maze features a small entry area that must be navigated in order to reach the maze proper. Smash the crates in the southeast corner to obtain a Boatman Coin, and then scale the north wall to reach a hand hold. Deathgrip across the overhead hoops to reach a southern ledge with a switch.
Boatman Coin 100

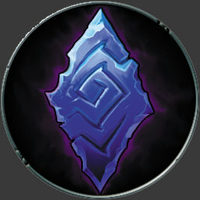
Before pushing the switch, aim west and blast the Stonebite on the wall. Push the switch afterward to make a row of pegs appear on the west wall. Drop down and quickly scale the west wall before the pegs retract. Deathgrip the overhead hoops to swing over to the east ledge.
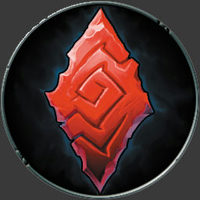
Stone of Power 25

Pull the east ledge’s lever to permanently lock the west wall’s pegs in place. Open the nearby chest, and then proceed through the north door. Follow a short passage to discover the unassuming entrance to the Soul Arbiter’s Maze.

Read the mysterious book that sits on the table to learn the basics of the maze, which we’ll cover in the next section. Collect the scroll that hovers near the maze’s entry portal, and then step onto the portal and travel into the maze.

Soul Arbiter's Scroll 10

Solving the Maze

There are ten levels to the Soul Arbiter’s Maze. Each level features multiple rooms, and each room presents you with a choice of four directions: north (N), south (S), east (E), or west (W). Simply defeat the enemies that attack you in each room, and then choose your direction. Keep searching until you find the stairs that lead down to the next level.

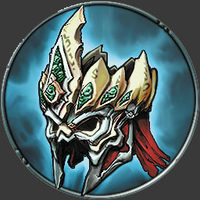
Each level of the maze presents you with progressively stronger enemies. When you reach the end of the maze, you’ll need to contend with the nefarious Soul Arbiter himself. Defeat this worthy adversary to obtain the Soul Arbiter’s Crown, which the Chancellor at the Eternal Throne seeks as part of his “The Chancellor’s Quarry” side quest. See the previous “Side Quests” section of this chapter for further details.

You could get lost forever on a single floor of the maze if you don’t know the correct route to take. Normally, the only way to solve the maze involves collecting the Soul Arbiter’s Scrolls that are scattered across the realms. However, you can easily see exactly how to complete the maze by referencing the following table.

Tip

If you’re determined to find all of the Soul Arbiter’s Scrolls and solve the maze in the traditional fashion, you might consider referencing the “Appendix” chapter for a quick-reference table that reveals the locations of every scroll.

Every level of the maze also holds a secret treasure trove. You’d normally only know to find these by collecting the Soul Arbiter’s Sacred Scrolls that are also hidden throughout the realms—but these, too, are revealed in the following table. Good luck!

Soul Arbiter’s Maze Solutions

Level Secret Directions Next Level Directions
1 - Declination S, E N, W
2 - Apprehension N, N E, S, N
3 - Opposition N, S, E W, E, N, N
4 - Separation W, E, N E, W, N, S
5 - Deception W, N, S W, W, N, E
6 - Isolation E, E, E, S S, E, E, N, N
7 - Revulsion S, S, W, N, N S, W, E, E, E
8 - Inversion N, S, S, E, N N, W, N, W, E
9 - Benediction S, W, E, E, N E, N, E, N, S
10 - Ascension N, S, E, W W, E, N, S, W

Maze Collectibles

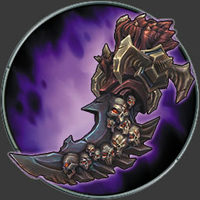
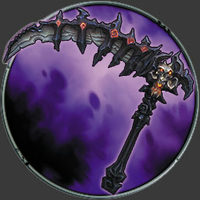
In addition to the Soul Arbiter's Maze's secret treasure troves, there are a few items of special interest hidden within the maze. When you reach the fifth level (Deception), access the secret treasure trove to discover unique scythes called the Black Demise. Also, as you approach the portal that leads down to the maze's eighth level (Inversion), look for a Stonebite on the wall behind it. You'll also earn a special secondary weapon for killing the Soul Arbiter: The Executioner's Hooks.
Tip

Smash breakable objects within the maze to potentially score potions. If your supply is dangerously low, consider leaving the maze to restock. You can return to the start of the lowest level you've reached by inspecting the Mysterious Book on the table near the maze's entrance.

Black Demise
Stone of Mystics 34
Executioner's Hooks
Crown of the Dead

Keep reading with a free account

The first 3 sections of Darksiders II are open to everyone. An account opens the rest of it, and every other guide in the archive. It's free, and there's nothing to buy.

Bought guides on the old Prima Games site? Your account and every guide you own moved here, so there's nothing to buy again. Sign in.

Create a free account Or browse our free guides

PreviousBoneriven NextBoss Battle: The Soul Arbiter