
Prima Games eGuides
primagames.com Browse Redeem a code Help
Street Fighter V eGuide
Sign in My Guides

Sign in or create an account

We'll email you a link. No password needed, and if you don't have an account yet, the link makes one.

By creating an account or signing in, you agree to our Terms of Service and Privacy Policy.

Have a password?

Had an account on the old eGuides site, or a code from a printed guide? Help and troubleshooting

Sign in with a password

By signing in, you agree to our Terms of Service and Privacy Policy.

Check your email

A sign-in link is on its way. It works once and expires in 15 minutes. Open it and you're in, with an account if you didn't already have one.

Contents

  • Changelog
    • Updates
  • Primer
    • About This Guide
    • Reading Frame Data
    • Battle Tips for Experienced Fighting Game Players
  • Glossary
    • A-C
    • D-J
    • K-O
    • P-S
    • T-Z
  • Fighters
    • Alex
      • Data
      • Standing Normal Moves
      • Crouching Normal Moves
      • Jumping Normal Moves
      • Unique Attacks
      • Normal Throws
      • Special Moves
      • Critical Art
      • V-System
      • Combos
    • Balrog
      • Data
      • Standing Normal Moves
      • Crouching Normal Moves
      • Jumping Normal Moves
      • Unique Attacks
      • Normal Throws
      • Special Moves
      • Critical Art
      • V-System
      • Combos
    • Birdie
      • Bio
      • Data
      • Standing Normal Moves
      • Crouching Normal Moves
      • Jumping Normal Moves
      • Unique Attacks
      • Normal Throws
      • Special Moves
      • Critical Art
      • V-System
      • Overview
      • Strategy
      • Combos
    • Cammy
      • Bio
      • Data
      • Standing Normal Moves
      • Crouching Normal Moves
      • Jumping Normal Moves
      • Unique Attacks
      • Normal Throws
      • Special Moves
      • Critical Art
      • V-System
      • Overview
      • Strategy
      • Combos
    • Chun-Li
      • Bio
      • Data
      • Standing Normal Moves
      • Crouching Normal Moves
      • Jumping Normal Moves
      • Unique Attacks
      • Normal Throws
      • Special Moves
      • Critical Art
      • V-System
      • Modified Attacks During Renkiko
      • Overview
      • Strategy
      • Combos
    • Dhalsim
      • Bio
      • Data
      • Standing Normal Moves
      • Crouching Normal Moves
      • Jumping Normal Moves
      • Unique Attacks
      • Normal Throws
      • Special Moves
      • Critical Art
      • V-System
      • Overview
      • Strategy
      • Combos
    • F.A.N.G.
      • Bio
      • Data
      • Standing Normal Moves
      • Crouching Normal Moves
      • Jumping Normal Moves
      • Unique Attacks
      • Normal Throws
      • Special Moves
      • Critical Art
      • V System
      • Overview
      • Strategy
      • Combos
    • Guile
      • Data
      • Standing Normal Moves
      • Crouching Normal Moves
      • Jumping Normal Moves
      • Unique Attacks
      • Normal Throws
      • Special Moves
      • Critical Art
      • V-System
      • Combos
    • Ibuki
      • Data
      • Standing Normal Moves
      • Crouching Normal Moves
      • Jumping Normal Moves
      • Unique Attacks
      • Normal Throws
      • Special Moves
      • Critical Art
      • V-System
      • Combos
    • Juri
      • Data
      • Standing Normal Moves
      • Crouching Normal Moves
      • Jumping Normal Moves
      • Unique Attacks
      • Normal Throws
      • Special Moves
      • Critical Art
      • V-System
      • Combos
    • Karin
      • Bio
      • Data
      • Standing Normal Moves
      • Crouching Normal Moves
      • Jumping Normal Moves
      • Unique Attacks
      • Normal Throws
      • Special Moves
      • Critical Art
      • V-System
      • Overview
      • Strategy
      • Combos
    • Ken
      • Bio
      • Data
      • Standing Normal Moves
      • Crouching Normal Moves
      • Jumping Normal Moves
      • Unique Attacks
      • Normal Throws
      • Special Moves
      • Critical Art
      • V System
      • Overview
      • Strategy
      • Combos
    • Laura
      • Bio
      • Data
      • Standing Normal Moves
      • Crouching Normal Moves
      • Jumping Normal Moves
      • Unique Attacks
      • Normal Throws
      • Special Moves
      • Critical Art
      • V System
      • Overview
      • Strategy
      • Combos
    • M. Bison
      • Bio
      • Data
      • Standing Normal Moves
      • Crouching Normal Moves
      • Jumping Normal Moves
      • Unique Attacks
      • Normal Throws
      • Special Moves
      • Critical Art
      • V-System
      • Overview
      • Strategy
      • Combos
    • Nash
      • Bio
      • Data
      • Standing Normal Moves
      • Crouching Normal Moves
      • Jumping Normal Moves
      • Unique Attacks
      • Normal Throws
      • Special Moves
      • Critical Art
      • V-System
      • Overview
      • Strategy
      • Combos
    • Necalli
      • Bio
      • Data
      • Standing Normal Moves
      • Crouching Normal Moves
      • Jumping Normal Moves
      • Unique Attacks
      • Normal Throws
      • Special Moves
      • Critical Art
      • V-System
      • Moves During Torrent of Power
      • Overview
      • Strategy
      • Combos
    • R. Mika
      • Bio
      • Data
      • Standing Normal Moves
      • Crouching Normal Moves
      • Jumping Normal Moves
      • Unique Attacks
      • Normal Throws
      • Special Moves
      • Critical Art
      • V-System
      • Overview
      • Strategy
      • Combos
    • Rashid
      • Bio
      • Data
      • Standing Normal Moves
      • Crouching Normal Moves
      • Jumping Normal Moves
      • Unique Attacks
      • Normal Throws
      • Special Moves
      • Critical Art
      • V-System
      • Overview
      • Strategy
      • Combos
    • Ryu
      • Bio
      • Data
      • Standing Normal Moves
      • Crouching Normal Moves
      • Jumping Normal Moves
      • Unique Attacks
      • Normal Throws
      • Special Moves
      • Critical Art
      • V-System
      • Modified Attacks During Denjin Renki
      • Overview
      • Strategy
      • Combos
    • Urien
      • Data
      • Standing Normal Moves
      • Crouching Normal Moves
      • Jumping Normal Moves
      • Unique Attacks
      • Normal Throws
      • Special Moves
      • Critical Art
      • V-System
      • Combos
    • Vega
      • Bio
      • Data
      • Claw Standing Punches
      • Hand Standing Punches
      • Standing Kicks
      • Claw Crouching Normals
      • Hand Crouching Normals
      • Crouching Kicks
      • Claw Jumping Normals
      • Hand Jumping Normals
      • Jumping Kicks
      • Claw Unique Attacks
      • Hand Unique Attacks
      • Normal Throws
      • Special Moves
      • Critical Art
      • V-System
      • Overview
      • Strategy
      • Combos
    • Zangief
      • Bio
      • Data
      • Standing Normal Moves
      • Crouching Normal Moves
      • Jumping Normal Moves
      • Unique Attacks
      • Normal Throws
      • Special Moves
      • Critical Art
      • V-System
      • Overview
      • Strategy
      • Combos
  • Matchups and Versus/Online Play
    • Matchups
    • Metagame
    • Classifying Player Types
    • Character Archetypes
    • Versus/Online Tips for Specific Characters
      • vs. Birdie
      • vs. Cammy
      • vs. Chun-Li
      • vs. Dhalsim
      • vs. F.A.N.G.
      • vs. Karin
      • vs. Ken
      • vs. Laura
      • vs. M. Bison
      • vs. Nash
      • vs. Necalli
      • vs. Rashid
      • vs. R. Mika
      • vs. Ryu
      • vs. Vega
      • vs. Zangief

Street Fighter V Guide › Matchups and Versus/Online Play › Versus/Online Tips for Specific Characters

vs. R. Mika

Arresting R. Mika

R. Mika has no real low threat besides a low-damage point-blank combo from crouching to LP Shooting Peach. Otherwise, her crouching slide is bad, not reaching very far and leaving her at a punishable disadvantage on block. However, she has a unique normal throw against crouching characters that gives her great position for wakeup pressure. There just isn’t incentive to block low against R. Mika. You’re free to block high and watch out for her command throws and potential left/right cross-ups with Dive Bomb and jumping , and forget worrying about high/low mix-ups. As a side benefit of holding to block, you may often simply walk backward out of her tick-throw attempts.

Despite lacking a real high/low game, R. Mika’s point-blank game is excellent, with three-frame jabs and untechable five-frame command grabs that you must respect. But her mid-range game beyond the reach of her standing is a little sparse. Her only real tools are charged standing (which is actually safe for her on block, so don’t try fighting back), EX Shooting Peach (which has one hit of armor against your pokes/projectiles), or a perfectly spaced HP Shooting Peach (which leaves R. Mika safe only if she makes you block the last few active frames as she starts to descend). Because she’s so linear from this range, kind of like a female grappler Balrog, she’s also predictable.

Her normal jump-ins are easy to anti-air if you’re prepared, and the only way she can alter jump arc is to use Dive Bomb. Dive Bomb slightly delays her fall and may cause your normal anti-airs to whiff if you use regular anti-air timing. Depending on the quality of your character’s anti-air, though, this may not be a problem: Ryu or Ken’s MP Shoryuken doesn’t care if R. Mika managed to slightly delay her fall. And the payoff for you is high if you block a Dive Bomb or it whiffs. When she is hesitant to jump and has to move in on the ground, use neutral jumps from just beyond the edge of her HK Wingless Airplane anti-air grab. This gives you falling combo chances if she attempts one of her ground-gaining mid-range options and stops under you.

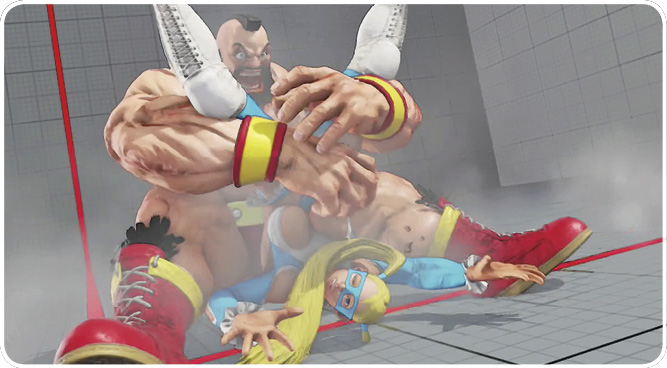
When she’s loaded with V-Gauge, watch out for her Nadeshiko calling animation. After the screen freeze, if she puts down her arms immediately, that means Nadeshiko is flying in after about half a second (slightly faster for the ceiling splash version, slightly later for the dropkick version). If R. Mika keeps her arms pointed skyward for a few beats longer after the screen freeze, that means Nadeshiko won’t show up for about two seconds (right on the nose for the splash, slightly earlier for the dropkicks). Learning to watch for the timing will remove some of the guesswork from worrying about which kind of setup R. Mika might use with her partner, and that helps you incorporate the evasive portions of your character’s moveset effectively. For a couple of examples, with Dhalsim, if you verify Nadeshiko’s incoming timing, it’s easy to Yoga Teleport away at the right moment; with Zangief, it’s easy to be ready to activate armored Iron Body.
Keep reading with a free account

The first 3 sections of Street Fighter V are open to everyone. An account opens the rest of it, and every other guide in the archive. It's free, and there's nothing to buy.

Bought guides on the old Prima Games site? Your account and every guide you own moved here, so there's nothing to buy again. Sign in.

Create a free account Or browse our free guides

Previousvs. Rashid Nextvs. Ryu