
Street Fighter V Guide Fighters Ryu
Unique Attacks
Collarbone Breaker 


| Startup |
20 |
|---|---|
| Active |
4 |
| Recovery |
17 |
| Guard Level |
H |
| On Hit |
±0 |
| On Guard |
-4 |
| VTX Hit |
— |
| VTX Guard |
— |
| Cancel |
— |
| Damage |
60(30+30) |
| Stun |
100(60+40) |
| Meter Gain |
30(10+20)/15(5+10) |
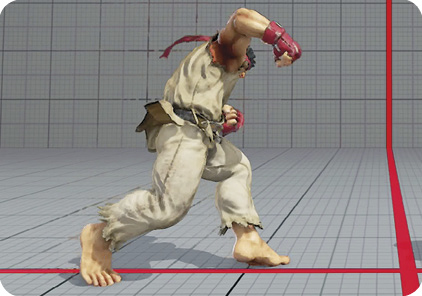
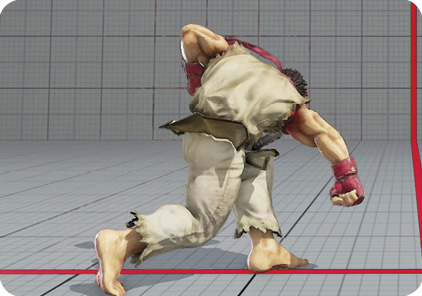
Collarbone Breaker: Ryu delivers a two-hit downward punch to the opponent’s head that can only be blocked standing. Collarbone Breaker is an important tool in Ryu’s arsenal, as it opens up another dimension in his close-range offense. In a vacuum, Collarbone Breaker isn’t a fantastic move to be thrown out on a whim. It’s mainly used as a complementary attack to crouching  since crouching
  LP Hadoken is one of Ryu’s main mid-range poke sequences. Once you’ve ingrained the threat of your low attacks in your opponent’s mind, you can start using Collarbone Breaker for near-guaranteed damage. However, try not to be predictable with it because a blocked Collarbone Breaker is easily punishable by most of the cast. On block it’s -4, making it punishable by many medium-strength attacks.
Solar Plexus Strike 
| Startup |
17 |
|---|---|
| Active |
2(1)2 |
| Recovery |
18 |
| Guard Level |
HL |
| On Hit |
6 |
| On Guard |
-2 |
| VTX Hit |
— |
| VTX Guard |
— |
| Cancel |
— |
| Damage |
90(45+45) |
| Stun |
100(50x2) |
| Meter Gain |
40(20+20)/20(10+10) |
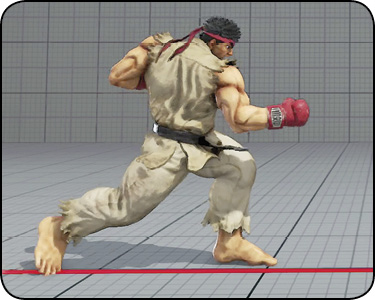
Solar Plexus Strike: Ryu lunges forward with a two-hit gut punch. Solar Plexus Strike has been a staple mid-range attack in Ryu’s toolkit since Super Street Fighter II and continues to be one of his best engagement moves in Street Fighter V. It’s slightly altered compared with the Street Fighter IV version of the attack: it is now slightly disadvantageous on block (-2) but can be canceled into Shoryuken on the second hit. It also opens up link combos at closer distances for even more damage (see Combo 5c and Combo 5d). With a relatively lengthy startup time, you’ll want to use this attack if you notice hesitation from your opponent at mid range. If it’s blocked, be prepared to be on defense against certain characters. Ryu’s left at -2 disadvantage, which is not quite punishable but sacrifices tempo advantage. Since Solar Plexus Strike is executed with a heavy punch, its priority allows it to beat medium attacks in the rare case that the enemy sticks one out to trade with your gut punch.
Axe Kick 

| Startup |
8 |
|---|---|
| Active |
3(3)4 |
| Recovery |
16 |
| Guard Level |
HL |
| On Hit |
4 |
| On Guard |
±0 |
| VTX Hit |
— |
| VTX Guard |
— |
| Cancel |
— |
| Damage |
80(40+40) |
| Stun |
150(60+90) |
| Meter Gain |
40(20+20)/20(10+10) |
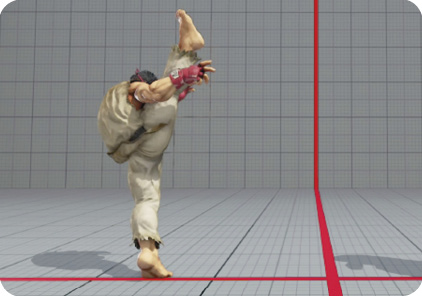
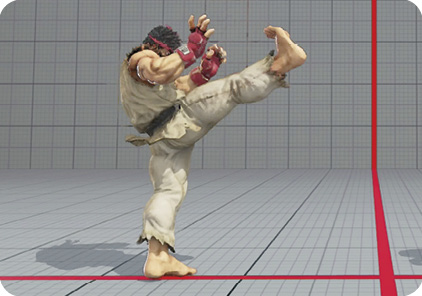
Axe Kick: Axe Kick is now a unique attack that resembles Ryu’s close attacks in prequel Street Fighter games. This attack is meant as a safe hit-check in Ryu’s close-range pressure, since it not only links into combos (see Combo 6) but puts Ryu at ±0 on block. The downside is that it requires some preparation to lead into because it’s a relatively slow move (eight frames of startup) and initially has a small range. An ideal setup is to dash into a downed opponent (like after an MP Shoryuken anti-air), then hit-check them with Axe Kick. Alternatively, if you can get the enemy to block a jumping or , you can go for Axe Kick (or a throw as the alternative) for your frame trap mix-up.
By utilizing the second hit, Axe Kick can be useful in some cases from mid range. For example, if you push the enemy back enough with crouching jabs in a blockstring, you can go for Axe Kick, and then on counter-hit, buffer into Shinku/Denjin Hadoken (provided you have full EX Gauge) for a combo.
Like Solar Plexus Strike, Axe Kick has the highest priority when it comes to “trading.” This is particularly useful when using it as a footsie tool—you’ll score a counter-hit if the challenger sticks out an ill-timed light or medium attack into Ryu’s kick.
Jodan Sanrengeki 1st
| Startup |
5(9) |
|---|---|
| Active |
2 |
| Recovery |
28 |
| Guard Level |
HL |
| On Hit |
-9 |
| On Guard |
-16 |
| VTX Hit |
— |
| VTX Guard |
— |
| Cancel |
V |
| Damage |
60 |
| Stun |
70 |
| Meter Gain |
30/15 |
Jodan Sanrengeki 2nd
| Startup |
9 |
|---|---|
| Active |
2 |
| Recovery |
26 |
| Guard Level |
HL |
| On Hit |
D |
| On Guard |
-7 |
| VTX Hit |
— |
| VTX Guard |
— |
| Cancel |
V |
| Damage |
70 |
| Stun |
80 |
| Meter Gain |
30/15 |
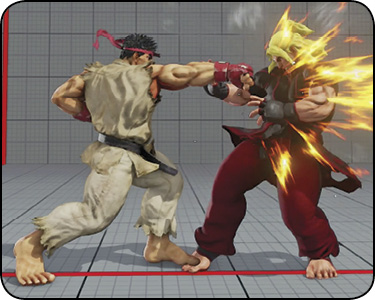
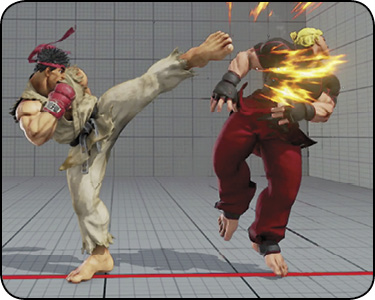
Jodan Sanrengeki: A multi-hit target combo that can be initiated with standing or standing . Generally, target combos leave you at a major disadvantage on block and are easily punishable with heavy-attack combos, so using them alone is not recommended. Additionally, the standing portion of Jodan Sanrengeki only connects with standing targets. An adversary crouching (either on hit or block) will totally avoid it, leaving Ryu open to a punish. You should only use this sequence in certain combos where the enemy is standing, such as after connecting a close standing on an opponent who has just whiffed a reversal or throw. However, in most scenarios, you can usually find a better, more damaging combo.
The upside is that you can easily confirm standing into when your standing counter-hits, thanks to the massive hitstop during a Crush Counter. In addition, the knockdown advantage from connecting with this target combo is more than enough for Ryu to dash into close range for a meaty attack or a frame trap setup on a quick-rising enemy.
The last hit () of Jodan Sanrengeki is V-Trigger-cancelable, so you can make it safe on block (as long as the enemy is standing) or as an extension into a juggle combo. See Combo 3b for examples of using this target combo in conjunction with Denjin Renki.