
Street Fighter V Guide Glossary
A-C
Abare
Japanese term referring to risky aggressive play, exemplified by frequently attacking out of frame disadvantage and during wakeup.
Absolute Block
Refers to getting stuck in blockstun even if you release  or
or  . Basically, a combo against blockstun. See blocking.
Absorb
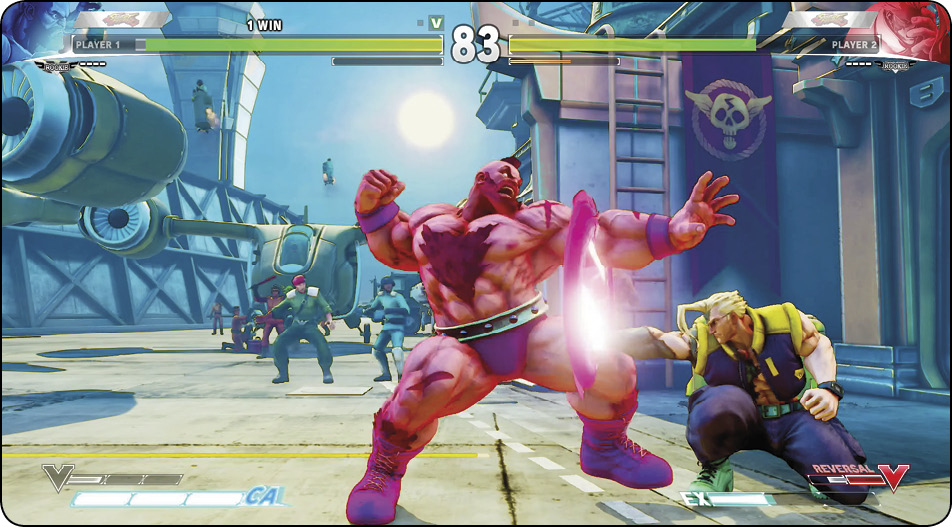
The effect when the armored period of a move repels an incoming strike. Some white damage is received (and thus some V-Gauge), but this quickly recovers over time if no clean damage is taken. Low-stamina characters cannot be knocked out by white damage, so you can use hit-absorbing moves with essentially no stamina left and still survive. See armor.
Active Frames
The actual striking/grabbing portion of a given move. Usually shortened to “active.” In the frame data tables throughout this guide, the first active frame is included in the figure for startup frames. This makes it easy to find possible links and true blockstrings by comparing a move’s startup frames (which include the first active hitting frame) with another move’s advantage on hit/on block. But this does mean that if you add up startup, active, and recovery frames for a move, the sum is one frame longer than the actual move. See frame data in the Primer.
Advantage
The opportunity to act first. Can be expressed numerically through frame data. When you knock someone down or dodge/block a laggy attack, you have advantage. See frame data in the Primer.
Aerial/Airborne
Refers to aerial states but not limited to jumping. Usually achieved by jumping, through special moves that leave the ground like Ken and Ryu’s Tatsumaki Senpukyaku, or from abilities like Dhalsim’s Yoga Float V-Skill. Airborne characters are immune to ground throws, but cannot block. An airborne character who is hit will either enter air recovery (falling invincibly before landing on their feet) or a juggle state (falling helplessly, vulnerable to juggle combos, before landing on their back).
Air Recovery
The hitstate triggered against an airborne fighter when they’re hit with an attack that doesn’t cause a knockdown. They’ll flip backward slightly, unable to act, and land on their feet. While falling during air recovery, the victim is invincible; upon landing, they’re vulnerable as normal, like after waking up.
Hitting someone out of the air can lead directly to offensive opportunity if you move in and attack their air recovery landing with a throw, low hit, or frame trap. Depending on your character choice and their aerial position, you might even get a chance for a grounded meaty or cross-up tricks (for example, anti-airing with Karin’s standing 
 Sappo command dash or Dhalsim’s crouching
  Yoga Fire).
But air recovery can also be beneficial to the victim. If the opponent hits you out of some grounded move with airborne frames, you’ll be put into air recovery instead of standing hitstun. Their potential combo will be busted, and they might not be ready to adjust quickly to your new position in time to keep their tempo advantage. Grounded moves that are briefly airborne actually have good defensive properties for this reason, and actual airborne frames are called out in data tables throughout this guide.
Air Throw
A throw that grabs jumping foes. Vega, Nash, and Chun-Li have normal air throws accomplished with 

 . Unlike grounded normal throws, air throws cannot be throw-escaped/teched. Zangief, Cammy, and Vega have special moves that act as throws against jumping opponents. Zangief, Birdie, R. Mika, and Laura have hit-throws aimed at airborne targets; they’re not technically throws since they have strike hitboxes, but they basically act the same, while also working in juggle combos.
Anti-Air
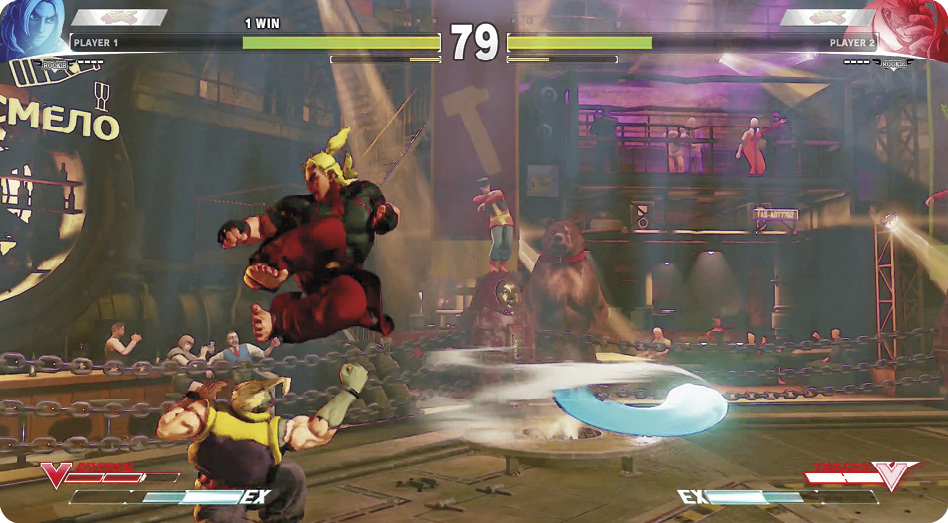
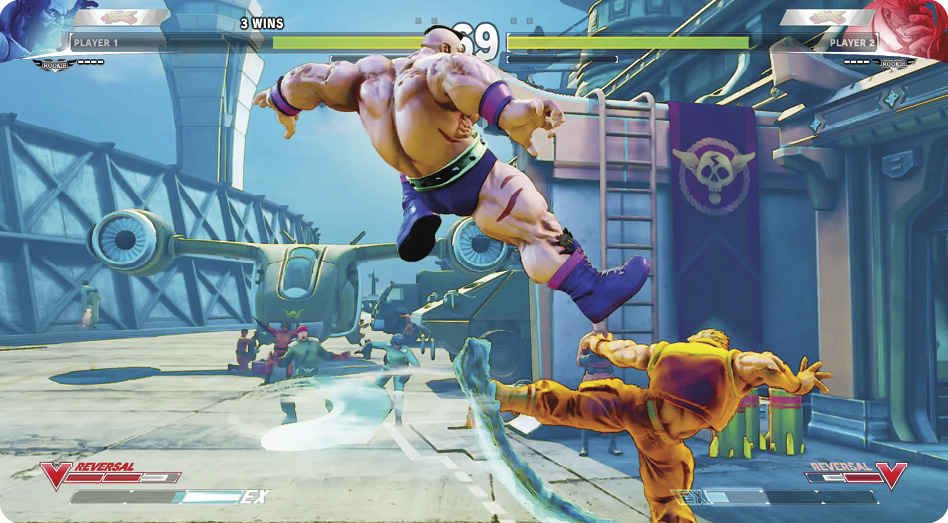
A move used to deflect jump-ins and cross-ups. Having solid anti-air is one of the foundations of high-level Street Fighter. Airborne characters cannot block and don’t have much freedom of movement (outside exceptions like Dhalsim’s Yoga Float), so jumping characters are vulnerable. But jumping is also one of the fastest ways to close in, can lead to very ambiguous point-blank situations, and avoids most ground-based attacks, so it’s appealing nevertheless.
The simplest way to anti-air is with an appropriate normal move. Standout examples include crouching from Birdie, R. Mika, and Dhalsim, and crouching from Ryu, Ken, and Karin. These normals take ~7 frames to hit, though, making them ineffective against cross-ups and deep jump-ins. In those cases, you’ll need invincible or evasive special moves to win (like Ken or Ryu’s MP Shoryuken, Karin’s EX Ressenha, or F.A.N.G.’s EX Nikankyaku).
Depending on your character, opponent, and the situation, you shouldn’t always go for anti-airs. If your character’s anti-air is weak at the moment (like the enemy is jumping/crossing-up deep and you lack an invincible reversal), just block (perhaps consider V-Reversal if you really want tempo advantage back) and be ready to defend against their grounded follow-up.
Your anti-air rate will increase if you get a sense of the jumping habits of your foes. Reacting isn’t simply about reflexes: it’s also about choosing to focus on one thing or another, depending on what you expect. You can react to a jump-in (or an overhead, a dash, a throw attempt, and so on) much better if you feel like it might be coming soon. No one can react to all threats all the time. What experienced players do is shifting focus in time with their reads against the enemy.
Your foe may use tactics intended to take your attention away from anti-airing, or to put you into situations where your anti-airs are ineffective. It’s your job to learn when to zero in on certain aspects of the game (like investing all your effort in punishing whiffed moves or shooting down an anticipated jump-in) and when to shift your attention thanks to a read you have on your opponent’s intent.
Armor
A property that allows an action to absorb an incoming attack, bypassing hitstun and taking white damage. Attacks with armor are generally intended to plow through mid-range fireballs and pokes, as well as up-close frame traps. Armored specials are distributed mostly between the grappler characters; as balance against their close-range strength, they lack true invincible reversals and must rely on these moves for defense. Some moves, like the V-Skills of M. Bison, Nash, and Ryu, work much like armored moves in certain situations but are not quite the same thing.
Armored Moves
| Birdie | Bull Charge |
| Birdie | EX Bull Horn |
| Birdie | V Bull Head and V Bull Horn |
| Laura | EX Bolt Charge |
| R. Mika | EX Shooting Peach |
| R. Mika | Heated Mic Performance |
| Zangief | Charged standing h |
| Zangief | EX Siberian Express |
| Zangief | Iron Muscle |
Back Quick-Recovery
Upon being knocked down, input or  to back recover, backflipping up from the floor. Back recovery takes five frames longer than standard quick-recovery but is still way better than forgoing quick-recovery and staying floored longer than necessary. It is virtually always better to either quick-recover or back recover whenever you’re able to; there’s no reason to hand your opponent time to space out their perfect ambiguous wakeup attack.
Back quick-recovery is not possible after throws, where only quick-recovery in place is available. Very few specific attacks disallow any kind of quick-recovery, including counter-hit sweeps and certain Critical Arts and specials. See wakeup and okizeme.
Backdash
An evasive dash backward away from the opponent, which begins with a period of throw invulnerability and transitions into a brief airborne period. See movement.
Back Throw
A backward normal throw, executed with . Escaped with . Swaps sides with the opponent, making it universally useful for escaping corners. See normal throw.
Bait
A tactic intended to “fish” for a punishable response from the opponent, like acting extremely aggressive but then doing nothing, hoping to induce a badly whiffed counterattack.
Balance
The degree of parity between different characters. Notions of balance are open to debate and are not static across skill levels. A high-level player’s perceptions of “balance” aren’t necessarily relevant to intermediate or casual players, and vice versa. They are typically expressed through debate about tiers. Ideas about a game’s balance are fluid over time, depending on the research and results of the game’s community. Seldom does the thinking about “top tier” remain the same for long periods of time. Players get more comfortable against the early cheap stuff, coming up with counter tactics and new cheap stuff to make the old cheap tricks seem tame. See metagame and matchups.
Block
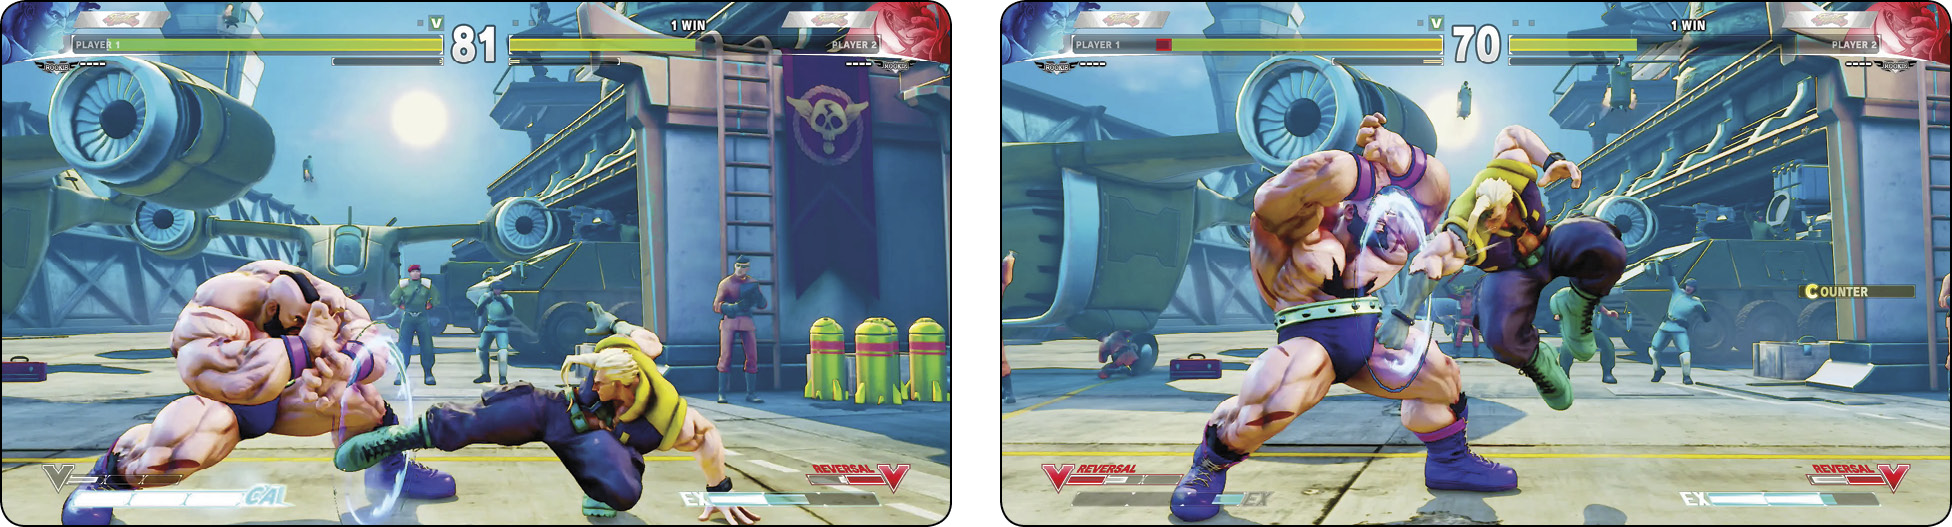
Blocking (synonymous with guarding) is a defensive stance activated with a backward input while the opponent is extending a strike. Use for standing block and to guard crouching. Holding back will guard against incoming high-striking overheads, while holding down-back will guard against incoming low-hitting moves. Mid-hitting gut-level strikes can be guarded either standing or crouching. Throws cannot be guarded. Blocking is always relative the direction of your opponent. (This is important to remember during cross-ups and when Dhalsim is using Yoga Teleport, R. Mika is calling Nadeshiko, F.A.N.G. is passing through with Nikankyaku, etc.)
Being able to guard correctly is crucial to Street Fighter success. Good opponents will vary their attacks, trying to confuse you with lows, overheads, ambiguous jump-ins and cross-ups, and frame trap baits. Considering how dangerous counter-hits are in Street Fighter V, and that most throws (which will grab you if you’re guarding) return you to a neutral-ish situation if you quick-rise, the safest play you can make when in doubt is usually to just block. This is even more true now than in Street Fighter IV because several mechanics are gone that used to give defensive players layers upon layers of escape options.
Likewise, whenever you realize that your current foe lacks blocking fundamentals (like maybe they fail to block cross-ups, or they always fall for empty jump into crouching , etc.), you have a crucial weakness to exploit.
Block and White Damage
Guarding stops most incoming damage, but it isn’t an unassailable wall. Blocked specials and CriticalArts will deal block damage (also called “chip” and rarely “cheese”), which for specials is about 25 percent of their damage on hit and varies for Critical Arts. Blocked medium and heavy normals (so strong, forward, fierce, and roundhouse buttons) deal recoverable white damage to the tune of one-sixth their regular damage on hit. And throws are simply unblockable. Block/white damage and the threat of throws together give turtles (extremely defensive players) something to think about. (However, note that stamina-critical characters cannot be knocked out by chip damage, unless it comes from a Critical Art.)
Block Advantage
In addition to reducing/eliminating incoming damage, guarding attacks also puts you at a better frame advantage than getting hit by them, preventing link combos for your enemy and possibly leaving you ready to take back tempo control.
“Mids”
Overheads must be blocked standing and lows must be blocked crouching, but many attacks can be blocked either way. For example, everyone’s crouching must be blocked crouching, but everyone’s crouching can be blocked high and low. Attacks like this are sometimes called “mids.” Note that “mid-hitting” may also refer to attacks that hit at about torso/gut level, rather than more toward the head or legs. Context should make this distinction clear, and this isn’t a critical concept anyway. In 3-D fighters like Tekken and Virtua Fighter, “mids” are entirely different, working as anti-crouch moves that must be blocked standing.
For attacks that can be blocked either way, there’s still a tiny difference between blocking high or low. Blocking characters have a slightly narrower horizontal hurtbox while standing than while crouching. As a consequence, crouching block actually puts you slightly closer to the opponent than standing block. This can have the indirect effect of making you more vulnerable during footsies (a poke that would whiff against standing block may connect against crouching block). By holding back for standing guard, you may also simply walk out of range of the opponent’s offense if they don’t account for the possibility that you’ll defensively default to instead of .
So, while crouching block seems like the safer default position (you hold down-back and watch out for jump-ins, overheads, and throws, basically), standing block/walking backward has certain advantages. There is no totally safe position, of course. If you’re blocking while standing (or simply walking backward), the opponent may realize this and use low attacks; if you’re blocking while crouching, the opponent may try to sneak in an overhead. And, in either case, they can just throw you.
Unblockables
Throws cannot be blocked. Everything is unblockable to a dizzied fighter, or to a fighter stuck in hitstun. Cross-ups done in particular situations can come very close to seeming unblockable because of their sheer ambiguity. In previous Street Fighter games, some cross-up setups were actually unblockable. Although these kinds of unintended tactics are usually bugs, the fighting game community tends to be fairly open about allowing them; if it’s in the game, it’s in the game.
Blockstring
A sequence of normal moves that keeps the defender guarding. Blockstrings usually start out as combo hit-checks; after the first two hits are blocked, you have time to realize your fishing has failed and to alter your actions accordingly. You can use blockstrings to push the foe away, to fish for counter-hits, and to condition the opponent into expecting certain sequences. This allows you to surprise them when (for example) you stop your blockstring early and attempt a throw or an overhead. New to Street Fighter V, blockstrings with medium and heavy moves will slowly build up white damage when guarded.
Frame Trap
Blockstrings/hit-checks crafted with intentional gaps are called frame traps. A defender who tries to poke back or use a non-invulnerable move during the gaps will eat a counter-hit if your frame trap is tight enough. Since good players are almost always competent at blocking but eager to take back tempo control once they start blocking, frame traps are a crucial tool for opening them up. Frame traps aren’t safe against reversals, but that’s part of the decision-making when using them. If you think the opponent is eager to blow up your frame trap with an invincible or fast reversal, you can just block and punish.
Absolute Block
Blocking mechanic that forces a character in blockstun to remain in blockstun if incoming attacks don’t let up. For example, you can block the first hit of Ryu’s Shinku Hadoken Critical Art, then completely let go of the joystick or d-pad; your character will still guard the rest. A “true” blockstring works because of absolute block. This contrasts with Street Fighter III: Third Strike, where absolute block didn’t exist; manually blocking only the first hit of Shinku Hadoken before letting go of the controller would merely result in eating the rest of the attack. (One of Third Strike’s mechanics, red parry, was possible because there was no absolute blocking.)
Blockstun
Synonymous with guardstun. The guarding version of hitstun, blockstun is the period of time when a blocking character is prohibited from performing other actions (with the exception of V-Reversal, at the cost of one stock of V-Gauge). When blockstun ends before the attacker’s move has recovered, the defender has advantage. When the attacker’s move recovers before blockstun ends, the attacker can attack immediately for a blockstring or frame trap, or walk up and throw if passivity is expected from the defender.
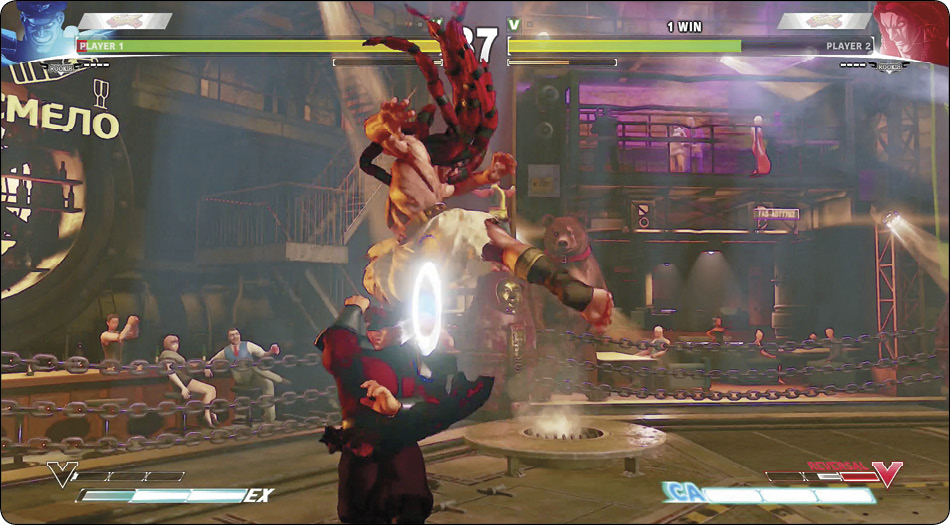
Characters who are in blockstun cannot be thrown, nor can they be thrown for an additional two frames after leaving blockstun. (Characters in hitstun can’t be thrown, either, which also continues for two frames after hitstun ends.) Attackers who want to follow up blocked attacks with a throw attempt must time the throw to land after blockstun ends, plus an extra tiny slice of time.
Boxer
Frequent nickname for Balrog. Shadaloo bosses in Japan have different names: the dictator is Vega, the claw-wielding Spaniard is Balrog, and the ferocious boxer is M. Bison. Capcom avoided calling the boxer M. Bison in American territories in the early ‘90s for obvious reasons, and the difference in naming conventions is now simply an accepted quirk in the SF canon.
Bread and Butter
A reliable, tried-and-true tactic.
Buffer
Inputting the command for one move during the action of another. This can be to activate cancels, to mask animations, or to perform certain option selects. New to Street Fighter V, your inputs will be carried forward a certain number of frames. Therefore, if a previous action ends, your input will be carried out at the earliest moment, with reversal timing:
- Dash inputs will buffer forward nine frames.
- Special inputs and throw commands will buffer forward six frames.
- Normal move inputs will buffer forward three frames.
That last bullet is the reason why link combos are easier in Street Fighter V than in any previous entry in the series. It’s also easier to perform wakeup attacks with reversal timing and to perfectly shoot through small gaps in the opponent’s frame traps. The input buffer also means it’s easier to erroneously trigger actions if you mash inputs or tap something in error; this can actually play directly into your foe’s meaty/frame trap plans, so be mindful of your own defensive habits.
Cancel
Interrupting one move’s recovery period with another action. The prototypical example is Ryu and Ken’s crouching  Hadoken sequence. Canceling enables myriad maneuvering, pressuring, and comboing tactics. See combos.
Cancelable
A property that indicates which types of moves a given attack can be canceled into. “Chainable” normal moves can be canceled into certain other normals. Many grounded normal moves are special-cancelable (which includes Critical Arts). Almost all grounded normal moves are cancelable into V-Trigger, but only for certain characters are grounded normal moves cancelable into V-Skills (Ken, Laura, Birdie, and Rashid can cancel many normals into their V-Skills; Necalli and Vega can cancel certain target combos into their V-Skills). Some moves can only be canceled into Critical Arts but not other specials, while a few moves can only be canceled into certain moves in particular (sometimes only during very particular windows, too).
Data tables in this guide have a shorthand for cancelable properties:
| CH | Chain combo-cancelable |
| Tc | Target combo-cancelable |
| Sp | Special-cancelable and EX Special-cancelable (includes Critical Arts) |
| Ca | Critical Art-cancelable (but not special-cancelable) |
| V | V-System-cancelable; depending on the character, this may apply to both V-Skill and V-Trigger, or just one or the other |
Chain Combo
A normal canceled into another normal. Some characters’ light attacks are chainable into other light attacks, like the chainable crouching jabs and shorts of Ken and Ryu. And some characters have normals that chain into specific other normals, like standing  for Ryu, for Ken, or standing (among many others) for Nash. These character-specific chains are called target combos.
Character Archetypes
A character’s general design strongly suggests how they should be played successfully. Characters broadly fit into different classes of behavior, at least in how they were envisioned. There are offensive, defensive, balanced, and grappling characters. See metagame.
Charge
Refers to the charge special commands required for charge characters, where a certain joystick/joypad direction needs to be held a minimum amount of time before you can perform the desired move. This includes classic charge moves like M. Bison’s Double Knee Press and Head Press, as well as specials for newcomers Necalli and F.A.N.G.
Also refers to certain normal attacks performed by holding down a button to “charge” the move until a powered-up version starts up, like R. Mika’s charged standing and Zangief’s charged standing . This also applies to Birdie’s Bull Horn special, activated by holding down any normal button and then releasing it after a minimum number of frames.
Certain moves will also continue after activation for as long as the buttons are held down, like Zangief’s V-Skill and V-Trigger.
Charge Character
Charge characters have special move arsenals that mostly require inputs involving charging a particular direction first. A different mindset is required when playing charge characters because any special move use requires premeditation. In SFV, since Nash and Vega are both “motion” characters now, the only “pure” charge characters are M. Bison and his new second-in-command, F.A.N.G. Most characters have motion-based arsenals now, requiring the usual semi-circular special move inputs.
Cheap
“Cheap” can refer to winning with block/chip damage (although in SFV, this can only be accomplished with the use of a Critical Art, which isn’t cheap in terms of EX Gauge cost). Cheap can also refer to tactics that are difficult to overcome, especially relative to their ease of execution. This can be complimentary or derogatory, depending on use.
Cheese
Can be synonymous with both block/chip damage, and with “cheap.”
Chip Damage
Synonymous with block damage.
Claw
Frequent nickname for Vega, intended to clear up confusion with Japanese players, where Vega is called Balrog. See dictator and boxer.
Close Range
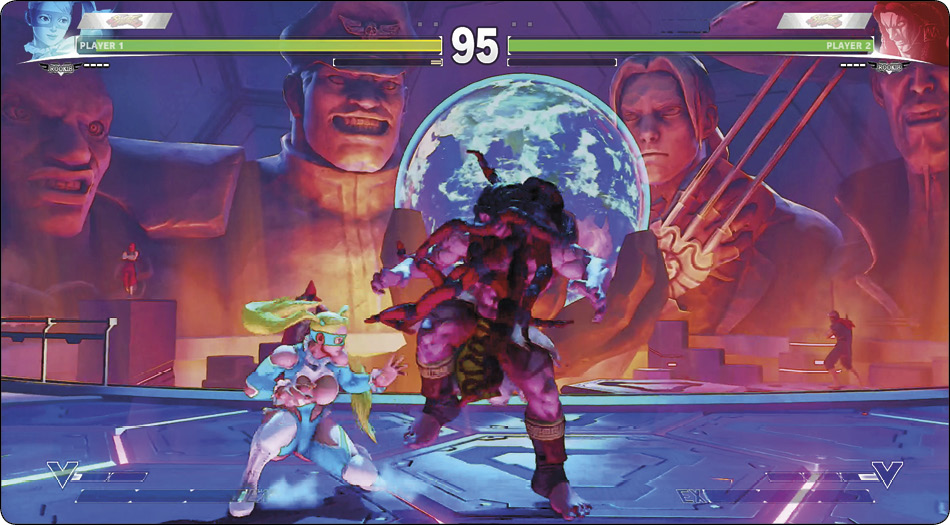
The characters are right next to each other, in range of normalthrows and all normal moves. This is the money spot for grapplers and offensive-minded characters/players. See position.
Close Standing
In previous SF titles, most characters had a different set of normals at close range. In SFV, characters use the same normal moveset at all ranges.
Combo
A combo is an attack sequence that’s guaranteed if the first attack hits. The opening attack puts the target in hitstun, and continued hits catch them before they recover. Multi-hit moves naturally create combos, but there are also several combo-creating execution techniques, including chains, cancels, links, and juggles.
Hit-Confirm
Often also called combo starters or hit-checks. A sequence of attacks, usually the first two or three hits of a combo, performed on auto-pilot from muscle memory while watching and listening for the result. If the opponent gets hit, you finish the combo. If the opponent blocks or evades somehow, you cut the combo attempt short and react as necessary. The point of hit-confirmation is to avoid leaving yourself vulnerable. While many initial combo-starting pokes and chains are relatively safe when blocked or avoided, most combo finishers are extremely unsafe if they don’t actually hit.
Combo Finisher
A reliable way to finish combos after a successful hit-check, hopefully maintaining tempo and position advantages. The “right” or “best” combo for a given situation depends on many things, including the relative positions of the characters and their position to any nearby corner, how much EX Gauge and V-Gauge is available, and how much of it you’re willing to spend, given the current overall match situation.
Cancel
Skipping one attack’s recovery to proceed directly into the next attack. Common cancel examples include normal attack chains (where normals are canceled into each other), normal moves canceled into specials, normals canceled into V-Trigger, and specials canceled into Critical Arts.
Chain Cancels
Some normal moves, like Ryu’s crouching , can simply be repeated by pressing the button over and over, canceling the poke into itself. Other specific sequences of normal moves can be chained, like Ryu’s standing target combo. To chain cancel, just push the next button in the sequence while the current normal is striking.
It’s possible to chain normals together and then cancel the last normal into a special or V-Trigger (assuming the last normal in the sequence is indeed cancelable). This means that Ryu and Ken can simply chain crouching and cancel immediately into Shoryuken, and it means that R. Mika can land her standing target combo and instantly cancel into Shooting Peach. This is more like the cancel situation in Street Fighter III and a departure from SFIV: in SFIV, you can’t cancel out of chain combos, so bread and butters generally involve linking into special cancels. No such limitation here.
Special Cancels
Special cancels (originally referred to as “two-in-ones” in the long-ago era of SFII) involve interrupting a normal move with a special, skipping the normal move’s recovery. In many situations, this will create or extend a combo, as the hitstun from the normal persists long enough for the special move to hit in time.
Not all normal moves can be special-canceled. The data tables for each character in this guide detail which moves can be canceled, and by what. Moves that can be special-canceled can also be Critical Art-canceled.
When poking with good special-cancelable normals, a buffering trick can be used to get “psychic” special cancels when you’re just outside the opponent’s range. Stick out your cancelablepoke just in front of the enemy so that it will actually whiff, while quickly buffering the desired special or Critical Art motion. You must complete the entire motion at least seven frames before the poke recovers, or you’ll just do the poke, followed by the special move, buffered forward and performed uncanceled. Just buffer the motion fast enough to avoid this. If your adversary does nothing and your poke simply whiffs in front of them, nothing happens. But if the foe dashes/walks forward, or if they stick out an attack that loses to your poke, your buffered motion will register and produce the special move. This leads to scenarios like Cammy being able to poke with crouching buffered into Spiral Arrow; what seems like a somewhat risky guess to many observers actually isn’t a guess at all, properly spaced.
Critical Art Cancels
Street Fighter V’s equivalent of “Super cancels.” This involves interrupting a normal, unique attack, or special move by canceling it into your current character’s Critical Art. (Some V-Skills can also be Critical Art-canceled, like Zangief’s Iron Body and Dhalsim’s Yoga Float.) This burns a full EX Gauge. Special-cancelable moves can also be Critical Art-canceled, but some moves are only Critical Art-cancelable, increasing the usefulness of those moves when you’re loaded with meter. One side effect of combos is damage scaling, a reduction of damage output as the number of uninterrupted hits accumulates. Critical Art cancels are nice because the base damage will never dip below 50 percent; Critical Arts will deal solid damage even at the end of very long combos.
V-Cancels
Almost every groundednormalmove is V-Trigger-cancelable with a full V-Gauge; in addition to whatever else a character’s V-Trigger accomplishes, this also means that the activation serves as an additional hit-confirm or block pressure tool per round. In most cases, canceling a normal on hit into V-Trigger gives a linkable advantage after the screen freeze.
Ken, Laura, Birdie, and Rashid also have V-Skills that can be canceled into from other actions. (The former three can simply cancel most normals into their V-Skills, while Rashid can cancel his HK/EX Whirlwind Shot projectiles into his movement V-Skills.) Necalli and Vega have target combos that are cancelable into their V-Skills. In combos, V-Trigger cancels increase the level of damage scaling being applied to the combo as though an extra attack was used. V-Skill cancels do not have this same effect on
damage scaling. For example, in a Ken combo of standing Head Rush  crouching , the crouching fierce does 80 percent damage. In a combo of standing Quick Step LP Shoryuken, the Shoryuken does 90 percent damage.
Link
While canceling involves continuing a combo by interrupting moves, linking involves continuing a combo by allowing a move to fully recover before performing the next one. Linking has an advantage over canceling in that it involves less commitment; most normal to special-cancel situations leave you punishable when they’re blocked, but if you use linked normals to hit-check, you’ll be less vulnerable when guarded.
One of the useful things about frame data is that it’s easy to quickly determine what links might work by looking at the figures under the columns for Startup and (advantage) On Hit. If advantage on hit for your starter move is equal to/greater than the startup for your follow-up move, a link is probably possible (unless pushback is too great or some other positioning quirk interferes).
Links require precise timing, but the input buffer of SFV makes their exacting nature much more manageable than in previous fighting games.
“Plink”
A technique used to extend the input window of a given attack by an extra frame. This was extremely important in SFIV to help ensure consistent linkexecution. The input technique still works in SFV, but the three-frame buffer for normal inputs makes it much less relevant.
Plinking is accomplished by pressing a lower-priority button the very next frame after a higher-priority button. Let’s say you’re plinking ~, a very common plink for crucial links into fierce. The previous move is recovering, and the window’s coming up for your link. As soon as your character can act again, you press and then drum immediately afterward. The timing should be as though you actually meant to press them simultaneously and only slightly messed up. In fact, that’s why plinking works—it’s a function of leniency intended to make actions requiring multiple button presses easier to execute. For a throw, for example, you can press on one frame and on the next frame. What actually happens is that the game animates one frame of standing , then reads the immediate follow-up and interprets your intent to throw. gets kara-canceled into by the game, and if you watch this happen during Training Mode with Input Display on, you’ll see what this looks like: on Frame 1, just , but on Frame 2, both and , even though it’s impossible to input the same button on consecutive frames simply by double-pressing it. The same is true of EX specials, V-Skills, V-Reversals, and V-Triggers. But the same ends up being true of any two buttons, which means you can register any button press on consecutive frames. This isn’t a huge deal anymore in SFV, but it was crucial in SFIV: turning a one-frame link into a two-frame link makes it twice as easy, after all. No one on the planet hits one-frame links with bulletproof consistency, but hitting almost all your two-frame links is humanly possible. In SFV, where (with rare exceptions for walking mid-combo) links require three-frame timing at worst, this just doesn’t have the same importance. It can still be a decent trick to know to help tighten up your footsie pokes, giving yourself a larger window to ensure that your attack comes out. Often, in tight spaces, you may go for a poke just slightly too early or late, and this can help give you more leeway.
Input priority matters for plinking because on any given frame, the game produces the move of highest priority. You plink ~ to have two chances at a fierce input. (Interestingly, you can build further failsafes into a plink in case you mess up plink execution and simply register , a dead frame, then , if the window for the combo is generous enough for to also work.) Kick inputs beat punch inputs, and heavier attacks beat weaker ones. Plink crouching ~, and you’ll get roundhouse; plink ~, and you’ll get fierce. There is no standard button with a lower priority than jab, so you can’t register on consecutive frames.
Finally, you can’t plink with same-strength buttons since you’ll just kara-cancel into (for and ) normal throw, (for and ) V-Skill, or (for and , if V-Gauge is full) V-Trigger.
Juggles and Juggle Potential
In Street Fighter V, juggle combos are not as free-form as they are in other modern fighting games. Not only do attacks need a particular property to launch an enemy into a state where a juggle is possible, but individual attacks must have “juggle potential” in order to hit an adversary while they’re jugglable.
There are two types of juggle states, free and limited. When knocked into a free juggle state, anything goes; a strike of any sort will connect against the falling foe for a single hit. Limited juggle states are a different matter. There are two factors that determine what works to juggle during a limited state:
- Juggle potential, a numerical value assigned to an attack to determine its hierarchy during juggles (this value can be anywhere from 1 to 99, though it generally doesn’t go far past 5)
- Juggle count tally, a hidden value that tracks the total number of attacks that have been done in a juggle
Once the target is knocked into the sky, hitting them with an attack that has juggle potential causes the juggle count tally to increase for every juggle hit. The amount it’s raised is usually by +1, but some single-hit attacks raise it higher. To keep juggling after the first hit, the next attack must have a juggle potential number that is greater than the total juggle count.
For example, Karin’s Tenko knocks the opponent into a limited juggle state. Immediately attacking the falling enemy with Meioken, her V-Skill, results in a juggle because of its potential of 1. On hit, Meioken bumps juggle count up by +2, so to keep juggling, you’ll need something with a potential of 3. Karin’s EX Ressenha has a juggle potential of 3 (then 4 and 5 for its second and third hits), allowing it to juggle after Meioken in corners.
Laura’s EX Thunder Clap sets up a free juggle state on hit, which is useful to her since she doesn’t have many attacks with juggle potential. A basic combo utilizing this is standing EX Thunder Clap; afterward, juggle with whatever you want. HP Bolt Charge is your most damaging follow-up, but if you want, you can knock your foe down from the air with crouching .
Note that there are a few hit states that mimic the exact same properties as a free juggle state without knocking the opponent into the air. The first is Karin’s EX Orochi, which causes the adversary to crumple over while grounded. The second is R. Mika’s Passion Rope Throw, which puts them into a stumbling run. In both instances, you can hit the enemy with whatever strikes you want, with no limitations.
Note that hits done against an enemy in a free juggle state do not increase the juggle count. If you knock the opponent into a free juggle state and then hit them with an attack that causes a limited juggle state, the total juggle count is still 0, so juggling afterward with an attack that has juggle potential of 1 is still possible. A great example of how to use this to your advantage is to throw the enemy into a corner with R. Mika’s Passion Rope Throw, then follow up with her Lady Mika uppercut. Once the victim is knocked into the air, juggle count is still 0, allowing you to juggle with crouching or Wingless Airplane, which both have a juggle potential of 1.
An extremely rare selection of attacks do not cause juggle count to go up as they hit. This used to be more prevalent in SFIV, but it’s now currently restricted to making a select few multi-hit attacks less destructive to juggle count. Karin’s LK Mujinkyaku has this property, with a first hit of potential 1 and a second with potential 2 that doesn’t raise juggle count. This allows for extended juggles after it connects, like Tenko launcher, LK Mujinkyaku juggle, EX Tenko juggle, then (in corners) EX Ressenha juggle. When combined with a free juggle state, like the one granted after Crush Counter crouching , you can even juggle with two LK Mujinkyakus back-to-back, then EX Tenko into a final EX Ressenha.
Command Throws
Special move throws performed using a motion instead of the normal command of . The classic example is Zangief’s Screw Pile Driver, but many other characters now have command throws. The grapplers Zangief, R. Mika, Birdie, and Laura all have special grabs, but so do Necalli, Vega, Karin, and Cammy. Command throws have the advantage over normal throws of being untechable/inescapable. They usually also have better range and deal more damage and stun.
There are also hit-throws, which are also inescapable but are technically different, since they hit as strikes instead of as grabs. See hit-throws.
Corner
The far edges of the stage. A bad place to get stuck defensively, since movement is limited and combo payoff is usually better. See position.
Counter Character
A character on the winning side of a lopsided matchup (for example, Rashid against Zangief). See matchups and metagame.
Counter-Hit
A counter-hit is a clean hit made against an opponent’s attack’s startup. This is opposed to a normal hit (usually just “hit”), which is a strike that the adversary simply fails to block. Counter-hits almost always produce extra frame advantage on hit (usually +2) while dealing 25 percent extra damage and stun. Their hitstun effect is a little more distinct, and a system message of “COUNTER” appears on screen, which is extremely helpful when you’re actually intentionally fishing for counter-hit confirm combos.
You may score counter-hits using quick, long-reaching pokes in the neutral game, striking the opponent’s slower pokes or their attempts to dash. For the first time in Street Fighter, striking a dashing foe registers as a counter-hit.
You may also score counter-hits through the use of frame traps and by baiting the opponent into trying to counter-throw or throw-tech, then striking their throw animation’s startup.
These aren’t tactics that you confirm hit-by-hit along the way, but more sequences you decide to use ahead of time based on how you think your foe will react. Assess whether they turtle up or use risky reversals, as well as whether they buffer inputs or wait to hit buttons reactively. Most counter-hit fishing involves doing a couple hits and then looking for a particular result. On block or a normal hit, you may just be left at a neutral-ish close-range situation, but on counter-hit, you might hit the combo jackpot.
Crush Counters
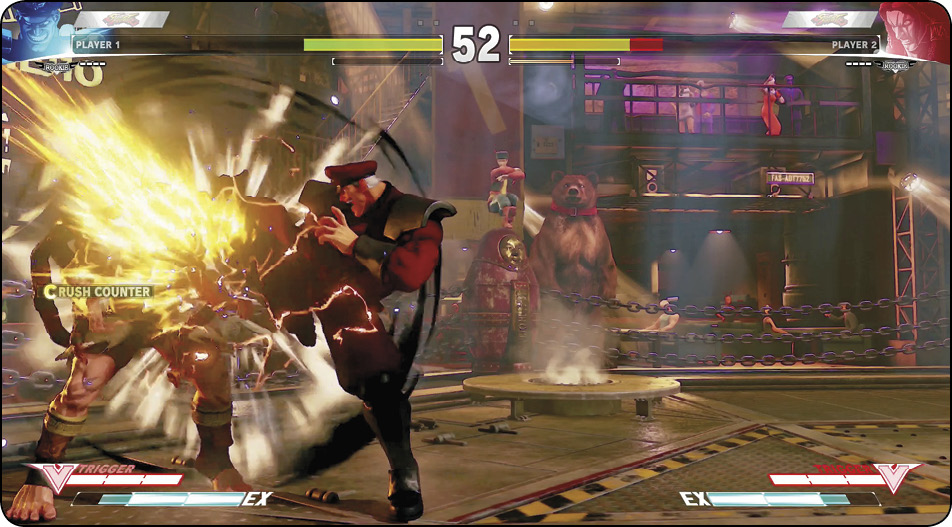
Crush Counters are a big reason why counter-hits have increased importance. Each character has specific attacks that cause a special Crush Counter, resulting in a special “CRUSH COUNTER” system message, a special hitstun state that almost always affords the chance for special combos, and a generous amount of V-Gauge gained—for most Crush Counters, half a V-Gauge stock, but for a few extra-strong Crush Counters, a full V-Gauge stock on counter-hit.
Critical Arts
Each character’s most powerful special move is an explosive attack activated with a double motion, expending all three stocks of the EXGauge. Every Critical Art has some degree of startup invincibility, so they can be used as expensive, risky reversals, and all of them can be used in combos… even for the grapplers. Many of them are also fast enough to be used as footsie tools in certain situations, like to punish whiffed mid-range pokes. And you’ll never have comeback or K.O. potential like when you’re loaded with full V-Gauge and EX Gauge at once, so you can V-Triggerhit-check into a Critical Art finisher.
Your EX Gauge management will center mostly around whether to plan to use EX specials or to try landing Critical Arts. Each character’s chapter contains data, details, and combos for their Critical Art.
Critical Art-Cancelable
A property that determines whether moves can be canceled into a Critical Art. Indicated in the Cancel columns of data tables with CA. All special-cancelable attacks are also Critical Art-cancelable, but the opposite isn’t true: a few attacks are cancelable into Critical Arts but not specials.
Cross-up
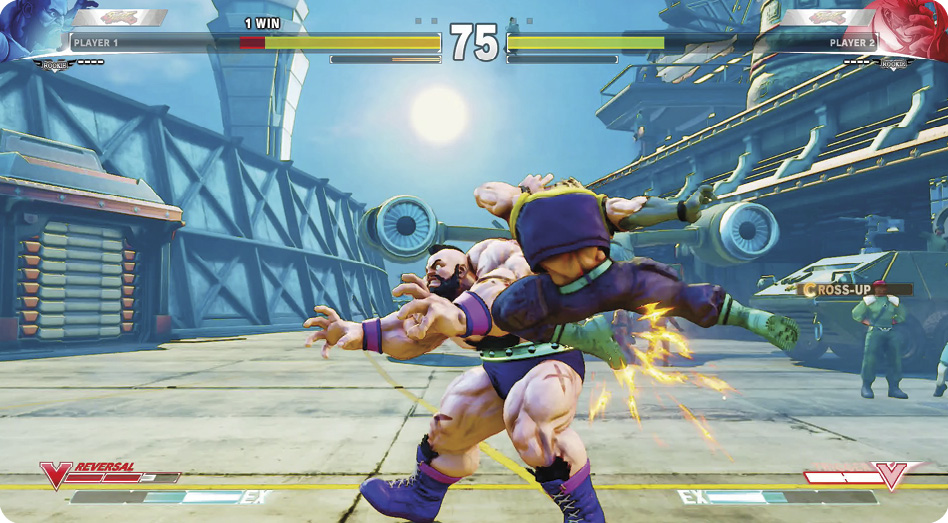
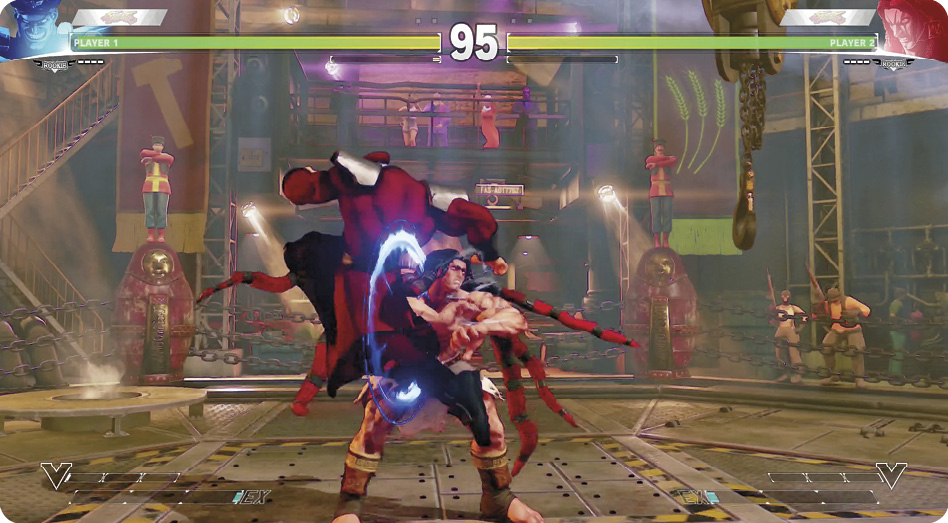
An attack directed ambiguously over the opponent’s midpoint so that it’s difficult for them to block correctly on reaction. The angle of cross-ups also makes most anti-airs ineffective, or at least difficult to perform. Defenders have to block standing, holding away from their attacker, but if they aren’t sure which side the attacker is actually on at the moment of contact, then this is obviously difficult. Cross-ups are usually jump-ins aimed at
the necks of standing characters or characters waking up from a knockdown (especially after a Crush Countersweep, which disallows quick-recovery). But grounded cross-ups are also possible, most notably against characters recovering from an aerial hit with automatic air recovery, and with specials like F.A.N.G.’s Nikankyaku.
Cross-Cut
A portmanteau of the words “cross-up” and “uppercut.”
A cross-cut is a reversal Shoryuken (or any other invincible  input) performed to counter a jumping cross-up attempt. When executed correctly, your character performs the desired move in the opposite direction, hitting the enemy out of the air. You can set up a cross-cut in a couple of ways. If an opponent knocks you down and then goes for an ill-spaced or ill-timed jumping cross-up attempt, you can simply use the “wiggle” technique: repeatedly motioning between
 rapidly and then pressing
  / while recovering from your wakeup. This works in both SFIV and SFV because these games accept / as a proper dragon punch motion. In conjunction with the six-frame special move reversal leniency, you can easily execute a Shoryuken-type move on your wakeup every time using this technique.
However, this motion is only useful for countering mistimed jumping attacks on your wakeup. If the opponent does a proper cross-up, not actually crossing up before your recovery but crossing up and hitting with a rear hitbox just after you actually rise, you’ll whiff your standard reversal because you’ll fly up into the air in the wrong direction. Being able to identify when you can use a wakeup reversal in this way takes experience and timing.
Another more elegant and accurate technique you can use to perform a cross-cut is executing a  motion as the opponent crosses you up. In this sequence, you’re relying on the timing of your adversary’s positioning for the game to register a proper motion. This has a few advantages over the wiggle technique. Using this technique, you can easily and accurately time your final attack input in cases where you don’t want to perform an immediate recovery reversal. For example, if your challenger knocks you down and does a late cross-up jump (as in the previous paragraph’s scenario), you won’t always want to reversal immediately. You might want to perform a cross-cut Shoryuken at the exact moment after the opponent flies over you. So, you motion when the foe is on top of your head and in front of you. Then, when the enemy is well over you, finally input to (which is now down-forward because you’ve turned around) plus . This ensures that you will shoot them down in the correct direction. Seeing you do this will be a strong deterrent against your attacker continuing to attempt bullying you with cross-ups.
More importantly, this motion allows you to perform advanced techniques in the neutralfootsie game against cross-up attacks while you’re walking forward. For instance, if you’re playing a mid-range game and your opponent goes for a well-spaced jump-in that you can’t reversal normally, you can actually walk under them (purposely crossing yourself up) and then execute your cross-cut motion. You do this by holding to walk forward enough to get under the airborne adversary, and then you finish the motion quickly with /.
Crouching
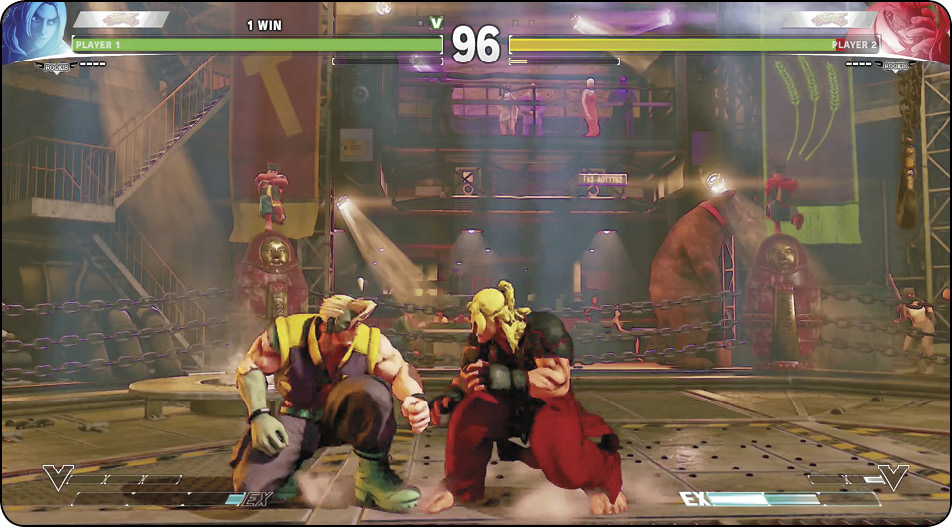
One of the most basic stances available, along with standing and jumping. Perform by holding any downward direction. Holding for crouching guard blocks low against incoming attacks but will lose against incoming high (or overhead) attacks. Buttons pressed while crouching will execute crouching normals, which tend to be lower-profile than standing moves. Crouching characters may be shorter than standing ones, but they’re also slightly wider.
Crush
Moves designed to avoid/beat particular kinds of attacks are sometimes said to “crush” them. So, an attack that hops over low-profile crouching attacks while cleanly beating them (like R. Mika or Rashid’s standing ) is sometimes called a “low crush.”
Crush Counter
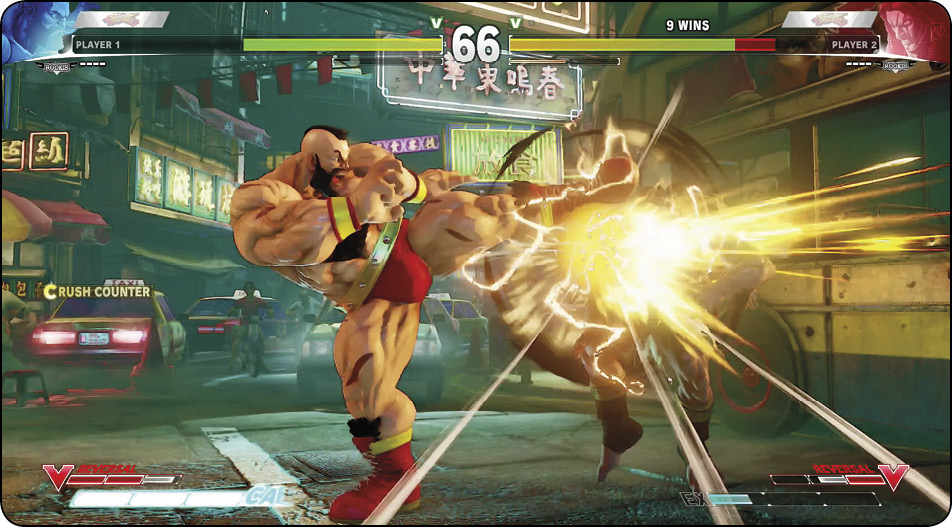
A special counter-hit caused by using certain attacks from each character’s arsenal. Gains V-Gauge and causes a special hitstun state. Good moves to use as pokes, in large-gap frame traps, and for punishing whiffed counter-hit-vulnerable specials (e.g., Shoryuken). See counter-hits. Every character’s chapter contains details on their Crush Counters, including huge combos.