
Street Fighter V Guide Glossary
D-J
Damage
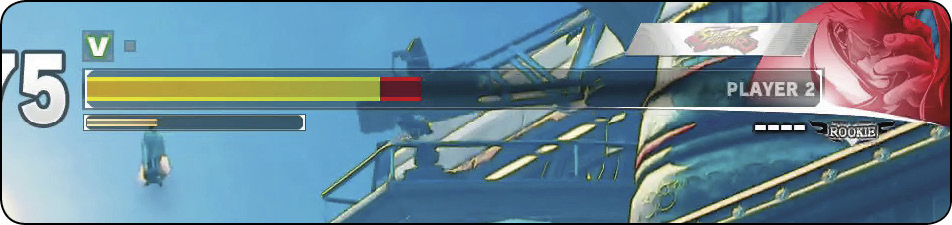
This almost always refers to stamina damage, though someone may occasionally be referring to stun damage. Stamina damage (henceforth just “damage”) is inflicted cleanly through strikes that aren’t blocked and throws that aren’t escaped, and through chip damage when specials and Critical Arts are guarded. White damage is inflicted conditionally when medium/heavy normals are blocked or when armorabsorbs attacks; clean damage makes white damage permanent.
Damage Scaling
As combos increase in length, and as stamina bars dwindle past their midpoints, a couple forms of damage scaling kick in to keep things interesting.
The first form of scaling is sometimes informally called “guts” and, at very low stamina, “the magic pixel.” Fighters with less than half stamina remaining take slightly less damage. This is a flat reduction against any incoming damage, including chip/white damage.
Low Stamina Scaling
| Victim’s Stamina Remaining | Scaling Percentage |
|---|---|
| Under 50% stamina | 95% |
| Under 25% stamina | 90% |
| Under 15% stamina | 75% |
The former applies in all circumstances. During combos, additional scaling kicks in. After the opening hit deals 100 percent of its potential damage (taking into account any stamina penalty as described before), each successive attack in a combo has its damage reduced by 10 percent. This scaling also applies to stun damage and EX Gauge gain. The eventual floor is 10 percent per attack after the ninth attack; every additional attack will deal 10 percent. The number of hits in the combo isn’t important; it’s the number of attacks. Multi-hit moves count as one
attack for the sake of scaling. This also means that although most V-Trigger activations themselves don’t hit the victim, using them to continue a hit-confirm combo still reduces the scaling by an extra 10 percent after the V-Trigger link. There’s one exception to combo scaling: Critical Arts will always do at least 50 percent of their max damage, no matter how many attacks precede them in combos. This is a nice change from SFIV, where using a Super/Ultra at the end of a long combo was usually a big waste of resources unless it would K.O. (or thoroughly embarrass) the victim.
Combo Scaling (Stamina, Stun, and EX Gauge)
| Attack Number | Scaling Percentage |
|---|---|
| 1 | 100% |
| 2 | 90% |
| 3 | 80% |
| 4 | 70% |
| 5 | 60% |
| 6 | 50% |
| 7 | 40% |
| 8 | 30% |
| 9 | 20% |
| 10 | 10% |
Dash
A quick forward movement accomplished with  . See movement.
Deep
An attack performed very far into the opponent’s body, like late during a jump-in/cross-up or directly against them on wakeup. Waiting longer to attack may put you more at risk for a reversal, but it usually improves combo potential and blockstring tightness. Some combos and follow-ups only work if initial strikes connected very deeply.
Delay
Performing an attack later than expected. May coerce premature reactions, potentially leading to counter-hits.
Dictator
Frequent nickname for M. Bison used to avoid cross-Pacific name confusion. In English territories, M. Bison is M. Bison, but in Japan, he’s Vega. See also claw and boxer.
Disadvantage
Being at disadvantage means that your opponent gets to act first if you both act as soon as possible. This happens frequently after blocked offensive openings and after mistakes like whiffedpokes. Fall far enough behind on disadvantage up close, and your foe will have a “guaranteed” punish opportunity (depending on distance and your adversary, this begins once you’re in -3 to -4 territory up close).
A smaller disadvantage where punishment isn’t guaranteed (-1 or -2) usually just means you should use caution. Attacking from mild disadvantage (“abare” play) is a recipe for getting counter-hit if the opponent scouts out this behavior. See frame data in the Primer.
Dive Kick
A steeply angled air attack that brings the aggressor back to the ground at an altered trajectory. With a lot of variance in how their attacks operate, Cammy, Necalli, Rashid, Ken, Chun-Li, Nash, R. Mika, and Dhalsim all have jumping uniqueattacks or special moves that act like dive kicks. Dive kick-style attacks are very good for altering jump-in timing, hitting slightly earlier or later than the opponent expects.
Dizzy
A helpless, dazed state achieved when a character’s stungauge is filled (see stun). The dizzied fighter stands in place and wobbles while their head is surrounded by visions of stars, chicks, or little reapers. (There’s no difference in the duration of dizzy between the different effects around the dizzied character’s head.) The player piloting the victim can mash all  ,
,  , and directional inputs to reduce the duration of dizziness, but it will still be enough time for a prepared foe to jump in for a full combo (or whatever they want).
A dizzied target basically never left hitstun, so if a combo is in progress, it’ll keep going. If you dizzy an enemy with a long combo, the damagescaling will pick up where you left off when you knocked them down. If you have a CriticalArt ready to go, it’s still great to cap off a huge dizzy combo since Critical Art scaling hits a floor at 50 percent. But otherwise, you might just try finishing long dizzy combos with either a reset attempt or whatever finisher puts you in the most advantageous follow-up position.
DP
Shorthand notation for “Dragon Punch,” the Shoryuken special move that helps define Ryu and Ken.
Empty Jump
A jump during which no action is taken. This reduces vulnerability on landing and creates mix-up potential. Using attacks or other actions during a jump means you lose tripguard, the ability to cancel the first couple of landing frames into immediate blocking or attacks. Empty jumps also often coax opponents into trying to block standing because they expect a jump-inoverhead. This makes them vulnerable to an immediate lowstrike upon landing.
Execution
Execution is the measure of skill that a player possesses in terms of performing combos and other dexterity-intensive SF tasks. It’s an extremely important skill to actively improve. You’ll want to be able to execute optimal combos, especially converting them from awkward situations, as consistently as possible at all times. The more you can defer your gameplay to muscle memory, the more you can focus on outplaying your opponent in the mind-game aspect of Street Fighter. Execution is typically improved on in Training Mode (see Training Mode for tips).
EX Gauge
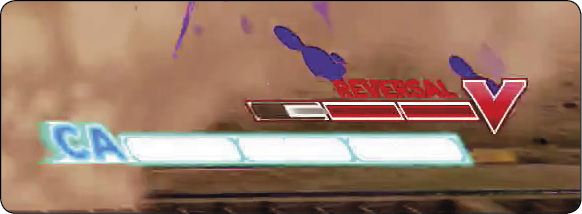
A meter located at the bottom of the screen that indicates how much energy is available to pour into EX specials and Critical Arts. EX Gauge is built by striking the opponent (hit or block), throwing them, getting hit, and whiffing most special moves. (Whiffing normals doesn’t build EX Gauge.) Blocking medium and heavy normal attacks builds a small amount of EX Gauge that’s proportional to the amount of whitedamage taken. Getting hit by a Critical Art also builds lots of EX Gauge, a third of a stock.
| Move | EX Gauge Expenditure |
|---|---|
| EX Special Move | 1 stock |
| Critical Art | 3 stocks (full EX Gauge) |
EX Special Moves
Enhanced versions of specialmoves executed by hitting two normal buttons to complete the special move’s command. A distinctive flash is visible, making it obvious that an EX move was used. This consumes one stock of the EX Gauge. Compared with special moves, EX special moves have enhanced properties, increased damage, or both; in some cases, the EX version of a special is like a different move entirely. Depending on your playstyle and the situation, your use of EX Gauge will be a tug-of-war between EX specials and CriticalArts.
FGC
Initials that stand for “fighting game community.” The wide network of tournament players, stream viewers, and fighting game enthusiasts who congregate on sites like shoryuken.com, eventhubs.com, and Capcom-unity.com, while filling YouTube and Twitch streams up with matches, tutorials, and combo videos.
Fierce
Original name for heavy punch ( ).
).
Fireball
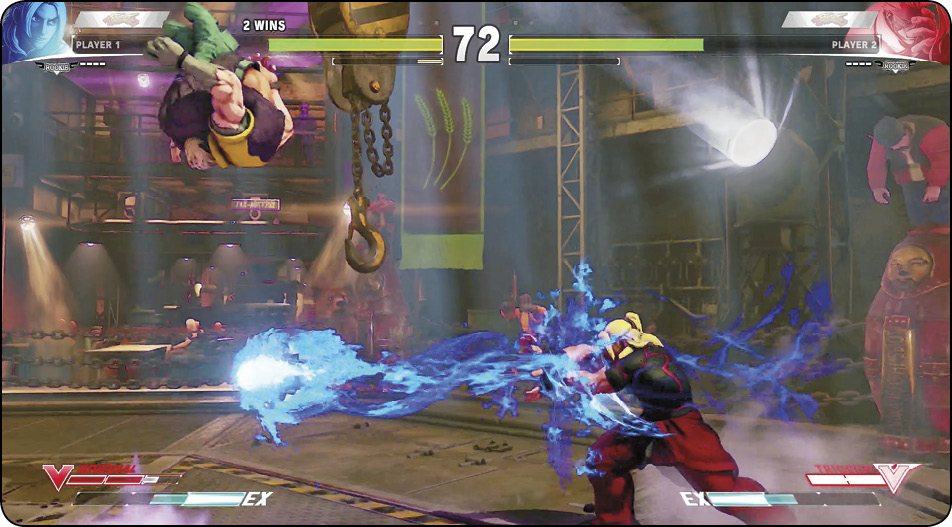
Informal term for projectiles, attacks that exist on screen independent of the fighters who created them. Vital for long-range zoning, mid-range footsies, and close-range combos. Each character’s chapter thoroughly details any projectiles they may have, along with any attacks they have that are designed to destroy/evade projectiles.
Fishing
Searching for a clean hit or a counterhit, or trying to bait the opponent into making a punishable mistake.
Floored
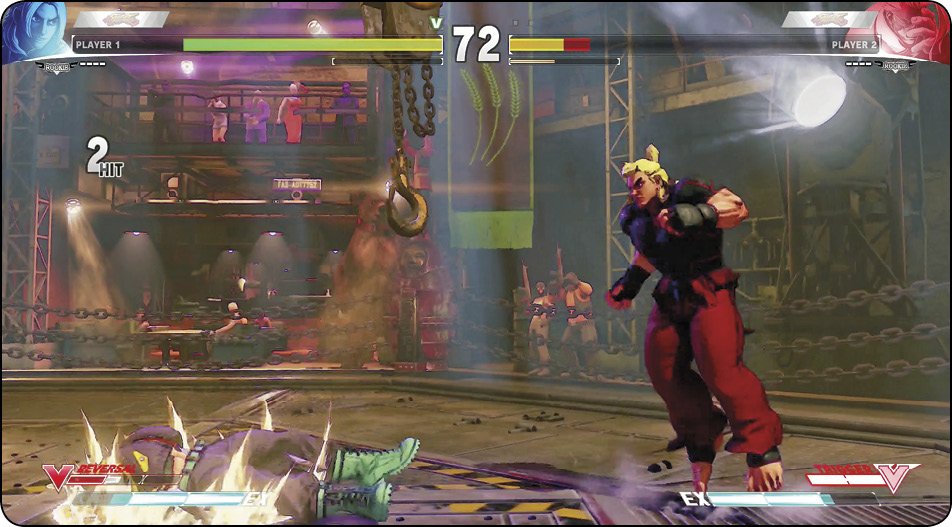
Refers to characters who are knockeddown. Floored characters have reduced options as they wake up before a waiting attacker. The anti-wakeup game against floored foes is called okizeme. Immediately upon being floored, input  / for quick-recovery in place, or
  / for backquick-recovery. Otherwise, waking up will happen at the normal (slow) speed, giving all initiative to the aggressor.
Focus
Not to be confused with SFIV’s Focus Attack mechanic, focus is a game concept referring to prioritizing which scenarios to look out for. Anything can happen in a fighting game, so choosing what to focus on is crucial. For instance, if you’re in a footsies battle, you need to think about your opponent’s best and most likely options (instead of their complete set of moves) so you can react quickly enough to punish them. No one can look out for everything at all times. This is a difficult skill to master, and your focus can vary drastically against different players and characters depending on their habits, your experience and muscle memory with your character, and so on. You must be able to consciously focus on a few specific things at a time (like worrying about good ground pokes instead of any possible poke), but you must also keep your focus flexible. You might be fighting a Zangief player where you’re heavily focusing on keeping him out and whiff-punishing his mid-range moves. However, you’ll also have to be prepared to switch focus sometimes so you’re ready to anti-air his jump-ins, as well. If you’re too focused on the ground game, you’ll sacrifice valuable tempo when you’re forced to block his jumping . Even worse, you might get punished with a full jump-in combo for whiffing your own ground attack because you were so committed on out-poking him.
It’s easier to focus and react to situations when you’re comfortable with your character’s moveset. Knowledge of when to use a particular button or move will greatly help you focus and react to specific situations.
Footsies
The mid-range to close-range game of controlling space in front of your character. This is a fine positional game that involves walking back and forth, jockeying for preferred position. Footsies can involve filling the space with projectiles and high-priority, low-risk pokes, or it can involve going for counter-hits and whiff-punishers against the opponent’s pokes. It’s important to recognize what has your attention wrapped up at a given moment. If you’re trying to control space with pokes, you’re leaving yourself open to whiff-punishing moves, and maybe to jump-ins, as well. If you’re dancing at the edge of your foe’s range, waiting intently for them to whiff something directly in front of you that you can sweep, you might not react immediately if they simply walk/dash forward well into your comfort zone, where their attacks will no longer whiff. But then, they wouldn’t have been able to simply move forward if you were filling the space with preemptive pokes instead of trying to punish whiffs. It’s easy to see how this neutral game can go in a circle. Just as was mentioned in the anti-air section, knowing when to switch your focus is equally as important as knowing what to do in a given situation because no one can keep every contingency in mind at all times.
For Free
Refers to a guaranteed situation, usually a punish chance. For example, if Ryu’s MP Shoryuken whiffs harmlessly in front of you, you can punish him “for free.”
Force Standing
A property of certain moves, like Ryu and M. Bison’s crouching and Dhalsim’s 
 . When these moves strike a crouching victim, the target will be forced into standinghitstun. Moves that force standing are most useful to ensure that certain combos work, like Ryu combos into Tatsumaki Senpukyaku. Tatsu whiffs over crouching opponents, but leading into it with crouching to force them up means that won’t happen.
Forward
Original name for medium kick ( ). Can also refer to direction (when facing right), toward the foe.
Frame
The game’s smallest unit of measurement. One frame is 1/60th of a second.
Frame Advantage/Disadvantage
The current degree of initiative (or lack of it) over the opponent, represented numerically. See framedata in the Primer.
Frame Data
Numeric representation of just about everything in SF. Find a thorough breakdown on reading frame data at the beginning of this Primer and Glossary.
Frame Trap
A poke/hit-confirm sequence timed to leave the opponent a gap to act. Most hit-check sequences become natural frame traps when the first attack is guarded. A well-planned and properly timed frame trap gives the enemy enough time to squeeze out attacks or throw-tech attempts, but not enough time for these attacks to actually become active threats. Frame traps are especially good against opponents who are in the habit of hitting buttons too often, whether because of an abare playstyle or because they are mashing. The input buffer carrying forward errant presses means that some players can be expected to habitually play right into the hands of frame traps. Frame trap success creates counter-hits.
Frame-trapping counter-hit setups are defeated by either using something fast/invincible enough to squeeze through the gap and hit first, or by just blocking, riding out the offensive fusillade. Against a defender who sits in crouch guard stance, switching to standing block on reaction to overheads, an attacker will get pushed by frame trap openers. To keep up the attack, they’ll have to either walk/dash back in or jump in from the edge of close range. If blocked attackers choose to cancel their close-range openers into specials on block, then they’ll surely do something punishable eventually. Walking/dashing back in to restart pressure or go for a throw is something that can be reacted to (much slower than an actual frame trap; reacting with a three-frame or four-frame crouching jab is often a decent and obvious option). And close-range jump-ins lead to obvious cross-ups that can be blocked (restarting the close-range defensive situation on the other side) or anti-aired with particular characters and tactics.
It’s easy to create your own frame traps and to check whether a sequence leaves a small or wide gap for the opponent to act. Look for the moves in your proposed frame trap in the data tables contained in this book. Find the “On Guard” value for the first move, and the “Startup” value for the second move. (On Guard must be a positive value.) If Startup is higher, the different between Startup and On Block tells you what your adversary’s gap will be, assuming the second move is performed immediately when the first move recovers (using the input buffer for normals works, of course). If Startup is equal to or less than On Block, then performing the second move immediately results in a “true” blockstring, locking the enemy in absolute guard instead of a frame trap.
Whether it’s better to leave a wide or small gap depends on your opponent and on what you expect them to do:
- If you expect a mashed reversal, any gap is bad unless you’re ready to just block and wait to punish a mistake.
- If you expect buffered/mashed three-frame and four-frame light attacks, the smallest gap you can leave is ideal, even just one or two frames. If you can do that while using a medium button for the trade priority, even better. Against a three-frame light attack character, a gap bigger than two frames (for your own light attacks, or three frames or greater for your mediums) will just get you hit yourself. The slower your foe’s reactions (and the slower the capabilities of their character), the more leniency you have to leave wide gaps.
- Against incredibly passive defenders, the kind who block three or four pokes in a row willingly, any kind of frame trap will likely be ineffective. By the time you’re leaving a space big enough to bait these players, the moves have long since stopped constituting a frame trap and instead simply become a poke into a really delayed poke.
See blocking, combos, and counter-hits.
Free Juggle
A combo-ready airbornehitstun state in which any striking attack will keep a victim lofted. See combos.
Front Throw
Normal throw accomplished with 
 . Also escaped with the same command. Hurls the victim in the direction the attacker currently faces. See normalthrow.
Full Screen
When combatants are all the way across the screen from one another. See position.
Gimmick
A generally unsound/punishable/unsafe tactic, which still might work if the opponent doesn’t know how to counter it or if it’s used sparingly.
Grab
Synonymous with throws, grabs are of the two main attack types, a counterpoint to strikes. Grab attacks cannot be blocked, and transition into a throw animation on contact with the enemy. When unsuccessful, grab attacks produce a throw whiff animation, which is vulnerable to punishment. A grab’s hitbox targets the central collision pushboxes of opposing characters, rather than their larger strike-vulnerable hurtbox area.
Grappler
A fighter whose motive is to get into close range and scare the enemy with untechablecommandthrows.
Guard
Synonymous with block. See blocking.
Guardstun
Synonymous with blockstun, a character’s blocking animation. No actions are possible except V-Reversals. See blocking.
Hardened State
This unofficial fighting game term simply refers to situations where a character cannot execute commands. If you’re in the middle of dashing, stuck in blockstun or hitstun, lying prone after getting floored, or already performing some uncancelable attack, then you’re committed until the character finishes their animation.
Hard Knockdown
Unofficial term for a knockdown that prevents quick-recovery. In Street Fighter V, the only attacks that are really “hard knockdowns” in the SFIV sense of the term are counter-hit sweeps; counter-hit sweeps cause a special Crush Counter effect that prevents quick-recovery (or backquick-recovery). This allows for stronger okizeme against the rising target since the defending fighter can’t vary their wakeup timing. There are certain attacks that prevent victims from using quick-recovery but also don’t allow the attacking player to move freely, usually because of some cinematic animation (like after Critical Arts for Nash, Karin, and M. Bison). These aren’t really hard/unrecoverable knockdowns since they don’t confer a big advantage to the aggressor; they just kind of return the situation to neutral.
Note: In any instance where "D" is given for a character's on hit data, this refers to a knockdown (a hitstun state where the victim is floored, lying prone on the ground). There is no frame data value due to the opponent's position on the ground.
HCB/HCF
Shorthand notations for “half circle back” specials (like Dhalsim’s Yoga Flame/Yoga Gale) and “half circle forward” moves (like Cammy’s Hooligan Combination).
High Attacks
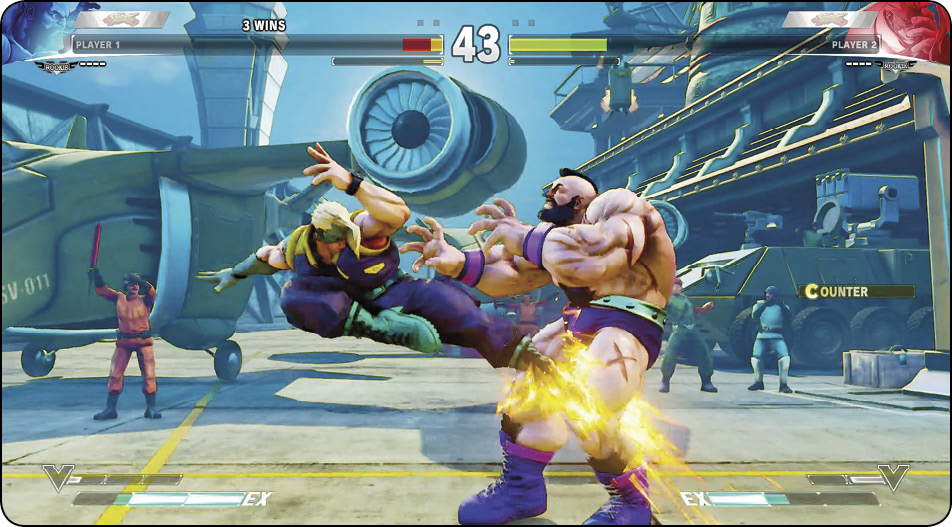
Attacks that must be blockedstanding. Also called “highs” and overheads; all jump-ins are included, as well as many uniqueattacks. See blocking.
Hit
The result when a strike connects with the target. If they just fail to block, it’s a normal hit; if they’re sticking out an attack that’s still in its startup period, it’s a counter-hit. Hits deal staminadamage and stun and create a very brief screen-freeze effect called hitstop before placing the victim into hitstun.
Hit-Check/Hit-Confirm
An attack opening designed to give you a chance to verify if it’s hitting cleanly before proceeding into follow-up options. See combos.
Hit-Throw
A striking attack that transitions into an inescapable throw after a successful hit. It’s important to note that hit-throws are strikes because they connect with the opponent’s hurtboxes, not their smaller, throwable “pushboxes.” Examples include Zangief’s EX Borscht Dynamite, R. Mika’s Wingless Airplane, and Birdie’s Hanging Chain. Since these attacks are strikes, they’ll work in combos. (True throws typically won’t work in combos unless used after a character is dizzied, or while they’re in particular Crush Counter hitstun states.)
Hitbox
A hitbox is an attack’s actual activestriking area, which doesn’t always conform to what the move looks like on screen. Hitboxes are targeted against hurtboxes, which are an opponent’s vulnerable portions. Moves that are said to be “high priority” are usually so-called because their hitboxes extend well outside the user’s vulnerable hurtboxes; a hitbox without a hurtbox is essentially an invincible striking area. (“High priority” can also refer to higher-strength normals cleanly beating lower-strength normals when clashing on the same frame.)
Hitstop
The very brief, almost imperceptible screen freeze that occurs to accentuate contact between combatants. Hitstop mostly figures into play when it gives the attacker longer to react to a successful hit, while also giving characters like M. Bison and F.A.N.G. a precious few extra frames to build up charge for their special moves (characters may be briefly motionless, but move charges continue to accrue). Hitstop can also be important for the option selects it enables, like hitting late during Crush Counter-capable moves. On block or normal hit, the attempted cancel is too late and nothing happens, but with the distinct hit effect and extended hitstop of a successful Crush Counter, a properly timed press becomes an automatic “psychic” V-Trigger cancellation. The absence of hitstop can also enable some option selects, like for jump-in attacks into immediate moves on the ground in case the jump-ins whiff. You bury an input during where hitstop would normally occur, so when hitstop isn’t there (like if the opponent somehow dodges, such as with Dhalsim’s Yoga Teleport), the quick input produces your desired secondary assault.
Hitstun
The helpless stance a character enters when they’re struck by an attack. Sometimes also called “hitreel,” hitstun is as hardened a state as there is; victims can’t do anything at all, not even block. Canceling or linking moves together to continue hitting a reeling character is the very definition of a combo. There is no way for victims to exit hitstun except to recover naturally over time. Hitstun tends to last longer the heavier the attack, and it will last longer for counter-hits than for normal hits. Throws won’t connect against hitstun and will just result in a whiffed attempt, but hit-throws will work (as well as the throw-based Critical Arts of Zangief, Laura, and R. Mika).
Armored attacks absorb an incoming strike without entering hitstun; some armored attacks (like Zangief’s V-Skill) can absorb multiple hits. The V-Skills of M. Bison and Ryu also function somewhat like armored moves, deflecting the incoming attack and skipping hitstun/blockstun.
Hurtbox
Hurtboxes are the actual areas on screen where a character can sustain damage. These areas usually don’t conform exactly to a character’s appearance; in fact, they’re typically much larger. The ratio of a character’s hurtboxes to their extended hitboxes is most of what determines the priority of their moves.
Input
A command or sequence given to the game. You can scrutinize your inputs by turning on Input Display in Training Mode, or by watching saved match replays. This is a good way to troubleshoot any problems with execution in tight situations, since there will be no question what the game thought you did (regardless of what you hope/claim to have done).
When you input commands during “hardened” states where your character is busy and cannot immediately act, the game will carry forward your inputs a certain number of frames, producing your desired action on the first possible frame, if soon enough. This is a first for the Street Fighter series and goes a long way toward making player execution more consistent, especially online.
Input Buffer
The input buffer can be used by both attacking and defending players in many very helpful ways. Different classes of action will carry forward different periods of time during hardened states:
- Dash inputs will buffer forward nine frames.
- Special inputs and throw commands will buffer forward six frames.
- Normal move inputs will buffer forward three frames.
Most obviously, the input buffer for normal moves makes link combos much easier in SFV than in other SF games (generally speaking). In SFIV, necessary two-frame links abounded, and many characters had one-frame tactics that were more or less required at a high enough level (shotos linking sweeps, Sakura Shunpu loops, Rufus linking standing short to standing fierce, Evil Ryu’s extended combos, Gen and C. Viper and Dudley in general, etc.). The “plinking” technique did mean that any one-frame link could actually become a two-frame link, but that’s using a dexterous motion that itself required understanding and practice to implement fully. In contrast, there are very few important SFV combos that require anything tighter than a three-frame link, thanks to the three-frame input buffer. And, in SFIV and other fighters, three-frame links are generally considered easy with a little practice.
The input buffer will also smooth over certain instances in online play. When latency affects wakeup or air recovery situations, for example, the three-frame buffer may still produce your desired meaty aggressive attack or defensive jab. Also, lag spikes are less likely to break your combos.
But the input buffer may also get you into trouble on defense when you’d really be better off not hitting anything for a moment. Buffering a poke just before air recovery or waking up or leaving blockstun will guarantee that that poke starts with reversal timing. This might be playing directly into your enemy’s hands, as your “perfect” buffered reversal poke runs into their “perfect” buffered frame trap setup, getting you counter-hit.
Input Priority
The game has a system of prioritizing what to do when it receives multiple inputs at once.
Roundhouse > Fierce > Forward > Strong > Short > Jab
> >  > > >
> > >
Taunt > V-Trigger > Normal Throw > V-Skill
> > >
Heavier attacks have priority over lighter attacks, and kicks have priority over punches. Light attacks together produce a throw, mediums produce a V-Skill, heavies produce (given enough V-Gauge) a V-Trigger, and all buttons together produce a taunt. The old “crouch tech” of SFIV is gone; pressing while crouching produces a standing throw attempt and will no longer give you a crouching short while doubling as a throw-tech command.
Invincibility
There are many ways a move can have absolute priority over certain types of incoming opposing moves. Actions can be categorically immune to certain things, like having throw, projectile, or strike immunity. A move might lack a hurtbox at all, making the character invincible to all damage types for these frames. Or, immunity can be limited to certain portions of the body. For example, most jumping attacks have a few frames of lower-body projectile immunity, making it easier for legs to skirt just over the tops of fireballs during jump-ins. Many dashing-type moves have some degree of upper-body projectile invulnerability, so conventional fireballs can be dodged (but unconventional ones, like Rashid’s, cannot). Moves with legit full-body invincibility are rare in SFV, and they usually come with counter-hittable recovery.
Invulnerable periods tend to be very brief, giving a particular move the upper hand when used in the right situation. For example, Ryu and Ken’s MP Shoryuken is invulnerable at the very beginning, so they’re virtually guaranteed to out-prioritize whatever they come into contact with if used with good timing.
Invulnerability
Synonymous with invincibility.
Jab
Original name for light punch ().
Juggle and Juggle Potential
The ability for attacks to carry foes reeling in midair. See combos.
Jump
A leaping action that either holds ground while avoiding grounded threats or quickly advances or retreats. See movement.
Jump-in
An attack executed from a jumping or airborne period, intended to hit a grounded target. Allows an aggressor to begin combos, blockstrings, and tick-throw tactics from midair. But seasoned players will be looking to anti-air obvious jump-ins. Successfully using jump-ins against good competition requires that you either divert their focus to something else first or that you jump in when you have extreme advantage, like after a counter-hit sweep knockdown. Depending on the matchup, you may also have relative freedom to jump at your foe aggressively if your character has jumping options that are difficult for your foe to deal with.
Typically, the term jump-in refers to attacks that hit the opponent’s front side, which they block by holding away from your side of the screen. A jump-in attack that hits ambiguously behind the foe, requiring that they block toward your side of the screen, is called a cross-up. An attack that seems like it’s going to cross-up but then doesn’t is called a fake cross-up; it’s helpful to nail people with one of these every once in a while to make them doubt where your jump-ins will end up. Position on the body also matters. Early jump-ins hit high on the body, increasing recovery; deep jump-ins hit late, resulting in less recovery and a better frame situation upon landing. You’ll have to weigh concerns about post-landing link positioning and timing, especially if your jump-ins and cross-ups involve light attacks or dive kicks.
Just Frame
A mechanic or move that requires an input within a specific period, usually as part of an exacting special move input. Just frames are not necessarily like one-frame-links. Examples of (fairly generous) just frame inputs in SFV are Karin’s “just frame” Tenko uppercut, and F.A.N.G. canceling Nishikyu poison balls into Nikankyaku dash moves within a tiny window. Similar to the “just defense” mechanic that showed up in SNK fighters like Garou: Mark of the Wolves and made it into Capcom’s Capcom vs. SNK 2, where blocking “just” before an attack connected (like with parry timing on the press) resulted in shorter blockstun.