
Street Fighter V Guide Fighters Balrog
Special Moves
LP Dash Straight Charge ,
, 


| Startup |
14 (10 close) |
|---|---|
| Active |
4 |
| Recovery |
22 |
| Guard Level |
HL |
| On Hit |
1 |
| On Guard |
-4 |
| VTX Hit |
3 |
| VTX Guard |
-2 |
| Cancel |
V, CA |
| Damage |
80 |
| Stun |
150 |
| Meter Gain |
10/20/10 |
MP Dash Straight Charge , 
| Startup |
18 (12 close) |
|---|---|
| Active |
4 |
| Recovery |
22 |
| Guard Level |
HL |
| On Hit |
2 |
| On Guard |
-6 |
| VTX Hit |
3 |
| VTX Guard |
-5 |
| Cancel |
V, CA |
| Damage |
90 |
| Stun |
150 |
| Meter Gain |
10/20/10 |
HP Dash Straight Charge , 
| Startup |
25 (19 close) |
|---|---|
| Active |
4 |
| Recovery |
22 |
| Guard Level |
HL |
| On Hit |
3 |
| On Guard |
-7 |
| VTX Hit |
5 |
| VTX Guard |
-5 |
| Cancel |
V, CA |
| Damage |
100 |
| Stun |
150 |
| Meter Gain |
10/20/10 |
EX Dash Straight Charge , 
| Startup |
22 (9 close) |
|---|---|
| Active |
6/3 |
| Recovery |
29 1st hit, 22 2nd hit |
| Guard Level |
HL |
| On Hit |
D |
| On Guard |
1 |
| VTX Hit |
7/D |
| VTX Guard |
4/-3 |
| Cancel |
V |
| Damage |
150(80+70) |
| Stun |
200(100*2) |
| Meter Gain |
-300 |
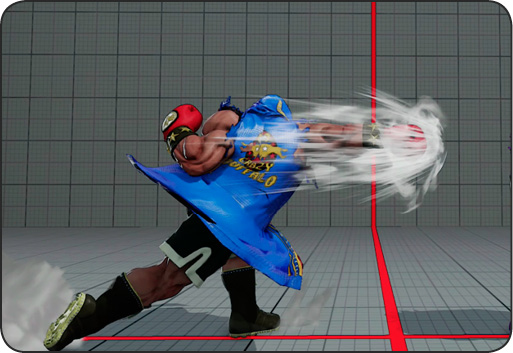
Dash Straight: Balrog’s classic “rush punch” is as old as the character himself, but remains the foundation of his wheelhouse. The boxer hurtles across the ground and extends a ferocious punch, the range of which is determined by the button used. Dash Straight is vital as a far-reaching poke, a hit-confirm combo tool, and a means of enabling tricky, advanced KKB-cancel tactics.
Functionally, any rush punch is Balrog hurling his fist out suddenly like a projectile, except that he’s still attached to it. His vulnerable hurtboxes extend a little bit in front of his arm’s hitbox. Pokes with invincible leading edges (and specials with strike-invulnerable periods) will snuff out incoming Dash Straights, along with projectiles. So if Dash Straight wins out encounters with other moves it’s because of speed, not priority.
LP Dash Straight hits about 40 percent of the screen away, MP Dash Straight reaches about 60 percent, and HP Dash Straight reaches 80 percent distance, almost full screen reach (and it can hit opponents standing at full screen distance, depending on their stance/hurtbox position). Heavier versions of Dash Straight deal slightly more damage, while lighter versions have faster startup and better recovery.
When using any version of Dash Straight up close, the move will occur right away, but lighter versions will still hit quicker than heavier ones. Any non-EX version of Dash Straight is punishable on block up close, so save close-range Dash Straight for hit-confirm combos and resist the urge to finish poke blockstrings with special moves.
LP Dash Straight strikes horizontally about 40 percent of the screen away, while Balrog moves forward about 30 percent. While he’s at -4 when LP Dash Straight is guarded, this is safe if the move is spaced from the edge of its range. No three or four frame pokes will close that gap on Balrog before he recovers. The reach of LP Dash Straight also synergizes well with the ranges of KKB  Buffalo Swing and of LK Dash Grand Blow.
MP Dash Straight is also mostly safe if spaced to hit with just the tip, but starting from farther out and with slightly longer startup, MP Dash Straight just isn’t as useful an engagement tool from its safe range as the LP version. MP Dash Straight is most useful to add a little extra combo damage canceling from crouching , standing/crouching , and standing  .
.
HP Dash Straight is even slower than the MP version and it’s even less likely that it would actually be deployed as from full-screen and hit with the relatively safe glove tip, all without being interrupted or dodged along the way. HP Dash Straight is useful in certain heavy-hitting combos, like crouching HP Dash Straight ( Gigaton Blow with EX gauge full, or a flurry of Charging Buffalo punches during V-Trigger).
The extra startup of HP Dash Straight, even at point-blank range, can actually be helpful for making KKB cancel tricks easier. Longer startup before the punch means more time to input for the “sway” cancel. It’s still much better in terms of startup and overall usefulness to perform KKB cancels from LP/MP Dash Straight (or ideally LK Dash Grand Blow), but some players may simply have trouble performing the cancel that quickly, in which case canceling from HP Dash Straight is an option. Consistency with tactics and execution is more important than going for stuff that’s out of reach or needs more lab time.
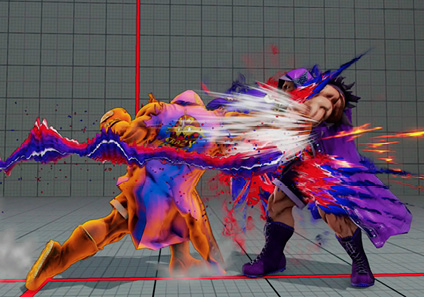
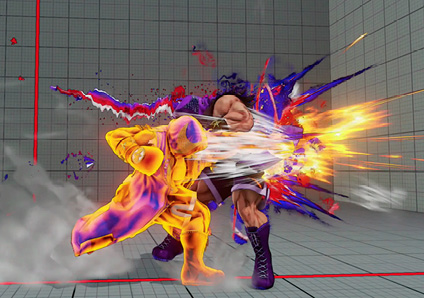
EX Dash Straight is the fastest, heaviest-hitting version. If the initial punch connects, Balrog follows up with another blow. (It’s possible to KKB-cancel the second punch before it hits, opening up potential mix-up/juggle chances.) The second hit knocks down, pushing the victim far toward the corner, and both hits have high juggle potential. EX Dash Straight is also actually safe on block, leaving Balrog at +1 up close. EX Dash Straight works in virtually any juggle, including after HK Screw Smash and counter-hit crouching . With some precision and a couple stocks of EX gauge to burn, a floating foe can actually be juggled with EX Dash Straight for one hit into KKB-canceled Buffalo Swing before the second hit, which pops the victim up a bit more, in position to be blasted back to earth with a two-hit EX Dash Straight.
Unlike in SFIV, EX Dash Straight has no armor. If a defensive special move is needed, look to EX Screw Smash or a high-level Turn Punch.
Part of playing Balrog (and other charge characters, like the forthcoming Urien) is always being ready to snap to back or down-back to start building charge in case a special move becomes useful. But over-committing to a charge is bad too; the days of being able to sit on down-back while staring at the opponent, turtling them to death with the threat of anti-air/anti-poke/totally random Buffalo Headbutt, are gone. Balrog players need comfort with building charge but also with breaking it. Balrog has lots of useful options that don’t involve back or down charge, like his new target combos and V-Skill.
Still, mid-range LP Dash Straight remains his most potent poke and engagement tool. The main counters to Balrog’s rush punches are preemptive neutral jumps; when defenders guess right, they can fall on Balrog with a jump-in combo as he whiffs his punch under them. High-priority pokes and moves that take up lots of horizontal space (including projectiles) will also snuff out Balrog’s specials, except for EX Screw Smash. Keep these counters in mind when threatening with far-reaching Dash Straights.
LK Dash Grand Blow Charge , 
| Startup |
17 |
|---|---|
| Active |
2 |
| Recovery |
26 |
| Guard Level |
L |
| On Hit |
D |
| On Guard |
-7 |
| VTX Hit |
D |
| VTX Guard |
2 |
| Cancel |
V |
| Damage |
70 |
| Stun |
150 |
| Meter Gain |
20/40/20 |
MK Dash Grand Blow Charge ,
| Startup |
18 |
|---|---|
| Active |
2 |
| Recovery |
26 |
| Guard Level |
L |
| On Hit |
D |
| On Guard |
-7 |
| VTX Hit |
D |
| VTX Guard |
2 |
| Cancel |
V |
| Damage |
80 |
| Stun |
150 |
| Meter Gain |
20/40/20 |
HK Dash Grand Blow Charge , 
| Startup |
19 |
|---|---|
| Active |
2 |
| Recovery |
26 |
| Guard Level |
L |
| On Hit |
D |
| On Guard |
-7 |
| VTX Hit |
D |
| VTX Guard |
2 |
| Cancel |
V |
| Damage |
90 |
| Stun |
150 |
| Meter Gain |
20/40/20 |
EX Dash Grand Blow Charge , 
| Startup |
11 |
|---|---|
| Active |
2 |
| Recovery |
18 |
| Guard Level |
L |
| On Hit |
D |
| On Guard |
-2 |
| VTX Hit |
D |
| VTX Guard |
4 |
| Cancel |
V |
| Damage |
140 |
| Stun |
200 |
| Meter Gain |
-300 |
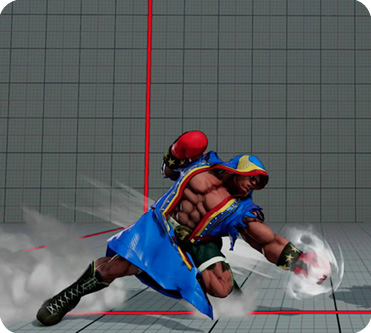
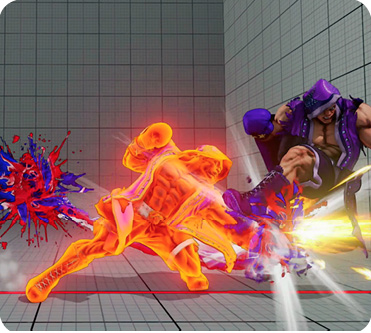
Dash Grand Blow: A slower, low-hitting counterpoint to Dash Straight. Balrog lunges forward then swipes at foot level with a sweeping punch. Heavier versions travel farther and are slower to connect, while dealing slightly more damage. EX Dash Grand Blow hits much faster than other versions and is much safer when guarded. Unfortunately for Balrog, counter-hit Dash Grand Blow doesn’t prevent quick recovery or add V-Gauge, unlike counter-hits with his regular crouching sweep. Still, a Dash Grand Blow hit into immediate forward dash against a quick-rising defender leaves Balrog at +3, point-blank.
A Dash Grand Blow hit leaves Balrog in great position to threaten an enemy as they get up from the close-range knockdown, but having Dash Grand Blow guarded leaves Balrog at -7, in position to eat a punish combo. Dash Grand Blow is much safer if aimed to hit with just the tip, like any forward-moving special move. Unlike Dash Straight, it actually has a hitbox that extends in front of the glove’s hurtbox and Balrog travels with a crouched profile. Having just the leading edge of non-EX Dash Grand Blow blocked is like having the tip of MP/HP Dash Straight blocked–the fastest lateral specials and Critical Arts can reach, but the usual three/four frame punish tools won’t. But ranged Dash Grand Blows are just that much slower than Dash Straights to mostly eliminate “occasional rushing sweep aimed at toes” as a good change-up. By the time the correct mid-to-long range position is achieved, a charge is built up and a carefully aimed Dash Grand Blow is fired off, the opponent probably relocated, or stuck something into the space for Balrog to run into, or neutral jumped in order to fall on a whiffed rush punch.
Instead, Dash Grand Blow is best used in combos. From medium-strength normals, canceling to LK Dash Grand Blow combos for a close-range knockdown. This does less damage than ending combos with Dash Straight or Screw Smash, but leaves the opponent closer when rising. For sheer speed used in advanced frame traps, LK Dash Grand Blow is also the best special move to use when going for KKB-cancel tricks--it can be KKB-canceled one frame sooner than any other special.
In blockstrings, while Dash Grand Blow is unsafe blocked as mentioned, canceling blocked moves into this low-hitting special will catch people who hold back (which will cause them to either block high or walk backward away from tick-throws) or up-back (which will cause them to block high or jump backward defensively). Something being unsafe when blocked doesn’t matter if the opponent isn’t bothering to block it, of course. And as a counter to grounded, mid-to-long range movement, occasional Dash Grand Blow can be treated as a far-reaching sweep with the same consequences when whiffed. Once the opponent starts thinking about Dash Grand Blow, the extra hesitation will increase the success rate of KKB tricks and the Buffalo Pressure overhead.
EX Dash Grand Blow hits faster than the other versions. It’s also safe if guarded, leaving Balrog at -2. With its range, speed, safety, and point-blank knockdown, EX Dash Grand Blow is a scary, versatile tool. If a knockdown is desired, it’s fast enough to link even after light attack hit-checks like crouching x2 or crouching  standing . It can also be used in juggle combos (hitting floating victims just above the ground, before they touch down) to score a point-blank knockdown with tons of momentum.
LK Screw Smash Charge  ,
, 
| Startup |
13 |
|---|---|
| Active |
5 |
| Recovery |
25 |
| Guard Level |
HL |
| On Hit |
D |
| On Guard |
-10 |
| VTX Hit |
D |
| VTX Guard |
-2 |
| Cancel |
V, CA |
| Damage |
100 |
| Stun |
150 |
| Meter Gain |
20/40/20 |
MK Screw Smash Charge ,
| Startup |
16 |
|---|---|
| Active |
5 |
| Recovery |
26 |
| Guard Level |
HL |
| On Hit |
D |
| On Guard |
-10 |
| VTX Hit |
D |
| VTX Guard |
-3 |
| Cancel |
V, CA |
| Damage |
100 |
| Stun |
150 |
| Meter Gain |
20/40/20 |
HK Screw Smash Charge ,
| Startup |
24 |
|---|---|
| Active |
5 |
| Recovery |
23 |
| Guard Level |
HL |
| On Hit |
D |
| On Guard |
-10 |
| VTX Hit |
D |
| VTX Guard |
±0 |
| Cancel |
V, CA |
| Damage |
90 |
| Stun |
150 |
| Meter Gain |
20/40/20 |
EX Screw Smash Charge ,
| Startup |
12 |
|---|---|
| Active |
5 |
| Recovery |
29 |
| Guard Level |
HL |
| On Hit |
D |
| On Guard |
-14 |
| VTX Hit |
D |
| VTX Guard |
-7 |
| Cancel |
V |
| Damage |
150 |
| Stun |
200 |
| Meter Gain |
-300 |
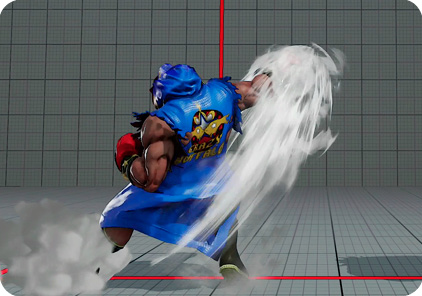
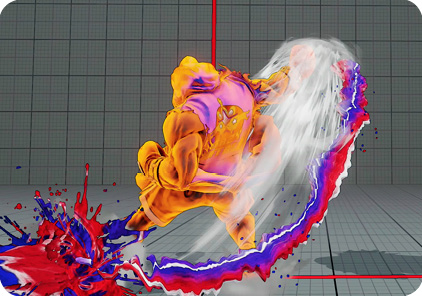
Screw Smash: A brand new move for Balrog in SFV, this “launcher punch” gives him new juggle and anti-air options. He ducks briefly while moving forward, then delivers a powerful hooking uppercut. Non-EX Screw Smash is a high-angled attack that whiffs over crouching characters’ heads, but has incredible hitboxes against standing or jumping foes. Balrog is invincible above his shoulders, including his head and attacking arm. Horizontally The hit profile is also great horizontally, since Screw Smash reaches about five percent of the screen’s width ahead of his vulnerable arm. Though, again, will whiff over crouchers, which is sort of a big catch. In SFII, Balrog could advance with “Dash Upper” rush punches, which also whiffed over crouchers, then immediately go for a grab. Unfortunately, the same thing tried here with whiffed Screw Smashes is nowhere near as fast and not really viable.
Non-EX versions leave Balrog at -10 when standing defenders block. Still, Screw Smash can clip enemies dashing, about to throw, or starting a jump. When making a hard read against a defensive target’s okizeme/neutral actions, one might just let Screw Smash fly if the opponent is expected to backdash or jump, either of which dodge ground throws and some pokes, but not Screw Smash.
LK Screw Smash strikes from about 25 to 40 percent of the screen away. The wide lateral range is noted because of how dominant this attack is aimed against jumping foes. LK Screw Smash will ruin any jump-in coming in from far out. But it’s too slow and far-aimed to be good against tightly-timed/meaty jump-ins up close, or against cross-ups. If the reach seems inadequate for sniffing out a backdash like Nash’s, use MK Screw Smash.
MK and HK Screw Smash strike from 45 to 60 percent away from where Balrog started. is fast enough to work in some combos, like standing crouching MK Screw Smash, and to sniff out backdashes and backward jumps. HK Screw Smash hits the same range and is slower (and less powerful), but launches victims into a very high, jugglable knockdown on hit. Hitstun after crouching is long enough for crouching HK Screw Smash to be a high-damage, juggle-starting option. HK Screw Smash can also continue a juggle after counter-hit crouching .
EX Screw Smash serves as Balrog’s most readily-accessible reversal–sort of. It travels the same distance as MK and HK Screw Smash, but faster than any non-EX version. It also has one point of armor from frames 3-16. Since the attack hits on frame 12 and is active for five frames, the armored period covers the entire attack. But since armor isn’t active until frame three of startup, meaty attacks will snuff out EX Screw Smash. This is like how R. Mika must deal with EX Shooting Peach as an imperfect reversal. Under true duress, Balrog’s only fully-invincible reversals are his V-Reversal, high-level (Lv7+) Turn Punches, and Gigaton Blow. Combined with his only three-frame attack (standing ) requiring him to stand up and poke with a stubby attack, these things help tilt Balrog’s focus in SFV more toward offense, since his defensive options aren’t always available or reliable and won’t scare other strong aggressive characters.
Turn Punch (Lv1) Charge and release two punches or kicks
| Startup |
26 |
|---|---|
| Active |
2 |
| Recovery |
22 |
| Guard Level |
HL |
| On Hit |
1 |
| On Guard |
-2 |
| VTX Hit |
5 |
| VTX Guard |
2 |
| Cancel |
V, SC |
| Damage |
80 |
| Stun |
150 |
| Meter Gain |
20/40/20 |
Turn Punch (Lv2) Charge and release two punches or kicks
| Startup |
26 |
|---|---|
| Active |
2 |
| Recovery |
22 |
| Guard Level |
HL |
| On Hit |
1 |
| On Guard |
-2 |
| VTX Hit |
5 |
| VTX Guard |
2 |
| Cancel |
V, SC |
| Damage |
100 |
| Stun |
150 |
| Meter Gain |
20/40/20 |
Turn Punch (Lv3) Charge and release two punches or kicks
| Startup |
26 |
|---|---|
| Active |
2 |
| Recovery |
22 |
| Guard Level |
HL |
| On Hit |
1 |
| On Guard |
-2 |
| VTX Hit |
5 |
| VTX Guard |
2 |
| Cancel |
V, SC |
| Damage |
120 |
| Stun |
150 |
| Meter Gain |
20/40/20 |
Turn Punch (Lv4) Charge and release two punches or kicks
| Startup |
26 |
|---|---|
| Active |
2 |
| Recovery |
22 |
| Guard Level |
HL |
| On Hit |
2 |
| On Guard |
-2 |
| VTX Hit |
6 |
| VTX Guard |
2 |
| Cancel |
V, SC |
| Damage |
160 |
| Stun |
200 |
| Meter Gain |
20/40/20 |
Turn Punch (Lv5) Charge and release two punches or kicks
| Startup |
26 |
|---|---|
| Active |
2 |
| Recovery |
22 |
| Guard Level |
HL |
| On Hit |
2 |
| On Guard |
-2 |
| VTX Hit |
6 |
| VTX Guard |
2 |
| Cancel |
V, SC |
| Damage |
200 |
| Stun |
200 |
| Meter Gain |
20/40/20 |
Turn Punch (Lv6) Charge and release two punches or kicks
| Startup |
26 |
|---|---|
| Active |
2 |
| Recovery |
22 |
| Guard Level |
HL |
| On Hit |
2 |
| On Guard |
-2 |
| VTX Hit |
6 |
| VTX Guard |
2 |
| Cancel |
V, SC |
| Damage |
240 |
| Stun |
200 |
| Meter Gain |
20/40/20 |
Turn Punch (Lv7) Charge and release two punches or kicks
| Startup |
26 |
|---|---|
| Active |
2 |
| Recovery |
22 |
| Guard Level |
HL |
| On Hit |
2 |
| On Guard |
-2 |
| VTX Hit |
6 |
| VTX Guard |
2 |
| Cancel |
V, SC |
| Damage |
300 |
| Stun |
300 |
| Meter Gain |
20/40/20 |
Turn Punch (Lv8) Charge and release two punches or kicks
| Startup |
26 |
|---|---|
| Active |
2 |
| Recovery |
22 |
| Guard Level |
HL |
| On Hit |
2 |
| On Guard |
-2 |
| VTX Hit |
6 |
| VTX Guard |
2 |
| Cancel |
V, SC |
| Damage |
360 |
| Stun |
300 |
| Meter Gain |
20/40/20 |
Turn Punch (Lv9) Charge and release two punches or kicks
| Startup |
26 |
|---|---|
| Active |
2 |
| Recovery |
22 |
| Guard Level |
HL |
| On Hit |
2 |
| On Guard |
-2 |
| VTX Hit |
6 |
| VTX Guard |
2 |
| Cancel |
V, SC |
| Damage |
420 |
| Stun |
300 |
| Meter Gain |
20/40/20 |
Turn Punch (Final) Charge and release two punches or kicks
| Startup |
26 |
|---|---|
| Active |
2 |
| Recovery |
22 |
| Guard Level |
HL |
| On Hit |
2 |
| On Guard |
-2 |
| VTX Hit |
6 |
| VTX Guard |
2 |
| Cancel |
V, SC |
| Damage |
500 |
| Stun |
400 |
| Meter Gain |
20/40/20 |
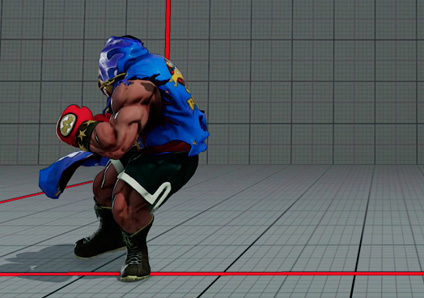
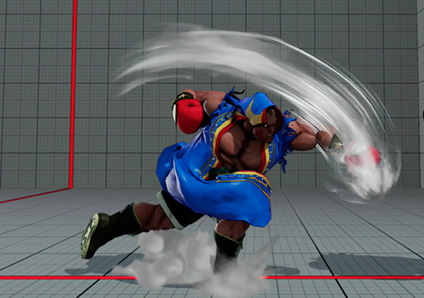
Turn Punch: Another classic punch as old as the boxer himself. Often also just called “TAP” for “turnaround punch,” Turn Punch is readied by holding any two attack buttons for at least 32 frames, or just over half a second. When ready, release both buttons simultaneously to trigger Turn Punch. The longer the charge, the stronger the Turn Punch. Multiple Turn Punches can be charged at once by holding four or six buttons, rather than two.
Turn Punches dodge projectiles and have varying degrees of strike invulnerability (depending on charge level) during most of startup. Lv1-3 Turn Punches are only upper-body invincible. Lv7+ Turn Punches have strike/projectile invulnerability on the first frame, making them true reversals. Only the Final version, after 56 seconds of charging, is fully invincible, also dodging throws.
Lv1-3 Turn Punches leave Balrog at -2 on block or +1 on hit, meaning links to standing are possible on counter-hit. Lv4+ Turn Punches knock the enemy down on hit. A fully-charged Final Turn Punch causes a wall bounce on hit that allows for juggles afterward! Thanks to this wall bounce, it’s possible (if incredibly unlikely), to juggle fully-charged “TAPs” back-to-back-to-back. But like with R. Mika’s full V-Skill taunt, the only way this is likely to happen in an actual match is if an online opponent stands still for a full minute while they answer their door or something.
Turn Punches that strike airborne foes (whether floating or jumping) leave them in a jugglable knockdown afterward, in position for Balrog to strike with Dash Straight/Gigaton Blow. This is most relevant after counter-hit crouching , or if an opponent jumps just before Turn Punch hits them.
As with Birdie, Ibuki, and some characters in other Capcom games, Balrog players must get used to being a bit premeditated with button charges if using Turn Punch is desired. The first thing to consider is that two buttons won’t be usable while charging. Depending on controller of choice and button configuration, holding two buttons may also make it difficult to perform Balrog’s target combos. Still, fairly functional combos and tactics can be built around just a button or two while trying to charge with other buttons: jump-in crouching standing LP Dash Straight, for example, or jump-in standing MK Dash Grand Blow.
Charging with light attacks is clearly a non-starter; Balrog has entire combos that can be constructed with , his fastest attack is standing , and of course these buttons are required for throws or to tech-throw. Charging by using any punches takes the use of Buffalo Headbutt off the table; whether this matters depends on how badly pressured Balrog is in a given matchup. Charging by using medium buttons removes access to KKB, along with Balrog’s great crouching , standing , and crouching pokes. This process of elimination leaves and as the most desirable buttons for charging, most of the time, but even then, this requires sacrifice: crouching is one of Balrog’s best counter-hit-fishing and anti-air weapons, standing is his longest-reaching normal poke, crouching is his sweep, and standing is a staple hit-check starter. No matter what, something important is put on hold while building a Turn Punch charge. Getting a sense of what to charge, and when, depends on style preference and matchups. Like with knowing when to build rush punch charge and when to let go, practice and experience will help Balrog players develop a sense of how and when to sit on an accumulating Turn Punch charge.
Of course, all that applies to holding charge for stronger versions. For shorter versions, it’s much simpler. For example, to juggle Turn Punch after counter-hit crouching , just start charging any two buttons along with the low fierce input (using ) and holding them down works both to produce the crouching as desired and to start the Turn Punch juggle charge in time). Or, to unleash a flurry of different punches, hold buttons to charge Turn Punch while other special moves speed toward the enemy and hold to charge other specials while Turn Punches are in progress.
Turn Punch Charge Times
| Level | Frames of Charge | Seconds of Charge |
|---|---|---|
| Lv1 | 32 | .5 |
| Lv2 | 121 | 2 |
| Lv3 | 241 | 4 |
| Lv4 | 481 | 8 |
| Lv5 | 961 | 16 |
| Lv6 | 1441 | 24 |
| Lv7 | 1921 | 32 |
| Lv8 | 2401 | 40 |
| Lv9 | 2881 | 48 |
| Final | 3361 | 56 |