
Street Fighter V Guide Glossary
P-S
Perfect K.O.
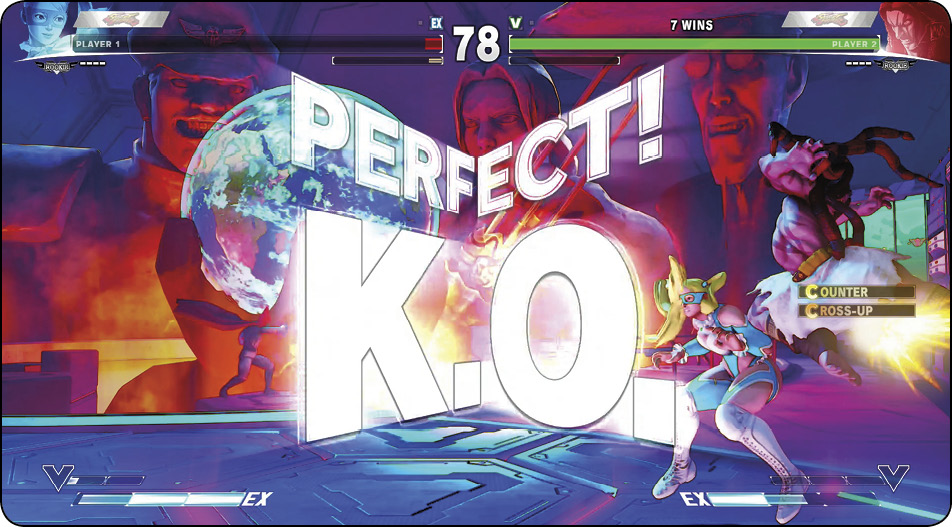
A round won without taking any damage. The stamina gauge remains full.
Personal Action
A taunting move executed with all six normal buttons together. Personal actions are just for show.
Plink
An execution technique that stretches a normal single-frame input to two frames. This was extremely helpful for making tight linkcombos consistent in SFIV and Street Fighter X Tekken but has greatly diminished importance (although the technique still works) in SFV thanks to the input buffer. (Adding one frame to input windows isn’t that hot when the game itself now adds three automatically.) See plink under combos.
Poke
A quick, useful move stuck out during close-range and mid-rangefootsies. Pokes control space, provoke reactions, punish whiffs, and begin hit-checks. Single pokes can serve as ticks up close, setting up throws and frame traps. You can bufferknockdownspecials during intentionally whiffed pokes as an anti-dash option select. Every character uses pokes, but the most poke-centered characters are those with fast movement speed and great normals, like Vega and Chun-Li. Their pokes can check the opponent’s guard from afar, whiff-punish the opposition’s missed pokes, and set up offense from mid range into close range, which is not a game that every character can play.
Position
Street Fighter has always been defined by its special moves, and the most fundamental specials (and the least realistic, for being in a game called “Street Fighter”) are projectiles (or as most players affectionately call them, fireballs). Projectiles allow users to attack from great distances and often without much risk, setting the tone for the way combat in Street Fighter evolved. Characters like Zangief, whose only wish is to throw, need to bypass a flurry of shots before even considering it. Vega wants to get in range to slash with his claw, but to do that, he must jump around countless fiery bolts. Even today, a quarter-century into SF, this aspect of its design hasn’t changed.
Close, Mid, and Long Range
Characters strike from a variety of distances at varying angles, which complicates trying to describe their tactics. To establish a visual notion of where certain strategies are effective, this guide references three general positions: close, mid, and long range.
Close range is directly next to the enemy, within range for both characters’ throws and short-range attacks. There’s some leeway with this definition because some characters’ best close-range pokes aren’t in range for certain opponents’ throws.
Mid range is defined as being about three character lengths away from the opponent, just on the edge of the range of their longest-reaching normal move. Throws aren’t an immediate threat, but jump-ins and walk-up pokes are. This isn’t an accurate description in Dhalsim’s case, so for the sake of finding a precise example, think of it as being just outside of range of Karin’s standing  .
.
Long range is typically defined as being well outside of range of an enemy’s normal moves, being reachable only by unique means (like special moves that travel forward or projectiles). This is usually just outside the reach of even long-reaching jump-ins. Again, Dhalsim is the exception to the rule here.
Corner, Midscreen, and Full Screen
Another important position is based on your character’s distance from the stage edge. A character with their back hugging the edge of a stage is considered cornered, which is generally the worst place to be. If your character is directly at the center of a stage (a position noted in Training Mode’s Grid stage with a thick red line), you’re midscreen. If you’re at the opposite edge of the screen in relation to your opponent, you’re at full screen distance.
Altitude
Altitude matters because of jumps, and thus jump altitude is frequently described (roughly). The apex or peak of a jump is self-explanatory; this simply describes the maximum height of a character’s jump. “While rising” refers to a jump’s ascent into the air before it meets its apex. “While falling” means the opposite, the period where a character passes the peak of their jump and descends. In reference to attack timing during jumps, “early” attacks are just after beginning to fall from a jump, while “late” attacks are near the end of a jump’s descent.
A common strategy when jumping in cautiously is to aim so only the tip of a far-reaching jump-in attack contacts the foe. If you decide to forgo the jump attack from this range, an attempted anti-air from the enemy may whiff because you’ve extended no limb for them to clip.
Corner
The left and right edges of the playing field. It’s usually bad to be backed into a corner because you have no space to back away, which makes it harder to avoid pokes and sweeps. Foes can create extremely ambiguous cross-ups by seeming to jump over you into the corner, but not quite making it. And combo potential increases near the corner for many characters. Conversely, cornering your foe and keeping them there is almost always a great goal.
Pre-Jump Frames
A character about to jump doesn’t leave the ground immediately. Depending on the character, there are a certain number of pre-jump frames that must elapse before they actually take to the air. These pre-jump frames are throw-invincible, but can still be hit with grounded strikes. Most characters have three pre-jump frames to go through, but Birdie has four, and Zangief has five. See jumps under the entry for movement.
Priority
The likelihood that one attack will beat another. Influenced by a move’s actual striking area (its hitbox), as well as the attacker’s vulnerable areas (their hurtboxes). Also influenced by various properties like being airborne, button strength and trade priority, invulnerability to certain types of moves, having a low profile, etc.
Projectile
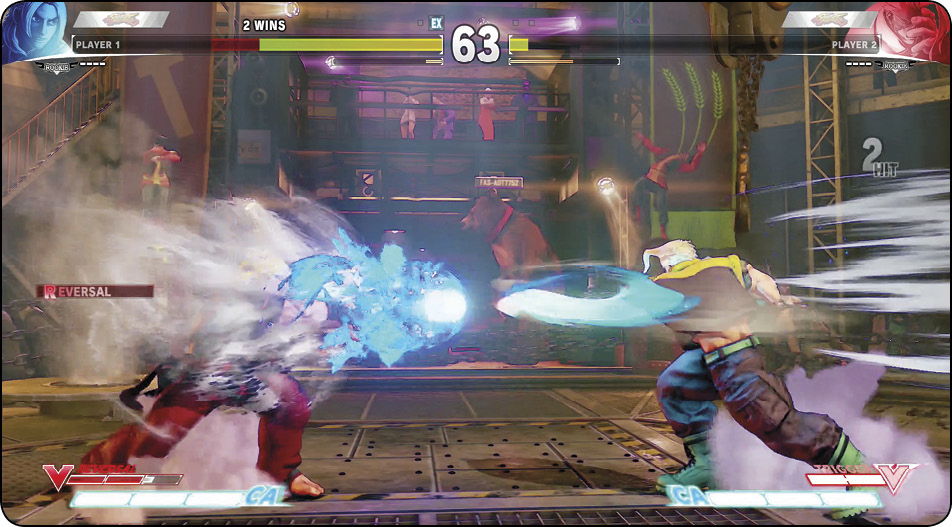
A striking object separate from a fighter thrown into the playing field. Projectiles are essentially horizontal pokes with long or infinite range. (Some character’s projectiles dwindle and disappear eventually, like Chun-Li’s, while characters like Dhalsim, Rashid, and F.A.N.G. hurl projectiles at unconventional angles.) Projectiles are crucial for zoning, for baitingjumps and bad reactions, as lengthy pokes at close range and mid range, and as useful combo components. Foes facing a projectile user must deal with it by blocking, by canceling out projectiles with their own, or by jumping over them. Armored moves can absorb single-hit projectiles, and many other moves can dodge or destroy incoming fireballs. Both creating projectile threats and circumventing them is as much a fundamental part of Street Fighter as jump-ins and blocking.
Proximity Block
A game mechanic where holding  or
or  when only slightly out of range of the opponent’s active attack frames still causes your character to enter a blocking animation. This can prevent walking backward out of mid range if the opponent whiffs attacks. In general, proximity block range and duration has been reduced in SFV. You’ll still block as a fail-safe if something is truly close to hitting you (which is the point of proximity block at all), but you’ll also have more freedom to actively walk around while opponents are whiffing moves near you. See blocking.
Punish
Capitalizing on an opponent’s error, ideally with a damaging combo or at least with something that gives you a leg-up on position and tempo, like a sweep. The most obvious examples of things to punish are whiffedthrow attempts and reversal-type special moves. Throws (which can’t be blocked) and moves like Shoryukens (which are extremely high-priority) are so good that everyone naturally wants to use them often. When you read your opponent’s intention to throw or use a big “get off me” reversal, you can simply step out of throw range or block, then reap a big opening when they whiff. Even beginners can quickly learn to at least throw in these situations, but eventually, it’s important to have good punish combos ready to go, even in awkward or tight situations.
Pushback
The degree to which a character is pushed away from another character when attacks connect. Pushback is the reason why you can’t just get next to someone and mad-dog them all day with offensive mix-ups. After they block no more than two or three opening salvos, you’re already pushed back too far to be an immediate threat anymore without repositioning.
Pushbox
The throwable central hurtbox for a character. It’s easy to find the boundaries of characters’ pushboxes: that’s where walking/dashing/jumping characters literally “push” each other. Just from cursory explorations of this, you’ll see that strikable hurtboxes surround characters on all sides much more than the throwable pushbox. Generally speaking, you have to be much closer to someone to throw them than to strike them.
QCB and QCF
Shorthand for the classic quarter-circle forward/backward motions. These actions drive most special moves, like Hadoken and Tatsumaki Senpukyaku.
Quick-Recovery
In addition to quick-recovery, this is often called quick-rise or tech rise. Just as your character is floored from a knockdown, tap  or
or  to get right back up in place, returning to the flow of combat quicker. For back quick-recovery (rising five frames slower but about a dash’s distance farther back), tap or
  as your character hits the turf.
You almost always want to use quick-recovery or back quick-recovery if possible. Staying floored for the full duration gives your opponent time to set up whatever mix-up they’d like for when you finally wake up. In normal gameplay situations, the only time you can’t quick-recover at all is after eating a counter-hit sweep. And after being thrown, you can only quick-recover in place and cannot use back quick-recovery. See wakeup and okizeme.
Read
An educated guess about what the opponent is going to do. Your ability to make solid reads depends on your knowledge (of your character, your opponent’s character, and your opponent’s tendencies), your reactions, and your intuition. Feeling like you know what your opponent will do can be helpful to focus your attention. Every character has dozens of options available at any given time, but you should worry only about what the opposing player is likely to do.
There’s sometimes a thin line between a read and a guess—it’s a read if it works, it’s a guess if it doesn’t. Try to determine in your own gameplay when you’re sometimes doing a move just because “it’s invincible” (or whatever reason) instead of because you specifically think that move will win at that moment. Everyone looks silly whiffing a reversal attempt here and there, and you can’t clam up or swear off risky plays entirely. But stay in the moment and don’t go on autopilot, and you’ll find yourself making more good reads and fewer bad guesses.
Recovery
Primarily refers to the period of a move after active frames, while it’s winding down. Canceling a move skips over this period. Whiff-punishing tactics are primarily aimed at recovery frames after something has barely missed. See frame data.
Recovery may also refer to quick-recovery and back quick-recovery, methods for wakingup from knockdowns quicker than usual, and air recovery, where fighters hit out of airborne actions land on their feet.
Reset
There are combo resets and tempo resets. A combo reset involves intentionally breaking a guaranteed combo or sequence with an unexpected alternate mix-up. Breaking a combo resets damage scaling, so if your mix-up is successful, you can end up doing more damage than you would’ve done with whatever guaranteed finisher you passed up. A reset can also be great right before the opponent gets dizzied. Stop a combo just short of dizzying them, then cause the dizzy with a quick overhead or low attack, keeping the combo hit total down (and damage scaling low) going into the dizzy combo itself.
Tempo resets, also called match resets or neutral situations, refer to exchanges that end with both sides fairly even, with neither character holding significant position or frame advantage.
Reversal
Refers to two things that are sometimes the same but not always. A reversal can be a counterattack (preferably something with high priority) used on the very first frame after certain inactive “hardened” periods (leaving blockstun or hitstun, waking up from a knockdown, and landing after air recovery are most prominent). SFV’s input buffer helps you time reversal attacks perfectly like never before. Reversal also often means a high-priority or invulnerable move that blasts through the opponent’s offense, overpowering their mix-up attempt. In comparison, the meaning of reversal is obvious in context; it often means both, and everyone uses the term both ways anyway.
Risky
A tactic that hands the opponent a golden opportunity if it fails. Invulnerable specials that make good reversals are also pretty risky to use for this purpose since they’re open to counter-hits on recovery. Sure, they might knock an aggressive foe off you and turn the tables. But if the adversary reads your urge to take back initiative and consequently just blocks, your whiffed special can become their harshest Crush Counter combo.
Roundhouse
Original name for heavy kick ( ).
).
Rushdown
Aggressive, forward-moving strategy. Generally, working to get inside to go for knockdowns, cross-ups, throws, combos, and close-rangemix-ups.
Safe
A move or tactic that doesn’t hand the opponent meaningful advantage. With rare exceptions, hurling projectiles from full screen is generally safe. Having crouching  blocked is generally safe. Having a sweep blocked is never safe… though sometimes moves like this become safe if used from max range, despite having lots of frame disadvantage.
Safe Jump
A jump attack timed to strike as late as possible against a foe rising from a knockdown. Ideally, the jump-in is blocked on the last possible frame of the jump-in and the first frame they rise. If the opponent tries a wakeup reversal, and if the safe jump is properly timed, the character who jumped in will already have landed and be resting in crouching block, and the reversal will probably just whiff. Proper safe jumps require immaculate timing and spacing. This is difficult to accomplish in SFV, where most set play is undone since almost all knockdowns allow for quick-recovery. Players generally use specific actions that always occupy the same length of time to try to set up safe jump attempts, like throws.
Shenanigan
See gimmick. If you’re unfamiliar with your opponent’s character, everything can feel like this. A tactic that doesn’t quite pass the sniff test for actually being good but works because you don’t expect it or don’t know how to respond to it.
Short
Original name for light kick ( ).
).
Shortcut
A method for performing a move or sequence that manages to omit portions of the command. This can make execution easier and more consistent, or simply different. Of particular importance to note in SFV is the addition of a new potential shortcut motion for Critical Arts, listed among these entries.
 and
and  Shortcuts
 and
and
The advertised motion of is not exactly accurate. The motion is actually any forward direction, any downward direction, then any forward direction again. The most useful shortcut application is the “wiggle” of . When you’re safely outside of poke/footsie range and you expect your opponent to jump or do something else that’s easily reversible, hold and wait a moment. If they jump (or whatever), the only thing you need to do to produce your Shoryuken-like move is to input and then the correct button. You don’t have to start from ; you can use this trick out of a crouch from also. Using only downward directions prevents your character from standing, even for imperceptible amounts of time. This keeps them lower-profile so your foe’s jump-in can’t hit before you activate your desired special. Performing it while ducking makes your character’s hurtbox shorter and increases the distance your foe has to descend before they can hit you.
This trick is also useful in combos where the official motion is awkward. For example, Ken and Ryu can cancel crouching  into Shoryuken. By performing crouching as
  , all you have to do to finish the cancel is .
 and
and  Shortcuts
 and
and
Moves like Dhalsim’s Yoga Flame have official commands that are half-circle motions. The trick here is that you don’t actually have to start these motions from or . You can start them from a defensive or offensive crouch. This mainly makes combos easier, like allowing Dhalsim players to hold for his crouching fierce, then simply perform 
 to combo Yoga Flame.
Critical Art Shortcuts
and
The old “Super” shortcut of is gone. This worked in many previous games, and allowed your Super to execute without you technically finishing the motion. (This was useful in footsies because it meant you could perform Supers straight out of a crouching position, from a wiggling input.)
The listed Critical Art motion for almost all characters is  , then punch or kick, character depending. R. Mika’s Critical Art also uses a double motion, but it’s with instead. (The only non-double-fireball-motion Critical Art is Zangief’s, which is not relevant for this shortcut, but is relevant to the
  shortcut listed after this one). For any of these double-motion Critical Arts, the actual command isn’t x2 (or x2 for R. Mika).
It’s actually just (or for R. Mika, ). Four directional inputs minimum is fewer than five for the old shortcut or six for the official motion, so this new motion can be faster to execute, if you quickly tap it out on a joystick or use a keyboard or custom button controller.
Otherwise, it’s important to be aware of just so you don’t trigger Critical Arts on accident in the normal course of footsie battles. While feinting and jockeying for position against an adversary, you might incidentally crouch, step forward, crouch, then step forward again all relatively quickly; if you happen to hit a button for a poke at the end, and all the inputs are close enough together, and your EX Gauge is filled, you’ll activate a Critical Art.
Shortcuts
The circular command has always been a little inexact. You can start it from any position, whether walking forward or backward. Given enough inputs around the circle, it can finish at any position, too. It requires upward motions by definition, but this is okay because pre-jump frames allow built-in leeway for upward motions in specials. The actual input the game is looking for isn’t a circle at all, though. It’s four different inputs from each of the cardinal or inter-cardinal directions. It doesn’t matter which order they’re in. To illustrate this, here are some legitimate commands to execute Screw Pile Driver:  ,
, 
 , , , and . These aren’t necessarily even feasible unless you’re using certain custom controllers or a keyboard on PC, but this is simply meant to illustrate what the game is looking for. It isn’t really a circle, and it isn’t really even however many consecutive inputs along a circular path as is sometimes claimed. It’s just one input each from backward, downward, forward, and upward. Repeated inputs don’t count, and you can’t make an input count for more than one direction ( can only count as your backward or your downward input in a given SPD motion, but not both).
For most players who are using a regular controller or joystick, this primarily just helps explain why you can somewhat seem to flub SPD motions and still get them. It also explains the OG trick of performing a half-circle motion, then heading to up. For players on keyboards and custom controllers, this can actually be used to a fairly large advantage. If you know that SPD only really requires four inputs, and it’s possible for you to hit only those inputs without having to travel along the edge of a d-pad’s or joystick’s inputs going from one to another, then you have a faster motion altogether.
Shoto
Gouken’s disciples, the Shoryuken and Hadoken-wielding Shotokan fighters. Ryu and Ken are the originals, going all the way back to the first SF game, and they’re naturally back in SFV.
Size
The gap between character sizes isn’t as big as it is in many fighting games, but characters still differ in size in various ways. This can have implications when poking, zoning, jumping in, crossing up, and performing combos.
A character’s actual strikable size is determined by hurtboxes, which don’t conform perfectly to on screen character images. A character’s throwable area, as well as the area where they’ll literally push against other characters, is their pushbox. The pushbox is smaller than the hurtbox area, more central in a character’s visual, and shorter, too. It’s the height of the pushbox, not the height of the hurtbox, that determines when and at which angle an airborne character might cross-up through a character.
With the exception of Vega, who’s unusually tall for his speed, the fastest characters also tend to be small (Chun-Li, Cammy, V-Trigger Necalli). The bigger the character, the slower their pace (Zangief, Birdie). Being huge has other consequences: tall crouchers are much more susceptible to “instant” jumping overhead tactics than smaller characters, especially Birdie.
The measurements here are not official units and are intended to show character sizes generally, relative to one another.
Standing Height
| Name | Hurtbox Height |
|---|---|
| V-Trigger Necalli | 75 |
| Most characters | 100 |
| M. Bison and Vega | 110 |
| Birdie, F.A.N.G, and Zangief | 125 |
Standing Pushbox Height
| Name | Pushbox Height |
|---|---|
| Cammy | 85 |
| R. Mika | 95 |
| Most characters | 100 |
| Nash | 103 |
| F.A.N.G | 105 |
| M. Bison and Vega | 110 |
| Birdie and Zangief | 125 |
Crouching Height
Crouching Pushbox Height
| Name | Crouching Pushbox Height |
|---|---|
| Vega | 83 |
| Cammy | 85 |
| Chun-Li | 85 |
| R. Mika | 85 |
| M. Bison | 90 |
| Most characters | 100 |
| Birdie and Zangief | 110 |
Width
Soft Knockdown
Refers to knockdowns that allow the victim to “tech” back to their feet immediately somehow. In Street Fighter V, almost all knockdowns are “soft,” allowing quick-recovery or back quick-recovery. Only knockdowns from counter-hit sweeps and a few certain moves are unrecoverable “hard” knockdowns. See wakeup and quick-recovery.
SPD
Initials for Zangief’s Screw Pile Driver, the game’s dominant command grab.
Special Moves
Special moves (usually just “specials”) are executed by correctly inputting a short motion sequence followed by a normal button. Most special moves are executed with one of the classic motions that dates all the way back to the first Street Fighter: quarter-circle and dragon punch motions. Other specials use half-circle motions or charge techniques. Most special moves have an EX version that can be performed (at the cost of a stock of EX Gauge) by pressing two normal buttons to complete the command. With a full EX Gauge, you can spend the whole thing to execute a character’s strongest special move, their Critical Art.
Stamina
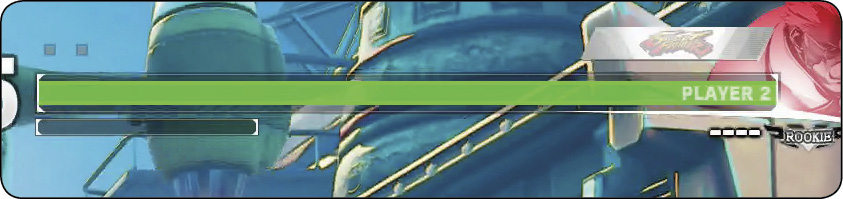
This represents how much punishment a character can take before being knocked out, and it is displayed by two gauges at the top of the screen. A character loses a round when all their stamina is wiped out. Slower, sturdier, heavier characters tend to have more stamina, requiring a bit more punishment to knock them out than diminutive, quick, lower-stamina characters. Stamina damage is usually just called damage.
Your playstyle means more to your survivability than these figures, and there’s less of a delta between the sturdiest and flimsiest characters than in previous titles anyway. Still, it’s worth being aware of. Higher-stamina characters will sometimes end up trading some of their stamina advantage taking risks to achieve their objectives, while lower-stamina characters pay a relatively higher price for their mistakes. Damage taken from combos begins to scale as the hits mount; some damage scaling also goes into effect after the stamina bar is less than half full.
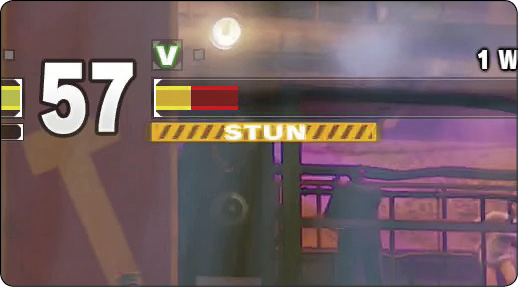
Characters also have a stun gauge: a smaller bar just under the stamina gauge that displays how much stun damage they can sustain before becoming dizzied.
| Name | Stamina | Rank |
|---|---|---|
| Birdie | 1050 | A |
| Zangief | 1050 | A |
| Laura | 1000 | B |
| Ryu | 1000 | B |
| Ken | 1000 | B |
| M. Bison | 1000 | B |
| Necalli | 1000 | B |
| Vega | 1000 | B |
| Rashid | 950 | C |
| Chun-Li | 950 | C |
| R. Mika | 950 | C |
| F.A.N.G | 950 | C |
| Nash | 950 | C |
| Cammy | 900 | D |
| Dhalsim | 900 | D |
| Karin | 900 | D |
Stance
A stance is a character’s current posture and determines what kind of actions are available to them. Basic voluntary postures like standing, crouching, and jumping give access to different sets of normal and special moves. Involuntary stances like hitstun and knockdowns hurt your character, while giving various advantages to your opponent.
Standing
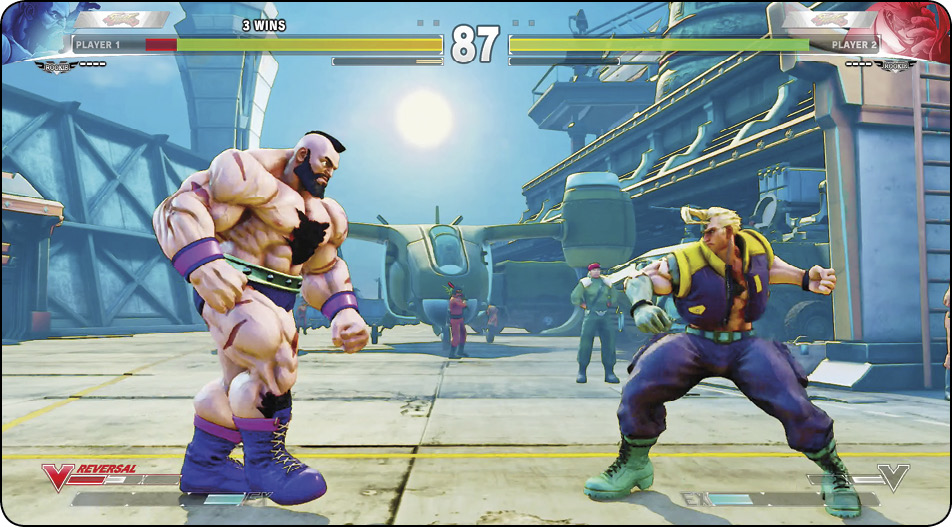
A character’s most basic, neutral posture, upright on their feet and ready to act. Normals will be the standing versions, as opposed to crouching or jumping variants. Standing characters can walk and dash for movement, and also guard standing against incoming high/mid strikes.
Startup
The initial wind-up frames of an attack prior to active frames. Counter-hits are attacks that strike the startup of the opponent’s attacks, interrupting them and dealing extra damage and hitstun. See frame data.
Strike
One of the two main classes of attack types, with the other being grabs. Strikes target opposing characters’ hurtboxes, and must be blocked to avoid staminadamage, stun, and hitstun. (Striking medium and heavy normals still cause whitedamage; striking specials and CriticalArts still cause chipdamage.)
Strong
Original name for medium punch ().
Stun
Stun is a parameter that builds up over time as characters sustain repeated damage. The heavier the attack, the more stun it deals, generally speaking. A gauge located just under the stamina bar represents accrued stun. Like stamina damage, stun damage scales in multi-hit combos. If the barrage of hits doesn’t continue, accumulated stun damage begins to wear off quickly. If the stun gauge is filled up, a character is dizzied. They’ll fall down immediately, then rise at normal speed while unable to act for a considerable period of time.
Activating a V-Reversal immediately removes 200 stun.
| Name | Stun Threshold | Rank |
|---|---|---|
| Zangief | 1050 | A |
| Rashid | 1000 | B |
| Laura | 1000 | B |
| Birdie | 1000 | B |
| Ryu | 1000 | B |
| Chun-Li | 1000 | B |
| R. Mika | 1000 | B |
| Ken | 1000 | B |
| Necalli | 1000 | B |
| F.A.N.G | 950 | C |
| Dhalsim | 950 | C |
| Karin | 950 | C |
| Nash | 950 | C |
| M. Bison | 950 | C |
| Vega | 950 | C |
| Cammy | 900 | D |
Sweep
Crouching , or low roundhouse. Every character’s crouching is a damaging knockdown move that must be blocked crouching. If a sweep counter-hits, it causes an unrecoverable (or “hard”) knockdown, giving the sweeper the perfect chance to set up an ideal cross-up or meaty. This is especially relevant since hits against dashes are counter-hits. Sweeps usually also have decent range, making them good footsie and whiff-punish tools. Remember that every character’s sweep is very punishable when guarded.