
Street Fighter V Guide Fighters Ibuki
Special Moves
LK Kazekiri


| Startup |
3 |
|---|---|
| Active |
13 |
| Recovery |
34 |
| Guard Level |
HL |
| On Hit |
D |
| On Guard |
-27 |
| Cancel |
CA |
| Damage |
50/40/30 |
| Stun |
50/50/50 |
| Meter Gain |
10/10+20+20/15 |
MK Kazekiri
| Startup |
4 |
|---|---|
| Active |
13 |
| Recovery |
34 |
| Guard Level |
HL |
| On Hit |
D |
| On Guard |
-27 |
| Cancel |
CA |
| Damage |
50/40/30 |
| Stun |
50/50/50 |
| Meter Gain |
10/10+20+20/15 |
HK Kazekiri
| Startup |
5 |
|---|---|
| Active |
13 |
| Recovery |
34 |
| Guard Level |
HL |
| On Hit |
D |
| On Guard |
-27 |
| Cancel |
CA |
| Damage |
50/40/30 |
| Stun |
50/50/50 |
| Meter Gain |
10/10+20+20/15 |
EX Kazekiri
| Startup |
4 |
|---|---|
| Active |
13 |
| Recovery |
34 |
| Guard Level |
HL |
| On Hit |
D |
| On Guard |
-27 |
| Cancel |
CA |
| Damage |
50/40/30 |
| Stun |
50/50/50 |
| Meter Gain |
10/10+20+20/15 |
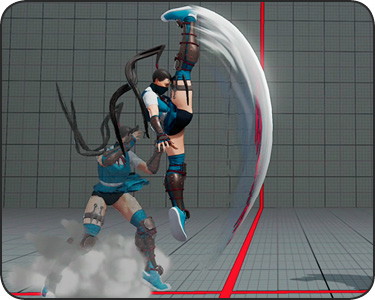
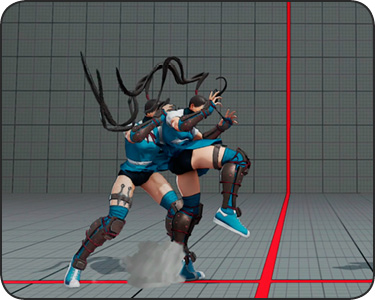
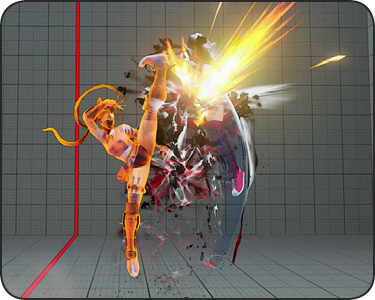
Kazekiri: Ibuki’s rising kick special move looks a lot like a shoto Shoryuken in trajectory and intended use, but it’s not quite like that. The normal versions don’t have any kind of invulnerability, and their hitbox starts as a knee into a toe kick out front, so they’re not ideal as anti-airs or grounded reversals. After the toe kick, Ibuki launches upward with kick angled to the sky. Non-EX versions of Kazekiri are primarily intended as combo enders. They can also be useful as low-damage juggle enders that leave Ibuki with excellent frame advantage against the victim’s wakeup.
All non-EX “uppercut kicks” have the same general behavior but differ in speed and range. LK Kazekiri is tied with standing  as Ibuki’s fastest move, striking in three frames. It has the least horizontal range of the three though, reaching about 20 percent of the screen away from Ibuki’s starting point. The MK version reaches about 25% of the screen away while adding one extra frame of startup. The HK version reaches the farthest, with a reach across almost a third of the screen for the horizontal toe-kick portion, but it’s the slowest to startup (five frames). Generally, it’s best to err toward HK Kazekiri in combos because why not? Ibuki’s hit-checks can sometimes push the opponent a bit away, and depending on the opponent’s size and stance, something like crouching
  standing

 LK Kazekiri might actually whiff at the end. However, LK Kazekiri can still be useful for spastic hit-confirms, like linking LK Kazekiri after standing or crouching standing , just like some short shoto hit-checks into linked SRK.
After hit-checking into Kazekiri, the opponent will be popped up into a short floating state that ends in a knockdown. Off any clean non-EX Kazekiri hit, dashing forward immediately on landing puts Ibuki at +5 against a foe who quick-rises in place, and at point-blank range to boot. Enemies who opt to recover backward will leave Ibuki dashing forward at +10, from slightly farther away. For a ground cross-up against quick-rise in place, or to stay even with a foe who quick-recovers backward, immediately use MK Kasumigake upon landing from a Kazekiri knockdown.
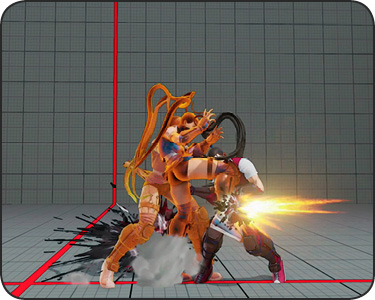
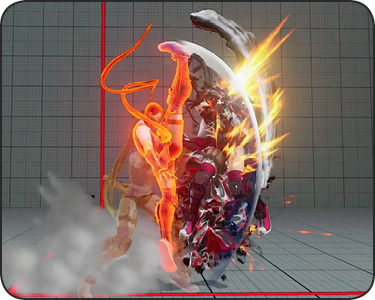
EX Kazekiri is Ibuki’s invincible reversal. This burns one stock of EX gauge for eight frames of total invulnerability. It’s also great when extra oomph is desired in combos. On hit, EX Kazekiri transitions into an extra kick attack in midair, one the non-EX versions don’t have. This extra aerial kick can be special-canceled into airborne Kunai or Kunai Ikkinage, which enables continued juggles from EX Kazekiri. Midscreen, EX Kazekiri into airborne EX Kunai bounces the opponent, potentially in position for another hit depending on positioning. In the corner, if an charge is stored for airborne MK Kunai Ikkinage, verifying into EX Kazekiri then canceling to MK Kunai Ikkinage off the aerial hit keeps the victim lofted long enough for Ibuki to land. From here, EX Raida snags them just off the ground for extremely heavy corner combo damage. This still works even if only one Kunai is stocked for MK Ikkinage. This is especially strong to keep in mind if the foe is dizzied near a corner.
Of course, as an upward-arcing special, any whiffed or blocked Kazekiri leaves Ibuki wide-open to max punishment.
LP Raida
| Startup |
7 |
|---|---|
| Active |
2 |
| Recovery |
30 |
| Guard Level |
HL |
| On Hit |
D |
| On Guard |
-12 |
| Cancel |
– |
| Damage |
100 |
| Stun |
200 |
| Meter Gain |
0/60/0 |
MP Raida
| Startup |
7 |
|---|---|
| Active |
2 |
| Recovery |
30 |
| Guard Level |
HL |
| On Hit |
D |
| On Guard |
-12 |
| Cancel |
– |
| Damage |
110 |
| Stun |
200 |
| Meter Gain |
0/60/0 |
HP Raida
| Startup |
7 |
|---|---|
| Active |
2 |
| Recovery |
30 |
| Guard Level |
HL |
| On Hit |
D |
| On Guard |
-12 |
| Cancel |
– |
| Damage |
120 |
| Stun |
200 |
| Meter Gain |
0/60/0 |
EX Raida
| Startup |
7 |
|---|---|
| Active |
3 |
| Recovery |
27 |
| Guard Level |
HL |
| On Hit |
D |
| On Guard |
-11 |
| Cancel |
– |
| Damage |
20/130 |
| Stun |
200 |
| Meter Gain |
-300 |
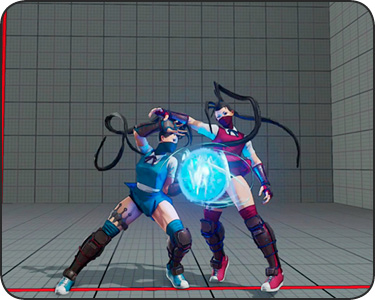
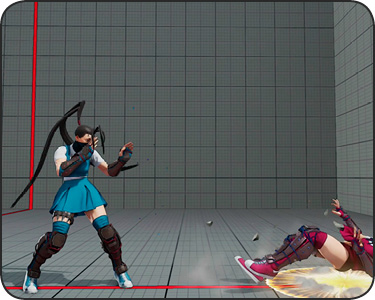
Raida: Ibuki’s hit-grab is back. She lunges forward with a throw attempt that’s actually a blockable strike. All normal versions have the same reach (a quarter of the screen) and damage, the only difference is in how far Ibuki blasts the victim across the playing field when successful. LP Raida launches the enemy close enough so that, by dashing forward immediately after LP Raida, Ibuki is left at +3 against stationary quick recovery. MP Raida launches them half a screen away, outside of immediate attack range after dashing back in. And HP Raida launches them to full screen’s distance, making it best when going for corner push or a chance to restock knives with Kunai Hojo.
Raida is too slow to practically link into from Ibuki’s pokes (like how LK Kazekiri can be useful), but Raida will grab from any situation where a standing can be successfully landed. For example, striking perfectly meaty with the last active frame or two of Sazan slide ( ) allows for a tight link to standing Raida. Jab canceled to Raida also combos after
  , and after crouching . Block any situation that leaves a close-range opponent at a mere -3, and standing Raida becomes a reliable lizard-brain punish, like Karin standing Tenko or R. Mika jab Shooting Peach.
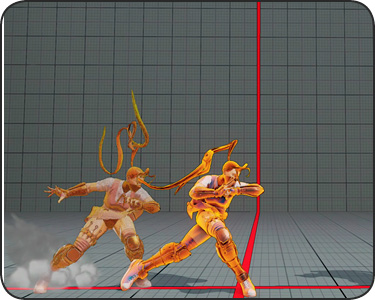
EX Raida starts with Ibuki stepping forward while projectile-invincible, then delivering an elbow strike that transitions into a powered-up Raida on hit. She’s projectile-invulnerable through to the elbow strike and reaches a bit farther than normal Raida, so EX Raida can be used like a higher-stakes HK Bonshogeri kick, blowing through anticipated projectile pokes at mid-range. EX Raida also works in grounded hit checks, but even better, has high juggle potential and is usually Ibuki’s highest-damage option for concluding juggle combos, if the floating foe is close enough to land the elbow.
LP Kunai
| Startup |
10 |
|---|---|
| Active |
See Notes |
| Recovery |
23 |
| Guard Level |
HL |
| On Hit |
2 |
| On Guard |
-2 |
| Cancel |
CA |
| Damage |
40 |
| Stun |
50 |
| Meter Gain |
10/20/10 |
MP Kunai
| Startup |
10 |
|---|---|
| Active |
See Notes |
| Recovery |
23 |
| Guard Level |
HL |
| On Hit |
2 |
| On Guard |
-2 |
| Cancel |
CA |
| Damage |
40 |
| Stun |
50 |
| Meter Gain |
10/20/10 |
HP Kunai
| Startup |
10 |
|---|---|
| Active |
See Notes |
| Recovery |
23 |
| Guard Level |
HL |
| On Hit |
2 |
| On Guard |
-2 |
| Cancel |
CA |
| Damage |
40 |
| Stun |
50 |
| Meter Gain |
10/20/10 |
EX Kunai
| Startup |
10 |
|---|---|
| Active |
See Notes |
| Recovery |
40 total |
| Guard Level |
HL |
| On Hit |
D |
| On Guard |
18 |
| Cancel |
– |
| Damage |
20/40 |
| Stun |
50/50 |
| Meter Gain |
-300 |
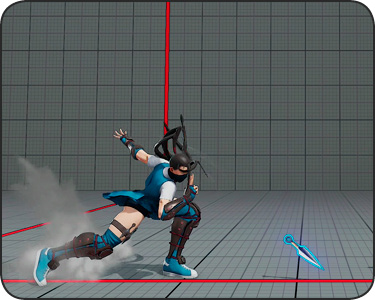
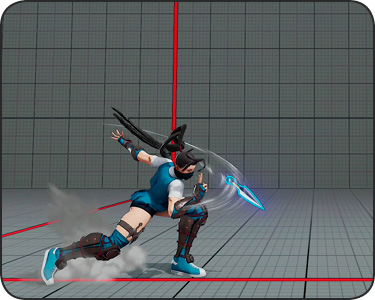
Kunai: Ibuki’s signature throwing daggers are no longer air-only, and she no longer carries an unlimited supply. At any given time, she can stock up to six Kunai total, which are expended one at a time for Kunai moves, or all at once with Kunai Ikkinage.
The strength of Kunai determines how far it travels down-forward before striking the ground and stopping. reaches to 40 percent screen distance in 11 frames, to 55 percent distance in 16 frames, and to 90 percent screen distance in 21 frames. HP Kunai will strike the feet of an opponent standing all the way across the playing field.
Non-EX Kunai are projectiles with no durability at all. They will be destroyed by any active hitbox. Incoming projectiles from other characters will plow through Ibuki’s Kunai like they aren’t there. The opponent can even poke incoming Kunai out of the air with normal attacks. Kunai basically function as extremely long pokes, not as a tool in grounded fireball battles.
Kunai can end hit-check combos with opponents on their feet, which is good if you want to cancel right into her Critical Art with full EX gauge, or for hit-confirm combos into V-Trigger bombs. For example, standing Kunai crouching bomb explodes, etc.
With V-Gauge full and at least one stock of EX gauge ready, Kunai can also be used as an option-select poke at mid-range. Aim LP Kunai so it will whiff in front of the opponent’s feet, and slap after throwing the Kunai no matter what. If the Kunai pings harmlessly off the ground before the enemy, nothing happens. If the opponent walks or dashes forward and Kunai hits, Kunai’s hitstop is automatically canceled into Rokushaku Horokudama. The screen freeze of Ibuki throwing the V-Trigger bomb gives a visual cue of success and plenty of time to get ready–immediately after the screen freeze, throw M EX Kunai to link from the Kunai and set the bomb off at the same time, creating a juggle opportunity and follow-up okizeme chance out of thin air. This kind of play often appears “psychic” but was really just the result of a button sequence that has no downside.
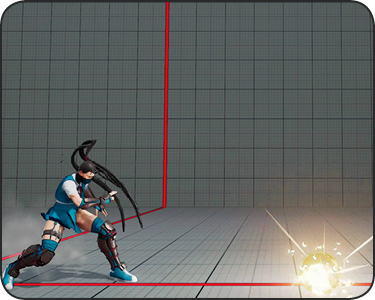
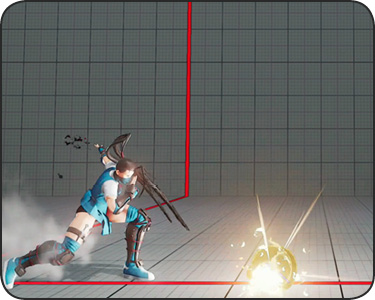
EX Kunai work differently. Throwing one expends both one stock of EX gauge, and one of Ibuki’s Kunai in reserve. While in transit, EX Kunai are actually strikes, like Birdie’s chains, so they pass through incoming projectiles without affecting them. EX Kunai can therefore hit a projectile thrower, but without stopping their projectile from hitting Ibuki too. After the initial striking hit of EX Kunai, a small bomb explosion goes off six frames after they slice into the ground. If the opponent is positioned along the right path, EX Kunai will register both the slicing hit and the launching explosion as a combo and juggle setup.
For L EX Kunai traveling to about 30 percent screen distance, input . For M EX Kunai traveling to 55 percent, input . For H EX Kunai traveling to 90 percent, input . L EX Kunai has use for launching opponents after up-close hit-checks. L or M EX Kunai may be appropriate at close to mid-range to manually detonate V-Trigger bombs in combos. And M and H EX Kunai can surprise opponents from incredible ranges, almost like full-screen sweeps at a cost.
Attempt a Kunai or EX Kunai throw when Ibuki is out of Kunai in reserve, and she’ll humorously whiff the throw motion, leaving herself open to punishment like she’d whiffed a grab. Develop a sense for how may knives are in reserve, and take little chances to quickly stock up just one or two with brief Kunai Hojo charges to keep a supply at hand.
LP Airborne Kunai while jumping
| Startup |
7 |
|---|---|
| Active |
– |
| Recovery |
13 landing |
| Guard Level |
HL |
| On Hit |
– |
| On Guard |
– |
| Cancel |
– |
| Damage |
40 |
| Stun |
50 |
| Meter Gain |
10/20/10 |
MP Airborne Kunai while jumping
| Startup |
7 |
|---|---|
| Active |
– |
| Recovery |
13 landing |
| Guard Level |
HL |
| On Hit |
– |
| On Guard |
– |
| Cancel |
– |
| Damage |
40 |
| Stun |
50 |
| Meter Gain |
10/20/10 |
HP Airborne Kunai while jumping
| Startup |
7 |
|---|---|
| Active |
– |
| Recovery |
13 landing |
| Guard Level |
HL |
| On Hit |
– |
| On Guard |
– |
| Cancel |
– |
| Damage |
40 |
| Stun |
50 |
| Meter Gain |
10/20/10 |
EX Airborne Kunai while jumping
| Startup |
7 |
|---|---|
| Active |
– |
| Recovery |
13 landing |
| Guard Level |
HL |
| On Hit |
– |
| On Guard |
– |
| Cancel |
– |
| Damage |
20/50 |
| Stun |
50/50 |
| Meter Gain |
-300 |
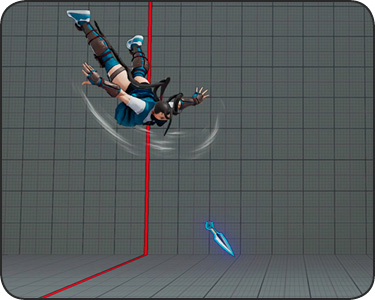
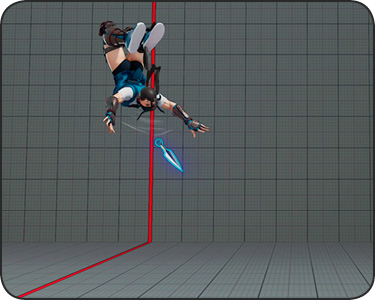
Airborne Kunai: Just like SFIII/SFIV Ibuki, this version of the high school ninja can throw aerial Kunai at a down-forward angle from a forward jump. Airborne Kunai are also possible during HK Kasumigake, after EX Kazekiri hits, and out of Nobusuma, Ibuki’s inverted carpet ride. The button strength determines the angle of travel. LP Kunai travels diagonally down at 25 degrees, MP Kunai at 35 degrees, and HP Kunai at 45 degrees. Like grounded Kunai, these have no durability and can be batted aside by anything.
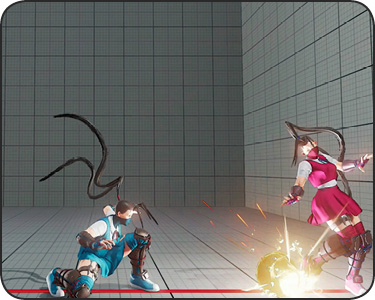
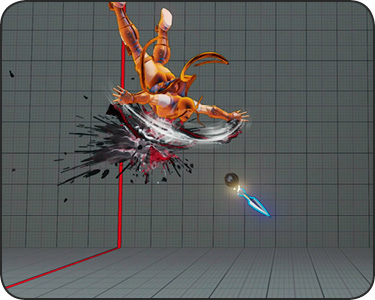
Airborne EX Kunai only has one version, which travels down-forward at 45 degrees, like the aerial HP version, and then explodes six frames after striking the ground. Like grounded EX Kunai, this is really a projectile-invincible strike in transit.
Having a down-forward aimed air projectile is never a bad thing. In fact, it’s usually the best thing possible. Every version of Akuma ever has a down-forward air fireball and no version of Akuma is bad, not even in “Versus” games, because of the value of that attack trajectory. However, Ibuki’s jumping Kunai has caveats. It also pulls from Kunai in reserve, and requires the commitment of a forward jump. Anti-airs don’t require any invulnerability at all to blow through incoming air Kunai and hit Ibuki too–they just have to aim up-forward, through the incoming blade. Historically, the main use for airborne Kunai is to set up a tricky left/right mixup as okizeme: jump toward a floored opponent during wakeup and throw a meaty Kunai over them as they rise, so that there’s some degree of uncertainty about where Ibuki will be right when they get up, which determines which side they have to block toward. Then, hit or block, Ibuki is right on top of them on wakeup, given entry coverage by the aerial knife.
This is still possible in SFV, but truly setting up a meaty aerial Kunai as okizeme requires a counter-hit sweep knockdown and a meaty knife throw. Since all other knockdowns allow for quick recovery, an attentive enemy will take advantage of this and spring up quickly from knockdowns, not affording Ibuki a meaty Kunai mixup attempt for free. And a cross-up Kunai throw at a target already standing will usually leave Ibuki no better than -5 on landing on hit. Hence, requiring a counter-hit sweet, which prevents quick recovery, giving plenty of time for a carefully-aimed airborne Kunai the enemy must rise into.
Kunai Ikkinage While grounded, charge and release with Kunai in hand
| Startup |
11 |
|---|---|
| Active |
– |
| Recovery |
36 total |
| Guard Level |
HL |
| On Hit |
D |
| On Guard |
9 (notes) |
| Cancel |
SC |
| Damage |
20*1~6 (150) |
| Stun |
20*1~6 (150) |
| Meter Gain |
10/10/5 |
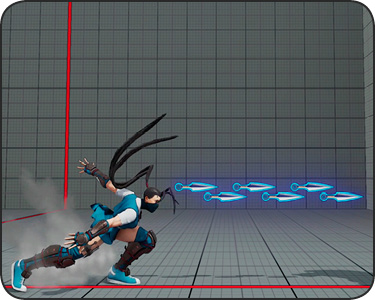
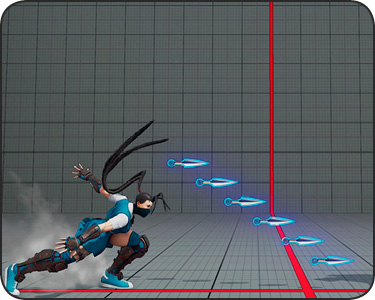
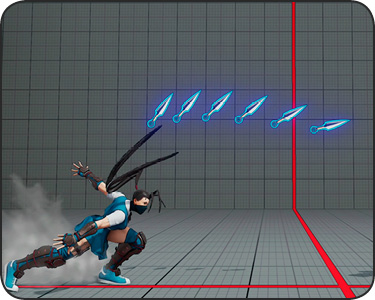
Kunai Ikkinage: With up to six Kunai in reserve at a time, they’re not just single-use anymore. By charging any punch button, a special Kunai discharge attack is activated upon button release. All remaining Kunai are hurled in a pattern that depends on the button used. LP Kunai Ikkinage features Ibuki throwing all remaining Kunai in a straight horizontal line. For , she throws them in an ascending pattern starting with a knife at shin level and going up to head level, so they travel like a staircase of blades. For , she throws them all in a crescent up-forward, saturating everything that isn’t straight up, straight across, or behind her.
If fewer than six Kunai are held in reserve, she’ll throw knives along the usual pattern until she runs out. For example, with only one Kunai stocked, MP Kunai Ikkinage will simply result in a single Kunai thrown low to the ground at shin level. The shin-level blade of MP Kunai Ikkinage gives Ibuki a low-damage tool against conventional fireballers since it travels under many of them; it won’t survive direct contact with any fully-fledged projectile, but it can travel under them now problem. This is one instance where using Ikkinage with only one Kunai stocked can be quite useful.
If zoning the enemy at mid-range with occasional LP and MP Kunai aimed at their feet, charge the button during. If the opponent jumps forward, anticipating more grounded Kunai, releasing produces an anti-air fan of knives, which will potentially put them in a jugglable state depending on position.
Unique to button-charged Kunai, Kunai Ikkinage daggers knock down on hit, and have very high juggle potential. LP Kunai Ikkinage can be useful to tack up to six extra juggle hits onto the end of juggle combos, even at long distance. This can happen after launching (or relaunching) the enemy with EX Kunai or V-Trigger bombs. The only tricks here are monitoring your stock of Kunai enough to use this effectively, and performing combo lead-ups while charging the correct button for this move, which takes practice. Birdie and Balrog have similar charging-some-buttons-while-using-others mechanics, as well as Zero from other Capcom games.
Airborne Kunai Ikkinage While airborne, charge and release with Kunai in hand
| Startup |
16 |
|---|---|
| Active |
– |
| Recovery |
50 total |
| Guard Level |
HL |
| On Hit |
D |
| On Guard |
– |
| Cancel |
– |
| Damage |
20*1~6 (150) |
| Stun |
20*1~6 (150) |
| Meter Gain |
10/10/5 |
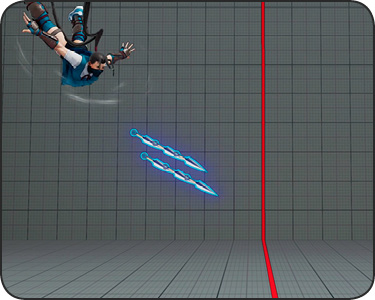
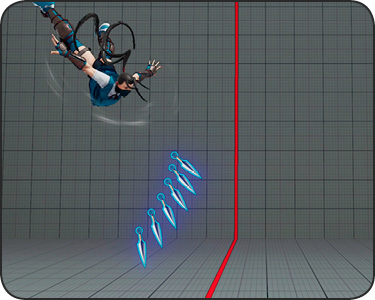
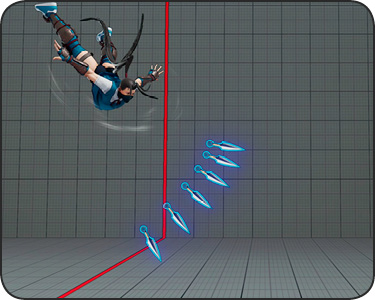
Airborne Kunai Ikkinage: Ibuki’s knife discharge special in mid-air is activated by charging and releasing a kick button. LK Kunai Ikkinage launches up to six blades a 45-degree angle down-forward. MK Kunai Ikkinage hurls six in a down-forward fan starting with the first one aimed almost straight downward. The first Kunai thrown during aerial MK Kunai Ikkinage is actually the most sharply downward-aimed of any version, with an arc out from straight down by only about five degrees, so it’s most noteworthy for throwing tricky Kunai at foes while passing overhead. MK Ikkinage’s fan ends with the sixth Kunai going down-forward at 45 degrees. HK Ikkinage blankets the widest area by far, hurling the first blade downward at about 15 degrees before fanning to the final one being thrown almost laterally.
Airborne Kunai Ikkinage are interesting. Like their grounded charge-button counterparts, and unlike motion Kunai throws, these knock down on hit, while also putting the enemy into a jugglable state. As mentioned already, the charge/release version also attacks almost straight downward. With a solid cross-up jump-in vector, especially after a Crush Counter sweep or from Nobusuma soaring above, MK Kunai Ikkinage may cause a knockdown and lead to an immediate close-range juggle chance as Ibuki lands near the floating victim. For example, Agemen (one hit) LK Kasumigake Raida. (Or, for simplicity’s sake, EX Raida.) Even using single MK Kunai Ikkinage this way is an example of a place where these knife-discharge moves are useful even with just one Kunai stocked.
MK and HK Kunai Ikkinage can keep juggle combos going after EX Kazekiri. Release the button just as Ibuki’s extra aerial kick animation occurs. Performing EX Kazekiri in combos while charging a kick button will take some getting used to.
Kunai Hojo(tap for one or hold for more)
| Kunai Replenished | Total Duration of Kunai Hojo (in Frames) |
|---|---|
| 1 | 54 |
| 2 | 74 |
| 3 | 82 |
| 4 | 99 |
| 5 | 103 |
| 6 | 115 |
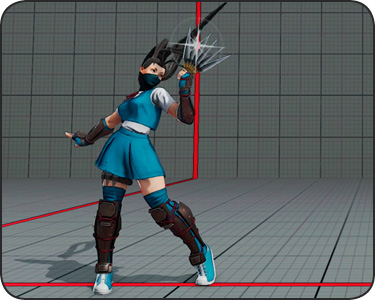
Kunai Hojo: Ibuki’s stock of reserve Kunai can be replenished through Kunai Hojo, activated with . At minimum, this move takes 54 frames and replenishes one Kunai. By holding down for just a few extra frames while Ibuki rifles through her bag for daggers, extra Kunai will be produced. There’s a rhythm to the length of button press made and the bobbing of Ibuki through the bag. Simply tap during execution for one Kunai, in 54 frames. Hold for longer periods for more Kunai restocked at once. The actual difference between pulling out one Kunai versus a full stock of six is actually just over one second, but this ends up being plenty of time for someone to close distance and hit Ibuki if they’re paying attention (for example, Nash has plenty of time to dash in twice and be at point-blank range in response to Kunai Hojo).
It’s possible to cancel into Kunai Hojo from cancelable normal moves, but that’s ill-advised since pulling even one Kunai out takes almost a second. Nobody’s letting that go unpunished up close. Instead, the safest places for Kunai Hojo include right after HP Raida or air throw.
LK Kasumigake
| Startup |
– |
|---|---|
| Active |
– |
| Recovery |
21 total |
| Guard Level |
– |
| On Hit |
– |
| On Guard |
– |
| Cancel |
– |
| Damage |
– |
| Stun |
– |
| Meter Gain |
– |
MK Kasumigake
| Startup |
– |
|---|---|
| Active |
– |
| Recovery |
23 total |
| Guard Level |
– |
| On Hit |
– |
| On Guard |
– |
| Cancel |
– |
| Damage |
– |
| Stun |
– |
| Meter Gain |
– |
HK Kasumigake
| Startup |
– |
|---|---|
| Active |
– |
| Recovery |
57 total |
| Guard Level |
– |
| On Hit |
– |
| On Guard |
– |
| Cancel |
– |
| Damage |
– |
| Stun |
– |
| Meter Gain |
– |
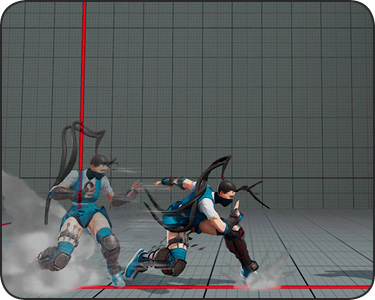
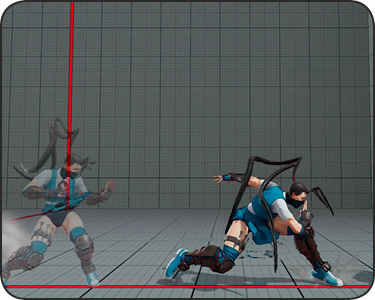
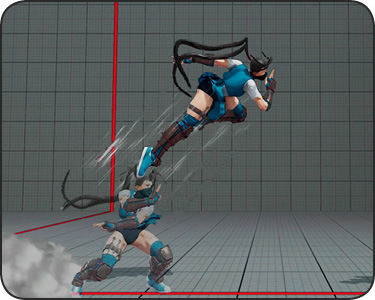
Kasumigake: Ibuki’s movement-oriented special move, Kasumigake is a grounded command dash when using LK or MK versions, and a longer-than-average jump when used with . Kasumigake can be canceled into from various hit-checks and target combos, or used on its own.
MK Kasumigake travels twice as far as the LK version, and will pass through standing opponents, ending with Ibuki on the other side. The differences in spacing, timing, and pass-through properties with the grounded command dashes allow for left/right mix-ups after common scenarios. These tactics are scariest for Ibuki’s opponent when her V-Trigger bombs are in play too.
| Move | Hit or Block | Into LK Kasumigake | Into MK Kasumigake (Ground cross up) |
|---|---|---|---|
| Standing |
Hit | -3 | -6 |
| Standing |
Blocked | -8 | -11 |
| Crouching |
Hit | -2 | -5 |
| Crouching |
Blocked | -7 | -10 |
| Shinten ( ) |
Hit | -5 | -8 |
Agemen ( ; one hit) ; one hit) |
Hit | -6 | -9 |
| Agemen (; one hit) |
Blocked | -11 | -14 |
For this kind of aggressive dash-in/ground cross-up game, ending up at -5 or -6 sometimes is like Ken’s V-Skill running, not quite the deal breaker it appears to be. It’s not “safe” but if they’re not preemptively ready to react then Ibuki can still get away with command dash mix-ups, especially with a varied approach, and especially if a V-Trigger bomb is out with the fuse ticking, strongly encouraging the opponent not to do anything rash.
The Gogasha target combo is tailor-made to lead into Kasumigake. Immediately after a foe is launched by standing , the roundhouse can be canceled into MK Kasumigake to end up at +6 up close, ready to greet a victim flipping out from air recovery. Canceling standing to LK Kasumigake, then immediately following with MK Kasumigake passes through them as they land, but ends with Ibuki at -10 or -11 instead. From standing , canceling to HK Kasumigake launches Ibuki into the air along with them, where she’ll fall just in front of where they flip out. This basically leads into a jump-in that gives them only about a five-frame gap to react between landing and when Ibuki falls right before them.