
Street Fighter V Guide Fighters Ibuki
Unique Attacks
Agemen


| Startup |
7 |
|---|---|
| Active |
3 |
| Recovery |
11 |
| Guard Level |
HL |
| On Hit |
4 |
| On Guard |
0 |
| Cancel |
Sp, V |
| Damage |
50+30 |
| Stun |
70+50 |
| Meter Gain |
20+20/10+10 |
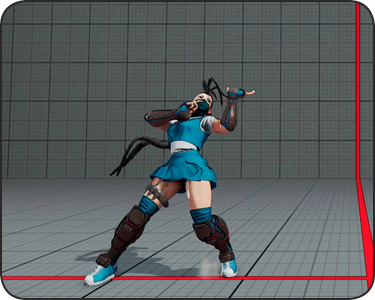
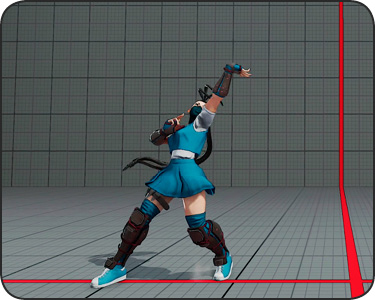
Agemen: Ibuki thrusts upward with a close-range, two-hit punch that can be canceled either hit. As an anti-air, or used in certain juggles, the first hit leaves the target in a jugglable state. Let the move ride, and the second hit will then immediately juggle and force the opponent to flip out with air recovery, landing on their feet. Against aerial targets, for an immediate mix-up chance, let both hits of Agemen strike then cancel the second hit into either LK Kasumigake or MK Kasumigake, which put Ibuki at different places around where they land. For a combo extender instead, cancel the first hit of Agemen into LK Kasumigake, then immediately juggle with Raida or Kazekiri. This can be tough–the first hit only has two active frames, meaning that the cancel here before the second hit is one of the most exacting techniques in the game.
Agemen won’t miss crouching opponents, but it doesn’t hit particularly low OR high-profile, with a hitbox that’s just a tiny bit above Ibuki’s vulnerable head for the first-hit frames, while she’s still standing herself. The second hit reaches up higher but is only active one frame (and doesn’t leave them jugglable if you cancel it into LK Kasumigake). It’s a great anti-air but it’s not quite Birdie’s crouching ; against high-priority or especially far-reaching, downward-angled jump-ins, it may trade, or even lose outright. Against enemies on the ground up close, it leaves Ibuki neutral if guarded, or at +4 on hit, which allows for stuff like a link into standing 
 Kazekiri/Raida.
Kobekudaki

| Startup |
28 |
|---|---|
| Active |
2 |
| Recovery |
16 |
| Guard Level |
H |
| On Hit |
3 |
| On Guard |
-2 |
| Cancel |
– |
| Damage |
70 |
| Stun |
100 |
| Meter Gain |
30/15 |
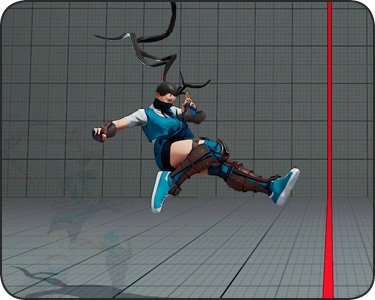
Kobekudaki: Ibuki’s command overhead, in which she hops forward, leaving the ground briefly (and causing low-profile strikes and ground throws to miss) before falling upon the target with her heel. It’s a tiny bit slower to start up (at 28 frames) than some similar command overheads, but makes up for this by allowing for link combos afterward on a successful hit. Mostly simply, standing  Raida can be tacked on for solid damage and corner push. If the overhead is guarded, Ibuki is left at a manageable -2 disadvantage; if counter-hit during startup, the airborne period means she might get knocked into air recovery instead of grounded hitstun, which is great, since it’ll mess up their preemptive strike/hit-check attempt.
Kobekudaki is a part of her Sasanaki target combo of standing . This is the same overhead with one difference: off the chain, the overhead is +5 on hit! This allows for an immediate link into standing , the first part of her Gogasha chain.
Sazan
| Startup |
7 |
|---|---|
| Active |
11 |
| Recovery |
14 |
| Guard Level |
L |
| On Hit |
-6 |
| On Guard |
-10 |
| Cancel |
– |
| Damage |
70 |
| Stun |
100 |
| Meter Gain |
20/10 |
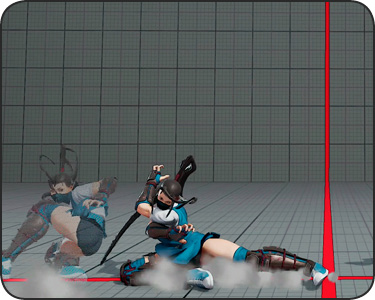
Sazan: Ibuki’s classic slide moves her forward along the ground with a low-hitting poke. The active period is a tremendous 11 frames long, and the low profile as she slides means it even has some use against aerial moves and jump-ins, depending on the angle and matchup. Guarded early in this period, Ibuki is left at a punishable disadvantage, so space Sazan (or time it meaty) to hit with just the tail end of the attack for safety. After a successful last-active-frame meaty hit, a standing link is possible from the slide; hit slightly off with the next-to-last active frame, and standing links are possible. Thanks to the forward movement and low profile, Sazan can also be great for kicking long-timer versions of her V-Trigger, Rokushaku Horokudama, toward the opponent. It also has a projectile-invulnerable hurtbox around Ibuki’s head, so Sazan can be used to slide under most projectiles.
Bonshogeri
| Startup |
14 |
|---|---|
| Active |
4 |
| Recovery |
16 |
| Guard Level |
HL |
| On Hit |
2 |
| On Guard |
-3 |
| Cancel |
– |
| Damage |
90 |
| Stun |
150 |
| Meter Gain |
50/25 |
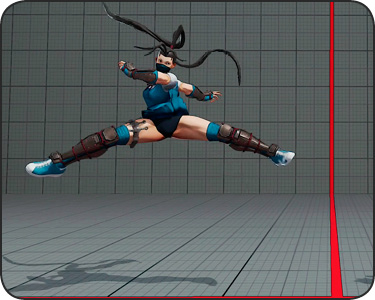
Bonshogeri: Another classic Ibuki hopping kick, with this one she springs up suddenly with a punishing midsection roundhouse. Like Kobekudaki, Bonshogeri leaves the ground briefly starting on the eighth frame, potentially avoiding throws. Unlike Kobekudaki, this isn’t an overhead and can be blocked while crouching. It’s also slightly less safe when guarded, at -3. On the bright side, it’s much faster than its counterpart, hitting in 14 frames. In addition to the airborne period avoiding throws, frames 8 to 26 are lower-body projectile invincible. This means Bonshogeri can be used to cleanly snuff out midrange projectiles from the tip of its reach.
This is also one of Ibuki’s Crush Counter attacks, along with standing . On counter-hit, it creates a great juggle opportunity. Cap off the spinning knockdown with a combo, or a reset/bait setup like (two hits) MK Kasumigake. If a counter-hit fishing attempt with Bonshogeri is guarded, at least Ibuki is only left at -3, which is not bad for a throw-dodging move with that kind of payoff.
Nobusuma while neutral/forward jumping
| Startup |
– |
|---|---|
| Active |
– |
| Recovery |
– |
| Guard Level |
– |
| On Hit |
– |
| On Guard |
– |
| Cancel |
– |
| Damage |
– |
| Stun |
– |
| Meter Gain |
– |
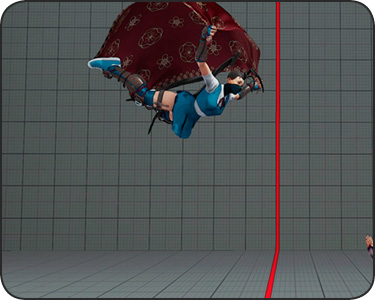
Nobusuma: A brand new move for Ibuki, in which she charmingly zips laterally along the top of the playing field out of a jump, using a big piece of fabric to briefly catch wind. Like many characters’ irregular jumping moves, the primary purpose here is to unexpectedly alter a jump’s arc, timing, and landing area. Opponents waiting to use grounded normals to anti-air Ibuki will probably just whiff, since she stays in the air much longer. Nobusuma also allows her to cover extra ground during an airborne period. This can be especially good to help escape being cornered, like by using HK Kasumigake to leap up then Nobusuma to glide over the opponent to midfield.
Before landing from Nobusuma, the only action possible is an airborne Kunai throw. Since Ibuki is totally defenseless during this aerial inverted carpet ride until landing, it’s usually advised to go ahead and throw a Kunai (or even Kunai Ikkinage) out of Nobusuma for some coverage. Normal air moves cannot be performed out of Nobusuma.
Shinten 1
| Startup |
5 |
|---|---|
| Active |
3 |
| Recovery |
15 |
| Guard Level |
HL |
| On Hit |
-5 |
| On Guard |
-8 |
| Cancel |
V |
| Damage |
40 |
| Stun |
50 |
| Meter Gain |
20/10 |
Shinten 2
| Startup |
6 |
|---|---|
| Active |
3 |
| Recovery |
16 |
| Guard Level |
HL |
| On Hit |
0 |
| On Guard |
-5 |
| Cancel |
Sp, V |
| Damage |
50 |
| Stun |
70 |
| Meter Gain |
20/10 |
Yagurakuzushi
| Startup |
4 |
|---|---|
| Active |
2 |
| Recovery |
15 |
| Guard Level |
HL |
| On Hit |
1 |
| On Guard |
-2 |
| Cancel |
V |
| Damage |
30 |
| Stun |
50 |
| Meter Gain |
20/10 |
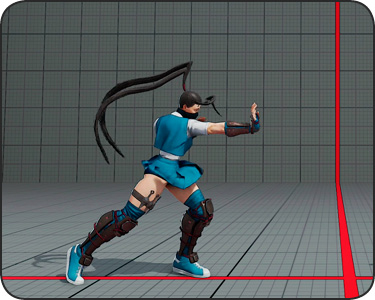
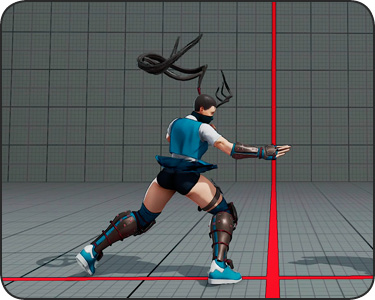
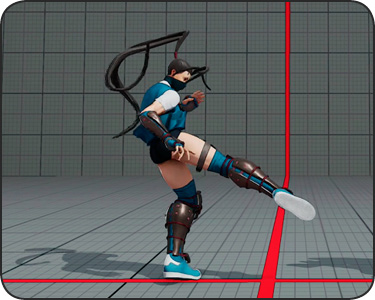
Shinten and Yagurakuzushi: Ibuki’s classic SFIII target combo is a staple of her close-range arsenal. After the initial standing chained to standing , the combo can be capped off with standing (Shinten 2) or standing (Yagurakuzushi) as needed. Simply ending after standing is unsafe on hit or block and is not advised, but these strikes give you time to confirm the hits and determine the best follow-up. On hit, finish with , then cancel into a special move. (Standing in this chain is not cancelable on block.) Lots of options are available when this chain into standing hits: Raida can cap it off for a far knockdown, or Kazekiri can pop them up into a closer knockdown. Standing can also combo into Kunai, which can itself be canceled into either Ibuki’s Critical Art for a big finish, or her V-Trigger, which leads into too many options of its own to list here. Needless to say, Ibuki players get very comfortable leading into standing and hit-checking for the appropriate capper. If it’s blocked, ending it by chaining into standing (Yagurakuzushi) is much safer than alternatives.
For extended hit-checks, this chain can be preceded by standing or crouching for an extra hit (and more flexibility in going for tick throws, or sometimes just doing the initial tick then waiting, baiting a reversal from people looking to blow up the hit-check). This requires flush distance though, and may be inconsistent depending on the opposing character, and whether they’re standing or crouching.
Gogasha 1
| Startup |
7 |
|---|---|
| Active |
2 |
| Recovery |
23 |
| Guard Level |
L |
| On Hit |
D |
| On Guard |
-12 |
| Cancel |
V |
| Damage |
60 |
| Stun |
60 |
| Meter Gain |
30/15 |
Gogasha 2
| Startup |
7 |
|---|---|
| Active |
2 |
| Recovery |
17 |
| Guard Level |
HL |
| On Hit |
D |
| On Guard |
– |
| Cancel |
Sp, V |
| Damage |
40 |
| Stun |
60 |
| Meter Gain |
30/15 |
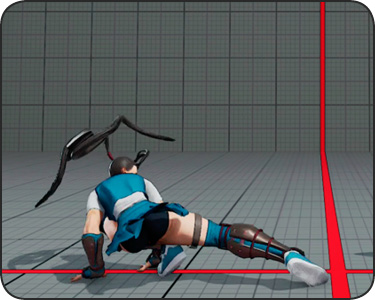
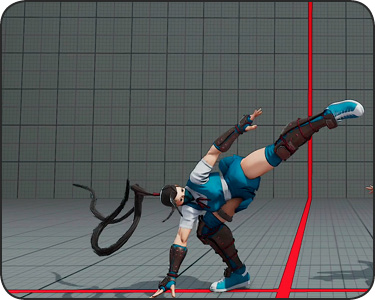
Gogasha: In SFIII, Ibuki had a close-range launching roundhouse kick. That’s emulated here with this three-hit chain of kicks that starts with her standing , chains into her sweep, then launches with standing . The second hit must be blocked low, while the third hit whiffs over crouching characters, so if this sequence is blocked by a crouching opponent, they are almost guaranteed retaliation against Ibuki. Stop after they block the sweep, and she’s at a very punishable frame disadvantage; stop with the whiffed standing at the end, and Ibuki is in dangerous of immediate punishment, though a hesitant opponent may let her get away with it (which is not necessarily uncommon; players often fail to punish whiffed portions of chains, like Ken’s whiffed kick chain, though this diminishes against the best players, and over time as everyone becomes more familiar with situational stuff).
But this isn’t really a hit-check on its own anyway. This chain’s purpose is to extend a confirm from something else, while setting up an immediate potential mix-up. Standing can link from +5 situations or better, the most likely being counter-hit standing / or counter-hit crouching , or from a successful overhead kick from standing . With a jump-in beforehand, the hit-check can also be the jump-in ( or from the front, or for a cross-up) into standing immediately on landing, which gives just enough time to not chain to sweep if blocked, and leaves Ibuki at +1 guarded, in position to threaten with standing or a normal throw.
The standing ender of this chain can be canceled into specials. Since the opponent is launched into an air recovery state and isn’t jugglable, the advantage here is an immediate confusion chance while keeping the pressure on. From standing crouching standing , to follow with an immediate frontal jump-in on their landing, cancel into HK Kasumigake. The gap between the earliest they land and can try to anti-air varies, but will tend to be about five frames, which means they don’t have time to squeeze out anti-air’s similar to Ibuki’s own seven-frame Agemen (). (Of course they still have time to let it rip with a Shoryuken or similar.) Otherwise, grounded cross-up/fake cross-up attempts are afforded by canceling standing into LK or MK Kasumigake. When V-Trigger is available, the standing chain ender can be canceled into a Rokushaku Horokudama bomb toss. Immediately after the screen freeze, use Kasumigake command dashes to pass under them during their air recovery with a bomb ticking away behind them. To put the bomb closer under their landing spot, cancel standing into LK Kasumigake for a short forward dash, then immediately throw a V-Trigger bomb, then go for okizeme against their air recovery. Starting with the bomb closer up makes it less predictable whether they should worry about Ibuki definitely trying to pass through with MK or HK Kasumigake moves.
Shakunage
| Startup |
14 |
|---|---|
| Active |
2 |
| Recovery |
23 |
| Guard Level |
HL |
| On Hit |
0 |
| On Guard |
-5 |
| Cancel |
– |
| Damage |
70 |
| Stun |
100 |
| Meter Gain |
30/15 |
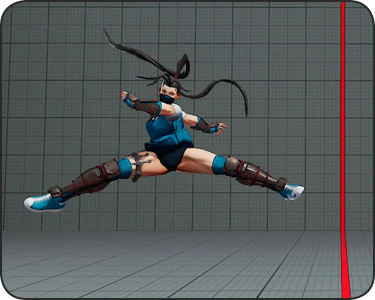
Shakunage: A target combo that involves Ibuki’s crouching strong canceled into Bonshogeri, her hopkick. This hopkick isn’t a Crush Counter though, and leaves her at -5 (rather than -3) when blocked. The use for this target combo is less flexible and more specific than for Ibuki’s other chains. Crouching has six frames of startup and leaves her at -1 guarded, so it’s not the fastest hit-check opener, and, on block, between the punch and there’s a gap the opponent could drive a Shadaloo van through.
So, the main purpose of this chain is actually as combo filler (or stalling, two-part poke) when using Ibuki’s Rokushaku Horokudama, her V-Trigger bombs. For example, from almost any hit-check into Kunai, you can V-Trigger cancel with a neutral bomb, pause ever-so-slightly after the screen freeze, then link Shakunage. (This is a rare instance where the best link timing isn’t immediate; don’t worry, there’s time to hesitate a tiny bit before the link after V-Trigger-canceling from something like standing or grounded Kunai.) These two hits hold the opponent long enough, and push them forward far enough, to be in perfect position when the short-fused bomb detonates, launching them into the juggle ender or reset setup of your choice.
Sasanaki
| Startup |
27 |
|---|---|
| Active |
2 |
| Recovery |
16 |
| Guard Level |
H |
| On Hit |
5 |
| On Guard |
-2 |
| Cancel |
– |
| Damage |
70 |
| Stun |
100 |
| Meter Gain |
30/15 |
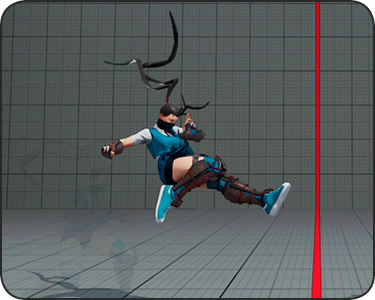
Sasanaki: This target combo features Ibuki’s standing strong canceled into her overhead hopkick. This version is actually a little better, hitting a tiny bit quicker and allowing for an immediate link afterward, since she’s at +5 here if the hopkick connects. The only bad thing about this overhead is that it’s telegraphed, since it must start with standing . Still, opponents who are confused by Ibuki’s assault of standing and standing pokes up-close may hesitate, encouraged to switch block or attack too late, just before the hopkick hits.
The Sasanaki target combo also has a kind-of-shennanigany use as a juggle ender... After a V-Trigger bomb launches the opponent, or after they’re juggled with (one hit) LK Kasumigake, juggle just before they hit the ground with standing and they’ll be greeted with an immediate overhead just as they flip out from air recovery.
TobikuraJumping
| Startup |
2 |
|---|---|
| Active |
6 |
| Recovery |
– |
| Guard Level |
HL |
| On Hit |
– |
| On Guard |
– |
| Cancel |
– |
| Damage |
70 |
| Stun |
50 |
| Meter Gain |
20/10 |
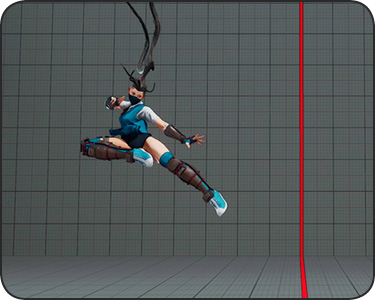
Tobikura: The first of two jumping target combos, this one features Ibuki striking with jumping jab canceled into forward (). This can be performed during a jump in any direction, or during HK Kasumigake. (Unfortunately, it can’t be performed out of Ibuki’s Nobusuma air glide!) The second hit isn’t an overhead, so if the opponent blocks the jumping jab correctly, they can’t be fooled by switching to crouching block too early like in “Versus” titles. Also, against smaller characters like Cammy and (soon!) Juri, they aren’t tall enough for the jump-in jab to register and cancel all the way into jump-in before Ibuki lands. This is thus naturally more useful against taller, bigger brawlers like Alex, Birdie, Zangief, and (soon!) Urien. Against them, the jab hits high enough in the air to give time to chain before landing. On the tallest characters like Birdie and Urien, jumping for an “instant” overhead with jumping immediately off the ground will actually connect for two hits.
In normal circumstances, hitting an opponent air-to-air with this chain will not work as a two-hit combo. However, using Tobikura out of HK Kasumigake (the “super jump” version of her movement special) increases the juggle potential of the sequence, allowing jumping to keep the enemy floating so that will link in mid-air.
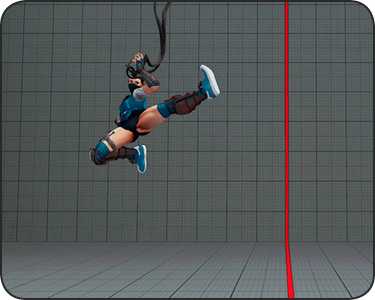
AojiJumping
| Startup |
16 |
|---|---|
| Active |
4 |
| Recovery |
– |
| Guard Level |
HL |
| On Hit |
– |
| On Guard |
– |
| Cancel |
– |
| Damage |
50 |
| Stun |
80 |
| Meter Gain |
30/15 |
Aoji: Ibuki’s heavier jumping chain is fierce canceled into roundhouse. Like with Tobikura, there’s not time to use this as a two-hit jump-in on small or mid-sized characters, and the second hit doesn’t have to be blocked standing. Also like with Tobikura, this air chain gains extra juggle potential when used out of HK Kasumigake. This can be useful for example for stylishly ending V-Trigger bomb combos. Use whatever setup pops the foe up into the air with the bomb’s explosion, then juggle them with HK Kasumigake into both hits of Aoji. This knockdown spikes them violently to the ground with the jumping roundhouse.