
Street Fighter V Guide Fighters Nash
Unique Attacks
Chopping Assault 


| Startup |
22 |
|---|---|
| Active |
3 |
| Recovery |
16 |
| Guard Level |
H |
| On Hit |
1 |
| On Guard |
-6 |
| SM-HX Hit |
— |
| SM-HX Guard |
— |
| Cancel |
— |
| Damage |
60 |
| Stun |
100 |
| Meter Gain |
30/15 |
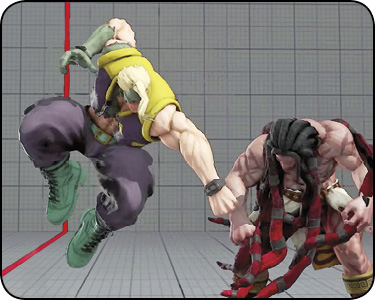
Chopping Assault: Nash’s overhead is a small forward hop into a downward fist thrust. Although he appears to be airborne, and his hop does crush certain low attacks, Nash isn’t technically considered to be airborne. Any attacks that connect with Nash during Chopping Assault will connect with him as if he’s grounded. You should use Chopping Assault sparingly, to either open up an opponent’s crouch-guard or to hop over and punish a crouching  attack. On block, it’s -6, making it easily punishable by most characters.
Spinning Back Knuckle 
| Startup |
15 |
|---|---|
| Active |
3 |
| Recovery |
30 |
| Guard Level |
HL |
| On Hit |
-3 |
| On Guard |
-13 |
| SM-HX Hit |
18 |
| SM-HX Guard |
8 |
| Cancel |
V |
| Damage |
90 |
| Stun |
200 |
| Meter Gain |
50/25 |
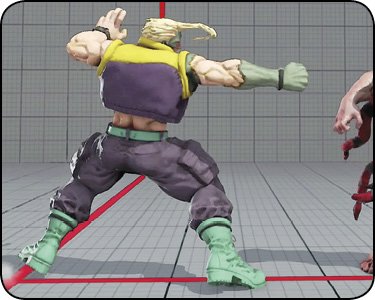
Spinning Back Knuckle: A throwback to Guile’s from previous Street Fighter titles, Nash lunges forward into a long-range spinning backfist. With its incredible range, Spinning Back Knuckle is one of Nash’s better mid-range to long-range attacks. On counter-hit, it puts Nash’s opponent into a crumple state, allowing him to juggle his adversary while they’re slumping over (see Combo 15).
However, Nash’s backfist has a couple of glaring weaknesses. It’s slow to start, and with his front leg lunging forward before its first active hitbox, he can be easily interrupted by low and midsection-hitting attacks. Furthermore, it’s -13 on block, making it punishable by certain gap-closing specials and supers even from near-max range (such as Ken’s EX Tatsumaki Senpukyaku, Chun-Li’s EX Hyakuretsukyaku, and Ryu’s Shinku Hadoken). Use caution when performing this attack, especially against characters with an accessible punish.
Knee Bazooka 
| Startup |
7 |
|---|---|
| Active |
6 |
| Recovery |
18 |
| Guard Level |
HL |
| On Hit |
-1 |
| On Guard |
-5 |
| SM-HX Hit |
— |
| SM-HX Guard |
— |
| Cancel |
— |
| Damage |
60 |
| Stun |
70 |
| Meter Gain |
30/15 |
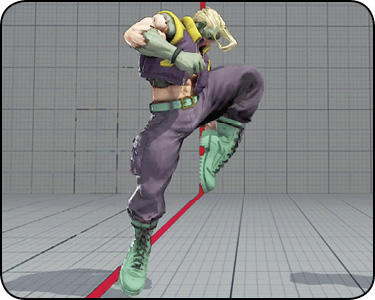
Knee Bazooka: Nash launches a quick knee attack toward his opponent. Like Chopping Assault, this attack seems airborne but technically isn’t. However, it does have a decent hitbox around his knee and midsection, slightly extending past its hurtbox. It also starts up relatively quickly (on the seventh frame) while staying out for an impressive six active frames. Its advantage on hit and block varies depending on which active frame you connect with. The first active frame leaves you at -1 on hit and -5 on block. Hitting with the last active frame leaves you at +4 on hit and ±0 on block. This ideal scenario is extremely difficult to pull off because you’ll have to either distance Nash perfectly in the neutral game or have frame-perfect timing on a meaty setup.
Knee Bazooka is a decent mid-range attack, and you can use it safely just outside of Nash’s crouching reach to get him into close range. At this distance, you’ll usually end up at -2 on block, safe from almost all reprisal attacks. On counter-hit from this distance, you can usually link into Combo 11. It’s also great as a follow-up juggle whenever your opponent erroneously lands on a Sonic Boom from a jump, which happens often.
Jumping Sobat
| Startup |
13 |
|---|---|
| Active |
2 |
| Recovery |
18 |
| Guard Level |
HL |
| On Hit |
2 |
| On Guard |
-3 |
| SM-HX Hit |
— |
| SM-HX Guard |
— |
| Cancel |
— |
| Damage |
60 |
| Stun |
100 |
| Meter Gain |
30/15 |
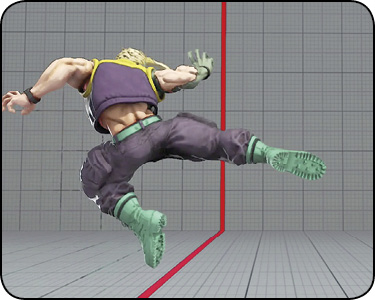
Jumping Sobat: Like Knee Bazooka and Chopping Assault, this hopping attack isn’t actually airborne, either. It does do a better job at crushing low attacks, with a better horizontal range and a smaller hurtbox around Nash’s feet. However, if interrupted, it puts Nash into a standing hitstun animation. Additionally, it’s more difficult to punish if guarded, especially at range (-3). Jumping Sobat is generally better to use than Knee Bazooka in mid-range footsies since it doesn’t lunge forward as far and the spacing to make it safe is a bit less strict.
On counter-hit, you can link into Combo 14.
Side Knee Attack 
| Startup |
5 |
|---|---|
| Active |
4 |
| Recovery |
15 |
| Guard Level |
HL |
| On Hit |
3 |
| On Guard |
±0 |
| SM-HX Hit |
9 |
| SM-HX Guard |
7 |
| Cancel |
SP, V |
| Damage |
60 |
| Stun |
100 |
| Meter Gain |
30/15 |
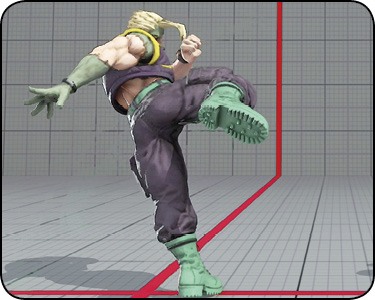
Side Knee Attack: Nash performs a five-frame, V- and special-cancelable side knee attack. Its range isn’t anything spectacular, and you can just regard it as a quick, medium-strength normal attack that forces standing state on hit (enabling LP Tragedy Assault follow-up).
Step Kick 
| Startup |
13 |
|---|---|
| Active |
4 |
| Recovery |
15 |
| Guard Level |
HL |
| On Hit |
2 |
| On Guard |
-2 |
| SM-HX Hit |
9 |
| SM-HX Guard |
5 |
| Cancel |
V |
| Damage |
90 |
| Stun |
150 |
| Meter Gain |
50/25 |
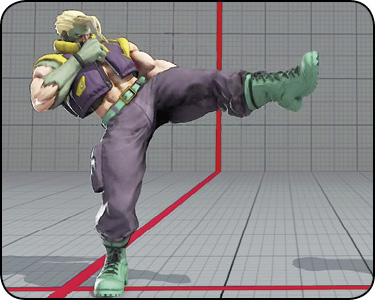
Step Kick: Step Kick is just what it sounds like—Nash takes a step forward, then delivers a horizontal, midsection-hitting front kick with his other leg. Its reach extends slightly past Jumping Sobat and is -2 on block. Although it’s not special-cancelable, it is V-cancelable. Unfortunately, it’s impossible to hit-confirm a raw Step Kick into Sonic Move – Hide for a combo (on reaction).
On counter-hit from a closer distance, you can link into standing or crouching  (see Combo 16).
Rapid Kick 
| Startup |
5 |
|---|---|
| Active |
4 |
| Recovery |
11 |
| Guard Level |
HL |
| On Hit |
4 |
| On Guard |
-2 |
| SM-HX Hit |
— |
| SM-HX Guard |
— |
| Cancel |
— |
| Damage |
60 |
| Stun |
80 |
| Meter Gain |
40/20 |
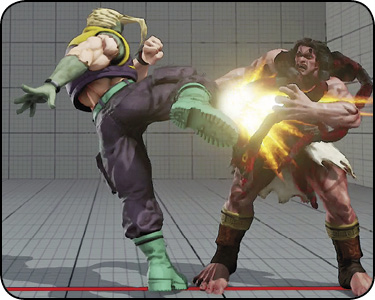
Rapid Kick: Like Rapid Punch, Rapid Kick is a two-hit target combo initiated from a four-frame light attack, but with a few differences. It’s not special or V-cancelable, but it leaves you with more frame advantage on both hit and block (+4 and -2, respectively). From point-blank range, this lets you link into a follow-up standing afterwards, seen in Combo 2. Standing doesn’t have much range, so you’ll want to use Rapid Kick for setups and situations where you either dash in next to the opponent or as a follow-up to a jumping attack, such as after a cross-up jumping .
Compared to his other light-attack combo initiators, it’s generally a better hit-check and frame trap tool because it’s relatively safe and easy to confirm off of, as long as you’re in range to connect with it. In most cases, you’ll want to start your light attack hit-checks with Rapid Kick over Rapid Punch, while reserving Rapid Punch for Sonic Boom blockstrings just outside of standing range.
Rapid Punch
| Startup |
6 |
|---|---|
| Active |
3 |
| Recovery |
14 |
| Guard Level |
HL |
| On Hit |
1 |
| On Guard |
-6 |
| SM-HX Hit |
6 |
| SM-HX Guard |
±0 |
| Cancel |
SP, V |
| Damage |
50 |
| Stun |
80 |
| Meter Gain |
40/20 |
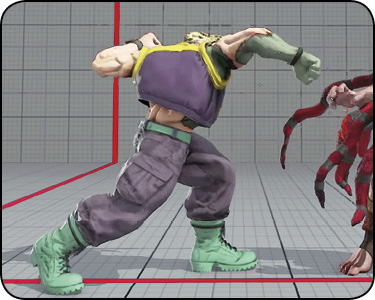
Rapid Punch: A one-two punch, special-cancelable target combo beginning with a standing , followed by a standing . Rapid Punch is primarily used in combos after a hit-confirm from either a jumping attack or as a preceding string canceled into EX Sonic Boom for a relatively safe blockstring. Rapid Punch alone can be unsafe to use since it’s -6 on block. However, if you cancel into EX Sonic Boom and Nash’s opponent doesn’t interrupt him, you’re left at +2 from the point-blank Sonic Boom.
Additionally, the MP portion of Rapid Punch suffers from a significantly smaller hitbox than Nash’s standalone standing , making it limited in use in link and chain combos.
Wind Shear
| Startup |
9 |
|---|---|
| Active |
7 |
| Recovery |
19 |
| Guard Level |
HL |
| On Hit |
3 |
| On Guard |
-7 |
| SM-HX Hit |
— |
| SM-HX Guard |
— |
| Cancel |
— |
| Damage |
40 |
| Stun |
50 |
| Meter Gain |
20/10 |
Wind Shear 2nd
| Startup |
6 |
|---|---|
| Active |
3 |
| Recovery |
24 |
| Guard Level |
HL |
| On Hit |
D |
| On Guard |
— |
| SM-HX Hit |
— |
| SM-HX Guard |
— |
| Cancel |
— |
| Damage |
60 |
| Stun |
80 |
| Meter Gain |
20/40 |
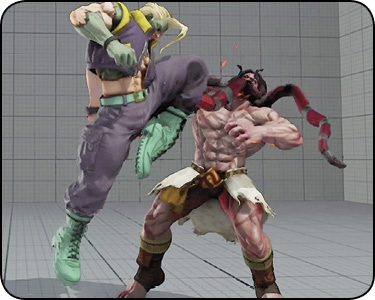
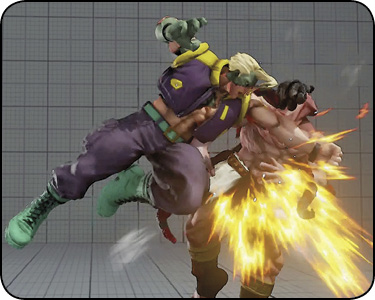
Wind Shear: Wind Shear is a potential three-hit target combo initiated from standing , followed by a Knee Bazooka and finished with a jumping fierce-like attack. As with most target combos, frame values on recovery of the subsequent hits are heavily increased relative to their normal versions; you need to ensure that you’re going to connect with the initial standing before using Wind Shear. For instance, the second hit of Wind Shear is -7 on block, compared to a standalone Knee Bazooka at -5.
Although it’s a dangerous target combo to use on its own, its saving grace lies in its advantage on knockdown from the final hit. If you can combo into Wind Shear, it’s usually best to go for it; for an example, see Combo 4b.
You can also use Wind Shear outside of standing range as an option select—input standing from a distance where the enemy might walk into your attack. If they walk into it or stick out an attack while your MP fist is active, you’ll automatically cancel into the follow-up Knee Bazooka, which is easily confirmable into the last input knockdown. With your knockdown advantage, follow up with a forward dash (+5 advantage against a quick-rising opponent), then go for a frame trap or throw mix-up.
Down Burst 
| Startup |
19 |
|---|---|
| Active |
3 |
| Recovery |
14 |
| Guard Level |
H |
| On Hit |
1 |
| On Guard |
-6 |
| SM-HX Hit |
— |
| SM-HX Guard |
— |
| Cancel |
— |
| Damage |
60 |
| Stun |
100 |
| Meter Gain |
20/40 |
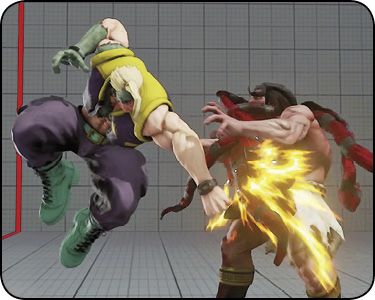
Down Burst: Off of crouching , you can cancel into for an overhead attack. Down Burst is unique in that it’s a target combo that cancels into an overhead attack for a two-hit combo if crouching successfully connects. It’s similar to Guile’s crouching target combo from SFIV, but it does not start with a low-hitting attack. The Chopping Assault portion of this sequence isn’t penalized with additional recovery, but it’s still an unsafe -6 on block.
Using Down Burst is generally not advised since there’s no possible low-hitting attack follow-up to crouching . Experienced players can spot this weakness and simply always block high after guarding your crouching attack, leaving you at -6 and punishable by medium-strength combos.
Raptor Combination
| Startup |
9 |
|---|---|
| Active |
3 |
| Recovery |
22 |
| Guard Level |
HL |
| On Hit |
D |
| On Guard |
-6 |
| SM-HX Hit |
— |
| SM-HX Guard |
— |
| Cancel |
— |
| Damage |
70 |
| Stun |
80 |
| Meter Gain |
20/40 |
Raptor Combination 2nd
| Startup |
14 |
|---|---|
| Active |
4 |
| Recovery |
17 |
| Guard Level |
HL |
| On Hit |
D |
| On Guard |
— |
| SM-HX Hit |
— |
| SM-HX Guard |
— |
| Cancel |
— |
| Damage |
70 |
| Stun |
100 |
| Meter Gain |
20/40 |
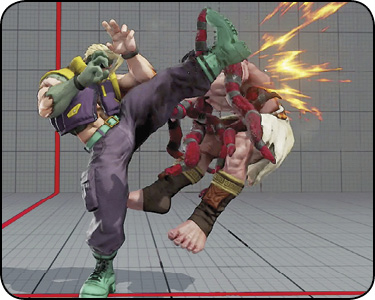
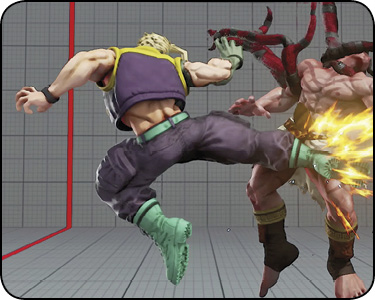
Raptor Combination: This is a three-hit kick target combo with a unique stipulation: you can only cancel into the third kick if the first two successfully connect. With standing whiffing against crouchers (unless Nash is very close to the opposing character), hitting with this target combo from a neutral game can prove difficult. Like Wind Shear, you should use Raptor Combination only after hit-confirming a jumping attack (such as forward jumping ).
Finishing this kick combo does afford you massive knockdown advantage, though. See Combo 5 for tips on using Raptor Combination.