
Street Fighter V Guide Fighters Urien
Special Moves
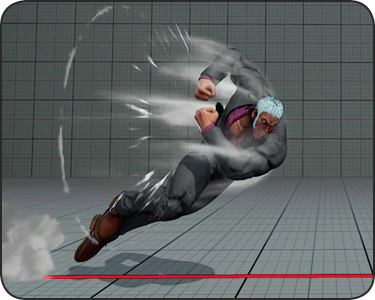
LK Chariot Tackle Charge ,
, 


| Startup |
10 |
|---|---|
| Active |
6 |
| Recovery |
22 |
| Hit Level |
HL |
| On Hit |
±0 |
| On Guard |
-5 |
| B-VTX on Hit |
– |
| B-VTX on Guard |
– |
| F-VTX on Hit |
– |
| F-VTX on Guard |
– |
| D-VTX on Hit |
– |
| D-VTX on Guard |
– |
| Cancel |
CA |
| Damage |
70 |
| Stun |
150 |
| Meter Gain |
15/30/15 (During V-Skill: V-Gauge 30/60/30) |
MK Chariot Tackle Charge, 
| Startup |
13 |
|---|---|
| Active |
10 |
| Recovery |
22 |
| Hit Level |
HL |
| On Hit |
-2 |
| On Guard |
-9 |
| B-VTX on Hit |
– |
| B-VTX on Guard |
– |
| F-VTX on Hit |
– |
| F-VTX on Guard |
– |
| D-VTX on Hit |
– |
| D-VTX on Guard |
– |
| Cancel |
CA |
| Damage |
80 |
| Stun |
150 |
| Meter Gain |
15/30/15 (During V-Skill: V-Gauge 30/60/30) |
HK Chariot Tackle Charge, 
| Startup |
16 |
|---|---|
| Active |
8 |
| Recovery |
21 |
| Hit Level |
HL |
| On Hit |
D |
| On Guard |
-6 |
| B-VTX on Hit |
– |
| B-VTX on Guard |
– |
| F-VTX on Hit |
– |
| F-VTX on Guard |
– |
| D-VTX on Hit |
– |
| D-VTX on Guard |
– |
| Cancel |
CA |
| Damage |
90 |
| Stun |
150 |
| Meter Gain |
15/30/15 (During V-Skill: V-Gauge 30/60/30) |
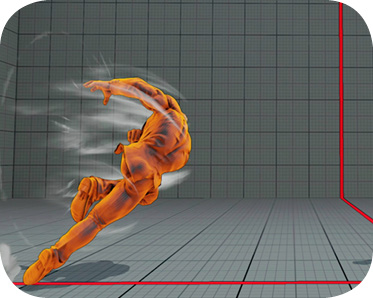
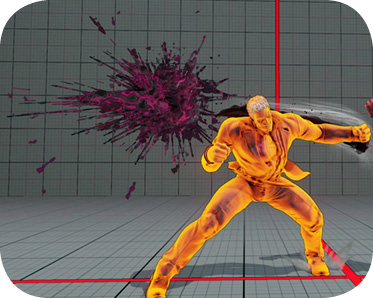
EX Chariot Tackle Charge, 
| Startup |
7, 25 |
|---|---|
| Active |
9 (9) 4 |
| Recovery |
20 |
| Hit Level |
HL |
| On Hit |
D |
| On Guard |
±0 |
| B-VTX on Hit |
D |
| B-VTX on Guard |
-4 (±0) |
| F-VTX on Hit |
D |
| F-VTX on Guard |
3 (7) |
| D-VTX on Hit |
D |
| D-VTX on Guard |
-16 (-12) |
| Cancel |
V |
| Damage |
150 (90+60) |
| Stun |
200 (100+100) |
| Meter Gain |
-300 (During V-Skill: V-Gauge 40/80/40) |
Chariot Tackle: Urien’s forward-rushing body check requires holding a backward charge first, and is unleashed by tapping forward plus kicks. The heavier the version, the farther Urien travels, and the more damage he does. The startup is progressively slower for stronger non-EX versions, however. Meter permitting, any version of Chariot Tackle can be canceled in combos or juggles into the Dominate Crush Critical Art, inflicting enormous damage. Chances to juggle with Chariot Tackle occur often after crouching  , EX Dangerous Headbutt, and HP Metallic Sphere. In ground combos, Chariot Tackles can continue combos off of many different normal hit-checks.
On top of good range, Chariot Tackle also has lots of active frames. Like Balrog’s Dash Straights and other forward-moving, body-as-projectile attacks, the later in the active period contact is made, the better. While Chariot Tackles are easily punishable when blocked on their first active frames, like in blockstrings up close (don’t do that), non-EX versions are actually safe if blocked late in their attack periods. And off a hit late in the active periods of LK or MK Chariot Tackle, it’s actually possible to link afterward, especially on counter-hit. Hitting with later Tackle frames is accomplished either by aiming to hit with them at max range, or by aiming them meaty, over an opponent waking up or flipping out from a midair hit. Laterally, with a hitbox around Urien’s head and lowered shoulder, LK Chariot Tackle attacks 35-40 percent of the screen away; MK Tackle covers 35-48%; and HK Tackle covers 44-60%. Urien’s hurtbox extends ahead of the hitbox, so if he runs into an already-extended attack, he’ll lose cleanly.
In meterless ground combos where an opponent left on their feet is preferrable, stick to LK Chariot Tackle over MK Tackle; the latter leaves Urien at -2 when it hits up close like that. The best Tackle strength for juggles depends on how much time there is; after crouching  HP Metallic Sphere, HK Chariot Tackle will work, but after launching with EX Dangerous Headbutt, LK Chariot Tackle is needed.
EX Chariot Tackle’s initial, faster shoulder check strikes from 25-54 percent of the screen away, then travels for nine frames without a hitbox, then strikes 74-80 percent of the screen away from the starting point. The hitbox is a little better than with non-EX Chariot Tackle; it’s doesn’t extend forward ahead of Urien’s hurtbox, but it’s at least even with it.
EX Chariot Tackle hits faster, with a quick lunging check followed by a clothesline punch that plants even the sturdiest fighter into the turf. EX Chariot Tackle is fast enough to enable simple bread and butters like crouching  crouching
  EX Chariot Tackle, as well as to catch laggy footsies whiffed in front of Urien. EX Chariot Tackle leaves Urien at neutral frames when guarded, so it’s reminiscent of Yun’s old EX “Dash Punch” in Street Fighter IV, an easy way in at the mere cost of EX Gauge. It’s also safe to use at the end of blockstrings, placing Urien right up close again at neutral frames. When EX Chariot Tackle hits, momentum is even better, with Urien up close at a whopping +11 against a quick-rising adversary.
Any veteran of Street Fighter III: Second Impact or Third Strike will remember Chariot Tackle into Aegis Reflector juggle combos for days. That function is still here, but only for EX Chariot Tackle–non-EX Chariot Tackles can’t be V-Trigger-canceled. Whether using EX Chariot Tackle in ground combos or as a juggle hit, cancel the first hit into far Aegis Reflector and, meter and position depending, it’s off to the flashy combo races.
To generate mix-up okizeme instead off EX Chariot Tackle, allow both hits of EX Tackle to connect then cancel to Aegis Reflector (use the version heading into a corner). Even if they quick rise, Urien has plenty of frame advantage and a shiny temporary tag-team partner overlapping them. Opponents hoping to escape the situation entirely will be forced to either rely on pure blocking skills, or use a projectile-invincible, probably-punishable-if-sniffed-out reversal attack. Enemies who opt not to quick-rise in this kind of situation give Urien time to cross over their bodies once or even twice by corpse-hopping with Dangerous Headbutt or Violence Knee Drop, hopefully adding to their confusion about how to deal with Urien and his reflectors up close; with proper timing, reflectors can even hit as pseudo cross-ups against opponents rising/landing on a reflector just as Urien passes over them with a special move.
So, even though Urien doesn’t technically have a cross-up, these tactics can still occupy some of the opponent’s mental energy on swapping left/right when blocking, which covers what’s supposed to be a Urien weakness, at least when V-Trigger is loaded.
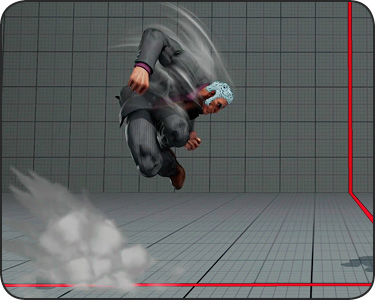
LP Dangerous Headbutt Charge  ,
, 
| Startup |
8 |
|---|---|
| Active |
3 |
| Recovery |
18 |
| Hit Level |
HL |
| On Hit |
1 |
| On Guard |
-2 |
| B-VTX on Hit |
– |
| B-VTX on Guard |
– |
| F-VTX on Hit |
– |
| F-VTX on Guard |
– |
| D-VTX on Hit |
– |
| D-VTX on Guard |
– |
| Cancel |
– |
| Damage |
100 |
| Stun |
150 |
| Meter Gain |
20/40/20 (During V-Skill: V-Gauge 30/60/30) |
MP Dangerous Headbutt Charge , 
| Startup |
11 |
|---|---|
| Active |
4 |
| Recovery |
18 |
| Hit Level |
HL |
| On Hit |
1 |
| On Guard |
-2 |
| B-VTX on Hit |
– |
| B-VTX on Guard |
– |
| F-VTX on Hit |
– |
| F-VTX on Guard |
– |
| D-VTX on Hit |
– |
| D-VTX on Guard |
– |
| Cancel |
– |
| Damage |
110 |
| Stun |
150 |
| Meter Gain |
20/40/20 (During V-Skill: V-Gauge 30/60/30) |
HP Dangerous Headbutt Charge ,
| Startup |
13 |
|---|---|
| Active |
5 |
| Recovery |
17 |
| Hit Level |
HL |
| On Hit |
D |
| On Guard |
-2 |
| B-VTX on Hit |
– |
| B-VTX on Guard |
– |
| F-VTX on Hit |
– |
| F-VTX on Guard |
– |
| D-VTX on Hit |
– |
| D-VTX on Guard |
– |
| Cancel |
– |
| Damage |
120 |
| Stun |
150 |
| Meter Gain |
20/40/20 (During V-Skill: V-Gauge 30/60/30) |
EX Dangerous Headbutt Charge , 
| Startup |
12 |
|---|---|
| Active |
5 |
| Recovery |
19 |
| Hit Level |
HL |
| On Hit |
D |
| On Guard |
-17 |
| B-VTX on Hit |
– |
| B-VTX on Guard |
– |
| F-VTX on Hit |
– |
| F-VTX on Guard |
– |
| D-VTX on Hit |
– |
| D-VTX on Guard |
– |
| Cancel |
– |
| Damage |
100 (50+50) |
| Stun |
100 (50+50) |
| Meter Gain |
-300 (During V-Skill: V-Gauge 40/80/40) |
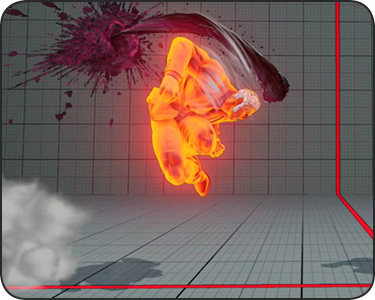
Dangerous Headbutt: Urien springs forward like a flea, jutting his head forward in midair. Headbutts require a down charge, before an upward direction plus punch sets off the move. (SFIII experts will notice that that game’s advanced charge partitioning tricks are no longer a part of SFV, so no dash-to-Headbutt, sadly.) Dangerous Headbutt takes Urien off the ground in a quick forward hop. Since Urien is airborne during most of the attack, he’ll avoid ground throws, along with most low-profile attacks. This retains Dangerous Headbutt’s old secondary function from Street Fighter III, as a kind of special short jump that happens to have an attack on it as much as an attack itself. Thinking of it like a command hop helps clarify its use.
Heavier versions deal more damage and travel farther. LP Dangerous Headbutt strikes a quarter-screen away, MP hits a little farther at 30 percent, and HP Headbutt, amazingly, hits half a screen away.
If Headbutts make it to their active frames, the priority is very good against standing opponents. Urien’s head extends an invincible hitbox well ahead of his curled-up, airborne form. He hits for a decent number of active frames, too. However, Dangerous Headbutts have no special avoidance properties during startup aside from dodging some low-profile pokes, so they’ll lose to anything else, putting Urien into an airborne counter-hit state. If they’re blocked by a standing opponent, Dangerous Headbutts are relatively safe, at -2; hit meaty or late at all, and Urien will land up close, safe or even advantaged by a frame or two. If LP/MP Dangerous Headbutt hits very meaty against a standing opponent, or counter-hits them (like if they happened to dash forward into the Headbutt), standing/crouching link combos are possible immediately upon landing. HP Dangerous Headbutt knocks victims down on contact.
Note that Dangerous Headbutt will whiff against crouching enemies. Since it doesn’t put them into blockstun, attentive foes have a chance to catch Urien as he lands, before blocking is possible again. If downward charge is available, Headbutts can cap off combos against standing opponents. Non-EX Headbutts can also be used to “corpse hop” over floored foes, whether just to switch sides (like to escape the corner after a Crush Counter sweep) or to attempt a reflector cross-up (dropping an Aegis Reflector over a floored victim, then immediately hopping over with Headbutt).
EX Dangerous Headbutt is Urien’s primary reversal. It’s fully invincible all the way into the active period, strikes about 15 percent of the screen away, and, on hit, launches victims into a jugglable knockdown. It will also hit crouching enemies, unlike the regular versions. Tap them into a reset attempt with , or (back charge permitting) juggle with LK Chariot Tackle (into Critical Art, meter permitting), or slap them to the ground with standing . EX Dangerous Headbutt works after crouching crouching , and after crouching /. It’s much less safe than non-EX Headbutts when whiffed or blocked, though, and good players will try to pressure hard to bait it out, since EX Headbutt is probably coming sometime if Urien is pinned down long enough.
LK Violence Knee Drop Charge ,
| Startup |
25 |
|---|---|
| Active |
Till landing |
| Recovery |
32 air, 11 on landing |
| Hit Level |
H |
| On Hit |
D |
| On Guard |
-4~+2 |
| B-VTX on Hit |
– |
| B-VTX on Guard |
– |
| F-VTX on Hit |
– |
| F-VTX on Guard |
– |
| D-VTX on Hit |
– |
| D-VTX on Guard |
– |
| Cancel |
– |
| Damage |
100 |
| Stun |
200 |
| Meter Gain |
20/40/20 (During V-Skill: V-Gauge 30/60/30) |
MK Violence Knee Drop Charge ,
| Startup |
25 |
|---|---|
| Active |
Till landing |
| Recovery |
32 air, 11 on landing |
| Hit Level |
H |
| On Hit |
D |
| On Guard |
-7~±0 |
| B-VTX on Hit |
– |
| B-VTX on Guard |
– |
| F-VTX on Hit |
– |
| F-VTX on Guard |
– |
| D-VTX on Hit |
– |
| D-VTX on Guard |
– |
| Cancel |
– |
| Damage |
100 |
| Stun |
200 |
| Meter Gain |
20/40/20 (During V-Skill: V-Gauge 30/60/30) |
HK Violence Knee Drop Charge ,
| Startup |
25 |
|---|---|
| Active |
Till landing |
| Recovery |
32 air, 11 on landing |
| Hit Level |
H |
| On Hit |
D |
| On Guard |
-8~-1 |
| B-VTX on Hit |
– |
| B-VTX on Guard |
– |
| F-VTX on Hit |
– |
| F-VTX on Guard |
– |
| D-VTX on Hit |
– |
| D-VTX on Guard |
– |
| Cancel |
– |
| Damage |
100 |
| Stun |
200 |
| Meter Gain |
20/40/20 (During V-Skill: V-Gauge 30/60/30) |
EX Violence Knee Drop Charge ,
| Startup |
25 |
|---|---|
| Active |
Till landing |
| Recovery |
33 air, 10 on landing |
| Hit Level |
H |
| On Hit |
D |
| On Guard |
1~6 |
| B-VTX on Hit |
– |
| B-VTX on Guard |
– |
| F-VTX on Hit |
– |
| F-VTX on Guard |
– |
| D-VTX on Hit |
– |
| D-VTX on Guard |
– |
| Cancel |
– |
| Damage |
150 |
| Stun |
200 |
| Meter Gain |
-300 (During V-Skill: V-Gauge 40/80/40) |
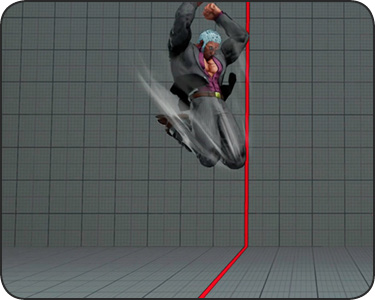
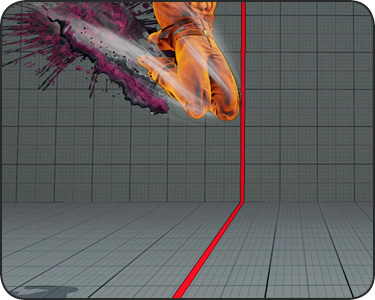
Violence Knee Drop: Another down-charge special move, in which Urien springs straight up at first with a vertical super jump, then plunges down-forward at a sharp angle with a knee-first divekick. All versions of Violence Knee Drop knock down on hit while dealing solid damage and stun. The difference in the versions is in how far they travel.
This is in some ways a bigger, higher-commitment version of Dangerous Headbutt. It also moves Urien forward in midair with a swooping strike that dodges most ground-level attacks. The data lists startup of 25 for all versions, which is technically true, but the attack actually begins high up during Urien’s jump, then continues all the way to the ground. When thinking of its practical startup against grounded characters, it hits standing foes on frame 28 at the earliest, and crouching targets around frame 31.
After a Violence Knee Drop hit, Urien bounces off and lands, while knocking the enemy down. On block, the frame situation on landing depends on how high up Urien’s knees contact the target’s body. Hit high up on their body, and Urien is at a disadvantage upon landing, a potentially punishable one. Hit around their knees, just before landing, and Urien is safe, or even left with mild frame advantage up close on the ground.
Scoring a just-before-landing Violence Knee Drop hit is contingent either on perfect meaty timing, or using the right version of Knee Drop from max range. LK Violence Knee Drop hits 30 percent of the screen away. The MK version hits 55 percent away, and the HK version hits 80 percent away.
Violence Knee Drops that aren’t perfectly timed or spaced to hit just as the divekick ends are much safer to use after throwing Metallic Sphere or Aegis Reflector first, so the opposition has something else onscreen to worry about too.
EX Violence Knee Drop is a much more lenient version, which can actually be directed closer or farther immediately after activation by holding or . On block, this version puts Urien at positive frames up close no matter how high up it connects. Depending on the angle of EX Knee Drop’s descent, it may even get blocked on one side of the enemy, while Urien lands on the other. An immediate crouching upon landing in this situation (while building a charge for EX Dangerous Headbutt in case of a hit) will get lots of mileage.
LP Metallic Sphere
| Startup |
14 |
|---|---|
| Active |
– |
| Recovery |
36 |
| Hit Level |
HL |
| On Hit |
-1 |
| On Guard |
-9 |
| B-VTX on Hit |
– |
| B-VTX on Guard |
– |
| F-VTX on Hit |
– |
| F-VTX on Guard |
– |
| D-VTX on Hit |
– |
| D-VTX on Guard |
– |
| Cancel |
– |
| Damage |
60 |
| Stun |
100 |
| Meter Gain |
10/10/5 |
MP Metallic Sphere
| Startup |
14 |
|---|---|
| Active |
– |
| Recovery |
36 |
| Hit Level |
HL |
| On Hit |
1 |
| On Guard |
-9 |
| B-VTX on Hit |
– |
| B-VTX on Guard |
– |
| F-VTX on Hit |
– |
| F-VTX on Guard |
– |
| D-VTX on Hit |
– |
| D-VTX on Guard |
– |
| Cancel |
– |
| Damage |
60 |
| Stun |
100 |
| Meter Gain |
10/10/5 |
HP Metallic Sphere
| Startup |
13 |
|---|---|
| Active |
– |
| Recovery |
36 |
| Hit Level |
HL |
| On Hit |
D |
| On Guard |
– |
| B-VTX on Hit |
– |
| B-VTX on Guard |
– |
| F-VTX on Hit |
– |
| F-VTX on Guard |
– |
| D-VTX on Hit |
– |
| D-VTX on Guard |
– |
| Cancel |
– |
| Damage |
60 |
| Stun |
100 |
| Meter Gain |
10/10/5 |
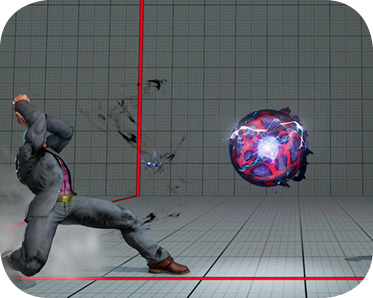
LP Metallic Sphere (Charged) hold
| Startup |
53 |
|---|---|
| Active |
– |
| Recovery |
29 |
| Hit Level |
HL |
| On Hit |
7 |
| On Guard |
4 |
| B-VTX on Hit |
– |
| B-VTX on Guard |
– |
| F-VTX on Hit |
– |
| F-VTX on Guard |
– |
| D-VTX on Hit |
– |
| D-VTX on Guard |
– |
| Cancel |
– |
| Damage |
90 (40+50) |
| Stun |
120 (60+60) |
| Meter Gain |
20 (10+10)/10 |
MP Metallic Sphere (Charged) hold
| Startup |
53 |
|---|---|
| Active |
– |
| Recovery |
31 |
| Hit Level |
HL |
| On Hit |
5 |
| On Guard |
2 |
| B-VTX on Hit |
– |
| B-VTX on Guard |
– |
| F-VTX on Hit |
– |
| F-VTX on Guard |
– |
| D-VTX on Hit |
– |
| D-VTX on Guard |
– |
| Cancel |
– |
| Damage |
90 (40+50) |
| Stun |
120 (60+60) |
| Meter Gain |
20 (10+10)/10 (5+5) |
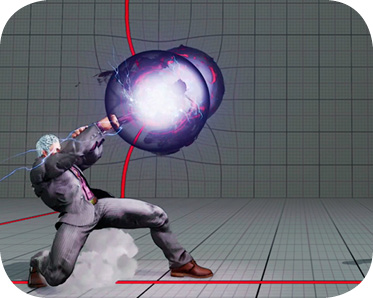
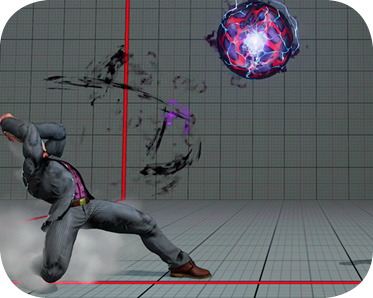
HP Metallic Sphere (Charged) hold
| Startup |
42 |
|---|---|
| Active |
– |
| Recovery |
31 |
| Hit Level |
HL |
| On Hit |
D |
| On Guard |
– |
| B-VTX on Hit |
– |
| B-VTX on Guard |
– |
| F-VTX on Hit |
– |
| F-VTX on Guard |
– |
| D-VTX on Hit |
– |
| D-VTX on Guard |
– |
| Cancel |
– |
| Damage |
90 (40+50) |
| Stun |
120 (60+60) |
| Meter Gain |
20 (10+10)/10 |
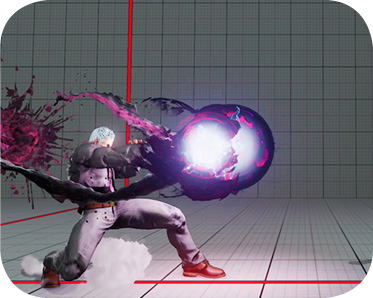
EX Metallic Sphere (Slow)
| Startup |
12 |
|---|---|
| Active |
– |
| Recovery |
32 |
| Hit Level |
HL |
| On Hit |
3 |
| On Guard |
1 |
| B-VTX on Hit |
14 |
| B-VTX on Guard |
12 |
| F-VTX on Hit |
21 |
| F-VTX on Guard |
19 |
| D-VTX on Hit |
2 |
| D-VTX on Guard |
±0 |
| Cancel |
V |
| Damage |
90 (40+50) |
| Stun |
120 (60+60) |
| Meter Gain |
-300 |
EX Metallic Sphere (Fast)
| Startup |
12 |
|---|---|
| Active |
– |
| Recovery |
32 |
| Hit Level |
HL |
| On Hit |
3 |
| On Guard |
1 |
| B-VTX on Hit |
14 |
| B-VTX on Guard |
12 |
| F-VTX on Hit |
21 |
| F-VTX on Guard |
19 |
| D-VTX on Hit |
2 |
| D-VTX on Guard |
±0 |
| Cancel |
V |
| Damage |
90 (40+50) |
| Stun |
120 (60+60) |
| Meter Gain |
-300 |
EX Metallic Sphere (Anti-air)
| Startup |
13 |
|---|---|
| Active |
– |
| Recovery |
32 |
| Hit Level |
HL |
| On Hit |
D |
| On Guard |
– |
| B-VTX on Hit |
D |
| B-VTX on Guard |
– |
| F-VTX on Hit |
D |
| F-VTX on Guard |
– |
| D-VTX on Hit |
D |
| D-VTX on Guard |
– |
| Cancel |
V |
| Damage |
90 (40+50) |
| Stun |
120 (60+60) |
| Meter Gain |
-300 |
EX Metallic Sphere (Charged) hold or hold
| Startup |
41 |
|---|---|
| Active |
– |
| Recovery |
28 |
| Hit Level |
HL |
| On Hit |
17 |
| On Guard |
13 |
| B-VTX on Hit |
23 |
| B-VTX on Guard |
19 |
| F-VTX on Hit |
30 |
| F-VTX on Guard |
26 |
| D-VTX on Hit |
11 |
| D-VTX on Guard |
7 |
| Cancel |
V |
| Damage |
120 |
| Stun |
150 |
| Meter Gain |
-300 |
EX Metallic Sphere (Charged Anti-air) hold
| Startup |
32 |
|---|---|
| Active |
– |
| Recovery |
28 |
| Hit Level |
HL |
| On Hit |
D |
| On Guard |
– |
| B-VTX on Hit |
D |
| B-VTX on Guard |
– |
| F-VTX on Hit |
D |
| F-VTX on Guard |
– |
| D-VTX on Hit |
D |
| D-VTX on Guard |
– |
| Cancel |
V |
| Damage |
120 |
| Stun |
150 |
| Meter Gain |
-300 |
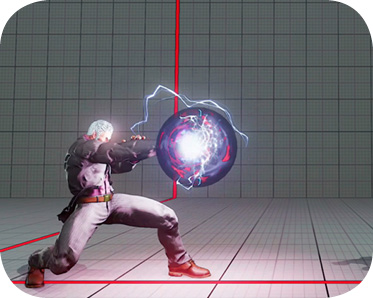
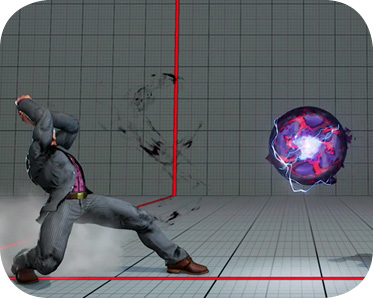
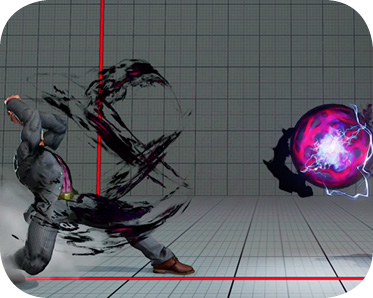
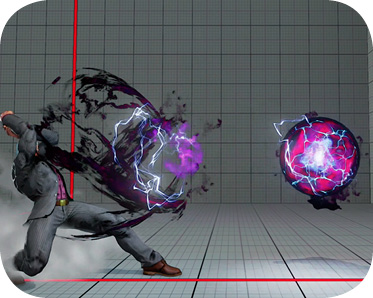
Metallic Sphere: Urien’s fireball attack returns. He hurls a pulsing orb across the screen, recoiling as if his arms formed a cannon. Among full-screen conventional projectiles, it’s middle of the road in terms of speed, not releasing or recovering as quickly as Ryu’s or Guile’s, but faster than Ken’s. It’s still competitive in the fireball pack, and has other projectiles beat for versatility since it can be varied greatly in startup and travel speed, or be aimed upward to punish jumpers.
Metallic Sphere’s versions break down as LP for slower, MP for faster, and HP for anti-air. LP and MP Metallic Sphere travel laterally, with MP moving almost twice as fast as the LP version. When engaging in fireball wars, the faster MP Sphere clashes with incoming enemy fireballs earlier, allowing for a follow-up Sphere sooner. In the neutral game at mid to long range, LP Metallic Sphere occupies the space between the characters longer, giving Urien more time to move in behind the fireball, like Guile with hopping special moves. The slower fireball also makes it more likely that an enemy misjudges a jump’s arc and lands on the Metallic Sphere, creating a brief juggle chance if close enough.
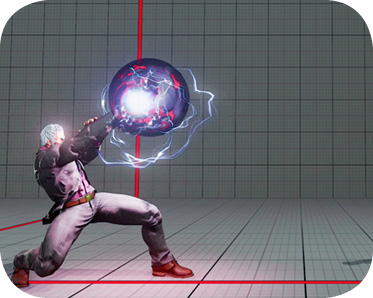
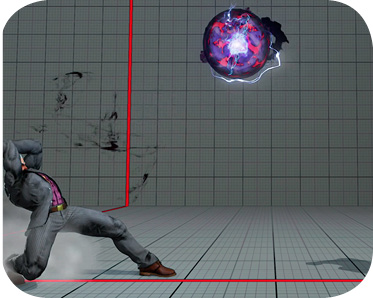
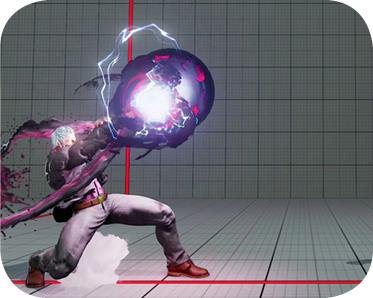
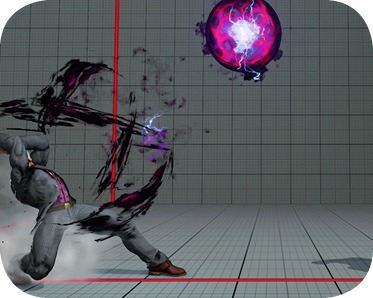
HP Metallic Sphere is aimed up-forward, and cannot hit grounded enemies. Airborne foes will get blasted into a jugglable knockdown, usually granting plenty of time to catch them with HK/EX Chariot Tackle. Even the ability to fire upward-aimed fireballs that lead into juggles may deter opponents from jumping in, and HP Metallic Spheres help round out his anti-air options after Quarrel Punch and standing .
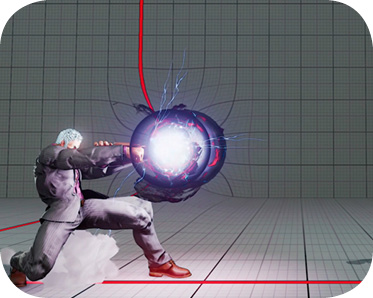
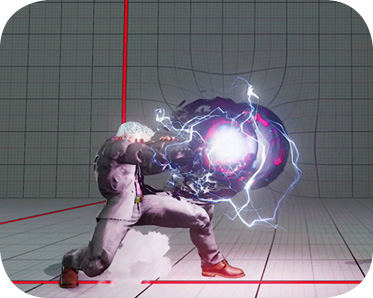
Just tap the desired button after for a 1-hit projectile. Hold the button to charge up a 2-hit fireball that has increased damage, stun, meter gain, and projectile durability. The delay involved in charging up a two-hit Metallic Sphere is a mix-up in itself. At long range, an opponent may be too keen to jump over the next Metallic Sphere they see, so they spazz out a bit and jump early when they see Urien stick his arms out; charged Metallic Sphere here can be released so their premature jump carries them right on top of it. Likewise, beginning to charge HP Metallic Sphere then simply waiting can bait a patient–but not totally patient–adversary into pausing, then jumping late, hoping to dodge a charged lateral Sphere. Again, they’ll conduct themselves directly into a juggle combo.
So that’s six versions of Metallic Sphere. But there are also EX versions of all these. Uncharged EX Metallic Sphere is basically a charged two-hit Metallic Sphere without the wait; in fact, EX Metallic Sphere is a little faster to release than normal Metallic Spheres (and therefore safer in blockstrings). When charged, EX Metallic Spheres become three-hit projectiles that will overpower most other projectile attacks in the game for durability and power. They’re like the three-hit projectiles Akuma and Gouken sported in previous games. Perform slow EX Spheres with , fast EX Spheres with , and anti-air EX Spheres with .
Against a dizzied enemy, starting combos with charged EX Metallic Sphere causes more damage (and frame advantage) than a jump-in starter, or charged standing . And in hit-confirm combos on the ground, canceling into EX Metallic Sphere then into Aegis Reflector is one of several bridges to start extended V-Trigger combos.
Be advised that the frame situation isn’t great on block up close off uncharged/non-EX Metallic Spheres; for something like standing standing LP Metallic Sphere on block, it might be better to simply not cancel when a guarding opponent is recognized, or to at least cancel into EX Metallic Sphere for a smaller potential gap and a little chip damage. EX/charged Spheres are safe when guarded, and create lots of frame advantage if they can be placed meaty over rising/air-recovering victims. Most EX Gauge will probably end up going toward EX Headbutt reversals/juggles and EX Chariot combos. When poking Ryu-style with a normal canceled into LP/MP Metallic Sphere, the following attacks don’t leave a gap between the blocked move and the fireball: crouching , , and charged standing .