
Street Fighter V Guide Fighters Urien
V-System
V-Skill
Metallic Aura


| Startup |
– |
|---|---|
| Active |
– |
| Recovery |
55 |
| Hit Level |
– |
| On Hit |
– |
| On Guard |
– |
| B-VTX on Hit |
– |
| B-VTX on Guard |
– |
| F-VTX on Hit |
– |
| F-VTX on Guard |
– |
| D-VTX on Hit |
– |
| D-VTX on Guard |
– |
| Cancel |
– |
| Damage |
– |
| Stun |
– |
| Meter Gain |
– |
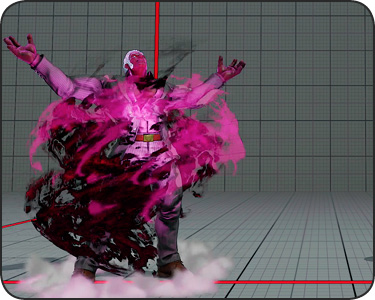
Metallic Aura: Urien gathers energy around himself for just under one second with what initially looks like a taunt. What’s actually happening is that Urien is buffing up the next forward-moving special move used. At will, by applying (like applying Hakan’s oil in SFIV, or Alex’s V-Skill counter-hit buff in SFV), the next use of Dangerous Headbutt, Violence Knee Drop, or Chariot Tackle gains one hit of armor absorption potential.
The armored period is the same for all relevant special moves: the armor begins on the third frame of startup and ends on the third active frame. So this doesn’t magically create any new reversals for Urien, since meaty attacks will still cleanly interrupt his armored specials, but at least they have insurance into the hitting period. This is a little deceptive for Violence Knee Drop, though–this divekick-like special move becomes active so high, the three active armored frames are used up well before it descends enough to hit grounded targets. But this is great news when poking aggressively with well-spaced Chariot Tackles, or hopping in to start close-range offense with Dangerous Headbutt.
Absorbing pokes with Metallic Aura armor builds valuable V-Gauge. This can help supplement counter-hit fishing with standing  and Quarrel Kick, and the natural V-Gauge building that occurs by getting knocked around (about one V-Gauge stock per quarter of stamina lost).
Using Metallic Sphere, or any other moves that aren’t listed here, doesn’t affect the Metallic Aura buff, after it’s applied. It won’t go away till the next forward-moving special is used. After that, using V-Skill again will re-apply the buff. The Metallic Aura buff doesn’t carry over between rounds.
V-Reversal
Anger Snap Fist
 during blockstun
| Startup |
15 |
|---|---|
| Active |
2 |
| Recovery |
24 |
| Hit Level |
HL |
| On Hit |
D |
| On Guard |
-2 |
| B-VTX on Hit |
– |
| B-VTX on Guard |
– |
| F-VTX on Hit |
– |
| F-VTX on Guard |
– |
| D-VTX on Hit |
– |
| D-VTX on Guard |
– |
| Cancel |
– |
| Damage |
60 |
| Stun |
0 |
| Meter Gain |
V-Gauge -300 |
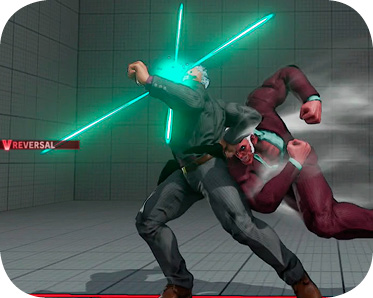
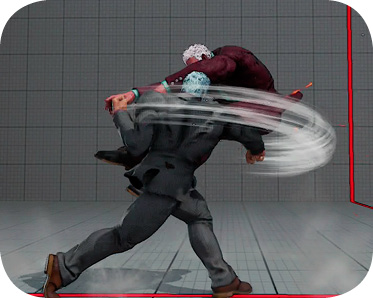
Anger Snap Fist: A decent enough V-Reversal in which Urien snaps out of blockstun by whirling with a knockdown punch. As with other V-Reversals, 200 points are removed from the stun gauge, potentially staving off dizzy disaster, and the damage that’s dealt isn’t permanent without doling out another clean hit. But sometimes a V-Reversal seems like the least-risky way to get breathing room against an aggressive player, especially in a game built around fishing for counter-hits.
Still, Urien’s whole personality is bound up in Aegis Reflector, a game-changing, fun, and annoying V-Trigger. And it’s costly, requiring three stocks of V-Gauge. So any V-Reversal used is putting off access to Urien’s best tool. If possible, with good reactions, just try to block and tech throws late and look for convenient gaps, or go a little nuts with EX Dangerous Headbutt, or even non-EX Headbutt, just to hop and make things messy. But try not to spend V-Gauge on this, basically, unless pinned in a corner, almost dizzy, without EX Gauge, at low stamina.
V-Trigger
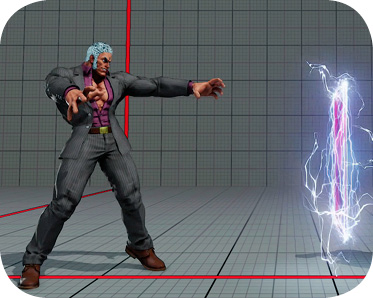
Close Aegis Reflector (first)

| Startup |
10 |
|---|---|
| Active |
Notes |
| Recovery |
10 |
| Hit Level |
HL |
| On Hit |
22 |
| On Guard |
17 |
| B-VTX on Hit |
– |
| B-VTX on Guard |
– |
| F-VTX on Hit |
– |
| F-VTX on Guard |
– |
| D-VTX on Hit |
– |
| D-VTX on Guard |
– |
| Cancel |
– |
| Damage |
10 |
| Stun |
0 |
| Meter Gain |
V-Gauge -900 |
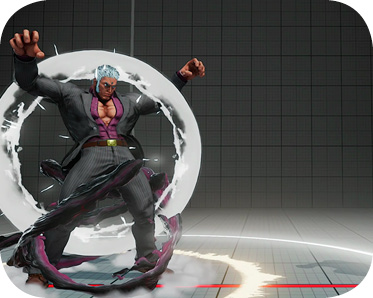
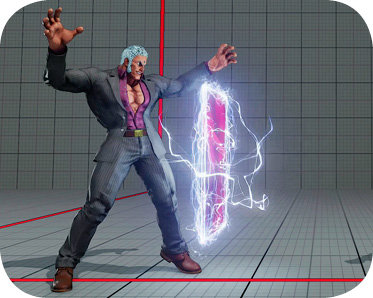
Far Aegis Reflector (first)
| Startup |
5 |
|---|---|
| Active |
Notes |
| Recovery |
8 |
| Hit Level |
HL |
| On Hit |
22 |
| On Guard |
17 |
| B-VTX on Hit |
– |
| B-VTX on Guard |
– |
| F-VTX on Hit |
– |
| F-VTX on Guard |
– |
| D-VTX on Hit |
– |
| D-VTX on Guard |
– |
| Cancel |
– |
| Damage |
10 |
| Stun |
0 |
| Meter Gain |
V-Gauge -900 |
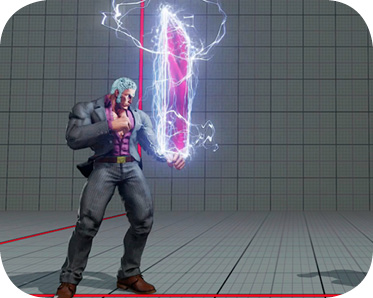
Upward Aegis Reflector (first)
| Startup |
15 |
|---|---|
| Active |
Notes |
| Recovery |
17 |
| Hit Level |
HL |
| On Hit |
22 |
| On Guard |
17 |
| B-VTX on Hit |
– |
| B-VTX on Guard |
– |
| F-VTX on Hit |
– |
| F-VTX on Guard |
– |
| D-VTX on Hit |
– |
| D-VTX on Guard |
– |
| Cancel |
– |
| Damage |
10 |
| Stun |
0 |
| Meter Gain |
V-Gauge -900 |
Close Aegis Reflector (last) after initial activation
| Startup |
14 |
|---|---|
| Active |
Notes |
| Recovery |
16 |
| Hit Level |
HL |
| On Hit |
22 |
| On Guard |
17 |
| B-VTX on Hit |
– |
| B-VTX on Guard |
– |
| F-VTX on Hit |
– |
| F-VTX on Guard |
– |
| D-VTX on Hit |
– |
| D-VTX on Guard |
– |
| Cancel |
– |
| Damage |
10 |
| Stun |
0 |
| Meter Gain |
V-Timer ends |
Far Aegis Reflector (last) after initial activation
| Startup |
24 |
|---|---|
| Active |
Notes |
| Recovery |
6 |
| Hit Level |
HL |
| On Hit |
22 |
| On Guard |
– |
| B-VTX on Hit |
– |
| B-VTX on Guard |
– |
| F-VTX on Hit |
– |
| F-VTX on Guard |
– |
| D-VTX on Hit |
– |
| D-VTX on Guard |
– |
| Cancel |
– |
| Damage |
10 |
| Stun |
0 |
| Meter Gain |
V-Timer ends |
Upward Aegis Reflector (last) after initial activation
| Startup |
16 |
|---|---|
| Active |
Notes |
| Recovery |
16 |
| Hit Level |
HL |
| On Hit |
22 |
| On Guard |
17 |
| B-VTX on Hit |
– |
| B-VTX on Guard |
– |
| F-VTX on Hit |
– |
| F-VTX on Guard |
– |
| D-VTX on Hit |
– |
| D-VTX on Guard |
– |
| Cancel |
– |
| Damage |
10 |
| Stun |
0 |
| Meter Gain |
V-Timer ends |
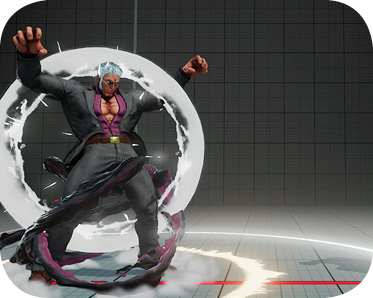
Aegis Reflector: Urien’s most powerful and notorious weapon returns as his V-Trigger. Aegis Reflectors are energy mirrors that hover in place, reflecting projectiles and bouncing enemies toward Urien. Aegis Reflectors have three points of projectile/”bounce” durability. Each bounce does only 10 damage, very low. Damage scaling can also ramp up rapidly, bouncing the opponent between Urien pokes and paltry 10-damage hits. Still, this ends up well worth it for the opportunities afforded by Aegis. Aegis Reflector doesn’t enable bonafide unblockables like it did in Third Strike, but it’s still very valuable for space control, huge combos, reset chances, and cracking defensive players.
When V-Gauge is filled, the first Aegis Reflector can be placed by inputting either , , or nothing along with both heavy buttons. (Inputting accomplishes the same thing as neutral . It’s like how isn’t necessary for forward throws.) The input determines the mirror placement, along with the frame situation after–different Aegis placements have different frame data, as indicated in tables throughout Urien’s section. A backward input places a mirror at close range, right in front of Urien. A neutral or forward input places a mirror at around the border of mid and long range, about half the screen away. And downward input results in a close-range Aegis Reflector at jump height.
Once the first mirror is thrown, a lengthy V-Timer begins, during which another Aegis Reflector can be thrown anytime Urien isn’t busy with something else. Once the second Aegis is in play, V-Trigger is effectively over, and Urien will begin building V-Gauge again (though two instances of V-Trigger in one round is unlikely, unless you’re landing a half-dozen counter-hit sweeps somehow). Each mirror lasts until its durability is used up, or until five seconds elapse. The mirrors can be placed back to back, or the second one can be used long after the first, in an entirely different set of plays.
It’s worth noting that the first Aegis deployed causes a screen freeze, while the second one does not. The first and second mirrors are mostly the same, but this means the second mirror has fewer hit-confirm options. Off the screen freeze of the first mirror, just about any successful poke canceled into Aegis Reflector can be converted into a longer combo by immediately linking another normal move after the freeze. If the initial poke into Reflector wouldn’t have been enough to make them reel back into the mirror, then the post-freeze link will. This verification tactic isn’t available when deploying the second mirror in a given V-Trigger period. Some hit-checks into Reflector are valuable since they’ll work in either situation, like crouching  EX Metallic Sphere or a single hit of EX Chariot Tackle, or standing .
Like with R. Mika’s quick or delayed Nadeshiko calls, there’s a subtle visual cue for the opponent to tell if it’s going to be a close or far Aegis Reflector. Urien’s hands thrusting outward at shoulder height results in a far Aegis Reflector, while his hands lifting upward above his head results in a close-range mirror. If they have fully-invincible or projectile-invincible moves, they may use those to blow through Aegis Reflectors entirely, hoping to completely restage the battle elsewhere while the mirrors simply run out of time and shatter. High-durability projectiles (even Critical Art projectiles) aren’t a solution though, of course, thanks to mirror reflections. Projectiles that strike Urien’s mirrors will be reflected back at their thrower, but with the fireball’s allegiance changed to Urien. (This doesn’t apply to projectile-like attacks that aren’t actually projectiles, technically, like Birdie’s chains or Ibuki’s kunai.)
On hit, these lead to extended combos and unexpected resets. On block, the enemy is between a proverbial rock and a hard place. Hitting Urien won’t make mirrors disappear, so they may be forced to gamble on a big invincible reversal (which can be anticipated, baited, and punished), or to just ride out the pressure with solid blocking. Cracking their shell can be accomplished by mixing up between crouching  /, overheads, and throws, as they bounce back and forth between the mirror and Urien until Aegis taps the opponent three times. As detailed in Urien’s unique attack descriptions, he has lots of different timings available for a reason.