
Street Fighter V Guide Glossary
K-O
Kara-Cancel
This is a type of cancel where one move is interrupted extremely early on, typically before it even perceptibly animates. Kara-cancels usually have to happen on the very first frame. This sometimes carries forward properties of the first move to the second move. In some games, this gives tremendous benefits to the user. Kara-canceling forward-moving normals into throws in SFIII/IV adds meaningful grab range. Kara-canceling forward-moving pokes into fireballs/uppercuts allows Sagat and Ken to eke out extra range on their specials in SFIV. And perhaps the most meaningful of all time, kara-canceling Capcom vs. SNK 2 rolls into special moves carried forward the rolls’ considerable invulnerable periods while the specials animated! If you never had to deal with Blanka flickering his electricity directly in front of you while covered every time by the lengthy invincible period of a roll, rest assured that it was tedious.
SFV has seen most kara-canceling benefits intentionally toned down, but kara-canceling still happens all the time. At heart, it’s a system mechanic designed to make move execution more consistent (pressing  just one frame before
  doesn’t result in a failed throw input; it results in one frame of a jab canceled into a throw, among many possible examples). It would actually be pretty miserable if kara-canceling were truly removed. It’s just that you’re much less likely to generate unintentional extra forward range or an extended invulnerable period or whatever, from kara-canceling in SFV. But it’s still an important historical fighting game concept, and there’s no telling when some newly released DLC SFV character or updated mechanic might make intentional kara-cancels relevant again.
Knockdown
A hitstun state where the victim is floored, lying prone on the ground. Normally, characters are invincible during a knockdown, though there are very rare exceptions (R. Mika’s tag partner Nadeshiko (Above) can hit floored targets on the ground if they fail to quick-recover). SF fans who participated in the SFV beta will remember that M. Bison’s Head Press used to be able to hit floored targets, too, but not anymore.
After being floored, knockdown victims then “wake up,” rising to their feet. This occurs at different speeds depending on whether quick-recovery or back quick-recovery are employed. Tactics related to mixing up characters rising from a knockdown are called okizeme. See wakeup and quick-recovery.
Note: In any instance where "D" is given for a character's on hit data, this refers to a knockdown (a hitstun state where the victim is floored, lying prone on the ground). There is no frame data value due to the opponent's position on the ground.
Landing
After taking to the air, whether through a jump or an attack with airborneframes, a character will have to endure landing recovery. Normal jump recovery takes four frames, with the last two being cancelable into any action: blocking, walking, striking, throwing, another jump, whatever. Whether the first two landing frames are cancelable depends on whether you performed an action in midair. If you jump and attack, the first two landing frames are essentially helpless. If you empty jump, though, you can cancel those landing frames, most importantly into either a low poke (thus faking high with the jump, then striking low) or into guarding stances in case the enemy sticks out a poke for you to land on. This is called tripguard, and you’ll sometimes hear people say that someone “lost tripguard” when they jumped, attacked, and then promptly landed on a meaty attack.
Launcher
A launcher is a combo-starting or combo-extending move that pops the opponent into the air, either in a free juggle or limited juggle state. Examples include R. Mika’s Lady Mika, Karin’s Tenko, counter-hit crouching  from Ken and Karin, and Zangief’s counter-hit standing
  .
.
See the combos entry, particularly juggles and juggle potential.
Limited Juggle
An aerial hitstun state where a victim is lofted airborne but can only be juggled more by attacks with sufficient juggle potential. See juggle potential details under combos.
Link 
A combo achieved by allowing a move that creates sizable hitstun to fully recover instead of canceling it. Links are vital to many hit-check combos since they allow you to confirm a combo is working with a couple of normal pokes. This is a much lower-commitment (not to mention more variable) comboopener than just fishing for a normal canceled to a special. See combos in the Glossary and frame data immediately at the beginning of the Primer section.
Long Range
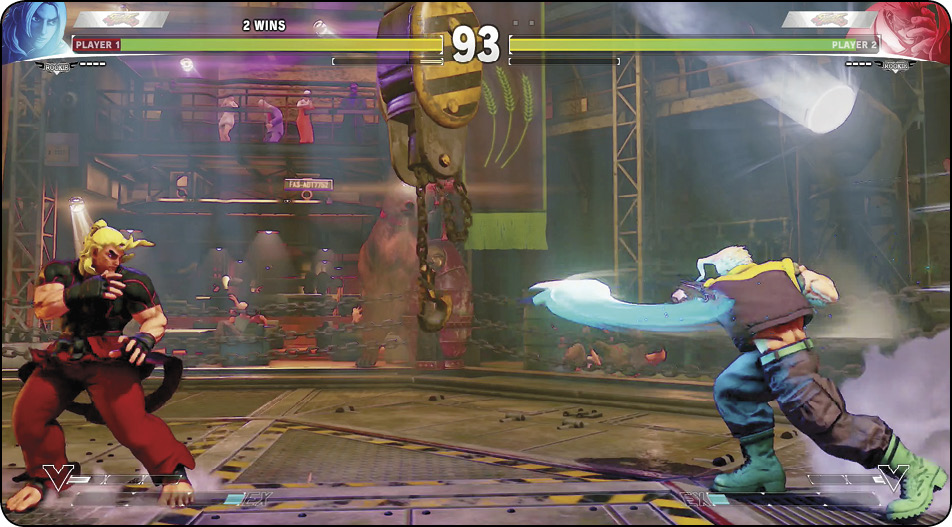
A position involving being backed out of mid range, almost to full screen. This is outside the range of immediate engagements or jump-ins; only the longest-reaching jump-in attacks will hit (if any at all), and only Dhalsim’s limbs can hope to hit here. A prime fireballzoning spot. See position.
Lows
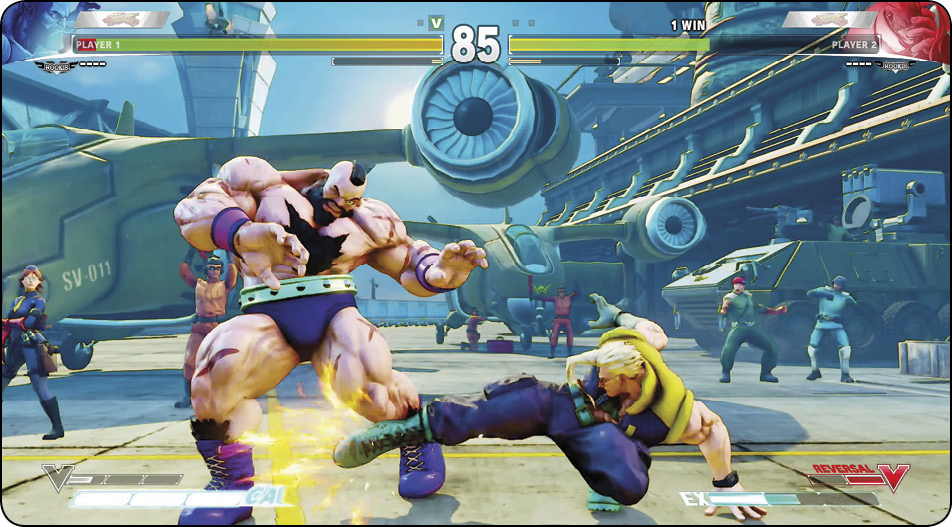
Attacks that must be blocked while crouching. Attempts to block low moves with standing guard lead to standing hitstun. Many crouching moves are low-striking attacks, or simply “lows.” Certain specials also hit low. See blocking.
Mash
Repeating an input or input series quickly. Can be command-related, like mashing on  for Rashid’s Spinning Mixer extensions, or tactical, like mashing on the input for an invinciblereversal during the opponent’s blockstrings or mashing out a three-frame poke during the adversary’s frame traps. See input, input buffer, and shortcuts.
Meaty
Ancient FGC terms like neck kick, top-down, and two-in-one are pretty much gone, but meaty is forever. It’s also a really important concept. Hitting meaty means intentionally timing a strike so you actually connect with later frames in the attack’s active period.
In practice, you have to time an attack a little early while the opponent is in some invincible state (so your initial active frames whiff) but right about to be predictably vulnerable (just before active frames end, if you timed it correctly). Obvious meaty timings include just before the adversary rises and just before they land from air recovery or a badly aimed jump. The more active frames a move has, the easier it will be to strike meaty with it. Moves that are only active for two frames or fewer don’t tend to be great meaty tools; at most, you’re gaining +1 advantage, but you’re requiring abnormal precision to do it.
In effect, meaties reduce your recovery period. Usually, recovery is really whatever is left of your active frames, plus your recovery frames. Hitting only with later frames leads to safer situations when guarded (perhaps even room for true blockstring pressure) and new links on hit.
With moves that travel forward during their active periods, like Dhalsim’s crouching  and R. Mika’s HP Shooting Peach, you can achieve the same effect by spacing the move so that only the very last active portion hits. (This is really hitting “late” instead of “meaty,” but same difference.)
Mechanics
Mechanics can mean different things when it comes to fighting games. System mechanics are the rules and machinery involved in the actual fighting game engine itself (things like V-System, EX Gauge, normal/counter-hits, damage scaling, blocking, etc.).
However, mechanics also refers to a player’s overall technical and physical skill in a particular fighting game. Not to be confused with execution (a subset of mechanics), it is the overall ability to perform moves and feats on demand, quickly and precisely. For example, someone who can deflect a 22-frame overhead with a flawlessly executed Crush Counter combo on reaction is someone with incredible command of mechanics. Simply having great reactions or superb combo execution doesn’t necessarily equate to having exceptional mechanics, though, since these are just simple muscle memory skills in sealed-off environments. Another example of possessing excellent mechanics is being able to perform an optimal punish combo from an unusual position (like punishing Dhalsim’s standing  with Ryu’s crouching
  Shinku Hadoken from full screen).
The more you actively work on your overall mechanics, the more you can use your mental processing power, or focus, to outplay your opponent in a real match. Not only should you practice your execution in combos, but you should test your reactions constantly in a variety of situations—either in real matches, or by using the handy Training Mode recording functions.
Metagame
A term that means “the game above the game,” referring to the body of knowledge required to play the game well that goes beyond knowing its mere rules and controls. See the Matchups and Versus chapter.
Mid Attacks
“Mids” are not quite an official class of move, but it’s a useful catch-all to describe moves that can be blocked either crouching or standing, and which also happen to usually hit at about mid-height. Just about all useful hit-check starters are mid pokes that start up in four to six frames. See blocking.
Mid Range
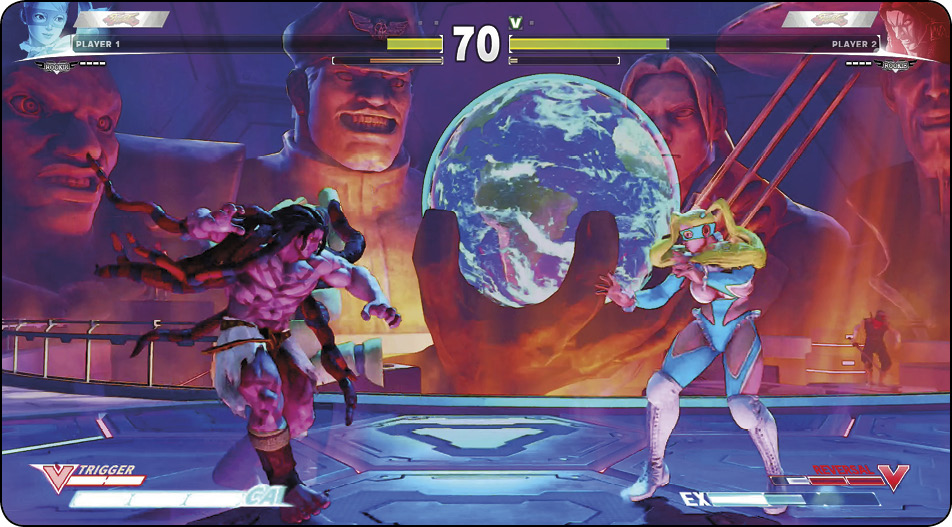
The distance where characters are in range of each other’s longest pokes and jump-ins, but not quite in range of throws and short-range moves. It can also become difficult to react to projectiles at this range. See position.
Midscreen
The center of the playing field, away from corners. Also sometimes referred to as mid-stage. See position.
Mirror Match
Self-explanatory: a character fighting against themselves. This wasn’t even available in the very first version of SFII (The World Warrior), and it was a big new feature in SFII: Champion Edition. Reduces the issue of matchups to seeing which player triumphs with the same set of tools.
Mix-up
A confusing tactic or setup designed to thwart the defender’s reactions. Usually works by making them worry about opposing options. Elemental examples include making them choose between blocking a strike or teching a throw, blocking high against overheads versus crouching against lows, and blocking normally against frontal jump-ins or reversed against cross-ups. There are many permutations of these, but most mix-ups are riffs on these core 50/50s.
Motion
A command that requires a fluid input of several directions, one after another. Most specialmoves have motion commands driving them. This contrasts with charge moves, where a particular direction or button must be held for a certain amount of time. Motion moves are available on command, with no premeditation required. See shortcuts for many quicker ways to execute motion moves.
Movement
Walk Forward
The most basic form of movement. Walk toward the opponent to gain ground, or walk away from them to retreat. Fast characters like Vega and Chun-Li have a big advantage here, while characters with poor walk speed like Nash and M. Bison must frequently rely on methods other than walking to reposition themselves.
One crucial difference between walking and other forms of movement is that it isn’t a “hardened” state, so you can still perform other actions while walking. If you think you need to block, like if you sense a sweep coming, simply swap from  to
to  . Likewise, if someone jumps unexpectedly at you as you walk forward, press your best single-input normal anti-air button to smack them down on short notice. Walking doesn’t stop you from doing other things. You don’t have the same freedom while dashing, jumping, or using specials to move around. So, although walking isn’t as fast as dashing, and although it obviously doesn’t lead to big damage like jump-ins and cross-ups, it’s the safest way to advance on your foe.
Advancing on your opponent by walking forward puts you in range of your own pokes, jump-ins, and cross-ups. If your opponent reacts by backing up themselves, good for you—they’ll back themselves into the corner eventually, and cornering an opponent provides a huge positional advantage.
Although walking forward is the simplest way to gain ground, it’s also the hardest to master. Walking forward means temporarily leaving behind standing/crouching guard, so it requires you to have a sense of when the opponent won’t stick out attacks. An important aspect of footsies is walking forward when you’re inside your opponent’s attack range but sense that they won’t actually attack. When your opponent is conditioned to be scared of other things you might do, you can sometimes just walk directly up to them.
Forward Walk Speed (Measured in Pixels Traveled per Frame)
| Name | Forward Walk Speed | Rank |
|---|---|---|
| Vega | 5.5 | S |
| Chun-Li | 5.4 | S |
| V-Trigger Necalli | 5.2 | S |
| Cammy | 5 | A |
| Karin | 4.9 | A |
| Necalli | 4.7 | A |
| Ryu | 4.7 | A |
| V-Trigger Birdie | 4.3 | B |
| R. Mika | 4.2 | B |
| Ken | 4.2 | B |
| Rashid | 4 | B |
| Laura | 3.8 | B |
| F.A.N.G | 3.2 | C |
| Birdie | 3.1 | C |
| Zangief | 3 | C |
| Nash | 2.7 | C |
| Dhalsim | 2.2 | C |
| M. Bison | 2 | D |
Walk Backward
Holding  to walk backward will also trigger a standing guard stance (halting your backward walk) if the enemy has an attack active nearby. This is called proximity block—without an active threat nearby, you’ll just keep walking. With charge characters, walking backward also loads a special move charge. A fast backward walk speed can be terrific both for retreating and for stepping back just out of your enemy’s poke/throw range, causing their attacks to whiff. For the quickest characters, like Vega and Cammy, you can greatly frustrate aggressors by walking backward away from their tick/frame trap offense about as fast as they can advance. (However, slower backpedalers—Nash, Birdie, M. Bison, Dhalsim, and Zangief—can’t really successfully play defensive footsies this way.)
Backward Walk Speed (Measured in Pixels per Frame)
| Name | Backward Walk Speed | Rank |
|---|---|---|
| Vega | 4.5 | S |
| Cammy | 3.8 | A |
| Chun-Li | 3.6 | A |
| Karin | 3.6 | A |
| Rashid | 3.6 | A |
| V-Trigger Necalli | 3.6 | A |
| Ken | 3.5 | A |
| Ryu | 3.4 | B |
| V-Trigger Birdie | 3.3 | B |
| Laura | 3.2 | B |
| Necalli | 3.2 | B |
| R. Mika | 3 | B |
| F.A.N.G | 2.8 | C |
| Nash | 2.7 | C |
| Birdie | 2.4 | C |
| M. Bison | 2.3 | D |
| Zangief | 2.3 | D |
| Dhalsim | 2 | D |
Dash
Tap for a fast forward movement. taps must be within nine frames of each other and will buffer forward up to nine frames during a hardened state (like toward the end of blockstun or while waking up). Dashing is faster across a set distance than walking, but most dashes (except M. Bison’s) lack exceptional properties, aside from quick forward movement. (This contrasts with backdashes, which feature a short period of throw invulnerability and a brief airborne period.)
A very important new feature in SFV is that hits against dashing characters are considered counter-hits. Especially considering the strength of Crush Counters, you’ll want to be very careful going too nuts with dashes.
Characters cannot block while dashing, nor can they perform any other actions until the dash ends—dashing is a “hardened” state. Dashing forward is an aggressive action, especially within attack range. Its audacity means that when you sense a passive opponent, it can pay off to dash in suddenly and then go for an immediate point-blank throw or hit-confirm combo. In general, dashes travel farther than in previous Street Fighter titles; the characters with the longest dashes (Rashid, M. Bison, Nash, and V-Trigger Necalli) can now traverse the full screen’s distance by dashing only twice.
If you make no immediate inputs nor buffer anything at the end of a dash, when forward momentum ends, your character settles back onto their heels slightly, losing a tiny bit of ground. This mild backpedaling actually occurs your character has recovered from the dash, so you can interrupt it with actions; it’s basically a return to normal idling stand with a quarter-step backward at the beginning. (This is sort of like how landingrecovery’s last two frames are a landing crouch cancelable by anything, and aren’t really a standalone state.) This means that if you dash forward then attack or throw immediately, the range will be slightly longer than if you dashed, paused briefly, and then tried something. This is a tiny boost to distance, but there are situations where every little bit counts. When you aggressively dash inside, if you’re not going to lay some bait by just blocking, you always want to start a mix-up right away, so you’ll benefit from the bonus here without putting in extra work.
Several characters have V-Skills or special moves that function like command dashes (like the V-Skills of Ken and Laura and the movement-oriented specials of F.A.N.G. and Karin), but these are different actions with their own nuances, although their function is similar.
Dash Duration in Frames
| Name | Dash Duration | Rank |
|---|---|---|
| Rashid | 15 (41 if held) | A |
| Chun-Li | 15 | A |
| Ken | 15 | A |
| Ryu | 16 | B |
| Cammy | 16 | B |
| Karin | 16 | B |
| Laura | 17 | B |
| Nash | 17 | B |
| Necalli | 17 | B |
| Vega | 17 | B |
| R. Mika | 18 | B |
| F.A.N.G | 20 | C |
| Dhalsim | 21 | C |
| M. Bison* | 22 | C |
| Birdie | 23 | D |
| Zangief | 25 | D |
Dash Distance in Pixels Traveled
| Name | Dash Distance | Rank |
|---|---|---|
| V-Trigger M. Bison | 227 | S |
| M. Bison | 198 | A |
| Rashid | 193.6 (435.5 if held) | A |
| V-Trigger Necalli | 193.2 | A |
| Nash | 175 | B |
| V-Trigger Birdie | 170.3 | B |
| Vega | 153.7 | C |
| Dhalsim | 147.7 | C |
| Necalli | 145.9 | C |
| Karin | 144.5 | C |
| Cammy | 142.1 | C |
| R. Mika | 141.1 | C |
| Ken | 136.2 | C |
| Ryu | 135 | C |
| Birdie | 132.6 | D |
| Chun-Li | 129.2 | D |
| F.A.N.G | 128.6 | D |
| Laura | 128.4 | D |
| Zangief | 104.6 | F |
Backdash
Tap to hop backward quickly. Like with dashes, the taps must be within nine frames. New to SFV, they can be buffered nine frames ahead while your character is preoccupied. Backdashing moves a fighter backward quickly, faster than walking back across a set distance. The first 10 frames of every backdash are throw-invincible, making backdashes a viable defensive option if you’re certain that a throw is coming up close (as will often be the case against grapplers). Backdashes are also airborne for a period of time that varies per character; getting hit during these frames results in an air hit instead of grounded hitstun.
Backdashes are no longer fully invulnerable at startup like they were in SFIV, and hits against dashes/backdashes now register as counter-hits. This means that foes don’t have to worry about executing some dexterous or elaborate anti-backdash option select (like in SFIV); if they predict your backdash, they can just use their most appropriate Crush Counter normal for a potentially devastating punishcombo.
Backdash Duration in Frames
| Name | Backdash Duration | Rank |
|---|---|---|
| Cammy | 21 (frames 3-16 airborne) | A |
| Chun-Li | 21 (frames 3-10 airborne) | A |
| Karin | 21 (frames 3-11 airborne) | A |
| Laura | 21 (frames 3-11 airborne) | A |
| Ryu | 21 (frames 3-10 airborne) | A |
| Vega | 21 (frames 3-10 airborne) | A |
| M. Bison | 22 (frames 3-10 airborne) | B |
| Necalli | 22 (frames 3-11 airborne) | B |
| F.A.N.G | 24 (frames 3-10 airborne) | C |
| Ken | 24 (frames 3-12 airborne) | C |
| Nash | 24 (frames 3-10 airborne) | C |
| Rashid | 24 (frames 3-18 airborne) | C |
| R. Mika | 24 (frames 3-10 airborne) | C |
| Dhalsim | 25 (frames 3-10 airborne) | D |
| Zangief | 25 (frames 3-16 airborne) | D |
| Birdie | 26 (frames 3-20 airborne) | F |
Backdash Distance in Pixels Traveled
| Name | Backdash Distance | Rank |
|---|---|---|
| F.A.N.G | 149.7 | S |
| Cammy | 143.6 | S |
| Vega | 137.7 | A |
| Chun-Li | 136.8 | A |
| Birdie | 134.6 | A |
| V-Trigger Necalli | 130 | A |
| Ken | 127.7 | B |
| Nash | 125 | B |
| M. Bison | 121.5 | B |
| R. Mika | 119.7 | B |
| Karin | 116.3 | B |
| Laura | 113.5 | C |
| Rashid | 110.6 | C |
| Necalli | 110.5 | C |
| Zangief | 106.5 | C |
| Ryu | 88.3 | D |
| Dhalsim | 82.5 | F |
Jump
A vertical or diagonal leap, depending on direction used. Jumping backward can be used to retreat, neutral jumping is an invaluable footsies/anti-projectile/stalemate tool, and forward jumps can lead to offensive jump-ins and cross-ups. After your upward jump input, your character first goes through pre-jump animation frames before they actually leave the ground, becoming airborne. Pre-jump frames are invincible to grabs, but strikes against pre-jump frames will still register as grounded hitstun. These grounded pre-jump frames can still be canceled into grounded actions, preventing the jump from ever happening (this is why doing Zangief’s Screw Pile Driver motion very quickly results in a grab before he jumps, as one example).
While jumping, characters are naturally immune to ground throws and will fly over most grounded attacks, but they cannot block or tech/escape air-to-air normal throws. After starting a jump, characters are pretty committed along their path, with exceptions for characters with dive kick-style moves, or Dhalsim with his Yoga Float and Yoga Teleport.
Upon landing, there are four frames of landing recovery that may be canceled early depending on whether you refrained from attacking while jumping, retaining tripguard. Basically, if you don’t perform an action while jumping, you’ll still have landing recovery, but you can cancel it into attacking or blocking. If you did perform an action during the jump, you can’t cancel the landing recovery frames into anything, so there’s nothing you can do if you land on extended, meaty attacks. A jump performed without an attack is called an empty jump.
Jump Duration in Frames
| Name | Jump Duration | Rank |
|---|---|---|
| Rashid | 38 | A |
| Laura | 38 | A |
| Ryu | 38 | A |
| R. Mika | 38 | A |
| Karin | 38 | A |
| Ken | 38 | A |
| Nash | 38 | A |
| V-Trigger Necalli | 38 | A |
| Cammy | 39 | B |
| M. Bison | 39 | B |
| Zangief | 39 | B |
| Vega | 39 | B |
| Necalli | 39 | B |
| Birdie | 41 | C |
| Chun-Li | 41 | C |
| F.A.N.G | 43 vertical, 44 diagonal | C |
| Dhalsim | 64 | D |
Forward Jump Distance in Pixels Traveled
| Name | Forward Jump Distance | Rank |
|---|---|---|
| F.A.N.G | 250.4 | S |
| M. Bison | 234 | A |
| Dhalsim | 224 | A |
| V-Trigger Necalli | 216.6 | B |
| Necalli | 214.5 | B |
| Rashid | 212.8 | B |
| Laura | 212.8 | B |
| Ryu | 212.8 | B |
| R. Mika | 212.8 | B |
| Karin | 212.8 | B |
| Ken | 212.8 | B |
| Nash | 205.2 | C |
| Chun-Li | 205 | C |
| Cammy | 195 | D |
| Vega | 195 | D |
| Zangief | 156 | F |
| Birdie | 143.5 | F |
Backward Jump Distance in Pixels Traveled
| Name | Backward Jump Distance | Rank |
|---|---|---|
| M. Bison | 234 | S |
| F.A.N.G | 233.2 | S |
| Rashid | 205.2 | A |
| Nash | 198.6 | A |
| Cammy | 195 | A |
| Dhalsim | 192 | A |
| Necalli | 187.2 | B |
| Vega | 187.2 | B |
| V-Trigger Necalli | 186.2 | B |
| Chun-Li | 184.5 | B |
| Laura | 182.4 | C |
| Ryu | 182.4 | C |
| R. Mika | 182.4 | C |
| Karin | 182.4 | C |
| Ken | 182.4 | C |
| Zangief | 156 | D |
| Birdie | 131.2 | F |
Neck Kick
An old-school, out-of-use term for cross-up.
Negative Edge
Refers to using the release of buttons to activate special moves. Using Ryu or Ken, holding , performing  , and then releasing will result in HP Hadoken, for example. This can sometimes be helpful or hindering for move execution, so be conscious of errant button releases. In general, you’ll want to tap individual button presses as briefly as possible, avoiding accidental negative edge on actions immediately after. When pressing multiple buttons at once, like for EX moves, you actually will want to press and hold all the buttons briefly instead of tapping and releasing as soon as possible. Going for multiple presses but accidentally releasing one of the buttons just a couple frames early is a common reason why players go for EX moves and get normal ones.
Neutral
Can refer to a character’s idle state, standing, where they’re ready to accept commands. Also refers generally to situations where neither character has a big advantage over the other, like in mid-range footsies.
Neutral Jump
A vertical jump generally used to either avoid a command throw or jump over an incoming projectile without much risk at mid to long range.
Normal Moves
Basic attacks executed with one of the six normal buttons. There are different normal moves depending on whether you’re standing, crouching, or jumping. (A few characters also have a different jumping roundhouse during a neutral jump than during a diagonal jump.) There are light, medium, and heavy normals—three punches and three kicks. Normals are the foundation of your arsenal. They’re the easiest, fastest, and most reliable way to begin poking, hit-checking, and anti-airing the opposition. Attacks are generally just called light punch, medium kick, heavy punch, etc. now, but you’ll still hear the old Street Fighter strength names here and there:
|
Jab |
|
Strong |
|
Fierce |
|
Short |
|
Forward |
|
Roundhouse |
Normal Throw
Normal throws can be performed either forward or backward for front throw or back throw, grabbing in five frames. One direction or the other will be better depending on a few factors. Most important is position relative to the corner, but stamina damage/stun/EX Gauge gain can differ between throws, as can post-throw advantage. Some characters have one throw that leaves the opponent close, while the other throw deposits the victim all the way across the screen. Most normal throws lead to a match reset.
Normal throws are escaped with  , the same command used to initiate them. Throw escape attempts will result in a whiffed throw if an enemy isn’t actually nearby. The window to escape normal throws is 11 frames long, starting five frames before your opponent’s throw actually grabs and extending six frames after their throw makes contact. This makes it possible to tech preemptively or to tech throw late, reacting like a spring only when the walk-up throw actually happens.
Ground throws will whiff against airborne characters, characters in pre-jump takeoff frames, and characters stuck in hitstun or blockstun. Air throws are, naturally, targeted at airborne characters, but won’t hit grounded foes.
Throws are generally active for two frames, so you may hit with a meaty throw in certain situations where the first active grabbing frame whiffs. Opposing characters continue to be unthrowable for two frames after leaving certain unthrowable states (air recovery, wakeup, and the end of hitstun/blockstun). These are exactly the kinds of places when a meaty throw might be good, so intentionally trying to use throws as meaty attacks doesn’t work. The extra grab frame is really just to help the throw hit, but not to allow for abnormal grab timing.
Okizeme
A Japanese term referring to mix-ups used against an opponent rising from a knockdown. Okizeme is stronger after throws and counter-hit sweeps, where the defending character’s quick-recovery options are restricted. See wakeup.
On Guard/On Hit
Quantifies the advantage/disadvantage created on contact. See frame data in the Primer. On counter-hit, most moves do +2 over normal On Hit figures. Crush Counter moves do even more.
Note: In any instance where "D" is given for a character's on hit data, this refers to a knockdown (a hitstun state where the victim is floored, lying prone on the ground). There is no frame data value due to the opponent's position on the ground.
Option Select
An option select involves combining inputs or performing sequences in such a way that, depending on the situation, you receive the best outcome from several. Using option selects may seem hard at first, mostly because this involves executing lots of extra, often useless inputs. But once upon a time, a mere Shoryuken motion seemed exacting to basically the entire gaming audience. Once you’ve thrown enough Hadokens, you don’t need to think about the command anymore, and these tactics are the same. You just have to get over the hump of committing them to muscle memory.
Buffered Pokes
This involves intentionally whiffingcancelablenormal moves just outside of the enemy’s poke/dash range, while performing the commands for certain specials. You have to perform the follow-up command very quickly, so you don’t risk simply producing the special after the initial normal move recovers. The intent is to preemptively snuff the opponent’s pokes or dashes. If they don’t do anything, you simply whiff a normal, but if they stick something out or dash in, your normal connects and cancels into your next input. Using this well can sometimes make you look clairvoyant (or very brave/foolish), but it really just involves good spacing. (It would be ill-advised to use this tactic when you’re still close enough to make them block, for example.) There’s no decision-making involved.
Naturally, you’ll want to use good pokes that have good priority and don’t put your character at too much risk when buffering.
Some characters have normals that are only Critical Art-cancelable, like R. Mika’s crouching and Ryu’s standing . The principle works exactly the same here: you simply can’t buffer special commands, as only a Critical Art motion will work.
Anti-Escape Option Select
Characters like Dhalsim and V-Gauge-loaded Nash have a sort of “get out of jail free card” during wakeup situations because of their teleports. Other characters have special moves that aren’t expressly teleports but accomplish the same objective of getting out of trouble in a hurry (like F.A.N.G.’s EX Nikankyaku). Depending on your character, you can install option selects in your offense that may catch these escape attempts. For example, with a shoto character, you can jump in with jumping , immediately input  before landing, then land and begin whatever grounded attack you’d planned for anyway. If jumping hits or is blocked, your ground sequence will simply occur as normal because hitstop eats up your option-select Tatsumaki input. If jumping misses, you’ll land and immediately perform HK Tatsumaki Senpukyaku. Depending on your foe’s escape method, the Tatsumaki may catch them. The success of such a tactic depends a lot on the character matchup at hand (as Cammy, you’d use Spiral Arrow instead; as Zangief, you won’t be getting much use from this kind of tactic) and your read of the opponent’s eagerness to get away.
Defensive players may anticipate this kind of anti-escape tactic and opt to teleport/escape toward your side of the screen rather than away from it. This may cause your option-selected special to whiff in the wrong direction. The catch here is that if you read their intent to thwart option selects by teleporting/escaping toward your side, you can just forego using any trick during your jump-in, readying yourself instead to punish them hard if they do teleport to your side. This situation requires hard reads on both your parts.
Overhead
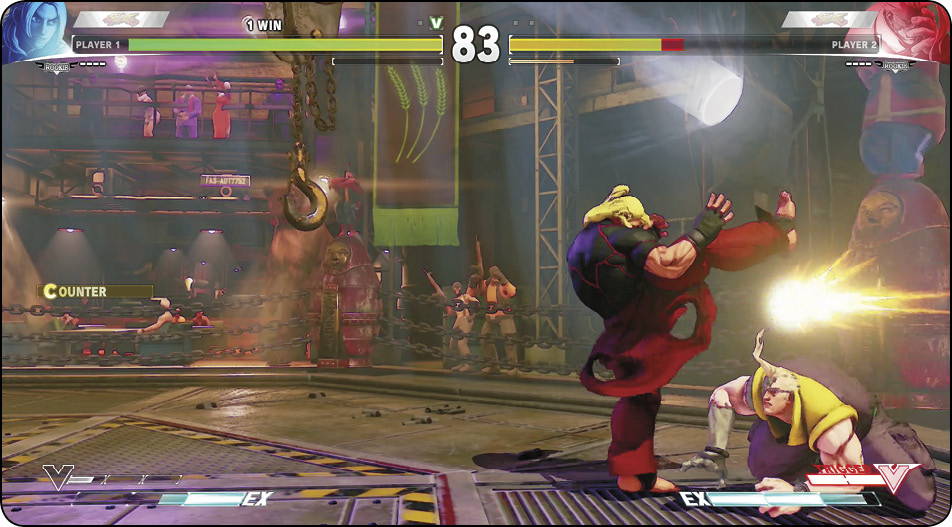
A high-striking attack that must be blocked standing. Jumping attacks and many unique attacks are overheads. See blocking.