
Street Fighter V Guide Fighters Ken
Special Moves
Hadoken 


| Startup |
14 |
|---|---|
| Active |
Notes |
| Recovery |
34 |
| Guard Level |
HL |
| On Hit |
-3 |
| On Guard |
-10 |
| VSX Hit |
— |
| VSX Guard |
— |
| VTX Hit |
18 |
| VTX Guard |
13 |
| Cancel |
CA, V |
| Damage |
50 |
| Stun |
100 |
| Meter Gain |
10/10/5 |
EX Hadoken
| Startup |
12 |
|---|---|
| Active |
— |
| Recovery |
33 |
| Guard Level |
HL |
| On Hit |
3 |
| On Guard |
1 |
| VSX Hit |
— |
| VSX Guard |
— |
| VTX Hit |
23 |
| VTX Guard |
21 |
| Cancel |
V |
| Damage |
90(40+50) |
| Stun |
150 |
| Meter Gain |
-300 |
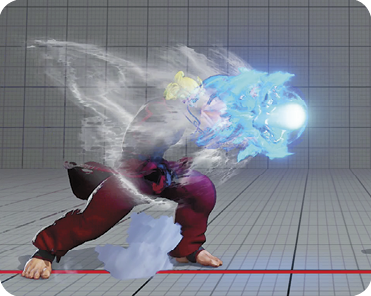
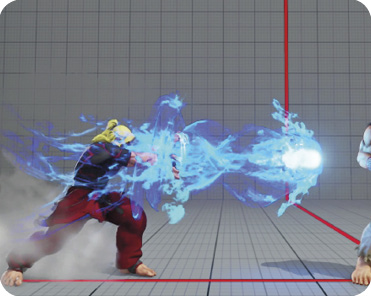
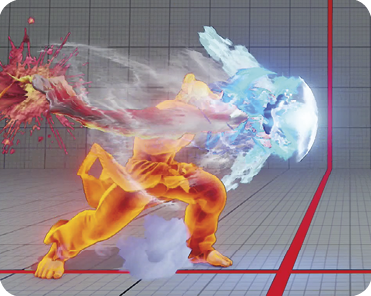
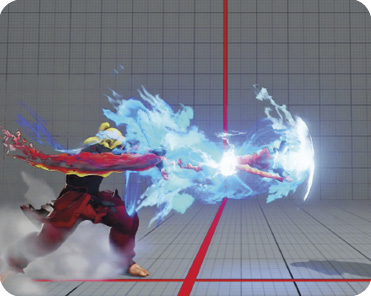
Hadoken: Ken’s version of the Hadoken has always been the weaker between the two flagship shoto characters, and in Street Fighter V, it’s no different. That’s not to say it’s useless, since it does give him a tool to help him get in from long range. It’s significantly more dangerous to use in closer ranges, especially in a blockstring, as it’s -10 on block with little pushback; this gives your opponent an easy time to punish your recovery. Unlike Ryu’s Hadoken, all of Ken’s non-EX Hadoken versions leave Ken at -10 when blocked up close. In these situations, you can cancel into EX Hadoken instead for a slight frame advantage, which comes at the cost of a stock of EX Gauge. You should use regular Hadokens sparingly and only at mid to long range when you need a slow-moving projectile on screen to clear the way for your offense.
LP Shoryuken 

| Startup |
3 |
|---|---|
| Active |
11 |
| Recovery |
21 + 9 landing |
| Guard Level |
HL |
| On Hit |
D |
| On Guard |
-18 |
| VSX Hit |
— |
| VSX Guard |
— |
| VTX Hit |
D |
| VTX Guard |
-5 |
| Cancel |
CA, V |
| Damage |
100/70 |
| Stun |
150/100 |
| Meter Gain |
20/40/20 |
MP Shoryuken 
| Startup |
4 |
|---|---|
| Active |
12 |
| Recovery |
24 + 11 landing |
| Guard Level |
HL |
| On Hit |
D |
| On Guard |
-33 |
| VSX Hit |
— |
| VSX Guard |
— |
| VTX Hit |
D |
| VTX Guard |
-5 |
| Cancel |
CA, V |
| Damage |
130(80+50) |
| Stun |
150(75x2) |
| Meter Gain |
20/40/20 |
HP Shoryuken 
| Startup |
4 |
|---|---|
| Active |
13 |
| Recovery |
30 + 13 landing |
| Guard Level |
HL |
| On Hit |
D |
| On Guard |
-41 |
| VSX Hit |
— |
| VSX Guard |
— |
| VTX Hit |
2/D |
| VTX Guard |
-5 |
| Cancel |
CA, V |
| Damage |
140(60+50+30) |
| Stun |
150(50x3) |
| Meter Gain |
20/40/20 |
EX Shoryuken
| Startup |
4 |
|---|---|
| Active |
8(18)7 |
| Recovery |
47 + 13 landing |
| Guard Level |
HL |
| On Hit |
D |
| On Guard |
-45 |
| VSX Hit |
— |
| VSX Guard |
— |
| VTX Hit |
3/2 |
| VTX Guard |
-5 |
| Cancel |
V |
| Damage |
150(20x6+30) |
| Stun |
200(20x5+50+50) |
| Meter Gain |
-300 |
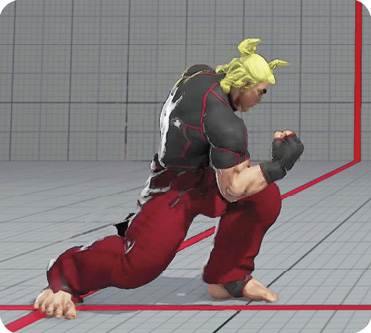
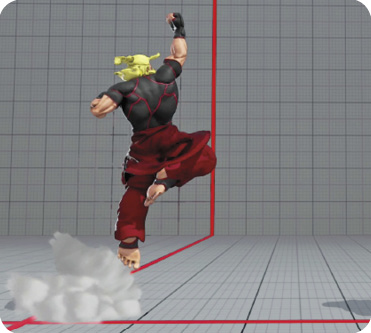
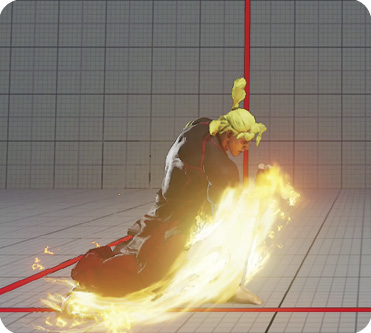
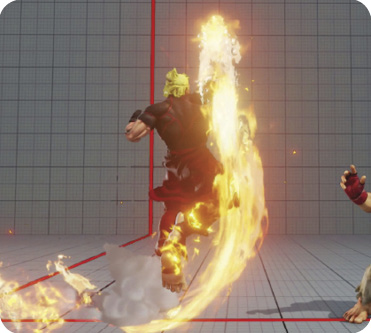
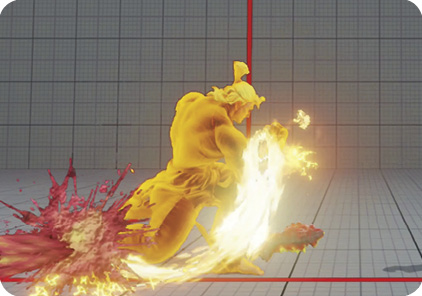
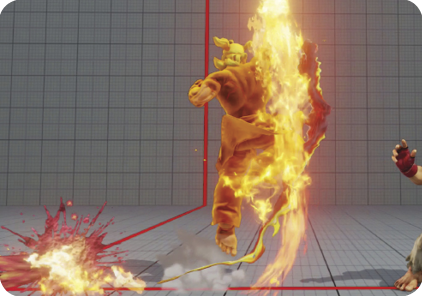
Shoryuken: Ken’s flaming dragon punch, the definitive anti-air, returns and is as potent as ever in Street Fighter V. Like in Street Fighter IV, each version of Ken’s Shoryuken serves a different purpose. LP Shoryuken is primarily used as a reversal against anti-throw and anti-low attacks. It has a quick startup of three frames and a lower amount of recovery than the other three versions. MP Shoryuken sports enough invincibility to cleanly deflect almost all jumping attacks, while HP Shoryuken deals more damage and covers a bit more horizontal range, making it ideal for most combos. EX Shoryuken features the best of both worlds: Ken starts with an invincible dragon punch followed by another dragon punch that covers a huge amount of distance. You can use it to extend juggle combos or as a high damage anti-air move. Like with other dragon punch-style moves, Shoryuken can be executed with a shortcut command of 
 instead of the usual classic
  motion.
LK Tatsumaki Senpukyaku 

| Startup |
3 |
|---|---|
| Active |
2(5)2(4)2 |
| Recovery |
8 + 11 landing |
| Guard Level |
HL |
| On Hit |
D |
| On Guard |
-8 |
| VSX Hit |
— |
| VSX Guard |
— |
| VTX Hit |
D |
| VTX Guard |
9 |
| Cancel |
CA, V |
| Damage |
70(40+30) |
| Stun |
100(50x2) |
| Meter Gain |
10/30/15 |
MK Tatsumaki Senpukyaku 
| Startup |
6 |
|---|---|
| Active |
2(5)2(6)2(6)2(4) |
| Recovery |
8 + 10 landing |
| Guard Level |
HL |
| On Hit |
D |
| On Guard |
-9 |
| VSX Hit |
— |
| VSX Guard |
— |
| VTX Hit |
D |
| VTX Guard |
9 |
| Cancel |
CA, V |
| Damage |
100(40+30+30) |
| Stun |
150(50+50+50) |
| Meter Gain |
10/30/15 |
HK Tatsumaki Senpukyaku 
| Startup |
16 |
|---|---|
| Active |
4(12)2(10)2(10)3 |
| Recovery |
5 + 16 landing |
| Guard Level |
HL |
| On Hit |
1 |
| On Guard |
-2 (-1 vs crouch block) |
| VSX Hit |
— |
| VSX Guard |
— |
| VTX Hit |
— |
| VTX Guard |
— |
| Cancel |
— |
| Damage |
140(50+30x3) |
| Stun |
200(60+40+40+60) |
| Meter Gain |
10/30/15 |
EX Tatsumaki Senpukyaku 
| Startup |
8 |
|---|---|
| Active |
5(9)3(4)3(3)3(5)2 |
| Recovery |
32 + 12 landing |
| Guard Level |
HL |
| On Hit |
D |
| On Guard |
-56 |
| VSX Hit |
— |
| VSX Guard |
— |
| VTX Hit |
— |
| VTX Guard |
— |
| Cancel |
— |
| Damage |
160(40x4) |
| Stun |
200(50x4) |
| Meter Gain |
-300 |
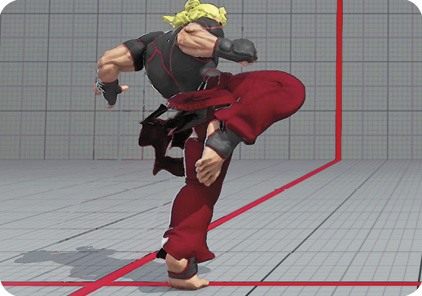
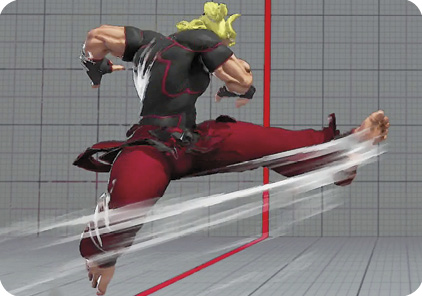
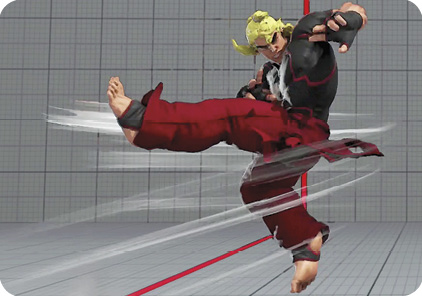
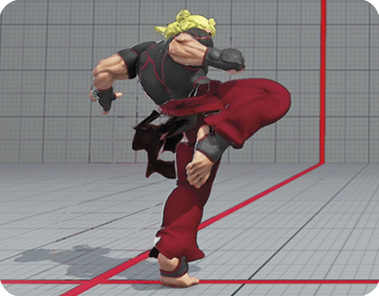
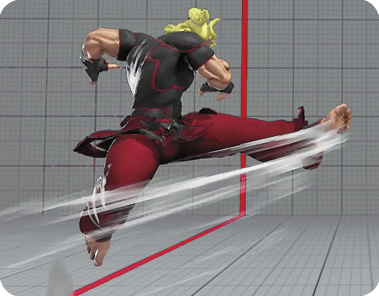
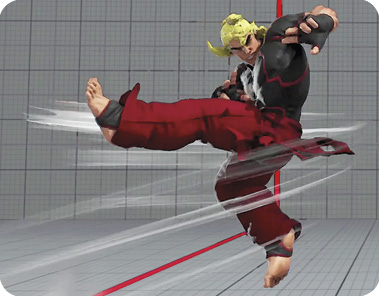
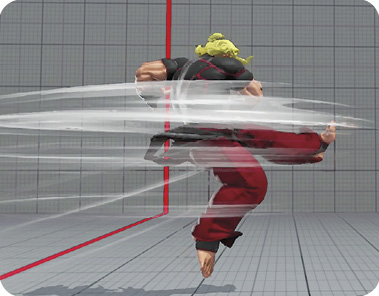
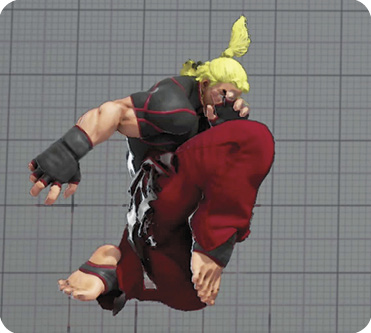
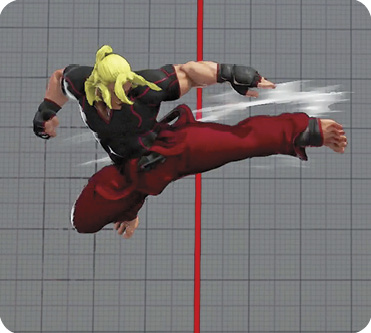
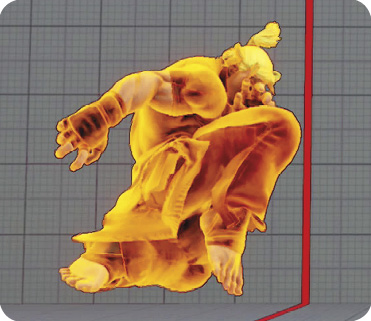
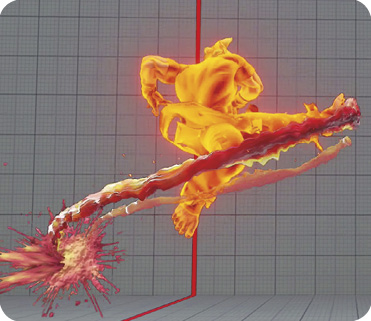
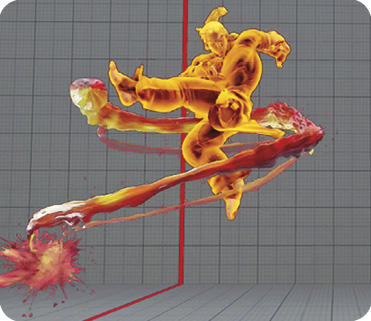
Tatsumaki Senpukyaku: Commonly referred to as a “hurricane kick” or “Tatsu,” Ken’s Tatsumaki Senpukyaku has seen some changes over the years, especially the HK version of the attack. LK Tatsumaki Senpukyaku starts with a three-frame rising knee that can connect on crouching opponents and leads into another kick revolution that knocks the enemy into the air in a juggle state. The MK version deals 30 more damage than the LK one and also allows for juggles afterwards, as in Combo 6. HK Tatsumaki Senpukyaku is much different: Ken launches himself into the air with a knee to his foe’s face, followed by a descent that consists of three more kick attacks. It’s deceptively safe on block (-2 against standing block, -1 against crouching block), so it’s actually an effective attack to throw out from about full screen. Its parabolic arc can make it difficult for inexperienced players to deal with. Just be careful not to whiff it, as it becomes extremely punishable because Ken flies over the adversary’s head and lands behind them. The EX version has Ken launch up-forward with a series of hurricane kicks, and it is well-suited for use in juggle combos where you’re willing to spend EX Gauge.
LK Air Tatsumaki Senpukyaku during forward jump
| Startup |
9 |
|---|---|
| Active |
2(6)2(6)2 |
| Recovery |
10 landing |
| Guard Level |
HL |
| On Hit |
— |
| On Guard |
— |
| VSX Hit |
— |
| VSX Guard |
— |
| VTX Hit |
— |
| VTX Guard |
— |
| Cancel |
— |
| Damage |
80 |
| Stun |
100 |
| Meter Gain |
0/40/20 |
MK Air Tatsumaki Senpukyaku during forward jump
| Startup |
9 |
|---|---|
| Active |
2(5)2(5)2 |
| Recovery |
10 landing |
| Guard Level |
HL |
| On Hit |
— |
| On Guard |
— |
| VSX Hit |
— |
| VSX Guard |
— |
| VTX Hit |
— |
| VTX Guard |
— |
| Cancel |
— |
| Damage |
80 |
| Stun |
100 |
| Meter Gain |
0/40/20 |
HK Air Tatsumaki Senpukyaku during forward jump
| Startup |
9 |
|---|---|
| Active |
2(4)2(4)2 |
| Recovery |
10 landing |
| Guard Level |
HL |
| On Hit |
— |
| On Guard |
— |
| VSX Hit |
— |
| VSX Guard |
— |
| VTX Hit |
— |
| VTX Guard |
— |
| Cancel |
— |
| Damage |
80 |
| Stun |
100 |
| Meter Gain |
0/40/20 |
EX Air Tatsumaki Senpukyaku during forward jump
| Startup |
8 |
|---|---|
| Active |
2(6)2(7)2 |
| Recovery |
13 landing |
| Guard Level |
HL |
| On Hit |
D |
| On Guard |
— |
| VSX Hit |
— |
| VSX Guard |
— |
| VTX Hit |
— |
| VTX Guard |
— |
| Cancel |
— |
| Damage |
90 |
| Stun |
100 |
| Meter Gain |
-300 |
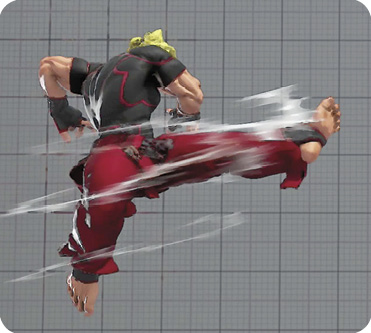
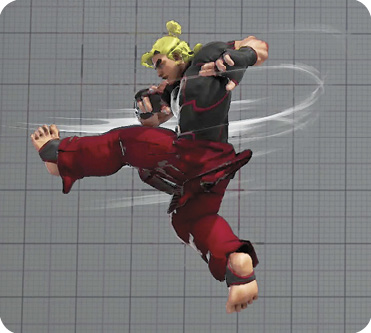
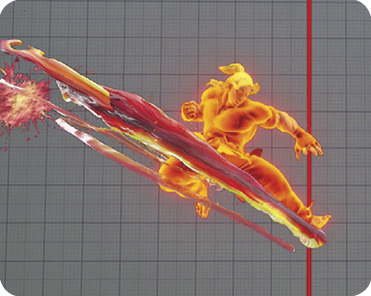
Air Tatsumaki Senpukyaku: Like Ryu, Ken can perform his Tatsumaki Senpukyaku in the air during a forward jump. This move isn’t as strong as it was in Street Fighter IV, due to both its smaller effect on Ken’s horizontal trajectory and a practically non-existent hitstun. However, it can still be applied in certain situations. At some distances, you can avoid certain anti-air attacks with it, rewarding you with a punish chance. As a left/right mix-up, you generally won’t be able to link into a combo, except in extremely rare cases. Air EX Tatsu travels more quickly, does more damage, and knocks your enemy down.