
Street Fighter V Guide Fighters Zangief
Unique Attacks
Head Butt 


| Startup |
12 |
|---|---|
| Active |
4 |
| Recovery |
14 |
| Guard Level |
HL |
| On Hit |
7 |
| On Guard |
2 |
| Cancel |
CA |
| Damage |
100 |
| Stun |
200 |
| Meter Gain |
50/25 |
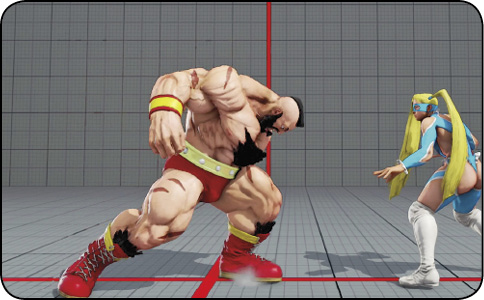
Head Butt: Zangief rears back, then swings the hardest thing he can find into the air directly in front of him. This heavy head smash actually has a projectile hitbox (and a projectile-invulnerable hurtbox around Zangief’s head), so it’ll wipe out incoming single-hit fireballs. Smacking away projectiles with Head Butt requires less commitment than jumping over them (which may get you anti-aired) or using Double Lariat (which allows projectiles to pass through harmlessly but has a lot of recovery at the end). Just watch out from mid range or closer against opponents loaded with full EX Gauge: they may intentionally throw a slow projectile to fish for Zangief’s Head Butt, then unleash their Critical Art when you take the bait. You’ll still need to just block some fireballs in cases where Head Butting or neutral jumping over them leads to punishment.
Up close, Head Butt works as a solid poke when you have decent frame advantage. The speed isn’t great (its speed falls directly between standing  and standing , Zangief’s other hard-hitting poke options), but it leaves Zangief at +2 on guard. It also allows a rare chance for conversion into a combo on hit (see Combo 3), whether canceling Head Butt or linking from it. Additionally, as a heavy unique attack, it’ll overpower any light or medium-strength pokes that hit at the same time as Head Butt.
Knee Hammer 
| Startup |
12 |
|---|---|
| Active |
4 |
| Recovery |
5+7 landing |
| Guard Level |
HL |
| On Hit |
3 |
| On Guard |
-3 |
| Cancel |
— |
| Damage |
70 |
| Stun |
100 |
| Meter Gain |
30/15 |
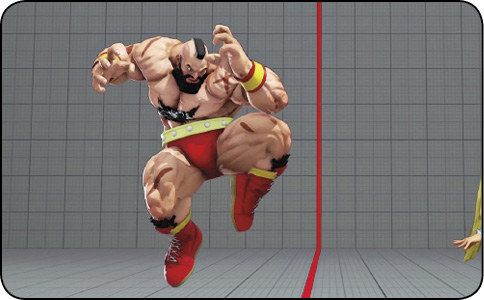
Knee Hammer: Zangief hops forward a bit (about half his width) and puts his weight behind an airborne knee attack. This functions somewhat like a miniature dive kick, advancing on the opponent with a move that dodges throws and low attacks. It’s similar to Zangief’s Street Fighter II HD Remix or his V-Ism  /X-Ism from Street Fighter Alpha 3. Players accustomed to Zangief’s extreme ground-gaining Street Fighter IV power using Banishing Flat and standing will have to get used to his steadier, more plodding pace in SFV.
Combined with the threat of the enormous range of LP Screw Pile Driver, hopping toward the opponent with Knee Hammer can be very threatening. This move’s greatest value isn’t so much in actually striking the foe as it is in moving Zangief just close enough to them for LP SPD to reach, while hopping over any low footsies they happen to stick out. Up close, a clean hit leaves Zangief in prime mix-up position, while a countewr-hit (possible if the enemy stuck out a low poke or tried to dash) allows a link combo of standing 
 Double Lariat. (Beware, though—the Double Lariat will whiff against crouching characters outside of point-blank range, even during this counter-hit link.) If Knee Hammer is guarded, Zangief is left at -3, safe from all but the fastest reversals. But note that Knee Hammer isn’t a good poke on its own and will lose to just about any incoming poke that strikes Zangief’s midsection or above. It is most useful for its ability to make Zangief hop forward, but at close range, other poke options are better.
Flying Body Press  during forward jump
| Startup |
7 |
|---|---|
| Active |
7 |
| Recovery |
Till landing |
| Guard Level |
H |
| On Hit |
— |
| On Guard |
— |
| Cancel |
— |
| Damage |
100 |
| Stun |
150 |
| Meter Gain |
50/25 |
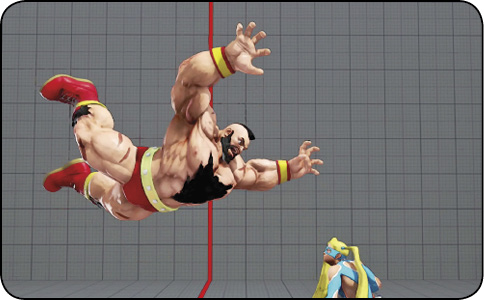
Flying Body Press: During a forward jump, Zangief splays his limbs and falls from the sky in a glorious “splash.” This classic Zangief move has an enormous jumping hitbox that easily crosses foes up high or deep, early or late. It’s the beefier counterpart to jumping , which also easily hits on both sides as a jump-in but causes much less hitstun/guardstun/hitstop.
Flying Body Press’s importance to Zangief is a little diminished in Street Fighter V since opponents can quick-rise from any knockdown, eliminating most opportunities you might have to place a really meaty, ambiguous Flying Body Press over them as they get up. However, against adversaries who don’t quick-recover every time, by all means abuse their wakeup by varying between cross-up Flying Body Press, jumping , or nothing at all. Hit high up on their bodies with jump-in , and you’ll be able to go for a throw immediately upon landing. However, you won’t be safe from invincible reversal attempts or be able to create airtight blockstrings. Hit deep into their bodies with Flying Body Press to create airtight blockstrings and combos on landing (see Combo 2 and Combo 3). If you “tick” with Flying Body Press, hesitate a bit before the throw. You can’t throw enemies within two frames of them leaving guardstun/hitstun, and you shouldn’t risk a throw whiff up close.