
Street Fighter V Guide Fighters Vega
Claw Unique Attacks
Mercury Shard 


| Startup |
22 |
|---|---|
| Active |
3 |
| Recovery |
13 |
| Guard Level |
H |
| On Hit |
±0 |
| On Guard |
-4 |
| STNC Hit |
— |
| STNC Guard |
— |
| Cancel |
— |
| Damage |
60 |
| Stun |
100 |
| Meter Gain |
30/15 |
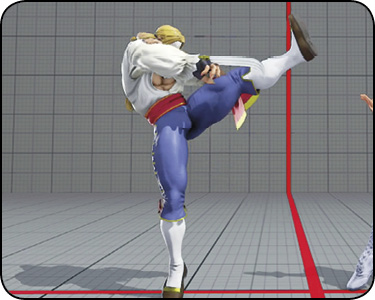
Mercury Shard: Vega performs a small hop, followed by a heel to the opponent’s head. Mercury Shard is Vega’s mid-range overhead attack. It must be blocked standing, and although it looks like Vega goes airborne before the actual strike, he’s considered grounded for the entirety of the move. If he’s interrupted, he’ll go into a grounded hitstun instead of being knocked into air recovery. Mercury Shard shares similarities with most other overhead attacks in SFV: it starts up at 22 frames and is -4 on block (just like Nash’s Chopping Assault and Rashid’s Beak Assault). However, Vega has an easier time landing his overhead because of the threat of both his crouching and crouching  in conjunction with his amazing walk speed.
It’s entirely blockable on reaction, so you’ll want to use Mercury Shard sparingly or if you feel like you’ve conditioned your opponent enough with your low-hitting crouching and slide attacks. Use Mercury Shard to either end the round or keep the enemy honest. Mixing up your high/low offense can be frustrating for your adversary to deal with, considering how fast Vega can walk in and out of range.
Buster Claw 
| Startup |
13 |
|---|---|
| Active |
4 |
| Recovery |
20 |
| Guard Level |
HL |
| On Hit |
-3 |
| On Guard |
-14 |
| STNC Hit |
— |
| STNC Guard |
— |
| Cancel |
— |
| Damage |
80 |
| Stun |
150 |
| Meter Gain |
50/25 |
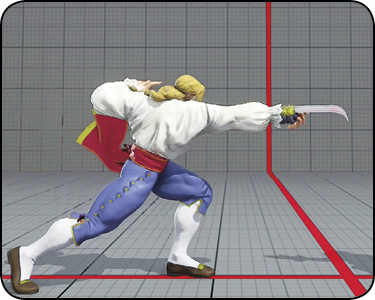
Buster Claw: Buster Claw is a unique far-reaching claw thrust executed by inputting . With its heavy-attack priority, it’s unlikely to lose to colliding medium and light attacks (unless they connect at the very tip of the claw, where there’s a hurtbox and no hitbox).
Buster Claw reaches from about forward jump distance—it will even reach the other character from the range at which you start a round. For instance, as soon as the round starts, if you input and your opponent doesn’t move backward, you’ll actually connect with Buster Claw.
It’s not without its drawbacks, though. On block, Buster Claw leads to a massive -13 disadvantage, making it punishable by most gap-closing special attacks and Critical Arts. You can make it safer by hitting with the tip, but this also opens you up to missing with it, which can be equally devastating because of its large hurtbox extension. Still, you’ll want to use it occasionally, especially to stop forward aggression from an opponent from past mid range. On counter-hit, it causes a Crush Counter, which you can capitalize on depending on Vega’s distance from the enemy (see Combo 16). While Buster Claw boasts an impressive range, its hurtbox extends significantly past its hitbox, making it vulnerable to whiff-punishes. Don’t be too predictable with it.
Reverse Claw 
| Startup |
10 |
|---|---|
| Active |
3 |
| Recovery |
22 |
| Guard Level |
HL |
| On Hit |
D |
| On Guard |
-10 |
| STNC Hit |
— |
| STNC Guard |
— |
| Cancel |
— |
| Damage |
60 |
| Stun |
80 |
| Meter Gain |
50/25 |
Matador Flash 
| Startup |
22 |
|---|---|
| Active |
2 |
| Recovery |
31 |
| Guard Level |
HL |
| On Hit |
D |
| On Guard |
-13 |
| STNC Hit |
— |
| STNC Guard |
— |
| Cancel |
— |
| Damage |
60 |
| Stun |
80 |
| Meter Gain |
V: 100/50 |
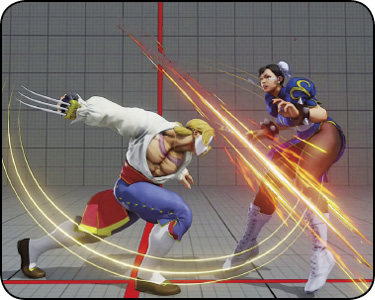
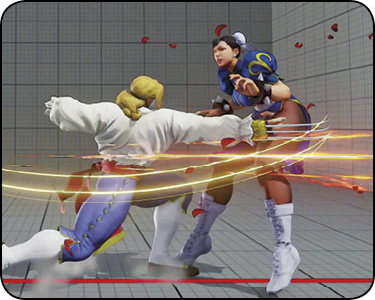
Reverse Claw/Matador Flash: Vega’s potential three-hit target combo initiated from standing . Reverse Claw is the second portion of the target combo canceled using a input. Vega performs an inverted slash with his claw that knocks down on hit. Matador Flash is the third and final portion of the sequence and can be executed by canceling Reverse Claw with either a or hold input.
It’s essentially a two-hit target combo with the option of tacking on either of his V-Skills (on hit only), so you can choose to go into the dodging taunt of Matador Turn or his dodging slash of Matador Turn Attack.
There’s a large window of cancelability between standing into Reverse Claw (24 frames during the initial standing hitstop), so you can vary your timing to throw off opponents. However, regardless of how late you cancel into Reverse Claw, you can’t create a blockstun gap so large that the enemy comes out of blockstun before Reverse Claw hits. For example, if you force the foe into blocking standing and then cancel into Reverse Claw on exactly the last frame while the opponent holds , they’ll still be able to block it. This variable timing is best used to confuse the enemy, disorienting them if they try to punish your initial standing .
In a vacuum, you should never use this target combo. However, in a real game scenario, you might get away with using it once in a while, especially if you’re employing standing frequently on its own or if you’re executing it at max hitbox distance. Standalone standing is also a decent frame trap tool that you can use up close or from range. Up close, it links into standing and crouching  on hit, so if you’ve been using it this way, you can start using the target combo to mix up your enemy’s natural reactions.
Reverse Claw, as its name implies, is only available with Vega’s claw equipped.
Wall Jump near wall while jumping
| Startup |
— |
|---|---|
| Active |
— |
| Recovery |
— |
| Guard Level |
— |
| On Hit |
— |
| On Guard |
— |
| STNC Hit |
— |
| STNC Guard |
— |
| Cancel |
— |
| Damage |
— |
| Stun |
— |
| Meter Gain |
— |
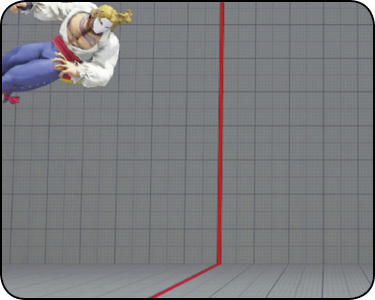
Wall Jump: Vega still has his Wall Jump from previous Street Fighter titles, performed with a input while backward jumping near a wall. You can use Wall Jump to change Vega’s trajectory while near a corner or if the opponent is a full screen away while Vega’s mid-stage. There’s a minimum height restriction at which you can cancel a backward jump into a forward jump; the earliest is on the 12th frame after inputting  against a wall. Furthermore, the altitude that Vega jumps from determines the duration and distance of the Wall Jump. The higher that Vega is when he wall jumps, the farther the jump will reach. For the most surprising jumps, aim to jump low to the ground. Vega will do a short hop, covering less distance, but it will have much more of a surprise factor against an unsuspecting enemy.
Use Wall Jumps to either escape the corner if you’re under pressure or as a jump-altering offensive measure. Your opponent may not be expecting it in the neutral game if you’re playing a runaway style and may become impatient chasing Vega down, running into an off-the-wall jumping . As long as you’re not too predictable with it, you shouldn’t get punished too often. However, since Vega isn’t as defense-based as he used to be in previous SF games, you probably won’t be using this maneuver too frequently.