Prima Games eGuides
primagames.com Browse Redeem a code Help
Game of Thrones eGuide
Sign in My Guides

Sign in or create an account

We'll email you a link. No password needed, and if you don't have an account yet, the link makes one.

By creating an account or signing in, you agree to our Terms of Service and Privacy Policy.

Have a password?

Had an account on the old eGuides site, or a code from a printed guide? Help and troubleshooting

Sign in with a password

By signing in, you agree to our Terms of Service and Privacy Policy.

Check your email

A sign-in link is on its way. It works once and expires in 15 minutes. Open it and you're in, with an account if you didn't already have one.

Contents

  • Essentials
    • The World of Westeros
      • Adventuring in Westeros
      • Combat Display
      • Combat
      • Options Menu
      • Achievements
      • Thrones and Bones
    • Mors Westford
      • Mors’s Story
      • Attributes
      • Classes
      • Stances
      • Skills
      • Traits
      • Warg Powers
      • Mors in Combat
    • Alester Sarwyck
      • Alester’s Story
      • Attributes
      • Classes
      • Stances
      • Skills
      • Traits
      • R’hllor Powers
      • Alester in Combat
    • Appendix Lists
      • Achievements
      • Companions
      • Equipment
      • Quests
      • Stances
      • Traits
  • Walkthrough
    • Chapter 1: For This Night, and All Nights to Come
      • Chapter 1: For This Night, and All Nights to Come - Castle Black
      • Chapter 1: For This Night, and All Nights to Come - Icemark
    • Chapter 2: For All the Days Gone By
      • Chapter 2: For All the Days Gone By - Riverspring
      • Chapter 2: For All the Days Gone By - Riverspring Godswood
      • Chapter 2: For All the Days Gone By - Riverspring Courtyard
      • Chapter 2: For All the Days Gone By - Riverspring
      • Chapter 2: For All the Days Gone By - Riverspring Castle
    • Chapter 3: Between a Hunter and His Prey
      • Chapter 3: Between a Hunter and His Prey - Icemark
      • Chapter 3: Between a Hunter and His Prey - The Gift
      • Chapter 3: Between a Hunter and His Prey - Castle Black Common Hall
    • Chapter 4: The Lion’s Will
      • Chapter 4: The Lion’s Will - King’s Landing
      • Chapter 4: The Lion’s Will - Sarwyck Manse
      • Chapter 4: The Lion’s Will - King’s Landing
      • Chapter 4: The Lion’s Will - Maegor’s Holdfast Dungeons
      • Chapter 4: The Lion’s Will - Red Keep
    • Chapter 5: Beauty and the Beast
      • Chapter 5: Beauty and the Beast - Castle Black
      • Chapter 5: Beauty and the Beast - Mole’s Town
      • Chapter 5: Beauty and the Beast - Mole’s Town Tunnels
      • Chapter 5: Beauty and the Beast - Mole’s Town
      • Chapter 5: Beauty and the Beast - Castle Black
    • Chapter 6: The Crown’s Dogs
      • Chapter 6: The Crown’s Dogs - Red Keep
      • Chapter 6: The Crown’s Dogs - King’s Landing
      • Chapter 6: The Crown’s Dogs - Hen House
      • Chapter 6: The Crown’s Dogs - Red Keep
    • Chapter 7: Stray Dog
      • Chapter 7: Stray Dog - Common Hall
      • Chapter 7: Stray Dog - Mole’s Town
      • Chapter 7: Stray Dog - Mole’s Town Tunnels
      • Chapter 7: Stray Dog - The Gift
      • Chapter 7: Stray Dog - Westford Cottage
    • Chapter 8: A New Hope
      • Chapter 8: A New Hope - King’s Landing
      • Chapter 8: A New Hope - King’s Landing Sewers
      • Chapter 8: A New Hope - King’s Landing
      • Chapter 8: A New Hope - City Watch Tower
      • Chapter 8: A New Hope - King’s Landing
      • Chapter 8: A New Hope - King’s Landing Sewers
      • Chapter 8: A New Hope - King’s Landing
      • Chapter 8: Legacy - Riverspring
      • Chapter 8: Legacy - Riverspring Castle
      • Chapter 8: Legacy - Riverspring Tunnels
      • Chapter 8: Legacy - Castlewood
    • Chapter 9: Promise
      • Chapter 9: Promise - Westford Cottage
      • Chapter 9: Promise - A Camp in the Woods
      • Chapter 9: Promise - Castlewood
      • Chapter 9: Promise - Castlewood Dungeon
    • Chapter 10: Crossroads
      • Chapter 10: Crossroads - Castlewood
      • Chapter 10: Crossroads - Castlewood Dungeon
      • Chapter 10: Crossroads - Castlewood Basement
      • Chapter 10: Crossroads - Castlewood
    • Chapter 11: Breaking Point
      • Chapter 11: Breaking Point - Riverspring
      • Chapter 11: Breaking Point - Riverspring Courtyard
      • Chapter 11: Breaking Point - Riverspring Castle
    • Chapter 12: Fight Fire with Fire
      • Chapter 12: Fight Fire with Fire - Riverspring Tunnels
      • Chapter 12: Fight Fire with Fire - Riverspring Castle
    • Chapter 13: Bound
      • Chapter 13: Bound - Riverspring
      • Chapter 13: Bound - Castlewood
      • Chapter 13: Bound - Riverspring Courtyard
    • Chapter 14: Light and Shadow
      • Chapter 14: Light and Shadow - King’s Landing
      • Chapter 14: Light and Shadow - King’s Landing Sewers
      • Chapter 14: Light and Shadow - Maegor’s Holdfast
      • Chapter 14: Light and Shadow - Red Keep
    • Chapter 15: Old Scar
      • Chapter 15: Old Scar - Westford Cottage
    • Final Chapter: Ice and Fire
      • Final Chapter: Ice and Fire - Red Keep
    • Epilogues
      • Alester’s Epilogue 1: “I will offer him to the queen in return for Riverspring.”
      • Alester’s Epilogue 2: “This child will live, in memory of Mors.”
      • Mors’s Epilogue 1: “I will care for him, for Jeyne’s sake...”
      • Mors’s Epilogue 2: “I will live and die at my post...at the Wall.”
    • Side Quests
      • The Faith of Our Ancestors
      • Their Watch Is Ending
      • Treasure Hunt
      • Silence in the Ranks
      • The Black Bloodhound
      • New Blood
      • Self-Made Girl
      • Blood on the Sand
      • Rings and Chains
      • Avenge Riverspring
      • The Maggot in the Apple
      • Safer Streets
      • Not So Wild
      • Rituals and Litanies

Game of Thrones Guide › Walkthrough › Chapter 5: Beauty and the Beast

Chapter 5: Beauty and the Beast - Mole’s Town

Mole’s Town

Click here for interactive maps

Take Jeyne To Castle Black

Objective Point A
View Map

Godric’s men find you outside the entrance to Mole’s Town. Patrek also gets caught up in the action, as Godric’s men attack him when he leaves the common room. (Walder passed out from too much drink, so he’s safe inside.) Together you must battle Godric’s men as they pile on you near the entrance. Patrek’s Devastation ability can pummel several enemies at once, while you and your dog can isolate and destroy single foes in seconds. If Patrek starts to get overwhelmed, break out his Upheaval attack to knock down the toughest attacker.

Companion Role Call: Patrek

Stats:

  • Strength: 8
  • Agility: 3
  • Luck: 4
  • Endurance: 6
  • Intelligence: 6

Class: Hedge Knight

Stance: Domination

Abilities: Death from Above, Devastation, Upheaval

Weapon of Choice: Rib-crusher (2H mace)

Description: Patrek joins your party after he gets attacked by Godric’s men outside Mole’s Town. Throughout the return trip through the forest between Mole’s Town and Castle Black, you can control Patrek during the battles. As a Hedge Knight, he can hit hard. Against single opponents, knock your foe down with Upheaval and follow up with a crushing Death from Above attack. Against groups of two or more, use Devastation to deal a moderate strike to all those in front of you. Patrek is a faithful companion who will get you home at all costs.

Objective Point B
View Map

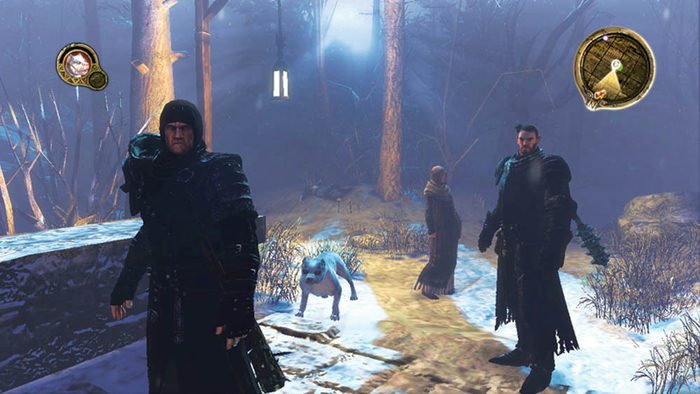
You can choose to fight each group of enemies you stumble across in the Mole’s Town forest, or you can use stealth and assassinate foes one by one with Dog. It’s advantageous to sneak up on foes and kill them with Dog as long as you can. The farther you get into the forest without the alarm going up, the better. Retrace the steps you took earlier to reach Mole’s Town. When you arrive at the first intersection, wait for the first enemy to pass and rip out his throat with a canine sneak attack.

Caution

If you choose to fight your way through all of Godric’s men, it could be suicide. Enemies can come from any direction and can easily overwhelm you.

Objective Point C
View Map

As Dog, patrol up the path slowly and search for the next enemy ahead in the darkness. Stop when you spot an enemy and watch his route as he walks along the paths. Position yourself in a good ambush spot, and when your foe walks by and shows his back to you, pounce on him and go for the throat.

Tip

You can spot enemies from afar by looking for their red health bars in the gloom.

Objective Point D
View Map

When you reach the outskirts of the enemy’s main camp, things get tricky. Several guards crisscross on patrol, and they will spot any group walking the paths. Only Dog can sneak through the defenses and pick off guards one by one.

Take out the guard on the left first. Sneak down the path and pass the wagon on your left. Stay close to the edge, away from the advancing guard on the path to your right, and look for a hole in the wall past the wagon. Duck through the hole and climb up the hill to get behind the guard. When you’re ready, charge the guard and kill him before he alerts anyone else. Return to your starting point at the camp outskirts without being seen.

Next, eliminate the middle guard. Wait until he walks up the path toward you, and when he turns his back, pounce on him. Be careful that the guard up on the hill to your right doesn’t spot your assassination attempt. After the middle guard falls, you have a clear path to the back of the hill. Move in, slip up the hill, and take out the last guard from behind.

Caution

There is one guard behind the stone wall at the back of the camp. It’s possible to avoid him if you don’t want an extra fight, or charge in with Mors and Patrek to overwhelm him quickly.

Objective Point E
View Map

Press on to the northwest corner of the main encampment. One of Godric’s men guards the door in the wall that leads to north section of the forest. Since he’s looking out with his back to the wall, it’s impossible for Dog to get him; better to charge with Mors and Patrek and gut him where he stands. If you’re quick enough, you can kill the guard, open the door, and dash inside before any other guards join the fight.

Objective Point F
View Map

You meet up with three brothers you assigned to the Gift before you left Castle Black. Theomar says they saw Godric race through earlier, and since then the three of them have been dodging Godric’s men in the area. You ask their assistance in exiting the forest.

Tip

If you use Dog to spy on Theomar and his two brothers before your whole party arrives, you can learn of their plans and attack the traitors before they lead you into the ambush.

Alas, the three brothers’ intentions are not honorable. They lead you a short distance into the forest and then pull their weapons on you. Godric offered them a hefty sum of coin to ambush you, and the three brothers took him up on the offer. It’s a Night’s Watch on Night’s Watch fight, and they’re all armed with decent weapons and medium armor. Switch to perforating weapons and hack away. If you, Patrek, and Dog all team up on a single foe, you will cut them down quicker than they can defeat you. Some of Godric’s men will participate as the ambush moves on, so it’s important to kill Theomar and the other brothers before the odds get too great.

Tip

You can learn of the treachery if you use Dog to listen to the conversation between Theomer and Godric's men. There is a small passage right of the door. If you go through the bushes with Dog, You can spy on them. If you do, Godric's men will not arrive as backup during the fight; you will fight them after you defeat the turned brothers.

Objective Point G
View Map

Scour the fallen bodies for loot before leaving the battlefield. Find the northern bridge, exit the forest, and return to Castle Black with more questions than answers lingering in your mind.

Keep reading with a free account

The first 3 sections of Game of Thrones are open to everyone. An account opens the rest of it, and every other guide in the archive. It's free, and there's nothing to buy.

Bought guides on the old Prima Games site? Your account and every guide you own moved here, so there's nothing to buy again. Sign in.

Create a free account Or browse our free guides

PreviousChapter 5: Beauty and the Beast - Mole’s Town Tunnels NextChapter 5: Beauty and the Beast - Castle Black