Prima Games eGuides
primagames.com Browse Redeem a code Help
Game of Thrones eGuide
Sign in My Guides

Sign in or create an account

We'll email you a link. No password needed, and if you don't have an account yet, the link makes one.

By creating an account or signing in, you agree to our Terms of Service and Privacy Policy.

Have a password?

Had an account on the old eGuides site, or a code from a printed guide? Help and troubleshooting

Sign in with a password

By signing in, you agree to our Terms of Service and Privacy Policy.

Check your email

A sign-in link is on its way. It works once and expires in 15 minutes. Open it and you're in, with an account if you didn't already have one.

Contents

  • Essentials
    • The World of Westeros
      • Adventuring in Westeros
      • Combat Display
      • Combat
      • Options Menu
      • Achievements
      • Thrones and Bones
    • Mors Westford
      • Mors’s Story
      • Attributes
      • Classes
      • Stances
      • Skills
      • Traits
      • Warg Powers
      • Mors in Combat
    • Alester Sarwyck
      • Alester’s Story
      • Attributes
      • Classes
      • Stances
      • Skills
      • Traits
      • R’hllor Powers
      • Alester in Combat
    • Appendix Lists
      • Achievements
      • Companions
      • Equipment
      • Quests
      • Stances
      • Traits
  • Walkthrough
    • Chapter 1: For This Night, and All Nights to Come
      • Chapter 1: For This Night, and All Nights to Come - Castle Black
      • Chapter 1: For This Night, and All Nights to Come - Icemark
    • Chapter 2: For All the Days Gone By
      • Chapter 2: For All the Days Gone By - Riverspring
      • Chapter 2: For All the Days Gone By - Riverspring Godswood
      • Chapter 2: For All the Days Gone By - Riverspring Courtyard
      • Chapter 2: For All the Days Gone By - Riverspring
      • Chapter 2: For All the Days Gone By - Riverspring Castle
    • Chapter 3: Between a Hunter and His Prey
      • Chapter 3: Between a Hunter and His Prey - Icemark
      • Chapter 3: Between a Hunter and His Prey - The Gift
      • Chapter 3: Between a Hunter and His Prey - Castle Black Common Hall
    • Chapter 4: The Lion’s Will
      • Chapter 4: The Lion’s Will - King’s Landing
      • Chapter 4: The Lion’s Will - Sarwyck Manse
      • Chapter 4: The Lion’s Will - King’s Landing
      • Chapter 4: The Lion’s Will - Maegor’s Holdfast Dungeons
      • Chapter 4: The Lion’s Will - Red Keep
    • Chapter 5: Beauty and the Beast
      • Chapter 5: Beauty and the Beast - Castle Black
      • Chapter 5: Beauty and the Beast - Mole’s Town
      • Chapter 5: Beauty and the Beast - Mole’s Town Tunnels
      • Chapter 5: Beauty and the Beast - Mole’s Town
      • Chapter 5: Beauty and the Beast - Castle Black
    • Chapter 6: The Crown’s Dogs
      • Chapter 6: The Crown’s Dogs - Red Keep
      • Chapter 6: The Crown’s Dogs - King’s Landing
      • Chapter 6: The Crown’s Dogs - Hen House
      • Chapter 6: The Crown’s Dogs - Red Keep
    • Chapter 7: Stray Dog
      • Chapter 7: Stray Dog - Common Hall
      • Chapter 7: Stray Dog - Mole’s Town
      • Chapter 7: Stray Dog - Mole’s Town Tunnels
      • Chapter 7: Stray Dog - The Gift
      • Chapter 7: Stray Dog - Westford Cottage
    • Chapter 8: A New Hope
      • Chapter 8: A New Hope - King’s Landing
      • Chapter 8: A New Hope - King’s Landing Sewers
      • Chapter 8: A New Hope - King’s Landing
      • Chapter 8: A New Hope - City Watch Tower
      • Chapter 8: A New Hope - King’s Landing
      • Chapter 8: A New Hope - King’s Landing Sewers
      • Chapter 8: A New Hope - King’s Landing
      • Chapter 8: Legacy - Riverspring
      • Chapter 8: Legacy - Riverspring Castle
      • Chapter 8: Legacy - Riverspring Tunnels
      • Chapter 8: Legacy - Castlewood
    • Chapter 9: Promise
      • Chapter 9: Promise - Westford Cottage
      • Chapter 9: Promise - A Camp in the Woods
      • Chapter 9: Promise - Castlewood
      • Chapter 9: Promise - Castlewood Dungeon
    • Chapter 10: Crossroads
      • Chapter 10: Crossroads - Castlewood
      • Chapter 10: Crossroads - Castlewood Dungeon
      • Chapter 10: Crossroads - Castlewood Basement
      • Chapter 10: Crossroads - Castlewood
    • Chapter 11: Breaking Point
      • Chapter 11: Breaking Point - Riverspring
      • Chapter 11: Breaking Point - Riverspring Courtyard
      • Chapter 11: Breaking Point - Riverspring Castle
    • Chapter 12: Fight Fire with Fire
      • Chapter 12: Fight Fire with Fire - Riverspring Tunnels
      • Chapter 12: Fight Fire with Fire - Riverspring Castle
    • Chapter 13: Bound
      • Chapter 13: Bound - Riverspring
      • Chapter 13: Bound - Castlewood
      • Chapter 13: Bound - Riverspring Courtyard
    • Chapter 14: Light and Shadow
      • Chapter 14: Light and Shadow - King’s Landing
      • Chapter 14: Light and Shadow - King’s Landing Sewers
      • Chapter 14: Light and Shadow - Maegor’s Holdfast
      • Chapter 14: Light and Shadow - Red Keep
    • Chapter 15: Old Scar
      • Chapter 15: Old Scar - Westford Cottage
    • Final Chapter: Ice and Fire
      • Final Chapter: Ice and Fire - Red Keep
    • Epilogues
      • Alester’s Epilogue 1: “I will offer him to the queen in return for Riverspring.”
      • Alester’s Epilogue 2: “This child will live, in memory of Mors.”
      • Mors’s Epilogue 1: “I will care for him, for Jeyne’s sake...”
      • Mors’s Epilogue 2: “I will live and die at my post...at the Wall.”
    • Side Quests
      • The Faith of Our Ancestors
      • Their Watch Is Ending
      • Treasure Hunt
      • Silence in the Ranks
      • The Black Bloodhound
      • New Blood
      • Self-Made Girl
      • Blood on the Sand
      • Rings and Chains
      • Avenge Riverspring
      • The Maggot in the Apple
      • Safer Streets
      • Not So Wild
      • Rituals and Litanies

Game of Thrones Guide › Essentials › Mors Westford

Stances

Depending on your starting class, you must choose Defense (Landed Knight), Domination (Hedge Knight), or Frenzy (Magnar) for your initial stance. At Level 7, you earn a secondary stance. You can choose Landed Knight’s secondary stance from Elite Knight, Domination, or Frenzy. Hedge Knight has access to Elite Knight, Defense, or Dexterity. Magnar can choose from Berserker, Domination, or Intensity.

Defense (Landed Knight Starting Stance)

Three-quarters of the skill tree concentrates on building up defense. The other quarter works in some attacks, generally focusing on disrupting your opponents’ actions. If you want to be the one who takes a pounding from the enemy, pick up this stance.

Domination (Hedge Knight Starting Stance)

Focused on a two-handed weapon, Domination loads up on abilities that inflict great damage with stunning and knockdown effects to complement the increased damage. There’s some defense here, but mostly in the form of “kill before they kill you.” If you want to wield the biggest weapons on the battlefield, Domination is a good place to start.

Frenzy (Magnar Starting Stance)

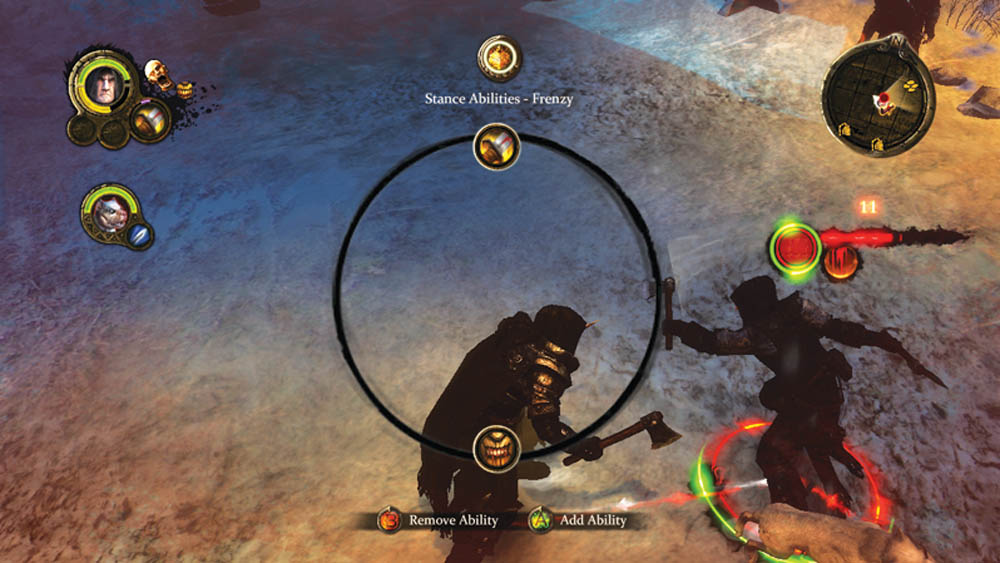
The Frenzy stance also focuses on offense, but it’s the two-handed variety and relies more on speed and precision than massive blows. Many abilities deal extra damage and trigger an effect (Bleeding, increased Attack Speed, stunning, etc.), but you have to set up a lot of combos, which takes valuable time in combat, or you risk going berserk and losing control of your character.

Berserker (Mastery)

Your incredible will and pain tolerance allows you to perform remarkable feats in combat. As you increase in proficiency, expect to improve combat damage, attack speed, and critical hit chance. You can also pick up a bonus to luck and energy.

Dexterity (Secondary Stance)

Your projectiles are deadly attacks at range. Because you would rather your enemies stay at a distance, you have various Immobilization and stun effects to make sure foes don’t close on you. If you like slinging arrows and causing carnage from the perimeter, the Dexterity stance is definitely for you.

Elite Knight (Mastery)

The ultimate training for a knight prepares your body for the difficult trials of combat. You can gain bonuses to health, energy, and endurance, or you can opt for a better health recovery and health replenishment per kill at the highest level. If you use a shield, you gain several improvements, or you can study how to punish foes with Bleeding.

Elite Warrior (Mastery)

The ultimate training for a warrior develops many of your other abilities. You can improve your damage resistance, strength, and energy. You can add extra effects to abilities such as Earthquaker (adds damage on top of stun) or Massacre (knocks down opponents instead). You can even choose to ignore the effects of Hemlock, Blindeye, and Manticore’s venom.

Intensity (Secondary Stance)

Your smooth and swift maneuvers set you up to counterattack with precision or capitalize on effects like knockdown and Bleeding. If you like to adjust on the fly and react to what the enemy throws at you, Intensity offers a lot for you.

Keep reading with a free account

The first 3 sections of Game of Thrones are open to everyone. An account opens the rest of it, and every other guide in the archive. It's free, and there's nothing to buy.

Bought guides on the old Prima Games site? Your account and every guide you own moved here, so there's nothing to buy again. Sign in.

Create a free account Or browse our free guides

PreviousClasses NextSkills