
Hyrule Warriors Legends Guide Warriors & Weapons
Impa
The Sheikah Tribesman, Impa, plays like a samurai straight out of feudal Japan. Speed, precision, and mass devastation are the traits she brings to battle. Wielding both a water-based Giant Blade and a fire-based Naginata, Impa has an elemental versatility that few other Warriors have, making her utility in every Scenario second only to Link’s. She wastes no time in defeating her enemies because her duty is, first and foremost, to protect Princess Zelda.
How to unlock
Impa is unlocked after completing “The Armies of Ruin” in Legend Mode.
Impa’s Weapons
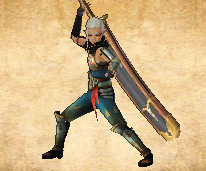
Giant Blade
Impa’s Giant Blade lives up to its name by being one of the larger weapons in the game. There are no tricks to this weapon, just incredible power, great range, and excellent speed. Her Giant Blade is also infused with the element of water, which means that enemies that hit with certain attacks take damage over time while there is water covering their head.
 Giant’s Knife
This is Impa’s starting weapon.
 Biggoron’s Knife
You can find this weapon in the Sealed Weapon in “Land of Myth” in Legend Mode.
 Biggoron’s Sword
You can find this weapon in Scenario G-6 of the Master Quest Map. You must first use an Item Card in the Search Screen to locate it, and then get an A-Rank to unlock the weapon.
Biggoron’s Sword +
You can find this weapon in Scenario C-7 of the Termina Map. You must first use an Item Card in the Search Screen to locate it, and then get an A-Rank to unlock the weapon.

Naginata
Compared to the Giant Blade, the Naginata might feel a bit unruly, but that doesn’t make it any less devastating. This weapon is strong and makes Impa highly mobile, as its moves propel her around the battlefield like an overly caffeinated harbinger of death. One of the best reasons to use this weapon is its Special Attack, which creates giant Naginata blades that draw foes in like a prison cage and then crash down on them, decimating any that are anywhere near the attack. It’s one of the best Special Attacks in the game, easily defeating 50+ foes and taking giant chunks out of the Health Bars of enemy Captains.
 Guardian Naginata
You can find this weapon in Scenario G-11 of the Adventure Map. You must first use an Item Card in the Search Screen to locate it, and then get an A-Rank to unlock the weapon.
 Scorching Naginata
You can find this weapon in Scenario G-14 of the Great Sea Map. You must first use an Item Card in the Search Screen to locate it, and then get an A-Rank to unlock the weapon.
 Sheikah Naginata
You can find this weapon in Scenario E-3 of the Master Quest Map. You must first use an Item Card in the Search Screen to locate it, and then get an A-Rank to unlock the weapon.
Sheikah Naginata +
You can find this weapon in Scenario G-8 of the Twilight Map. You must first use an Item Card in the Search Screen to locate it, and then get an A-Rank to unlock the weapon.
Impa’s Badges
Attack Badges
| Name | Description | Materials Required | Cost | |
|---|---|---|---|---|

|
Kokiri Sword I (Unlocks Din’s Fire I) | New Combo Attack for the Giant Blade: Regular Attack ×6 | Metal Plate ×1 | 100 |

|
Kokiri Sword II (Unlocks Stamina Fruit I) | New spin attack for the Giant Blade: Regular Attack x4, then press Combo Attack | Piece of Darknut Armor ×1, Metal Plate ×1 | 500 |

|
Kokiri Sword III (Unlocks Digging Mitts I) | New Combo Attack for the Giant Blade: Regular Attack ×7 | Goron Armor Breastplate ×1, Metal Plate ×1 | 1,000 |

|
Kokiri Sword IV | New Combo Attack for the Giant Blade: Regular Attack ×5, then press Combo Attack | ReDead Bandage ×1, Metal Plate ×1 | 3,000 |

|
Din’s Fire I (Unlocks Hover Boots I) | Makes the Special Attack gauge fill slightly faster. | Goron Armor Breastplate ×1, Metal Plate ×1 | 500 |

|
Din’s Fire II (Unlocks Fierce Deity’s Mask I) | Makes Special Attack gauge fill moderately faster. | ReDead Bandage ×1, Metal Plate ×1 | 1,000 |

|
Din’s Fire III | Makes the Special Attack gauge fill a lot faster. | Lana’s Cloak ×1, Wizzro’s Robe ×2, Big Poe’s Lantern ×2 | 3,000 |

|
Stamina Fruit I | Makes the Weak Point gauge diminish slightly quicker. | Big Poe Necklace ×1 | 500 |

|
Stamina Fruit II | Makes the Weak Point gauge diminish moderately quicker. | Lana’s Hair Clip ×1, Wizzro’s Robe ×1, Big Poe Necklace ×3 | 1,000 |

|
Stamina Fruit III | Makes the Weak Point gauge diminish a lot quicker. | Lana’s Cloak ×1, Wizzro’s Robe ×2, Big Poe’s Lantern ×2 | 3,000 |

|
Hover Boots I | Slightly lengthens the duration of Focus Spirit. | Big Poe Necklace ×2 | 500 |

|
Hover Boots II | Moderately lengthens the duration of Focus Spirit. | Lana’s Hair Clip ×1, Wizzro’s Robe ×1, Big Poe Necklace ×3 | 1,000 |

|
Hover Boots III | Greatly lengthens the duration of Focus Spirit. | Lana’s Cloak ×1, Wizzro’s Robe ×2, Big Poe’s Lantern ×2 | 3,000 |

|
Digging Mitts I | Allows the warrior to inflict minor damage to enemies with their guard up. | Big Poe Necklace ×3 | 2,000 |
|
|
Digging Mitts II | Allows the warrior to inflict moderate damage to enemies with their guard up. | Materials Needed:, Lana’s Hair Clip ×1, Wizzro’s Robe ×1, Big Poe Necklace ×3 | 3,000 |

|
Digging Mitts III | Allows the warrior to inflict heavy damage to enemies with their guard up. | Lana’s Cloak ×1, Wizzro’s Robe ×2, Big Poe’s Lantern ×2 | 5,000 |

|
Fierce Deity’s Mask I | Gives the warrior a second Special Attack gauge. | Stalmaster’s Wrist Bone ×1, Metal Plate ×1 | 2,000 |

|
Fierce Deity’s Mask II | Gives the warrior a third Special Attack gauge. | Lana’s Cloak ×1, Wizzro’s Robe ×2, Big Poe’s Lantern ×2 | 3,000 |

|
Wooden Sword I | New Combo Attack for the Naginata: Regular Attack ×1, then Combo Attack ×3. | Metal Plate ×1 | 100 |

|
Wooden Sword II | New Combo Attack for the Naginata: Regular Attack ×2, then Combo Attack ×3. | Fiery Aeralfos Leather ×1, Metal Plate ×1 | 500 |

|
Wooden Sword III | New Combo Attack for the Naginata: Regular Attack ×3, then Combo Attack ×3. | ReDead Bandage ×1, Metal Plate ×1 | 1,000 |

|
Wooden Sword IV | New Combo Attack for the Magic Rod: Regular Attack ×4, then Combo Attack ×1. | Shield-Moblin Helmet ×1, Metal Plate ×1 | 3,000 |
Defense Badges
| Name | Description | Materials Required | Cost | |
|---|---|---|---|---|

|
Empty Bottle I (Unlocks all other tier I badges in Link’s Defense Badge tree) | Allows a warrior to use a potion once per battle. | Old Rag ×1 | 100 |

|
Empty Bottle II (Unlocks Nayru’s Love I) | Allows a warrior to use a potion twice per battle. | ReDead Bandage ×1, Old Rag ×1 | 1,000 |

|
Empty Bottle III | Allows a warrior to use a potion three times per battle. | Wizzro’s Ring ×1, Lana’s Hair Clip ×2, Big Poe’s Lantern ×2 | 3,000 |

|
Hornet Larvae I | Slightly increases the healing effect from hearts picked up in battle. | Big Poe Necklace ×1 | 500 |

|
Hornet Larvae II | Moderately increases the healing effect from hearts picked up in battle. | Lana’s Hair Clip ×1, Wizzro’s Robe ×1, Big Poe Necklace ×3 | 1,000 |

|
Hornet Larvae III | Greatly increases the healing effect from hearts picked up in battle. | Wizzro’s Ring ×1, Lana’s Hair Clip ×2, Big Poe’s Lantern ×2 | 3,000 |

|
Goron Tunic I | Slightly reduces damage taken on fire-element-recommended stages. | Big Poe Necklace ×2 | 1,000 |

|
Goron Tunic II | Moderately reduces damage taken on fire-element-recommended stages. | Lana’s Hair Clip ×1, Wizzro’s Robe ×1, Big Poe Necklace ×3 | 3,000 |

|
Goron Tunic III | Greatly reduces damage taken on fire-element-recommended stages. | Wizzro’s Ring ×1, Lana’s Hair Clip ×2, Big Poe’s Lantern ×2 | 5,000 |

|
Zora Tunic I | Slightly reduces damage taken on water-element-recommended stages. | Big Poe Necklace ×2 | 1,000 |

|
Zora Tunic II | Moderately reduces damage taken on water-element-recommended stages. | Lana’s Hair Clip ×1, Wizzro’s Robe ×1, Big Poe Necklace ×3 | 3,000 |

|
Zora Tunic III | Greatly reduces damage taken on water-element-recommended stages. | Wizzro’s Ring ×1, Lana’s Hair Clip ×2, Big Poe’s Lantern ×2 | 5,000 |

|
Magic Armor I | Slightly reduces damage taken on lightning-element-recommended stages. | Big Poe Necklace ×2 | 1,000 |

|
Magic Armor II | Moderately reduces damage taken on lightning-element-recommended stages. | Lana’s Hair Clip ×1, Wizzro’s Robe ×1, Big Poe Necklace ×3 | 3,000 |

|
Magic Armor III | Greatly reduces damage taken on lightning-element-recommended stages. | Wizzro’s Ring ×1, Lana’s Hair Clip ×2, Big Poe’s Lantern ×2 | 5,000 |

|
Sacred Shield I | Slightly reduces damages taken on light-element-recommended stages. | Big Poe Necklace ×2 | 1,000 |

|
Sacred Shield II | Moderately reduces damage taken on light-element-recommended stages. | Lana’s Hair Clip ×1, Wizzro’s Robe ×1, Big Poe Necklace ×3 | 3,000 |

|
Sacred Shield III | Greatly reduces damage taken on light-element-recommended stages. | Wizzro’s Ring ×1, Lana’s Hair Clip ×2, Big Poe’s Lantern ×2 | 5,000 |

|
Mirror Shield I | Slightly reduces damage taken on darkness-element-recommended stages. | Big Poe Necklace ×2 | 1,000 |

|
Mirror Shield II | Moderately reduces damage taken on darkness-element-recommended stages. | Lana’s Hair Clip ×1, Wizzro’s Robe ×1, Big Poe Necklace ×3 | 3,000 |

|
Mirror Shield III | Greatly reduces damage taken on darkness-element-recommended stages. | Wizzro’s Ring ×1, Lana’s Hair Clip ×2, Big Poe’s Lantern ×2 | 5,000 |

|
Naryu’s Love I | Nullifies knock-back on the first hit taken from enemies. | Big Poe Necklace ×3 | 1,000 |

|
Nayru’s Love II | Nullifies knock-back on the first two hits taken from enemies. | Lana’s Hair Clip ×1, Wizzro’s Robe ×1, Big Poe Necklace ×3 | 3,000 |
|
|
Nayru’s Love III | Nullifies knock-back on the first three hits taken from enemies. | Wizzro’s Ring ×1, Lana’s Hair Clip ×2, Big Poe’s Lantern ×2 | 5,000 |
Assist Badges
| Name | Description | Materials Required | Cost | |
|---|---|---|---|---|

|
Farore’s Wind I (Unlocks Goron’s Bracelet I) | Slightly speeds up the process of taking keeps. | Monster Tooth ×1 | 500 |

|
Farore’s Wind II | Moderately speeds up the process of taking keeps. | Lana’s Hair Clip ×1, Wizzro’s Robe ×1, Big Poe Necklace ×3 | 1,000 |

|
Farore’s Wind III | Greatly speeds up the process of taking keeps. | Lana’s Cloak ×1, Lana’s Hair Clip ×2, Big Poe’s Lantern ×2 | 3,000 |

|
Goron’s Bracelet I (Unlocks Hawkeye I) | Slightly increases the duration of bomb power-ups. | Big Poe Necklace ×2 | 1,000 |

|
Goron’s Bracelet II | Greatly increases the duration of bomb power-ups. | Lana’s Cloak ×1, Lana’s Hair Clip ×2, Big Poe’s Lantern ×2 | 2,000 |

|
Hawkeye I (Unlocks Beetle I) | Slightly increases the duration of bow and arrows power-ups. | Big Poe Necklace ×2 | 1,000 |

|
Hawkeye II | Greatly increases the duration of bow and arrows power-ups. | Lana’s Cloak ×1, Lana’s Hair Clip ×2, Big Poe’s Lantern ×2 | 2,000 |

|
Beetle I (Unlocks Whip I) | Slightly increases the duration of boomerang power-ups. | Big Poe Necklace ×2 | 1,000 |

|
Beetle II | Greatly increases the duration of boomerang power-ups. | Lana’s Cloak ×1, Lana’s Hair Clip ×2, Big Poe’s Lantern ×2 | 2,000 |

|
Whip I (Unlocks Bug Net I) | Slightly increases the duration of Hookshot power-ups. | Big Poe Necklace ×2 | 1,000 |

|
Whip II | Greatly increases the duration of Hookshot power-ups. | Lana’s Cloak ×1, Lana’s Hair Clip ×2, Big Poe’s Lantern ×2 | 2,000 |

|
Bug Net I | Slightly increases the duration of hammer power-ups. | Big Poe Necklace ×2 | 1,000 |

|
Bug Net II | Greatly increases the duration of hammer power-ups. | Lana’s Cloak ×1, Lana’s Hair Clip ×2, Big Poe’s Lantern ×2 | 2,000 |
Impa’s Costumes
| Name | Location |
|---|---|
| Standard Outfit | This is Impa’s starting outfit. |
| Standard Outfit (Great Sea) | A-10 in the Great Sea Map; need to use Item Card. |
| Standard Outfit (Master Quest) | E-7 in the Master Quest Map; need to use Item Card. |
| Standard Outfit (Twilight) | B-11 in the Twilight Map; need to use Item Card. |
| Era of the Hero of Time Outfit | F-10 in the Termina Map; need to use Item Card. |
| Mask of Truth | A-11 in the Termina Map; need to use Item Card. |