
Hyrule Warriors Legends Guide Legend Mode
Boss Fight: King Dodongo First Fight
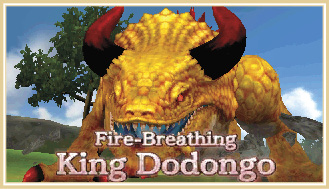
Legend of Zelda veterans will know this creature and its hatred of Bombs all too well. The giant lizard starts its path of destruction directly above the Central Keep. It swiftly conquers the Keep before making its way down to the Allied Base, destroying every Keep it comes across along the way.
Boss fights are all about speed in Hyrule Warriors. Letting a boss have its way with the battlefield for too long will have heavy consequences. If a boss enters the field, waste no time in attacking and defeating it.
Don’t hesitate to hit the boss with attacks until its Weak Point Mark is exposed; most attacks do little or no damage and can leave you vulnerable to a boss’s attack.
Skulltula OpportunityUnfortunately, you’ve likely crossed the 1,000 KO mark around the time you start this boss fight, which means your very first Gold Skulltula has appeared somewhere on the field. If you want to get the Skulltula, you’ll need to ignore the devastating Dodongo and head directly to the west side of the battlefield, above the Hyrule Castle Keep.. The Skulltula can be found skittering along the ground to the right of the Abandoned Keep’s southern entrance. Hit it to defeat it and earn your first puzzle piece. |
If you race directly to the Central Keep, you should have no problem catching the Dodongo before it destroys the Keep and moves on.
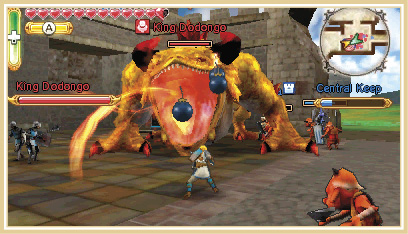
King Dodongo looks frightening, but if you know what you’re doing, you’ll make the fire-breathing behemoth look like a garden-variety lizard. Just wait for Dodongo to open its mouth and then throw a Bomb inside to get it to reveal its Weak Point Mark. The trick is knowing when Dodongo’s going to open its mouth and when it’s going to strike with another move. Just about any time the Dodongo breaths fire, it’ll follow up by opening its mouth to charge up a giant fireball to damage you. You know what to do at this point—toss that Bomb in its mouth and then let it feel the fury of your sword.
If King Dodongo stands up on its back legs, get a good distance away, as it’ll likely come crashing down, sending a shock wave in every direction. If it doesn’t crash down, then it’s going to roll directly toward you, This is a good deal easier to dodge if you’re alert. Roll to either the left or right so you are not directly in front of the Dodongo and you should be fine.
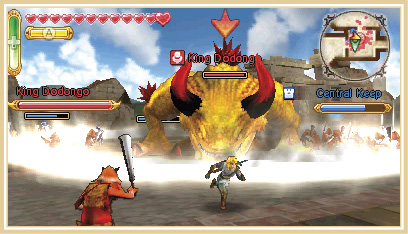
King Dodongo must also have aspirations of becoming a singer, as it likes to make powerful, shock wave-producing roar frequently. Before the Dodongo roars, it cocks its head back and to the side (use the above screenshot as a reference). This is your chance to race a good distance away from the monstrous reptile to avoid having your skull rattled and your eardrums . . . well, let’s just say they’ll be a lot less than functional. The roar is definitely one of Dodongo’s most powerful attacks, so avoiding it should be one of your highest priorities.
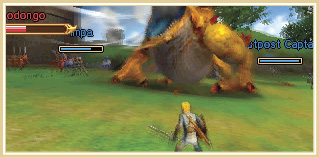
The last few moves King Dodongo can do are pretty easy to avoid if you know what’s coming. If you spend too much time in front of its front legs it’ll try and swat at you. If you spend too much time behind Dodongo, however, it’ll jump and spin around in the air to reposition itself to face you. Both moves are easy to dodge and the lizard king doesn’t use them often. Just stay on your toes and you’ll be able to avoid them with ease.
Hit the Dodongo monarch with three or four Weak Point Smashes and you’ll put the beast to bed, winning the Scenario in the process.
How Bazaar
You also have the ability to visit the Bazaar, a marketplace where you can buy potions and upgrade your Warriors’ weapons, levels, and abilities.
To get to the Bazaar press the R buttonat any time before selecting your Warrior and their weapon. This will lead you to the Bazaar screen which will have four options (though the Smithy will be closed for the time being). The different options are:
Badge Market: This is where you can purchase badges using both Rupees and Materials you’ve collected by defeating Captains. Here you’ll be able to upgrade various aspects of your Warrior, like the length of the Special Bar, how quickly you capture Keeps, and your resistance to certain elements. Be sure to check back here often and look through each of the different Badges to see what Materials are required. If you want to know where to find a specific Material, you can head to the Badges chapter of this guide and look through the Enemies section.
Training Dojo: This store is equipped for the extremely important purpose of leveling up your Warriors at the cost of Rupees. There is a catch, however: You can only level up your Warriors to the level of your highest Warrior. If Link is your strongest at Level 20, then you can only level your other Warriors to Level 20 as well. This is an excellent tool for keeping Warriors that don’t see a lot of action battle-ready.
Apothecary: For the price of Materials, you can purchase Potions that increase the drop rates of certain items for the duration of a single mission. A lot of the Potions affect the drop rates of weapons with specific properties such as more Weapon Skill Slots and Materials of higher rarity levels. If you find that you have an excess of a certain type of Material, you can use it to buy a Potion to ensure you gather better resources for the battles ahead.
Smithy: This is the store to go to if you want to make your weapons more powerful. If you have a weapon with high attack power, but no Weapon Skills in its Slots, you can take a weaker weapon with a Skill you want and fuse them together. All you need to do is select the weapon with an empty Slot that you want to strengthen, then select a weapon with the Skill you want and select Fuse Weapons. Simple!
Use these stores frequently and you’ll have Warriors that could even challenge the goddesses themselves.