
Hyrule Warriors Legends Guide Legend Mode
Shining Beacon: Valley of Seers
Playable Characters
Heart ContainerPiece of HeartGold Skulltula
Hard Mode Gold Skulltula
UnlockablesVictory ConditionsDefeat Cia. Defeat ConditionsIf Zelda flees. |





Cia’s Final Strike
With the Master Sword powered up and with Cia’s defeat at the Temple of Souls, the heroes now stand a fighting chance against the evil sorceress. And Cia is aware of this—and afraid. She found a way to strengthen her soldiers at the cost of her own lifeforce, a reckless and desperate move. The heroes decide to bring the fight to Cia once more in an attempt to bring a conclusion to this war. The time to finish Cia is now!
Because of Cia’s gambit, all of the enemies start this Scenario with a morale boost. Be careful and don’t let your guard down or you’ll be knocked out before you know what hit you.
Hard Gold Skulltula OpportunityTo get this Gold Skulltula, you must defeat Volga two or more times while keeping every one of your allies alive. That may sound simple, but believe us when we say, it’s not. You’ll be switching characters and running around the battlefield like a crazy person just trying to keep your allies alive. Your allies will eventually scatter across the battlefield, so pay close attention their Health Bars on the Battlefield Info screen to avoid being caught off guard. |
A Race to the Finish
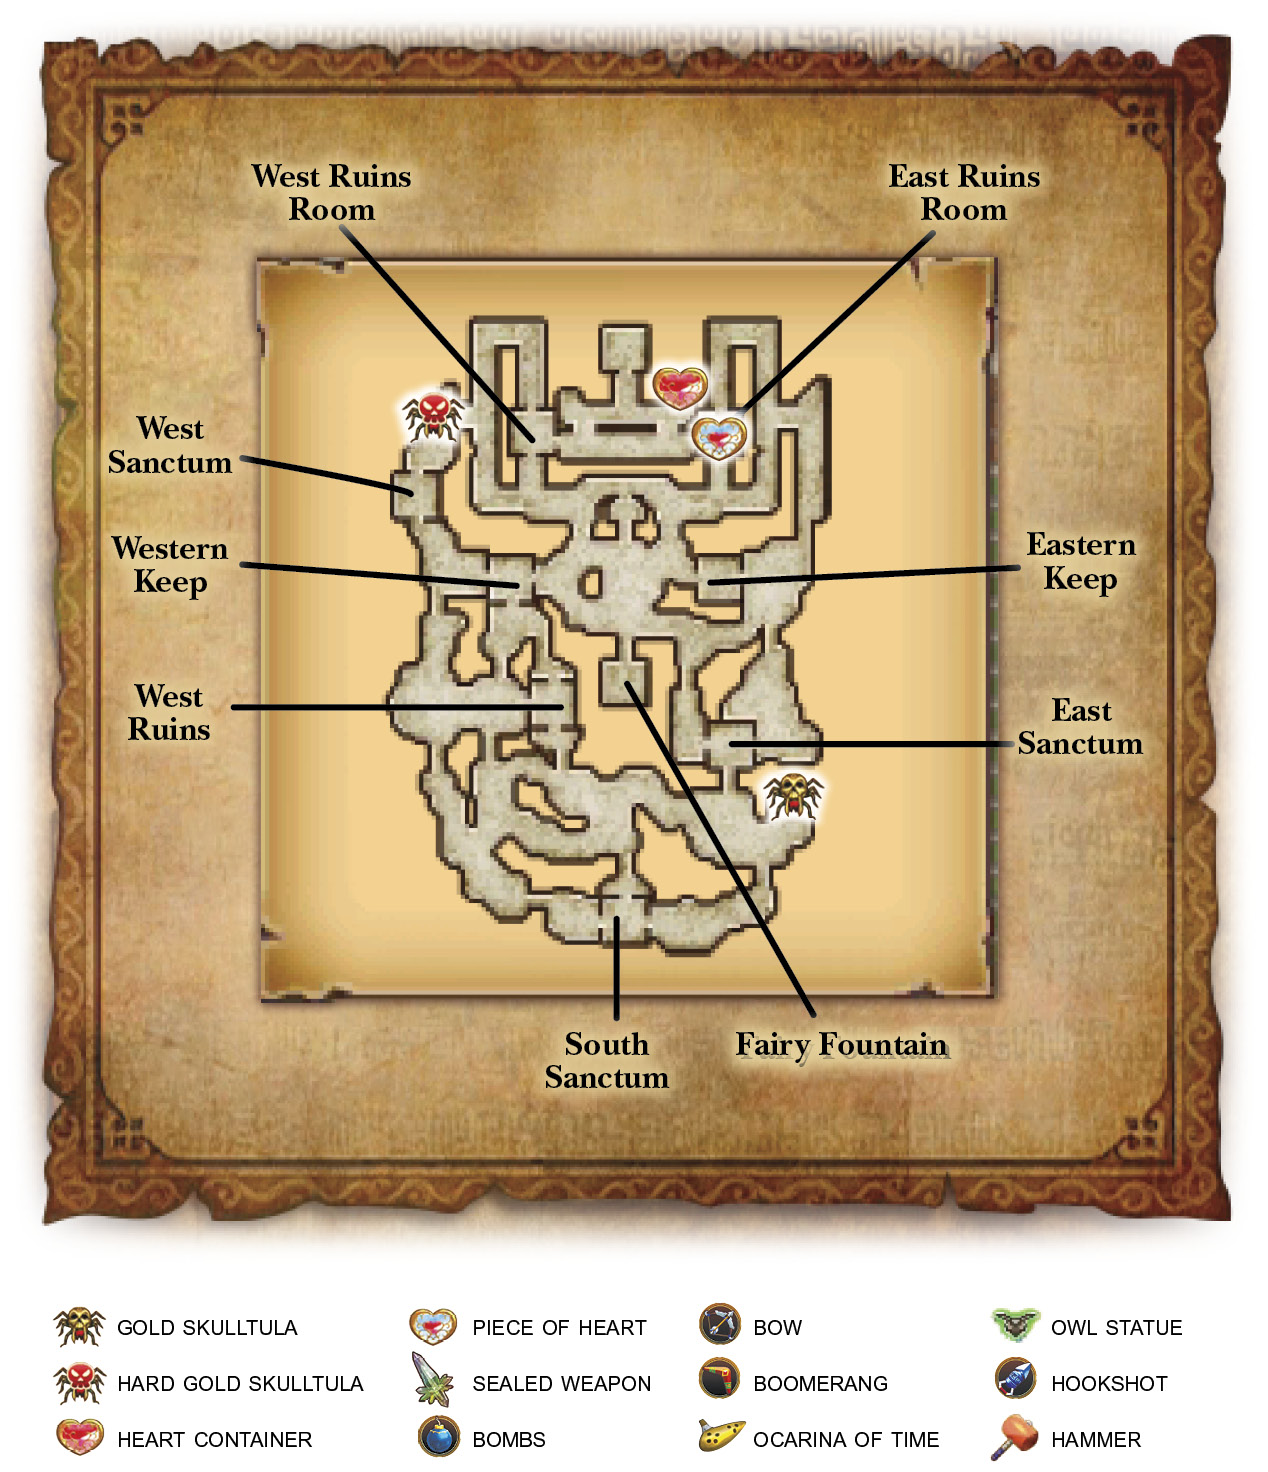
Start this Scenario by immediately racing to the West Ruins and capture it. There is a lull between the start of the Scenario and when you’re given your first mission; use that lull to gather as much of a foothold as possible. From the West Ruins, head north to the Western Keep and capture it as well, taking out any Captains you run into along the way.
Capture the Sanctums
By the time you reach the Western Keep you likely have your first mission: capturing the Sanctums. Cia’s army is empowered by the use of Sanctums hidden inside certain Keeps. These Sanctums project evil energy, which is making the enemy army stronger. You need to find three different Sanctums and capture the Keeps they are hiding in to cut off the flow of evil energy.
You must also pay very close attention to Zelda during this fight. She’s going to run off with Impa to a Sanctum on the east side of the battlefield. They can hold their own for a bit, but given the circumstances of the battle, they’re very likely end up in danger before long. Command Darunia or Lana to defend Zelda, and you can switch to them to lend her aid at a moment’s notice. Zelda is fine to deal with the lesser enemies, so don’t bother with them.
Start your Sanctum hunt by capturing the West Sanctum first, but only after you’ve captured the Western Keep. Fi will begin to migrate up to it, which you’ll want to keep in mind for future events. Once you’ve captured your first Sanctum, cut across the center of the map and take out any Captains you encounter. If all of your allies are in good health, move to capture the Eastern Keep. If they are not, race to their aid, but try to avoid capturing the East Sanctum. Defeat any Captains you see and heal your allies, but then make your way back to the Eastern Keep and capture it. This will help you maintain field control for the events ahead.
Probably, by the time you reach the center of the map, Cia will have ordered an enemy Captain to attack Zelda in the East Sanctum. The Captain has to move through the center of the battlefield, so you can intercept it if you’re still in the area.
Cia then orders an attack on Fi in the West Sanctum. You’ll have to race to the West Sanctum to assist Fi in defeating the Captains if you want to help her. Cia continues alternating between sending a Captain to attack Zelda and one to attack Fi until you have captured the remaining Sanctums, so waste no time in assisting your allies and capturing the Eastern Keep.
The South Sanctum
The two Sanctums have been captured, but Cia’s evil energy is still pouring over the battlefield. That means there is still a Sanctum remaining. Lana races off to locate the secret Sanctum, but you don’t have to wait until she finds it. The Sanctum is actually hidden in the abandoned Keep on the south end of the map. As soon as you step foot inside of the Keep, it fills with enemies and becomes the South Sanctum.
However, avoid capturing the South Sanctum Keep until you’ve conquered the rest of the map and located the 1,000 KO Gold Skulltula.
Gold Skulltula Opportunity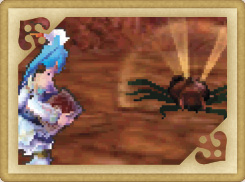 South and to the east of the East Sanctum Keep, you’ll find the Gold Skulltula hiding under a boulder. Destroy the boulder, then destroy the Skulltula to get your puzzle piece. |
Hook, Line, and Sinker
In a blind rage, Cia uses more of her lifeforce to summon reinforcements to the battlefield. Zelda has a plan to deal with this latest wave of enemies, but it requires the help of the Great Fairy. Zelda asks for an escort to the Great Fairy Fountain, but if you were successful in capturing the Keeps we listed earlier, she’ll have no problem getting to the Fairy Fountain on her own. Instead of escorting her, focus on clearing out the enemy Captains that just entered the field.
Zelda enters the Fairy Fountain, targets three enemy Captains on the field, and gives you explicit instructions to bring them to the center of the map, just above the Fairy Fountain. Head to each Captain marked on your map and approach them, but DO NOT ATTACK. A moment after you approach one, the Captain begins racing toward the center of the map—that’s a good thing. Let it leave while you head off to another targeted Captain.
Volga Strikes Back
After you finish luring two of the targeted Captains to the center of the map, Volga enters the fray from inside the ruins. Volga has become empowered by dark magic the way as he was during your time in Skyloft. He is incredibly dangerous and you should avoid him at all costs. Once he and the two Captains have entered the center of the map, race into the Fairy Fountain and activate it to deal massive damage to Cia’s forces and remove Volga’s dark powers.
Hard Gold Skulltula Opportunity Continued Don’t activate the Fairy Fountain if you’re looking to get the Hard Gold Skulltula for this stage. If you’ve protected your allies and kept them from fleeing, then you now only need to defeat Volga twice before the end of the battle to reveal the Gold Skulltula. Defeat him once before activating the Fairy Fountain and you’ll seal the deal. Volga must be defeated a second time for the Scenario to progress, so you’ll get both of your fights in with no problem. Because he’s powered up, the usual tactics won’t work on Volga. You must focus on baiting the Dragon Knight and using stick-and-move tactics to beat him this time around. He doesn’t get staggered by your attacks while he’s powered up, so be very careful about how you attack him; he will very quickly punish you for your hubris. Once you’ve defeated him, wait for him to reenter the center of the map, then head into the Fairy Fountain and activate the Magic Circle. |
Zelda tries to reason with Volga, believing that he is an honorable warrior and opponent. Volga hears what Zelda has to say and vows to change his ways, but demands one last fight with Link to see if he and the Hero truly match each other in power. Accept his challenge and battle with the Dragon Knight one last time to show him what a true hero is made of.
Hard Gold Skulltula Opportunity ContinuedAfter you defeat Volga, the Skulltula appears just above the West Sanctum Keep. Find and claim your prize; you’ve certainly earned it. |
Cia’s Last Resort
Out of options, Cia decides to challenge the heroes herself. The front gate of the ruins opens, giving you a direct path to her room at the top of the structure. Cia also summons clones of herself to guard the nearby Keeps. Defeat these clones on your way to Cia’s stronghold.
Piece of Heart OpportunityCapture the East Ruins Room Keep as Midna to reveal a chest containing a Piece of Heart. Open the chest and then it’s yours for the taking. |
Heart Container OpportunityTo the right of the entrance to Cia’s room is a boulder concealing a treasure chest. If you open the treasure chest as Link, you’ll find a Heart Container with his name on it. |
Face each Cia with the usual method of bringing your guard up to bait her into attacking. Defeat all of the Cias to finish her off once and for all and bring this battle to a close.
Maybe now Hyrule can finally rest in piece.