
Hyrule Warriors Legends Guide Adventure Mode
How It Works
Adventure Mode makes up the meat of the Hyrule Warriors experience with a whopping 500+ Scenarios to play through. There are a ton of unlockables including Heart Containers, Weapons, new Warriors, and even new Adventure Mode maps. We have a breakdown of each Scenario, what unlockables you’ll find, and how to obtain them. Read on to get the most out of your time with this game mode.
In Adventure Mode, you have the freedom to choose whichever Scenario you’d like to play as long as you unlock it first. To unlock new Scenarios, you have to obtain the Rank listed for that Scenario. What is a Rank, you ask? It’s the way by which your performance in an Adventure Mode Scenario is judged. All Adventure Mode Scenarios judge you by how quickly you complete a Scenario and how little damage you take—there are also plenty of other Scenarios that also take into account how many enemies you defeated as well. Depending on how well you did, you receive either an A-, B-, or C-Rank. If you receive the Rank listed on an Adventure Mode world map or better, the next Scenario will open up for you.
Item Cards
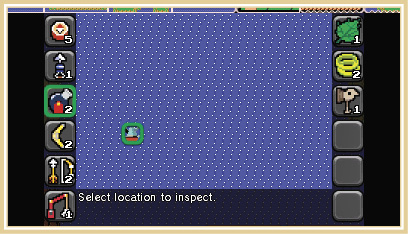
There is one more element barring your acquisition of unlockables in Adventure Mode: Item Cards. Item Cards are found as Battle Victory rewards for a large portion of the Scenarios in Adventure Mode. They are used to reveal unlockables and paths to certain Scenarios that aren’t unlocked by Rank alone. To use an Item Card, you must first go to the Search Screen by pressing the X button while on the World Map screen. There are many different Item Cards and each one has a specific element it can interact with to reveal an unlockable.
When you bring up the Search Screen, you can select from one of your acquired Item Cards to use on an element in the screen. However, you can’t just use any Item Card on anything you want; you need to look closely at the Search Screen for any abnormalities and select the Item Card that works to remove it.
Here’s a breakdown of all the Item Cards that can be found in the Adventure Map and what they do:
 Compass
Use this while searching to identify where an Item Card can be used.
 Power Bracelet
Use this on heavy rocks or tombstones to uncover hidden stairways.
 Raft
Raft
Use this on piers to cross to the opposite shore.
 Bombs
Bombs
Use this on walls to uncover hidden caves.
 Water Bombs
Use this on submerged rocks to destroy them.
 Hookshot
Use this on distant targets to pull yourself toward them.
 Candle
The Candle is used to burn bushes to reveal hidden stairways.
 Digging Mitts
Use these on soft earth to uncover hidden stairways. X marks the spot!
 Recorder
Use this on a small body of water to reveal secrets and enemies.
 Ladder
The Ladder is used to move across a single space of water.
 Ice Arrow
Use this on circles of flame to uncover hidden stairways.
 Goddess’s Harp
Use it on Goddess Butterflies to make enemies appear.
Unlockables
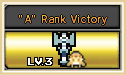
Ranks aren’t just how you unlock new Scenarios; they also unlock new weapons, Warriors, Pieces of Heart, and Heart Containers. If an item appears in the “A” Rank Victory tab in the top-left corner of the map screen, then you have to meet the A-Rank requirements listed for that Scenario in order to obtain it.
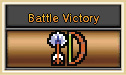
Getting A-Ranks is one of the hardest things to do in Hyrule Warriors, so you’ll be happy to know that it’s not the only way to obtain new unlockables. If an item appears under the Battle Victory tab on the top of the Adventure Mode map screen, it means you simply need to complete the Scenario in order to obtain it.
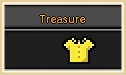
If you see any items appear under the Treasure tab on the top right of the Adventure Mode map screen, it means the item in question is found in a treasure chest or around the map in the Scenario itself. You can find how to obtain those items in each of the Scenario strategies below.
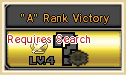
One thing that is important to note: Some of the unlockables will have either a darkened character icon or just a black circle with a question mark in it. If you see the black circle with a question mark, it means that the unlockable is for a Warrior you have yet to unlock. If you see a large question mark next to a darkened character icon, it means you need to use an Item Card on the Search Screen to reveal the reward.
Gold Skulltulas
The Adventure Mode Skulltulas all follow a very distinct pattern in terms of the locations they appear in. They are either at the center of the web that appears on the map, or they are at a location within the web that requires an item (usually this location is fairly obvious, such as a cliff that requires a Hookshot that serves no other purpose within the game aside from housing a Skulltula). In addition, the closer you get to a Skulltula, the louder the Skulltula’s scuttling will get. If you keep these things in mind while searching you should have little trouble finding all the Skulltulas before they disappear.
To get the first Skulltula in every Adventure Mode Scenario, you need to defeat 1,000 enemies. To get the second Gold Skulltula to appear, you need to defeat the Scenario’s first Gold Skulltula, complete the Scenario once, then play it a second time. Open up the “Warrior Info” screen on the pause menu to check the requirements for the second Skulltula. You will always need to get 1,200 KOs without taking four or more full Hearts of damage, then complete an additional task to reveal the second Gold Skulltula.
Scenario Types
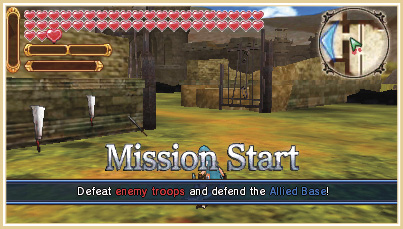
Scenarios in Adventure Mode differ greatly from Scenarios in Legend Mode. Legend Mode Scenarios follow a pretty strict mission-based path, whereas most Adventure Mode Scenarios have only a single mission and handful of smaller sub-missions to complete. An even greater difference is that there is a wide variety of Scenario types that are almost entirely different from anything you see in Legend Mode.
Below is a list of the different Scenario categories.
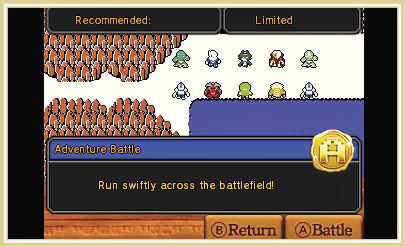
Adventure Battles
These Adventure Mode Scenarios are the closest you’ll get to Scenarios in Legend Mode. They give you access to a full battlefield, just like Legend Mode, and have a Commander waiting to fight you at the end of the Scenario. Adventure Battle Scenarios typically have only one major mission that you have to complete to gain access to the enemy Commander. They often play out like short versions of Legend Mode Scenarios, so these will certainly feel the most familiar to you.
Dungeon Scenarios
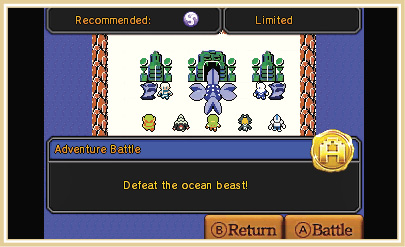
While Dungeon Scenarios are technically Adventure Battles, they have enough differences to give them their own description. Just about every one of these Scenarios contains an exclusive Item Card that is needed to progress in Adventure Mode, so completing each Dungeon is absolutely important. All Dungeons end with a Giant Boss fight that can only be accessed after you find a Boss Key somewhere on the battlefield. Longtime fans of the Legend of Zelda series will likely feel right at home in these Scenarios.
Challenge Battles
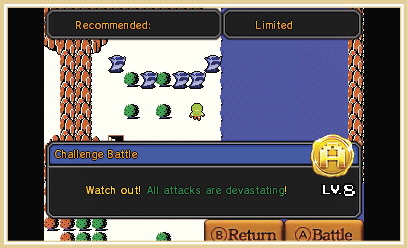
Challenge Battles are where Adventure Mode really distinguishes itself from Legend Mode. Challenge Battles usually task you with one simple mission that is anything but simple to complete. Some require you to defeat a certain number of Giant Bosses within a specific amount of time, avoid taking any damage, or even take part in a quiz. These Scenarios tend to be very short, but are often incredibly challenging—some of them are the toughest Scenarios in the game. These Challenge Battles require skill, speed, and cleverness to succeed.
Challenge Battle Mission Types
As we mentioned, Challenge Battles generally have a singular mission that you must complete in order to win. These missions range from no-brainers to hair-pullers. Here are all of the Challenge Battle mission types in Adventure Mode.
Defeat all enemies!
“Defeat all Enemies!” Scenarios are incredibly straightforward. If you’ve done Quiz and “Defeat x enemies in time!” Scenarios, you’re pretty much prepared for what these ones throw at you. Your job is to fight two or more Captains/Warriors/Bosses at the same time, defeat them, and then move on to another Keep to fight a new set of Captains/Warriors/Bosses. Avoid taking too much damage and defeat the enemies swiftly to walk out of these battles with an A-Rank.
Defeat all Giant Bosses in time!
“Defeat all Giant Bosses in time!” Scenarios require you to do just that: defeat all giant bosses on the map within the time limit. These Scenarios almost always consist of two or three of the same Giant Boss attacking different corners of a confined map at once. Select your strongest Warrior and challenge the Giant Bosses one at a time to avoid a chaotic fight. Just try to divide up your time evenly for each of the bosses. If you notice that it’s taking more than half of your time for any monster, quit the Scenario, level up your character, and try again. If that still doesn’t cut it, unlock some of the stronger Weapons in Adventure Mode and return at a later time.
Defeat x enemies in time!
This is one of the more straightforward Scenario types in Adventure Mode. Defeat the listed number of enemies in the given amount of time to win. Oftentimes with “Defeat x enemies in time!” stages, defeating Captains or Giant Bosses can cause hordes of small enemies to appear. This can be a benefit in the end. Don’t linger on individual enemies and do your best to ignore enemy Warriors, Captains, and Bosses; they are only there to distract you from your goal. Enemy Warriors and Captains boost the morale of the enemy troops currently in the battlefield. Defeating them will remove the morale boost and also cause a large group of smaller enemies to appear.
Fight through the ___ quiz!
“Quizzes” are Scenarios where you have to answer three questions about a specific Zelda title or element in Hyrule Warriors Legends. The questions are always answered by defeating the enemy that matches the description. For example: a question could say, “Defeat the enemy that holds a shield.” Two enemies appear: a Big Poe and a Shield Moblin. Just defeat the enemy holding the shield to successfully answer the question. It’s that easy. Just be careful not to defeat the wrong enemy while fighting the right one and you’ll have no issues with these challenges.
Watch out! All attacks are devastating!
“Watch Out!” Scenarios can get pretty hairy if you don’t, well… watch out! Any enemy in these battles—even the basic soldier—can take you down to a quarter heart in a single hit. Basically, you can take two hits before you fail the Scenario. Luckily, these are incredibly straightforward fights, working similarly to the Defeat all enemies! Scenarios. Your goal is to defeat a certain number of Captains in order to complete the Scenario. Your best bet is to stick to ranged weapons and use your Bow and Arrow Item frequently. Attack your way into groups of enemies, instead of running through them, to avoid any wayward strikes from lesser enemies, and don’t linger near enemies for even a moment. One strike is all it takes to get your health down to nothing, so don’t give your enemies the chance! If you do take a hit, try to find a Heart Pot as soon as possible. If you have more than a quarter Heart, you can always take two hits before keeling over. The “Hard Worker” Fairy Rental Skill is a massive boon for these stages, so use it if you have it.
Put an end to the enemy’s divisive plan!
This is a simple Scenario that involves you fighting a single Warrior that creates multiple versions of itself every time it’s defeated. There isn’t much to these Scenarios other than defeating the Warrior and its clone. These are great Scenarios to gather Materials from the Warrior you must face, so keep that in mind going in.
Learn the key to a balanced attack!
Defeat enemy Warriors and Captains in pairs to complete this mission type. Every Warrior or Captain that appears on the field has a twin or triplet that you must also defeat. Sounds easy, right? Well, there’s a bit more to it than that. You need to defeat these twins and triplets at roughly to same time. To do that, you just need to damage each of the enemies in equal parts. If you hit one enemy Captain or Warrior three times, make sure you hit their counterparts the same amount. If you hit one enemy too many times while ignoring its twin, the healthy twin refills the wounded twin’s health entirely. If you damage them both equally, the pair is too wounded to heal each other, which means you can finish them both off at your leisure.
Repeat this process with each of the groups of enemy Warriors and Captains to win!
Team up and defeat the enemy forces!
At the start of these Scenarios you are tasked with selecting a teammate. You accomplish this by entering the marked Keep where they are housed. The Warrior you didn’t select becomes your enemy for the duration of the Scenario. Your objective is to protect your teammate and defeat the enemy commanders. The enemy commanders can summon more enemies and also call upon Giant Bosses to attack you. Make the commanders your priority. After choosing your teammate, two enemy Warriors appear. Defeating one makes the other one join you. After that, you are tasked with defeating the Warriors that didn’t join you.
Defeat x enemies before the Rogue Forces do!
Same as “defeat x enemies” missions, but in this one you’re racing against other Warriors to defeat the set number of enemies first. You can knock-out the opposing Warriors to slow them down, but they’ll go back to fighting shortly after you knock them out, so unless you’re really struggling to keep up with your opponents, ignore them and focus on taking out the small enemies. Fairy Magic attacks work wonderfully well on these stages.
Win the Rupee competition
This is a deceptively challenging mission type. Your goal is to gather more Rupees than your opponents by defeating enemies scattered around the battlefield. The stronger the enemy, the more Rupees you’ll gather upon their defeat. Rupee Captains and Fairy Hunters will appear from time to time, which will give you a nice boost in Rupees; make sure to chase them down above all else to prevent your opponents from claiming them for themselves. Fairy Hunters carry Rupee Fairies, which will temporarily boost your Rupee intake, while Rupee Captains just drop a large amount of Rupees upon their defeat.
As your opponents gather Rupees, they call in reinforcements, making it easier for them to gather their own Rupees while stifling your gathering progress. Ignore the enemy as much as possible except to follow their movements on the map. They always drop everything to defeat Fairy Hunters and Rupee Captains, so if they’re running, you know that one of those two Captains is on the field.
Win the KO competition
Like the “Defeat x enemies before the Rogue Forces do!” levels, this level type has you trying to defeat enemies faster than your opponents, but with a major difference: You’re racing to have more enemies defeated than your opponents at the end of the time limit. These levels get incredibly intense and even the strongest Warrior will struggle to keep up with the Rogue Forces. Always keep a Rogue Forces Captain or Warrior near you. Doing so slows their progress as they focus on defeating you instead of the smaller enemies. Defeating Captains is must during these levels, as they will drop Magic Jars and spawn more small enemies. Use your Focus ability as often as possible, attack furiously, and don’t end it prematurely. Pick up Magic Jars to extend your Focus Gauge and fight, fight, fight!
Rack up your KO count
This level type is just like the “Win the KO competition,” but without the competition. Things are much tamer in these levels, but you must still go absolutely nuts on all of the enemies if you want to reach an A-Rank. Defeating a Giant Boss spawns more small enemies, and using your Focus Spirit and Fairy Companion helps you rack up KOs as fast as possible. Bring your strongest Warrior and go to town!
Guard Allied Keeps with your life!
There are four keeps in these Scenarios that have next to no health. Your job is to defeat a specific number of Captains on the battlefield while defending these four Keeps. Bringing the “Repair Technician” Fairy Rental Skill with you makes these Scenarios a whole lot easier, so make a point to do so. These battles are some of the most intense in the game and will have you running like you’re on fire to protect Keep after Keep after Keep.
Sub-Mission Types
Here’s a list of all of the sub-missions during Adventure Battles and Dungeon Scenarios, as well as a brief strategy on how to deal with them. Refer to this section during your Adventure Battles or Dungeon Scenarios whenever a sub-mission pops up to get the lowdown on how to prevail.
A Cucco has appeared on the battlefield
A Cucco appears on the battlefield after a short while and begins following you around. Avoid attacking this one to the best of your abilities. It starts off as a neutral creature, but will call in a regiment of Cuccos to fight you if you attack it too much. Having to challenge so much perilous poultry makes getting an A-Rank much harder.
A faction of enemy forces is advancing
Enemies begin marching their way toward your Commander. The enemy forces will also march toward another objective on the battlefield or toward the Allied Base. You must stop what you’re doing and take them out. If they defeat your Commander or take the Allied Base, you will lose the battle.
A Recon Soldier has entered the battlefield
At some point during the battle a Recon Soldier appears and begins combing the field for your current Playable Warrior. Shortly after reaching your Warrior, the Recon Warrior will summon reinforcements to the battlefield. The reinforcements aren’t much of a challenge, so don’t worry about the Recon Soldier.
Ambush!
Enemy troops appear in Allied keeps across the map. Either swiftly wrap up the mission, or head to each one and clear them out.
An Escort Soldier appeared on the battlefield
An Escort Soldier appears somewhere on the battlefield. Its goal is the enemy Commander. If it’s able to reach the Commander, it gives the enemy forces a morale boost. Stop it if you don’t think you can defeat the Commander before it reaches him or her.
Barrier Specialists have appeared on the battlefield
Barrier Specialists appear on separate points of the battlefield and swiftly begin making their way to keeps on the map. If they are allowed to sit in a keep for too long, they capture it and put up an elemental Barrier. Take these enemies down quickly.
Convince ____ to join you
A group of Captains appears on the map. If you reach them, they join your team. Make a point to get to them as swiftly as possible to prevent them from being defeated by the enemy army, or yours. All you need to do is approach it and it will join your side of the conflict.
Stop the Bombchu from destroying the keep
A Bombchu appears on the battlefield and begins making its way toward an allied Keep. Destroy it before it can self-destruct, or you’ll instantly lose a Keep. If a Bombchu detonates inside the Allied Base, the battle will be lost.
Defeat enemy forces to inspire yours
Defeat enemy troops to give your Allied troops a morale boost. The more enemies you defeat, the more troops you have with boosted morale.
Defeat the Fortifier Captains
Shortly after the Scenario begins, Fortifier Captains enter the battlefield. Take them out immediately or else they fortify any keeps they come across, which makes it a royal pain to capture them.
Defeat the Gold Cucco
An enemy Cucco appears on the battlefield almost immediately after the Scenario starts and begins eating everywhere it goes. As it eats, it grows more and more powerful. Make a point to defeat the Gold Cucco as soon as possible to keep it from growing stronger and causing you unnecessary problems.
Defeat the Healers
Two Healers enter the battlefield. They roam around the map, healing any of their allies that need it. To prevent this from happening, you must hunt down the Healers and defeat them.
Defeat the Hylian Ghost
A Hylian Ghost appears on the battlefield and places a curse on you. This curse can involve one of the following:
• Reduced health
• Reduced Rupees
• Destroyed replenishment items
• Retreat of an allied faction
• Lowered morale for an allied faction
Defeat the Hylian Ghost to break the curse!
Defeat the Item Transporter and take the treasure.
An Item Transporter enemy Captain appears on the battlefield. These enemies drop Weapons and Materials when defeated. Use the Battlefield Info screen to locate them on the battlefield.
Defeat the Manhandla Stalks
Manhandla Stalks appear and begin launching seeds at you or the Allied Base. Don’t delay: Look for their location on the Battlefield Info screen and take them out immediately to stop the attack.
Defeat the Messengers before they call in reinforcements
Messengers will appear on the field and attempt to make it to a Keep or one of their allied units somewhere on the battlefield. Defeat them before they reach their destination to prevent them from calling in enemy reinforcements.
Defeat the Rally Captain
During the battle, a Rally Captain will enter the field. Rally Captains boost the morale of enemy troops, so taking them out swiftly should be high on your priority list.
Defeat the real Magic Thief to get your magic back
Shortly after the battle begins, a Magic Thief begins making its way toward you. If it hits you with a single attack, it steals all of your Magic gauge energy, teleports to another part of the map, and splits into two. You must defeat the real Magic Thief to get your Magic gauge energy back. If you defeat the fake Magic Thief, the real one begins to leave the battlefield, meaning you’ll have to race over and defeat it if you want your Magic gauge refilled.
Defeat the Scout Captain before Scout Troops can be called
A Scout Captain enters the field while you’re working on your mission. If the Scout Captain is left to his own devices, he calls in Scout Troops to aid in the fight. To stop this from happening, race to the Scout Captain and defeat it swiftly.
Defeat the Siege Captains
Siege Captains begin pouring out of enemy keeps. They have the ability to capture your keeps at a remarkable pace. That’s why taking them out as they appear on the battlefield should be near the top of your list; the top should be capturing those keeps to stem the flow of Siege Captains.
Defeat the Summoner immediately
At some point during the battle, a Summoner enters the battlefield. It has the ability to summon enemy soldiers directly to your location. If you’re not struggling to defeat the soldiers it’s summoning, don’t worry about rushing over to take out the Summoner. In some cases, having the extra enemies appear around you will make getting the A-Rank for that Scenario easier.
Defeat the two Cuccos
Two Cuccos enter the battlefield and begin battling it out. If you want to keep them from hurting your troops and damaging your keeps, head to their location and break up the fight by defeating them. If they are left uninterrupted, the winner takes over whatever keep they were fighting in and begin to create Cucco troops that move out and attack both your forces and enemy troops. This repeats until you defeat them or until they capture three keeps.
Defeat the Wandering Spirit to stop the grudge
A Wandering Spirit enters the battlefield at some point during the battle. It arrives with a grudge on your Playable Warrior, which causes it to constantly summon enemy reinforcements for as long as it’s on the field. The longer you let it stay on the battlefield, the more reinforcements it produces. It also calls in other Wandering Spirits as time goes on (up to two others). If its reinforcements aren’t bothering you, don’t stress about taking it out. When there are a total of three Wandering Spirits, they all begin chasing you down, so you can take them all out then or just ignore them altogether.
Defend Cucco while defeating enemies
A Cucco enters the battlefield shortly after the mission starts. As you defeat enemies, the Cucco summons reinforcements to help aid your fight. Keep the Cucco alive and well and defeat enemies to keep it summoning more reinforcements.
Escort Cucco Chick to Mama Cucco
Two Cuccos appear on the battlefield: a Mama Cucco and a Cucco Chick. Cucco Chick starts in a random keep; look up its location in the Battlefield Info screen. Approach the Cucco Chick to get it moving. Escort it to its destination by defeating all enemies near it. If you fail to rescue it, the Mama Cucco becomes enraged, attacking everyone everywhere it goes. If you succeed, Mama Cucco begins attacking the enemy forces.
Powerful enemies appeared from the enemy keep
Morale-boosted Captains enter the battlefield from enemy keeps around the map. Defeat these guys immediately, then capture the keep they came from to prevent any more Morale-boosted enemies from entering the fight.
Provide support for the Hylian Captain
Shortly after completing the first mission, an Allied Hylian Captain appears on the battlefield, behind enemy lines. When his health gets low, he attempts to retreat to the Allied Base and requests your aid in accomplishing that goal. If you fail to bring him back to the Allied Base, he returns as a vengeful spirit, dead set on bringing you to the underworld with him. Race to his aid the second you see the mission pop up; the Hylian Captain will have very low health at this point and can be defeated by enemy forces quickly.
Rampaging soldiers have appeared
At some point during the battle, some of your Allied troops begin rampaging, which basically means they turn on you and your team. If
you find a Negotiator in one of the keeps that’s flashing with a white border, he returns the rampaging soldiers back to the Allied side. All you need to do is walk into each of the keeps that are flashing, then move on. If the Negotiator is in a keep, he appears immediately after you enter, so don’t linger for too long. But don’t worry about this sub-mission too much. The rampaging soldiers are easily defeated and the rewards for having them return to your side is minimal. Just stay focused on the other events on the map instead of worrying about this one.
Stop the ____’s assault
Captains appear on the map and immediately charge toward to the Allied Base. Don’t worry about them unless the Allied Base or your teammates are in trouble. Focus on your other objectives until things calm down, then chase them down.
The Captains are boosting each other’s strength
Two enemy Captains appear on the battlefield at the same time and begin hunting after your Playable Warrior. The longer both of them are alive at the same time, the stronger they both become. Take at least one of them out to stop them from increasing their strength and from hunting you down.
The enemy is trying to persuade Allied units
Recruiters appear on different sides of the battlefield and attempt to turn your troops against you. They do this by defeating the enemy Captain that an allied Captain is fighting against. When you see something like “Attack Specialist’s plight convinced Recruiter to advance toward Big Poe,” that’s your call to action. You must defeat the targeted Captain (in the example we’ve given, it would be the Big Poe) or defeat the Recruiter to keep your allies from turning against you.
Watch for the Item Thief’s approach
An enemy Captain known as Item Thief enters the battlefield and makes its way directly toward you. If it reaches you and manages to land an attack you, it steals one of your Items and Sub-Weapons and disappears. It eventually reappears on the map, which gives you the chance to get back what was stolen from you. Defeat the Item Thief to reacquire your stolen goods.
Adventure Map
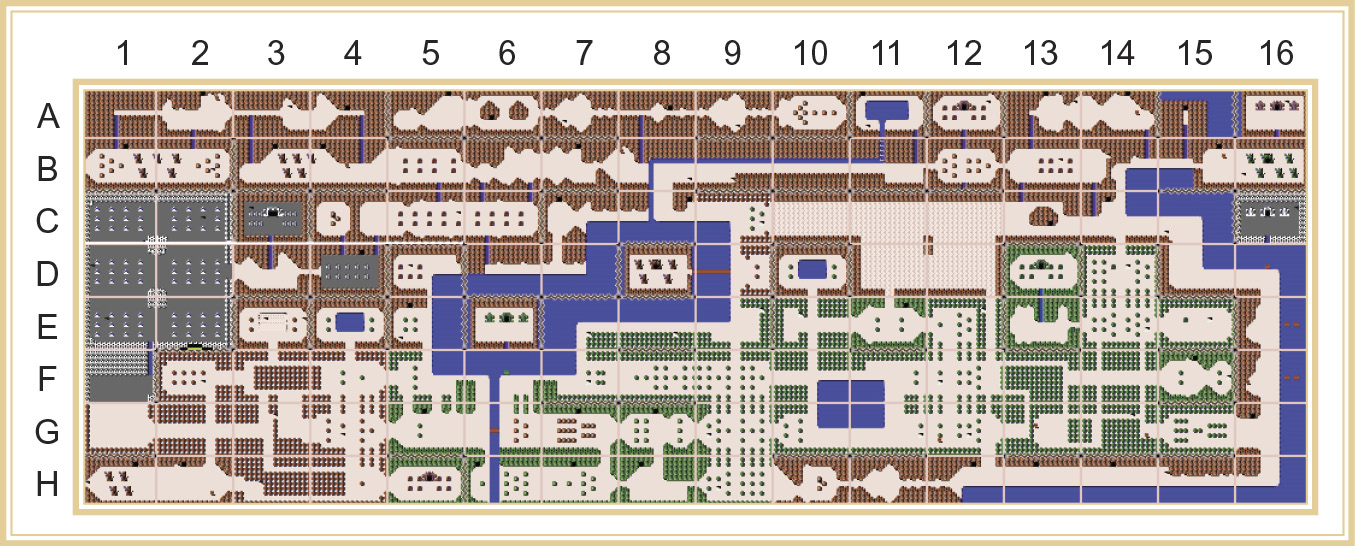
Longtime fans of the Legend of Zelda will recognize this map; it’s the map of the original NES/Famicom game, complete with every secret found in that game—and some new ones. While you may be feeling ready to dive into Adventure Mode, there are a few more things to note about this mode and its map.
The map is broken into six different colored sections: green, yellow, purple, orange, blue, and red. Each of these sections represents a sort of degree of difficulty. Green Scenarios are the easiest (next to the Scenarios that are unlocked at the start of Adventure Mode) while red Scenarios are the hardest.
We’ve labeled the world map with a combination of letters and numbers to help you identify what Scenarios we’re referring to. The letters label each of the rows (going top to bottom, A is the top row, B is the row below that, and so on) and numbers label the columns left to right. When you see A-1 in the strategy section below, it refers to the top left corner of the map, but if you see H-16, it refers to the bottom right corner.
This labeling system can also be used to gauge the general difficulty of a Scenario. The higher up you go vertically on the world map, the harder the stages tend to become, so rows A and B hold the hardest stages, while H and G tend to be easier. Though, this rule is not absolute: the highest and lowest numbered Scenarios also tend to be a bit difficult—not as difficult as the A and B Scenarios, but the closer you venture toward squares labeled with a 1 or 16, the more dangerous they are likely to be. Keep this in mind while traversing the world map.