
Hyrule Warriors Legends Guide Legend Mode
Boss Fight: The Imprisoned
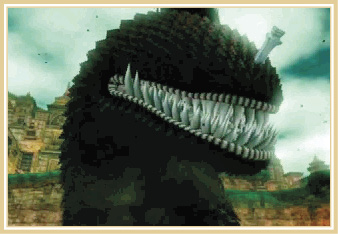
The Imprisoned is one of the deadliest Giant Bosses in the game despite its limited move set. The monumental beast starts in the center of the map and slowly makes its way up to the West Cannon Keep. It can destroy Keeps instantly if it is allowed to charge a devastating energy attack, so waste no time in reaching the Giant Boss immediately.
The way to bring The Imprisoned down is by, well, bringing The Imprisoned down, literally. You need to attack the jiggling toes on both of its feet until they pop. Once its out of toes, it’ll fall over and his Weak Point Mark will appear. Sounds easy enough, right? But the challenge truly comes from destroying the toes without getting smashed by his feet.
Each time the feet hit the ground they create a shock wave that deals damage.
if you’re caught in it. You must alternate between attacking the left foot and right foot, depending on which one The Imprisoned is about to step with—only strike the foot that is firmly planted on the ground and try to stay on its outside to avoid taking damage from the shock wave created by the other, stepping foot.
Once the Imprisoned falls and you deplete half of its Weak Point Mark, it begins slithering around the ground. Try to distance yourself from the beast to avoid taking damage while it slithers. It eventually stands up again and its toes regenerate, allowing you to begin the assault once more.
The Imprisoned eventually reaches the West Cannon Keep and begins hovering above it. Waste no time. Race into the Keep and capture it immediately if hasn’t been captured already.
The Imprisoned begins charging an attack that, if unleashed, can capture the Keep for the opposing forces instantly. Against the western wall of the Keep is a catapult created by the devilishly handsome Groose called the Groosenator. You can use it to do massive damage to The Imprisoned and knock it out of the sky, but only if you’ve captured the Keep first.
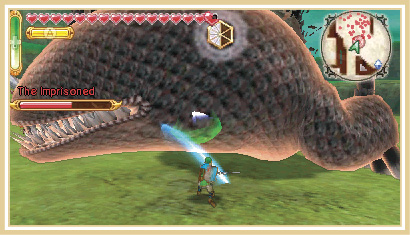
After its been hit by the Groosenator, The Imprisoned hits the ground and its Weak Point Mark appears. The Weak Point Mark will stick around this time for much longer than it does if you knock it over by destroying its toes, so you have a real shot of performing a Weak Point Smash on The Imprisoned if you hurry to where it fell
Once you’ve lowered its Health Bar to half, The Imprisoned’s steps become electrified and it begins doing large, dark electricity attacks. Every time The Imprisoned takes a step, it create an even more deadly shock wave. You must avoid its shock waves at all costs if you want to avoid a quick defeat. Continue alternating between the feet to attack the foot that is firmly planted on the ground, and dash away whenever you see its other foot about to hit the ground. It is more important now than ever to use Focus Spirit attacks and Special Attacks to knock The Imprisoned over quickly.
The Imprisoned’s next destination is the East Cannon Keep. When it reaches the Keep, it hovers in the air once again. You need to capture the Keep if you want to use the Groosenator within, so hurry and get it!
The Imprisoned’s last stop is at the Allied Base. Needless to say, letting it charge up and release its energy attack will cause a Scenario failure, so get into the Base and wait by the Groosenator. No matter how much damage you’ve done to the monster, the next hit with the Groosenator will be the last.
One Last Push
That’s it! Ghirahim’s use of The Imprisoned was the last straw! It’s time to take the fight to him directly. Lucky for us, the Demon Lord knows he’s in trouble, so he sends out most of the Captains in his stronghold to attack the Allied Base directly, including dangerous Assault Troopers. Intercept them by focusing on the Captains that get closest to the Base, then mop them up quickly; Ghirahim needs to be paid a visit so we can get some well-deserved revenge.
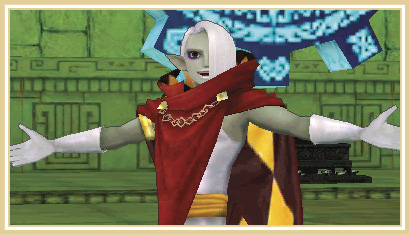
After you’ve dealt with all of his attacking Captains, head north and enter Ghirahim’s stronghold. Ghirahim is waiting inside the Enemy Base Keep, so let’s get moving!
Heart Container OpportunityIn Ghirahim’s northern base, you can find a boulder containing Fi’s Heart Container directly to the right of the Temple Entrance Keep. Blow up the boulder with your Bombs to reveal your prize. |
When you’ve reached Ghirahim, use the same strategy to defeat him as you did in Skyloft: Block his attacks and blitz him the second his Weak Point Mark appears. When you see an opportunity to dash out of the way of his attacks and get behind him, don’t hesitate to take it. Most of Ghirahim’s Strong Attacks are launched directly in front of him, so getting behind him will help you dodge his attacks and strike at him the second his Mark appears.
Defeating Ghirahim wins you the fight, so give him all you’ve got!