
Hyrule Warriors Legends Guide Master Quest Map
Overview
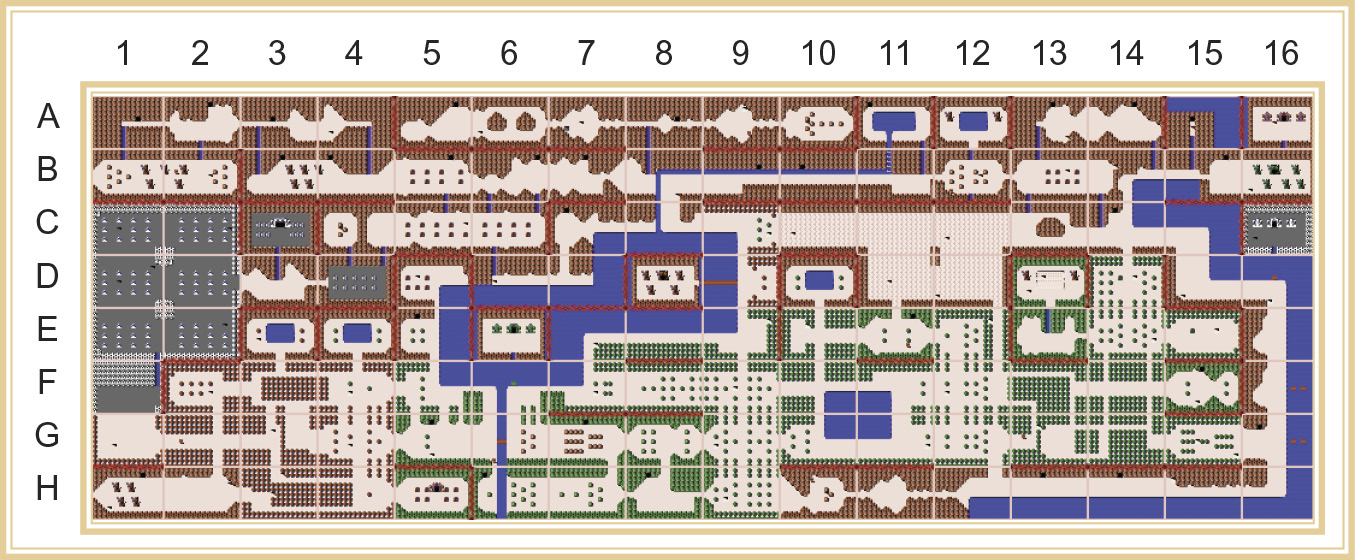
In classic Zelda fashion, the Master Quest Map has you playing through a visually-similar, but completely different version of the Adventure Map. You’ll have a special, challenging Master Quest Rule to deal with on each of the stages.
This map isn’t for slouches, so prepare for a real challenge that will put your Hyrule Warriors Legends skills to the test.
Item Cards
The Master Quest Map shares all of the same Item Cards as the Adventure Map. All of them work the same way as they do in the Adventure Map, so there is little need for explanation here. Still, as a refresher, you can find information on each card in following this paragraph.
Here’s a breakdown of all the Item Cards that can be found in the Master Quest Map and what they do:
 Compass
Use this while on the Search screen to identify where an Item Card can be used.
 Ladder
Use this to move across a single space of water.

 Digging Mitts
Use these on soft earth to uncover hidden stairways. X marks the spot!

 Hookshot
Use this on distant targets to pull yourself toward them.
 Bombs
Bombs
Use this on walls to uncover hidden caves.

 Power Bracelet
Use this on heavy rocks or tombstones to uncover hidden stairways.

 Ice Arrow
Use this on circles of flame to uncover hidden stairways.
 Recorder
Use this on a small body of water to reveal secrets and enemies.
 Candle
Use this on bushes to uncover hidden stairways.

 Water Bombs
Use this on submerged rocks to destroy them.
 Raft
Raft
Use this on piers to cross to the opposite shore.

 Goddess’s Harp
Use it on Goddess Butterflies to make enemies appear.
Master Quest Challenges
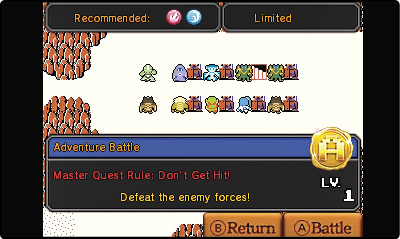
Like the Great Sea Map, levels in the Master Quest have rules that can make things extra challenging. Unlike the Great Sea Map, the Master Quest Map has rules on every single square and you can’t remove them with Item Cards like you can on the Great Sea Map. Some of these rules don’t have any real effect on the stages they’re on, while others can make a simple mission ridiculously challenging. Make sure to always read what the rule is on a level before entering it and always take a moment to think about how that rule might affect the stage they’re on. We took the liberty of listing all of the rules you can expect to deal with in the Master Quest and what kind of effects they have on you.
No Guarding
This rule is probably the easiest to deal with. Exactly as it sounds, you are unable to guard in levels with this rule on them. This is really only an issue if you’re trying to bait enemy Warriors into attacking you and reveal their Weak Point Marks. Other than those specific instances, not being able to guard isn’t a big deal at all.
No Healing
Like the “No Guarding” rule, this one isn’t generally a big problem. Certain Scenario types with this rule on them can be a real challenge with this rule, however. The “Watch Out! All attacks are devastating!” Scenario type is particularly rough, since a single attack can reduce you down to a quarter Heart without being able to heal even in the slightest; “Defeat all Giant Bosses” Scenario types can also be pretty rough. Aside from those two, unless the level is challenging without the rule, it’s not likely that it will be all that challenging with the rule. Just take extra care to not get hit and maybe bring a Fairy along with the Hard Worker spell to prevent any accidental defeats and you’ll be fine.
Speed Run
The “Speed Run” rule forces you to beat a level in 20 minutes or less. This is another rule that really isn’t an issue under pretty much any circumstances. If you’re aiming for an A-Rank on a stage, you’ll never even come close to hitting the 20-minute mark. Really, unless you’re goofing around a lot—and we mean a LOT—you’re very unlikely to come anywhere near the time limit. Just stay focused and be quick to complete stages with this rule on them.
Don’t Get Hit
Now this rule is the granddaddy of all rules. It can make even the simplest of Scenario types into a total nightmare; even Quiz Scenarios can become a treacherous task with this rule on them. If you see the “Don’t Get Hit” rule on a level, it means that any one hit of any kind reduces your health down to a quarter Heart. Levels with this rule practically demand that you bring a Fairy with the Hard Worker spell on it to help make up for taking any wayward attacks. Be extremely careful if you see this rule on a stage.
No Item Attacks
This rule isn’t generally a big deal, but when it is an issue, it’s a BIG issue. Specifically, if this rule pops up on a “Watch out! All attacks are devastating!” Scenario, prepare for a struggle. Those Scenario types benefit heavily from the ability to use the Bow Sub-Weapon, since, well all attacks are devastating! With the Bow you can just stand back and safely attack enemies without much risk of being hit. Without the Bow, you have to get right up close and personal with the enemies in order to defeat them. Our suggestion for completing these levels without the Bow is to use a ranged character like Linkle or Link. Linkle moves quickly and all of her attacks are ranged, so she can get in and out of a group of enemies with little issue. If you use Link’s Regular-Regular-Combo attack, you can maintain distance pretty effectively while picking off the enemy Captains. Just be extra cautious in these stages above all.