
Hyrule Warriors Legends Guide Hero Training
Legend Mode
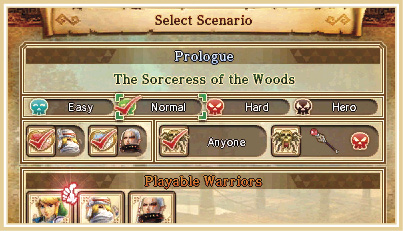
This could be classified as the main game mode of Hyrule Warriors, as it is where you’ll find the game’s story and unlock most of the playable characters. Legend Mode plays out like a traditional video game: Play a Scenario to unlock another Scenario and progress the story. As you continue to play through each of the Scenario, you’ll unlock more Warriors to play with. Each Scenario can be played only by the specific characters listed below the Scenario’s image on the Scenario details section on the right side of the screen.
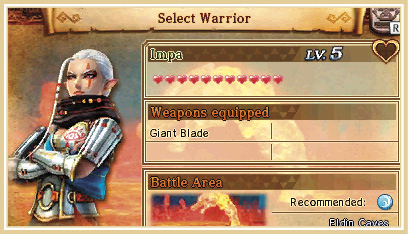
Before you start the mission you’re taken to the Warrior selection screen, where you’ll be able to choose one of the available playable characters to take into the level. The thumbs-up icon is there to let you know the best Warrior and weapon to bring to battle for this specific stage. You are free to go against the grain and choose a character and/or weapon you enjoy using more, if the suggested character is not to your liking.
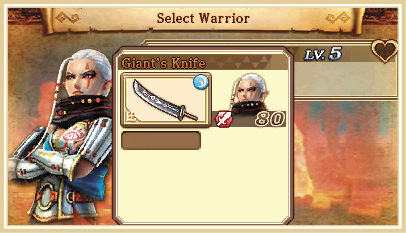
Once you’ve selected your hero, you move onto the weapon type selection screen. Here you select from any of the weapon types you’ve unlocked, which will move you over to the weapon selection screen. On the weapon selection screen, you choose one of 10 weapons, depending on whether you’ve found that many during your time playing the game. Each weapon can have a number of skills attached to it that add different effects to that weapon. Some skills increase your Strong Attack power in various ways, while others make finding Materials, Rupees and other weapons easier.
Fairies
If you’ve discovered Fairy companions during your travels, then you also have the option of choosing which Fairy you’d like to bring with you into the Scenario. Fairies can provide significant benefits to your Warriors if properly nurtured. See the “Companion Fairies” chapter of this guide for more details.

Scenario Information
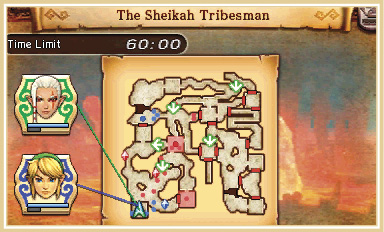
Once you’ve selected your weapon, you’ll be ushered to the Scenario Information screen, where you can look at your victory and defeat conditions, map, and other informative bits about the battle.
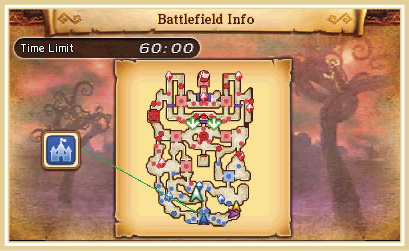
Battlefield Info
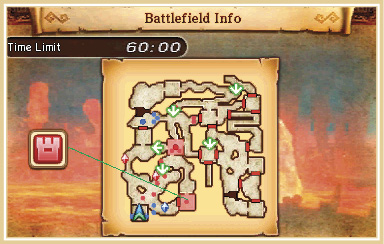
This is almost certainly the most important option on this screen, as it lets you see where your allies and enemies are, but even better, it allows you to see the name and location of each Keep on the map. We refer to Keeps by name a lot in this guide, so knowing how to view this information is vital to your success.
Current Status
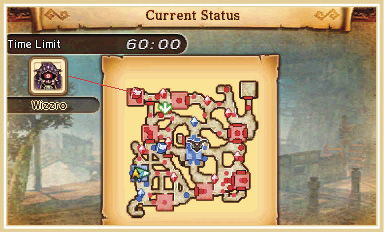
This section allows you to check your current victory and defeat conditions for the battle. More specifically, this is what you need to do to win the Scenario, and what you want to avoid if you don’t want to fail the battle.
Warrior Info
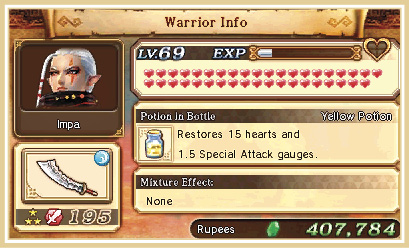
Warrior Info is a submenu of information about your current Warrior and his or her weapon Combos, the Mixture being used, and Weapon Skills their weapons have, and the requirements for getting the Skulltulas in a Scenario (if there are any). The most important menu option here is the Skulltulas; the other information is more for reference if you can’t remember how to do a certain Combo or what Weapon Skills you currently have equipped.
Skulltulas
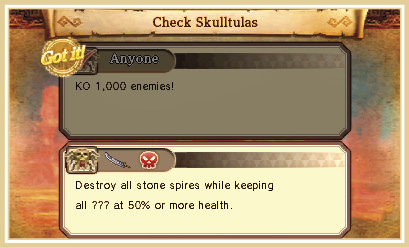
Check Skulltulas is another incredibly important option in the Scenario Information menus. Skulltulas are the spider-like creatures with golden skulls for carapaces. There are 180 in the game and let us tell you, getting all 180 is an incredible challenge. Check Skulltulas gives you information on the Skulltulas hidden in a Scenario and how to get them to appear. Check this menu whenever you’re in a Scenario that has Skulltulas to figure out exactly how to find them. Trust us: You’ll be glad you did.
The Tutorials and Settings options allow you to read up on some aspects of the game if you’re having a hard time remembering, and also allow you to change some simple settings, the same as you would on the games Main menu of the game.
Basics of Combat
Combat in Hyrule Warriors is a pretty straightforward affair. Use the analog stick to move your Warrior and press the Regular Attack and Combo Attack buttons to unleash attacks. There is a bit more to attacking, but we’ll get to that in just a moment. The overall goal of Hyrule Warriors is to attack enemies while completing missions as they appear on the screen, and try not to get hit. It’ll take some getting used to, but if ever you see an enemy raise its weapon in attack, you can press the Dodge button to roll out of the way of its swing. Get used to using the Dodge button, because it’s a move that’s going to get you out of a lot of trouble and its usefulness just gets greater as you play through the game. To further the Dodge button’s usefulness, you can make your Warrior run if you press and hold the Dodge button for a few seconds. This is absolutely essential to getting around the map with ease.
Regular and Combo Attacks
Now on to combat; it’s a little bit trickier than we made it sound. While most of combat is managed with the Regular Attack and Combo Attack buttons, the trick is learning which does what and, more importantly, how to use them together. Pressing the Regular Attack button will perform a Regular Attack, that is, a simple swing with your weapon that is, more often than not, speedy and easy to use, but has limited range and isn’t very powerful. You use this attack more for building up your Special Attack Meter and for cutting through foes when you’re limited on other options. That’s not to say that you shouldn’t use it. In fact, Regular Attacks are your bread and butter. They don’t take much time to use, don’t use your Special Attack Meter, and they’re necessary for creating Combo Attacks. Pressing the Combo Attack button will perform a Strong Attack, a unique Warrior and weapon-specific move that varies greatly between each Warrior. Combining the Regular Attack and Combo Attack buttons will create a Combo Attack, an often devastating attack that is used for taking out large groups of enemies or doing a good bit of damage to enemy Warriors when Regular Attacks just aren’t cutting it.
Try varying these attacks to see which Combo Attacks do what. For more info on Combo Attacks, open the Scenario Information screen with the Start button, head to Warrior Info, and click Check Combos to see a list of everything your equipped weapon can do.
Special Attacks
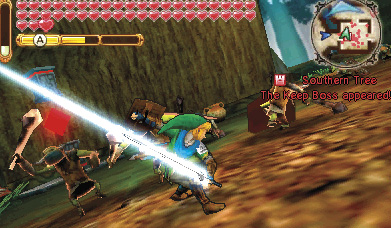
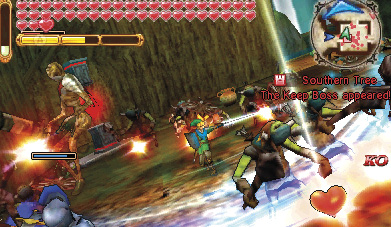
We’ve covered Combo and Regular attacks, but there are still a couple of others to tackle, namely, Special Attacks and Focus Spirit. Special Attacks are moves that can be used only after filling at least one bar of your Special Attack Meter. Once you’ve achieved that, press the Special Attack button to activate a Special Attack. Like any other attack, Special Attacks are specific to the weapon being used. They are often the most powerful attack in your arsenal and are even better at damaging foes and clearing out enemies than Combo Attacks. You fill your Special Attack Meter by attacking enemies with Regular and Combo Attacks and by picking up Triforce Pieces from enemy Captains, Jars, and tufts of grass.
Focus Spirit
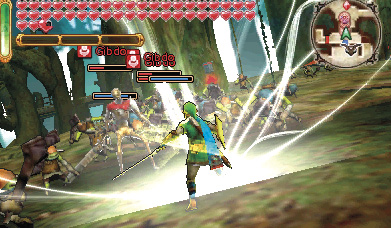
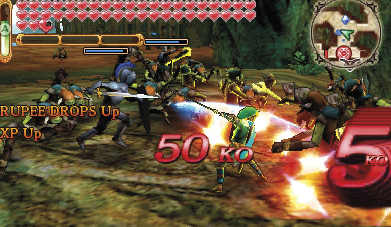
The final attack isn’t necessarily an attack in and of itself, but it packs a punch and has a few moves not unlike Special Attacks. Focus Spirit boosts the attack power, attack speed, and defense of the Warrior that uses it. It also makes it so you can’t be staggered when hit (though, you can still be knocked in the air by a particularly strong attack) and allows you to break the guard of your enemies if you just keep attacking with Regular Attacks. You are also given rewards based on how many enemies you defeat while Focus Spirit is active, and your Focus Spirit Meter will continue to increase slightly as you reach those rewards. To activate Focus Spirit, you must first fill the Meter by collecting Magic Jars from enemy drops, breakable green Jars, and tufts of grass. Once it’s full, hit the Focus Spirit button and Focus Spirit will activate and remain active until the Focus Spirit Meter in the top-left corner of the screen depletes. When it depletes, your Warrior will perform a powerful attack with a very wide range, not unlike a Special Attack. You can also have your Warrior perform a completely different Focus Spirit Attack by pressing the Special Attack button, but be warned: This will end your Focus Spirit prematurely. The great benefit to ending your Focus Spirit with that particular attack is that it will reveal the Weak Point gauge of almost any enemy Warrior, Captain, or Giant Boss. All in all, Focus Spirit is incredibly useful, but because you need to fill the Meter with a particular type of item, it can be very difficult to use it more than once or twice a battle, so use it wisely! And make sure to mainly use it for normal enemies; you won’t get a lot out of Focus Spirit when using it against an enemy Warrior or Giant Boss, unless you use the Special Attack button to reveal their Weak Point gauge.
Guarding
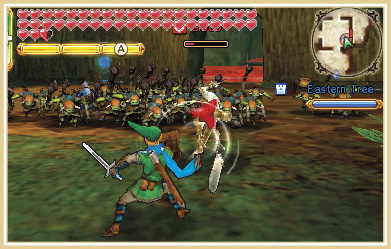
There is one more very important technique that you can use in combat: guarding. Guarding is the act of holding the Guard button to, well, guard! This is an extremely important technique when it comes to taking on Giant Bosses, enemy Warriors, and Captains. Aside from being able to deflect damage from enemy attacks, guarding while challenging an enemy Warrior will almost always get them to perform a move that will reveal their Weak Point gauge (more on Weak Point gauges in a moment). Enemy Warriors tend to have a good bit of health, so being able to perform a Weak Point Smash by depleting their Weak Point gauge is incredibly handy, especially if you’re in a bind and need to defeat an enemy Warrior swiftly (which you will have to do frequently). It can be easy to forget that you can guard in the game, but do your best to log it away in your brain for future use; you’ll thank us for it.
Baddies and How to Beat Them
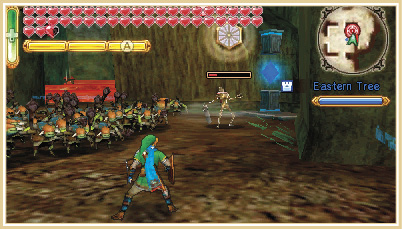
There are a variety of enemies to face off with in Hyrule Warriors: normal soldiers, Captains, Warriors, and Giant Bosses. Every enemy you encounter—with the exception of normal soldiers—has a Weak Point gauge. What’s a Weak Point gauge, you ask? It’s the single most important element to defeating enemies in the game. When specific attacks are performed, from either you or your enemy, a hexagon will appear above the enemy’s head for a short period of time. This is your chance to strike! Every attack you do will deplete their Weak Point gauge little by little. Once the Mark is completely depleted, you’ll perform a Weak Point Smash: a devastating attack that, more often than not, deals more damage than any other move in the game. Make a point to deplete Weak Point gauges as quickly as possible.
Giant Bosses

When it comes to taking down Giant Bosses, nothing works better than teamwork. Gather multiple playable Warriors near a Giant Boss to gain special benefits known as Smash Boost Power!
If two playable warriors gather near a Giant Boss, 50% of their Magic gauges instantly fills. Plus, the Warriors can refill the Magic gauge just by attacking enemies.
If three playable Warriors gather near a Giant Boss, its Weak Point gauge depletes faster than normal.
If four playable Warriors gather near a Giant Boss, the Giant Boss receives greater amounts of damage from attacks than normal.
Command your Warriors to converge on Giant Bosses to bring them down with ease!
The Flow of Battle
The general goal of almost every Scenario in the game is to take Keeps, defeat enemies, and protect the Allied Base and an allied Warrior. Missions will pop up from time to time to give you specific objectives to progress the Scenario, and failing them can cause you to fail the entire battle. There are a few things you want to always be on the lookout for when completing Scenarios. Here are a few guidelines to follow:
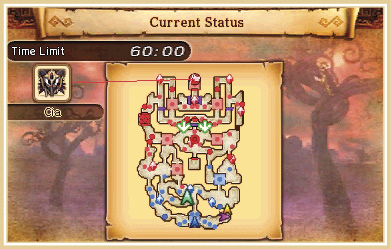
Always read the Victory and Defeat Conditions at the Scenario Information Screen that appears before you officially start the battle.
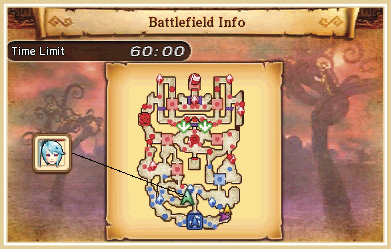
Make sure to use the Battlefield Info screen to see where your allies are, especially the one that needs to be prevented from fleeing.
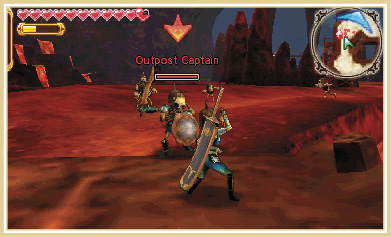
Always make a point to defeat any enemies with a Health Bar if you are not pressed for time. While traveling around the battlefield to complete missions, you’ll undoubtedly encounter lots of enemies with Health Bars. While normal enemy soldiers will struggle to do anything of significance to your allies, even minor enemies with Health Bars can tip the scales of a battle out of your favor if you’re not around. Defeat Captains, Warriors, and anything else with a Health Bar to maintain a firm grasp of the field and to keep yourself from having to race over to the other side of the map to rescue allies while in the middle of a mission.
Regularly check on the Allied Base to make sure it isn’t full of enemy Captains.
Captains can be sneaky and slip right into the Allied Base without your noticing. If left alone, they can cause a ton of damage to the Allied Base, which will give you a tremendous amount of trouble later in a Scenario, if they don’t outright capture it first. If you see any red or yellow circles inside theAllied Base, race over there and clear it of enemy Captains immediately.
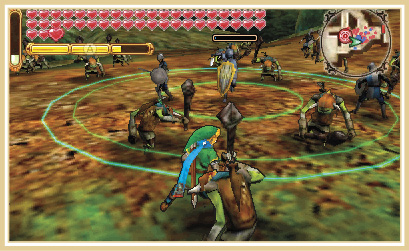
Another important tip is that you can heal any allied Warrior or Captain if their Health Bar drops to around a third by walking into the green rings that encircle them when their health gets that low. Entering the green circle fills your allies’ Health Bar completely and keeps them from fleeing the battlefield—an invaluable tool when the one in danger is the one that will cause the Scenario to fail if they flee.
Commanding Characters

Many Scenarios present you with multiple playable Warriors, letting you switch between Warriors on the fly. Additional playable Warriors may become available as a Scenario unfolds, so pay close attention to the bottom screen. If multiple Warrior portraits appear on the bottom screen, then you can take control to any of those Warriors. Simply tap a Warrior’s portrait to take control of that character.

You can also issue special orders to playable Warriors via the Command screen. Press the Start button to pause the action, then select Command from the Pause menu. Highlight a Warrior and press the A button, then select any space on the map and press the A button again to call up your command options for that space.

After pressing the A button to select a space, a list of command options appears based off the space’s contents. For example, if you’ve selected a space with a Keep, then you can order your Warrior to capture or defend that Keep (depending on its allegiance). If you’ve selected a space that features an enemy, you can command a playable Warrior to intercept and battle that enemy. If you’ve selected a space with an ally (playable or not), you can order your Warrior to escort and defend that ally. Use the Command screen to coordinate your forces with greater efficiency during frantic battles, completing objectives and battling foes on multiple fronts.
Treasure Chests
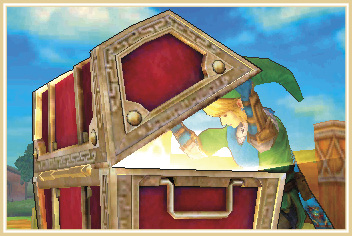
Treasure chests in Hyrule Warriors are a lot like treasure chests in other Legend of Zelda titles, in that they almost always contain a rare item or Rupees. Here are some important aspects about Treasure Chests so you can get the most out of this game.
Chests can contain a variety of rare items such as Pieces of Heart, Heart Containers, and Sealed Weapons. Getting your hands on these items can be pretty tricky if you don’t know how they work. The thing is, Hyrule Warriors boasts 24 playable Warriors, each with their own Health Bar. When it comes to obtaining Heart Containers and Pieces of Heart, each Warrior has to grab their own. That means, when a Scenario in Adventure Mode or Legend Mode has a Piece of Heart or a Heart Container, you can collect it only with the Warrior who’s shown with it. If you attempt to grab one of these items without the indicated Warrior, it’ll show up as a generic brown chest with nothing but Rupees inside.
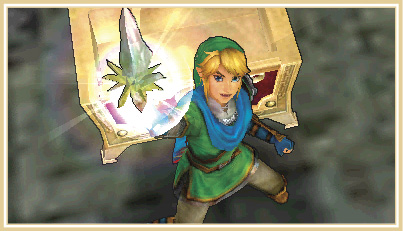
The rare items you can find in treasure chests are called Sealed Weapons. These crystallized weapons are found in the same kind of chests you’d find Heart Containers and Pieces of Heart in, but you don’t need to be playing as a specific Warrior to claim them. At the end of the Scenario in which you found them, Sealed Weapons will become either a new weapon or a new weapon type. Each Sealed Weapon is fixed, so you can only find it once; after that, the item in the chest will be nothing more than a simple Weapon Bag.
Weapons
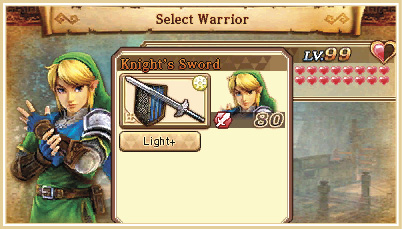
You’ll probably spend a lot of time trying to find new weapons, improving upon the old ones and trying to make sense of everything in between. Weapons are found in weapon bags and Sealed Weapons on the battlefield. They are also offered as rewards for completing Adventure Mode Scenarios with an A-Rank after using an Item Card to root them out. There are a lot of elements to how weapons work and how to get the most out of them, so here’s all the need-to-know information.
Types
Every weapon has three different versions of it, each one more powerful than the last. Link, for example, starts off with his Knight’s Sword, the first type of his Hylian Sword. He can find three more, better types of the Hylian Sword called the White Sword, the Magical Sword, and the Magical Sword +. Each new type of weapon offers more slots for Weapon Skills and a higher base damage. After you’ve unlocked a new weapon type, variations of it will begin showing up in Weapon Bags that enemies drop during a Scenario.
Weapon Skills
These are the second most important part of making a strong weapon. Weapon Skills offer extra damage and other benefits when attached to a weapon that you brought into battle. Most Weapon Skills offer very specific damage boosts, but other Skills offer more or better item drops from enemies and the ability to find more Hearts and Rupees. You can use the Smithy in the Bazaar to take Weapon Skills you like from one weapon and put them in another, but be warned: The weapon you are taking the Weapon Skill from will be destroyed in the process.
Stars
The stars next to the weapon show how much a weapon’s base damage has been boosted. All weapon types have a fixed base attack damage that only grows based on the number of stars found on a weapon. Each added star adds an additional 10 percent attack damage to a weapon. The damage added by stars is automatically added to the weapon, so the attack power you see is the attack power you get. Just keep all of this in mind when you’re visiting the Apothecary or wondering if adding the Stars+ Weapon Skill is worth it. It is and you should make a point to try to get higher starred items as often as possible.