
Hyrule Warriors Legends Guide Companion Fairies
Companion Fairies
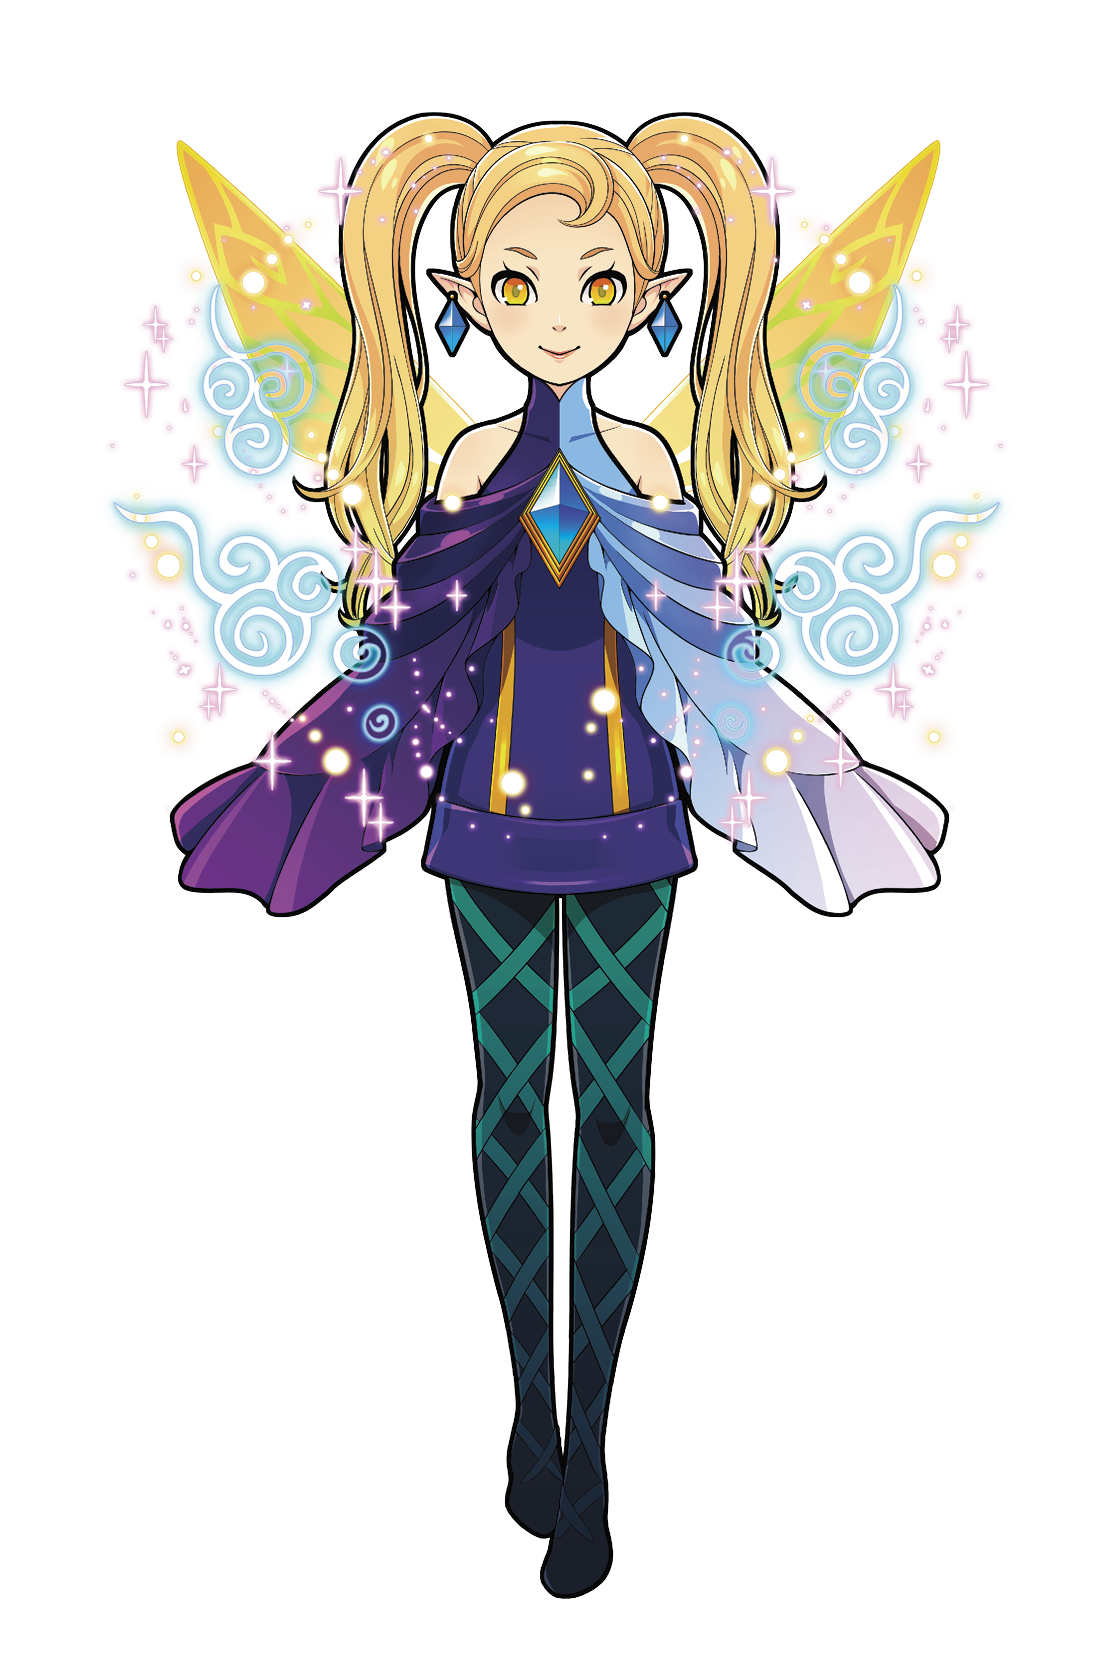
Once you start playing through Adventure Mode you unquestionably run into Companion Fairies. Unlike the Barrier Fairies you use to remove elemental barriers from Keeps, Companion Fairies allow you to use a Fairy Magic, which is a massive magic explosion that can sometimes capture a Keep in one fell swoop. There’s a lot more to them than just their magic, and this section of the guide tells you all about it.
 How to Obtain Them

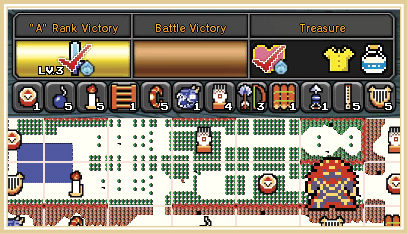
First things first. We’ll start with the most important aspect of Companion Fairies, which is how to obtain them. Companion Fairies can only be found in Adventure Mode and you have to find them in a somewhat specific fashion. They show up under the “Treasure” box on the list of Rewards for an Adventure Mode level, but they aren’t found inside of chests. Instead, Companion Fairies show up in pots in a level that lists them as a “Treasure” reward, so make sure to break every pot you find in those stages until you find the Fairy.
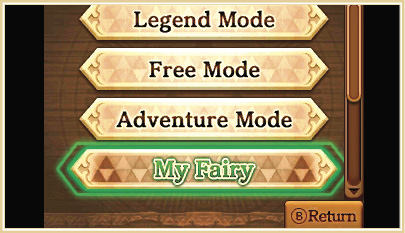
Once you’ve found a Companion Fairy, you can go back to the main menu and select “My Fairy” to view it.
Interacting with Your Companion Fairy
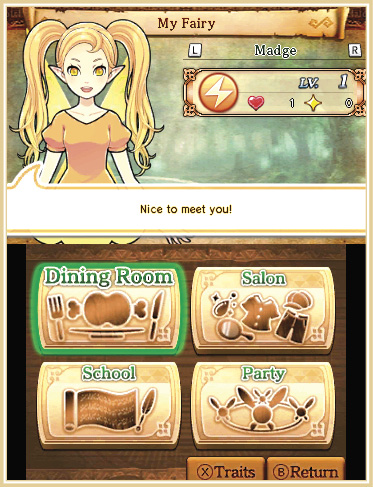
You have a number of choices once you’re in the “My Fairy” section: Dining Room, Salon, School and Party. We go over each of these in greater detail, but for now we’ll just give you a quick summary of each of them.
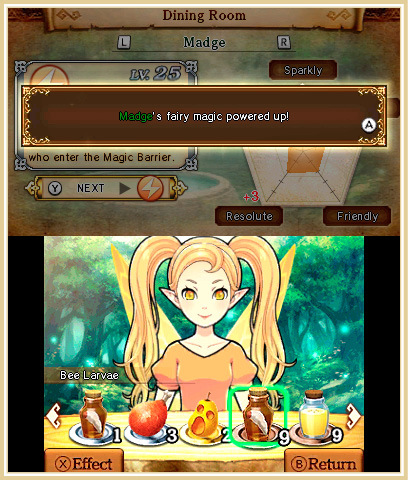
You can feed your Fairy in the Dining Room, which boosts their personality stats, raises their level, and helps you gain access to Rental Skills, which are the most useful aspect of Companion Fairies.
The Salon is used to put Fairy Clothing on your Fairy to increase some of its attributes, like making its elemental attack stronger, or lowering the cost to use their explosive Fairy Magic.
You can use the School to select Rental Skills after you’ve unlocked them in the Dining Room. You can also temporarily get additional Rental Skills by connecting with friends who also have Hyrule Warriors: Legends via a local wireless connection. They’ll be able to share a Rental Skill from their Fairy with you for a period of 24 hours. After that the skill will disappear and you’ll have to connect with your friend through local wireless if you want to use the skill again.
Speaking of which, in order to link up with your friends, you all need to select “Party”. This is where you can link up with other friends and borrow their Companion Fairy skills. You can only have three Fairies queued up at a time, so you have access to a maximum of three Rental Skills from other players at any given time.
Fairy Growth
To raise make your Fairy stronger and to unlock Rental Skills, you must feed and care for your Fairy.
Personalities
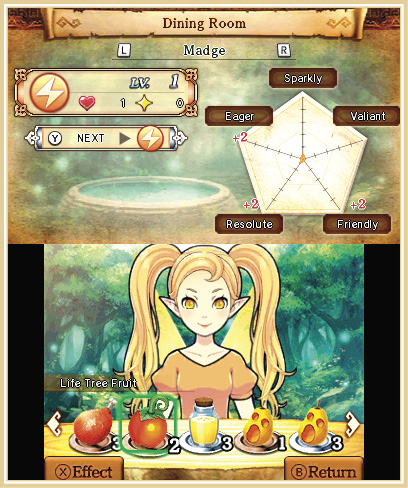
Every Fairy has five personality traits and each one rises and falls depending on what you feed your Fairy. What do these personality traits do? They completely determine what Rental Skills you unlock and when.
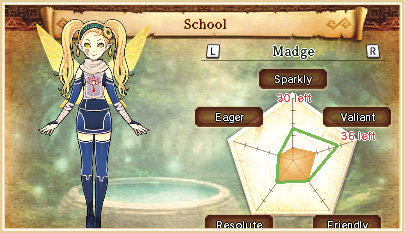
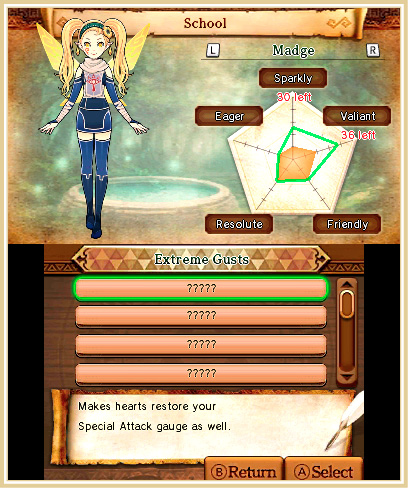
If you head over to the School, you can scroll down the list of Rental Skills and read the descriptions. You may not be able to see the names of all the Rental Skills, but being about to read the descriptions shows you what each Rental Skill does and how to unlock it. This is important to pay attention to and we’ll get to why in just a moment.
Food
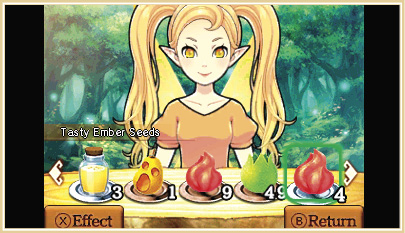
Every time you feed your Fairy, it gains or loses points in specific personality traits. Rental Skills require your Fairy to have certain personality traits at a specific level, which means you must take great care in what you feed them. Certain foods raise a trait while lowering another.
Obtaining Food
Like Materials and Weapons, Fairy Food has different quality and rarity levels. Finding the best Fairy Food is a real challenge and is almost completely up to the game on whether or not it drops. Heading to the Twilight or Termina Adventure Mode maps helps raise your chances of obtaining higher tier Fairy Food, as will using Potions from the Apothecary that increase Fairy Food drop rates.
Fairy Food drops from enemy Captains and Warriors just like Materials and Weapon Bags; it’s also in a bag, same as those two, but the bag is more rounded at the bottom than the others. If you see one of the Fairy Food icons in the “Treasure” box in Adventure Mode, that means you’re more likely to find that category of food.
Leveling
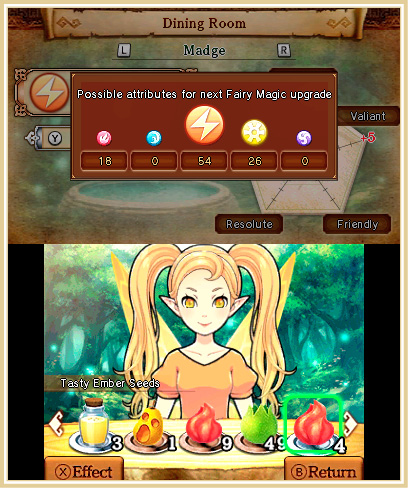
Food also has a specific elemental attribute assigned to each type of food, which rises as you feed your Fairy that food, but lowers if you feed them food of a different attribute. After an elemental attribute reaches a certain level, your Fairy gains an added effect to their Fairy Magic: the explosion you use during levels.
Every time you feed a Fairy, their level goes up. When a Fairy’s level reaches 99, food no longer raises their personality traits or their elemental attributes. There’s a very simple and advantageous way to reduce their level back to 1, but we’ll get to that shortly. Raising a Fairy’s level isn’t necessary to have a powerful Fairy. In fact, raising their level is more of a way to limit how many times you can feed them so that you think more carefully about what to feed them at all times.
Fairy Magic
We’ve talked about food and elemental attributes, but all of that means very little without explaining how those things affect combat. When you’re in a level, if you have a full Focus Gauge, you can tap the icon in the bottom-left corner of the bottom screen to use Fairy Magic—and trigger a massive explosion that blows up all nearby enemies. It’s excellent for clearing Keeps swiftly or for taking out a large group of enemy forces while buffing your allies or debuffing any nearby enemies.
If you’ve fed your Fairy enough food to raises one of their elemental attributes to a certain level, a special effect is added to your Fairy Magic based on what element you’ve added to your Fairy.
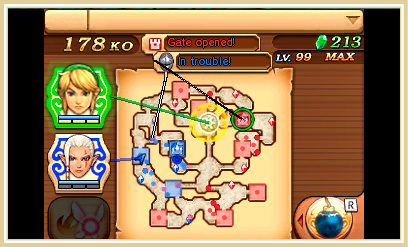
These effects only affect enemies and allies within the barrier icon as displayed on the map, but they can help turn the tide of battle pretty quickly. Say your Allied Base and Commander are on the verge of defeat and the Allied Base is positively swarming with enemies. If your Fairy has the Shine element (the yellow icon that looks like a gear) on their Fairy Magic, any allies that are within the invisible barrier created by the Fairy Magic slowly regain health, while any small enemies near you when you used the Magic are almost certainly defeated instantly.
Rental Skills
We touched on them briefly already, but we’re going to go into greater detail about Rental Skills here.
Rental Skills have the potential to be the greatest asset to your conquest of Adventure Mode in the game. Every Rental Skill has point requirements for specific personality traits. If you take a look at the School and begin scrolling down that seemingly endless list of question marks, you’ll see the graph on the right side of the top screen change and shift. Numbers appear underneath the names of each of the personality traits and some of the traits are red. The numbers reflect how many points you need in that trait to unlock the highlighted Rental Skill, while the red trait names indicate that you need a personality trait that you don’t currently have. The best way to get the best Rental Skills in the game as soon as possible is to find the one you want, then feed your Fairy food that raises the required personality traits.
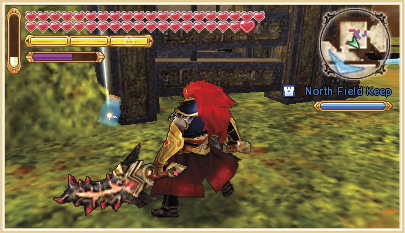
Once you’ve unlocked a Rental Skill, you can use it in battle by tapping the Sub-Weapon icon in the bottom-right corner of the bottom screen. This opens up the Sub-Weapon Menu.
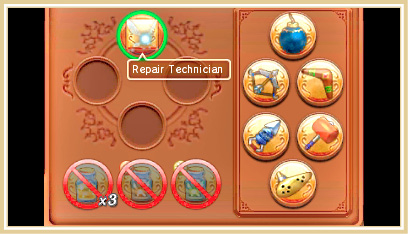
The Rental Skill is at the top of the Sub-Weapon Menu, slightly to the left. Some Rental Skills activate automatically, which means they won’t be selectable. In cases like those, the Rental Skill is darkened, so it’s very clear whether or not it’s usable.
Refresh
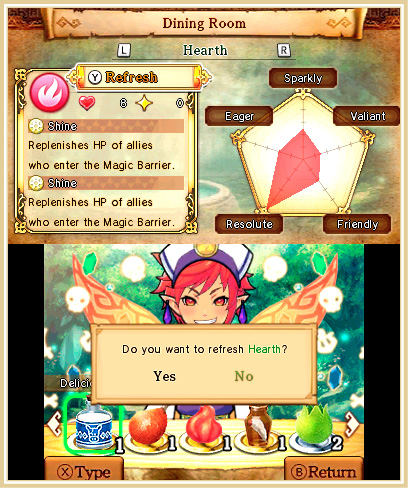
We’ve told you that 99 is the level cap for Fairies and that some spells require certain personality traits that your Fairy may not have, at least not when you first obtain them. What do you do to keep raising your Fairy’s traits and obtain those incredible Rental Skills? You Refresh.
Refreshing reduces your Fairy back to level 1 while maintaining 10 percent of their total personality trait stats. You lose your elemental attributes and their boosts to your Fairy Magic, but can start feeding your Fairy with that 10 percent boost to their traits, which allows you to get much farther than you did before Refreshing.
It should also be mentioned that your Fairy’s Trust level won’t diminish when you Refresh. What is a Trust level? Glad you asked!
Trust
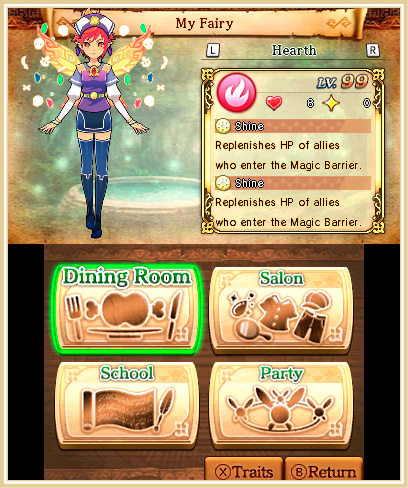
As you care for your Fairy, their Trust level (which is represented by the Heart icon near the top-left corner of the top screen), this figure increases. As it does, they begin showering you with gifts like Weapons, Rupees, and Materials.
Every once in a while, your Fairy mentions a desire for a specific type of Food. This won’t be as simple as “I want Lon-Lon Milk!” Instead, your Fairy will say something like, “I want something sweet!” If you give your Fairy food that meets their request, their Trust goes up by 1. Every time your Fairy makes one of these requests, it actually has a craving for a specific food item. You have no way of knowing exactly what item it’s craving, but if you manage to meet the Fairy’s secret demand, her trust will go up by 5 instead of 1.
Fairy Clothing
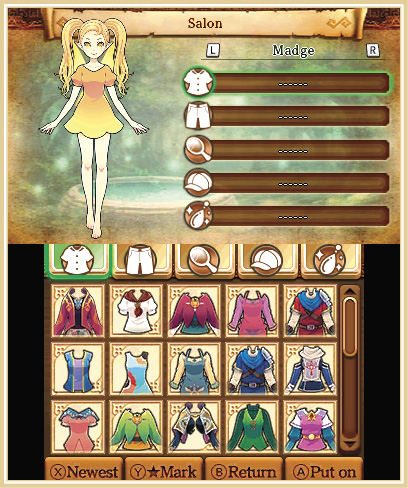
Aside from raising your Fairy’s stats with food, you can also boost your Fairy’s Magic with Fairy Clothing. Dressing them up in certain attire either boosts their Fairy Magic damage or lowers the Focus Gauge cost of that magic—or both.
To get these boosts, you need to put on clothing with a white description instead of a black one. As you might have guessed, a black description means that the effect in the description won’t work for your Fairy, while a white one will. Make sure to put on as many clothing items with white descriptions as you can to get the maximum benefits of Fairy Clothing.
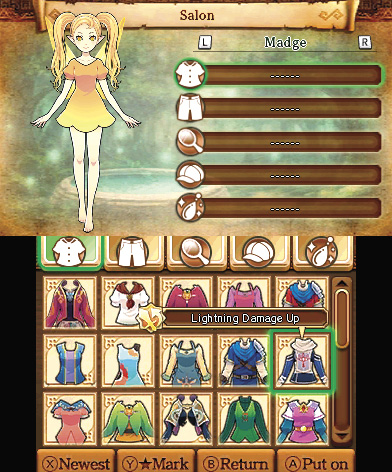
Fairy Clothing shows up in the “Treasure” box in Adventure Mode, same as Fairy Food and Fairies themselves. The key difference here is the Fairy Clothing DOES show up in treasure chests, unlike Food and Fairies. If you see one of the five Fairy Clothing icons listed as a treasure for an Adventure Map stage, be on the lookout for any treasure chests in the level if you want to collect it.
Clothing and Food
Here are lists of all the Fairy Clothing items and Fairy Food in the game.
CLOTHING
| TOPS |
|---|
| Kokiri Cardigan |
| Zora Tunic |
| Sheikah Shirt |
| Royal Tunic (Pink) |
| Royal Tunic (Purple) |
| Pirate Vest |
| Island Dress (Flower) |
| Island Dress (White) |
| Wind Robe (Black) |
| Wind Robe (Red) |
| Outset Shirt |
| Skyloft Shirt (Tan) |
| Skyloft Shirt (Blue) |
| Skyloft Shirt (Short Pink) |
| Skyloft Shirt (Short Blue) |
| Skyloft Shirt (Short Orange) |
| Skyloft Shirt (Short Red) |
| Skyloft Shawl (Pink) |
| Skyloft Shawl (Green) |
| Skyloft Shawl (Blue) |
| Skyloft Shawl (Magenta) |
| Skyloft Apron (Purple) |
| Skyloft Apron (Red) |
| Skyloft Apron (Blue) |
| Skyloft Apron (Tan) |
| Spirit Dress |
| Demon Lord Cape |
| Demon Lord Shirt |
| Twilight Top |
| Magic Top |
| Butterfly Top (Blue) |
| Butterfly Top (Dark) |
| Hero’s Clothes (Green) |
| Hero’s Clothes (Blue) |
| Hero’s Clothes (Red) |
| Hero’s Clothes (Purple) |
| Hero’s Clothes (Yellow) |
| Ranch Top (Yellow) |
| Ranch Top (Red) |
| Deku Dress |
| Happiness Dress |
| Forest Top |
| BOTTOMS |
|---|
| Kokiri Shorts |
| Zora Skirt |
| Sheikah Leggings |
| Royal Skirt (Pink) |
| Royal Skirt (Purple) |
| Pirate Slacks |
| Skyloft Skirt (Orange Pumpkin/Blue/Orange) |
| Skyloft Skirt (Orange Pumpkin/Green/Blue) |
| Skyloft Skirt (Orange Pumpkin/Blue/Purple) |
| Skyloft Skirt (Green Pumpkin/Orange/Magenta) |
| Skyloft Slacks (Red) |
| Skyloft Slacks (Blue) |
| Skyloft Slacks (Pink) |
| Skyloft Slacks (Tan) |
| Demon Lord Slacks |
| Twilight Skirt |
| Magic Skirt |
| Butterfly Skirt (Blue) |
| Butterfly Skirt (Black) |
| Hero’s Trousers |
| Ranch Skirt (Pink) |
| Ranch Skirt (Blue) |
| Balloon Shorts |
| MAKE-UP |
|---|
| Sheikah Facepaint (Red) |
| Sheikah Facepaint (Grey) |
| Pirate Aura |
| Treasure Aura |
| Island Aura (Pink/Blue) |
| Island Aura (Purple/Orange) |
| Wind Aura |
| Farore’s Aura |
| Swirly Cheeks |
| Butterfly Makeup |
| Goron Facepaint (Tan) |
| Goron Facepaint (Red) |
| Goron Facepaint (Orange) |
| Moon’s Aura |
| Fiercy Deity Facepaint |
| HEADWEAR |
|---|
| Kokiri Band (Orange) |
| Kokiri Band (Pink) |
| Kokiri Band (Yellow) |
| Royal Hood (Pink) |
| Royal Hood (Purple) |
| King of Red Lions Mask |
| Rito Mask |
| Korok Mask |
| Phantom Horns |
| Bone Hat |
| Butterfly Headband (Purple) |
| Butterfly Headband (Black) |
| Fused Shadow Mask |
| Deku Tiara (Pink) |
| Deku Tiara (Red) |
| Happiness Tiara |
| Postman Hat (Red) |
| Postman Hat (Blue) |
| Bunny Hood (Yellow) |
| Bunny Hood (Purple) |
| Trickster Mask |
| JEWELRY |
|---|
| Zora Earrings (Purple) |
| Zora Earrings (Yellow) |
| Zora Earrings (Red) |
| Pirate Bandana |
| Demon Lord Earrings (Blue) |
| Demon Lord Earrings (White) |
| Demon Lord Earrings (Black) |
| Twilight Jewel |
| Snowhead Necklace (Black) |
| Snowhead Necklace (Blue) |
FOOD
| NAME | CATEGORY | ELEMENT | FIRE | WATER | LIGHTNING | LIGHT | DARKNESS | PERSONALITY: SPARKLY | PERSONALITY: SOFT | PERSONALITY: FLASHY | PERSONALITY: DIZZY | PERSONALITY: FRIENDLY | PERSONALITY: DREAMY | PERSONALITY: RESOLUTE | PERSONALITY: FLEET | PERSONALITY: EAGER | PERSONALITY: SMILEY |
|---|---|---|---|---|---|---|---|---|---|---|---|---|---|---|---|---|---|
| Weird Egg | Feast | Light | 0 | 0 | 0 | 1 | 0 | 2 | 0 | 2 | 0 | -1 | 0 | 2 | 0 | 0 | 0 |
| Tasty Weird Egg | Feast | Light | 0 | 0 | 0 | 2 | 0 | 5 | -2 | 2 | 0 | 0 | 0 | 5 | 0 | 2 | 0 |
| Delicious Weird Egg | Feast | Light | 0 | 0 | 0 | 3 | 0 | 10 | -5 | 5 | -2 | 2 | 0 | 5 | -2 | 2 | 0 |
| Lon Lon Milk | Drink | Light | 0 | 0 | 0 | 1 | 0 | 2 | 0 | -1 | 0 | 0 | 0 | 5 | 0 | 2 | 0 |
| Tasty Lon Lon Milk | Drink | Light | 0 | 0 | 0 | 2 | 0 | 2 | 0 | 0 | 0 | 2 | 0 | 5 | -2 | 5 | 0 |
| ReTastying Lon Lon Milk | Drink | Light | 0 | 0 | 0 | 3 | 0 | 5 | -2 | 2 | 0 | 2 | 0 | 10 | -5 | 5 | -2 |
| Odd Mushroom | Plant | Darkness | 0 | 0 | 0 | 0 | 1 | 0 | 0 | 2 | 0 | 2 | 0 | 2 | 0 | -1 | 0 |
| Tasty Odd Mushroom | Plant | Darkness | 0 | 0 | 0 | 0 | 2 | 2 | 0 | 5 | -2 | 2 | 0 | 5 | 0 | 0 | 0 |
| Delicious Odd Mushroom | Plant | Darkness | 0 | 0 | 0 | 0 | 3 | 2 | 0 | 10 | -5 | 5 | -2 | 5 | -2 | 2 | 0 |
| Deku Nut | Plant | Lightning | 0 | 0 | 1 | 0 | 0 | -1 | 0 | 2 | 0 | 2 | 0 | 2 | 0 | 0 | 0 |
| Tasty Deku Nut | Plant | Lightning | 0 | 0 | 2 | 0 | 0 | 0 | 0 | 5 | 0 | 5 | -2 | 2 | 0 | 2 | 0 |
| Delicious Deku Nut | Plant | Lightning | 0 | 0 | 3 | 0 | 0 | 2 | 0 | 5 | -2 | 10 | -5 | 5 | -2 | 2 | 0 |
| Magic Beans | Plant | Water | 0 | 1 | 0 | 0 | 0 | 2 | 0 | -1 | 0 | 2 | 0 | 0 | 0 | 2 | 0 |
| Tasty Magic Beans | Plant | Water | 0 | 2 | 0 | 0 | 0 | 5 | 0 | 0 | 0 | 5 | -2 | 2 | 0 | 2 | 0 |
| Delicious Magic Beans | Plant | Water | 0 | 3 | 0 | 0 | 0 | 5 | -2 | 2 | 0 | 10 | -5 | 2 | 0 | 5 | -2 |
| Pumpkin Soup | Drink | Fire | 1 | 0 | 0 | 0 | 0 | 0 | 0 | 0 | -1 | 2 | 0 | 2 | 0 | 2 | 0 |
| Tasty Pumpkin Soup | Drink | Fire | 2 | 0 | 0 | 0 | 0 | 2 | 0 | 0 | 0 | 2 | 0 | 5 | -2 | 5 | 0 |
| Delicious Pumpkin Soup | Drink | Fire | 3 | 0 | 0 | 0 | 0 | 2 | 0 | 0 | 2 | 5 | -2 | 10 | -5 | 5 | -2 |
| Sacred Water | Drink | Water | 0 | 1 | 0 | 0 | 0 | 2 | 0 | 0 | -1 | 2 | 0 | 2 | 0 | 0 | 0 |
| Tasty Sacred Water | Drink | Water | 0 | 2 | 0 | 0 | 0 | 5 | -2 | 0 | 0 | 5 | 0 | 2 | 0 | 2 | 0 |
| ReTastying Sacred Water | Drink | Water | 0 | 3 | 0 | 0 | 0 | 10 | -5 | 0 | 2 | 5 | -2 | 5 | -2 | 2 | 0 |
| Life Tree Fruit | Plant | Light | 0 | 0 | 0 | 1 | 0 | 0 | 0 | 0 | -1 | 2 | 0 | 2 | 0 | 2 | 0 |
| Tasty Life Tree Fruit | Plant | Light | 0 | 0 | 0 | 2 | 0 | 2 | 0 | 0 | 0 | 5 | -2 | 5 | 0 | 2 | 0 |
| Delicious Life Tree Fruit | Plant | Light | 0 | 0 | 0 | 3 | 0 | 2 | 0 | 0 | 2 | 10 | -5 | 5 | -2 | 5 | -2 |
| Light Fruit | Plant | Light | 0 | 0 | 0 | 1 | 0 | 2 | 0 | 0 | -1 | 2 | 0 | 0 | 0 | 2 | 0 |
| Tasty Light Fruit | Plant | Light | 0 | 0 | 0 | 2 | 0 | 5 | -2 | 0 | 0 | 5 | 0 | 2 | 0 | 2 | 0 |
| Delicious Light Fruit | Plant | Light | 0 | 0 | 0 | 3 | 0 | 10 | -5 | 0 | 2 | 5 | -2 | 2 | 0 | 5 | -2 |
| Stamina Fruit | Plant | Fire | 1 | 0 | 0 | 0 | 0 | 2 | 0 | 0 | 0 | -1 | 0 | 2 | 0 | 2 | 0 |
| Tasty Stamina Fruit | Plant | Fire | 2 | 0 | 0 | 0 | 0 | 5 | 0 | 0 | 2 | 0 | 0 | 5 | -2 | 2 | 0 |
| Delicious Stamina Fruit | Plant | Fire | 3 | 0 | 0 | 0 | 0 | 5 | -2 | 0 | 2 | 2 | 0 | 10 | -5 | 5 | -2 |
| Water Fruit | Plant | Water | 0 | 1 | 0 | 0 | 0 | -1 | 0 | 0 | 2 | 2 | 0 | 2 | 0 | 0 | 0 |
| Tasty Water Fruit | Plant | Water | 0 | 2 | 0 | 0 | 0 | 0 | 0 | 0 | 5 | 2 | 0 | 5 | -2 | 2 | 0 |
| Delicious Water Fruit | Plant | Water | 0 | 3 | 0 | 0 | 0 | 2 | 0 | -2 | 5 | 5 | -2 | 10 | -5 | 2 | 0 |
| Mushroom Spores | Weird | Lightning | 0 | 0 | 1 | 0 | 0 | 2 | 0 | 0 | 2 | 2 | 0 | -1 | 0 | 0 | 0 |
| Tasty Mushroom Spores | Weird | Lightning | 0 | 0 | 2 | 0 | 0 | 5 | -2 | 0 | 2 | 5 | 0 | 0 | 0 | 2 | 0 |
| Delicious Mushroom Spores | Weird | Lightning | 0 | 0 | 3 | 0 | 0 | 10 | -5 | -2 | 5 | 5 | -2 | 2 | 0 | 2 | 0 |
| All-purpose Bait | Feast | Light | 0 | 0 | 0 | 1 | 0 | 0 | 0 | -1 | 0 | 2 | 0 | 2 | 0 | 0 | 2 |
| Tasty All-purpose Bait | Feast | Light | 0 | 0 | 0 | 2 | 0 | 2 | 0 | 0 | 0 | 5 | 0 | 2 | 0 | -2 | 5 |
| Delicious All-purpose Bait | Feast | Light | 0 | 0 | 0 | 3 | 0 | 2 | 0 | 2 | 0 | 5 | -2 | 5 | -2 | -5 | 10 |
| Elixir Soup | Drink | Fire | 1 | 0 | 0 | 0 | 0 | 0 | 0 | -1 | 0 | 2 | 0 | 2 | 0 | 0 | 2 |
| Tasty Elixir Soup | Drink | Fire | 2 | 0 | 0 | 0 | 0 | 2 | 0 | 0 | 0 | 2 | 0 | 5 | 0 | -2 | 5 |
| Delicious Elixir Soup | Drink | Fire | 3 | 0 | 0 | 0 | 0 | 2 | 0 | 2 | 0 | 5 | -2 | 5 | -2 | -5 | 10 |
| Hyoi Pear | Plant | Lightning | 0 | 0 | 1 | 0 | 0 | -1 | 0 | 2 | 0 | 2 | 0 | 0 | 0 | 0 | 2 |
| Tasty Hyoi Pear | Plant | Lightning | 0 | 0 | 2 | 0 | 0 | 0 | 0 | 5 | 0 | 2 | 0 | 2 | 0 | -2 | 5 |
| Delicious Hyoi Pear | Plant | Lightning | 0 | 0 | 3 | 0 | 0 | 2 | 0 | 5 | -2 | 5 | -2 | 2 | 0 | -5 | 10 |
| Ordon Goat Cheese | Feast | Darkness | 0 | 0 | 0 | 0 | 1 | 0 | 2 | 2 | 0 | 0 | 0 | 2 | 0 | -1 | 0 |
| Tasty Ordon Goat Cheese | Feast | Darkness | 0 | 0 | 0 | 0 | 2 | 0 | 2 | 5 | -2 | 0 | 2 | 5 | 0 | 0 | 0 |
| Delicious Ordon Goat Cheese | Feast | Darkness | 0 | 0 | 0 | 0 | 3 | -2 | 5 | 10 | -5 | 0 | 2 | 5 | -2 | 2 | 0 |
| Great Fairy’s Tears | Drink | Light | 0 | 0 | 0 | 1 | 0 | 0 | 2 | 0 | 0 | 0 | 2 | 2 | 0 | -1 | 0 |
| Tasty Great Fairy’s Tears | Drink | Light | 0 | 0 | 0 | 2 | 0 | 0 | 5 | 2 | 0 | -2 | 5 | 2 | 0 | 0 | 0 |
| ReTastying Great Fairy’s Tears | Drink | Light | 0 | 0 | 0 | 3 | 0 | -2 | 5 | 2 | 0 | -5 | 10 | 5 | -2 | 2 | 0 |
| Greengill | Fish | Water | 0 | 1 | 0 | 0 | 0 | 0 | 0 | -1 | 0 | 0 | 2 | 2 | 0 | 2 | 0 |
| Tasty Greengill | Fish | Water | 0 | 2 | 0 | 0 | 0 | 0 | 2 | 0 | 0 | -2 | 5 | 2 | 0 | 5 | 0 |
| Delicious Greengill | Fish | Water | 0 | 3 | 0 | 0 | 0 | 0 | 2 | 2 | 0 | -5 | 10 | 5 | -2 | 5 | -2 |
| Ordon Catfish | Fish | Water | 0 | 1 | 0 | 0 | 0 | 0 | 2 | 2 | 0 | 0 | 2 | -1 | 0 | 0 | 0 |
| Tasty Ordon Catfish | Fish | Water | 0 | 2 | 0 | 0 | 0 | -2 | 5 | 5 | 0 | 0 | 2 | 0 | 0 | 2 | 0 |
| Delicious Ordon Catfish | Fish | Water | 0 | 3 | 0 | 0 | 0 | -5 | 10 | 5 | -2 | -2 | 5 | 2 | 0 | 2 | 0 |
| Hyrule Bass | Fish | Water | 0 | 1 | 0 | 0 | 0 | 0 | 2 | 2 | 0 | 0 | 0 | 2 | 0 | -1 | 0 |
| Tasty Hyrule Bass | Fish | Water | 0 | 2 | 0 | 0 | 0 | -2 | 5 | 2 | 0 | 0 | 2 | 5 | 0 | 0 | 0 |
| Delicious Hyrule Bass | Fish | Water | 0 | 3 | 0 | 0 | 0 | -5 | 10 | 5 | -2 | 0 | 2 | 5 | -2 | 2 | 0 |
| Hylian Pike | Fish | Water | 0 | 1 | 0 | 0 | 0 | 0 | 2 | 0 | 0 | 0 | -1 | 2 | 0 | 2 | 0 |
| Tasty Hylian Pike | Fish | Water | 0 | 2 | 0 | 0 | 0 | 0 | 2 | 2 | 0 | 0 | 0 | 5 | -2 | 5 | 0 |
| Delicious Hylian Pike | Fish | Water | 0 | 3 | 0 | 0 | 0 | -2 | 5 | 2 | 0 | 0 | 2 | 10 | -5 | 5 | -2 |
| Reekfish | Fish | Water | 0 | 1 | 0 | 0 | 0 | 0 | 2 | 2 | 0 | 0 | -1 | 2 | 0 | 0 | 0 |
| Tasty Reekfish | Fish | Water | 0 | 2 | 0 | 0 | 0 | 0 | 2 | 5 | -2 | 0 | 0 | 5 | 0 | 2 | 0 |
| Delicious Reekfish | Fish | Water | 0 | 3 | 0 | 0 | 0 | -2 | 5 | 10 | -5 | 0 | 2 | 5 | -2 | 2 | 0 |
| Hylian Loach | Fish | Water | 0 | 1 | 0 | 0 | 0 | 0 | 2 | -1 | 0 | 0 | 2 | 0 | 0 | 2 | 0 |
| Tasty Hylian Loach | Fish | Water | 0 | 2 | 0 | 0 | 0 | 0 | 2 | 0 | 0 | 0 | 5 | 2 | 0 | 5 | -2 |
| Delicious Hylian Loach | Fish | Water | 0 | 3 | 0 | 0 | 0 | -2 | 5 | 2 | 0 | -2 | 5 | 2 | 0 | 10 | -5 |
| Skullfish | Weird | Darkness | 0 | 0 | 0 | 0 | 1 | 0 | -1 | 2 | 0 | 0 | 2 | 2 | 0 | 0 | 0 |
| Tasty Skullfish | Weird | Darkness | 0 | 0 | 0 | 0 | 2 | 0 | 0 | 5 | -2 | 0 | 2 | 5 | 0 | 2 | 0 |
| Delicious Skullfish | Weird | Darkness | 0 | 0 | 0 | 0 | 3 | 0 | 2 | 10 | -5 | -2 | 5 | 5 | -2 | 2 | 0 |
| Bombfish | Weird | Darkness | 0 | 0 | 0 | 0 | 1 | 0 | -1 | 2 | 0 | 0 | 0 | 2 | 0 | 5 | 0 |
| Tasty Bombfish | Weird | Darkness | 0 | 0 | 0 | 0 | 2 | 0 | 0 | 5 | 0 | 0 | 2 | 2 | 0 | 5 | -2 |
| Delicious Bombfish | Weird | Darkness | 0 | 0 | 0 | 0 | 3 | 0 | 2 | 5 | -2 | 0 | 2 | 5 | -2 | 10 | -5 |
| Chu Jelly | Weird | Lightning | 0 | 0 | 1 | 0 | 0 | 0 | 2 | 2 | 0 | 0 | -1 | 2 | 0 | 0 | 0 |
| Tasty Chu Jelly | Weird | Lightning | 0 | 0 | 2 | 0 | 0 | 0 | 5 | 2 | 0 | 0 | 0 | 5 | -2 | 2 | 0 |
| Delicious Chu Jelly | Weird | Lightning | 0 | 0 | 3 | 0 | 0 | -2 | 5 | 5 | -2 | 0 | 2 | 10 | -5 | 2 | 0 |
| Bee Larvae | Weird | Lightning | 0 | 0 | 1 | 0 | 0 | 0 | 0 | 2 | 0 | 0 | -1 | 2 | 0 | 2 | 0 |
| Tasty Bee Larvae | Weird | Lightning | 0 | 0 | 2 | 0 | 0 | 0 | 2 | 5 | 0 | 0 | 0 | 2 | 0 | 5 | -2 |
| Delicious Bee Larvae | Weird | Lightning | 0 | 0 | 3 | 0 | 0 | 0 | 2 | 5 | -2 | 0 | 2 | 5 | -2 | 10 | -5 |
| Chateau Romani | Drink | Darkness | 0 | 0 | 0 | 0 | 1 | 0 | 0 | 2 | 0 | 2 | 0 | 0 | 2 | -1 | 0 |
| Tasty Chateau Romani | Drink | Darkness | 0 | 0 | 0 | 0 | 2 | 0 | 2 | 5 | -2 | 5 | 0 | 0 | 2 | 0 | 0 |
| ReTastying Chateau Romani | Drink | Darkness | 0 | 0 | 0 | 0 | 3 | 0 | 2 | 10 | -5 | 5 | -2 | -2 | 5 | 2 | 0 |
| Bottled Water | Drink | Water | 0 | 1 | 0 | 0 | 0 | 0 | 2 | -1 | 0 | 2 | 0 | 0 | 2 | 0 | 0 |
| Tasty Bottled Water | Drink | Water | 0 | 2 | 0 | 0 | 0 | 0 | 5 | 0 | 0 | 5 | -2 | 0 | 2 | 2 | 0 |
| ReTastying Bottled Water | Drink | Water | 0 | 3 | 0 | 0 | 0 | -2 | 5 | 2 | 0 | 10 | -5 | -2 | 5 | 2 | 0 |
| Hot Spring Water | Drink | Fire | 1 | 0 | 0 | 0 | 0 | 0 | 2 | 0 | 0 | -1 | 0 | 0 | 2 | 2 | 0 |
| Tasty Hot Spring Water | Drink | Fire | 2 | 0 | 0 | 0 | 0 | -2 | 5 | 2 | 0 | 0 | 0 | 0 | 2 | 5 | 0 |
| ReTastying Hot Spring Water | Drink | Fire | 3 | 0 | 0 | 0 | 0 | -5 | 10 | 2 | 0 | 2 | 0 | -2 | 5 | 5 | -2 |
| Rock Sirloin | Weird | Fire | 1 | 0 | 0 | 0 | 0 | 0 | -1 | 2 | 0 | 0 | 0 | 0 | 2 | 2 | 0 |
| Tasty Rock Sirloin | Weird | Fire | 2 | 0 | 0 | 0 | 0 | 0 | 0 | 5 | 0 | 2 | 0 | -2 | 5 | 2 | 0 |
| Delicious Rock Sirloin | Weird | Fire | 3 | 0 | 0 | 0 | 0 | 0 | 2 | 5 | -2 | 2 | 0 | -5 | 10 | 5 | -2 |
| Meat | Feast | Fire | 1 | 0 | 0 | 0 | 0 | 0 | -1 | 2 | 0 | 0 | 0 | 0 | 2 | 2 | 0 |
| Tasty Meat | Feast | Fire | 2 | 0 | 0 | 0 | 0 | 0 | 0 | 5 | -2 | 2 | 0 | 0 | 5 | 2 | 0 |
| Delicious Meat | Feast | Fire | 3 | 0 | 0 | 0 | 0 | 0 | 2 | 10 | -5 | 2 | 0 | -2 | 5 | 5 | -2 |
| Carrot | Plant | Lightning | 0 | 0 | 1 | 0 | 0 | -1 | 0 | 2 | 0 | 0 | 0 | 0 | 2 | 0 | 2 |
| Tasty Carrot | Plant | Lightning | 0 | 0 | 2 | 0 | 0 | 0 | 0 | 2 | 0 | 2 | 0 | -2 | 5 | 0 | 5 |
| Delicious Carrot | Plant | Lightning | 0 | 0 | 3 | 0 | 0 | 2 | 0 | 5 | -2 | 2 | 0 | -5 | 10 | -2 | 5 |
| Ember Seeds | Plant | Fire | 1 | 0 | 0 | 0 | 0 | 0 | 0 | 2 | 0 | -1 | 0 | 0 | 2 | 2 | 0 |
| Tasty Ember Seeds | Plant | Fire | 2 | 0 | 0 | 0 | 0 | 0 | 2 | 5 | -2 | 0 | 0 | 0 | 2 | 5 | 0 |
| Delicious Ember Seeds | Plant | Fire | 3 | 0 | 0 | 0 | 0 | 0 | 2 | 10 | -5 | 2 | 0 | -2 | 5 | 5 | -2 |
| Scent Seeds | Plant | Darkness | 0 | 0 | 0 | 1 | 0 | 0 | 0 | 2 | 0 | 2 | 0 | 0 | 2 | -1 | 0 |
| Tasty Scent Seeds | Plant | Darkness | 0 | 0 | 0 | 2 | 0 | 0 | 2 | 5 | 0 | 2 | 0 | -2 | 5 | 0 | 0 |
| Delicious Scent Seeds | Plant | Darkness | 0 | 0 | 0 | 3 | 0 | 0 | 2 | 5 | -2 | 5 | -2 | -5 | 10 | 2 | 0 |
| Pegasus Seeds | Plant | Lightning | 0 | 0 | 1 | 0 | 0 | 0 | -1 | 0 | 0 | 2 | 0 | 0 | 2 | 2 | 0 |
| Tasty Pegasus Seeds | Plant | Lightning | 0 | 0 | 2 | 0 | 0 | 0 | 0 | 2 | 0 | 2 | 0 | -2 | 5 | 5 | 0 |
| Delicious Pegasus Seeds | Plant | Lightning | 0 | 0 | 3 | 0 | 0 | 0 | 2 | 2 | 0 | 5 | -2 | -5 | 10 | 5 | -2 |
| Gale Seeds | Plant | Water | 0 | 1 | 0 | 0 | 0 | 0 | 2 | 2 | 0 | 2 | 0 | 0 | 0 | -1 | 0 |
| Tasty Gale Seeds | Plant | Water | 0 | 2 | 0 | 0 | 0 | 0 | 2 | 5 | -2 | 5 | 0 | 0 | 2 | 0 | 0 |
| Delicious Gale Seeds | Plant | Water | 0 | 3 | 0 | 0 | 0 | -2 | 5 | 10 | -5 | 5 | -2 | 0 | 2 | 2 | 0 |
| Mystery Seeds | Plant | Light | 0 | 0 | 0 | 0 | 1 | 0 | 2 | 2 | 0 | 2 | 0 | 0 | -1 | 0 | 0 |
| Tasty Mystery Seeds | Plant | Light | 0 | 0 | 0 | 0 | 2 | 0 | 5 | 2 | 0 | 5 | -2 | 0 | 0 | 2 | 0 |
| Delicious Mystery Seeds | Plant | Light | 0 | 0 | 0 | 0 | 3 | -2 | 5 | 5 | -2 | 10 | -5 | 0 | 2 | 2 | 0 |
| Gratitude Crystal | Feast | Fire | 2 | 0 | 0 | 0 | 0 | 5 | 5 | 5 | 5 | 5 | 5 | 5 | 5 | 5 | 5 |
| Gratitude Crystal | Feast | Fire | 3 | 0 | 0 | 0 | 0 | 10 | 10 | 10 | 10 | 10 | 10 | 10 | 10 | 10 | 10 |
| Gratitude Crystal | Feast | Water | 0 | 2 | 0 | 0 | 0 | 5 | 5 | 5 | 5 | 5 | 5 | 5 | 5 | 5 | 5 |
| Gratitude Crystal | Feast | Water | 0 | 3 | 0 | 0 | 0 | 10 | 10 | 10 | 10 | 10 | 10 | 10 | 10 | 10 | 10 |
| Gratitude Crystal | Feast | Lightning | 0 | 0 | 2 | 0 | 0 | 5 | 5 | 5 | 5 | 5 | 5 | 5 | 5 | 5 | 5 |
| Gratitude Crystal | Feast | Lightning | 0 | 0 | 3 | 0 | 0 | 10 | 10 | 10 | 10 | 10 | 10 | 10 | 10 | 10 | 10 |
| Gratitude Crystal | Feast | Light | 0 | 0 | 0 | 2 | 0 | 5 | 5 | 5 | 5 | 5 | 5 | 5 | 5 | 5 | 5 |
| Gratitude Crystal | Feast | Light | 0 | 0 | 0 | 3 | 0 | 10 | 10 | 10 | 10 | 10 | 10 | 10 | 10 | 10 | 10 |
| Gratitude Crystal | Feast | Darkness | 0 | 0 | 0 | 0 | 2 | 5 | 5 | 5 | 5 | 5 | 5 | 5 | 5 | 5 | 5 |
| Gratitude Crystal | Feast | Darkness | 0 | 0 | 0 | 0 | 3 | 10 | 10 | 10 | 10 | 10 | 10 | 10 | 10 | 10 | 10 |
| Pumpkin | Plant | Light | 0 | 0 | 0 | 1 | 0 | -1 | 0 | 0 | 0 | 2 | 0 | 2 | 0 | 2 | 0 |
| Tasty Pumpkin | Plant | Light | 0 | 0 | 0 | 2 | 0 | 0 | 0 | 0 | 2 | 5 | 0 | 2 | 0 | 5 | -2 |
| Delicious Pumpkin | Plant | Light | 0 | 0 | 0 | 3 | 0 | 2 | 0 | 0 | 2 | 5 | -2 | 5 | -2 | 10 | -5 |