
Final Fantasy XII: The Zodiac Age Guide Zodiac Job System
Zodiac Job System
Among many updates, the Zodiac Job System stands out as the most significant alteration to FINAL FANTASY XII. The purpose of this chapter is to help you make lasting, effective, and fun choices for your combat party. We would caution you about delving too far into most chapters before you’ve seen the content yourself, to avoid potentially spoiling the experience, but that’s not the case here. You’ll be better off spending a little time thinking about party makeup early, rather than wishing you’d made different choices 100 hours later. This chapter describes the basic concerns of Job assignment and party building, as well as crucial long-term implications, which are not apparent early on.
Jobs of the Zodiac age
A History of Updates
2006: FINAL FANTASY XII
In the original release of FFXII, all characters were developed on an enormous license board. There was specialty and customization, but eventually it was possible to more or less give all abilities to all characters. This aspect was somewhat altered from many early FINAL FANTASY titles, where heroes were locked into different roles.
2007: FINAL FANTASY XII International Zodiac Job System
In 2007, a job system was introduced through the International Zodiac Job System re-release of the game in Japan. Here, at a certain level of progression, each of the six main characters could be permanently locked into a particular Job, each of which had its own unique license board for further character development. This release of FFXII took care of the problem of not allowing for strong customization and distinct roles between characters, but it was never released in English-speaking markets (though many fans acquired the Japanese version to play anyway, which used English language cutscenes—hence “International” in the title for the Japanese re-release). While the FINAL FANTASY XII: International Zodiac Job System introduced lots of new gameplay variation, it also created new issues: with six characters and 12 Jobs, it wasn’t possible to enjoy all the abilities and weapons available in one playthrough. It was also possible to design parties that were capable of completing the main game, but inadequate to the challenge of the toughest side quests, not to mention Trial Mode.
2017: FINAL FANTASY XII: The Zodiac Age
With this new, remastered Final Fantasy: The Zodiac Age edition, these issues are addressed. As before, after enough game progression, you’ll be able to assign each of the six main heroes with a permanent Job, granting them access to that Job’s license board. But now, not long after that, you’ll be able to assign a second Job (and license board) to each character!
The ability to assign a second Job board is gained at the same time as access to the first Esper.
The potential here is dizzying, in all directions. You can think of these Jobs as FFXI-style “subjobs,” using them to bolster the strengths of your “main” Job, like granting more battle and swiftness lores than would normally be available. Or, you can use them to shore up deficiencies, like adding heavy armor capability to a fragile white or black mage.
Some considerations are obvious, like adding a mage board onto a melee to make a more survivable, flexible hybrid. Or mixing weapon and armor types that don’t normally get to blend.
But some are less obvious, like choosing a pair of Jobs based on what you’ll unlock by giving that character a particular Esper, adding unique capabilities to that combination.
| Character | Roles | First Job | Second Job | Quickening to Skip | Espers | |||
|---|---|---|---|---|---|---|---|---|
|
Vaan |
Melee & Magick damage |
75 |
Ultima |
— |
— |
— |
||
|
Penelo |
Tanking, Melee Damage, (Healing later) |
50 |
Chaos |
Zodiark |
— |
— |
||
|
Basch |
Melee & Ranged Damage, Damage, Support |
Time Mage |
50 |
Zalera |
Adrammelech |
— |
— |
|
|
Balthier |
Healing, Ranged Damage, Support |
125 |
Belias |
— |
— |
— |
||
|
Fran |
Melee & Magick Damage, Healing, Support, Tanking |
100 |
Zeromus |
Exodus |
Cúchulainn |
Shemhazai |
||
|
Ashe |
Tanking, Melee Damage, (Healing later) |
100 |
Hashmal |
Famfrit |
Mateus |
— |
||
Licenses
Licenses are what make the characters function, and the only difference between Jobs is which licenses they bring to the table. At the core of your team’s identity and functionality are their Licenses. Magicks, technicks, weapons, armor, and even accessories require a license before a character can wield or equip them. Each character enters the game with a few basic licenses. You can try to optimize your choice to take advantage of these free licenses, giving your characters Jobs which suit this flavor, or simply follow your whims.
Licenses are purchased with LP (License Points) earned during battle. Most creatures are worth 1 LP, so it can take a long time to earn the LP needed to unlock some of the best licenses. (Once you’re strong enough to make a little progress in Trial Mode, it becomes an excellent source of LP—see the Trial Mode chapter for more on this.) Check a character’s LP by entering the Licenses sub-menu within the Main Menu. Each character can have as much as 99999 LP accumulated; although collecting that much LP would be a highly unlikely scenario, any LP beyond the amount you need to fill out the characters’ license boards is wasted.
Purchasing Licenses
At first, most of the boards appear blank and desolate. On top of that, you will obtain a second board, invisibly intersecting your first. Fortunately, you have this guide to provide a visual map of both boards and allow for better planning from the beginning. Each character starts with a few innate abilities, which will be unlocked on any boards that contain them. These panels represent the character’s experience prior to joining the party. It also enables them to wield basic weapons and armor while using some low-level magicks and technicks too, so they can do a little more than just attack at the start of the adventure. (Should you choose to progress jobless to just after the Tomb of Raithwall, granting access to both boards on a pristine party, it’s these abilities you’ll have to rely upon until then.)
| Character | Licenses | |||||
|---|---|---|---|---|---|---|
|
Vaan |
Daggers 1 |
Light Armor 1 |
Steal |
— |
— |
— |
|
Balthier |
Guns 1 |
Light Armor 2 |
Steal |
First Aid |
— |
— |
|
Fran |
Bows 1 |
Light Armor 2 |
White Magick 1 |
Black Magick 1 |
Steal |
— |
|
Basch |
Swords 2 |
Shields 1 |
Heavy Armor 1 |
Libra |
— |
— |
|
Ashe |
Swords 2 |
Shields 1 |
Heavy Armor 1 |
Accessories 2 |
White Magick 1 |
Libra |
|
Penelo |
Daggers 1 |
Mystic Armor 1 |
White Magick 1 |
First Aid |
— |
— |
Next to the unlocked panels are locked panels. These panels are filled in, but haven’t been purchased with LP. Press the  button over a locked panel and the game will ask you to confirm the purchase if the character has enough LP to complete the transaction. Agree to do so to unlock the locked panel. Any unfilled panels adjacent to the recently unlocked panel have their information filled in on the board. These are now available for purchase. While unfilled panels look blank, if you move your cursor over them, you can see what they contain, letting you plan ahead.
What Should I Buy?
While each character will likely have all of their unique abilities and equipment unlocked by the end of game, prioritizing which order to do this in can spare you a significant amount of hassle. With the magic of two simultaneous boards, it’s now possible to skip across license boards with a few, selective purchases. The Accessory, Battle Lore, and Magick Lore licenses in particular can often provide handy shortcuts for the forward-thinking gamer. Just reference the license boards ahead in this chapter to make those random unlocks a lot less random.
A good rule of thumb is to avoid grayed-out slots like the plague. If you don’t have a particular magick, technick, or equipment available, that license is a waste of points. Augments, on the other hand, always apply, making them a very alluring choice. A few Battle Lores or Health Point bonuses early on can make a huge difference when you stumble into a zone full of overpowered monsters.
Gambits are critical to a strong team, but early on you may not need to unlock all ten Gambit licenses on the board. If you have open slots you just aren’t using, save your License Points for something that will help you now, like Remedy Lore 3, which can save your party from the heartbreak of Disease before any other cures are available. On the other hand, when you need to put a gambit together to use a strong new ability or handle a tough situation, that slot is a wise investment.
Breaking Down the License Boards
Gambit Panels
Throughout the augmentations section, there are 10 Gambit Slot panels that increase in cost from 15 LP to as much as 100 LP. Unlocking a Gambit Slot panel adds a gambit slot to that character. This allows for the creation of additional gambits so you can automate more of a character’s actions. As noted, don’t invest in these panels at the very start of the game; instead, wait until the gambits are needed. A character can never have too many gambits, but extra HP and swiftness are far more important at the beginning of the game.
Quickenings
During Quickenings, characters draw upon the mist to unleash devastating attacks. Once one character begins a Quickening, you’ll be able to play a kind of mini-game to make other characters chain their Quickening attacks, one after another. This can often absolutely decimate a group of enemies or a boss, even allowing you to punch well above your weight class in fights against high-level beasts.
On each license board, there are potentially four Quickening panels, even though each character can unlock only three. Once three are unlocked, the fourth panel disappears. Planning which Quickenings a character should take doesn’t matter, unless the fourth panel you’re neglecting turns out to have something behind it, which isn’t an issue on most license boards for Quickenings (though it definitely is a concern for Espers). Whichever Quickening panels you unlock, your characters learn their three Quickening attacks in the same order. (Fun fact: Quickenings translate as “Mist Knacks” from the Japanese version.)
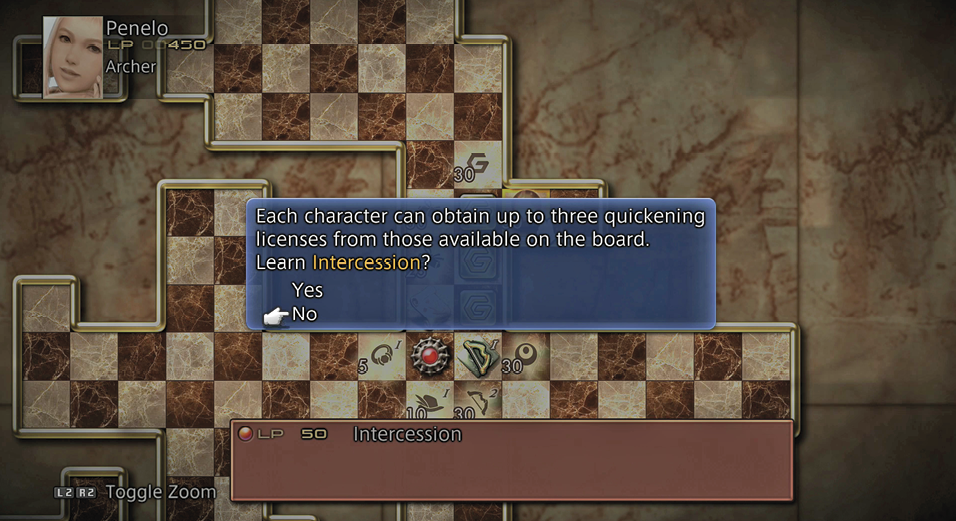
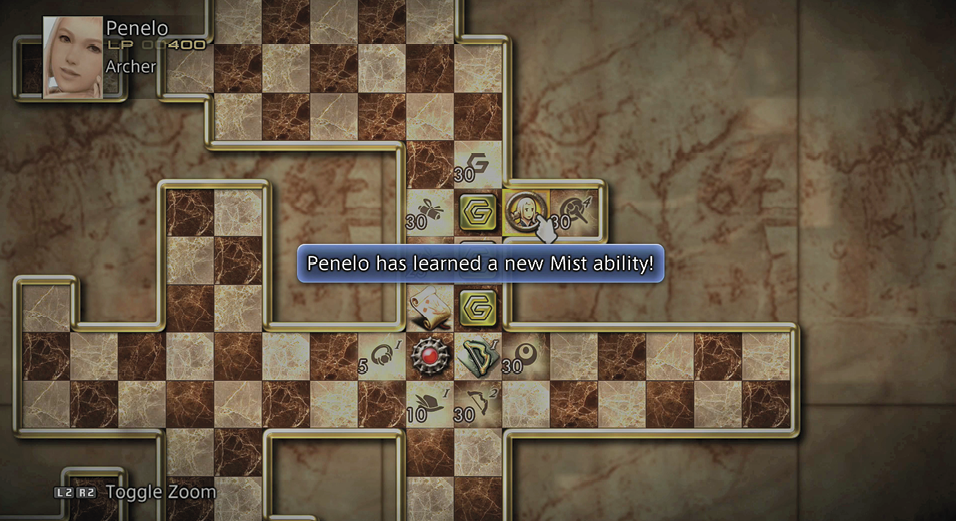
It pays to go after these panels early in the game because Quickenings are very powerful attacks, and because the more Quickenings you unlock for a character, the more Mist Charges they can store in reserve. Performing a Quickening expends a Mist Charge. Upon unlocking a second and third Quickening panel, the character also gains an additional Mist Charge each time. Mist Charges are also expended when summoning Espers.
Espers
Espers don’t appear on the license board until the party finds them and subsequently defeats them. (The time of your first encounter with an Esper is also when characters first gain access to second license boards.) Esper slots appear as empty spaces until that time arises. Characters can learn any number of Espers, but a character can only summon one Esper at a time. More importantly, only the character who unlocks the Esper may command it.
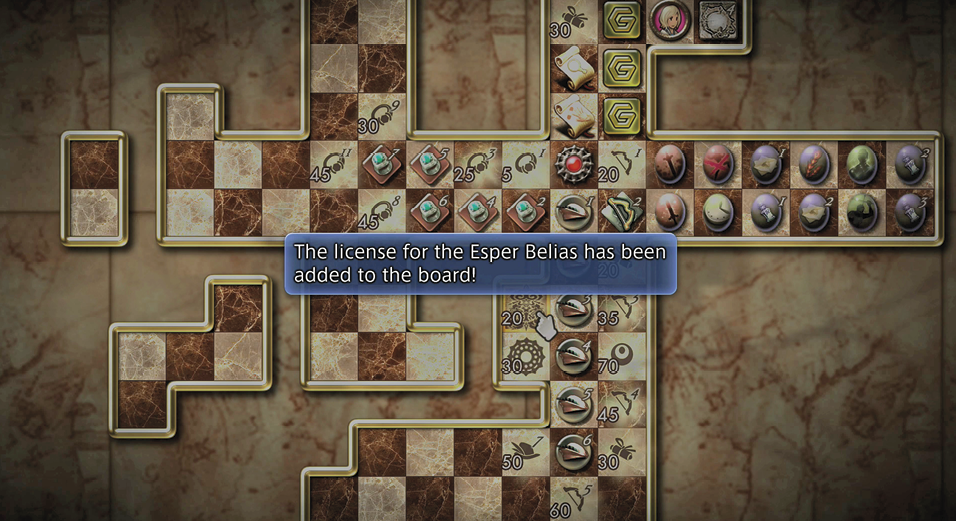
It requires from one to three Mist Charges to summon an Esper. Try to evenly spread out the Espers amongst the party members, heeding what each character gains on their dual license boards by choosing certain Espers. Be sure to consult the Esper and Quickening Lock chart (later in this chapter) when deciding which licenses to unlock!
Magicks
Powerful spells used to inflict damage, cure wounds, strengthen the party, and weaken the enemy.
White Magick
Focuses on healing and restoration.
White magick is used primarily for healing and reviving party members. These spells are critical to any viable team. Even those characters who focus on melee will benefit greatly from being able to shoulder some of the healing load. (And nowhere is white magick on a melee Job more obviously useful than when assigning Espers Mateus and Hashmal to characters assigned as Knights.) The most useful abilities include:
Cure & Curaga: Heal an individual party member. Curaga is an enhanced version of Cure that restores more lost HP. These are absolutely essential; pick them up as early as possible. Healing magick spells can also be directed against undead foes to damage them, a strategy that’s worked since time immemorial.
Cura & Curaja: These are “group heals” that affect every ally within a small area. These powerful spells will eventually replace Cure and Curaga.
Raise & Arise: You can use these spells to revive a fallen ally. This is essential as the game progresses and enemies become more and more vicious. Players may also use tufts of Phoenix Down to restore downed characters more quickly, but at an added expense. These spells are the perfect choice in most situations.
Esuna & Esunaga: Negative status effects can cripple party members. These magicks make it easy to erase the negative status. Although they don’t affect every status, they take care of the most common ones. All-purpose Esuna aside, the most important specialized status-curing spell is probably Cleanse, which is crucial for removing the devastating Disease effect from allies.
Protect & Protectga: These magicks improve the party’s defense against physical attacks. This is essential when facing a powerful foe in battle. In tough fights, the damage reduction can mean the difference between death and a narrow victory.
Shell & Shellga: Much like the previous magicks, these increase the party’s magick defense. It reduces the damage of enemy magicks significantly and can also prove to be a deciding factor in a major battle.
Faith & Bravery: Spells that boost magick or physical abilities. Apply surgically to characters specializing in either physical or magick damage dealing. Meanwhile, keep a watchful eye for enemies buffed with Bravery or Faith, since they’ll be extremely dangerous compared to their unbuffed comrades.
Dispel: This indispensable white magick spell removes a beneficial effect from the target. Use this to undo enemy buffs like Reflect, Haste, Bravery/Faith, and Protect/Shell. It can also remove Stop and Berserk from allies.
Holy: This strong white magick spell provides an avenue for efficient damage against dark-element enemies, like the undead. The guest character Reddas is capable of casting Holy.
Black Magick
Largely elemental attacks that allow the party to strike an enemy’s weak spot.
Black magick also includes some status effects used to weaken enemies.
Black magick is a powerful tool. Enemies with an elemental weakness may suffer critical damage from these magicks when other weapons and magicks seem to bounce right off. Gambits that check for an enemy’s elemental weakness and pair them with appropriate “nukes” are particularly strong. Make sure casters are equipped with the following:
Fire, Blizzard, Thunder: These are three of the basic elemental attacks. Any caster should be ready to use these at a moment’s notice. Aqua and Aero also provide water and wind element options; the earth element is assigned to certain abilities, but there are no earth-element nukes. More powerful versions of each elemental attack spell can be acquired, making them area-of-effect attacks.
Scourge: This is a powerful, non-elemental attack that sometimes leaves a Sap effect on its victims. The HP Sap continues to drain HP from the target until the status effect is removed. This is especially effective against targets with a tough physical defense.
Flare: This extremely powerful magick delivers a devastating, non-elemental blow. It’s perfect to use when the enemy is immune to the basic elements and tends to absorb magick damage. It’s also good to use during some boss fights. Shock and Scathe are comparable high-level black magick attacks, capable of inflicting gigantic, Concurrence-like amounts of damage.
Sleep, Sleepga: Crowd control spells that allow black mages to contribute to party stability. Keep these in mind to prevent being overwhelmed by lots of enemies at once. For example, once Sleepga is acquired, a gambit can be set up that triggers an area-of-effect slumber party when more than a certain number of enemies are detected.
Silence & Silencega: Casters are ineffective when they can’t use magicks. Silence robs an enemy of its ability to use magicks until the effect is removed. This effect never runs out on its own, so cast it early and it may last throughout the entire fight.
Blind & Blindga: Blind and Blindga can cripple a character who relies on melee fighting. This type of magick robs the victim of his eyesight, drastically reducing the enemy’s chance to hit. This effect never wears off, so use it early in battle.
Green Magick
Green magick provides strange and unusual effects to bolster and replenish the party, while focusing the enemy’s attention.
Decoy: This spell afflicts the target with the “Lure” status effect, which greatly increases the odds that they’ll attract hostile attention. Cast this on an ally, and you’ve essentially designated them as the “tank.” Equip them with a shield, heavy armor, and a Battle Harness accessory.
Bubble: This strange spell doubles the maximum HP of the target. It’s not necessary through the main adventure, but Bubble can be crucial for surviving some of the nastiest battles in side quests or Trial Mode.
Reverse: This peculiar spell reverses the effects of damage and healing—an enemy mindlessly wailing on a Reverse-afflicted character will simply keep healing them, while normal Cure-type spells will prove fatal. Combined with Decoy and specialized healing gambits that avoid the designated Reverse/Decoy tank, this spell can be horizon-expanding against the strongest marks.
Drain & Syphon: These offensive green magick spells allow either Health Points or Mist Points to be absorbed from enemy targets. Syphon in particular is great for frequent magick casters, since it’s more efficient at restoring MP than the Charge technick.
Time Magick
Speed-enhancing magick that improves the party’s efficiency or slows the enemy, among other things, including DOT (Damage Over Time) attacks.
The status effects found in Time magick increase the party’s speed, slow down enemies or stop them altogether, and cause damage over time. These are especially effective, since speed is a huge advantage in any battle. Magicks that damage over time are also an effective way to take down creatures that are otherwise too powerful.
Slow & Slowga: The Slow magicks are key to use when facing tough opponents like bosses or marks. Slowing the target reduces the damage it can cause over the course of the battle and it gives the party more time to react and heal. This effect eventually wears off during long battles, so you may need to recast it.
Haste & Hastega: Haste speeds up the party’s actions, allowing them to react and attack much faster. Combine Haste on the party with Slow on an enemy and the party will gain a huge advantage. These spells also eventually wear off during a long fight, so you may need to recast it.
Reflect: This spell places a magick shield before the character, which bounces incoming magick back at the caster. This can shield allies from enemy spells, but it also prevents healing by Cure magick. Reflect is most useful in specific fights where enemies wield overwhelming magick power. But it can also be a fun high-powered gimmick by keeping it active on all three allies, then bouncing area-of-effect nukes off the party, turning one spellcast into three hits on an enemy target.
Disable & Stop: These magicks temporarily remove the target from battle. They’re most effective when facing large groups of lesser enemies. Note that most bosses are immune to Disable and Stop.
Break: After casting Break, a 10-second countdown begins. If the effect isn’t removed in time, the target will turn to Stone. This is a great weapon to use against high-level enemies that are otherwise too strong for the party. Most bosses are immune to Break, but many random enemies aren’t.
Float: This magick enables the party to float over traps instead of trying to run around them. It never hurts to set this one up as a gambit, so that it’s always in effect while you’re exploring areas where traps are very common. It’s also a good way to counter Earth magick.
Arcane Magick
Powerful dark-based offensive magick.
This magick school allows Red Battlemages to compete with the offensive magickal output of black mages in the right conditions. Dark, Darkra, & Darkga: These magicks are powerful elemental attacks that are effective against many creatures early in the game.
Technicks
Unusual and sometimes useful abilities that don’t require MP.
Technicks are much like magicks except that they typically cause physical damage (except Shades of Black) and they don’t require MP to use. Many of these abilities have limited usefulness, since they rely on unusual conditions such as time played and steps taken. A few of the most useful technicks are:
Libra: This handy spell reveals more information about monsters, but more importantly, it also reveals traps. Keep it on a gambit from the very beginning of the game.
Steal: Almost every monster carries loot. Steal enables the party to snatch an extra item from enemies, which greatly increases the amount of loot you can collect. This in turn provides more gil and better weapons, armor, magicks, and technicks. Steal whenever possible!
Charge: When MP is running low, Charge is a consistent if not always speedy way to get some back. The only risk is that a miss reduces the user’s MP to zero. Only use this technick when a character’s MP is low to avoid misses and wasted MP.
Expose and Shear: These technicks reduce the target’s defense, and magick resist respectively. They can be applied repeatedly, amplifying their effects. Nothing is immune to these, making them life-savers against bosses.
Wither and Addle: Expose and Shear lower the target’s defense, while Wither and Addle reduce the target’s power. Wither reduces the enemy’s physical power, while Addle reduces their magickal power. Expose, Wither, Shear, and Addle work on all the game’s enemies, and can be used repeatedly to deeply diminish desired enemy parameters.
Accessories
Wearable items that provide passive bonuses, immunities, or increase the effectiveness of abilities.
The accessories found throughout the game play a huge role. They offer constant effects that are extremely valuable in any fight. Always ensure that characters have a good accessory equipped. These are some of the best available:
Golden Amulet: This item doubles the number of LP earned by the wearer. This is one of the most useful accessories in the game. It’s always a good thing to equip it on characters held in reserve, since they earn LP from every battle.
Embroidered Tippet: Need to quickly level up? This item doubles the EXP earned from each monster defeated. It only works on characters in the battle party, though. This is great if you desire to reach Level 99 with your characters, or help a low-level character catch up with the rest of the party.
Bubble Belt: This item has the same effect as the Bubble magick—it doubles the wearer’s HP. The difference between the two is that the effect is constant and can’t be dispelled or removed by death.
Diamond Armlet: This armlet is essential for finding the rarest treasures in the game.
Thief’s Cuffs: If it’s worth stealing, it’s worth stealing well. The Thief’s Cuffs improve the way your steal works, netting you a higher quality of loot and at a higher success rate as well.
Cat-ear Hood: This item provides a +3 boost to Speed, halves ice and wind damage, and converts all license points earned to gil.
Sage’s Ring: The Sage’s Ring cuts the MP cost of magicks in half, rounding down. Improve the efficiency of casters with this handy item. In particular, this can really allow a Black Mage or Red Battlemage to truly cut loose with their strongest Black Magick attacks.
Ribbon: The Ribbon always has been, and always will be, the ultimate FINAL FANTASY accessory! This accessory prevents all negative status effects, which makes even the toughest battles much easier.
Augments
Passive bonuses that greatly enhance the party’s effectiveness in battle.
Augmentations provide a character with passive bonuses that remain in effect throughout the course of the game. Purchase these early and make your party a specialized strike force right away!
+HP: These augmentations provide extra HP. Although the bonuses are initially small, they are worth the investment for every character.
Battle Lore & Magick Lore: These augmentations increase the party’s attack power and magick power, respectively.
Swiftness: Speed is everything and these augmentations reduce action time by 10% apiece up to a maximum of 30%. Unlock these as early as possible to drastically improve the party’s efficiency in combat.
Channeling: Channeling helps to conserve MP by reducing the cost of magicks by 10% up to a maximum of 30%. These are critical for healers.
Inquisitor, Martyr, Headsman, Warmage: Invest in these augmentations for each character, since they provide additional MP under various circumstances. You can never have too much MP!
Weapons & Armor
Armor: While each Job has only one type of armor and weapon fully represented, most or all of your characters will probably have two different types of each to choose between. At any moment, you’ll need to choose the right armor and weapons to unlock and wear.
Armor affects most attributes except for attack power. Equipping the right type of armor for a character’s role is vitally important. Equip the primary melee characters with heavy armor for strength and defense, and equip backup melee characters with light armor for speed and vitality. Equip mystic armor on casters for magick power and resistance. Shields are also essential for anyone wielding a one-handed weapon, especially if you intend to use Decoy on them, since they drastically reduce the damage taken from physical attacks.
Heavy Weapons: This section includes Swords, Bows, Spears, Axes, Hammers, Katana and massive Greatswords. Swords, and Greatswords tend to be the most reliable weapons since they cause consistent damage with each swing. These are optimal for primary melee characters who want to deal heavy damage and take some hits, too.
Hammers and Axes can cause tremendous damage, but they’re quite unpredictable. The number of big hits and little hits tends to balance out in the end, however. Bows serve as great ranged weapons and they are very effective against flying monsters. Katana aren’t as powerful as Greatswords, but they are fast and combo often. Spears are powerful, two-handed weapons that are great for hitting flying creatures.
Light Weapons: This portion of the license board includes Daggers, Guns, Poles, Hand-bombs, Crossbows, and Ninja Swords. Daggers and Ninja Swords rely heavily on speed and the ability to combo. Hand-bombs are effective ranged weapons, but cause unpredictable amounts of damage. Crossbows are also excellent ranged weapons with a variety of ammunition and are notable for being impossible to parry. Poles are extremely effective against enemies with low magick defense.
Mystic Weapons: Mystic weapons contain Staves, Rods, Maces, and Measures. Staves and Rods are excellent weapons for casters, since they greatly enhance the character’s magick power and often strengthen particular elemental attacks. Maces use magick power to determine damage instead of strength. Measures are unusual weapons that often leave behind beneficial status effects. These are better suited for characters who rarely attack the enemy and focus on supporting the other party members.