Final Fantasy XII: The Zodiac Age Guide Walkthrough Part 3
Mosphoran Highwaste
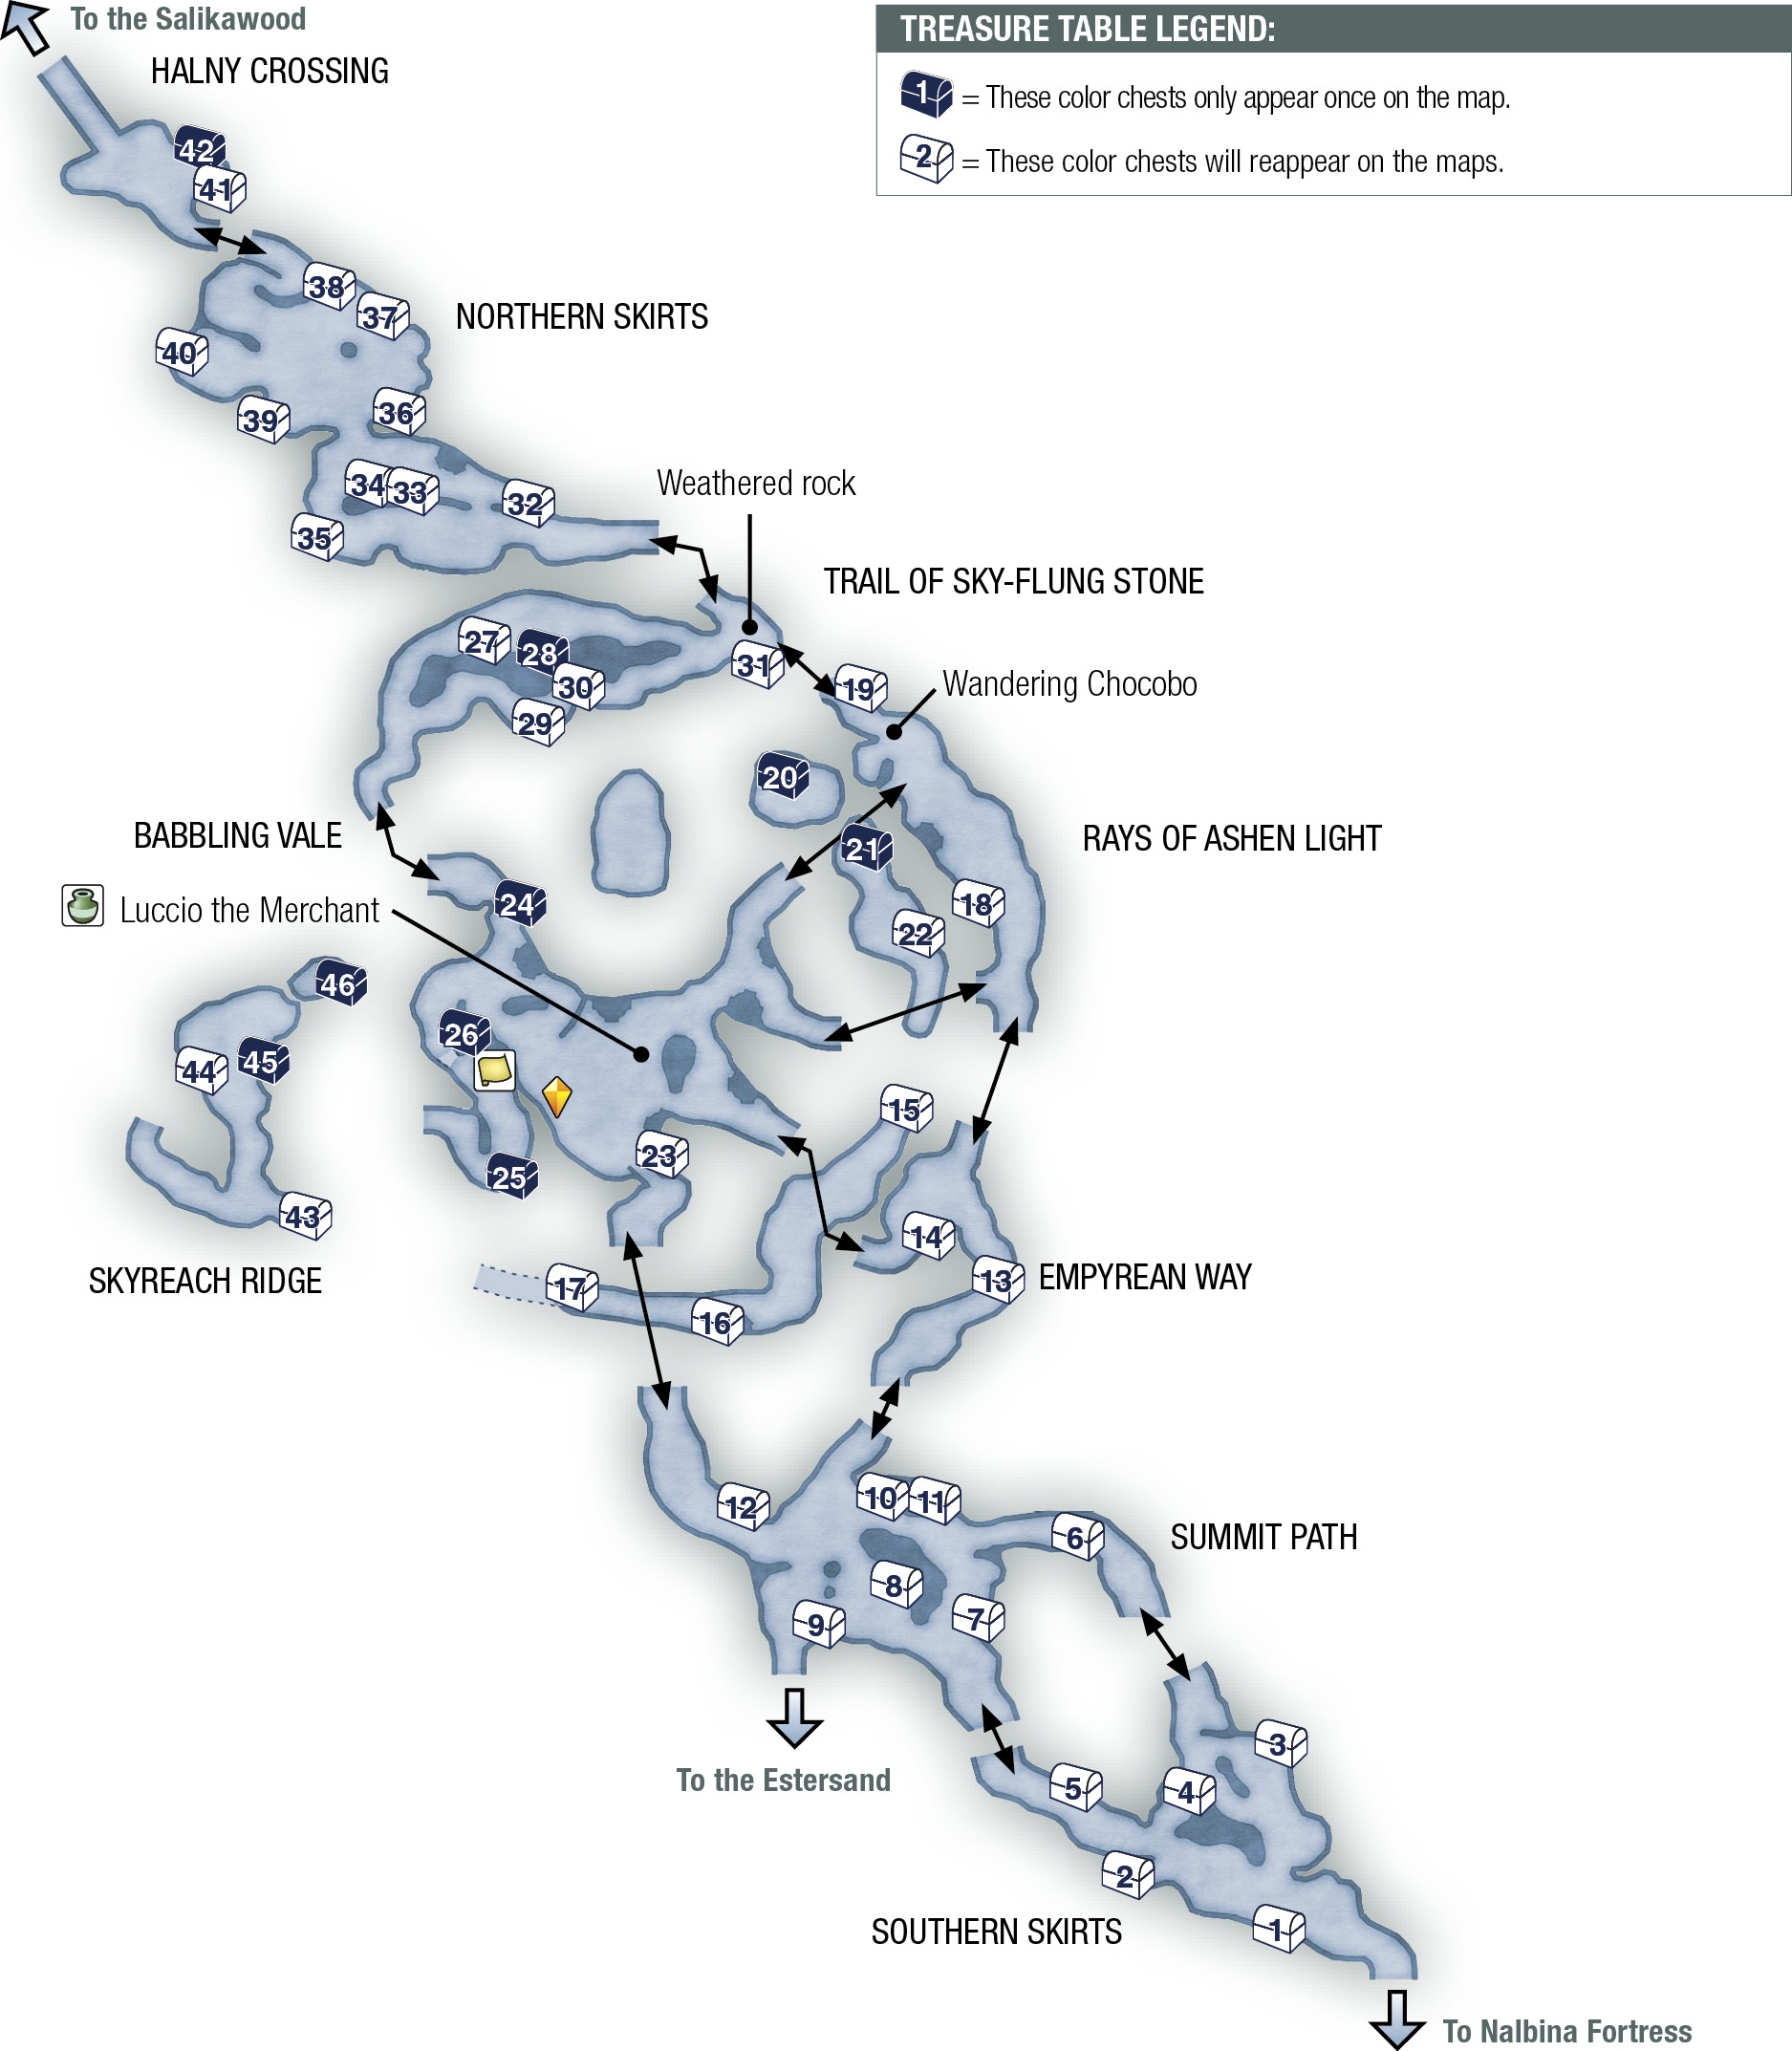
The map of the Mosphoran Highwaste shown here reflects only the areas of the main routes that are directly connected. To learn about access to the secret areas, refer to the “Side Quests” chapter in this guide.
Action Checklist
1. Cross the Mosphoran Highwaste.
| Pop odds | If pop, Gil odds & Amt | Normal Loot | w/Diamond Armlet | ||||
|---|---|---|---|---|---|---|---|
|
# |
App. % |
Gil % |
Amt. if Gil |
50% |
50% |
90% |
10% |
|
1 |
80% |
30% |
~320 |
Potion |
Echo Herbs |
Knot of Rust |
Meteorite (A) |
|
2 |
80% |
30% |
~320 |
Potion |
Echo Herbs |
Knot of Rust |
Meteorite (A) |
|
3 |
80% |
30% |
~320 |
Potion |
Echo Herbs |
Knot of Rust |
Meteorite (A) |
|
4 |
70% |
30% |
~320 |
Phoenix Down |
Echo Herbs |
Knot of Rust |
Meteorite (A) |
|
5 |
80% |
30% |
~320 |
Potion |
Echo Herbs |
Knot of Rust |
Meteorite (B) |
|
6 |
80% |
35% |
~360 |
Phoenix Down |
Echo Herbs |
Knot of Rust |
Meteorite (A) |
|
7 |
80% |
35% |
~360 |
Aqua Mote |
Echo Herbs |
Knot of Rust |
Meteorite (A) |
|
8 |
75% |
40% |
~290 |
Potion |
Golden Staff |
Knot of Rust |
Meteorite (A) |
|
9 |
80% |
35% |
~360 |
Chronos Tear |
Echo Herbs |
Knot of Rust |
Meteorite (A) |
|
10 |
80% |
35% |
~360 |
Aqua Mote |
Hi-Potion |
Knot of Rust |
Meteorite (A) |
|
11 |
75% |
40% |
~290 |
Bio Mote |
Kiku-ichimonji |
Knot of Rust |
Meteorite (A) |
|
12 |
80% |
35% |
~360 |
Chronos Tear |
Bio Mote |
Knot of Rust |
Meteorite (A) |
|
13 |
70% |
50% |
~280 |
Echo Herbs |
Antidote |
Knot of Rust |
Meteorite (A) |
|
14 |
70% |
50% |
~280 |
Echo Herbs |
Hi-Potion |
Knot of Rust |
Meteorite (A) |
|
15 |
60% |
50% |
~280 |
Phoenix Down |
Echo Herbs |
Knot of Rust |
Meteorite (C) |
|
16 |
70% |
50% |
~280 |
Aqua Mote |
Hi-Potion |
Knot of Rust |
Meteorite (B) |
|
17 |
70% |
50% |
~280 |
Echo Herbs |
Hi-Potion |
Knot of Rust |
Meteorite (A) |
|
18 |
70% |
40% |
~250 |
Echo Herbs |
Avenger |
Knot of Rust |
Meteorite (B) |
|
19 |
70% |
35% |
~300 |
Echo Herbs |
Hi-Potion |
Knot of Rust |
Meteorite (A) |
|
20 |
100% |
0% |
— |
Stamp |
Stamp |
Stamp |
Stamp |
|
21 |
80% |
0% |
— |
Blood Sword |
Blood Sword |
Blood Sword |
Blood Sword |
|
22 |
50% |
50% |
500 |
Chronos Tear |
Serum |
Knot of Rust |
Meteorite (C) |
|
23 |
100% |
100% |
~50 |
— |
— |
— |
— |
|
24 |
100% |
0% |
— |
Thief’s Cuffs |
Thief’s Cuffs |
Thief’s Cuffs |
Thief’s Cuffs |
|
25 |
100% |
0% |
— |
Turtleshell Choker |
Turtleshell Choker |
Turtleshell Choker |
Turtleshell Choker |
|
26 |
100% |
100% |
6636 |
— |
— |
— |
— |
|
27 |
60% |
30% |
~400 |
Phoenix Down |
Balance Mote |
Knot of Rust |
Meteorite (B) |
|
28 |
100% |
0% |
— |
Gillie Boots |
Gillie Boots |
Gillie Boots |
Gillie Boots |
|
29 |
75% |
40% |
~250 |
Echo Herbs |
Diamond Armor |
Knot of Rust |
Meteorite (A) |
|
30 |
75% |
40% |
~250 |
Echo Herbs |
Black Garb |
Knot of Rust |
Meteorite (A) |
|
31 |
70% |
30% |
~400 |
Echo Herbs |
Remedy |
Knot of Rust |
Meteorite (A) |
|
32 |
75% |
35% |
~400 |
Echo Herbs |
Potion |
Knot of Rust |
Meteorite (A) |
|
33 |
70% |
40% |
~350 |
Echo Herbs |
Black Garb |
Knot of Rust |
Meteorite (A) |
|
34 |
75% |
40% |
~350 |
Echo Herbs |
Remedy |
Knot of Rust |
Meteorite (A) |
|
35 |
70% |
40% |
~350 |
Echo Herbs |
Metal Jerkin |
Knot of Rust |
Meteorite (B) |
|
36 |
70% |
40% |
~350 |
Echo Herbs |
Dragon Shield |
Knot of Rust |
Meteorite (A) |
|
37 |
75% |
35% |
~500 |
Echo Herbs |
Potion |
Knot of Rust |
Meteorite (A) |
|
38 |
70% |
40% |
~350 |
Echo Herbs |
Giant Stonebow |
Knot of Rust |
Meteorite (A) |
|
39 |
75% |
40% |
~350 |
Echo Herbs |
Remedy |
Knot of Rust |
Meteorite (A) |
|
40 |
75% |
35% |
~250 |
Echo Herbs |
Gold Needle |
Knot of Rust |
Meteorite (A) |
|
41 |
90% |
90% |
~120 |
Hi-Ether |
Hi-Ether |
Knot of Rust |
Meteorite (B) |
|
42 |
80% |
0% |
— |
Elixir |
Elixir |
Elixir |
Elixir |
|
43 |
70% |
50% |
~400 |
Echo Herbs |
Nu Khai Sand |
Knot of Rust |
Meteorite (A) |
|
44 |
70% |
50% |
~400 |
Aqua Mote |
Ether |
Knot of Rust |
Meteorite (B) |
|
45 |
100% |
0% |
— |
Dispel Mote |
Dispel Mote |
Dispel Mote |
Dispel Mote |
|
46 |
100% |
0% |
— |
Reflectga Mote |
Reflectga Mote |
Reflectga Mote |
Reflectga Mote |
Hike Through the Highwaste
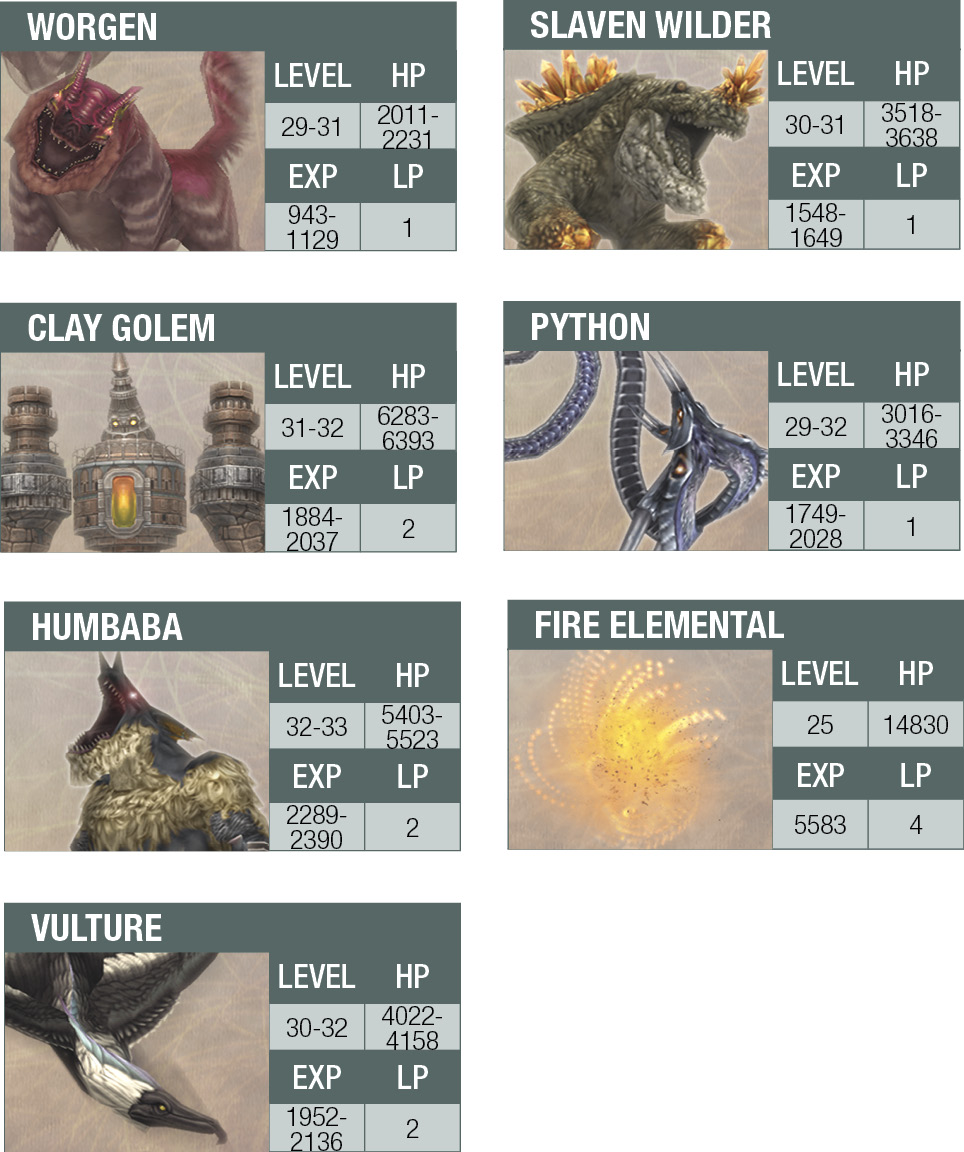
Mosphoran Highwaste. Sounds like a fun place, doesn’t it? These mountain passes and canyons are crawling with wolf-like Worgens, making it a good place to string together a Battle Chain. The party starts in the Southern Skirts. Move northwest. You can take either one of two exits leading up to the next area, Summit Path, but watch out for the explosive traps blocking the passages. Move up against the ravine walls and carefully move past the traps.
Beware the Fire Elemental floating around this area. Your party may be strong enough to challenge this elemental, but make sure you know where the zone exits are just in case things get out of hand. Keep an eye out for the Wary Wolf on the Summit Path, too; it’s a powerful Rare Game animal—very rare, in fact!
Exit from Summit Path to the northwest into Babbling Vale. This area is a caravan rest stop with a Save Crystal, a traveling merchant named Luccio, and a Scout moogle who sells a Mosphoran Highwaste map and tells of a giant Bomb deep in the Salikawood. (This is an optional boss you can fight later.) Among new weapons and armor, Luccio also sells Aeroga and Vanishga.
Side Quest: The Wind ShrinesIf you acquire the Mosphoran Highwaste map from the moogle in the Babbling Vale and examine it, you will see a number of seemingly unconnected areas tucked in and around the main areas of the Highwaste. These are areas that you can reach by finding the hidden paths. Note the eight wind shrines around the Babbling Vale area of the Mosphoran Highwaste. Talk to the Learned Man looking at the northeast shrine and he gives you some information about what he has learned. Note, however, that you must return later to unlock the shrine puzzle, which leads to an Esper named Exodus. Also, the “Trouble in the Hills” hunt target, Atomos, is located in Northern Skirts. |
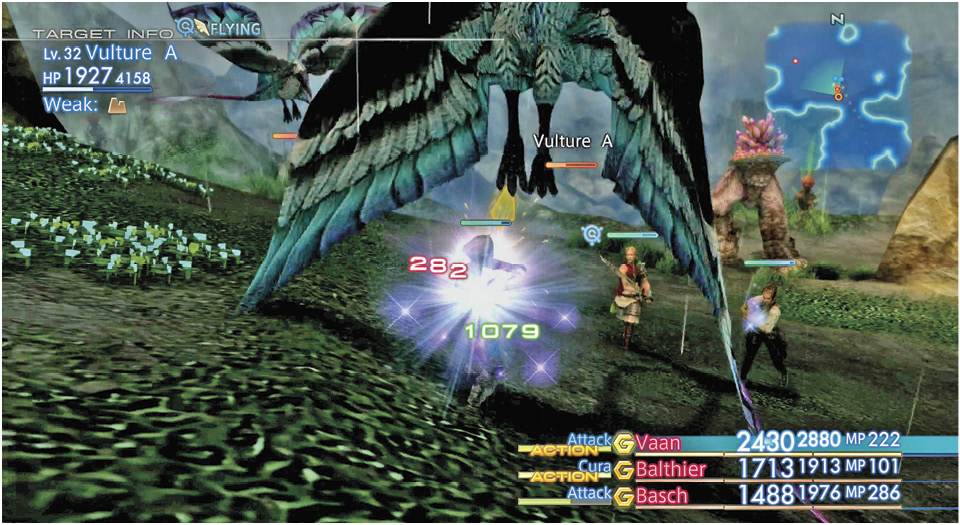
Exit the Babbling Vale to the north into the coolest-sounding area so far, the Trail of Sky-flung Stone. Pythons start popping up to attack, so be ready. Near the rock bridge, a flock of Vultures can be seen circling above. Shoot them out of the sky and move to the east exit.
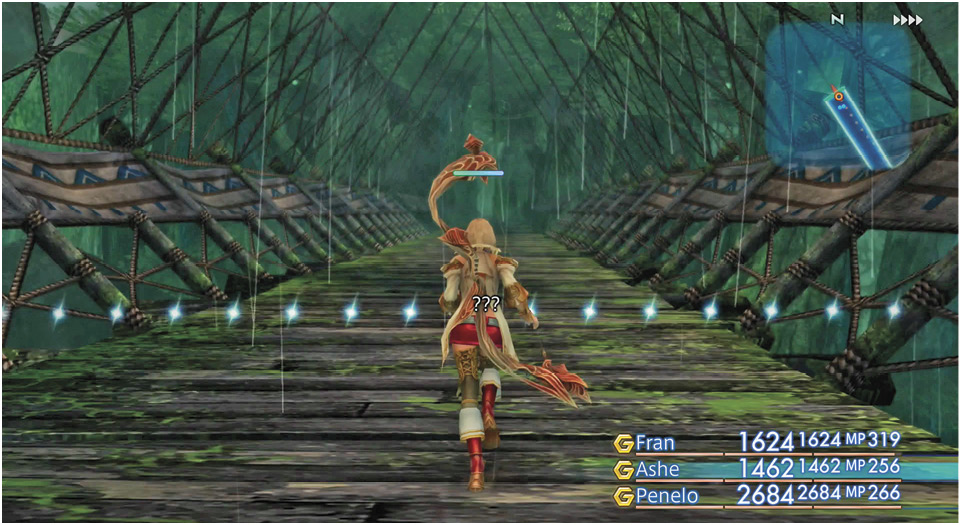
Now fight through the Northern Skirts to a long bridge at Halny Crossing. You'll run into the lumbering Atomos along the way through Northern Skirts, if you've triggered that hunt. Run across it to leave the Mosphoran Highwaste behind and enter the Salikawood.