
Final Fantasy XII: The Zodiac Age Guide Walkthrough Part 3
Sochen Cave Palace (Main)
Action Checklist
1. Navigate through the palace.
2. Optional! Solve the waterfall puzzle to reach the item in a secret room.
3. Defeat Ahriman.
4. Exit the caves into Old Archades.
Find a Palace Map
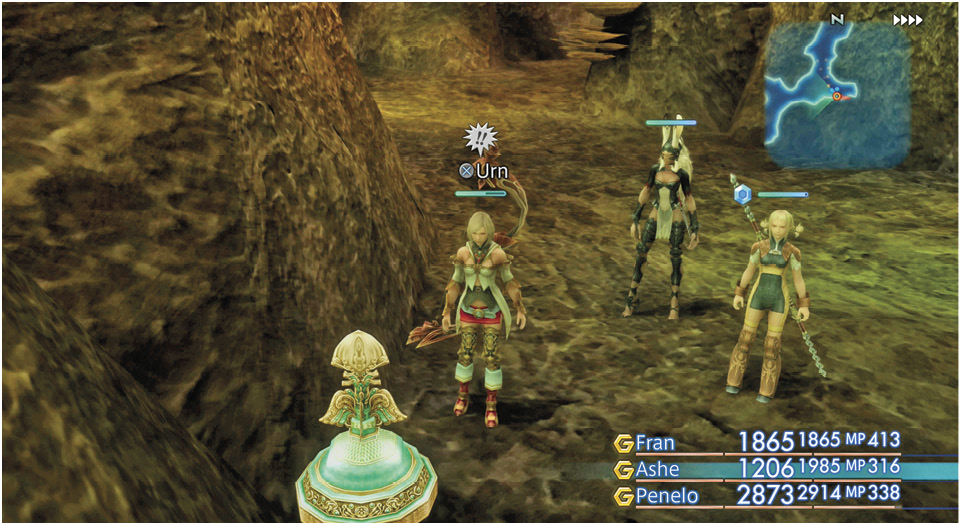
From the Save Crystal (formerly the Crystalbug) in the Acolyte’s Burden area, take the east door to enter the main palace. All sorts of demons prowl the cave corridors, so be ready for combat. In the Mirror of the Soul, go north through the ancient door to the path split. Watch out for a swarm of Imps and a Pit Fiend. Next, turn east and stay close to the easternmost (right) wall as you move toward an alcove with a Map Urn that is guarded by three Gorgimeras. The map will be very helpful in the next areas. Continue to hug the right side wall while moving north across the zone line into the next area, Falls of Time.
OPTIONAL! Solve the Waterfall Puzzle
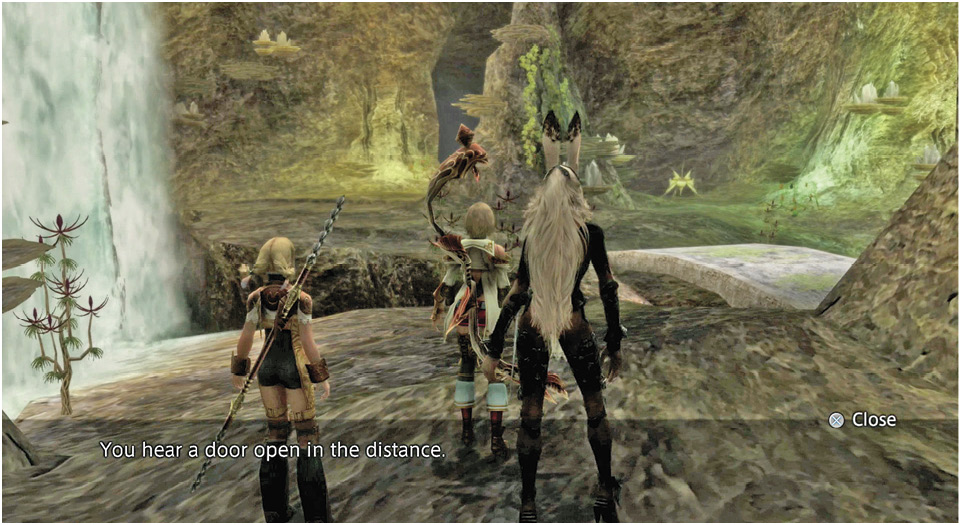
If you examine the Area Map, you will see a small room in the center of the palace between the southern Mirror of the Soul and the northern Falls of Time. This room holds a treasure chest with an item inside. However, a waterfall blocks the entrance from the north. In fact, numerous waterfalls block passages between the areas. When you move from the Falls of Time area to the Mirror of the Soul area, you trigger magick that actually moves the waterfall locations! (The game states: “The course of the waterfalls seems to have changed.”) If you follow the correct route back and forth between the two areas, you can create a path to the secret room.
The best way to describe the route is visually with maps, so move from room to room in the order shown here.
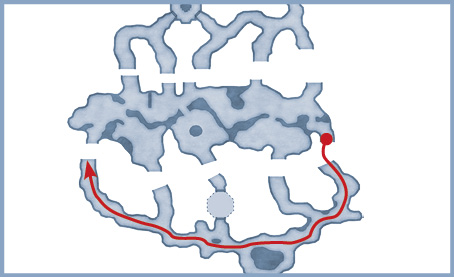
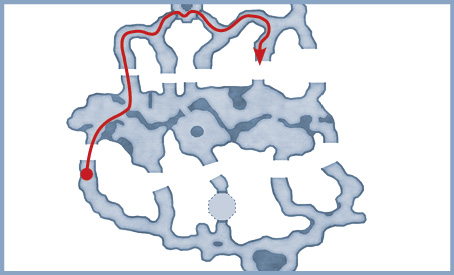
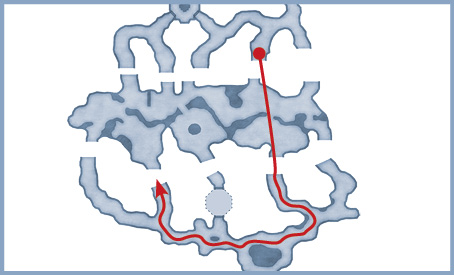
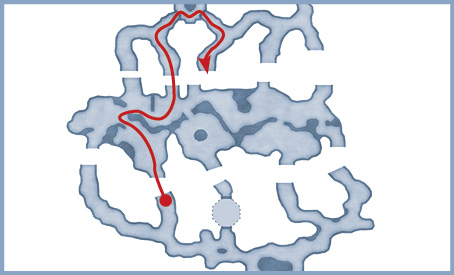
When you return south from the Falls of Time to the Mirror of the Soul the last time, you receive a message that a door has opened in the distance. Go across the bridge directly ahead, open the treasure chests containing the Sakura-saezuri ninja sword and 1000 Needles technick, and venture south into the cave. This path leads to the Pilgrim’s Door. The inscription on it provides directions for the moves you just completed. After reading it, enter the room and get the treasure.
Head North to Ahriman
Now head north through the Falls of Time and up the middle of Destiny’s March. At the far northern edge of the palace is the Hall of Shadowlight, where a boss battle looms.
Side Quest: The Western MenaceYou can see the Hall of the Wroth God on your Area Map at this point. This is the home of a mighty (and optional) boss called the Hell Wyrm. You can’t get there just yet, however. You must first complete some tasks amongst the Cerobi Steppe windmills, including the hunt for Vyraal. After that, you must solve a directional puzzle here in the Sochen Cave Palace (similar to the waterfall puzzle) to unlock the path to the Hall of the Wroth God. For all the details, check out the “Side Quests” chapter and look for the section on the Hell Wyrm. |
Ahriman
The ghostly Ahriman is another one of those maddening foes who keeps the party tied up with status ailments. This boss will toss Doom, Confuse, Blind, and Sleep at the party in combination on occasion. Ahriman also conjures up replicas of itself. At times, you’ll find three or four “Ahrimans” in your target selection box. 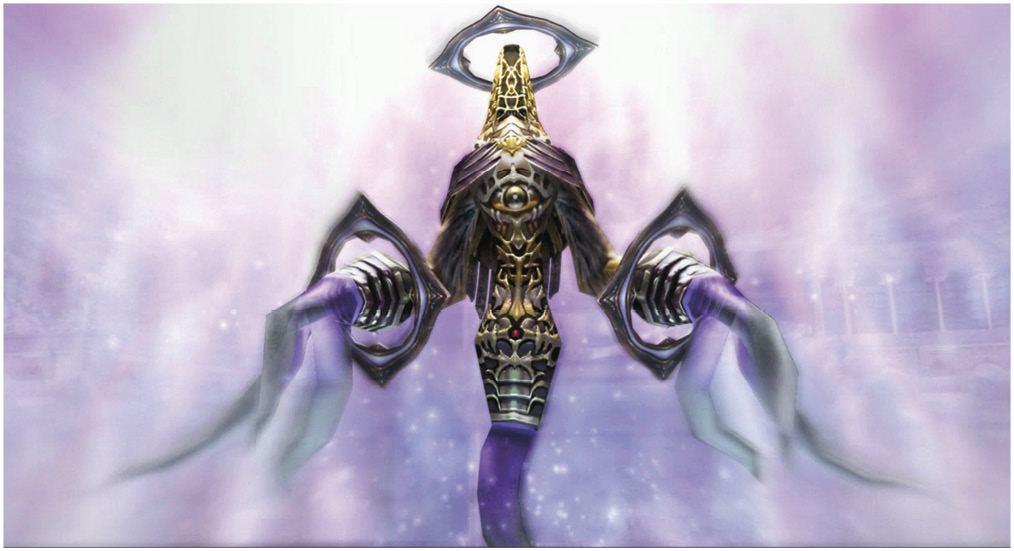
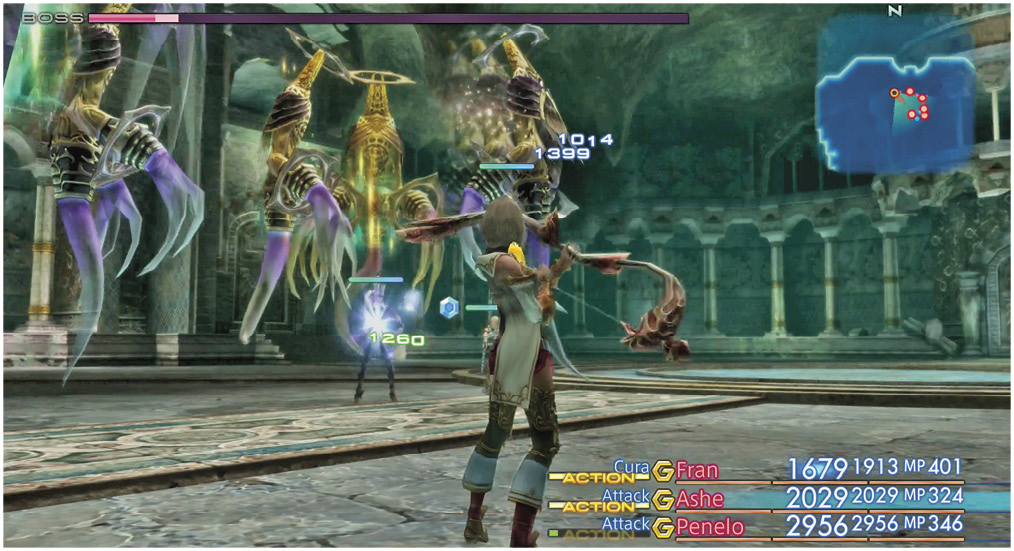
There are a couple of keys to achieve victory over this boss. First, make sure you heal status ailments immediately. Good status-removing gambits automate this process, but keep an eye on your characters’ MP levels. If MP drops to zero, your status-healing spells like Vox and Blindna are worthless. Use the Charge technick, or start using the corresponding items in your inventory such as Echo Herbs and Eye Drops. In any case, you need Remedies available with the License upgrades that allow them to cure Doom as well as other status ailments. Second, keep moving and swinging away, even when Ahriman’s “shadows” (the replicas it spawns) have the party confused. The replicas are weak, so they will drop after one or two good hits. You can also utilize Cura or Bio against the shadows, as these spells will destroy all of the shadows within range with one spell. Keep everybody’s HP above 50 percent, if possible. Ice Shields make good equipment, since Ahriman likes to cast Blizzara at your party. When Ahriman’s HP bar hits the 20% mark, watch out for a powerful Maser Eye attack that deals heavy damage. If you have Raise or Phoenix Down gambits set in each ally’s number 1 gambit slot (and you should), the party can pull through this brutal area attack. Quickenings will hurt Ahriman, but probably not enough to unleash them until Ahriman’s HP bar drops below half. Try keeping a reserve party with Mist Charges ready if possible, and swap them in for a Quickening chain when Ahriman’s HP drops below one-quarter. After the battle, pick up the treasures around the perimeter of the room and exit via the east door into the Temptation Eluded area. |

Survive the Palace Exit
There is still no Save Crystal in sight yet, so stay alert! Watch out for lots of explosive traps at intervals in the passage ahead. (If you took off your Bangle for the boss fight, equip it now to locate the traps or use Libra.) Fight through the Strikers and Imps guarding the long passage that slopes up into a large room, then exit north into the Chamber of the Chosen.
Climb the spiral rock ramp to the elevator platform. Activate the Disused Pedestal to ride the lift platform up to the Skybent Chamber, then use the Save Crystal. Open the stone door and exit into Old Archades, the slum on the outskirts of the imperial city, where the party can finally breathe some fresh air. Well, sort of…
Side Quest: Palace Side QuestsYou can return later for the “Shelled Obstruction” hunt for Darksteel and “The Things We Do…” hunt for Overlord. See the “Side Quests” chapter for all the details. |