Final Fantasy XII: The Zodiac Age Guide Side Events
Side Events Part 1
Hunts
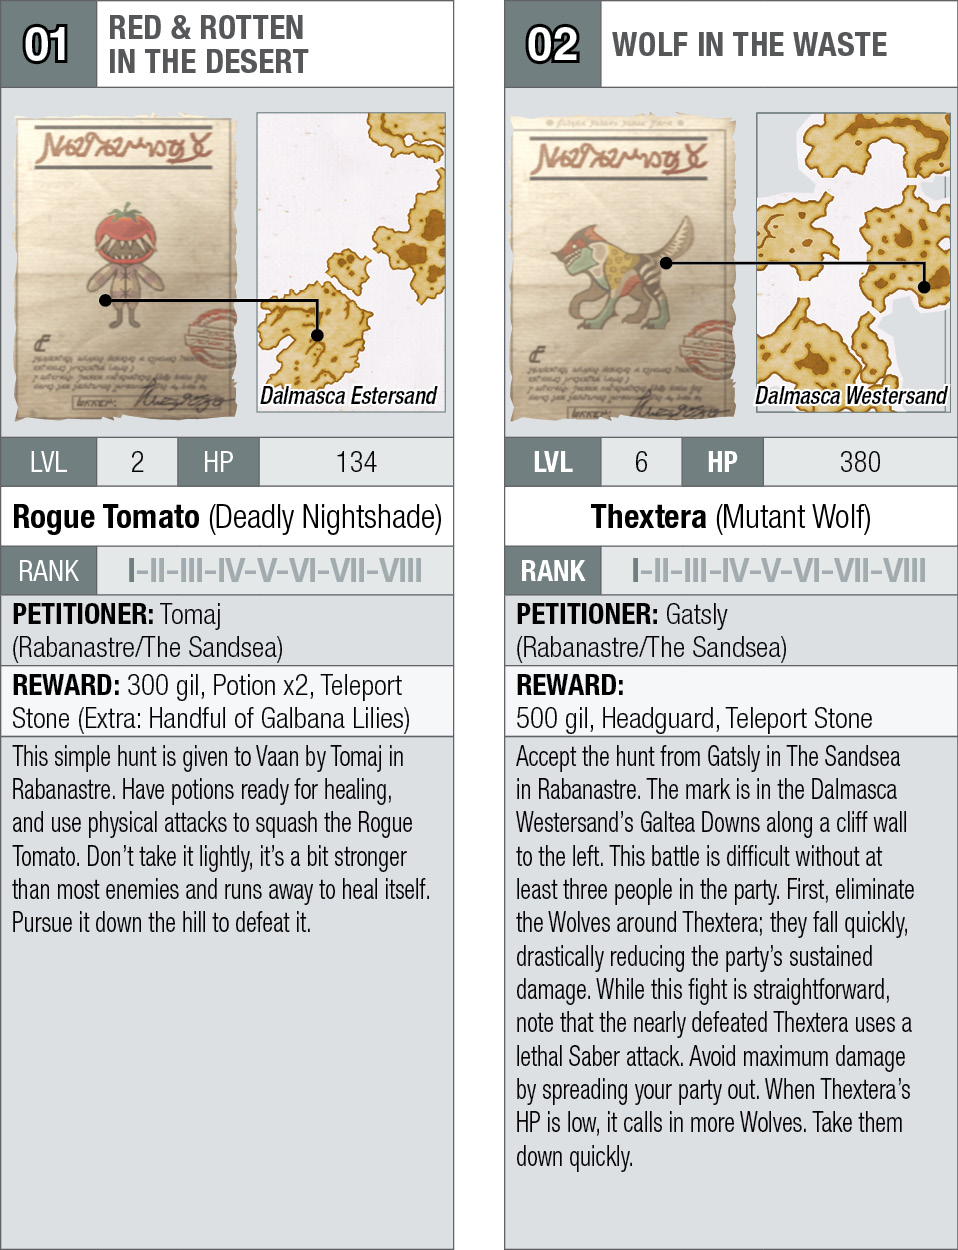
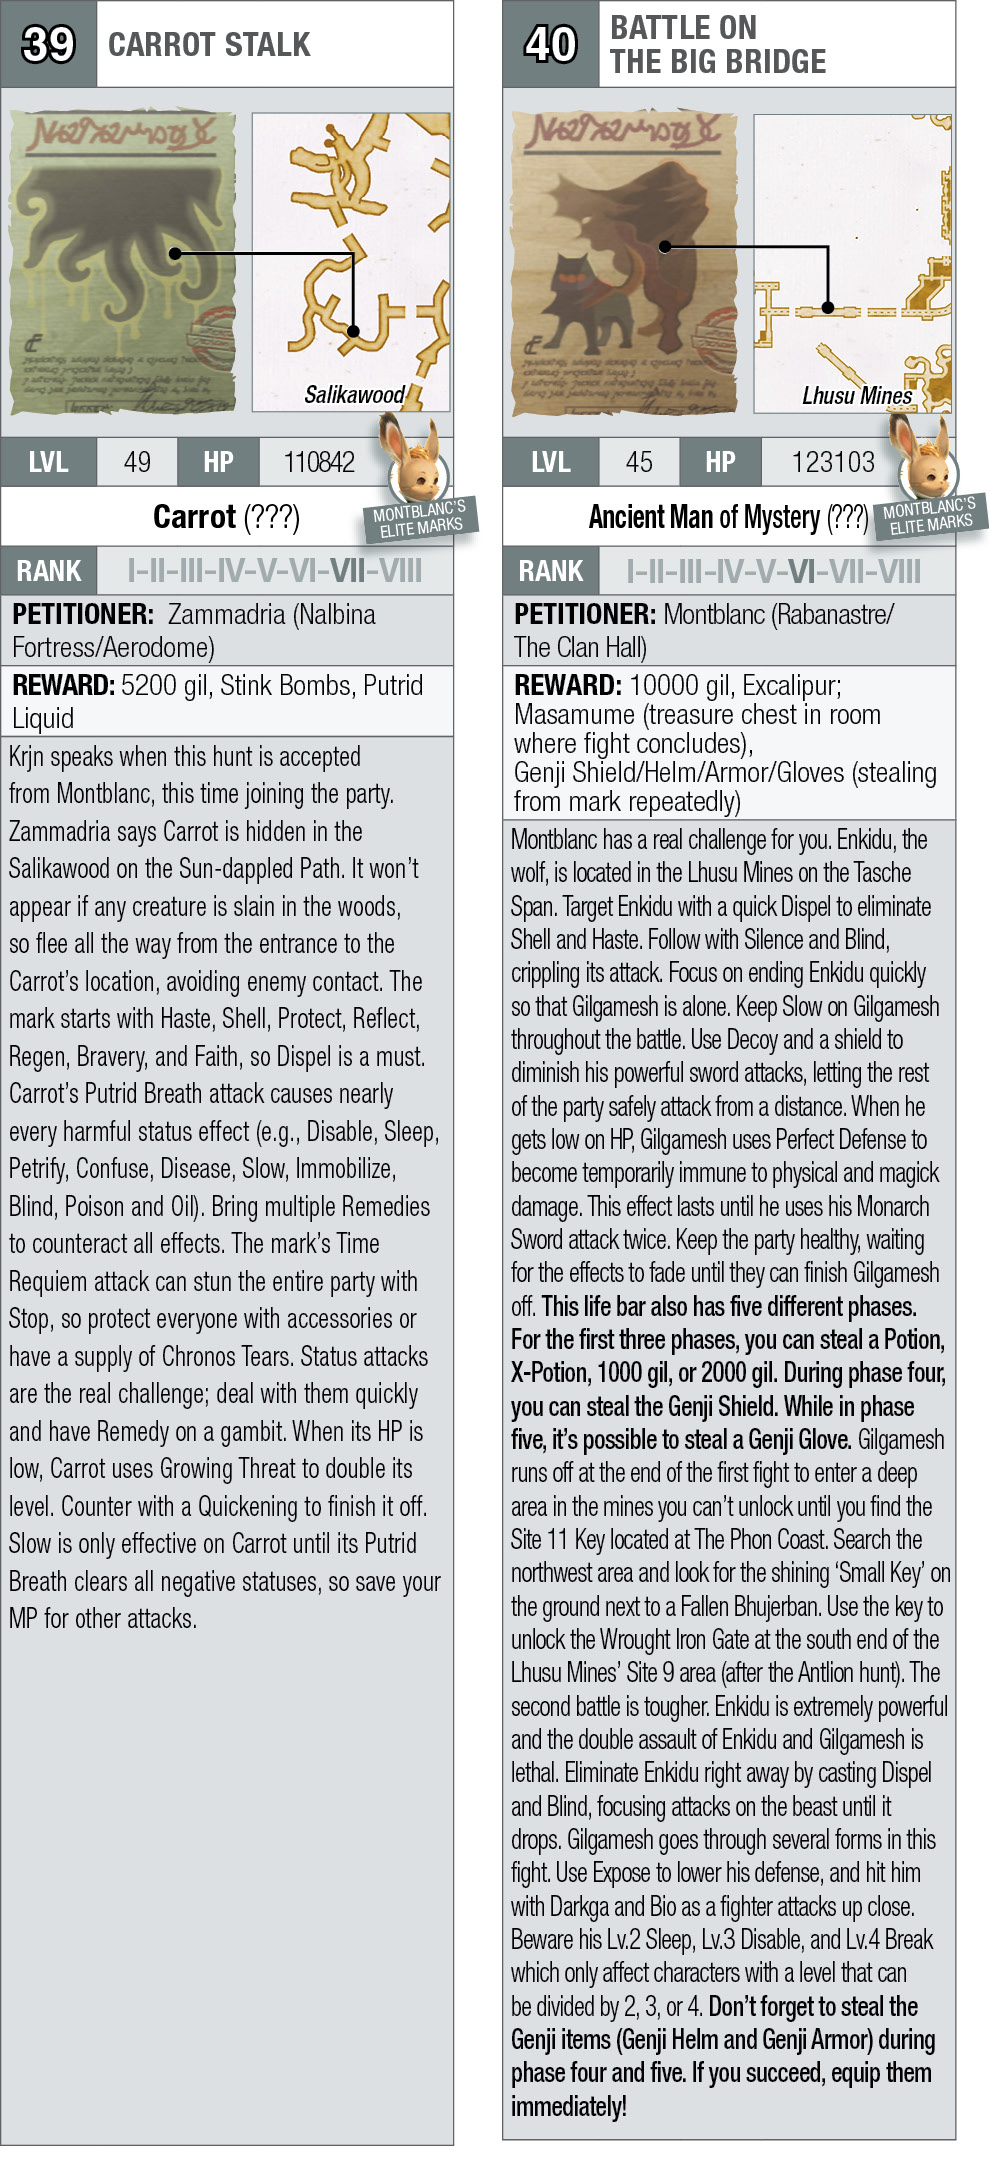
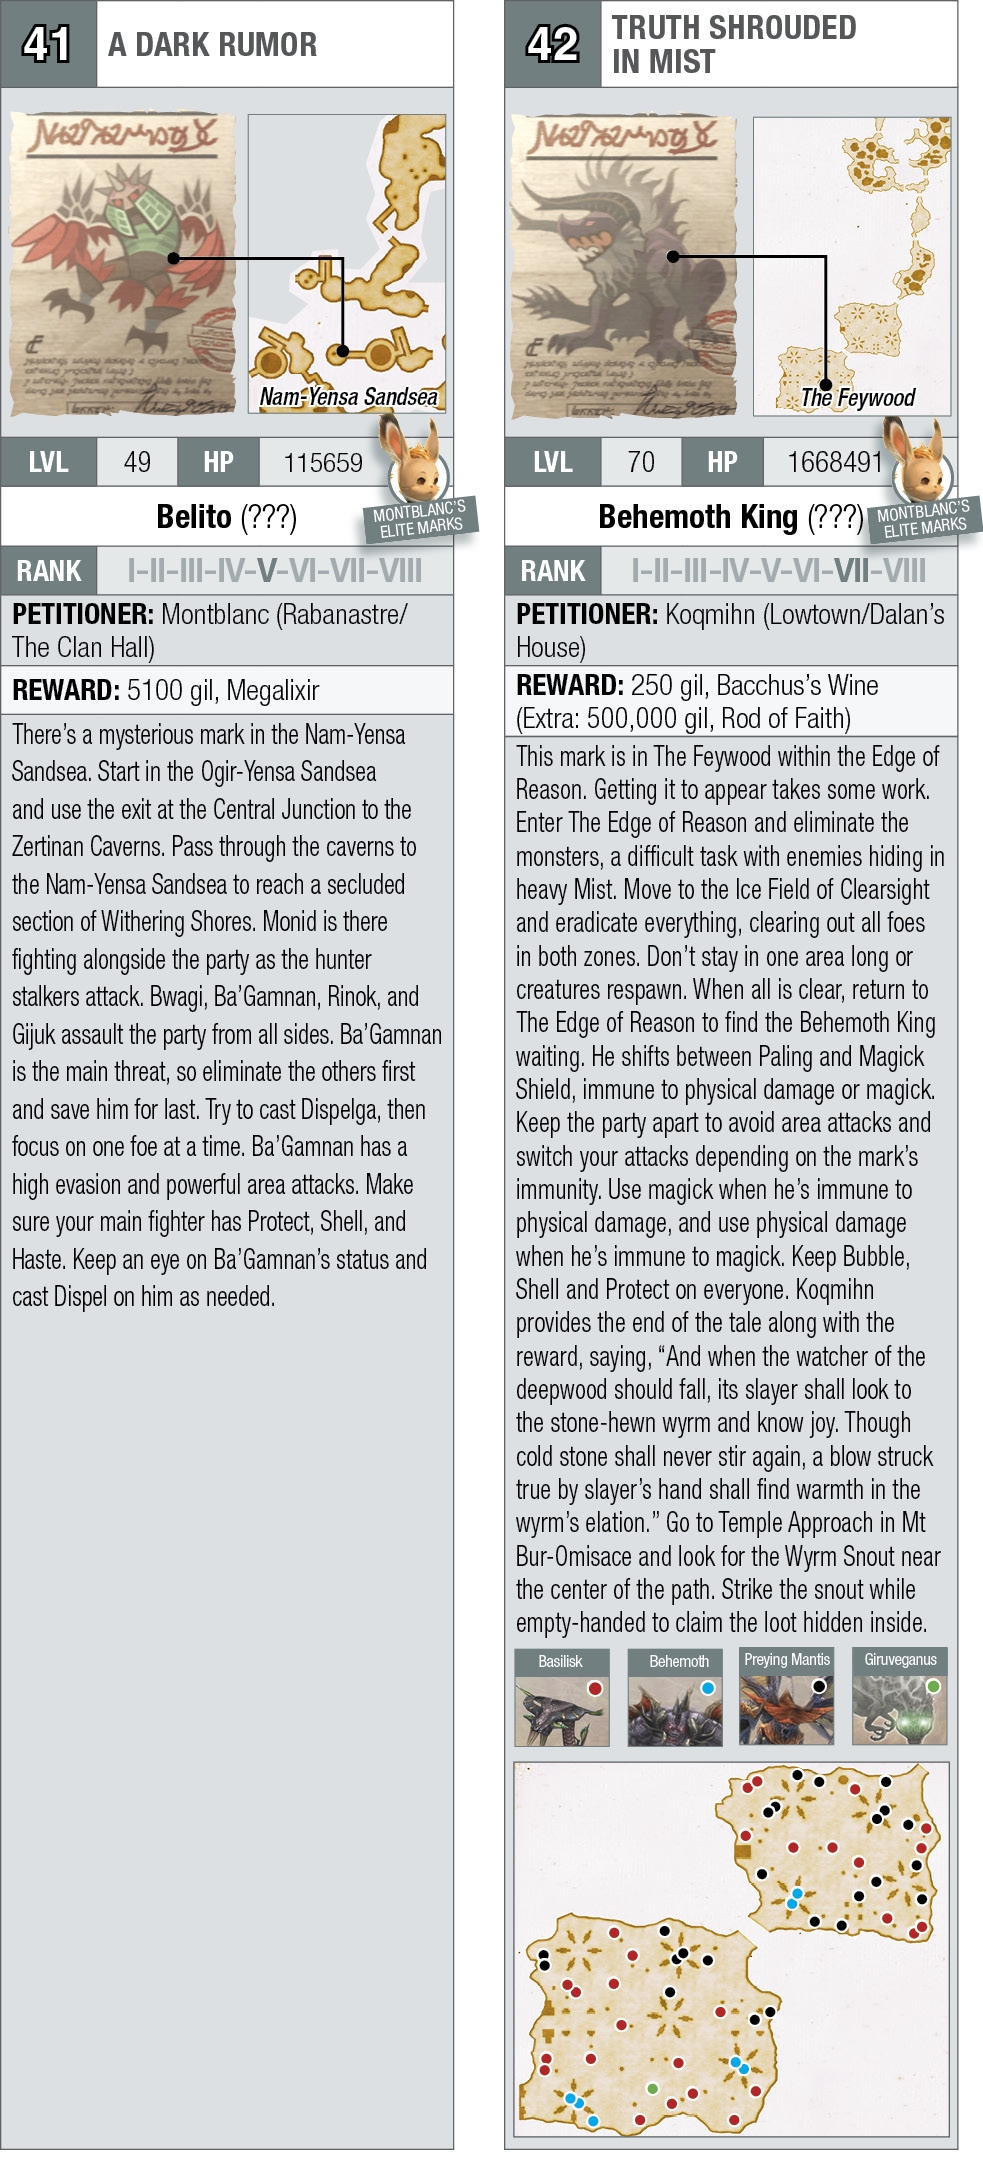
Hunters of Clan Centurio earn extra experience, gil, and items, making hunts a very important part of FINAL FANTASY XII. Hunters can unlock most side events and set the stage to find optional bosses and Espers.
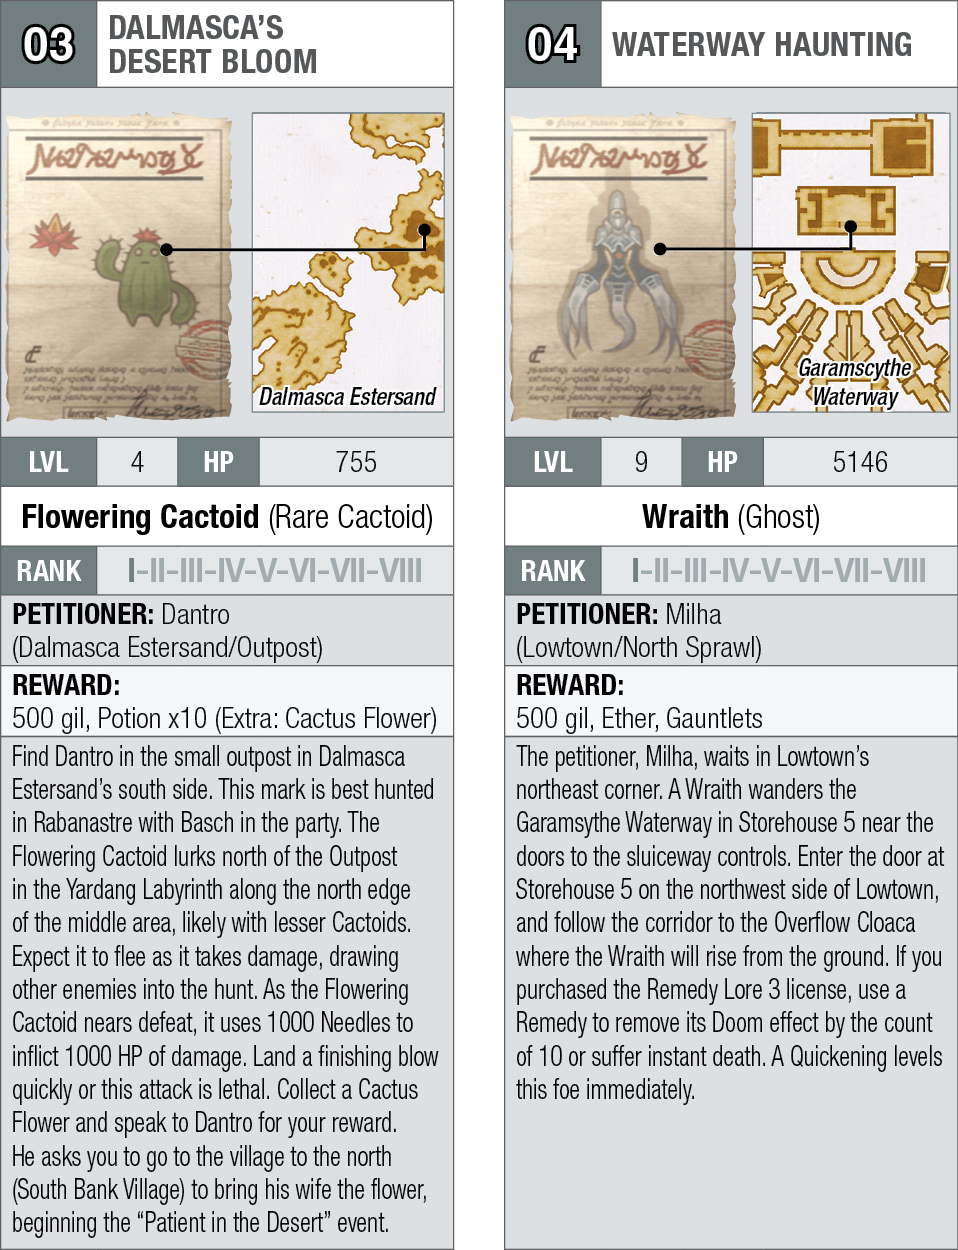
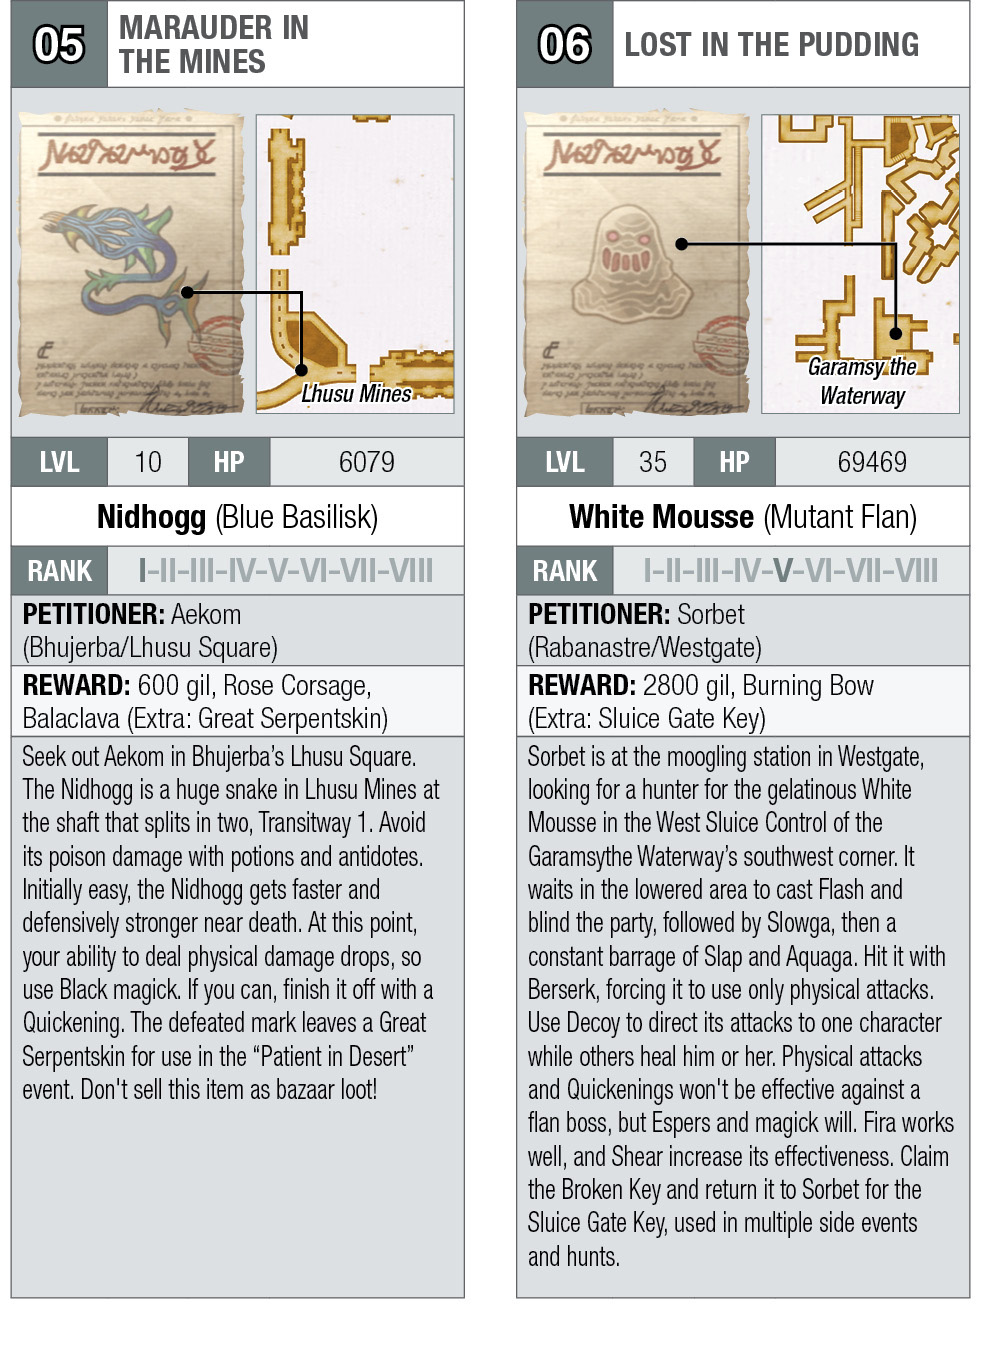
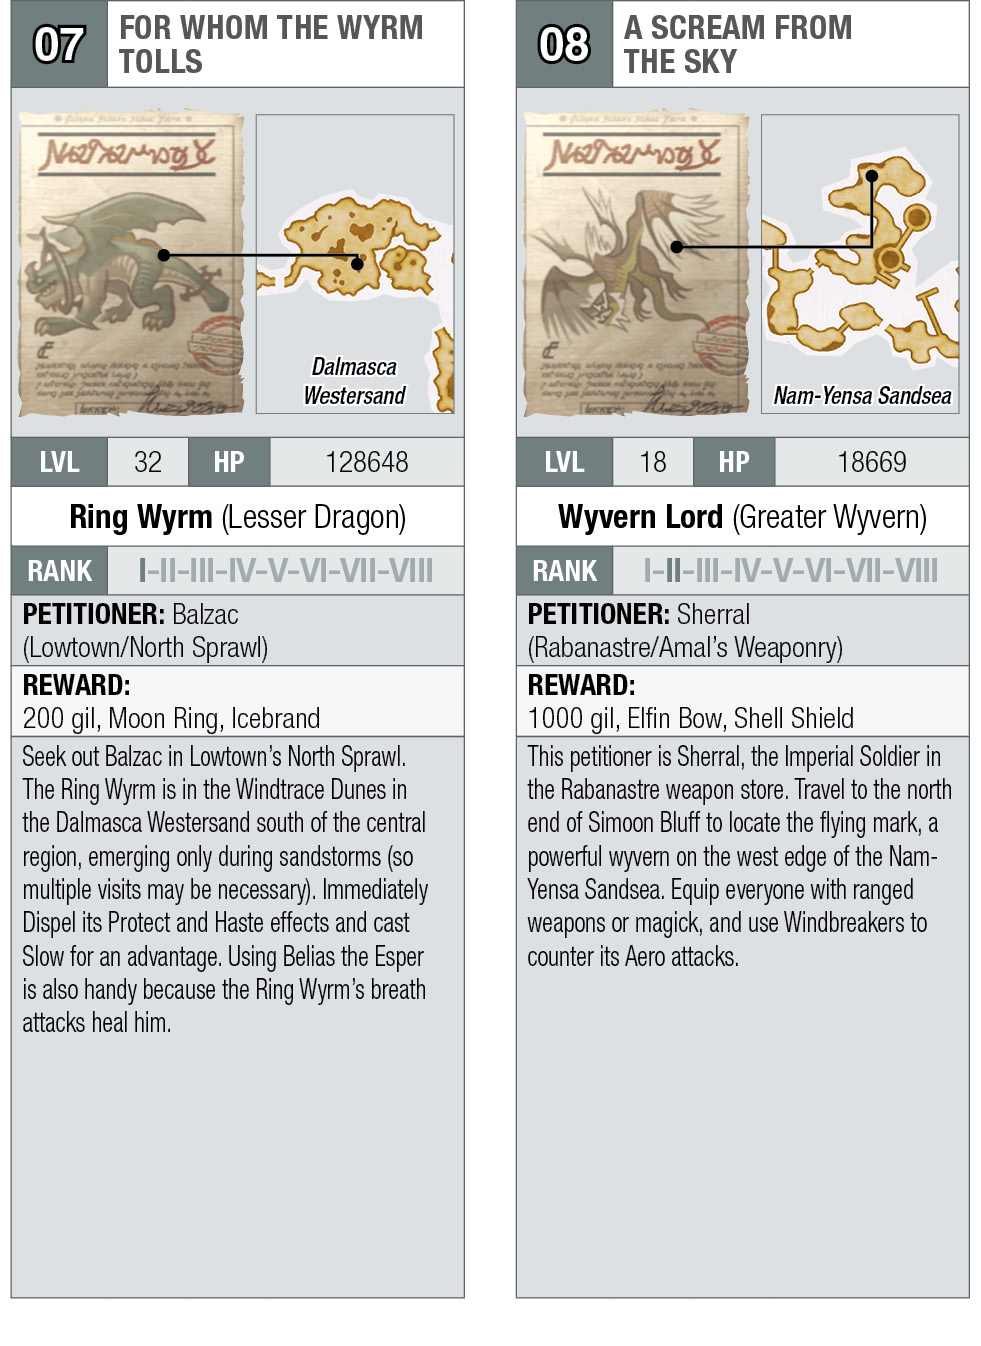
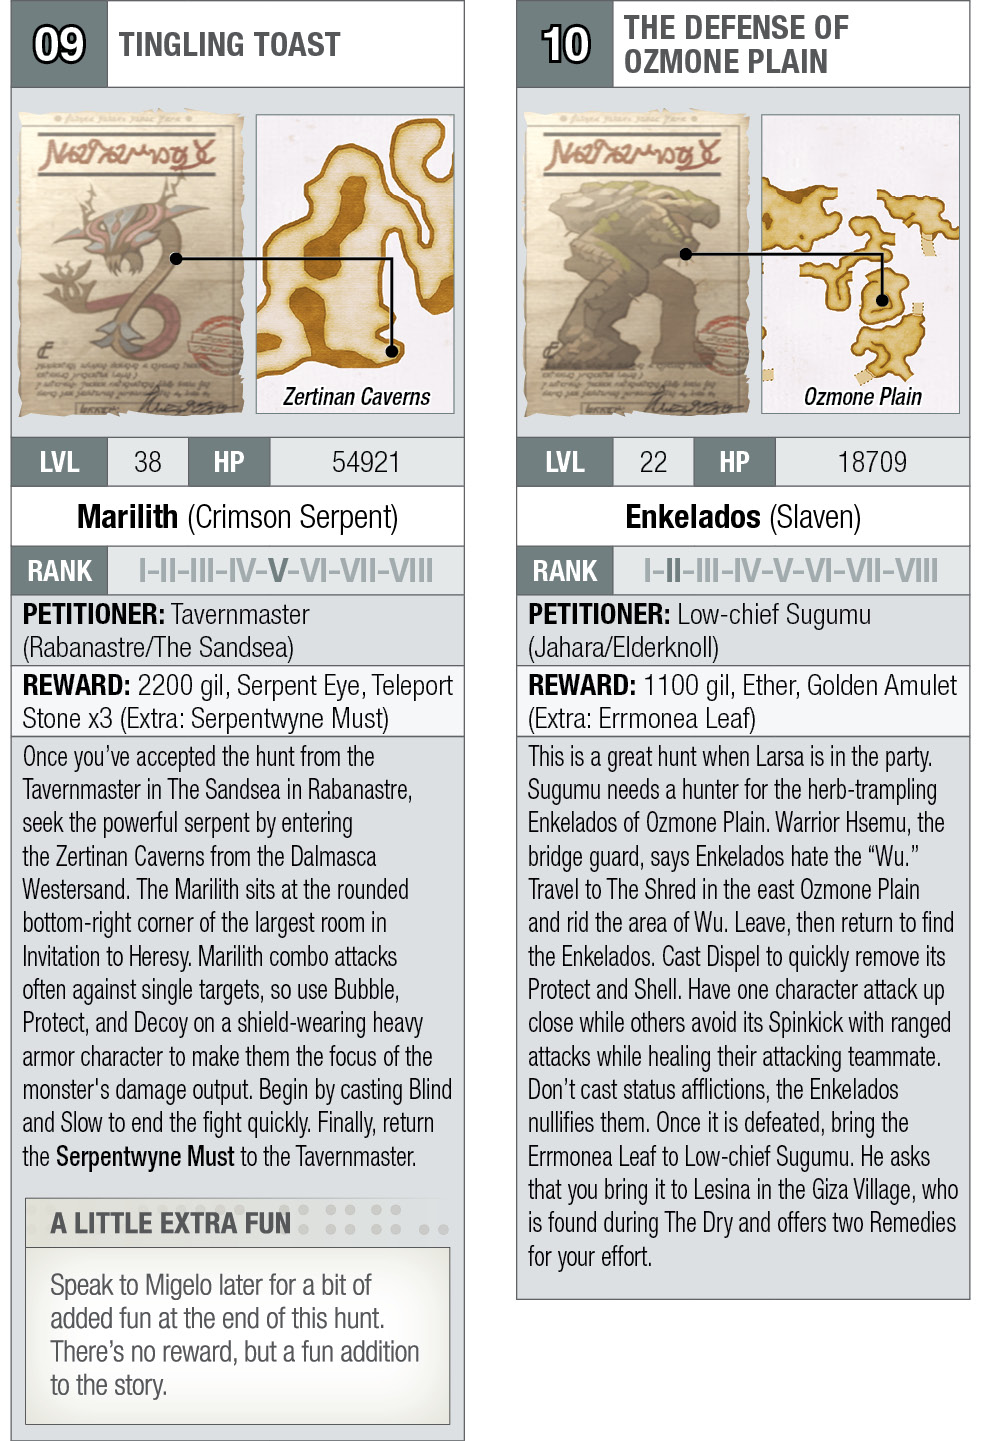
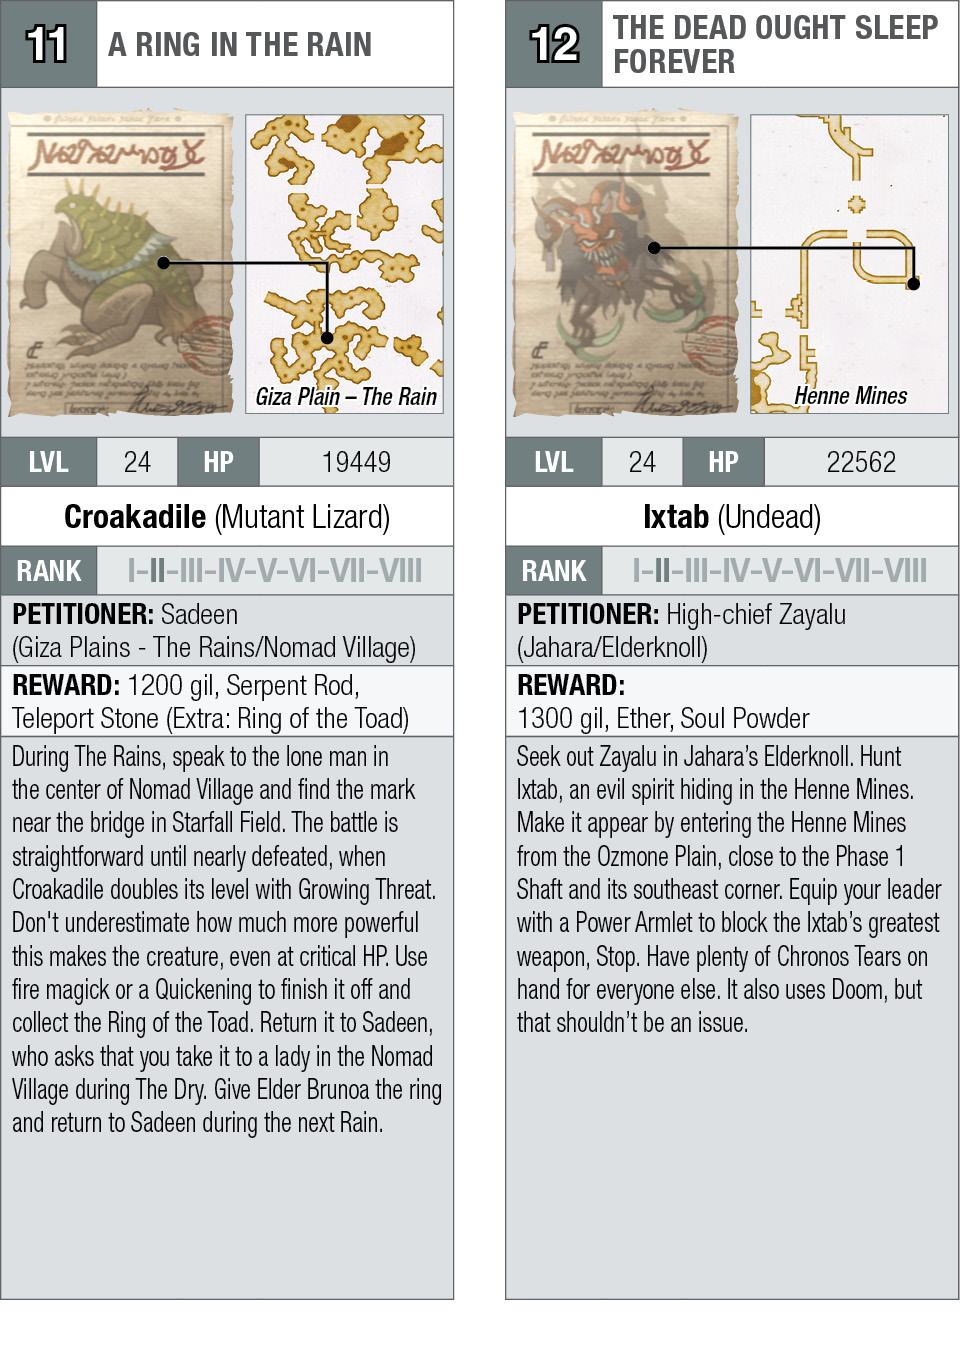
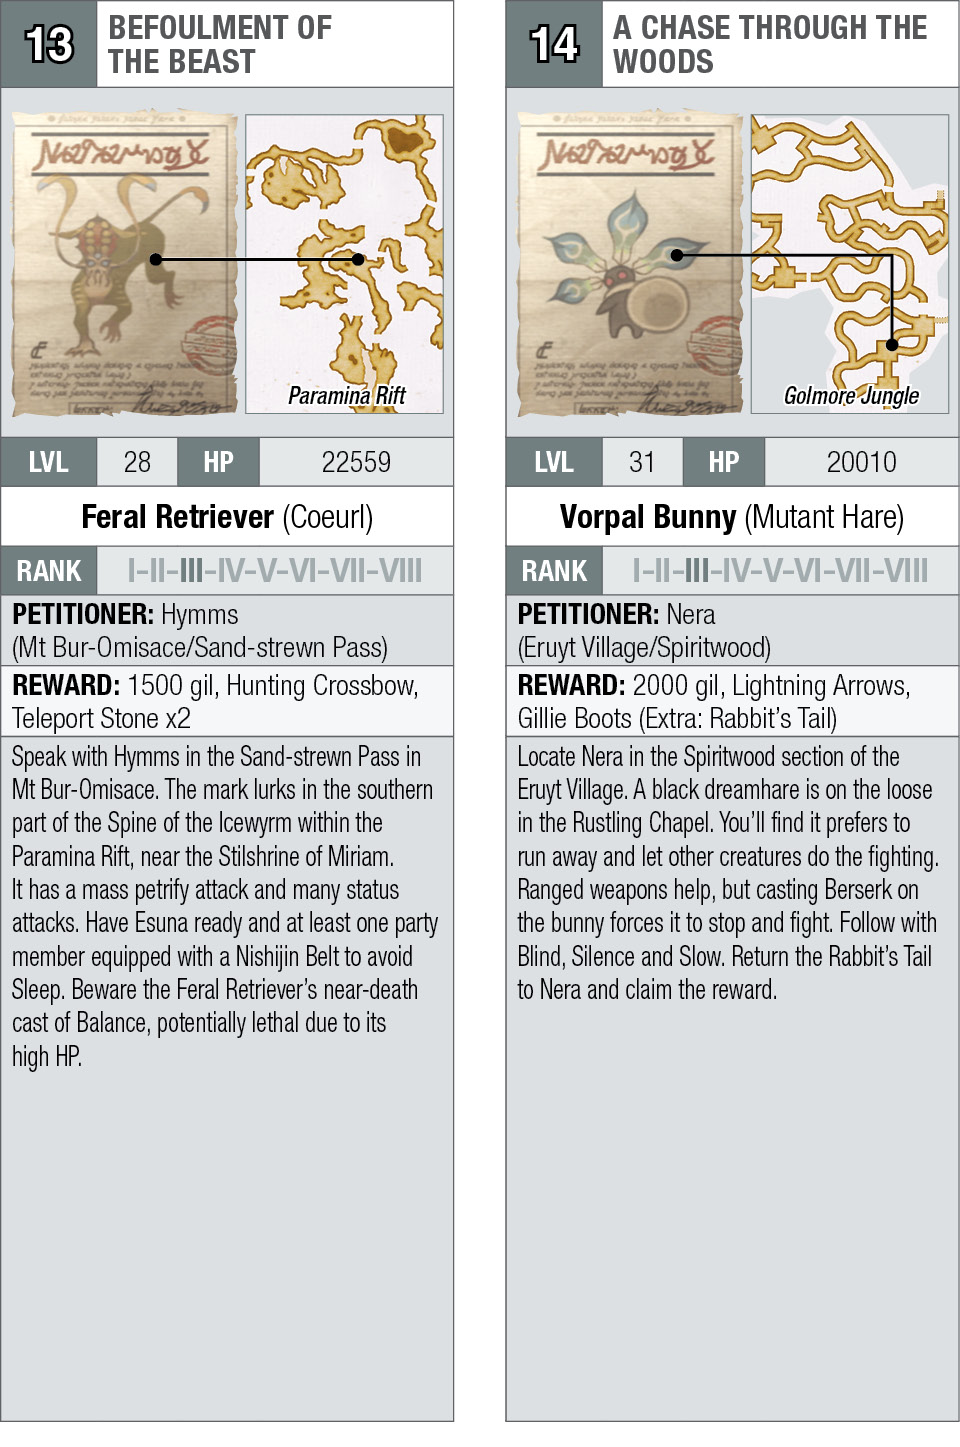
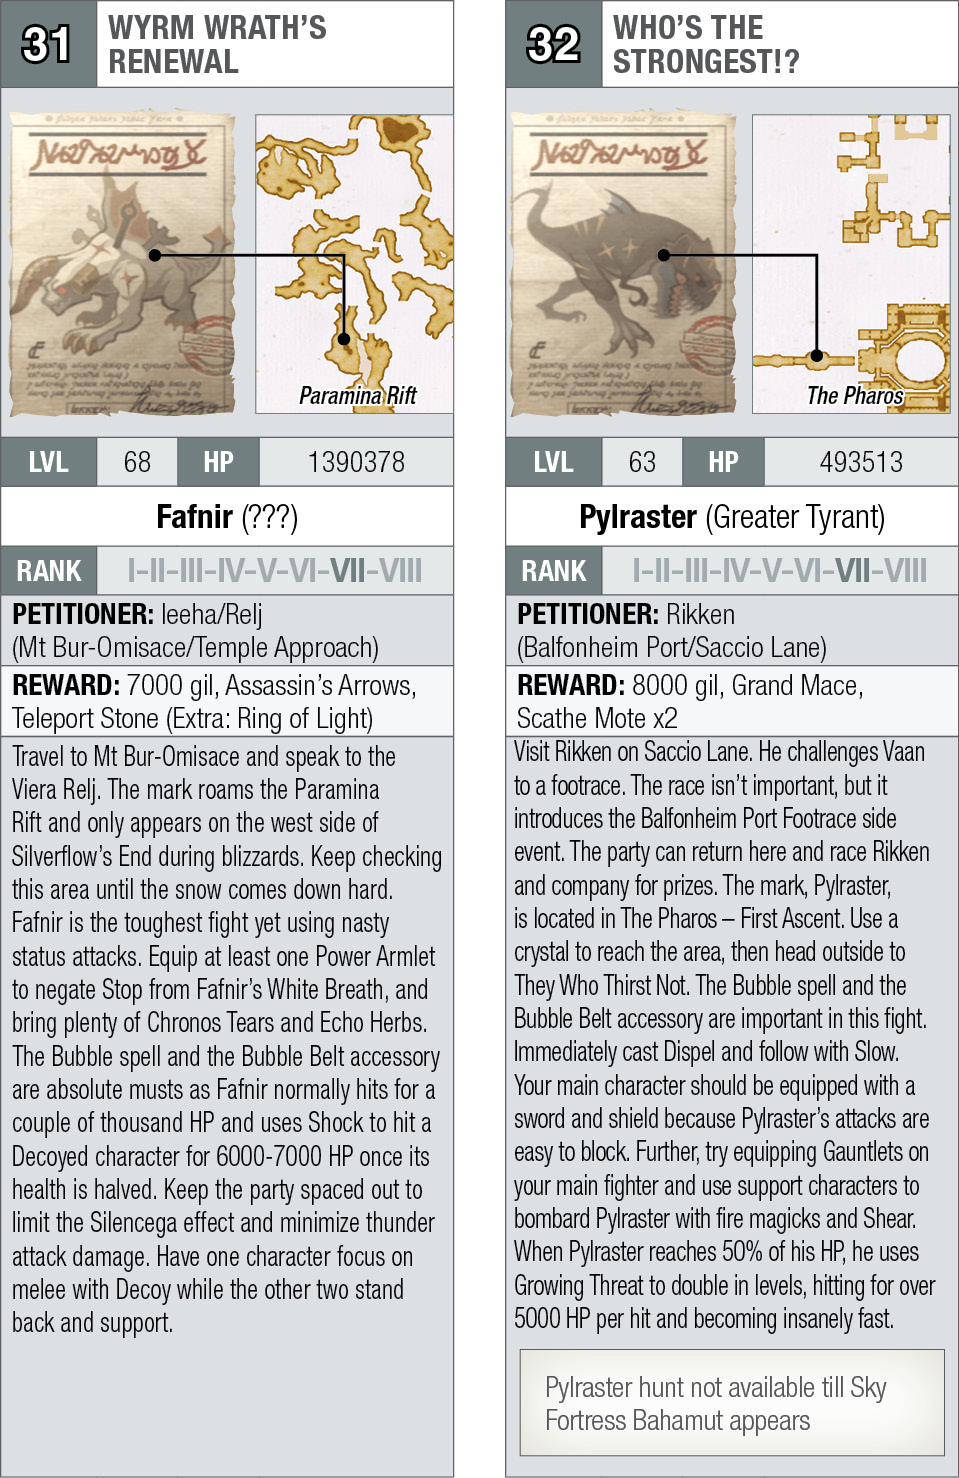
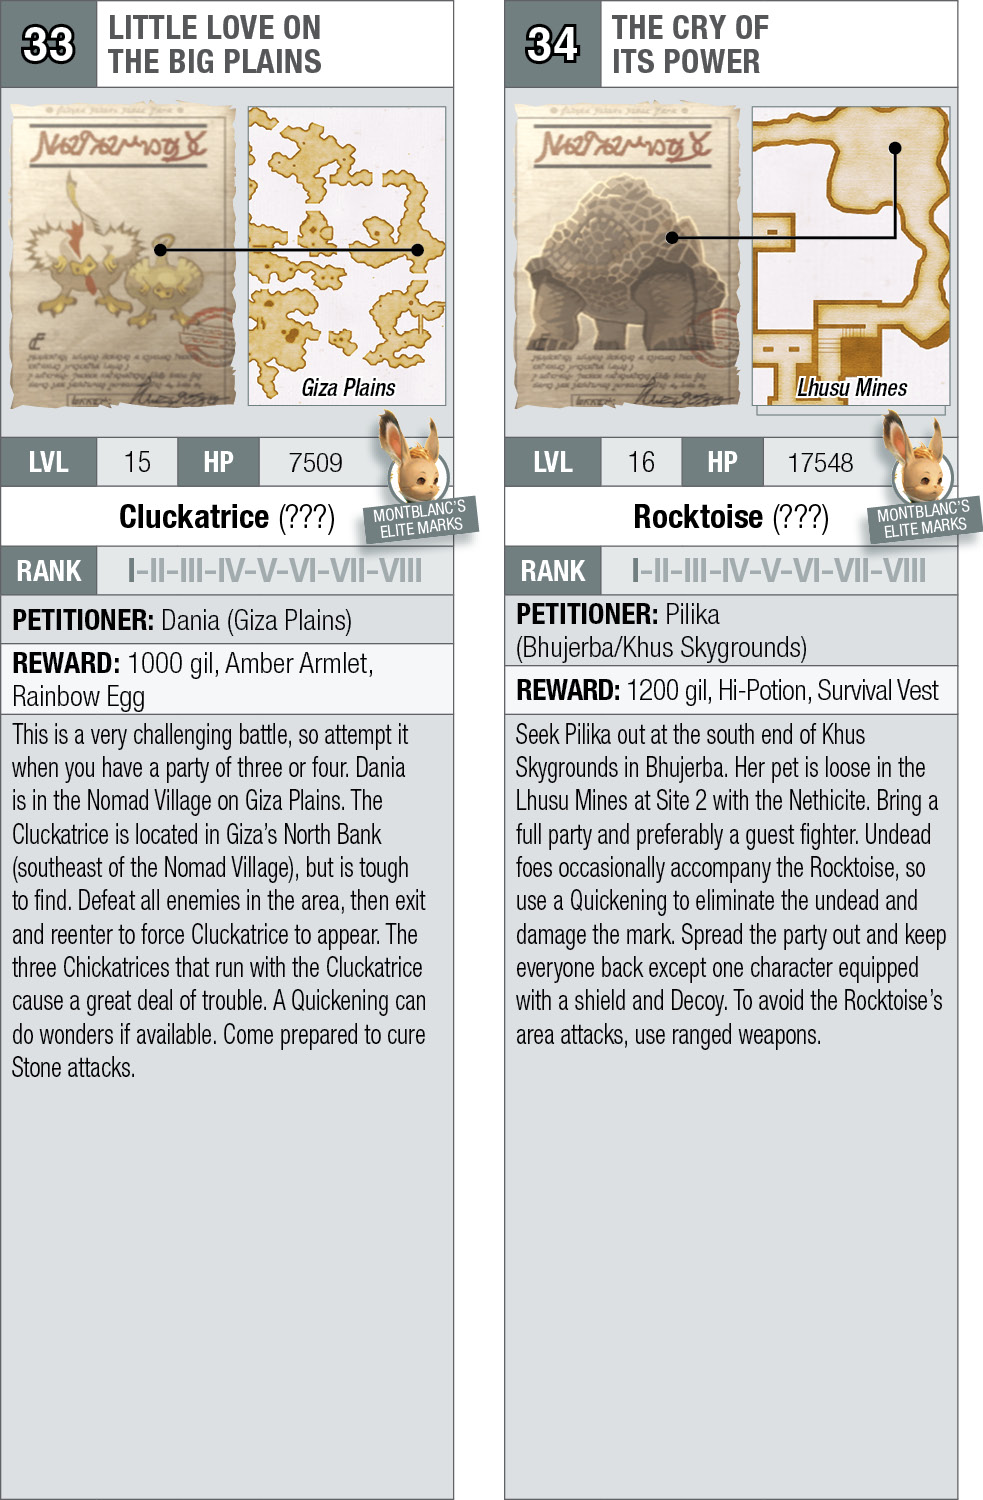
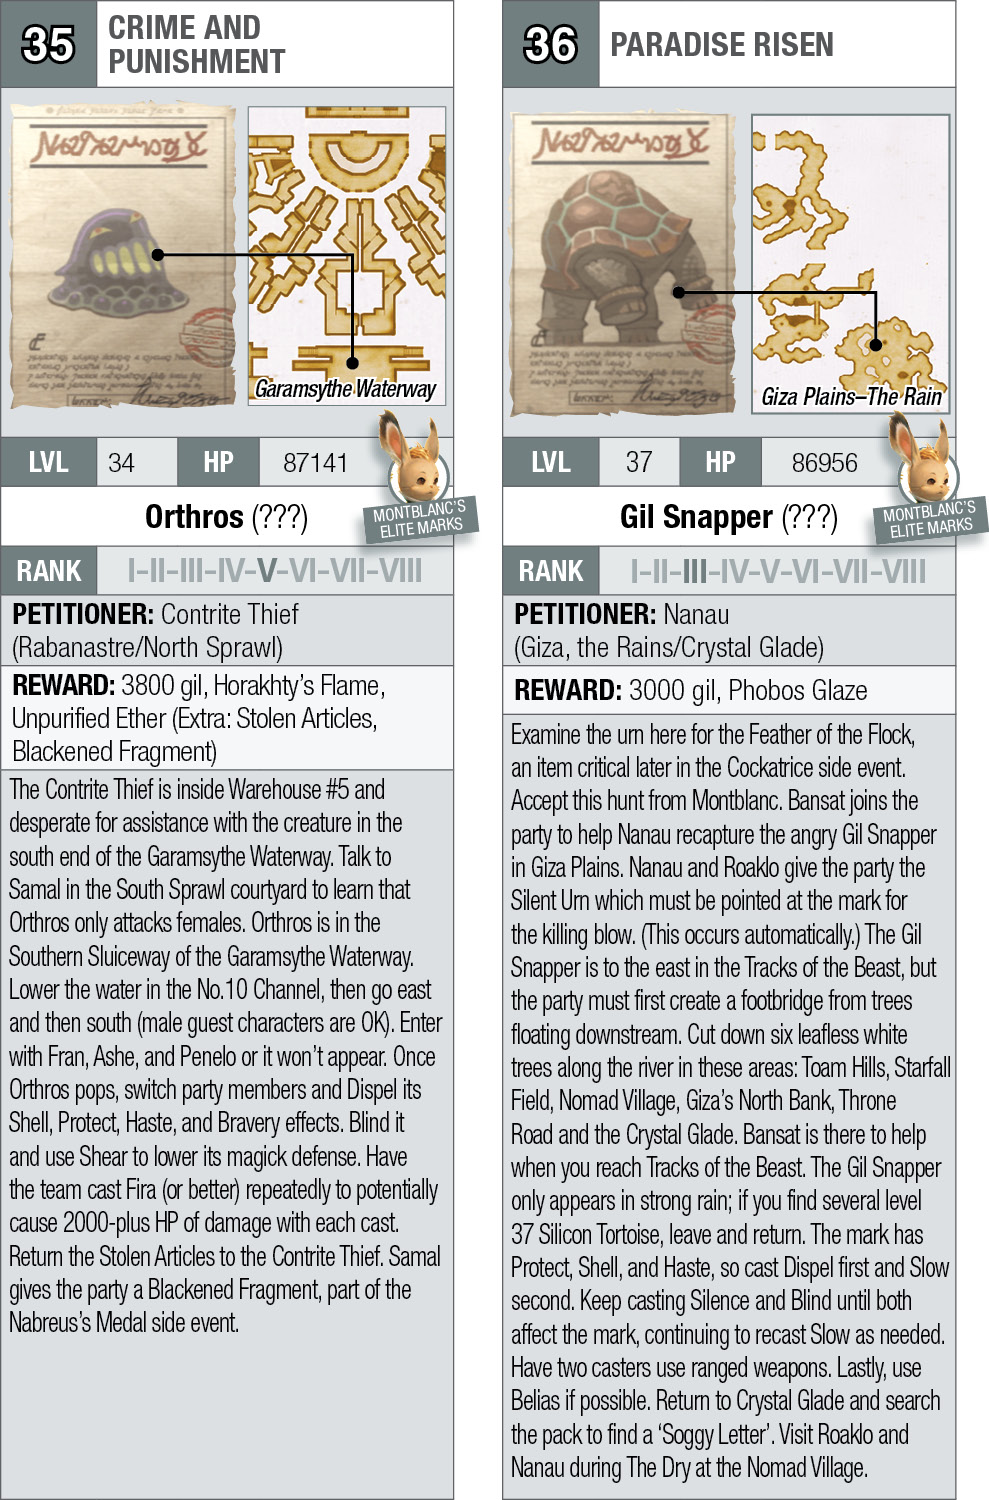
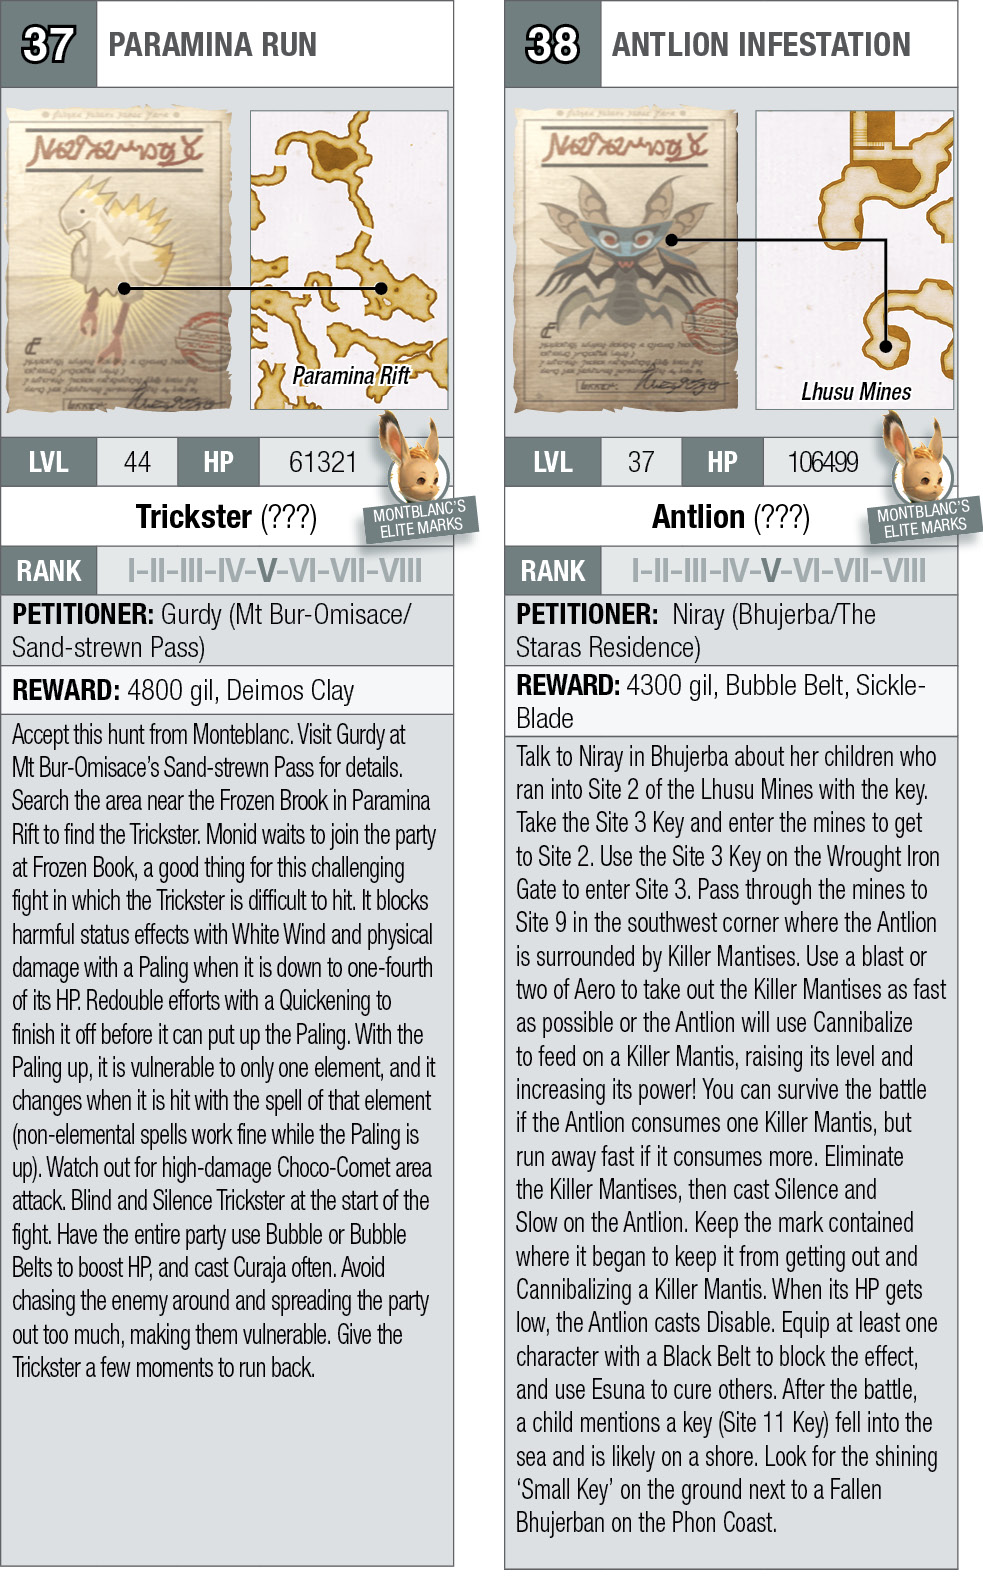
To find a hunt, go to the local tavern and check the Notice Board for new bills from petitioners. Add a hunt to the Clan Primer by agreeing to speak to the petitioner, and use its map to help find each person in need of your skills. Once you’ve found the petitioner, he or she shares details about the hunt. Petitioners can be anywhere, but tend to be easily found in popular areas. Please note that marks, the target of the hunt, won’t appear in the Clan Primer until you officially accept the hunt.
Now it’s time to hunt! The petitioner has likely provided the basic information to find the mark, but you’ll find all the details in this guide. Petitioners are often vague, so expect the information in this section to be of extreme value. You can obtain additional clues by visiting Ma’kenroh in The Clan Hall. If you meet the requirements to find the mark and defeat it, return to the petitioner for a reward and maybe extra information leading to another event in the game!
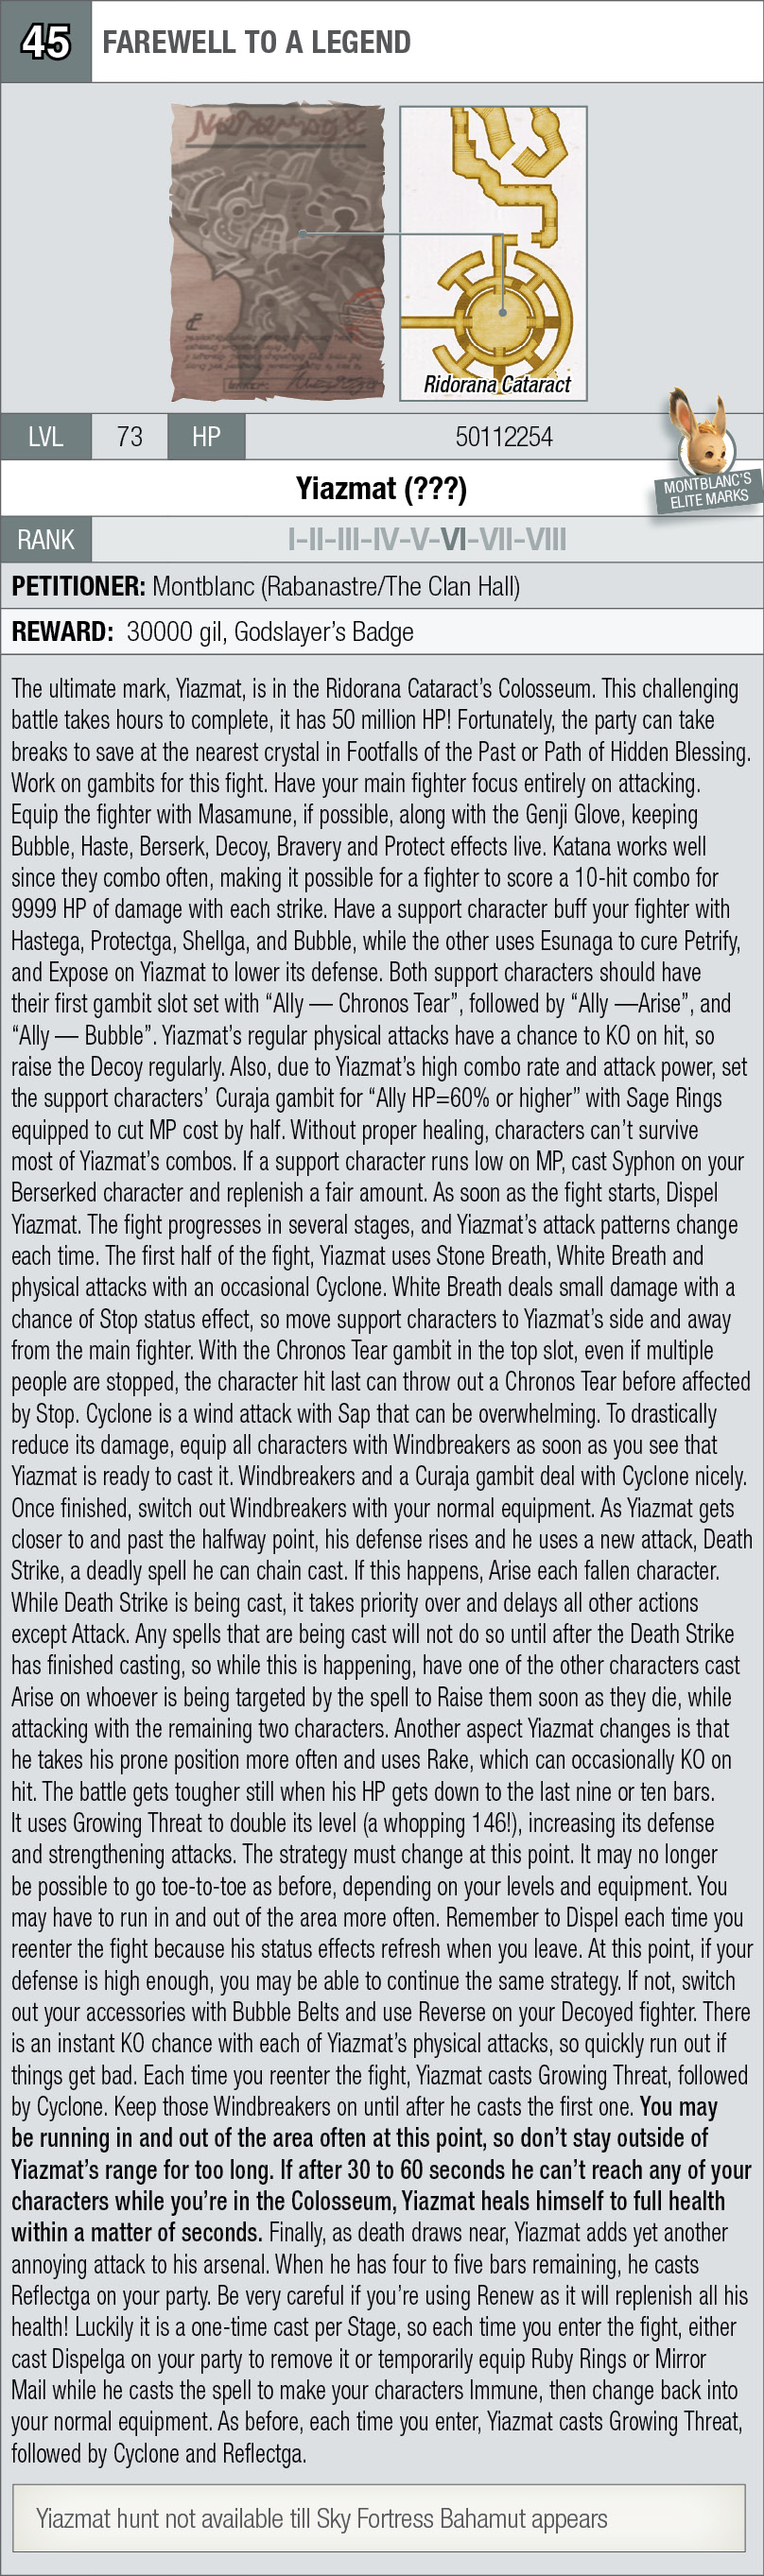
That’s all there is to it! There are 45 marks in the game. Normal hunts are found on the Notice Board. Montblanc (in The Clan Hall) hands out the elite marks, which are real challenges. Keep checking the board and visiting Montblanc for regularly updated hunt opportunities.
Notice Board Hunts
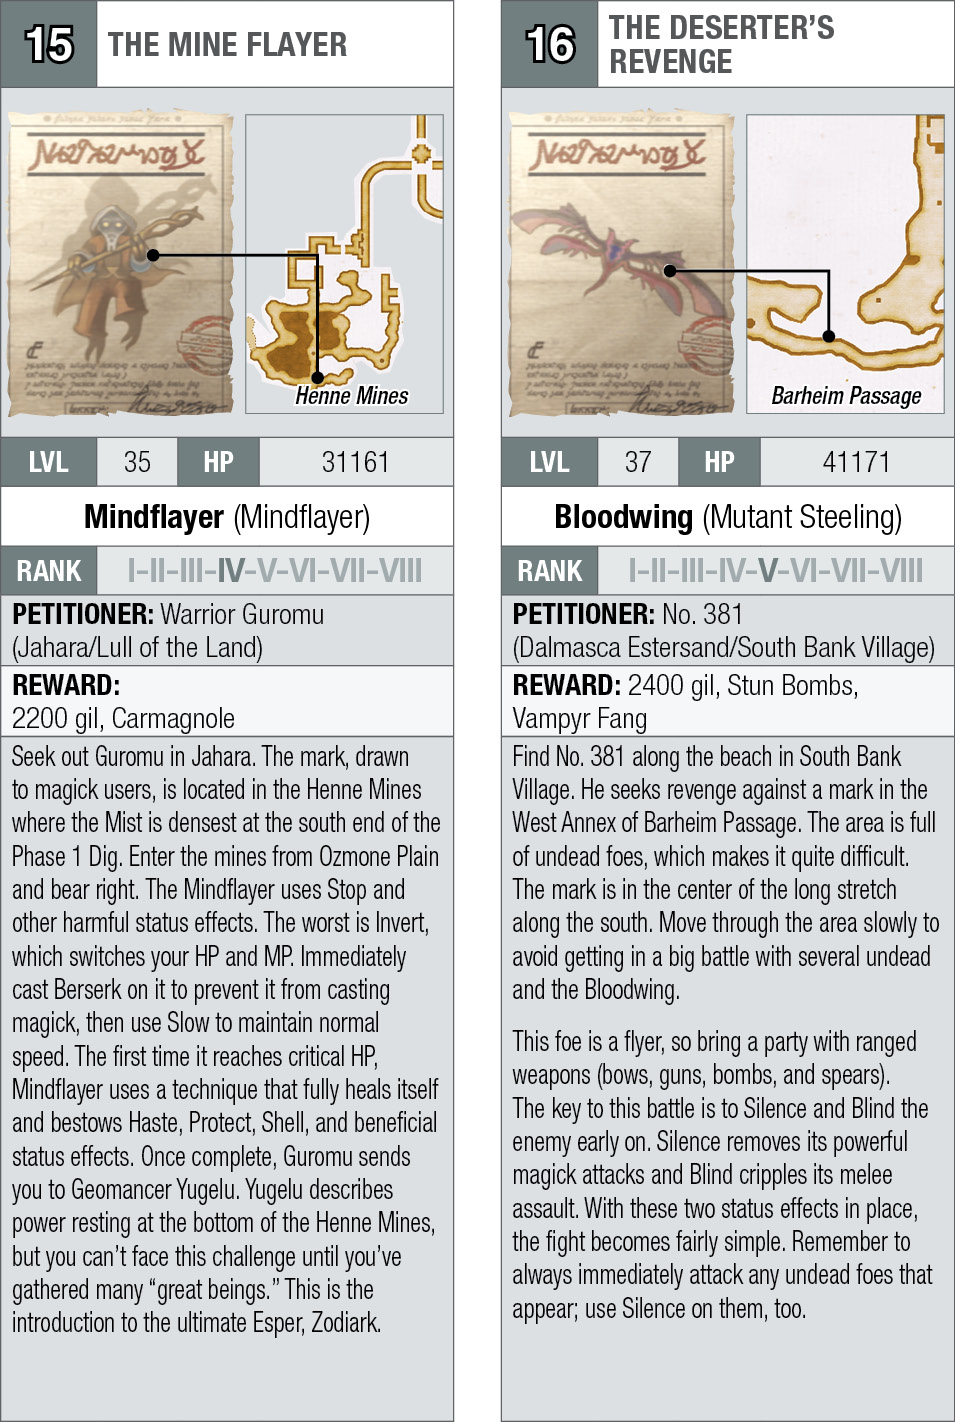
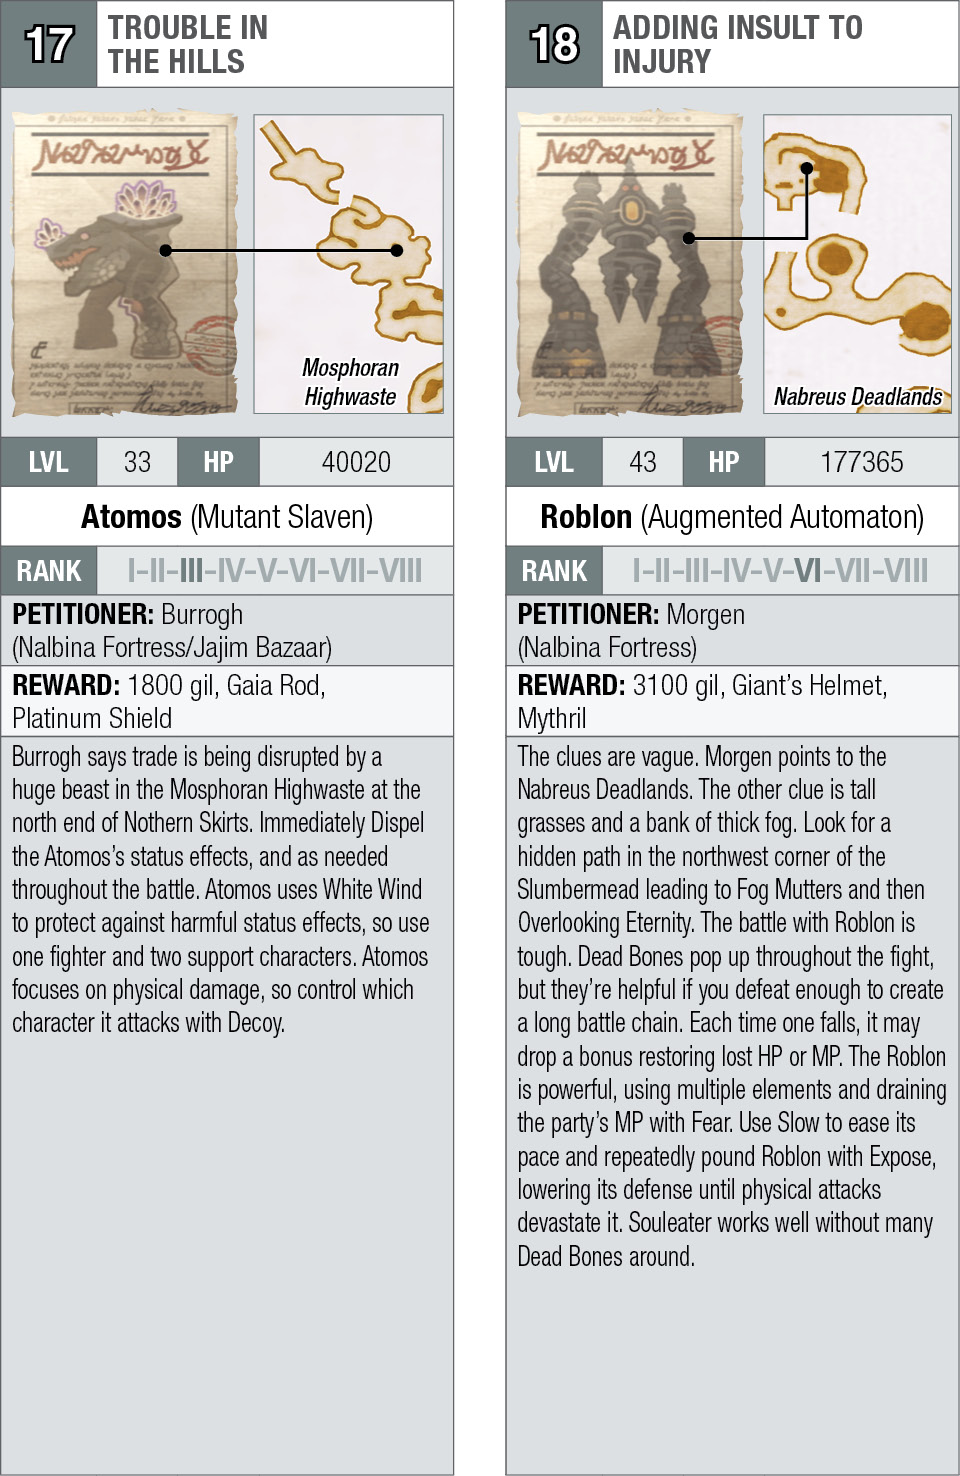
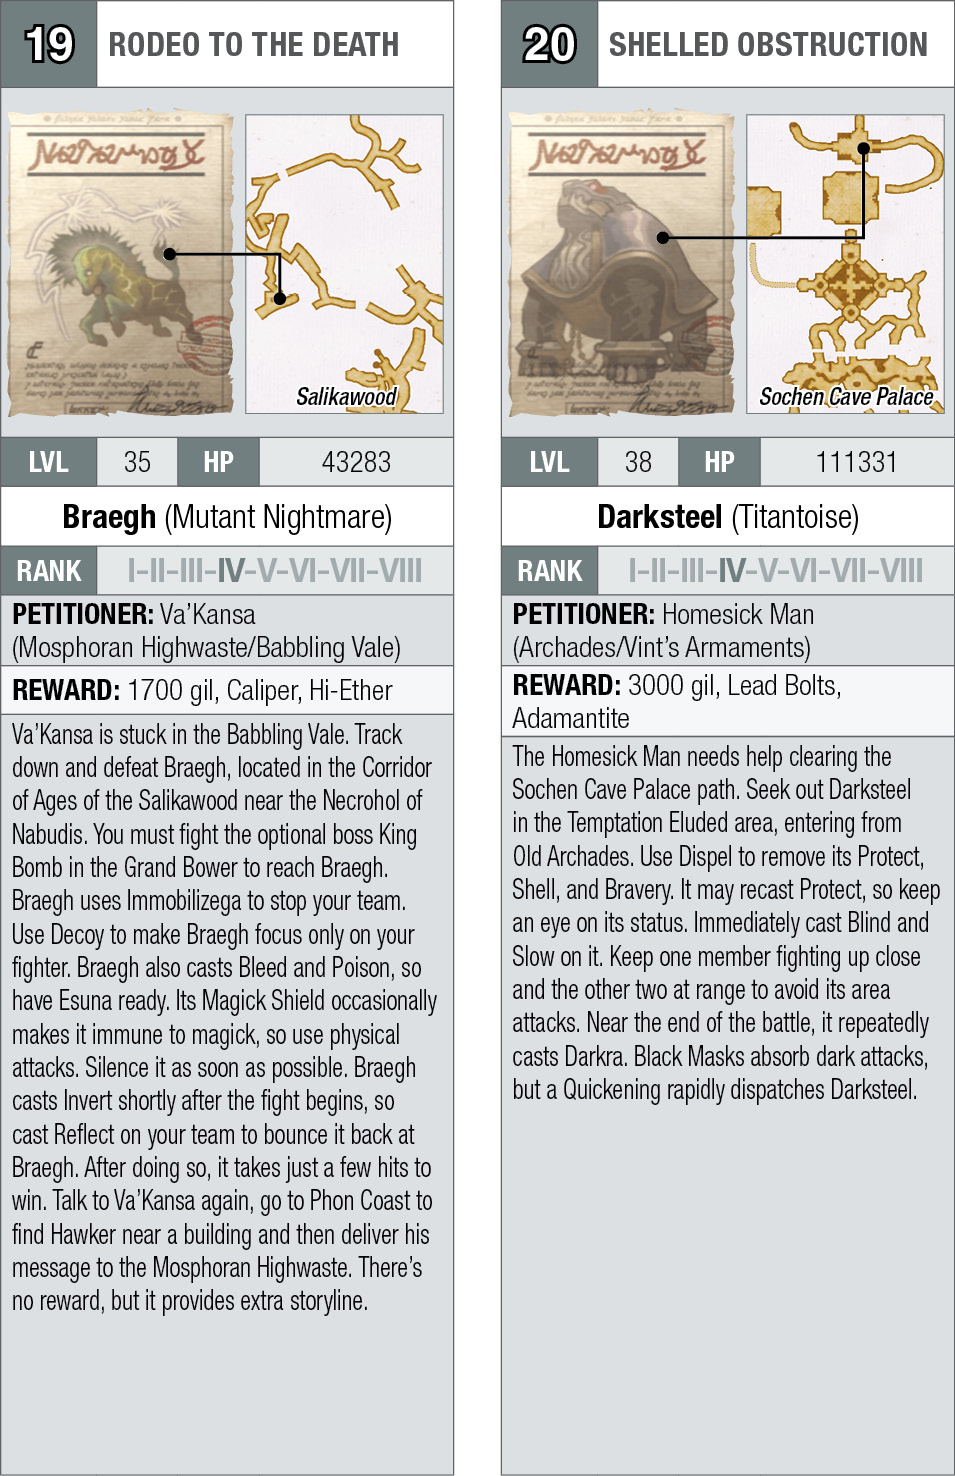
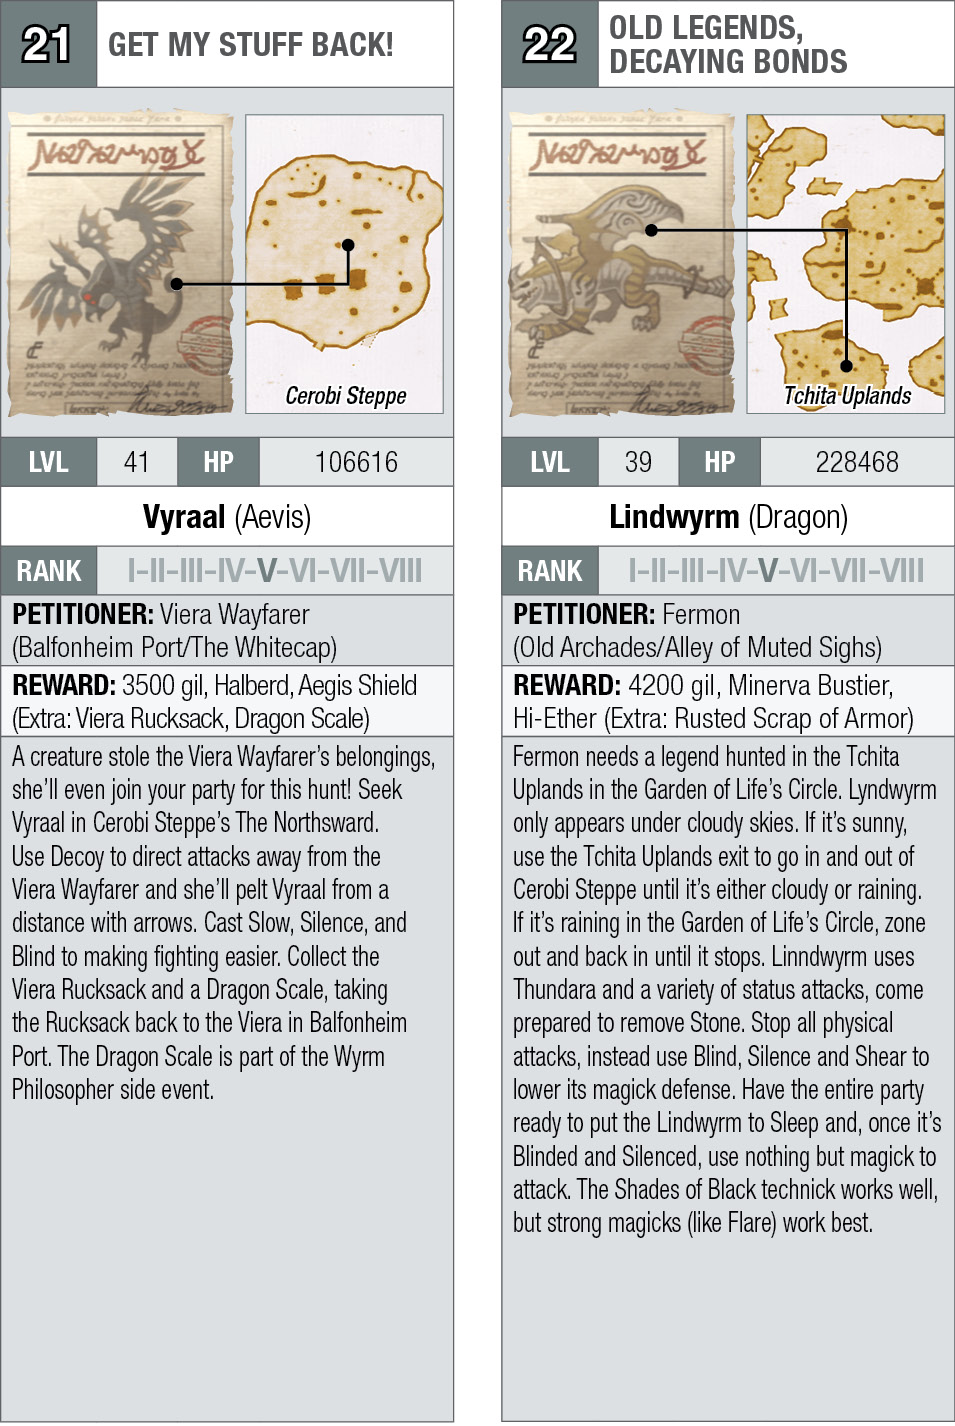
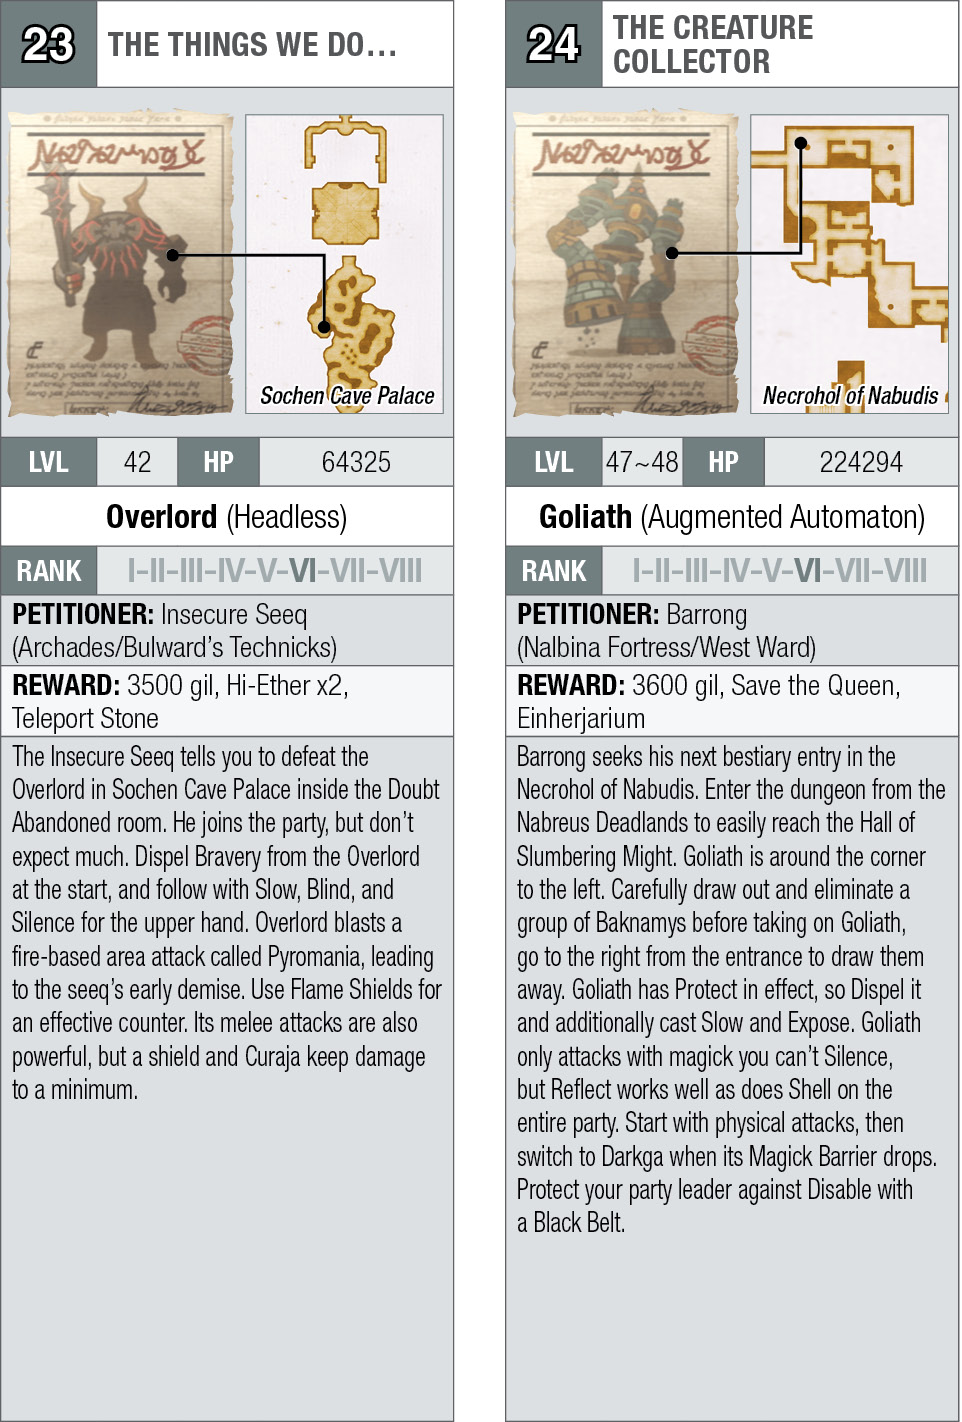
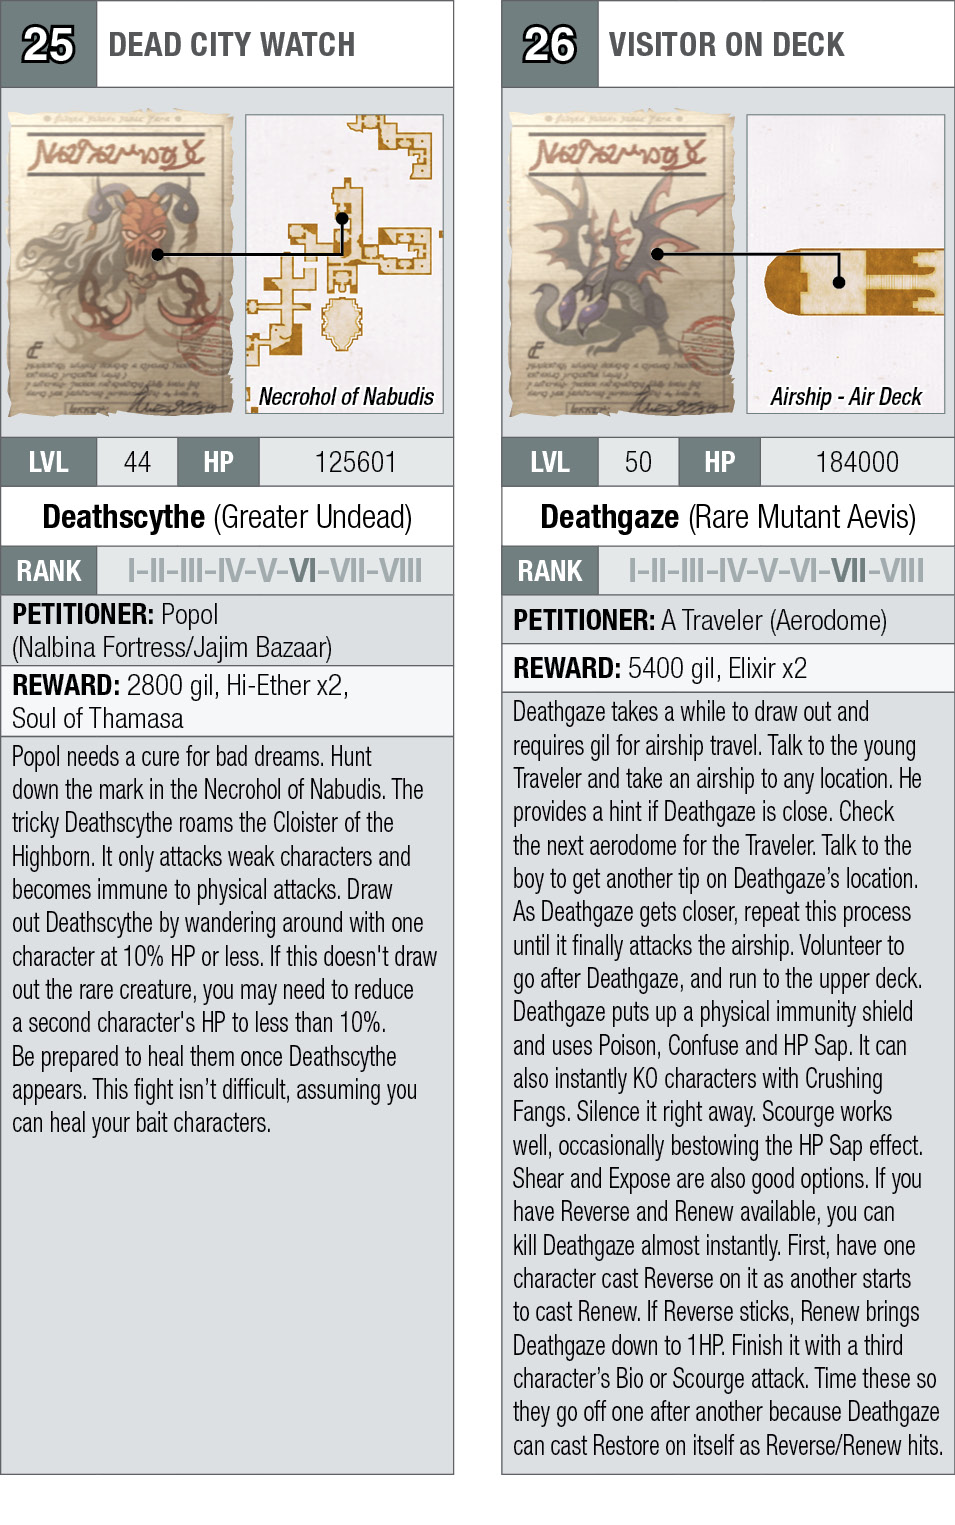
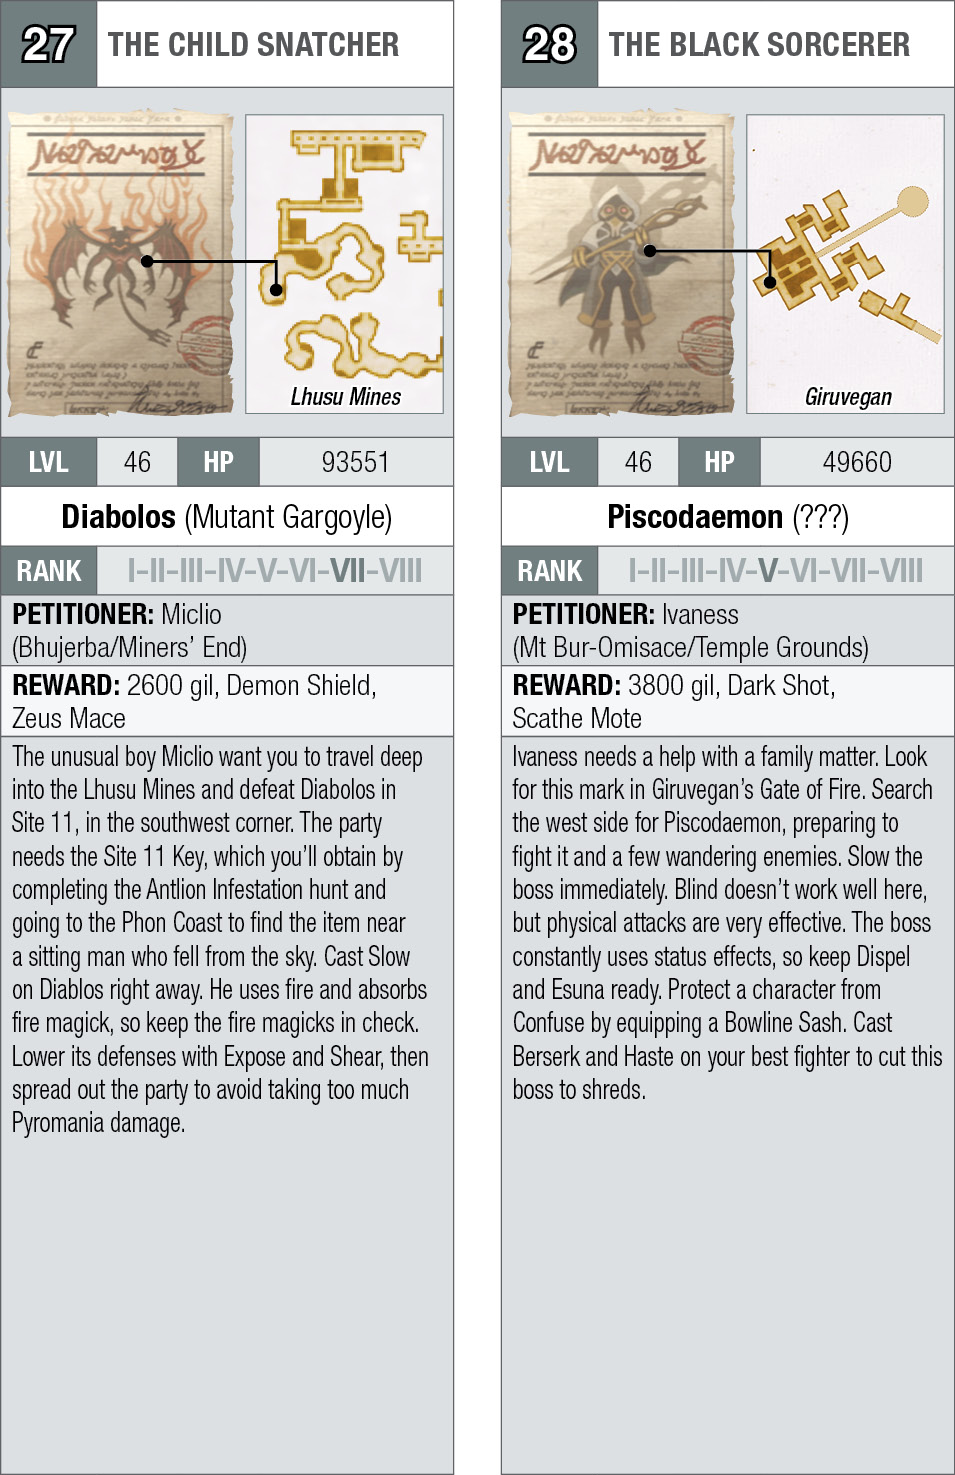
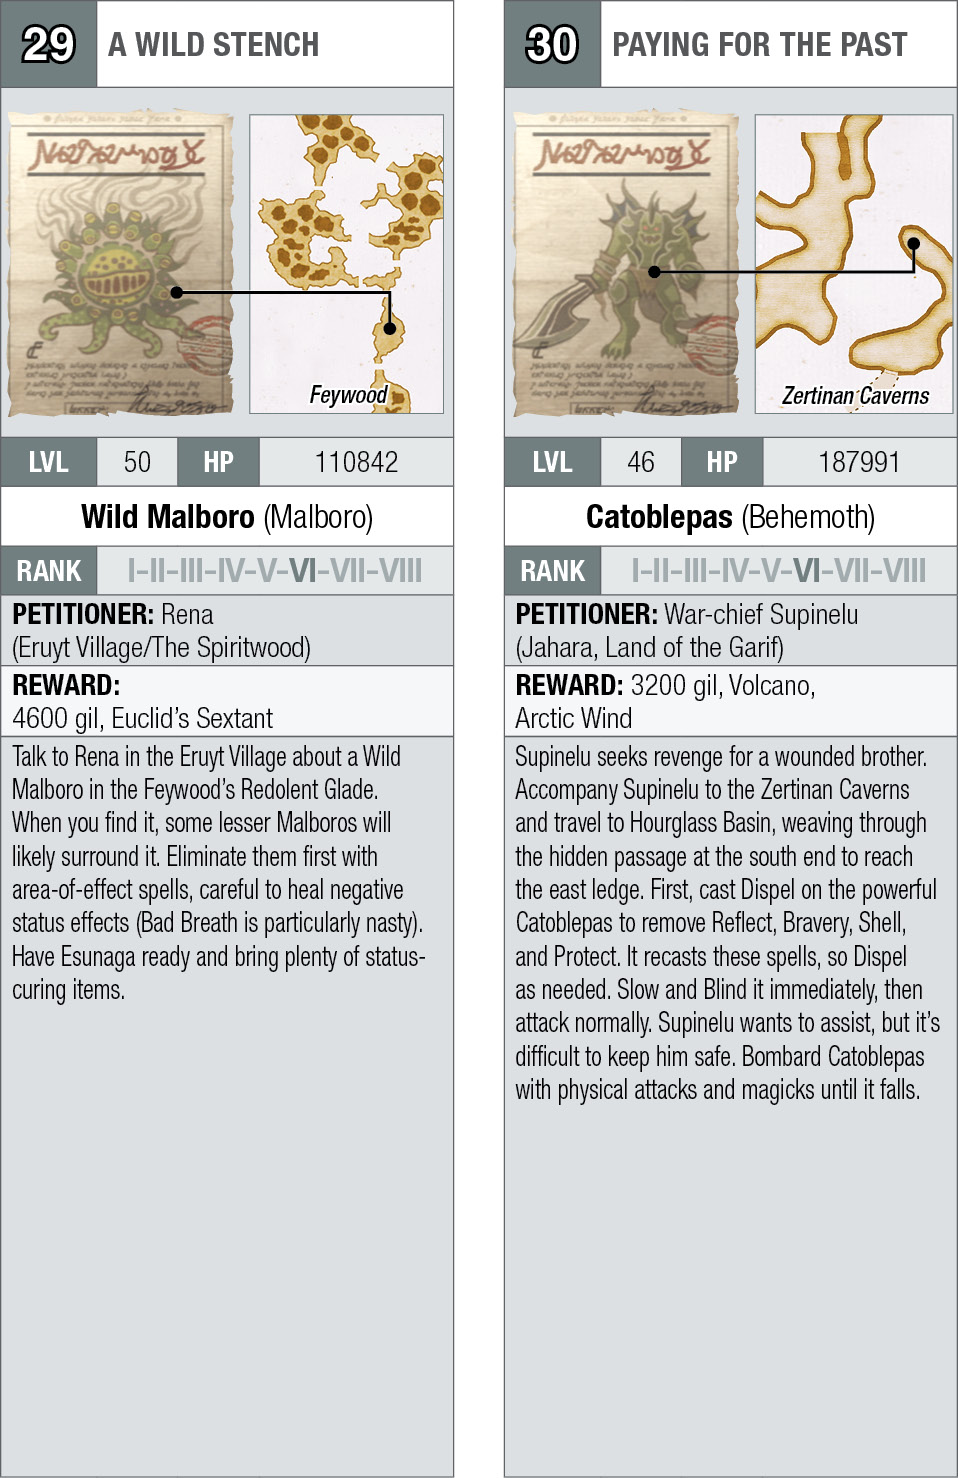
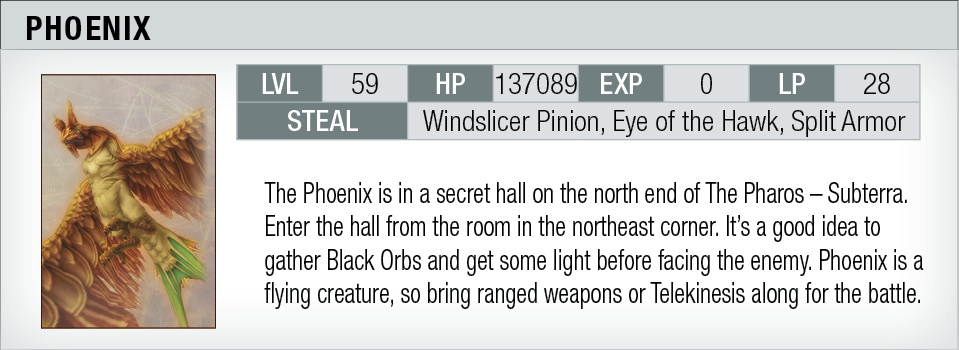
Phoenix –Optional Boss
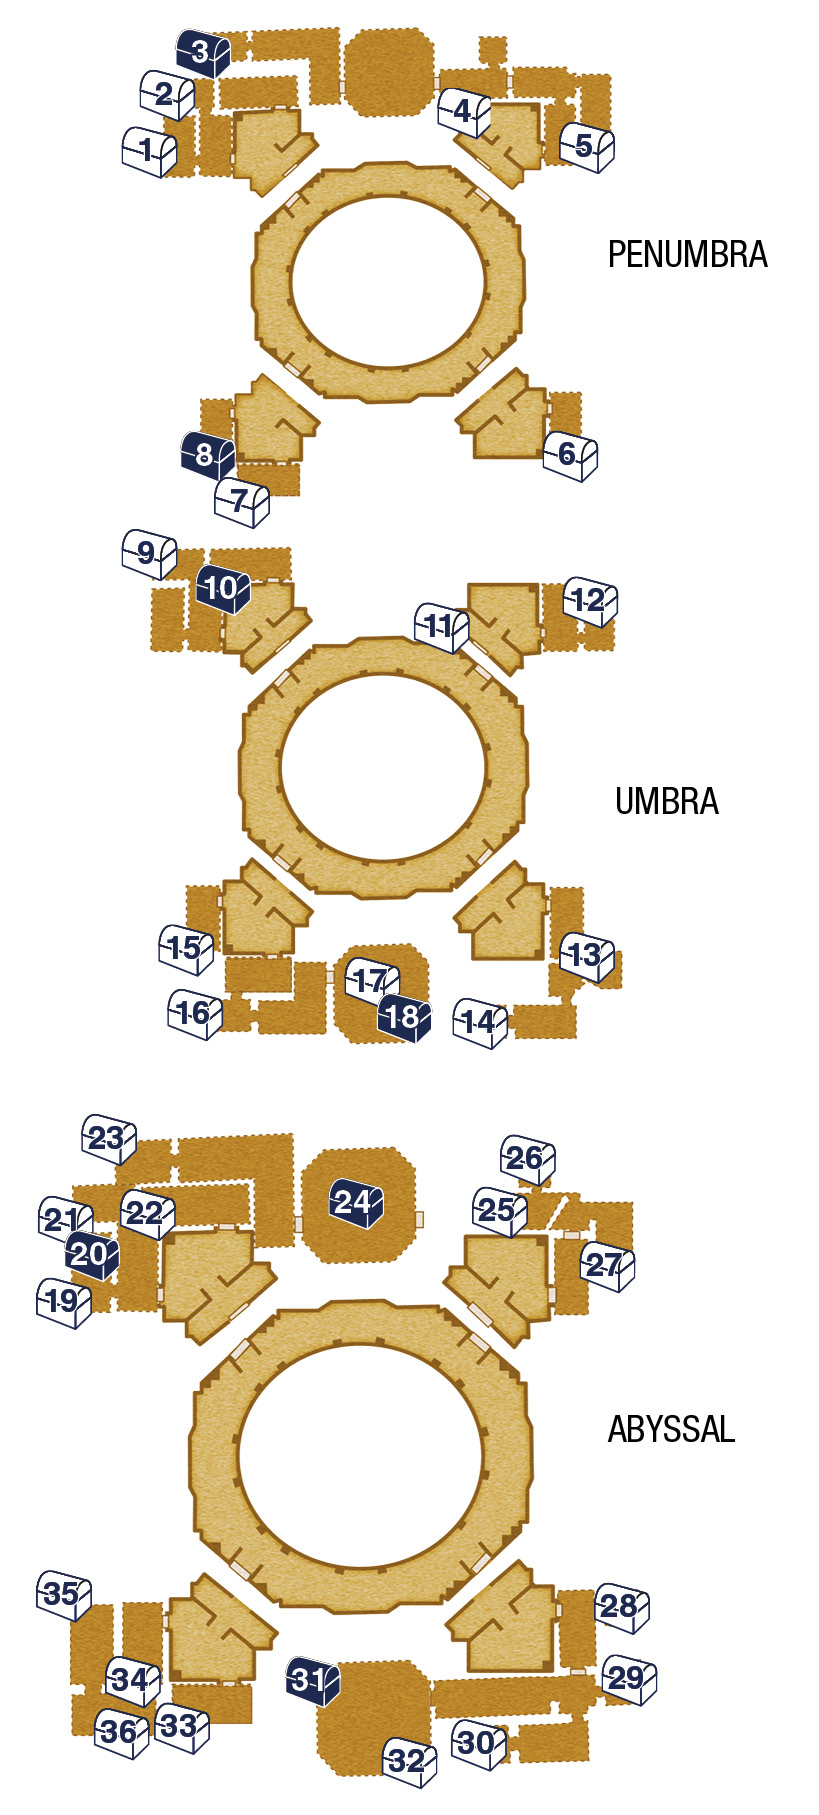
| Pop odds | If pop, Gil odds & Amt | Normal Loot | w/Diamond Armlet | ||||
|---|---|---|---|---|---|---|---|
|
OG # |
App. % |
Gil % |
Amt. if Gil |
50% |
50% |
95% |
5% |
|
1 |
70% |
80% |
1 |
Diamond Armlet |
Hastega Mote |
Knot of Rust |
Meteorite (B) |
|
2 |
70% |
80% |
1 |
Orrachea Armlet |
Shock Mote |
Knot of Rust |
Meteorite (C) |
|
3 |
5% |
0% |
— |
Indigo Pendant |
Indigo Pendant |
Indigo Pendant |
Indigo Pendant |
|
4 |
70% |
80% |
1 |
Battle Harness |
Reverse Mote |
Knot of Rust |
Meteorite (A) |
|
5 |
70% |
80% |
1 |
Firefly |
Chaos Bombs |
Knot of Rust |
Meteorite (A) |
|
6 |
70% |
80% |
1 |
Golden Amulet |
Assassin’s Arrows |
Knot of Rust |
Meteorite (A) |
|
7 |
70% |
80% |
1 |
Embroidered Tippet |
X-Potion |
Knot of Rust |
Meteorite (B) |
|
8 |
20% |
0% |
— |
Ring of Renewal |
Ring of Renewal |
Ring of Renewal |
Ring of Renewal |
|
9 |
70% |
80% |
2 |
Amber Armlet |
Stink Bombs |
Knot of Rust |
Meteorite (A) |
|
10 |
5% |
0% |
— |
Cameo Belt |
Cameo Belt |
Cameo Belt |
Cameo Belt |
|
11 |
70% |
80% |
2 |
Thief’s Cuffs |
Holy Mote |
Knot of Rust |
Meteorite (B) |
|
12 |
70% |
80% |
2 |
Turtleshell Choker |
Time Bolts |
Knot of Rust |
Meteorite (A) |
|
13 |
70% |
80% |
2 |
Gillie Boots |
Scathe Mote |
Knot of Rust |
Meteorite (C) |
|
14 |
70% |
80% |
2 |
Berserker Bracers |
Windslicer Shot |
Knot of Rust |
Meteorite (A) |
|
15 |
70% |
80% |
2 |
Sage’s Ring |
Dark Matter |
Knot of Rust |
Meteorite (A) |
|
16 |
70% |
80% |
2 |
Jade Collar |
Sapping Bolts |
Knot of Rust |
Meteorite (A) |
|
17 |
70% |
80% |
2 |
Pheasant Netsuke |
Elixir |
Knot of Rust |
Meteorite (B) |
|
18 |
5% |
0% |
— |
Nihopalaoa |
Nihopalaoa |
Nihopalaoa |
Nihopalaoa |
|
19 |
70% |
80% |
3 |
Quasimodo Boots |
Scathe Mote |
Knot of Rust |
Meteorite (B) |
|
20 |
10% |
0% |
— |
Ribbon |
Ribbon |
Ribbon |
Ribbon |
|
21 |
70% |
80% |
3 |
Opal Ring |
Icecloud Arrows |
Knot of Rust |
Meteorite (A) |
|
22 |
70% |
80% |
3 |
Hermes Sandals |
Elixir |
Knot of Rust |
Meteorite (A) |
|
23 |
70% |
80% |
3 |
Bubble Belt |
Dark Shot |
Knot of Rust |
Meteorite (A) |
|
24 |
10% |
0% |
— |
Wither |
Wither |
Wither |
Wither |
|
25 |
70% |
80% |
3 |
Germinas Boots |
Scathe Mote |
Knot of Rust |
Meteorite (B) |
|
26 |
70% |
80% |
3 |
Sash |
Holy Mote |
Knot of Rust |
Meteorite (B) |
|
27 |
70% |
80% |
3 |
Ruby Ring |
Dark Matter |
Knot of Rust |
Meteorite (A) |
|
28 |
40% |
97% |
3 |
Knot of Rust |
Knot of Rust |
Knot of Rust |
Baltoro Seed |
|
29 |
40% |
97% |
3 |
Knot of Rust |
Knot of Rust |
Knot of Rust |
Baltoro Seed |
|
30 |
40% |
97% |
3 |
Knot of Rust |
Knot of Rust |
Knot of Rust |
Baltoro Seed |
|
31 |
100% |
0% |
— |
Megalixir |
Megalixir |
Megalixir |
Megalixir |
|
32 |
40% |
97% |
3 |
Knot of Rust |
Knot of Rust |
Knot of Rust |
Great Trango |
|
33 |
40% |
97% |
3 |
Knot of Rust |
Knot of Rust |
Knot of Rust |
Baltoro Seed |
|
34 |
40% |
97% |
3 |
Knot of Rust |
Knot of Rust |
Knot of Rust |
Baltoro Seed |
|
35 |
40% |
97% |
3 |
Knot of Rust |
Knot of Rust |
Knot of Rust |
Baltoro Seed |
|
36 |
40% |
97% |
3 |
Knot of Rust |
Knot of Rust |
Knot of Rust |
Baltoro Seed |