
Final Fantasy XII: The Zodiac Age Guide Trial Mode
Trial Mode
What is Trial Mode?
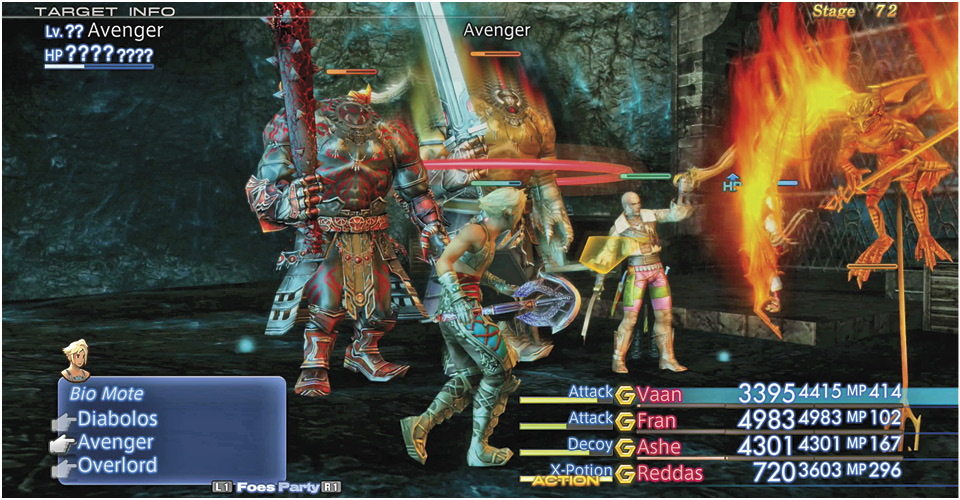
Trial Mode is a sprawling “boss rush” style mode that combines many of the game’s meanest and rarest adversaries into interesting and grueling scenarios. Trial Mode was not in the original release of Final Fantasy XII, so this is a real treat for fans both old and new.
Getting Started

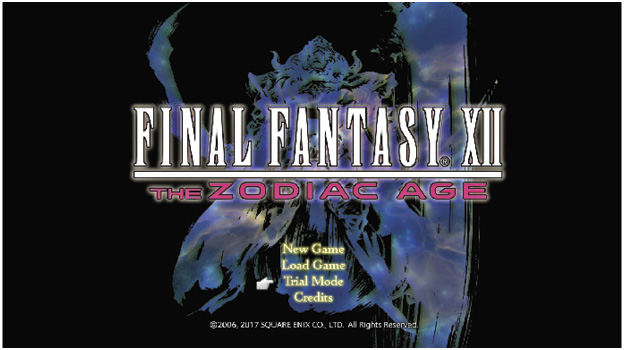
A Trial Mode run begins from the title screen. Select Trial Mode and the game will prompt you to choose save data. (Of course, you must have main game save data in progress to enjoy Trial Mode.)
Whichever data you select, your party from this save file will enter Trial Mode on Stage 1, fighting Dire Rats in Garamscythe Waterway just as Vaan does at the outset of the adventure proper. Don’t expect it to remain that sedate; Trial Mode ramps up the threat with dizzying speed.
Stages progress through a variety of small environments that represent territories all over Ivalice. All Stages have targets that you must defeat in order to advance. Many stages also have optional creatures in evidence. These can be pesky helpers to the main boss, or hidden enemies you can uncover by fully exploring the small maps. Optional Trial Mode enemies are usually tougher than the required enemies on their stage, and carry exceptional gear to Steal. A few Stages feature allied creatures who will assist the party, like during certain clan hunts. And, if a special limited effect hampered the battlefield during the original boss fight, then it’s present during Trial Mode too. Whether HP and MP sapping fields, Attack/Item/Magicks/Technicks command restrictions, or magnetic forces weighing down metallic heavy armors and accessories, the same conditions are in effect.
What Do I Get?
Aside from the privilege of taking on variations on all of the game’s most challenging and dynamic fights in a row, not to mention putting your gambit palettes and equipment sets through the ultimate stress test, there are lots of material gains to be had in Trial Mode. The only caveat to get out of the way up front is that you don’t gain EXP.
Stealing: Stealing works as normal. Be careful with this; you’re not wandering through Giza Plains anymore. Steal manually rather than with a gambit. Steal results from monsters are different in Trial Mode than in the normal game. Some of the rarest and most sought-after pieces of gear can be found as rare Steal results here!
Swap in Thief’s Cuffs before Steal attempts to increase your shot at rarer drops, along with creating the possibility of swiping stuff from different rarity tiers—you might snag the common, uncommon, and rare items all at once. The Stage breakdown in this chapter lists any exceptional pieces available from a given enemy, ordered from most common to rarest. Aside from what’s listed here, enemies also carry various disposable items and spell motes—Potions, Ethers, status-restoring items, Soleil Fangs, Shock Motes, and so on.
Thanks to the new per-Stage autosave, it’s possible to target specific Stages for certain spoils, Stealing and reloading until the desired item comes to hand.
Drops: Defeated foes may leave drops behind, which you can pick up. You’ll miss out against solo foes or the last enemy on any given Stage, however, since the action freezes and the Stage advances when the last foe’s HP is depleted. On some Stages where normal enemies respawn repeatedly, this can be exploited to collect drops and build up a battle chain. Don’t underestimate battle chain potential during some stretches of Trial Mode—higher battle chains begin randomly replenishing party HP and MP.
Drops from defeated enemies are mostly disposable items and motes, but a few specific enemies can drop something more, mostly Elixirs or Dark Matter. Where Dark Matter appears in Exceptional Treasure or Spoils in Stage breakdowns, it requires you have the Canopic Jar (The ‘Morbid Urn’ Bazaar recipe, which unlocks the ultimate loot-quality-boosting Grimoire; see the Bazaar chapter for more).
Treasure: Hovering crystal treasure chests can be seen across all Stages. They contain all kinds of useful disposable items—from Potions and Ethers to Bubble Motes and Elixirs. Certain Stages have treasure chests that contain something more, if you open them with Diamond Armlet equipped. The Stage breakdown shows what’s available with the Diamond Armlet throughout Trial Mode. Amusingly, if you don’t have a Diamond Armlet, it’s no problem—search treasure chests in Stage 1 to find one, a pretty strong hint that you’ll want to wear it while opening chests for the rest of Trial Mode.
When opening treasure chests, you must refrain from defeating all the required targets on the current Stage. You can easily Flee around a Stage to look for treasure without risking a premature victory, but once you find a chest it can be hard to actually pick up the treasure while hostile creatures prod the party. To make it easy, disable gambits for the party leader, so he or she goes inactive and treasure pickup is prioritized. If you want to make sure your allies don’t defeat the foes before you’ve picked up all the treasure you want, you’ll need to temporarily disable everyone’s gambits. Luckily, this is quick and easy to do right from the battle menu. Be sure to keep an eye on the party’s health while trying to open treasure chests with gambits off, and manually issue healing commands if necessary.
As with Steal results, the new autosave system allows you to exit Trial Mode and reload the current Stage if treasure chest results are unsatisfactory.
LP: Enemies grant their normal LP totals. Defeating boss after boss on demand in Trial Mode piles up LP much faster than normal adventure gameplay.
Rewards Every 10 Stages: Every 10 Stages, you’ll receive some gil and useful disposable items. Here, you’ll also have the opportunity to save the game. These saves are more permanent than autosaves, which can easily be overwritten.
System Trophies: It’s possible to defeat many of the game’s elite marks and superbosses in Trial Mode before you’ve even seen them in the main adventure. If you do, this will unlock the Trophy like normal. Similarly, Trial Mode can help fill out the Clan Primer’s Bestiary entries for rare monsters you haven’t encountered normally. The rare monsters that unlock Trophies are required for the Order of Ambrosia, Clan Centurio’s highest rank.
“Weak Mode” New Game-: While level 90 New Game+ mode is unlocked by beating the main adventure, low-level New Game- mode is unlocked by beating Stage 100 in Trial Mode. Save the game when prompted, and a playthrough on this data will proceed as though each character wears a Firefly accessory—no EXP will be gained, so allies remain at the level they’re at when joining. The inspiration for this ultimate FFXII challenge comes from the so-called “122333 challenge,” in which fans seeking extra challenge in the original release kept Fireflies equipped on allies to prevent level-ups.
As you progress through the main adventure, you can use Trial Mode as an occasional action-filled breather and LP/item-farming opportunity between story events, seeing how far your party can progress before they bite off more than they can chew. Whenever you hit a GAME OVER screen, go to Load Game from the title screen menu, load the Trial Mode autosave from whichever Stage consumed your party, and continue the main adventure, Trial Mode spoils intact.
Trial Mode SavesTrial Mode will autosave at the beginning of the most recent floor. If you fall in battle, you’ll be able to reload this autosave in Trial Mode for another crack at it. You can also exploit this autosave to repeatedly Steal from Trial Mode targets, waiting to move on till you get what you want. 
Trial Mode gives you an opportunity to create a manual save file every 10 stages. This save can also be reloaded in Trial Mode to pick up wherever you left off on the march to stage 100. |
Returning to the Main Game From Trial ModeTrial Mode save files (and autosaves) can be loaded from the normal “Load Game” option at the main title screen. If you load a Trial Mode save this way, you’ll return to the main adventure of FINAL FANTASY XII, carrying with you any license points and items earned up to that point in Trial Mode. However, your Trial Mode progress disappears. 
You can return to the 100 Stage climb anytime by saving your ongoing main adventure normally, then loading that save in Trial Mode, but you’ll start again at Stage 1. |
Acquitting Yourself—Trial Counseling
Don’t worry if it takes some time before you can climb high in Trial Mode. The upper echelons here are intended to be even more challenging than the stoutest foes of the main adventure. Before you can realistically tackle the upper reaches here, you’ll want a party with Job combos that enhance survivability, full license boards, and Espers well-distributed between allies. Various powerful strengthening and enfeebling magicks should all come standard, like Bubble, Bravery, Faith, Blind, Protectga, and so on. For a frame of reference, once you can beat the last bosses in the main adventure (which, for most first-time adventurers, occurs with party member’s levels at 40-45), you can probably plow to about halfway through Trial Mode, Stage 50 or so (with such a run taking about a half hour or so, depending on how liberally you use x4 Speed Mode Multiplier). Ascending farther still requires honing your party in certain ways.
Bring a Guest: If a guest character is accompanying the party in the save date that you use to initiate Trial Mode, then that guest will tag along. It will probably not shock you if we strongly recommend bringing guests, when available. Depending on where you are in the adventure, you may bring Vossler, Larsa, or Reddas into Trial Mode, with Reddas the most likely choice for lengthy Trial Mode plunges, if only because he’s a member of the party furthest along in the main adventure.
Collect Three of Each “Immune” Accessory/Totally Refill Status-Curing Items Every Run: Often, the key to a stage will be quickly swapping in accessories and gambits that block a devastating effect, like Stop or Disable. It can also be quickly adjusting your strategy in a crucial way, like: if your damage is focused on Black Mage nukes, you’d either better cool it, put on an Opal Ring, or swap to using spell motes against monsters protected by Reflect, lest you want to melt your own party member’s faces.
Blocking Status Ailments
| Accessory | Immunity | Acquisition |
|---|---|---|
|
Argyle Armlet |
Blind |
Shop in Barheim Passage, Dreadnought Leviathan, Dalmasca Westersand, Nam-Yensa Sandsea |
|
Black Belt |
Immobilize, Disable |
Shop in Dalmasca Westersand, Jahara, Eruyt Village, Mt Bur-Omisace |
|
Bowline Sash |
Confuse |
Shop in Mt Bur-Omisace, Phon Coast, Balfonheim |
|
Diamond Armlet |
Lightning |
Treasure in Dalmasca Westersand, Zertinan Caverns, Pharos – Subterra; Drops from Mom Bomb; Shop in Phon Coast |
|
Fuzzy Miter |
Petrify |
Shop in Mt Bur-Omisace, Phon Coast, Balfonheim |
|
Gillie Boots |
Oil |
“A Chase Through the Woods” hunt; treasure in Mosphoran Highwaste, Ridorana Cataract, Pharos – Subterra; Ninja Footgear Bazaar recipe |
|
Nishijin Belt |
Sleep |
Shop in Nam-Yensa Sandsea, Tomb of Raithwall, Eruyt Village, Mt Bur-Omisace |
|
Power Armlet |
Stop |
Shop in Phon Coast, Balfonheim, Necrohol of Nabudis |
|
Quasimodo Boots |
Sap |
Treasure in Lhusu Mines, Pharos – Second Ascent, Pharos – Subterra; Shoes of the Dead Bazaar recipe |
|
Ribbon |
Everything |
Treasure in Henne Mines, Pharos – Subterra; Drops from Lv.99 Red Chocobo, Vishno; Phon Coast Hunt Club |
|
Rose Corsage |
Silence |
Shop in Dalmasca Westersand, Tomb of Raithwall, Jahara, Eruyt Village |
|
Sash |
Slow |
Treasure in Giruvegan, Pharos – Second Ascent, Pharos – Subterra; obtained during story events |
|
Tourmaline Ring |
Poison, Sap |
Shop in Dreadnought Leviathan, Dalmasca Westersand, Tomb of Raithwall, Jahara |
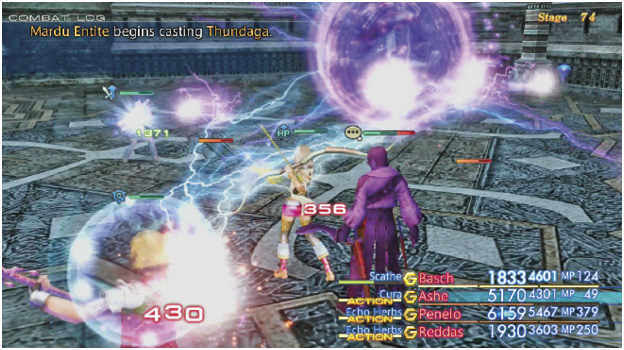
Prepare for Heavy Elemental Magick Threats: Particularly when you run into almost ten solid stages of notorious elemental monsters late in Trial Mode, you’ll be glad to have some way to mitigate their constant area-of-effect attacks. Sadly, there aren’t armor pieces for every possible elemental threat, so you’ll have to consider using Shellga, Faith, and gear with higher Magick Resist as needed. Reflect can come into play, if you have solutions for curing the party through magick walls (like with an item-using primary healer equipped with Pheasant Netsuke, or a magick-using primary healing equipped with Opal Ring).
Absorb—Crucial Against Holyja/Darkja
| Armor | Element Absorbed | Acquisition |
|---|---|---|
|
Black Mask |
Dark |
Treasure in Cerobi Steppe, Pharos – First Ascent; Drop from Banshee; Black Vestments Bazaar recipe; Phon Coast Hunt Club |
|
Demon Shield |
Dark |
“The Child Snatcher” hunt; treasure in Cerobi Steppe, Pharos – First Ascent; Drop/Steal from Abysteel; Forbidding Shield Bazaar recipe |
|
Gendarme |
Everything |
Treasure in The Great Crystal/Crystal Peak: acquire Excalibur from original chest, zone back out and return for rare chance at another chest (open with Diamond Armlet) |
|
White Mask |
Light |
Treasure in Cerobi Steppe, Necrohol of Nabudis; Drop from Juggernaut; White Vestments Bazaar recipe; Phon Coast Hunt Club |
Immune—Great for Hashmal and Elementals
| Armor | Elemental Immunity | Acquisition |
|---|---|---|
|
Dragon Shield |
Earth |
Treasure in Dalmasca Estersand, Mosphoran Highwaste, Phon Coast, Tchita Uplands; Shop in Mosphoran Highwaste, Phon Coast |
|
Rubber Suit |
Lightning |
Treasure in Cerobi Steppe, The Great Crystal; Poach from Abaddon/Bull Abaddon; Nature’s Armory Bazaar recipe |
|
Viking Coat |
Water |
Treasure in Dalmasca Estersand, Phon Coast; Poach from Blood Gigas; Shop in Mt Bur-Omisace, Mosphoran Highwaste |
|
Zodiac Escutcheon |
Lightning |
Treasure in Sochen Cave Palace; Phon Coast Hunt Club |
Damage Halved
| Armor | Element Halved | Acquisition |
|---|---|---|
|
Adamant Hat/Vest |
Fire (weak to Ice) |
Treasure in Phon Coast, Tchita Uplands; Light & Sturdy Garb Bazaar recipe; Shop in Phon Coast, Archades; Steal Hat from Malboro Overking; Steal Vest from White Chocobo |
|
Bone Helm/Mail |
Dark (weak to Light) |
Treasure in Dalmasca Estersand; Drops from Wild Saurian; Shop in Mt Bur-Omisace, Mosphoran Highwaste |
|
Flame Shield |
Fire |
Treasure in Henne Mines, Paramina Rift; Steal from Ixtab; Shop in Eruyt Village, Mt Bur-Omisace |
|
Ice Shield |
Ice |
Treasure in Tomb of Raithwall, Paramina Rift, Stilshrine of Miriam; Drops from Redmaw; Burnished Protectives Bazaar recipe |
|
Lamia’s Tiara |
Ice |
Treasure in Barheim Passage, Paramina Rift, Phon Coast; Steal from Barmuu; Alluring Finery Bazaar recipe; Shop in Mt Bur-Omisace |
|
Windbreaker |
Wind |
Treasure in Ogir-Yensa Sandsea; Shop in Rabanastre, Bhujerba, Balfonheim |
Get Comfortable Swapping Gear Often: Most Final Fantasy games don’t allow access to the full party menu during combat, but FFXII does. Fans of FFXI will be extremely comfortable with this idea. Thief’s Cuffs or Diamond Armlet should be equipped only as long as it takes to get an item. The status/elemental immunity items mentioned previously might be equipped for the duration of battles against particular foes, or you might swap in defensive gear on reaction to system notices or enemy animations, only leaving the gear on long enough to stave off an incoming attack. After absorbing the blow, you can quickly swap back in your preferred moment-to-moment equipment.
This is all part of a Trial Mode theme: you’ll be more hands-on, managing individual actions more often, even to swap gear just for magicks or technicks, and relying on gambits less.
Upgrade Equipment and Abilities: Great gear and accessories are a must, as are up-to-date technicks and magicks. If you’re far in the main adventure, and have access to Cerobi Steppe, then you can wander that region wearing a Diamond Armlet, collecting exceptional rare treasure while gaining EXP and levels. Also explore the game’s forbidding optional regions, the Zertinan Caverns, Nabreus Deadlands, Necrohol of Nabudis, and Pharos – Subterra (treasure maps for all these optional high-level areas are located in this guide’s Sidequests chapter.) The game’s choicest pieces of gear, most powerful marks, and rarest abilities are found in these challenging depths.
Ultimate Items: During your preparation, note the very best pieces of gear in the game: the sword Great Trango, the bow Seitengrat, and the shield Gendarme. (None of which require a license—any Job can use them.) Great Trango can be stolen from the ultimate Esper, Zodiark. Otherwise, the sword and the other ultimate items are the rare spoil found in rarely spawning treasure chests that must be opened with the Diamond Armlet equipped.
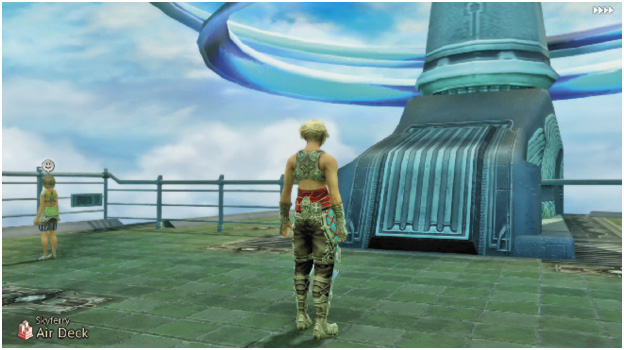
With the Diamond Armlet on, Great Trango can be found in a rare treasure chest in Pharos – Subterra. Gendarme rarely appears in a treasure chest that appears in The Great Crystal, where the Ultima battle takes place. And strangely, Seitengrat can be found in an invisible treasure chest that rarely exists on the Skyferry between Nalbina and Rabanastre. To check, board the ferry, equip the Diamond Armlet, head to the top of the Air Deck, then walk along the back of the ferry’s top deck, near the tall blue engine tail. You won’t receive the contextual “!” tip that indicates a treasure chest is nearby, but you will have your progress impeded by the invisible chest if it’s there. Make sure the Diamond Armlet is equipped, cross your fingers, and press X for a (very long) shot at the game’s best weapon. If there’s no chest (which will be the case 99 times out of 100), you’ll have to zone out of the Air Deck and return to try again.
Before seeking any of these out, bear in mind that they’re extremely rare, and getting them is sheer chance. You could conceivably get six of each for all your allies, or never see any of them. It’s totally possible to clear everything in the game without them… However, these items are absurdly nice to have, if you get lucky. Other ultimate weapons are more than enough, and are listed here.
Many of the more-easily-obtained ultimate weapons are acquired through rare Bazaar recipes. These recipes used to be for the ultimate weapons of the original release of FFXII. That original selection of ultimate weapons is still present in the game, usually now as remote treasure chests or steal results from rare game monsters. For example, the original ultimate Masamune was a Bazaar recipe, but is now found in a chest deep in Lhusu Mines; the old Bazaar recipe of Gemsteel x2, Orichalcum x3, and Mallet x2 now unlocks an even better ultimate katana, named Kumbha, a more powerful one-handed version with a very high combo rate! Some of the other “best” weapons can also be found in the optional regions mentioned before (Nabreus Deadlands, Necrohol of Nabudis, Zertinan Caverns, Pharos – Subterra), or even as extremely rare results in Cerobi Steppe. And finally, of course, these items are also present here in Trial Mode, as rare Steal results from specific bosses throughout.
Legendary Weapons
| Name | Type | Acquisition |
|---|---|---|
|
Karkata |
Swords |
Crimson Blade Bazaar recipe; Trial Mode Stage 3 |
|
Simha |
Swords |
Well-Forged Blade Bazaar recipe; Trial Mode Stage 86 |
|
Shikari Nagasa |
Daggers |
Treasure in Cerobi Steppe; Steal from Vagrant Soul; Trial Mode Stage 72 |
|
Mina |
Daggers |
Rare drop from Larva Eater in The Great Crystal; Trial Mode Stage 88 |
|
Scorpion Tail |
Axes & Hammers |
Treasure in Cerobi Steppe; Drop from Glaring Eye |
|
Vrscika |
Axes & Hammers |
The Scorpion Bazaar recipe |
|
Bonebreaker |
Maces |
Treasure in Cerobi Steppe; Drop from Omega Mark XII; Trial Mode Stage 99 |
|
Bone of Byblos |
Maces |
Treasure in Lhusu Mines, Cerobi Steppe; Steal from Yiazmat; Trial Mode Stage 59 |
|
Euclid’s Sextant |
Measures |
“A Wild Stench” Clan Hunt; Treasure in Cerobi Steppe; Trial Mode Stage 82 |
|
Wyrmhero Blade |
Greatswords |
Dragon Crest Bazaar recipe; Trial Mode Stages 50, 94 |
|
Excalibur |
Greatswords |
Treasure in The Great Crystal; Trail Mode Stages 64, 87, 99 |
|
Tournesol |
Greatswords |
The Sunflower Bazaar recipe; Trial Mode Stage 100 |
|
Masamune |
Katana |
Treasure in Lhusu Mines; Phon Coast Hunt Club; Trial Mode Stages 72, 94 |
|
Kumbha |
Katana |
Master-crafted Blade Bazaar recipe; Trial Mode Stage 94 |
|
Yagyu Darkblade |
Ninja Swords |
Treasure in Cerobi Steppe, The Great Crystal; Drop from Bombshell; Trial Mode Stage 98 |
|
Mesa |
Ninja Swords |
Serpent Blade Bazaar recipe; Trial Mode Stage 98 |
|
Vrsabha |
Spears |
Drops from Evil Spirit; Trial Mode Stage 72 |
|
Zodiac Spear |
Spears |
Treasure in Henne Mines; Phon Coast Hunt Club; Trial Mode Stage 62 |
|
Whale Whisker |
Poles |
Treasure in Lhusu Mines, Cerobi Steppe; Trial Mode Stage 66 |
|
Kanya |
Poles |
Whisker of the Beast Bazaar recipe |
|
Holy Rod |
Rods |
Treasure in Cerobi Steppe, The Great Crystal |
|
Rod of Faith |
Rods |
Treasure in Cerobi Steppe; Bonus reward after Behemoth King clan hunt; Trial Mode Stage 68 |
|
Cloud Staff |
Staves |
Treasure in Cerobi Steppe, The Great Crystal; Mystic Staff Bazaar recipe; Trial Mode Stage 67 |
|
Staff of the Magi |
Staves |
Treasure in Cerobi Steppe, The Great Crystal; Drop from Oversoul |
|
Sagittarius |
Bows |
Treasure in Cerobi Steppe; Steal from Luxollid; Trial Mode Stage 71 |
|
Dhanusha |
Bows |
Silver Bow Bazaar recipe; Trial Mode Stage 71 |
|
Artemis Arrows |
Ammunition |
Treasure in Cerobi Steppe; Arrows of the Moon Goddess Bazaar recipe; Phon Coast Hunt Club; Trial Mode Stage 71 |
|
Gastrophetes |
Crossbows |
Treasure in Cerobi Steppe; Steal from Pallicant; Trial Mode Stage 55 |
|
Tula |
Crossbows |
Treasure in Pharos – Second Ascent; Phon Coast Hunt Club |
|
Grand Bolts |
Ammunition |
Treasure in Cerobi Steppe; Piercing Bolts Bazaar recipe; Phon Coast Hunt Club; Trial Mode Stage 51 |
|
Fomalhaut |
Guns |
Treasure in Henne Mines, Cerobi Steppe; Trial Mode Stage 86 |
|
Mithuna |
Guns |
Mudslinger Bazaar recipe; Trial Mode Stage 86 |
|
Stone Shot |
Ammunition |
Treasure in Cerobi Steppe; Stone Shot Bazaar recipe |
|
Volcano |
Hand-bombs |
“Paying for the Past” Clan Hunt; Treasure in Cerobi Steppe; Trial Mode Stage 69 |
|
Makara |
Hand-bombs |
Treasure in Henne Mines (x2) |
|
Castellanos |
Ammunition |
Devastating Incendiaries Bazaar recipe; Trial Mode Stage 67 |
Freshen Up Your Tactics: In virtually all the higher-level Stages, powerful tactics will be a boon, if not an outright necessity. You should have a purpose for your party, and gambits that accomplish most of this automatically. A heavy armor wearer should be in mind as the tank, so Decoy is upkept on them, along with Bubble, Bravery, and Protect. Either a Shield or Pole is strongly recommended for the Evasion benefits. Depending on Job, this ally might just be a meatshield and damage-dealer (like Foebreaker, Uhlan, or Shikari), or might be able to handle some party upkeep and healing too (like Knight or Monk). The other two slots will be down to your preference, but you’ll want characters filling out the party with impactful healing, buffing, and damaging abilities. The Zodiac Job System chapter in this guide has extensive tips for choosing Job combos and assembling strong, synergistic parties, capable of clearing the toughest marks and Trial Mode.
It’ll help to get creative with your ideas of what constitutes healing, offense, and defense.
With Reverse status applied to the tank, your whole approach can change radically. Suddenly, enemies that output tremendous single-target damage, usually chewing through your party members mercilessly one-by-one, are rendered basically harmless if you do not let Decoy or Reverse status drop off your designated tank. You must also be very careful to tailor your gambits so other party members don’t use typical healing actions on the tank. You must also be careful about the rare enemies judicious enough to respond to Reverse by healing your party…
With the Nihopalaoa accessory equipped on a character with all the Remedy Lore licenses, suddenly Remedies become status bombs, like throwing a tiny Malboro at the enemy. Like with Reverse, you must now take care to make sure this character never throws curative items at an ally—one universal avenue for healing is cut off for users of this accessory. But it can be a small price to pay, when Remedy inflicts every status effect a target isn’t immune to. This can pay off even in the roughest fights in the game, especially against the imperius group found in the final Stage.
With spell motes, anyone can nuke or buff in a pinch, without MP, and taking less charge time. Moreso than the main game, battles in Trial Mode illustrate the real advantages of magick motes, like Hastega Motes, Bubble Motes, Scathe Motes, and so on. These are a pathway to buffs for party configurations that don’t have access to those abilities, and a way to situationally apply strong buffs without committing the gambit slots or MP. You’ll have to get by on the motes you acquire along the way for awhile, until you unlock Clan Centurio’s ultimate rank, Order of Ambrosia. This rank is quite a task in and of itself, requiring over a million clan points, the completion of every clan hunt (along with optional superboss Hell Wyrm), acquisition of every magick and technick, the triggering of every Quickening Concurrence at least once, and completion of the Clan Primer Bestiary, among other miscellaneous minor odds and ends—basically every system trophy except those for Trial Mode completion. Once max clan rank is attained, the Muthruu Bazaar clan provisioner begins selling every type of spell mote. This is a tremendous boon to Trial Mode once it’s available, so make sure to stock up between runs.
Important magicks like Bubble, Syphon, and Reverse also become available here during your clan rank-ups along the way, so whenever you’re checking in with Montblanc at Clan Centurio, make a point of checking out the Muthruu Bazaar as well.
Dark Energy: When all else fails, Dark Energy will light the way. This rare and powerful disposable item deals incredible, instant damage to all foes in sight, damage on par with Zodiark’s Final Eclipse, or a Black Hole Quickening Concurrence. With enough Dark Energy items to burn, even Stage 100 doesn’t hold up long.
It’s time-consuming to amass a reserve of Dark Energy, however. Dark Energy has several repeatable treasure chest locations, all of which require Diamond Armlet equipped, and all of which have low odds to appear, and to contain Dark Energy.
Three Dark Energy locations are spread throughout Cerobi Steppe. There’s a rare Dark Energy chest dead center in Archades/Grand Arcade (which you cannot enter without a Sandalwood Chop). And there’s a rare Dark Energy chest in the far southeast tip of Mt Bur-Omisace/Temple Grounds.
Finally, the Mysterious Substance Bazaar recipe also awards Dark Energy, and can be repeated.
It’s less likely that you have a piles of Dark Energy ready to bowl over anything, and more likely that an occasional prudent use of Dark Energy gets you over a dangerous hump. They’re like offensive Megalixirs that way. A single Dark Energy works well to add an instant final punch when you’ve spent everyone’s Mist Charges for Zodiark’s Final Eclipse followed by a Quickening chain into Concurrence. Dark Energy can be thought of as the (incredibly rare) item version of those abilities.
Stage Breakdown
Stages 1-10
A good place to take a first plunge into Trial Mode is just after events at the Tomb of Raithwall. Although, almost every Stage of Trial Mode is made of bosses, each tenth floor is a kind of Trial Mode boss, and Stage 10 ends where the Tomb of Raithwall does.
Nothing in the first ten Stages is particularly tricky. Eventually, using 4x Speed Mode Multiplier, you’ll blaze through these stages in just the first couple minutes of a larger attempt.
| Stage | Exceptional Treasure (Diamond Armlet required unless noted) | Target | Class | HP | Exceptional Spoils |
|---|---|---|---|---|---|
|
1 |
Headguard, First Aid; without Armlet: Diamond Armlet |
Dire Rat x6 |
Standard |
78 |
— |
|
2 |
Fire, Headguard |
Thextera |
Mark |
353 |
— |
|
Alpha Hyena |
Standard |
158 |
— |
||
|
Alpha Wolf |
Standard |
111 |
— |
||
|
3 |
— |
Flowering Cactoid |
Mark |
532 |
Steal: Longsword, Mythril Blade, Karkata |
|
Cactoid x2 |
Standard |
274 |
— |
||
|
Cactite x4 |
Standard |
199 |
— |
||
|
(Optional) Ripe Rampager |
Rare Game |
989 |
Steal: Bronze Shield, Gauntlets, Round Shield; Drop: Elixir, Dark Matter |
||
|
4 |
Onion Arrows, Pointy Hat |
Razorfin |
Rare Game |
937 |
— |
|
Ichthon x4 |
Standard |
506 |
— |
||
|
5 |
— |
Nekhbet |
Rare Game |
853 |
— |
|
Werewolf |
Standard |
1777 |
Steal: Windbreaker, Chainmail, Berserker Bracers |
||
|
Cockatrice x4 |
Standard |
389 |
— |
||
|
6 |
Onion Bolts, Bronze Helm |
Cluckatrice |
Elite Mark |
1452 |
— |
|
Chickatrice x4 |
Standard |
532 |
— |
||
|
7 |
Bronze Armor, Libra |
Judge x2 |
Imperial |
2046 |
— |
|
(Optional) Imperial Magus |
Imperial |
584 |
— |
||
|
(Optional) Imperial Swordsman x2 |
Imperial |
630 |
— |
||
|
8 |
Bangle, Onion Shot |
Bagoly x6 |
Standard |
3003 |
— |
|
(Optional) Imdugud |
Rare Game |
4125 |
Steal: Killer Bow, Sirius, Paramina Crossbow; Drop: Elixir, Dark Matter |
||
|
9 |
Argyle Armlet, Onion Bombs |
Liches x3 |
Standard |
1325 |
Steal: Agate Ring, Magick Gloves |
|
(Optional) Cultsworn Lich |
Rare Game |
7634 |
Steal: Golden Shield, Flame Shield, Lamia’s Tiara; Poach: Dark Matter; Drop: Elixir, Dark Matter |
||
|
10 |
Steel Gorget, Parallel Arrows |
Belias |
Esper |
21384 |
Steal: Sword of Kings, Goddess’s Magicite |
Reward-1000 gil, Hi-Potion x10, Handkerchief x15
Stages 11-20
Compared to the first ten Stages, enemies starting here are considerably stronger. Monsters like Tiamat and Elder Wyrm are intimidating for a long time simply by virtue of being dangerous bosses, and rooms filled with Jellies or Petrifying Panthers can overwhelm the battle party. A trio of Mindflayers capable of using Stop on the whole party are a rude introduction to monsters who will wipe your run very quickly without adequate preparation. The same fight also features the first deleterious field effect, an area wide MP drain that will leave the party totally depleted at the end of a tough fight.
Be ready to spend the beginning of the next fight after an MP-Drain field recovering with Charge, Ethers, and Hi-Ethers. Don’t be shy about disposables here. Unfortunately, Trial Mode monsters are Syphon-immune, but you can have mages Syphon allies who don’t need MP. (A melee-centric character using some Job duo from Uhlan/Foebreaker/Shikari/Bushi/Machinist/Archer can be a kind of MP backpack for allies this way.) You might be tempted to just swap to fresh reserve members rather than refill allies with low resources, but if so, be sure to replenish those depleted reserves when you find a safe moment. It can also be difficult to promptly swap to reserve members in the midst of battle, without manually disabling a character’s gambits and waiting for them to become inactive.
| Stage | Exceptional Treasure (Diamond Armlet required unless noted) | Target | Class | HP | Exceptional Spoils |
|---|---|---|---|---|---|
|
11 |
Leather Headgear, Immobilize |
Croakadile |
Mark |
15348 |
Steal: Fiery Arrows, Long Bolts, Aqua Shot |
|
12 |
— |
Jelly x8 |
Standard |
1406 |
Steal: Aqua Shot |
|
(Optional) Melt |
Trophy Rare Game |
10740 |
Steal: Golden Armor, Shielded Armor, Shell Shield |
||
|
13 |
Dark, Topkapi Hat |
Tiamat |
Boss |
18532 |
Steal: Assassin’s Dagger |
|
14 |
Kilimweave Shirt, Long Bolts |
Panther x5 |
Standard |
1855 |
— |
|
15 |
Silent Shot, Sallet |
Elder Wyrm |
Boss |
32154 |
Steal: Shell Shield |
|
(Optional) Treant x2 |
Standard |
4250 |
Poach: Gillie Boots; Drop: Dark Matter |
||
|
16 |
Scale Armor, Poach |
Mateus |
Esper |
28546 |
Steal: Ice Shield, Icebrand |
|
(Optional) Ice Azer x5 |
Standard |
1248 |
Drop: Dark Matter |
||
|
17 - MP Drain Field |
Bronze Shield, Poison Bombs |
Mindflayer x3 |
Mark |
8654 |
Steal: Rose Corsage, Power Armlet, Maduin Gear |
|
18 |
Tourmaline Ring, Thunder |
Ring Wyrm |
Mark |
64318 |
Steal: Bone Helm, Pirate Hat, Black Cowl |
|
19 |
Leather Gorget, Fiery Arrows |
Earth Tyrant |
Boss |
39546 |
Steal: Broadaxe, Hornito, Main Gauche |
|
20 |
Stone Bolts, Rose Corsage |
Vulture x6 |
Standard |
4774 |
— |
Reward-2000 gil, Phoenix Down x10, Domaine Calvados x5
Stages 21-30
These stages are mostly a reprisal of the surprisingly slapstick Sochen Cave Palace boss battle against a goofy group of aggressive vegetables. As such, the primary threat is getting slowed down by a stream of the lesser enfeebling status effects—Sleep, Oil, Poison, and Blind. You’ll also have to contend with numerous small foes scampering separately around a big room. Focus fire and take out any of them that wander by to minimize how much you have to chase half-damaged onions around.
| Stage | Exceptional Treasure (Diamond Armlet required unless noted) | Target | Class | HP | Exceptional Spoils |
|---|---|---|---|---|---|
|
21 |
Horned Hat, Vox |
King Bomb |
Boss |
21548 |
Steal: Onion Bombs, Flametongue, Oil Bombs |
|
(Optional) Bomb x3 |
Standard |
2635 |
— |
||
|
22 |
Ringmail, Horology |
Topstalk |
Boss |
7751 |
— |
|
Deadly Nightshade x8 |
Standard |
4701 |
— |
||
|
23 |
Calot Hat, Blizzard |
Pumpkin Star |
Boss |
7751 |
— |
|
Pumpkin Head x8 |
Standard |
4531 |
— |
||
|
24 |
Aqua Shot, Shepherd’s Bolero |
Mandragora Prince |
Boss |
7751 |
— |
|
Mandragora x8 |
Standard |
4531 |
— |
||
|
25 |
Poisona, Iron Helm |
Onion Queen |
Boss |
7751 |
— |
|
Wild Onion x8 |
Standard |
4531 |
— |
||
|
26 |
Iron Armor, Protect |
Alraune King |
Boss |
7751 |
— |
|
Alraune x8 |
Standard |
4407 |
— |
||
|
27 |
Shell, Gauntlets |
Topstalk |
Boss |
8139 |
Steal: Black Belt |
|
Pumpkin Star |
Boss |
8139 |
Steal: Nishijin Belt |
||
|
Mandragora Prince |
Boss |
8139 |
Steal: Sash |
||
|
Onion Queen |
Boss |
8139 |
Steal: Bowline Sash |
||
|
Alraune King |
Boss |
8139 |
Steal: Pheasant Netsuke |
||
|
28 |
Stun Bombs, Black Belt |
Wendice |
Trophy Rare Game |
12989 |
Steal: Lightning Arrows, Black Bolts, Stun Bombs |
|
Striker x2 |
Standard |
9099 |
— |
||
|
(Optional) Cubus |
Rare Game |
25162 |
Steal: Six-fluted Pole, Halberd, Mirror Mail; Drop: Chaos Mace, Elixir, Dark Matter |
||
|
29 |
Bamboo Arrows, Nishijin Belt |
Ahriman |
Boss |
32586 |
Steal: Thief’s Cap, Hypnocrown, Black Robes |
|
(Optional) Ahriman clones |
Standard |
6581 |
— |
||
|
30 |
Lead Bolts, Blazer Gloves, Bangle |
Gil Snapper |
Elite Mark |
22584 |
Steal: Turtleshell Choker, Thief’s Cuffs |
|
(Optional) Storm Elemental x3 |
Standard |
7164 |
Drop: Dark Matter |
||
|
(Ally) Bansat |
Ally |
3859 |
— |
Reward-3000 gil, Ether x10, Echo Herb x15
Stages 31-40
Several enemies in this group come with Reflect active, so they’ll bounce back damage, probably fatally, if you’re using strong black magicks like Shock, Flare, or Scathe. The Espers in Trial Mode are just as strong as their normal-game counterparts, and have the same tricks up their proverbial sleeves—Adrammelech floats, afflicts the party with Stop, and applies Perfect Defense to himself, Zalera can be quite dangerous if Prime Level Death catches your party with the wrong arrangement of level values, and Shemhazai can bathe the party in numerous negative status effects.
| Stage | Exceptional Treasure (Diamond Armlet required unless noted) | Target | Class | HP | Exceptional Spoils |
|---|---|---|---|---|---|
|
31 |
Steel Gorget, Argyle Armlet, Traveler, Tourmaline Ring, Balaclava |
Bansat |
Ally |
18450 |
— |
|
Seeq Fisher x4 |
Ally |
6809 |
— |
||
|
(Optional) Apsara |
Rare Game |
17336 |
Steal: Power Rod, Multiscale; Poach: Crown of Laurels; Drop: Diamond Shield, Platinum Armor, Elixir, Dark Matter |
||
|
32 |
Disable, Leather Gorget, Windbreaker |
Zalera |
Esper |
41310 |
Steal: Time Bolts, Doom Mace, Hunting Crossbow |
|
(Optional) Dead Bones |
Standard |
3342 |
— |
||
|
33 |
Wizard’s Hat, Wyrmfire Shot |
Scythe Mantis x4 |
Standard |
6593 |
— |
|
34 |
Aqua, Wizard’s Robes |
Marilith |
Mark |
35550 |
Steal: Platinum Shield, Platinum Helm, Platinum Armor |
|
(Optional) Bogey x3 |
Standard |
6318 |
Drop: Dark Matter |
||
|
35 |
Barbut, Rose Corsage, Gauntlets, Oil Bombs |
Adrammelech |
Esper |
41663 |
Steal: Ras Algethi, Traitor’s Bow, Rubber Suit |
|
(Optional) Skulwyrm x2 |
Standard |
14448 |
Drop: Platinum Sword, Dark Matter |
||
|
36 |
Black Belt, Raise, Linen Cuirass |
Dreadguard |
Trophy Rare Game |
21830 |
— |
|
Mirrorknight x4 |
Standard |
6492 |
— |
||
|
37 |
Amber Armlet, Round Shield |
Behemoth x5 |
Standard |
10158 |
Steal: Hammerhead |
|
38 |
Miter, Steel Poleyns |
Mythril Golem x3 |
Standard |
10834 |
Steal: Gold Hairpin |
|
39 |
Main Gauche, Magick Gloves; without Armlet: Dark Matter |
Shemhazai |
Esper |
42685 |
Steal: Treaty-Blade, Dawn Shard |
|
(Optional) Ose x2 |
Standard |
6304 |
Drop: Dark Matter |
||
|
40 |
Slasher, Agate Ring |
Gavial |
Trophy Rare Game |
19696 |
Steal: Thief’s Cuffs |
|
Baritine Croc x2 |
Standard |
10804 |
— |
Reward-4000 gil, Phoenix Down x10, Reverse Mote x3
Stages 41-50
Cúchulainn’s stage gives you a taste of an HP-Down field, a fast-acting Sap effect across the whole area. Antlion’s Stage highlights the importance of removing Bravery from enemies with Dispel. It’s also a hurried crowd-control scenario—Antlion will try to kill its brood of insects as fast as you will, cannibalizing helpers to boost its own power. More Espers round out this grouping of levels. Hashmal can dish out Disease, which seriously degrades party stability left unchecked.
| Stage | Exceptional Treasure (Diamond Armlet required unless noted) | Target | Class | HP | Exceptional Spoils |
|---|---|---|---|---|---|
|
41 |
Aero, Soldier’s Cap |
Orthros |
Elite Mark |
30625 |
Steal: Wyrmfire Shot, Defender |
|
White Mousse x3 |
Mark |
19740 |
— |
||
|
42 - HP Sap Field |
Souleater, Heavy Coat |
Cúchulainn |
Esper |
47683 |
Steal: Cameo Belt, Indigo Pendant, Hermes Sandals |
|
(Optional) Foobar x4 |
Standard |
4855 |
Drop: Dark Matter |
||
|
43 |
Iron Pole, Lambent Hat |
Deathclaw x4 |
Standard |
12424 |
— |
|
(Optional) Pallicant |
Rare Game |
30870 |
Steal: Minerva Bustier, Magepower Shishak, Dragon Mail; Drop: Penetrator Crossbow, Kaiser Shield, Elixir, Dark Matter |
||
|
44 |
Chanter’s Djellaba, Magoroku |
Antlion |
Elite Mark |
41800 |
Steal: Dragon Shield |
|
Killer Mantis x4 |
Standard |
6824 |
— |
||
|
45 |
Cura, Winged Helm |
Vishno |
Rare Game |
42150 |
Steal: Judicer’s Staff, Maximillian |
|
Brainpan x2 |
Standard |
9360 |
Poach: Runeblade; Drop: Dark Matter |
||
|
Deidar x2 |
Standard |
9360 |
Poach: Sweep; Drop: Dark Matter |
||
|
(Optional) Crusader |
Standard |
5022 |
Drop: Dark Matter |
||
|
46 |
Recurve Crossbow, Chainmail |
Purobolos x6 |
Standard |
3740 |
— |
|
47 |
Betelgeuse, Golden Shield |
Aeronite x2 |
Standard |
7142 |
— |
|
48 |
Bowline Sash, Elfin Bow |
Tower |
Rare Game |
58120 |
Steal: Assassin’s Arrows |
|
(Optional) Zombie Warlock x2 |
Standard |
4266 |
Drop: Dark Matter |
||
|
49 |
Storm Spear, Storm Staff |
Hashmal |
Esper |
37620 |
Steal: Elixir, Ribbon |
|
(Optional) Reaver x2 |
Standard |
13562 |
Drop: Dark Matter |
||
|
50 |
Demonsbane, Gaia Rod |
Famfrit |
Esper |
49185 |
Steal: Elixir, Wyrmhero Blade |
|
(Optional) Abaddon x3 |
Standard |
12036 |
Drop: Dark Matter |
Reward-5000 gil, X-Potion x10, Chronos Tear x15
Stages 51-60
The first Stage here can be really annoying, as Oversouls use MP Annul to wipe your party member’s Mist Points away. An MP-Drain field also exists on Stage 55, enhancing the magick strain in this sequence. Item-based healers with Pheasant Netsuke equipped lessen worry here a lot. The next Stage, against a group of dangerous demons, you’ll have to be ready to remove or prevent Disable, while Dispelling Bravery from all enemies. Stage 57 features unique robots from Sky Fortress Bahamut, who will blanket allies with Stop, Sap, and Blind. Stage 60 begins on an industrial scaffold like in the Sandseas, with no enemies in sight. This is one of the very few spots for a safe breather anywhere in Trial Mode, a great time to assess gear and gambit approaches so far without any threat of harassment or interruption. Keep one well-stocked healing mage in the battle party, swap all five other fighters to the reserve party, then use the solo active ally to restore everyone in reserve at once!
| Stage | Exceptional Treasure (Diamond Armlet required unless noted) | Target | Class | HP | Exceptional Spoils |
|---|---|---|---|---|---|
|
51 |
Stop, Green Beret |
Helvinek |
Rare Game |
41226 |
Steal: Chaos Bombs, Dark Shot, Grand Bolts |
|
Oversoul x2 |
Standard |
38923 |
— |
||
|
52 |
Survival Vest, Lightning Arrows |
Catoblepas |
Mark |
112240 |
Steal: Golden Axe |
|
(Ally) War-Chief Supinelu |
Ally |
16940 |
— |
||
|
53 |
Feathered Cap, Bleed |
War-Chief Supinelu |
Ally |
36940 |
Steal: Dragon Whisker |
|
Garif Adventurer x2 |
Standard |
10212 |
— |
||
|
54 |
Black Bolts, Traveler’s Vestment |
Deathscythe |
Rare Game |
15328 |
Steal: Black Robes |
|
Reaper x2 |
Standard |
31467 |
Steal: Crown of Laurels |
||
|
55 - MP Drain Field |
Mud Shot |
Tyrant |
Boss |
71168 |
Steal: Artemis Bow, Gastrophetes |
|
Piscodaemon x3 |
Mark |
6600 |
Steal: Black Mask |
||
|
56 |
Fira, Golden Armor |
Larva Eater |
Rare Game |
39235 |
— |
|
Elvoret x4 |
Standard |
11544 |
— |
||
|
57 |
Stona, Ice Shield |
Helm-Rook x2 |
Standard |
16390 |
— |
|
Spinner-Rook x2 |
Standard |
16390 |
— |
||
|
Sphere-Rook x2 |
Standard |
16390 |
— |
||
|
58 |
Chaos Bombs, Fuzzy Miter |
Trickster |
Elite Mark |
52980 |
Steal: Hermes Sandals, Bubble Belt |
|
Green Chocobo |
Standard |
20056 |
— |
||
|
Brown Chocobo |
Standard |
20056 |
— |
||
|
Red Chocobo |
Standard |
20172 |
— |
||
|
Black Chocobo |
Standard |
20172 |
— |
||
|
59 |
Thief’s Cuffs, Break |
Ba’Gamnan |
Boss |
68060 |
Steal: Elixir, Caldera, Bone of Byblos |
|
(Optional) Rinok |
Boss |
37326 |
— |
||
|
(Optional) Gijuk |
Boss |
37326 |
— |
||
|
(Optional) Bwagi |
Boss |
37326 |
— |
||
|
(Ally) Monid |
Ally |
20010 |
— |
||
|
60 |
Power Armlet, Assassin’s Arrows |
(Ally) Monid |
Ally |
52274 |
Steal: Magepower Shishak, Brave Suit |
|
Bangaa Hunter x2 |
Ally |
25140 |
Steal: Onion Shot |
||
|
Rabanastre Watch x2 |
Ally |
28342 |
— |
Reward-6000 gil, Phoenix Down x10, Scathe Mote x3
Stages 61-70
The Baknamy fight hearkens back to the dogpiles of Jellies and Panthers in the first 10 Stages. Stage 62 against Vorpal Bunny takes place on the biggest arena of Trial Mode, a full stretch of jungle replete with dozens of respawning Vampyr bats and a rare Biding Mantis. Take out Vorpal Bunny as soon as possible before it escapes and forces you to track it down again. The battle in Stage 65 against two looming Vyraals and a Deathgaze all together can get out of hand quickly, with the monsters inflicting Disease and Confuse. During Stage 68, the Esper Exodus imposes an Item Restriction on the battlefield, while shielding itself with Reflect magick. Be ready to Dispel his magick mirror or equip Opal Rings before attacking with magick, if you’re going that route.
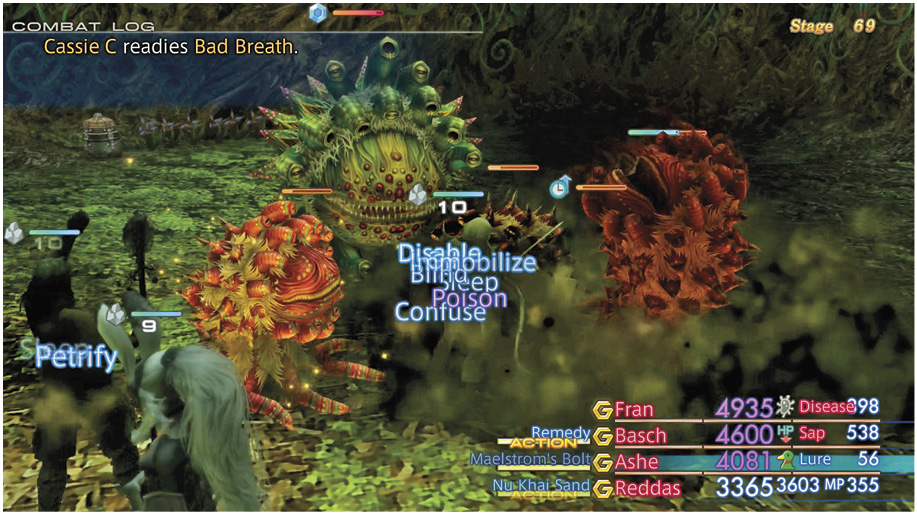
For the final two Stages in this group, you’ll face almost certainly the most arduous fights so far: scrums against groups of Malboro creatures, always some of the most nightmarish foes in any Final Fantasy game. In both fights, the Malboro mob will unleash Bad Breath or Putrid Breath one after another in a chain, repeatedly, disastrously inflicting the party with Disease, Slow, Immobilize, Disable, Blind, Poison, Oil, and Sap. This is, if it needs to be indicated, very bad, and cannot be fully guarded against without the Ribbon accessory (available from the Phon Coast Hunt Club, Henne Mines, Pharos – Subterra, and from the ultra-rare Lv.99 Red Chocobo who can spawn in Ozmone Plain). If you manage to farm up two or three Ribbons, disregard any mention here about these battles being difficult. Wipe out all the minor Malboros ASAP and focus on the gigantic one with whatever it takes—Scathe spells and Scathe Motes, Quickening chain Concurrence effects, Esper ultimate technicks, anything strong and area of effect. Go full-blast immediately with all characters and push all the small Malboros down. If using Quickening chains or Esper ultimate technicks, keep in mind that this is basically the same stage twice, and pace your Mist Charges expenditure.
| Stage | Exceptional Treasure (Diamond Armlet required unless noted) | Target | Class | HP | Exceptional Spoils |
|---|---|---|---|---|---|
|
61 |
Time Bolts, Red Cap |
Baknamy (Sword) x2 |
Standard |
10017 |
— |
|
Baknamy (Gun) x3 |
Standard |
8228 |
— |
||
|
Baknamy x3 |
Standard |
10017 |
— |
||
|
62 |
Brigandine, Nishijin Belt, Blazer Gloves, Thundara |
Vorpal Bunny |
Mark |
26620 |
— |
|
(Optional) Biding Mantis |
Trophy Rare Game |
51471 |
Steal: Orochi, Zodiac Spear |
||
|
(Optional) Vampyr |
Standard |
7446 |
— |
||
|
63 |
Darkra, Mage’s Hat |
Fury |
Boss |
38830 |
Drop: Dark Matter |
|
Vorpal Bunny |
Mark |
36228 |
Drop: Dark Matter |
||
|
Wyrdhare |
Standard |
27072 |
Drop: Dark Matter |
||
|
Ozmone Hare |
Standard |
30534 |
Drop: Dark Matter |
||
|
Mu |
Standard |
33748 |
Steal: Cat-ear Hood |
||
|
64 |
Quasimodo Boots, Berserker Bracers |
Humbaba Mistant x2 |
Boss |
70320 |
Steal: Ultima Blade, Excalibur |
|
(Optional) Vorres |
Trophy Rare Game |
41712 |
Steal: Elixir |
||
|
65 |
Mage’s Habit, Windslicer Shot |
Deathgaze |
Mark |
54880 |
Steal: Tourmaline Ring, Genji Shield, Aegis Shield |
|
Vyraal x2 |
Mark |
44880 |
Steal: Demon Shield; Poach: Dragon Shield |
||
|
66 |
Burgonet, Berserk |
Saloon Steward |
Ally |
64288 |
Steal: Amber Armlet, Whale Whisker |
|
Bangaa Pugilist x5 |
Ally |
21710 |
— |
||
|
67 |
Stink Bombs, Shielded Armor |
Shield Wyrm |
Standard |
47712 |
Steal: Ring of Renewal |
|
Dheed |
Trophy Rare Game |
71568 |
Steal: Diamond Armlet, Cloud Staff, Castellanos |
||
|
68 |
Flame Shield, Judicer’s Staff; without Armlet: Elixir |
Exodus |
Esper |
76430 |
Steal: Elixir, Rod of Faith, Golden Skullcap |
|
(Optional) Golem x2 |
Standard |
48622 |
Drop: Dark Matter |
||
|
69 |
Blizzara, Winged Boots |
Wild Malboro |
Mark |
73129 |
Steal: Volcano |
|
(Optional) Cassie x4 |
Standard |
18678 |
Drop: Dark Matter |
||
|
(Optional) Spee |
Rare Game |
22222 |
Drop: Cat-ear Hood, Elixir, Dark Matter |
||
|
70 |
Empyrean Rod, Sash |
Carrot |
Elite Mark |
81396 |
Steal: Nihopalaoa |
|
(Optional) Vivian x4 |
Standard |
18678 |
Drop: Dark Matter |
||
|
(Optional) Crypt Bunny |
Rare Game |
33333 |
Drop: Cat-ear Hood, Elixir, Dark Matter |
||
|
(Ally) Krjn |
Ally |
14685 |
— |
Reward-7000 gil, Hi-Ether x10, Serum x15
Stages 71-80
This set of Stages is a clear test of elemental mettle in Pharos-like settings against the gnarliest incarnations of Elementals in all of Ivalice. The attendant minor Elementals in each stage will spam Silencega and middle-tier elemental nukes on your whole party, while the swelling Entite creatures unleash the most powerful elemental magicks. Reflect won’t help you—Elementals getting their school of magick reflected back onto them will simply be healed—but Shellga and Faith will. Maximizing your chance of success involves collecting various elemental resistance/absorption gear to swap between (a table early in this chapter displays this equipment). Do this, and you’ll go most of the way toward streamlining these battles. If you don’t have enough pieces of reistance gear on a given floor to afford some measure of protection to the whole party, you might also consider spending Mist Charges on an Esper summon who will absorb the spells of whichever Entite you’re fighting (for example, Hashmal will soak up Gnoma Entite and Earth Elemental magicks, or Belias will soak up Salamand Entite and Fire Elemental casts). Then just make sure the summoner is equipped with resistant gear, and focus on keeping the Esper up and running while it spews counter-technicks and magicks at the Elemental horde.
| Stage | Exceptional Treasure (Diamond Armlet required unless noted) | Target | Class | HP | Exceptional Spoils |
|---|---|---|---|---|---|
|
71 |
Curaga, Headband |
Krjn |
Ally |
82005 |
Steal: Artemis Arrows, Sagittarius, Dhanusha |
|
Viera Hunter x5 |
Ally |
42490 |
— |
||
|
72 |
Jujitsu Gi, Francisca |
Diabolos |
Mark |
57675 |
Steal: Power Armlet, Dragon Whisker, Vrsabha |
|
Avenger |
Trophy Rare Game |
83250 |
Steal: Argyle Armlet, Muramasa, Masamune |
||
|
Overlord |
Mark |
74095 |
Steal: Blazer Gloves, Zwill Crossblade, Shikari Nagasa |
||
|
73 |
Lamia’s Tiara, Bio |
Salamand Entite |
Standard |
53590 |
Steal: Elixir |
|
Fire Elemental x4 |
Standard |
26820 |
— |
||
|
74 |
Aldebaran, Enchanter’s Habit |
Mardu Entite |
Standard |
53590 |
Steal: Elixir |
|
Storm Elemental x4 |
Standard |
26820 |
— |
||
|
75 |
Close Helm, Berserker Bracers |
Leshach Entite |
Standard |
53590 |
Steal: Elixir |
|
Ice Elemental x4 |
Standard |
26820 |
— |
||
|
76 |
Demon Mail, Vanishga |
Gnoma Entite |
Standard |
53590 |
Steal: Elixir |
|
Earth Elemental x4 |
Standard |
26820 |
— |
||
|
77 |
Golden Amulet, Diamond Shield |
Undin Entite |
Standard |
53590 |
Steal: Elixir |
|
Water Elemental x4 |
Standard |
26820 |
— |
||
|
78 |
Pheasant Netsuke, Ruby Ring |
Sylphi Entite |
Standard |
53590 |
Steal: Elixir |
|
Air Elemental x4 |
Standard |
26820 |
— |
||
|
79 |
Battle Harness, Opal Ring |
Luxollid |
Rare Game |
68480 |
Steal: Dark Matter |
|
Daikon Entite x2 |
Standard |
53710 |
— |
||
|
80 |
Sage’s Ring, Aeroga |
Vagrant Soul |
Rare Game |
68480 |
Steal: Dark Matter |
|
Leamonde Entite x2 |
Standard |
53710 |
— |
Reward-8000 gil, Elixir x3, Bubble Mote x2
Stages 81-90
More Espers impose field restrictions here. Zeromus cuts off magicks on Stage 81, and Chaos cuts off standard attacks on Stage 84. In both stages, the Espers are accompanied by many minor enemies, who can pile up and create a lethal distraction. Keeping surrounding hordes at bay is the top priority, while also working around the limitations imposed by the restriction. In both cases, the crucial usefulness of disposable magick mote items is demonstrated. Very hard fights become fairly pedestrian, as long as you’re willing to make it rain with motes. Along these Esper battles is a trio of fights against absolutely hulking groups of fierce monsters, from a swarm of upright Behemoth-types, to a group of spectral, otherworldly creatures from The Great Crystal, finally to a terrifying group of Tyrant type bosses. These are followed by another overwhelming-style fight against Reddas’s old sky pirate crew, eight strong. These fights against squads of overpowering physical threats highlight more than any Stages before how useful Reverse and Decoy are on a sturdy ally. Reddas’s pirate crew in particular will shred parties who aren’t ready to deflect or mitigate huge, Omega-like damage output.
The last few Stages then focus on towering individual threats, some of the game’s strongest marks. These enemies are as fearsome as their normal versions, but have considerably less HP. Hell Wyrm (who is basically a warm-up for Yiazmat) has 1.326 million HP, way down from about 9 million HP as an optional boss alongside the main adventure. Fafnir is reduced to 622,840 HP (from 1.39 million), and Behemoth King is reduced to 751,545 HP (from 1.68 million). This gauntlet of superbosses toward the end of Trial Mode is grueling, but it’s not as grueling as it could be. Again, Reverse and Decoy go most of the way toward making these brutes manageable. In between the brute Stages, Stage 88’s undead horde gives you a chance to Steal the ultimate dagger, Mina, from a hidden ghost, Evil Spirit. Don’t pass this up, since Mina’s location in the normal game is in The Great Crystal, from the egregiously rare monster Larva Eater.
| Stage | Exceptional Treasure (Diamond Armlet required unless noted) | Target | Class | HP | Exceptional Spoils |
|---|---|---|---|---|---|
|
81 - Magicks Disabled |
Halberd, Pirate Hat |
Zeromus |
Esper |
86924 |
Steal: Elixir, Circlet |
|
(Optional) Dark Lord |
Standard |
15262 |
— |
||
|
82 |
Penetrator Crossbow, Viking Coat, Steel Poleyns |
High Reaver x2 |
Standard |
44234 |
— |
|
Reaver x3 |
Standard |
31671 |
— |
||
|
(Optional) Crystal Knight |
Trophy Rare Game |
51838 |
Steal: Euclid’s Sextant, Golden Skullcap |
||
|
83 |
Sorcerer’s Hat, Doom Mace, Magick Gloves |
Giruveganus x3 |
Standard |
114000 |
— |
|
84 - Attacks Disabled |
Agate Ring, Sorcerer’s Habit, Esuna |
Chaos |
Esper |
117150 |
Steal: Elixir, Glimmering Robes, Sage’s Ring |
|
Wind/Earth/Fire/Water Chaosjet |
Standard |
26700 |
Steal: Elixir (Wind/Fire Chaosjets) |
||
|
85 |
Bowline Sash, Orichalcum Dirk, Bone Helm |
Pylraster |
Mark |
129740 |
Steal: Renewing Morion, Brave Suit |
|
Abelisk |
Trophy Rare Game |
66600 |
Steal: Maximillian |
||
|
Terror Tyrant |
Trophy Rare Game |
78980 |
Steal: Magepower Shishak |
||
|
86 |
Bone Mail, Burning Bow, Cat-ear Hood |
Rikken |
Ally |
133550 |
Steal: Durandal, Simha |
|
Elza |
Ally |
78360 |
Steal: Fomalhaut, Mithuna |
||
|
Pirate x6 |
Ally |
29610 |
Steal: Onion Shot; Poach: Onion Shot |
||
|
87 |
Darkga, Platinum Shield, Power Armlet, Fuzzy Miter |
Hell Wyrm |
Boss |
1326600 |
Steal: Jade Collar, Excalibur |
|
88 |
Zephyr Pole, Winged Boots, Turtleshell Choker |
Disma |
Trophy Rare Game |
100598 |
Steal: Demon Shield, Aegis Shield, Ensanguined Shield |
|
(Optional) Forbidden |
Standard |
23430 |
— |
||
|
(Optional) Evil Spirit |
Rare Game |
72894 |
Steal: Demon Shield, Sage’s Ring, Mina; Drop: Elixir, Dark Matter |
||
|
89 |
Yakei, Firefly |
Fafnir |
Mark |
622840 |
Steal: Elixir, Grand Helm; Poach: Grand Armor |
|
90 |
Runeblade, Hermes Sandals |
Behemoth King |
Elite Mark |
751545 |
Steal: Grand Helm, Grand Armor |
Reward-9000 gil, Megalixir x2, Remedy x15
Stages 91-100
Beware the diabolical Magick Pot in Stage 91, which is absurdly dangerous if you attack it like any other monster, but it is docile and agreeable if you feed it an Elixir before attacking. You must also be respectful of the Red Chocobo trio, who have equally high-octane offense and stats to match. In between those fights, the Shadowseer returns. Here, instead of summoning powerful helpers one after another, Shadowseer calls forth the Pharos guardians all at once! After the Red Chocobo trio comes Gilgamesh, as during the Gilgamesh clan hunt, you won’t want to miss Stealing from him and his hound, Enkidu. The Esper battle that follows on Stage 95, against saintly Ultima, is challenging both because of the Esper’s powerful holy assault and the stage’s rotating field restriction. Alternatively, different abilities will be disabled, or either HP or MP will be rapidly sapped from everyone.
Holy Esper Ultima is followed by dark Esper Zodiark a couple Stages later, with an Abysteel interlude between them. As when approaching Zodiark in the normal game, you should consider preparing toward the end of Stage 96 by having only one character in the active party, equipped with dark-absorbing gear. Zodiark always begins fights with Darkja, and one person eating it is better than three. Swap everyone in right after Zodiark fires this first salvo.
The gauntlet of fights starting with Zodiark is intense, to put it lightly. The ultimate Esper, Zodiark, leads to the ultimate mark, Yiazmat. Endure through Yiazmat, and it’s time for the ultimate monster, Omega Mark XII. Ultima and Zodiark have just a small reduction of HP from their normal game versions. Yiazmat has a tremendous reduction in its HP, down to under four million HP, way down from about fifty million. So if you saw Yiazmat on the Stage list and got worried about time, don’t be, since this version falls far quicker. But, giant mimic legs girding the penultimate Stage, Omega Mark XII is the same hyper-lethal monster as in The Great Crystal.
The challenge of Omega Mark XII here, besides the laser death it outputs regularly, is that Reverse is tremendously helpful for surviving Omega’s attacks consistently, but you really do not want to finish Omega Mark XII with Reverse status active on anyone if you can help it.
| Stage | Exceptional Treasure (Diamond Armlet required unless noted) | Target | Class | HP | Exceptional Spoils |
|---|---|---|---|---|---|
|
91 - Technicks Disabled |
Icecloud Arrows, Ruby Ring, Sash, Goggle Mask |
Magick Pot |
??? |
30000 |
— |
|
(Optional) Hecteyes |
Standard |
26806 |
Drop: Dark Matter |
||
|
92 |
Sapping Bolts, Metal Jerkin, Opal Ring |
Shadowseer |
Elite Mark |
176605 |
Steal: Elixir |
|
Fenrir |
Boss |
119490 |
— |
||
|
Slyt |
Boss |
90003 |
— |
||
|
Pandaemonium |
Boss |
101040 |
— |
||
|
Phoenix |
Boss |
69960 |
— |
||
|
93 |
Dark Shot, Black Cowl; without Armlet: Elixir |
Lv.99 Red Chocobo x3 |
Rare Spawn |
67700 |
Steal: Elixir, Megalixir, Ribbon |
|
94 |
Water Bombs, Black Garb, Sage’s Ring |
Gilgamesh |
Elite Mark |
823246 |
Steal: Masamune, Kumbha, Wyrmhero Blade |
|
Enkidu |
Loyal Hound |
280162 |
Steal: Genji Helm, Genji Shield, Genji Armor |
||
|
95 - Rotating Restriction |
— |
Ultima |
Esper |
217200 |
Steal: White Mask, White Robes, Lordly Robes |
|
96 |
Diamond Helm, Diamond Armor |
Abysteel (many) |
Standard |
20894 |
— |
|
(Optional) Glaring Eye |
Rare Spawn |
175195 |
Steal: Dark Matter; Poach: Dark Matter; Drop: Elixir, Dark Matter |
||
|
97 |
Hermes Sandals, Turtleshell Choker, Firefly, Dragon Shield |
Zodiark |
Esper |
247200 |
Steal: Black Mask, Black Robes, Lordly Robes |
|
98 |
— |
Yiazmat |
Elite Mark |
3777216 |
Steal: Yagyu Darkblade, Mesa |
|
99 |
Elixir, Megalixir |
Omega Mark XII |
Boss |
1037069 |
Steal: Bonebreaker, Ribbon, Excalibur |
|
100 |
Cameo Belt, Jade Collar, Ribbon; without Armlet: Elixir |
Gabranth |
Imperial |
343243 |
Steal: Tournesol |
|
Judge Ghis |
Imperial |
123244 |
Steal: Circlet |
||
|
Judge Bergan |
Imperial |
382348 |
Steal: Genji Gloves |
||
|
Judge Drace |
Imperial |
224843 |
Steal: Megalixir |
||
|
Judge Zargabaath |
Imperial |
194543 |
Steal: Grand Armor |
Stage 100: Imperial CourtA dreadful sight unknown in the normal game, all five Judge Magisters of Archades assembled to bring the insurgency down. The game’s most challenging battle isn’t the endurance test of Hell Wyrm or Yiazmat, but more like the challenge of staying alive against Omega Mark XII or Reddas’s Stage 86 pirate crew. The Judges have Gabranth and Bergan as the frontline, and Ghis, Drace, and Zargabaath as support. They are all capable of Potion healing except Bergan. Ghis is the main enfeebler. Drace serves as the party’s primary buffer, also throwing in some nukes. Zargabaath also uses enhancing magick on the Judges, and will aggressively heal Gabranth. If you attempt to use Reverse against them, all the Judges except Bergan will bombard the Reverse tank with Elixirs and X-Potions, making comically short work of that strategy. This is vexing since Reverse is great against Omega Mark XII, the previous opponent. Part of the difficulty of the Judge fight is making a smooth hand-off from the end of Stage 99, finishing off Omega in its last-gasp desperation without limping before the Judges with Reverse still active and resources heavily taxed. Instead of Reverse, you want the best armor you can get and Bubble active. The magick, not the Belt—you’ll need accessory slots for Nihopalaoa. Nihopalaoa turns status-restoring items into their opposite, so Serums become Disease, Prince’s Kiss causes Sleep, and Remedy causes, well, everything. That’s vital here, because most of the Judges have important status weaknesses. When enfeebling Judges with items, if you have two or three Nihopalaoa, equip them on everyone and have each party member enfeeble a different Judge at once. This makes victory much more likely than if you have to rely on one Nihopalaoa-user to spend turn after turn trying to hamper Judges. Besides Ghis, the Judges most tamable with different ailments are Zargabaath, who is susceptible to Sleep, Bergan, who can be Confused, and Drace, who can be Immobilized. Gabranth is mostly immune to status effects, so you’ll just have to deal with him. Ghis has the lowest HP, inflicts dangerous status effects on the party, and can cast Dispelga, so he should be the first priority. Taking out Ghis while surviving the Judges' first contact with the party is the real test of the battle. When all the Judges are still alive, inflicting Disease on the current target is important because otherwise they’ll heal each other. Throw a Serum or Remedy on Ghis with Nihopalaoa equipped, then dogpile him with everything you’ve got (Meterorite (B) will also inflict Disease). If you have Mist Charges to spare, you may consider unleashing Zodiark’s Final Eclipse, or the best Quickening chain you can muster, or both. If you want to reload Zodiark for one summoner, feed them an Elixir. To reload everyone's Mist Charges for Quickening chains, use a Megalixir. When Judge Ghis is down, the Judges lose their main Reverse Elixir-bomber—Gabranth and Zargabaath will use Elixirs on each other, but not on your party members, Drace uses Potions, and Bergan doesn’t use items at all. Immobilize Drace (Nihopalaoa plus Remedy) and pull the battle away from her. If she’s in range, she’ll buff other Judges with protective “-ga” magicks, and can use offensive magick to nuke the party. Far away from Drace, inflict Disease on Bergan with Meteorite (B) or an inverted Serum or Remedy, then go full steam again to knock him out. The Wither technick can be used repeatedly on Bergan (and Gabranth) to weaken their physical attacks. Bergan is the strongest physical threat from the Judges, and Zargabaath will make him more dangerous with Bravery and Berserk, so keep Zargabaath asleep with Nihopalaoa and Prince’s Kiss. When Judge Bergan falls, turn your attention back to Drace, inflicting Disease before starting your attack. When Drace is defeated, it’s down to Judge Gabranth and Zargabaath. Continue keeping Zargabaath asleep so he can’t heal Gabranth, and whittle down Gabranth’s stats with repeated use of both Expose and Wither. At low HP, Gabranth enrages, gaining rapid, last-gasp attack speed. Once Gabranth is subdued, Zargabaath will be the only Judge left… Trial Mode imitates story mode? Use Expose several times to reduce his defense, then focus all allied fire to take down the final Judge, conquering Trial Mode! |
Reward—New Game-: “Weak Mode” prevents allies from leveling up! Stats can only be increased with equipment and licenses. (In an interesting twist, what is probably the normal game’s weakest Job becomes crucial in Weak Mode, because Machinists wielding Guns ignore the enemy’s defense.) Clearing the adventure with floored levels is the penultimate FFXII challenge. The ultimate challenge? Taking your “Weak Mode” party into “Weak” Trial Mode!