
Power Weapons
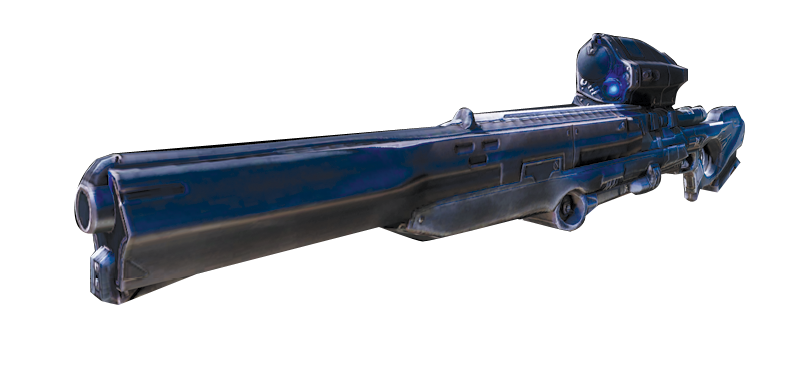
Longshot
Weapon Stats
| Magazine Size | Max Ammo | Rate of Fire | Reload Speed |
|---|---|---|---|
| 1 | 24 | 60/M | Moderate |
The Longshot is the ultimate long-range weapon in the Gears of War 3 arsenal. This sniper rifle allows you to put a bullet between a Grenadier’s eyes with pinpoint accuracy from a hundred yards out. Its powerful scope fills the screen with even the most distant Locust’s ugly mug. There are no gravitational or wind effects to worry about—just point, aim, and fire! The Longshot delivers one-shot kills to any humanoid enemy you hit in the head.
Campaign mode is an excellent place to practice your sniping with the Longshot. Consider pairing this weapon with an assault rifle or Gnasher for much of the campaign. This allows you to pick off a couple of distant Locust before the battle moves to a more intimate range.
Damage Statistics
| Difficulty | Standard Reload | Active Reload |
|---|---|---|
| Casual | 750 | 825 |
| Normal | 600 | 660 |
| Hardcore | 488 | 536 |
| Insane | 375 | 413 |
Active Reload increases the damage dealt by 10%.
Field Notes
Long Range: This is the ideal range for using the Longshot. Slide into cover, shoulder the Longshot, and use the weapon’s impressive optical scope to pan for enemies. Take a moment to fix the crosshairs on the target’s head and fire away. The Longshot’s accuracy allows you to deliver deadly force to enemies in cover, even if only a small piece of their armor protrudes from cover.
Medium Range: The Longshot can be effective at medium range in the right hands, but this is an advanced play. Resist the urge to use the zoom, and try to “no-scope” your enemy instead. Aim for the target’s torso if he’s closing on your position. The slower rate of fire is a liability in medium-range skirmishes. Try to put distance between you and your foe, or switch to another weapon.
Close Range: You shouldn’t use the Longshot at close range. Though it inflicts more damage at short distance, its slow rate of fire makes using it an extreme liability. Go in for the melee attack, switch weapons, or get out of there!
Torque Bow
Weapon Stats
| Magazine Size | Max Ammo | Rate of Fire | Reload Speed |
|---|---|---|---|
| 1 | 12 | 60/M | Moderate |
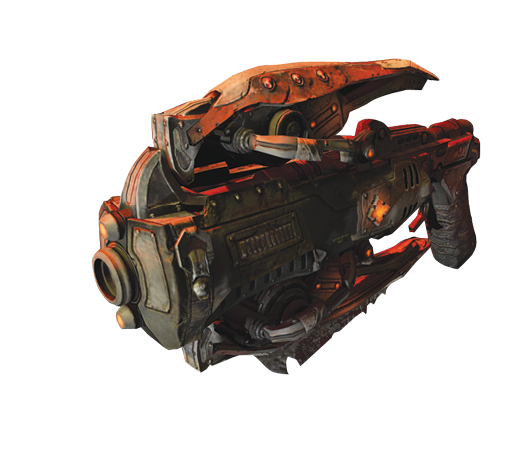
The Torque Bow is the Locust’s go-to weapon for medium-long-range combat. This crossbow-like device fires an explosive-tipped arrow that can stick into enemies and surfaces alike. The explosives then erupt after a slight delay. The explosion is large enough to kill multiple foes with a single shot, provided they’re congregated within the blast radius. A Perfect Active Reload increases the blast radius.
The key to using the Torque Bow lies in its name. You must hold the trigger long enough to fully torque the bowstring. Otherwise, the arrow will not stick into the target. Watch the orange targeting reticule as it draws into a straight, taught line. That’s your signal that the Torque Bow is ready to fire. Though an under-charged arrow may ricochet off hard surfaces, trying to bounce one over cover is extremely difficult with any consistency. The Torque Bow is the favored weapon of Palace Guards, and it’s available throughout much of the campaign. Pair it with the Hammerburst or Lancer for an exceptional answer to most every situation.
Damage Statistics
| Difficulty | Standard Reload | Active Reload |
|---|---|---|
| Casual | 1416 | 1770 |
| Normal | 1133 | 1416 |
| Hardcore | 920 | 1151 |
| Insane | 708 | 885 |
Active Reload increases the size of the blast radius and splash damage by 25%.
Field Notes
Long Range: The Torque Bow isn’t bad at long range, but its lack of a scope makes it more difficult to use than the Longshot from this distance. The need to draw the bowstring—and an orange glowing bolt tip that everyone on the battlefield can see—makes it even harder to hit a long-range target quickly.
Medium Range: This is where the Torque Bow really shines. So long as you draw the bow tightly enough for the arrow to stick, an arrow in the foot is as deadly as one in the chest. It’s also possible—and relatively easy—to headshot enemies at this range for an instant kill. This is a satisfying tactic against lone enemies. It’s better to aim for the torso when you engage multiple foes, so the blast has a chance to kill/down more than one target.
Close Range: Avoid using the Torque Bow at close range, except when you perform a melee attack. Its slow rate of fire and requisite charging make it a liability against an armed enemy that’s up close.
Boomshot
Weapon Stats
| Magazine Size | Max Ammo | Rate of Fire | Reload Speed |
|---|---|---|---|
| 1 | 6 | 60/M | fast |
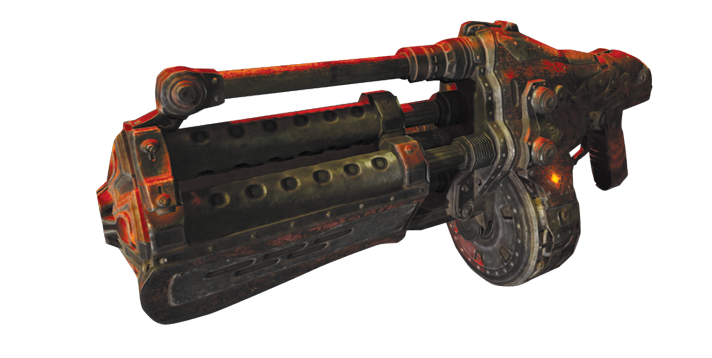
The Boomshot is the one of the most powerful weapons outside the heavy weapons category. Though the Torque Bow excels in several important categories, the Boomshot’s clustered grenades inflict nearly twice as much damage. The Boomshot’s expansive blast radius allows you to kill enemies behind cover by firing at the ground beside them. Enemies caught in the blast radius suffer great damage, and those on the periphery are momentarily stunned.
Mastering the Boomshot takes practice, as the player must account for the projectile’s trajectory, which tends to shrug off gravity’s effects more than one might expect. Aiming over great distances can be tricky, particularly against an elevated enemy. Always aim low on the target to keep the Boomshot’s clustered grenades from sailing overhead. It’s better for the projectiles to explode on the ground in front of your foe than to fly past harmlessly. The Boomshot—and power weapons in general—tend to be available more frequently in Gears of War 3 than in previous games.
Damage Statistics
| Difficulty | Standard Reload | Active Reload |
|---|---|---|
| Casual | 1400 | 1610 |
| Normal | 1120 | 1288 |
| Hardcore | 910 | 1047 |
| Insane | 700 | 805 |
Active Reload increases the splash damage dealt by 15%.
Field Notes
Long Range: The slower flight speed and arcing trajectory render the Boomshot less effective at long range, as enemies have time to evade the attack. Nevertheless, the Boomshot’s splash damage can wreak havoc against large groups of distant foes.
Medium Range: The Boomshot excels at medium range. The target is distant enough to keep you safely outside the blast radius, but not so far that he can easily avoid your attack. Exposed enemies can do little more than pray for a quick death, and a well-aimed shot’s splash damage can easily envelop those behind cover as well.
Close Range: Be very careful when you fire the Boomshot at nearby enemies, as you’re likely to be caught in the blast radius. Though this may only drop you to a downed state on lower difficulty settings, it surely results in death by suicide on harder settings.
Digger Launcher
Weapon Stats
| Magazine Size | Max Ammo | Rate of Fire | Reload Speed |
|---|---|---|---|
| 1 | 6 | 300/M | Moderate |
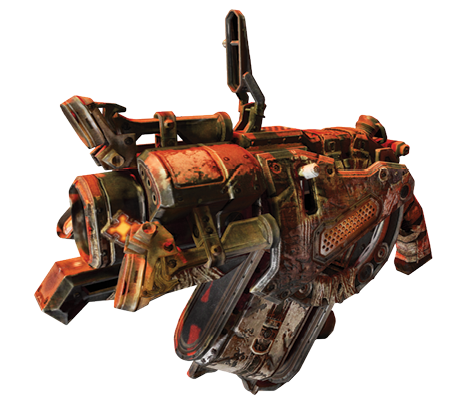
Left to roam the surface without their trusty Boomshot, it should be no surprise that Savage Boomers found an organism they could weaponize. The Digger Launcher fires an explosively-charged creature that burrows through the ground in a straight path toward its target. It springs forth from the ground upon contact with an enemy and instantly detonates, potentially killing all those caught within the blast radius. The Digger Launcher has a higher baseline damage rating than the Boomshot!
Though it’s quite rare in Campaign mode, the Digger Launcher is a very potent weapon. It enables you to target enemies behind cover easily, and you can use it at close range in a pinch. Its projectile arcs forth from the weapon before it dives into the ground, and it can hit enemies on the fly, instantly burrowing into their bodies and exploding from within. If the Digger Launcher has a flaw, it’s the loud crunching sound that the burrowing creature makes when you fire it. This telltale noise acts as a warning to those being targeted, potentially giving them time to dodge the shot. The Digger Launcher’s relatively slow burrowing speed makes this a common occurrence when you use it against wily enemies.
Damage Statistics
| Difficulty | Standard Reload | Active Reload |
|---|---|---|
| Casual | 1800 | 1800 |
| Normal | 1440 | 1440 |
| Hardcore | 1170 | 1170 |
| Insane | 900 | 900 |
Active Reload only increases the reload speed of the Digger Launcher.
Field Notes
Long Range: In Campaign mode, the Digger Launcher isn’t very effective at long range due to the burrowing projectile’s slow speed and the presence of so much undulating terrain. The Digger Launcher can burrow under cover that rests on the surface, but it can’t rise through multiple levels or overcome a terraced landscape. Give it a try against a group of distant foes, especially if the architecture prevents them from fleeing laterally, but try to move in closer.
Medium Range: Like so many other power weapons, the Digger Launcher is most effective at medium range. Enemies don’t have as much time to evade the burrowing projectile, and you’re less likely to encounter surface complexities that interrupt the projectile’s path. When you can, try to anticipate your enemies’ movements and aim in front of them.
Close Range: The Digger Launcher isn’t quite as effective at close range, but it can be a lot of fun if you manage to hit an enemy at pointblank range. The projectile burrows into the enemy and explodes from within. This makes a fabulous mess of your foe, but be careful of the splash damage. Firing a shot into the ground at very close enemies triggers the Digger Launcher’s typical behavior, in which case you may be caught inside the blast radius.
Scorcher
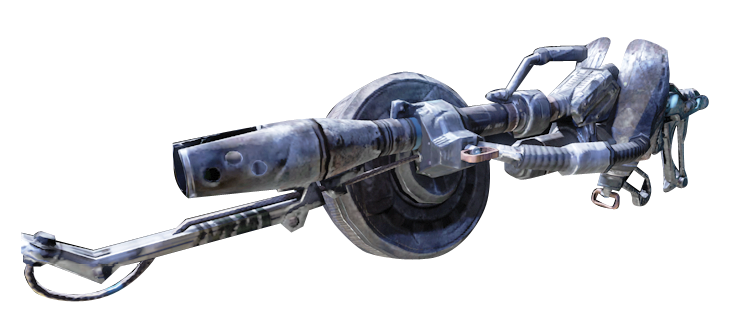
Weapon Stats
| Magazine Size | Max Ammo | Rate of Fire | Reload Speed |
|---|---|---|---|
| 450 | 350 | 850/M | fast |
This impressive flamethrower is ideal for engaging enemies at close range without the fear of self-inflicted splash damage. The Scorcher fires a steady stream of flame that engulfs targets, rapidly draining them of health and even potentially cooking them within their armor—the Scorcher is positively lethal against Armored Kantus.
If the Scorcher has a limiting feature, it’s the weapon’s restricted range. Damage doesn’t fade with distance; it terminates. Whereas bullets continue their flight and merely weaken with distance, the Scorcher’s flames can reach only so far. Beyond that, they inflict no damage at all.
Damage Statistics
| Difficulty | Standard Reload | Active Reload |
|---|---|---|
| Casual | 2000 | N/A |
| Normal | 1600 | N/A |
| Hardcore | 1300 | N/A |
| Insane | 1000 | N/A |
Active Reload increases the Scorcher’s range.
Field Notes
Long Range: The Scorcher inflicts no damage against long-range foes and should not be used at all in these situations.
Medium Range: The Scorcher can inflict some damage at medium range, but only with a perfect Active Reload. The flames extend only so far. Consider the opposition’s makeup and weaponry, and either switch weapons, retreat, or move in for the kill based on the enemy’s ability.
Close Range: The Scorcher really shines at close range. Its flames can easily engulf a group of foes. They can even spread to those around cover if you aim them on an angle. Though we don’t recommend using it against shotgun wielders, the Scorcher’s consistent fire stream can down an enemy armed with a pistol or assault rifle before he can overpower you.
Hammer of Dawn
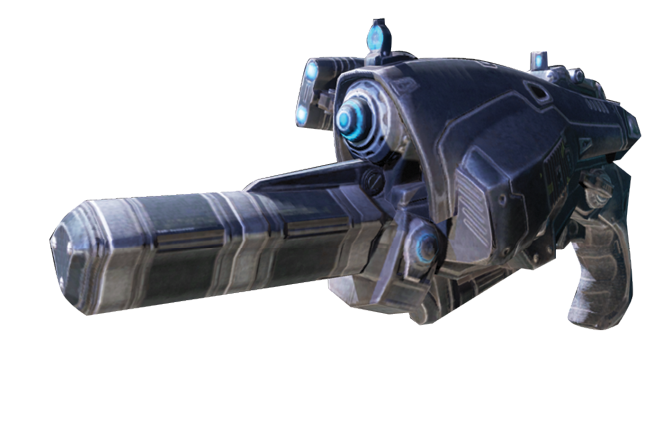
Weapon Stats
| Magazine Size | Max Ammo | Rate of Fire | Reload Speed |
|---|---|---|---|
| N/A | N/A | 5/M | N/A |
The Hammer of Dawn’s awesome power isn’t frequently available during the campaign, so make it count when it is. This handheld targeting device calls in a devastating laser strike from satellites orbiting high above Sera. The initial laser strike instantly kills anything within the blast radius, boss enemies excluded. This makes it the perfect weapon for groups of enemies and large singular foes alike. Once you fire it, you can guide the laser across the ground by holding the trigger and steering the targeting reticle.
You can use the Hammer of Dawn only when its satellites are online and there is a clear view from the target to the sky. You cannot use the Hammer of Dawn indoors or underground. The initial targeting also requires a steady hand in order to achieve accurate coordinates. Fix the reticle on a stationary foe or solid surface, such as a wall or floor, to acquire the target lock. It takes roughly three seconds for the laser to fire from the moment you squeeze the trigger.
Damage Statistics
| Difficulty | Standard Reload | Active Reload |
|---|---|---|
| Casual | 3000 | N/A |
| Normal | 2400 | N/A |
| Hardcore | 1950 | N/A |
| Insane | 1500 | N/A |
The Hammer of Dawn cannot be reloaded.
Field Notes
Long Range: The further the laser strike is from your position, the better. The Hammer of Dawn can strike anywhere that you can spot with the targeting reticle.
Medium Range: The Hammer of Dawn is easiest to use at medium range, as you can better monitor the enemies’ movements and position the reticle with pinpoint accuracy, something that’s a bit hard to do at extreme range. Fast-moving enemies can be tricky to hit, but if you anticipate their movements, you can kill them.
Close Range: The Hammer of Dawn isn’t suitable for close-quarters combat. For starters, its three-second targeting procedure puts you at great risk to enemy attack or at least a disruption of the targeting process. Furthermore, standing too close to the Hammer’s laser blast isn’t good for your health.