
Gears of War 3 Guide Multiplayer Multiplayer Maps
Sandbar
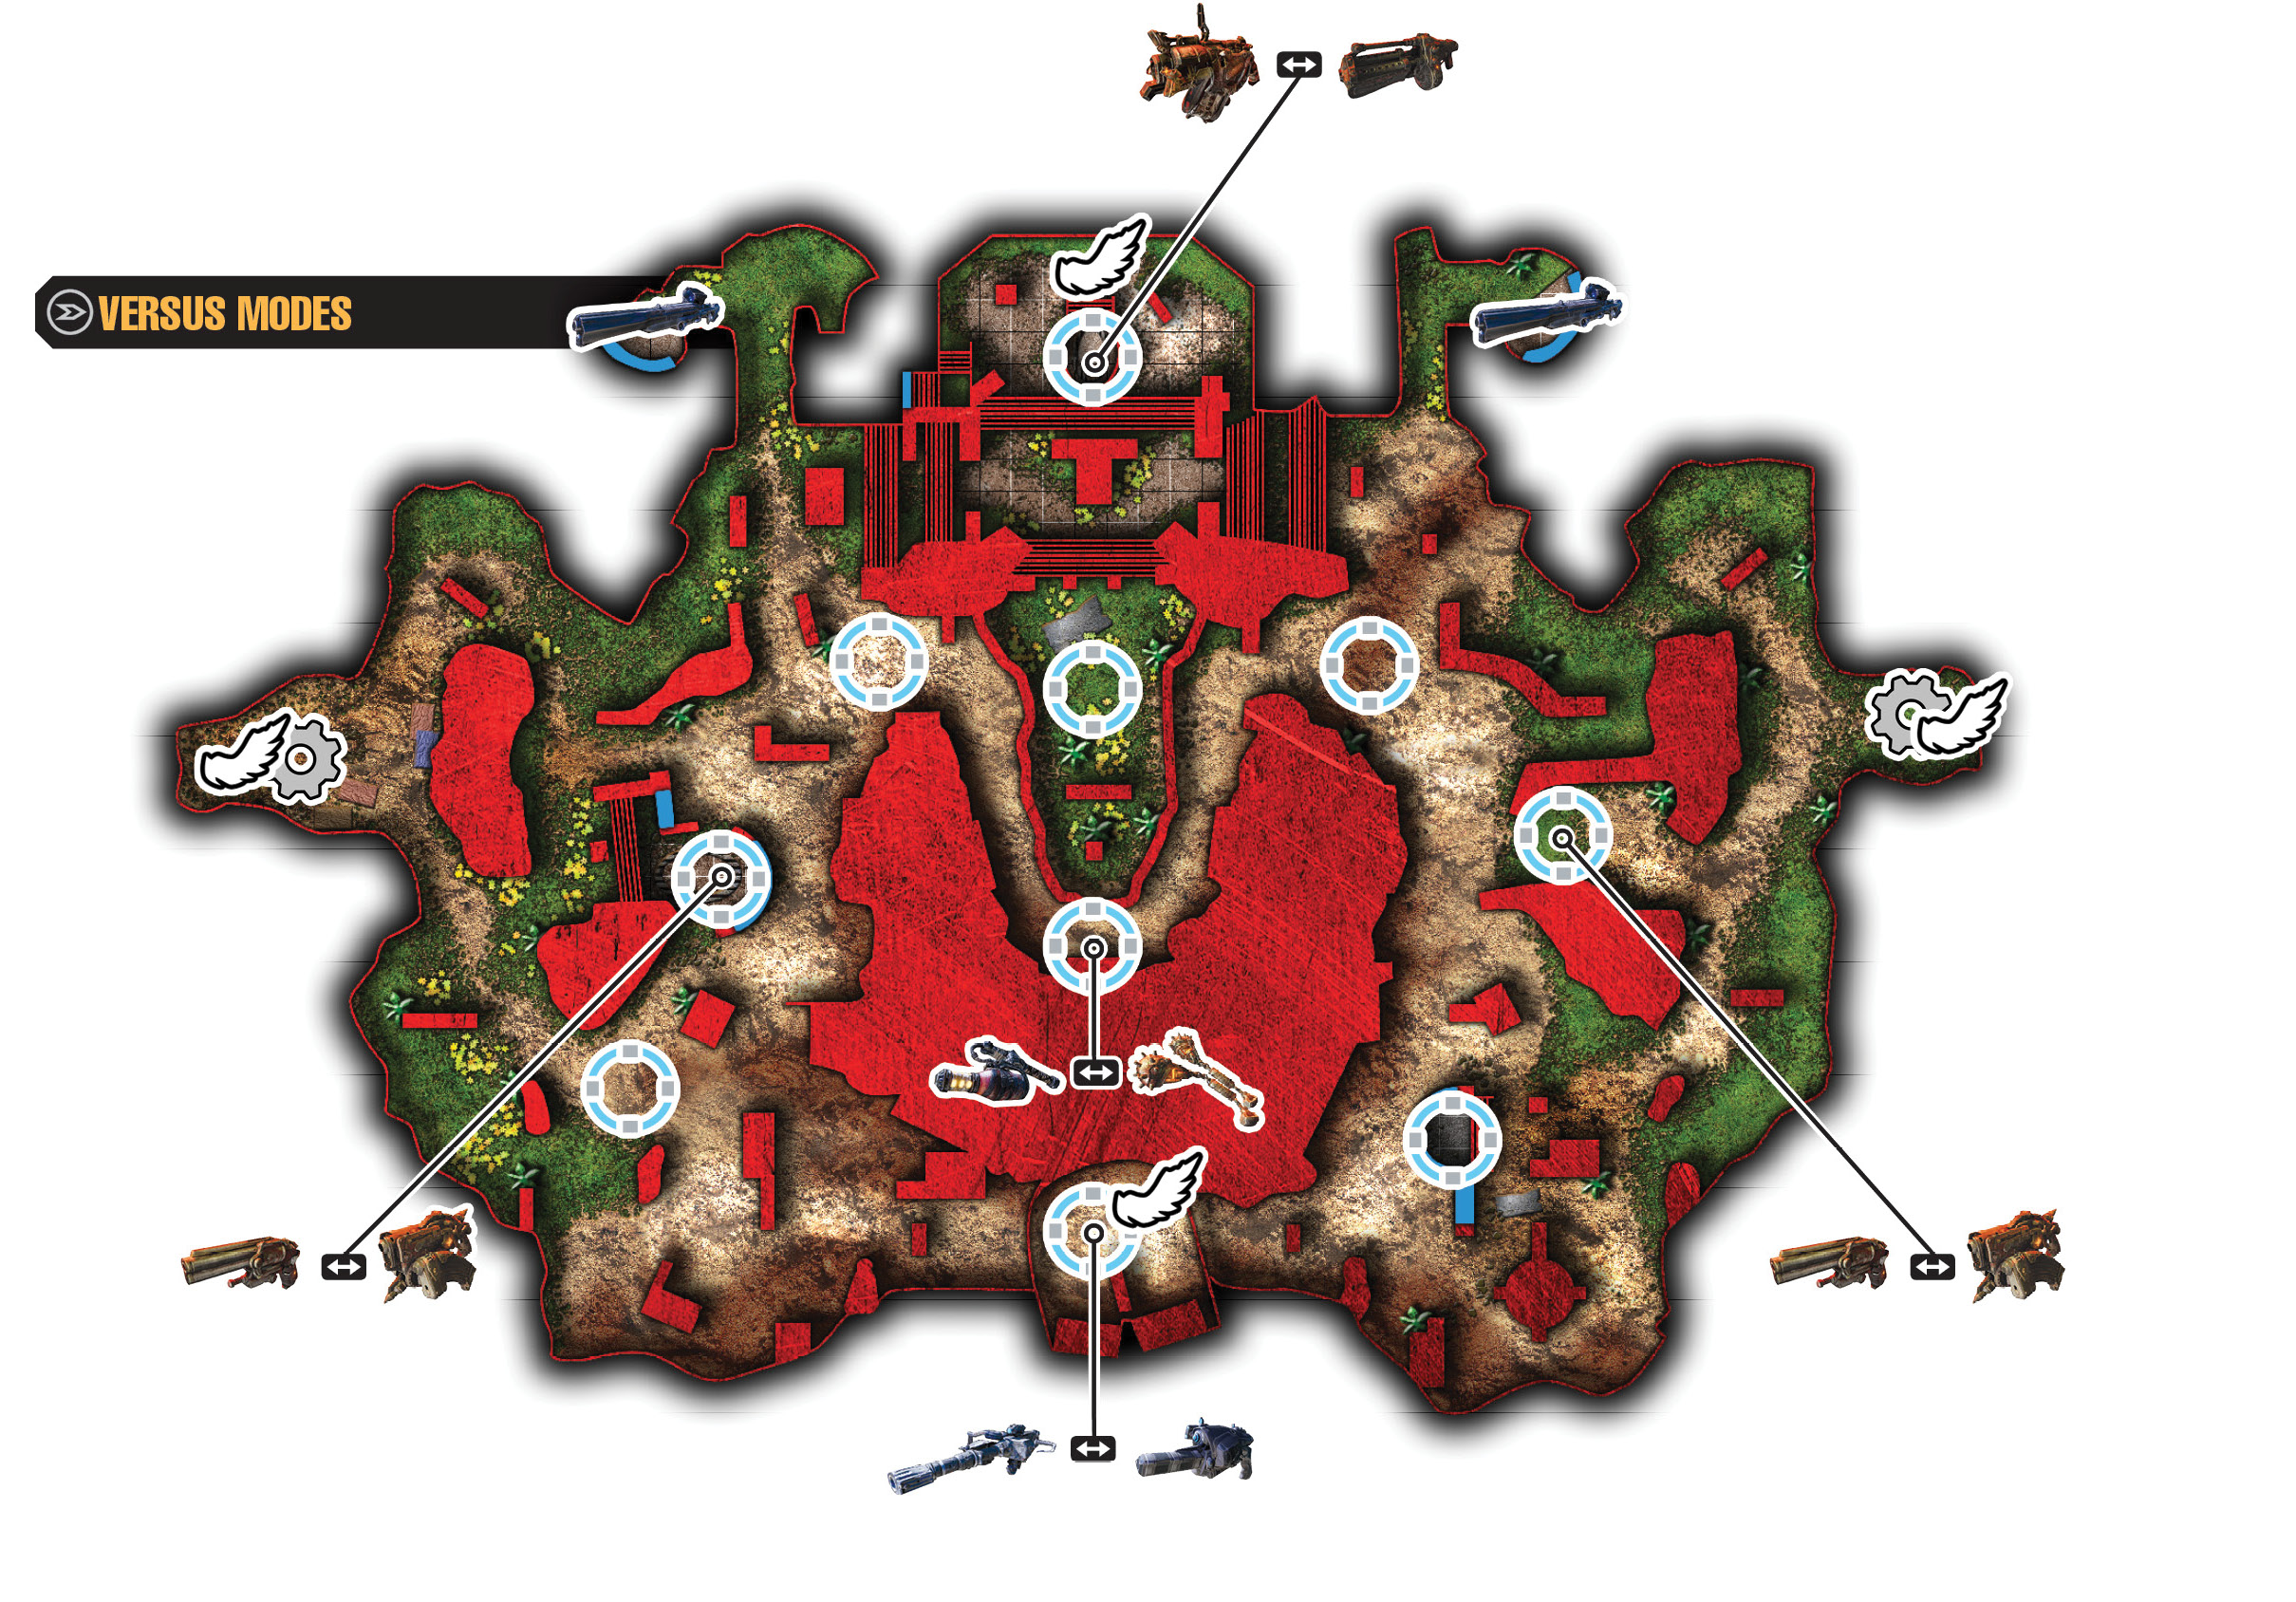
Versus
A once peaceful beachfront has been transformed into a fortified stronghold. The fortress area in the north is a key defensive position on this map. It boasts a strong overlook of the entire map and a great vantage point for using either of this map’s two Longshots. The Longshot is key no matter where you travel here; while the Boomshot and Digger are important, their power depends on the game mode you’re playing. Of course, you can expect plenty of action near the Oneshot/Hammer of Dawn spawn as players fight to control these powerful weapons.
If the other team is camping the fortress, use the grenade spawn beneath the overlook area to flank around it. Just be wary of enemy spawns moving up behind you when you attempt to flank. Use the abundant cover in the east and west when you move from place to place. It’s fairly easy to avoid long-range fire, even from the Hammerburst, and you make a difficult target for Longshot users.
Horde
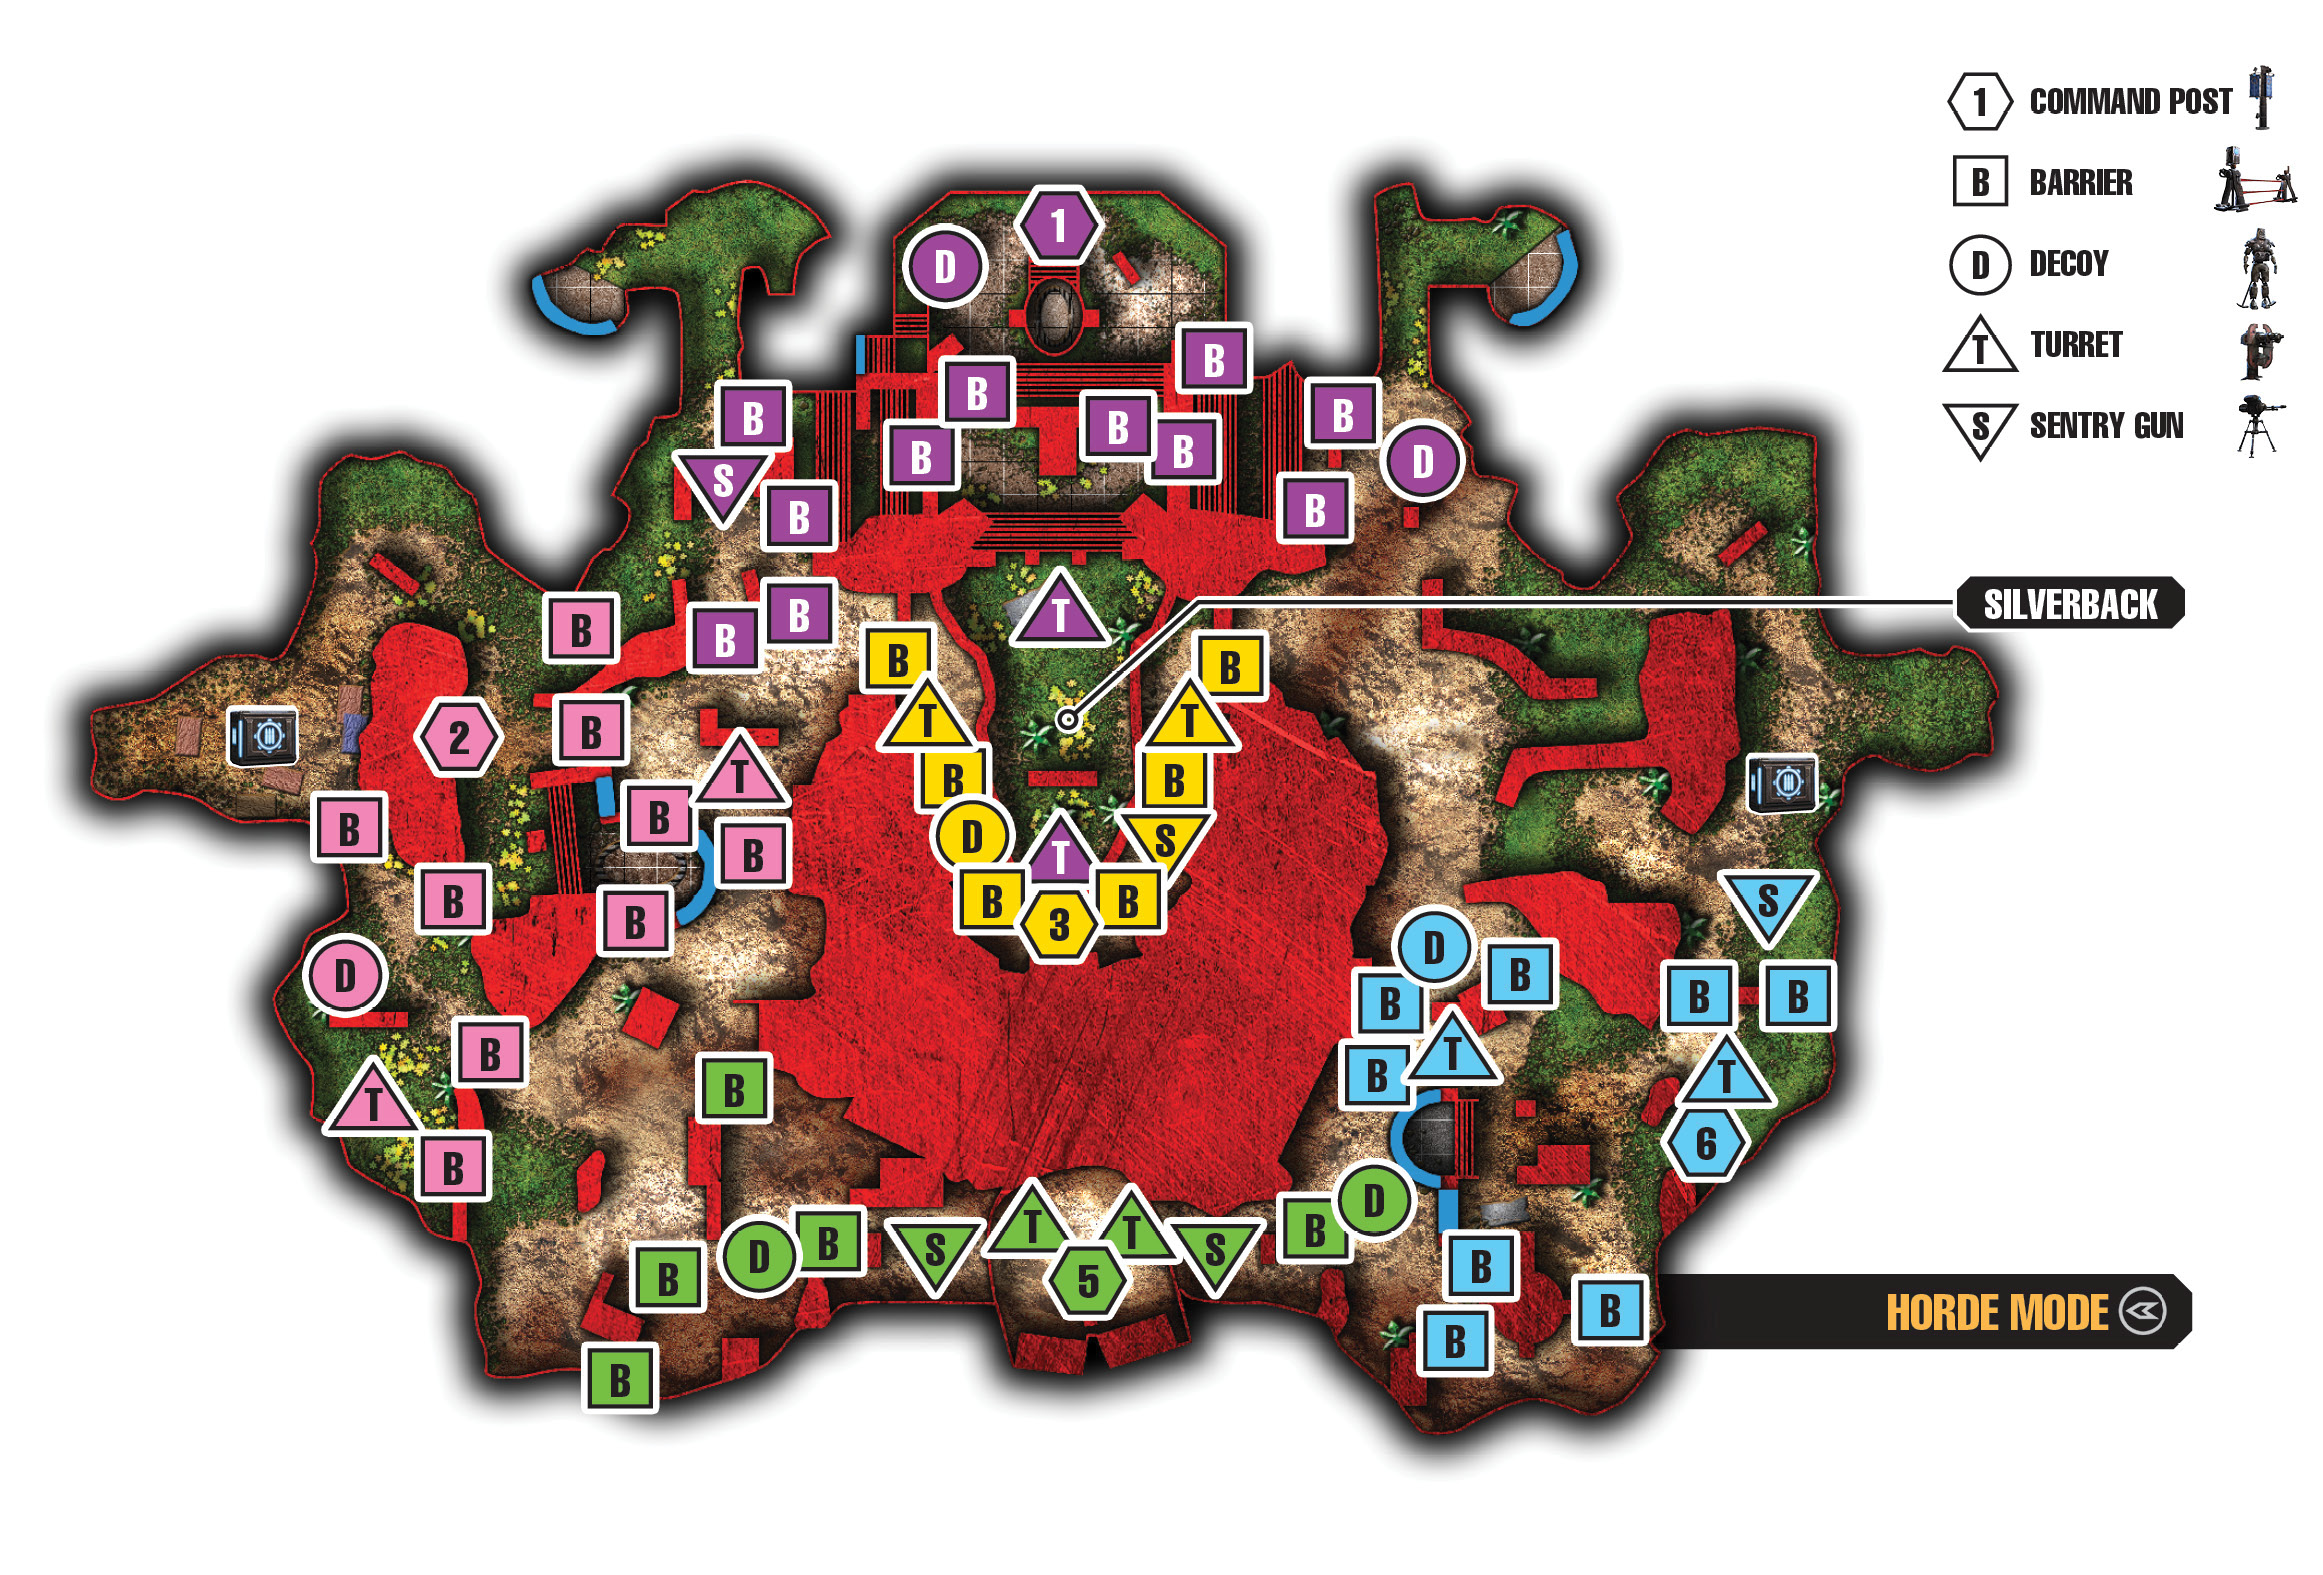
 Command Post North, Fortress
This post boasts a sentry on the west, a sentry inside, a turret on the east, and turrets on the overlook’s center and south. This Command Post has elevation, extensive fortifications, and plenty of cover—it’s an ideal defensive position. There are two decoys, one in the base and one to the east.
The two turrets on the overlook are very effective, especially the southernmost turret with clear line of sight on almost the entire level. Just be wary of taking too much fire from behind. You have to get off the turret to take cover occasionally. Use the walls in the area only after you build up the key turrets. You can save the interior sentry and decoy for later, if at all.
 Command Post West, Bunker
Two turrets and a decoy are your sole defensive options at this Command Post. The outermost turret near the northern ruins has good line of sight to the north. It can provide some support to the center or south. The rear turret and the nearby sentry are useful mostly as a fallback. They have poor line of sight to this Command Post’s main approaches. Split up your team to cover the northern ruins and the southern cargo ship approaches. Communicate if one side begins to face heavy pressure.
 Command Post Center, Below Overlook
The centrally located Command Post is in a seemingly exposed position. But unlike the center market post on Old Town, this position has good cover on both sides and well-positioned turrets on the east and west. The east side has a sentry, while the west has a decoy. Both provide a bit of support to the turrets. With good shooting by your teammates, you can repel most waves before they get dangerously close to your defenses. Build up the outer walls last to protect your decoy and sentry.
 Command Post 5 South, Cargo Ship
Two each of decoys, sentries, and turrets provide excellent defenses for this position. Both the east and the west have some additional fixed cover that you can use to attack enemies as they come down from both directions. With its bunker position, the east is slightly superior to the west, while the west has only a few crates for cover.
In either case, you can always retreat into your cargo ship ‘base’ should the enemies press in toward your position. This assumes they survive the withering hail of fire on the approach. This position also has the benefit of the Hammer of Dawn and Oneshot being close at hand.
 Command Post Southeast, Cannons
Two turrets, a sentry and a decoy are your fixed defenses here. The westerly turret has better coverage of the map’s center, though it’s somewhat exposed. Keep the decoy up to protect it. The eastern turret is mostly for defending against enemies that appear at the eastern player spawn. However, it can provide some coverage toward the center of the map. The sentry is positioned up the hill on the east, giving it little effective coverage. It can at least alert you to enemies in that area. The various walls here are less critical than they are on smaller maps. You can typically down enemies before they get too close to your defenses.
Beast
One of the most difficult Beast maps, Sandbar is so large that half of your time may be gone by the time you make contact with the COG forces. The northern fortress base is especially difficult to assault. It has a very nasty elevation advantage, which the turrets exploit. Plus, you must destroy several barriers to enter it. The map’s other bases are not extremely difficult to penetrate. However, the time restriction leaves little margin for error on your assaults—you must inflict appreciable damage on every attack.
The Boomer is especially effective on this map, particularly if the fortress is unoccupied. You can make your way up to the overlook and shell the COG position from on high. Be very sure of your attacks on this level. You don’t get many second chances, so make a point of not attacking alone unless the timer forces you to do so.