
Gears of War 3 Guide Collectibles
Act 1
 Recovered Cog Tags #1
Prologue: Trouble Past
Location: Exit the prison cell and notice the Crimson Omen insignia on the wall. This is your cue that a COG Tag is somewhere nearby. Approach the cell to the right and kick open the door to find the first collectible.
 Twenty-Dollar Bill
Chapter 1: Anchored
Location: The first collectible in this chapter is inside Marcus’s cabin, on the edge of the table. It’s a Twenty-Dollar Bill. Coalition Reserve currency may not do him any good now, but the cash reminds him of better times…and bets made with Dom.
Marcus,Here’s that $20 I owe you. A few years overdue, but better late than never.
—Dom
 Dom’s Psych Report
Chapter 1: Anchored
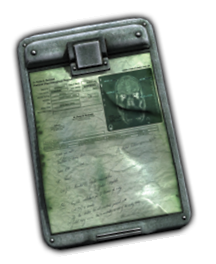
Location: Enter the infirmary across from Dom’s cabin. The write-up on Dom’s mental state is attached to the clipboard in the back corner, near the chair and sink. Few members of the Sovereign’s crew have had it as hard as Dom…
Private Santiago appears to be coming to terms with his wife’s death, but I still have concerns about his mental state. I am an emergency physician, and in the absence of a psychiatrist, I can offer only general observation. He has been depressed—a normal reaction—but he has also had episodes of uncharacteristic anger and admits to experiencing flashbacks and hyper-vigilance.
Almost everyone in this community has lost family and shares similar levels of traumatic stress, so he is surrounded by comrades who both understand and sympathize. However, very few have to take their loved one’s life under such harrowing circumstances. Santiago warrants continued observation.
Dr. Isabel Hayman MD FTCS FTCO Chief Medical Officer, CNV Sovereign
 Requisition Form
Chapter 1: Anchored
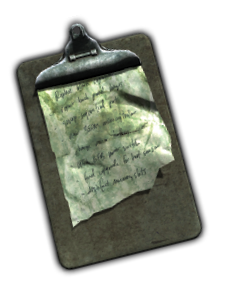
Location: Step inside Baird’s cabin on the left before leading Dom up the stairs. Baird is currently out on a supply run, but he filled out the form on his workbench before he left. It has to be hard to keep Jack in working order when you’re stranded at sea.
These forms are worthless. Jack is pretty beat up, but it’s not like we can point some rookie to the corner hardware store with a list and expect to get the parts we need to fix him. Do me a favor and keep your eyes out for the following junk:
— One plasma torch assembly. Any basic or busted cutter will do.
— CL8-330 load cells. These can be pulled from a Silverback without any harm. Not like we use ‘em for loading cargo anymore.
— NN-1101A wireless transmission board for Jack’s uplink. This is gonna be a bitch to track down, but I might be able to hack something wtogether with a NN-2371R from a scrapped ‘Dill.
You guys remember when we actually had the crap we needed to do our jobs? And working toilets? Man, those were the days.
—Baird
 Recovered Cog Tags #2
Chapter 1: Anchored
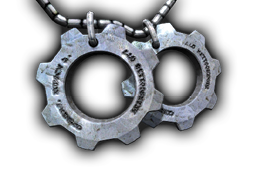
Location: The Crimson Omen painted on the side of the shipping container to the left is your cue that there’s a COG Tag nearby, but this one is tricky to spot. It’s hanging off the neck of a slain COG soldier on the walkway above, beyond the portion severed by the exploding Drudge. The only way to get this collectible is to shoot it down. Locate the corpse hanging partially off the walkway and target the COG Tag with the Lancer to make it drop.
 Silverback Manual
Chapter 2: Abandon Ship
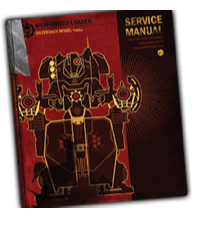
Location: Sprint across the ship’s deck to avoid being crushed by the shipping containers, and descend the steps to safety. Open the door to the maintenance bay, but don’t let the gleam of the Silverbacks distract you from the collectible to the left. The Silverback Manual is perched atop the crate on the maintenance bay’s left side.
Once you’re suited up, take a moment to adjust to hydraulic ambulation. It’s a little different than you might expect. Joint stabilizers will keep your aim steady. All you’ve got to do is get the enemy in your sights and let the triple-barrel chain gun do the rest. Point, shoot, and ruin a grub’s day. Hell yes.
Making use of the Silverback’s deployable cover systems can mean the difference between life and death for your squad mates. Once engaged, the rig settles into a lower stance and raises rear plate shields to provide cover for your crew while you take care of business. With rockets. Damn, I love rockets.
The Silverback’s blast shielding has been further reinforced to soak up more fire. It can take a lot of heat, but like the civilian model, when the alarms start blaring, it’s time to get the hell out.
Watch your back. Oh, and have fun.
CPL Kathryn Farrell COG Engineering Corps
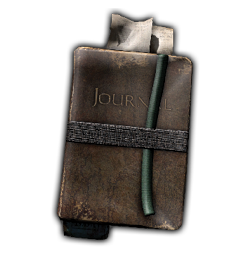 Journal
Chapter 3: Homecoming
Location: Kick open the gate to the right of the poster declaring the “Best Breakfast in Town,” and enter the outdoor café. There’s a Journal lying on the ground near a corpse straight ahead. Take a moment to read the author’s final entry about fighting the Lambent.
Hanover’s never really been what you’d call “secure,” not by any stretch. But since these Lambent freaks started dropping in, everything we know about keeping ourselves safe out here has gone out the damn window.
The little crawly sons of bitches, they go down quick, but there’s so many of them that we’re burning through ammo like toilet paper at a chili festival. You put a round or two in ‘em and they just tear into a dead sprint straight at you. They don’t flinch, they don’t take cover. Once they get within range, you’re either gonna get torn to shreds or blown to bits right along with ‘em.
The Locust were bad, but these things… How do you defend yourself against something that don’t care if it lives or dies?
(From Kevin Mahoney’s personal journal.)
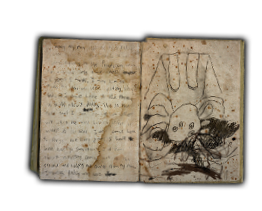 Student’s Notebook
Chapter 3: Homecoming
Location: A Student’s Notebook has been left on the playground fort with the slide and other fun toys. Run up the slide to climb onto the platform where the collectible is located.
Dear Dr. Cragen,
I’m writing in this diary because you told me that the best way to get rid of nightmares is to write them down so you can see them like a story or a show on TV. I asked mom to buy me a diary and now I’m going to write down what happens in my nightmares for you.
In my nightmares I’m running away from something I can’t see, and when I look at them (the monsters chasing me) I just see blurs but I know that they’re monsters. And because they are all blurry nobody believes me that they are monsters. And they’re chasing me for a really long time usually until I wake up.
Sometimes I wake up way before I’m supposed to get up to go to school and I can’t go back to sleep because of my nightmares and the other night we had an earthquake and it woke me up from a nightmare. My mom and dad came in to ask if I was okay and I told them that the earthquake saved me from the monsters. And they thought that was funny and we talked about my nightmares before mom made me cocoa and I went back to sleep.
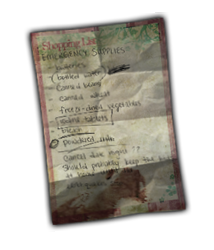 Grocery List
Chapter 3: Homecoming
Location: The Snack Champion has been running low on items for quite some time, but that didn’t stop wishful shoppers from bringing lists of everything they needed. You can find one such list on the end of a checkout aisle, near the Boomshot.
pasta milk eggs wine (2 bottles)butcher shop order @ 1PM
prep kit for these CRAZY-ASS earthquakesbottled water canned goodsportable radio??? BATTERIES! first-aid pack
(holy CRAP!! theater ticket PICKUP!)
Recovered Cog Tags #3
Chapter 3: Homecoming
Location: There’s a Cog Tag in the storeroom office, where the Boomshot is located. It’s on the desk next to the computer.
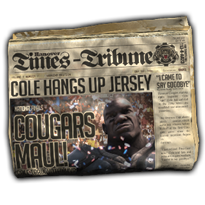 Clipping, Hanover Times-Tribune
Chapter 4: Helping Hand
Location: Cole’s decision to hang up the cleats and enlist in the COG Army was front-page news back in the day. Read all about it with the collectible newspaper on the ground to the left of the container with the Boomshot in it.
Cole Hangs Up Jersey, Enlists in COG Army
Hanover Cougars starting alpha Augustus “Cole Train” Cole has enlisted in the COG Army, the Thrashball star announced yesterday. The Grayson Cup champion’s announcement came just minutes before kickoff at the first Cougars game since the Locust incursion began six days ago.
“I just enlisted. I’m a Gear now,” Cole told fans and press at Cougars Stadium. “I came to say goodbye.”
Though few expected Cole’s return so soon after suffering the loss of his family in the attack, fans were nonetheless stunned by the announcement. Cole explained that he was leaving to do his part in the mounting war effort, and encouraged attendees to follow suit and enlist in the COG army.
“The Cole Train’s gotta go kick some grub ass, but I’ll be back when the job’s done,” Cole added. “Are you gonna enlist? You gonna help me put ‘em back down the hole they came from?”
Local recruitment officials reported a 390% jump in voluntary enlistment following the event. In his five-year career in professional Thrashball, Cole has shattered dozens of long-standing records, including most injuries inflicted in a single play.
Recovered Cog Tags #4
Chapter 4: Helping Hand
Location: Note the Crimson Omen on the brick wall to the left, immediately after exiting the outpost. The COG Tag isn’t far. Just walk out onto the narrow wooden pier beyond the wall to find it lying next to a fallen Stranded. Rest in peace, friend.
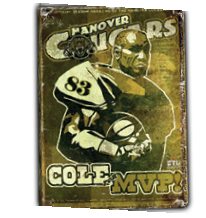 Cougars Season Program
Chapter 5: Helping Hand
Location: This collectible is located on the concourse’s upper level, but you can reach it regardless of the level you take. It’s on the floor, behind the counter in the concession stand. If you choose the lower route, head up the escalators after you defeat the Lambent to collect it.
UNSTOPPABLE!
Get ready for the most explosive Cougars post-season yet! Two-time MVP Augustus “Cole Train” Cole leads the charge toward yet another Grayson Cup Victory!
UNBREAKABLE!
Cole is joined by breakout starting guardian Mitch Hilde, and the powerhouse attacker combo of Ryan “Big Bastard” Poole and Anton “Li’l Bastard” Chambers to form the deadliest starting roster Hanover’s ever seen!
UNBELIEVABLE!
Tickets are going fast, so don’t miss out! Secure your seats on the front line and be there to watch the Cougars write another page of Thrashball history!
 Cougars Player Handbook
Chapter 5: MVP
Location: Proceed toward the south gate and turn to the right to spot the neon glow of a “Stimo” beverage machine. The collectible is on the floor next to the vending machine and ammo crate. Grab the rules and conduct book before you head down the hall to the locker room.
All players associated with the Hanover Cougars are required to abide by the following rules governing physical contact in regulation matches:
1. “Backing”: Players cannot touch the back of an opponent in possession of a ball in play.
2. “Holding”: Players cannot hold, grab or otherwise restrain other players, regardless of position or circumstance.
Cougars management recognizes injury as an acceptable inevitability in professional Thrashball matches, and advises (but does not require) players to avoid engaging in the following actionable or potentially criminal acts:
1. Purposefully missing (“whiffing”) a dive catch with arms outstretched to punch an opponent’s face, mouth, or groin (CCL 5.13.19)
2. Trampling over or stomping on an opponent off his feet while feigning distraction (CCL 12.10.83)
3. Checking opponents over boundaries and into spectator stands (Alejandro v. Smits)
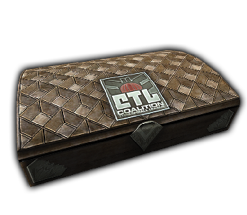 Cole’s Championship Ring
Chapter 5: MVP
Location: Walk back across the playing field toward the storage shed with the UXO banner hanging on it. Cole forgot to take his championship ring with him when he joined the COG Army. Now’s his chance to take it with him for safe keeping. It’s on the ground next to the corpse.
Augustus Cole Hanover Cougars Grayson Cup Champions ANIMUS INDOMITABILIS
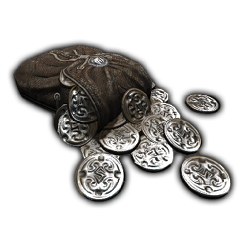 Toll Booth Tokens
Chapter 6: Hanging by a Thread
Location: This collectible is among the easiest to find, particularly if you use the Multi-Turret inside the middle tollbooth. Put some change in your pocket by picking up the Toll Booth Tokens on the ground to the right of the steps that lead into the middle booth.
UNTIL FURTHER NOTICEBy order of COG Civil Defense, civilian passage across Centennial Bridge is restricted to the daylight hours of 14:00-16:00 on the lower deck ONLY.
Do not slow, stop, or delay traffic for any reason, unless ordered by stationed military personnel.
Do not park or leave your vehicle for any reason, unless ordered by stationed military personnel.
Suspicious activity or failure to comply with official instructions will be considered a hostile act and will be dealt with swiftly and severely.
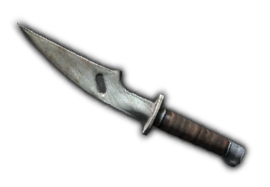 Bayonet
Chapter 6: Hanging by a Thread
Location: Continue past the barricaded toll booth area and spot the large, red shipping container on the right. The wooden crate inside it can be destroyed. Go ahead and break it to pieces to find the Bayonet on the ground inside it. The container is to the right of the guardrail, between the two “Stay in Lane” signs.
The Mk1 Lancer was the standard infantry assault weapon for COG forces during the later decades of the Pendulum Wars, undergoing very few modifications because of its reliability and its tolerance of a wide range of climatic conditions.
Its broad, serrated bayonet—famed for its intimidating effect on UIR forces—was replaced by an integral chainsaw in the Mk2 Lancer after operational experience against Locust. While the blade-type bayonet was effective against human enemies, it had difficulty penetrating the thick hide of Locust and was prone to snapping. The chainsaw modification, designed by Professor Adam Fenix a year after Emergence, was inspired by Private Tai Kaliso of 26 RTI successfully using a chainsaw to kill a Locust drone.
While the Mk2 Lancer resembles the Mk1 externally, an almost complete redesign was necessary to accommodate the cutting chain and drive mechanism.
(From “Small Arms of the Coalition,” page 28.)
Recovered Cog Tags #5
Chapter 6: Hanging by a Thread
Location: Clear out the Locust from within the darkened lower deck area. Then wind through the shacks behind the turret and around the barriers. Step out onto the right-hand walkway on the edge of the bridge. Descend the ladder here to the catwalk suspended below the bridge. Follow the path around to the COG Tag. You can also pick up this COG Tag after you descend the ladder on the left-hand side of the bridge.
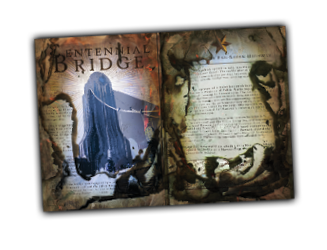 The Sights of Sera
Chapter 6: Hanging by a Thread
Location: Climb the ladders to the upper bridge deck one final time, but don’t head off to fight more Locust just yet! First, find this handy sightseeing guide in the other direction. Turn around to face the ladder you climbed, and walk to the left to find the collectible.
No journey through Hanover is complete without a trek across Centennial Bridge, the longest suspension bridge in Sera and one of Hanover’s most iconic and breathtaking landmarks.
A masterwork of structural engineering, the bridge’s most recognizable feature—four grand support pillars bearing the COG seal above intricately sculpted facades—is also the foundation of its incredible load capacity. Triple-wound cabling supports the bridge’s two eight-lane decks, which have never budged, despite seasons of high winds and dozens of earthquakes in the decades since the bridge was built.
But why cruise by at highway speeds when you can see the bridge at your own pace? Plan your trip around Hanover’s bustling annual festival (Bloom 24th to 26th), when the upper deck is closed to vehicles and pedestrians are free to walk the entire length of the bridge.
(From “The Sights of Sera,” page 162.)