
Gears of War 3 Guide Multiplayer Multiplayer Maps
Drydock
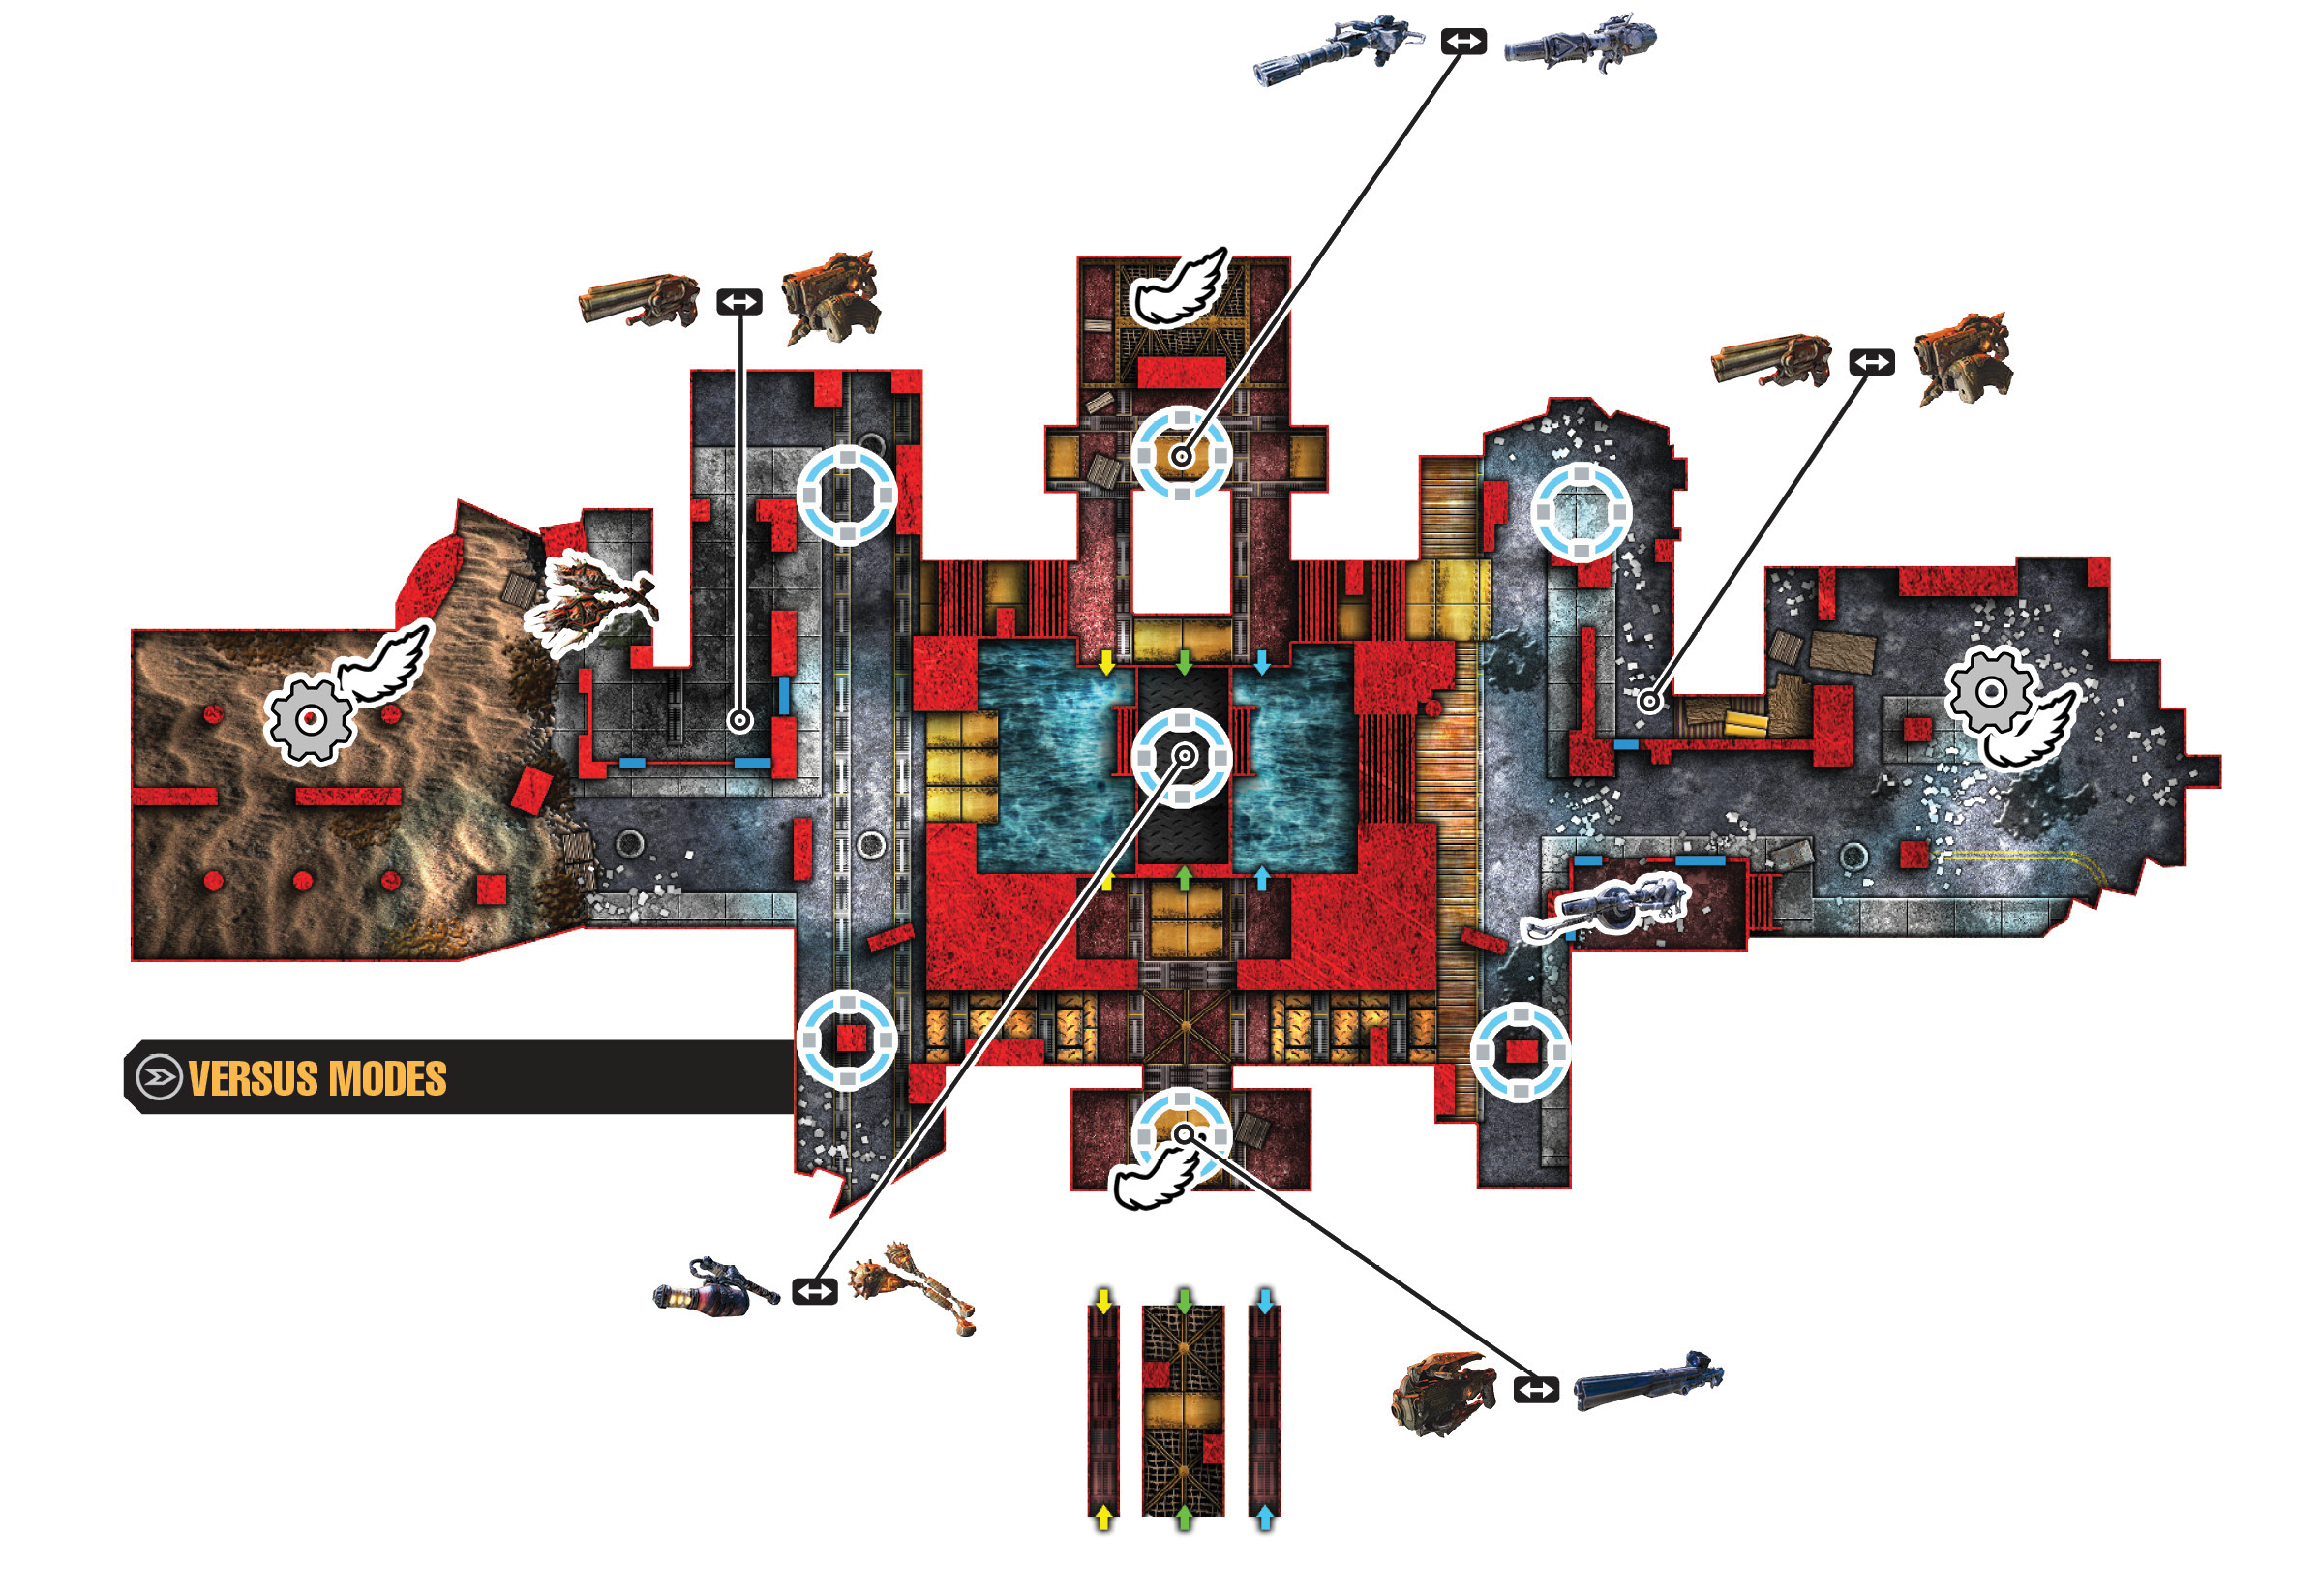
Versus
Set in a rusted-out shipyard, the remnants of a massive ship form this map’s center. This level’s central portion is elevated, making it a key location and a constant battleground. Two ramps lead up to the ship, a narrow one in the north, and a broader ramp in the south. Meanwhile, the central open area allows you to pass underneath the raised deck above. Both the north and south ends of the ship have power weapons. If you or your team are kicked off the ship, secondary weapons are available in both the east and west spawn areas.
If you aren’t controlling the center, you can try to bait enemies to come down into the side areas and face you. It’s possible to mantle out onto the I-beams that run north-south across the ship. By doing so on the opposite side from your enemy’s spawn, you can travel from one side to the other without exposing yourself to fire. This also hides your movement, which is useful if you’re trying to flank down one of the ramps.
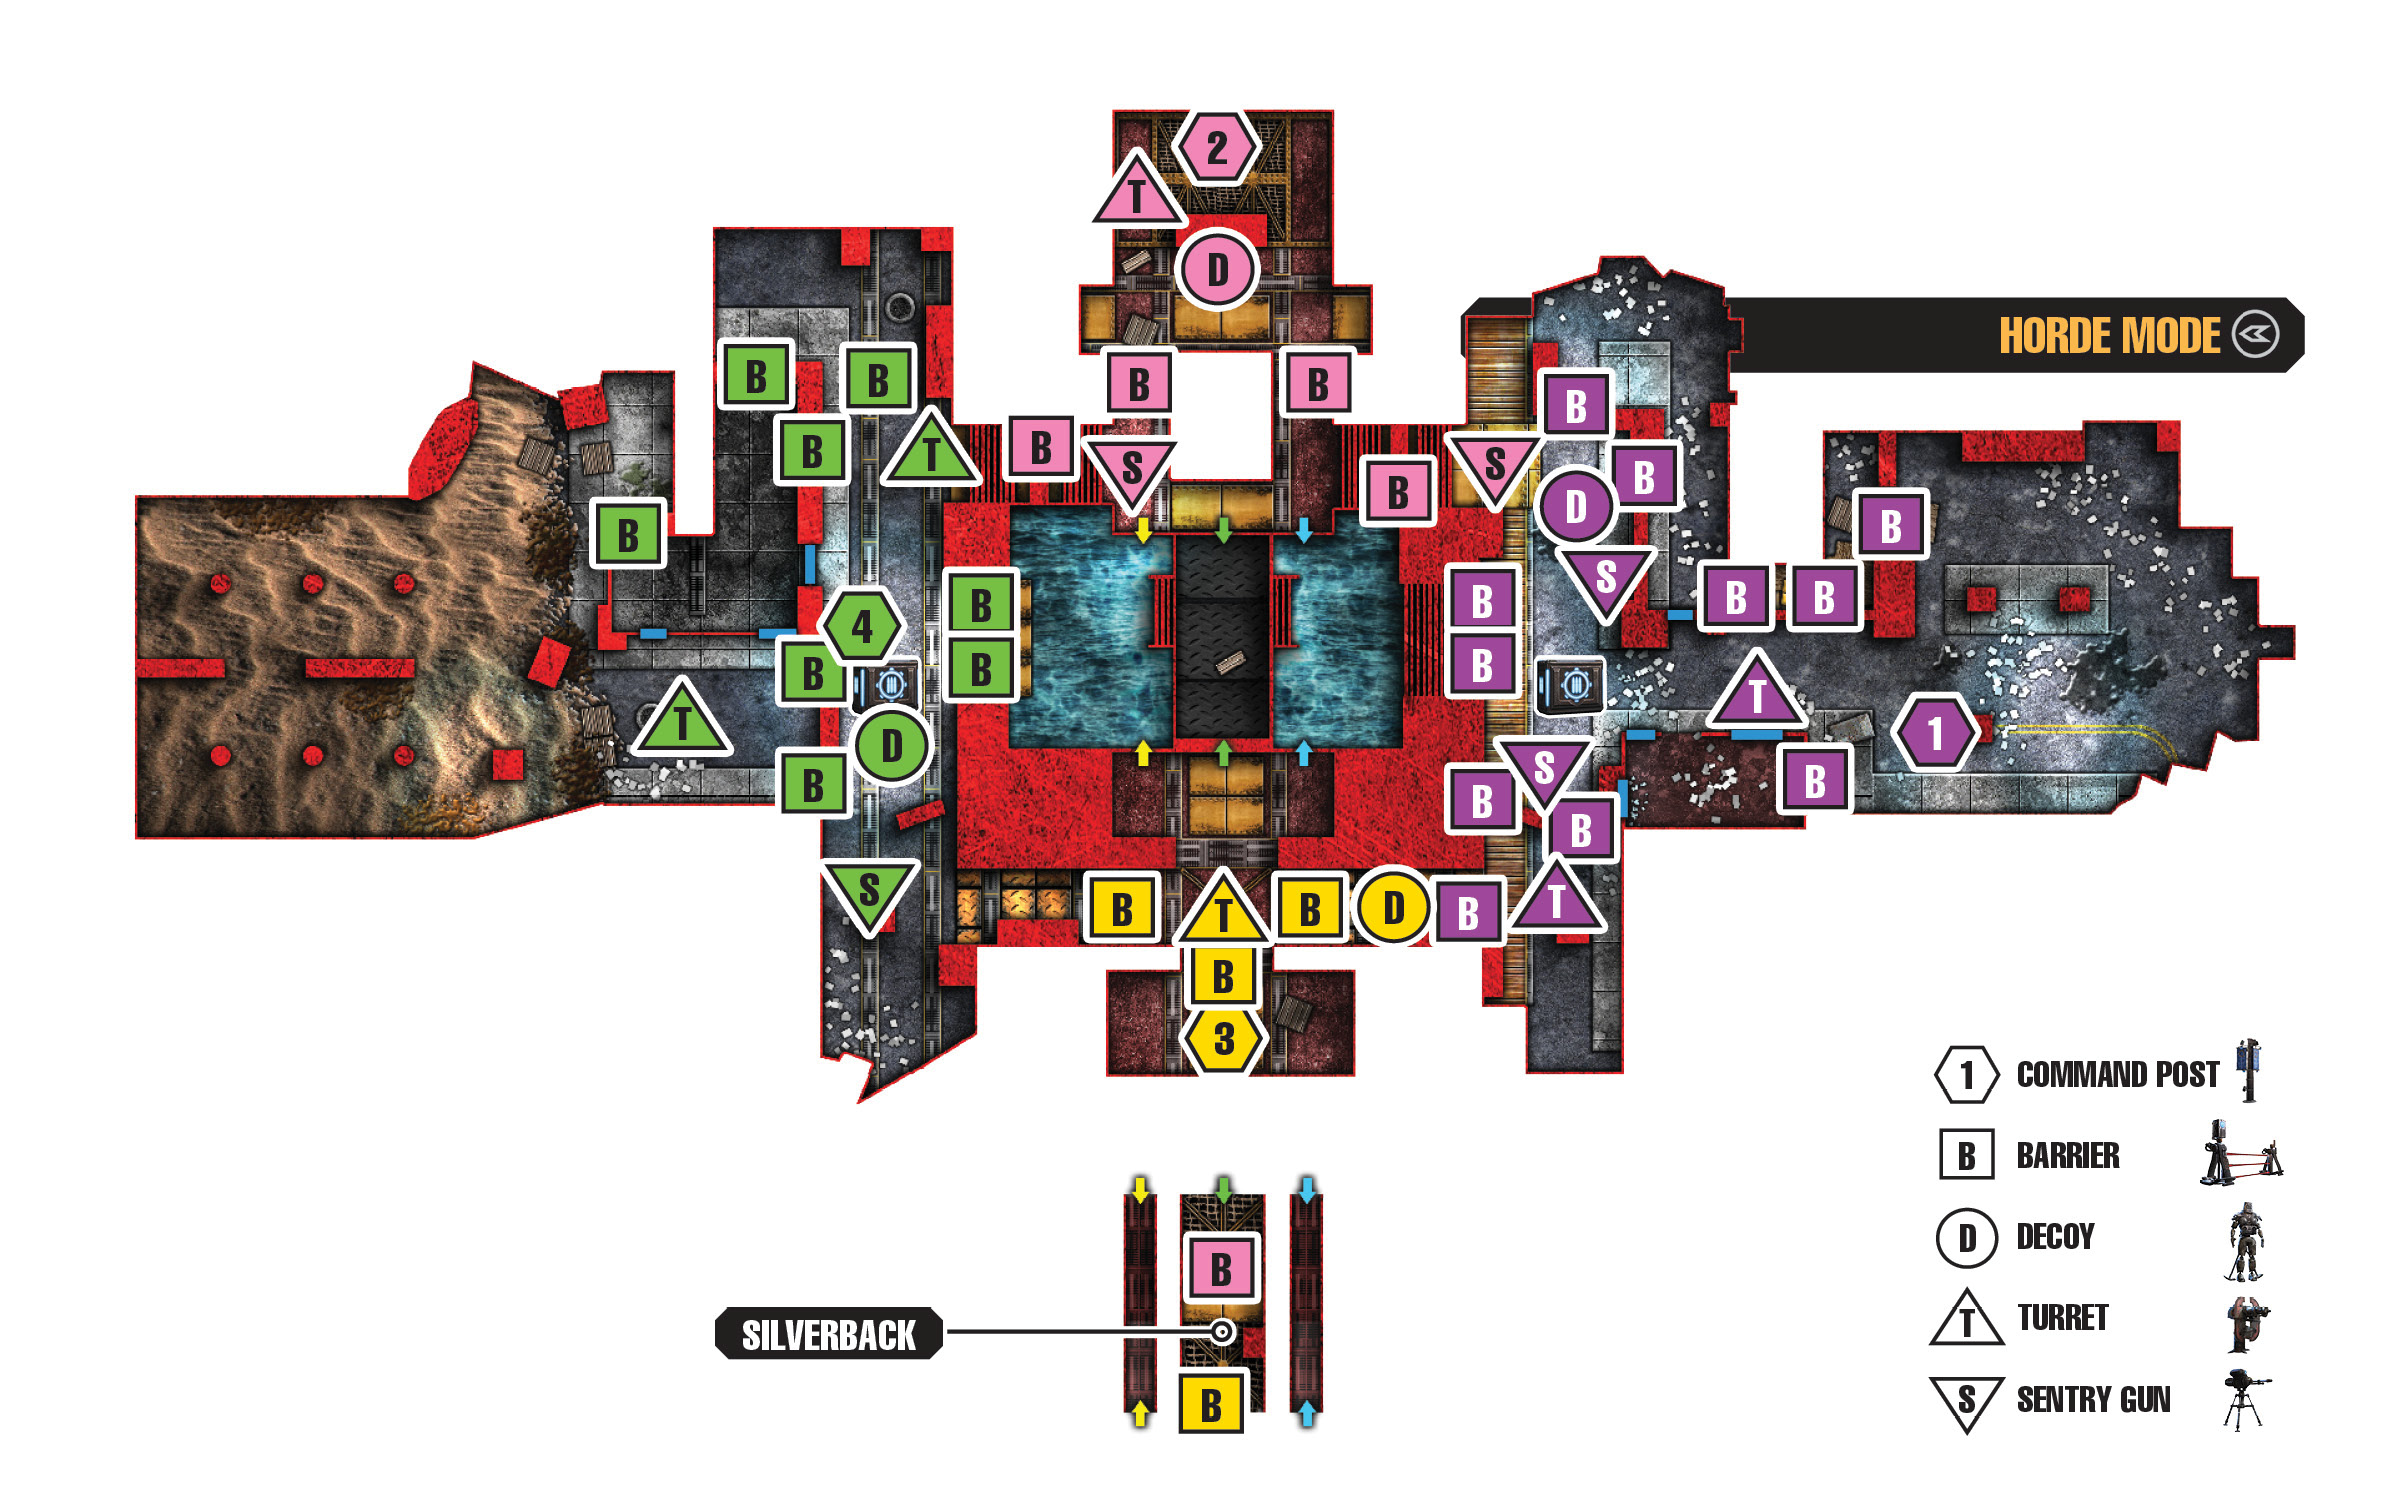
Horde
 Command Post East, Cargo Spawn
A southern turret and a northern decoy provide your front line defenses, while another turret back in the east serves as a fallback position. The two sentries near the middle of the street are mostly supplementary defense. They can help put fire on targets that the turret isn’t attacking. Keep one double team covering the turret and the southern ramp, while everyone else deals with the center and northern assaults, swinging south if it’s pressured.
 Command Post North, Banner
A very defensible position, the elevation, narrow chokepoints, and easy-to-use barriers make for easy defense. Two sentries are on the top of the narrow east and west ramps, and a turret protects the western side of the base itself. This can be quite effective if you keep the barriers in good repair.
This location’s downside is that, if you are overrun, getting out safely without losing the entire base to a single Mauler is problematic. Try to put out fires before they reach the base itself. You can use the narrow beam shortcuts to the south to cross and pick up weapons, or even use the other control point.
 Command Post South, Anchor
With an elevated position, a centrally located turret, a decoy, and well-placed walls, this is an excellent defensive position. The turret doesn’t have the raw offensive power of some other locations, but it does provide an excellent last-second defense against enemies attempting to reach the Command Post itself.
Station your forces on the centrally located catwalk so that you can fire down on the Locust as they approach from the east and west. With quick response time, you can down most of their forces before they get anywhere near the ramps. Be sure to communicate if someone needs to get back on the turret and protect one of the ramps from an attacker—the east side has a decoy to buy some time, but the west does not.
 Command Post West, Pier Spawn
Two turrets here provide coverage of both the north and south ramps, leaving the remaining players to cover the center approach and provide backup for the turrets. A single sentry to the south provides double coverage for the southern ramp approach.
Be wary of forces spawning behind you; they tend to attack the rear turret. There are quite a few walls here. Don’t upgrade the rear walls until the two blocking off the center path are upgraded.
Beast
The route through the center of the map is dangerous due to exposure. You must clear multiple barriers to make it through safely. Both the north and south ramps are tricky to approach. They give the COG forces elevation and good line of sight on the way up. Use a mix of distraction and direct assault to make the initial breakthrough. Maulers and Boomers are critical in later waves to penetrate the defenses.
Beware of Silverbacks out in the open on this level. They can tear your team to shreds if you leave them unopposed. Have a grenade from a Kantus or Savage Grenadier ready for them. In the worst case scenario, use multiple Savage Drones and simply pick it apart from a distance with your Retro Lancers.