
Heavy Weapons
- Heavy weapons can be carried in addition to the four weapons mapped to each of the slots in the player’s inventory.
- Heavy Weapons encumber the player substantially, affecting both movement speed and the ability to utilize cover fully.
- These weapons tend to be extremely powerful, but they cannot be reloaded, and only one can be used at a time per player.
- Heavy Weapons are typically available for a reason. Unlike the ubiquitous Lancer or Gnasher pick-ups, the presence of a Mulcher, Mortar, or Vulcan is a telltale indicator that a significant enemy presence is fast approaching. Grab that weapon!
Mulcher
Weapon Stats
| Magazine Size | Max Ammo | Rate of Fire | Reload Speed |
|---|---|---|---|
| N/A | 600 | 1200/M | N/A |
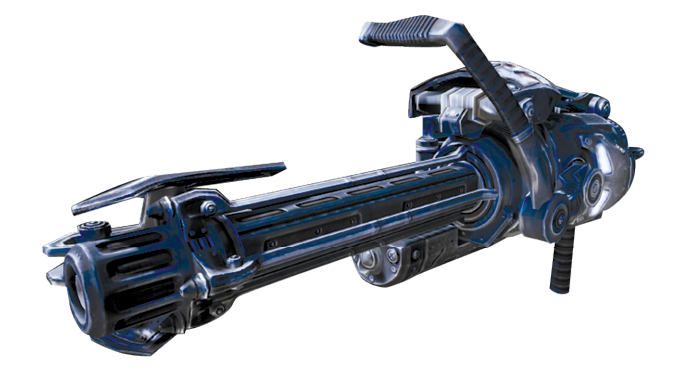
Perhaps the most aptly-named weapon on planet Sera, the Mulcher fires a ridiculous twelve hundred rounds per minute and reduces anything it hits to fertilizer in mere seconds. The Mulcher is one of the more commonly encountered heavy weapons in the campaign, largely due to the Grinders’ preference for this chaingun.
Using the Mulcher is straightforward. Though it takes a brief moment to wind up when you first squeeze the trigger, once it begins firing it unleashes a nonstop spray of bullets like a fire hose. The Mulcher can’t be reloaded, but it does require periodic cooling. The temperature gauge in the corner of the screen displays the weapon’s heat level. When the weapon overheats, a forced cool-down of roughly three seconds takes place. To accelerate the cool down period, Monitor the gauge and manually cool the weapon by holding the Reload button.
The Mulcher is most accurate when you plant it on the ground or atop a piece of low cover by holding the Weapon Aim button. However, you can also fire it from the hip while you walk. Reserve this for encounters with ample fodder pouring forth from a single location. Otherwise, it’s better to get into cover.
Damage Statistics
| Difficulty | Standard Reload | Active Reload |
|---|---|---|
| Casual | 154 | N/A |
| Normal | 123 | N/A |
| Hardcore | 100 | N/A |
| Insane | 77 | N/A |
The Mulcher cannot be reloaded, so Active Reload does not apply.
Field Notes
Long Range: Don’t use the Mulcher at long range except to offer cover fire for your squad. Though its bullets can reach faraway targets, the weapon’s accuracy deteriorates with range, and you’re unlikely to score enough hits to truly injure an enemy.
Medium Range: The Mulcher is very deadly at medium range. This is close enough to sink enough bullets into the target, thus overcoming the weapon’s inherent lack of accuracy. It’s also far enough to allow the user to maneuver in and out of cover and avoid being overrun.
Close Range: Only those who enjoy the thrill of gambling should take the Mulcher into close-range combat. There’s no denying the weapon’s ability to eviscerate anything that happens in front of its muzzle, but they don’t call it a heavy weapon for nothing. The Mulcher’s heft slows the player considerably, making it very easy for flanking enemies to issue a fatal attack. This isn’t a problem in narrow corridors where enemies are forced to attack from one direction, but it’s a huge risk in spacious areas.
Mortar
Weapon Stats
| Magazine Size | Max Ammo | Rate of Fire | Reload Speed |
|---|---|---|---|
| 1 | 12 | 45/M | very slow |
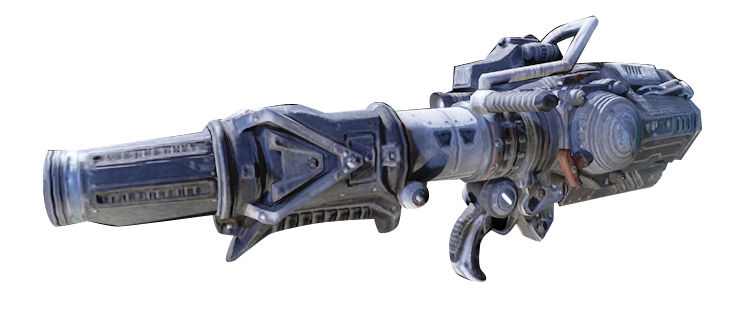
The Mortar is the premier long-distance weapon for handling large enemy groups. Fired from afar, the Mortar’s shell arcs high into the air and splits into ten separate bomblets that rain down on enemies across a wide area. The Mortar is perfect for eliminating foes that are well entrenched behind cover, provided they lack overhead protection.
The Mortar relies on you to master its shell’s trajectory. For starters, plant the weapon on the ground and tilt the Mortar’s tube forward or backward depending on whether the target is farther or nearer, respectively. This affects the trajectory’s initial angle, whether the shell follows a low and shallow path or a much steeper, higher one. This is especially important if you’re anywhere near overhead obstructions—you must angle the shot out from under them to avoid self-annihilation. Now hold the trigger long enough to set the power, which affects the distance the shell travels. The weapon’s rangefinder indicates the relative power; a hash mark shows the previously-fired setting so you can correct the trajectory from one shot to the next.
Damage Statistics
| Difficulty | Standard Reload | Active Reload |
|---|---|---|
| Casual | 1600 | 1920 |
| Normal | 1280 | 1536 |
| Hardcore | 1040 | 1248 |
| Insane | 800 | 960 |
Active Reload increases the damage dealt by 20%.
Field Notes
Long Range: The Mortar is a fine weapon to use against large enemy groups at long range, but don’t use it against individual enemies. The Mortar takes a long time to load and fire, and any enemy aware of its presence can easily dodge its shell. Don’t waste shells at this range unless it’s against a group of foes with few places to run.
Medium Range: This is where the Mortar truly shines. It’s easier to spot your targets and accurately adjust the trajectory from shell to shell. The only reason to hesitate using the Mortar at this range is if you face just a few fast-moving targets that can maneuver out of the Mortar’s blast radius.
Close Range: The Mortar is not designed for close-range combat. It’s difficult to fire at very short distance, and the resulting blast may envelop your position, inflicting significant casualties on your squad. Nevertheless, you can fire the Mortar from the hip as a last resort. This bowling ball-like projectile bounces at an awkward and unpredictable trajectory in the direction you fire it. It’s lethal, but not very reliable.
OneShot
Weapon Stats
| Magazine Size | Max Ammo | Rate of Fire | Reload Speed |
|---|---|---|---|
| 1 | 8 | 60/M | Slow |
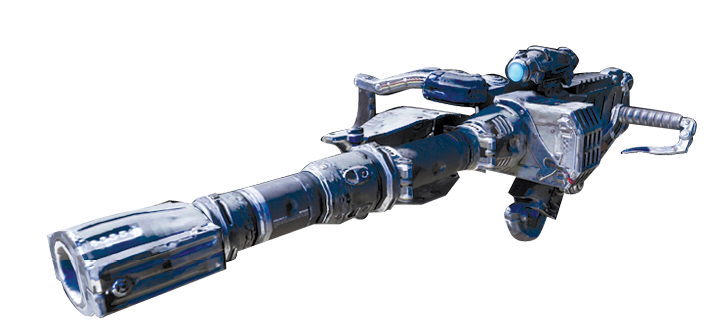
The OneShot is a new addition to the COG arsenal. Quite simply, it can kill nearly any Locust with a single shot. The OneShot can even decimate Reavers, Corpsers, and Bloodmounts with a single trigger squeeze. This immense power comes at a price—its optical scope narrows your field of view so significantly that you’re essentially blind to the action around you.
You cannot use the OneShot on the move—you must plant it either on low cover or on the ground. Hold the Weapon Aim button to look through the scope. The weapon emits an orange targeting laser to help pinpoint the high-velocity projectile’s placement. The weapon has perfect precision, but the aiming system’s sound and its highly visible laser warn the opposition that the OneShot is about to fire. Though the weapon can’t fire through solid cover, an Active-Reloaded OneShot can shoot straight through a Boomshield! Furthermore, the OneShot delivers lethal damage to any part of the body—there’s no need to aim for the head when even a direct hit to the leg or arm can be deadly!
Damage Statistics
| Difficulty | Standard Reload | Active Reload |
|---|---|---|
| Casual | 11000 | 13200 |
| Normal | 8800 | 10560 |
| Hardcore | 7150 | 8580 |
| Insane | 5500 | 6600 |
Active Reload increases the damage dealt by 20% and shoots through Boomshields.
Field Notes
Long Range: It’s best to use the OneShot at long range, where enemy movement doesn’t require as much panning while you aim. It’s also much easier to spot your target at this range with the immensely powerful scope. Precision doesn’t diminish with range; just aim the laser and squeeze the trigger as soon as you acquire your target.
Medium Range: You can use the OneShot at medium range, but it’s risky. The scope blocks much of your peripheral vision, and fast-moving enemies are much harder to track with the weapon at this range. Lastly, and perhaps most importantly, a zigzagging enemy can easily close on your position, putting you at significant risk. Drop the OneShot until you dispatch the nearer enemies through other means.
Close Range: The OneShot is an incredible liability at close range. You’re unlikely to get off a shot before you’re blasted to pieces, and the weapon’s bulk hinders your maneuverability. Put down the weapon before it comes to this!
Vulcan
Weapon Stats
| Magazine Size | Max Ammo | Rate of Fire | Reload Speed |
|---|---|---|---|
| 80 | 640 | 1200 | Slow |
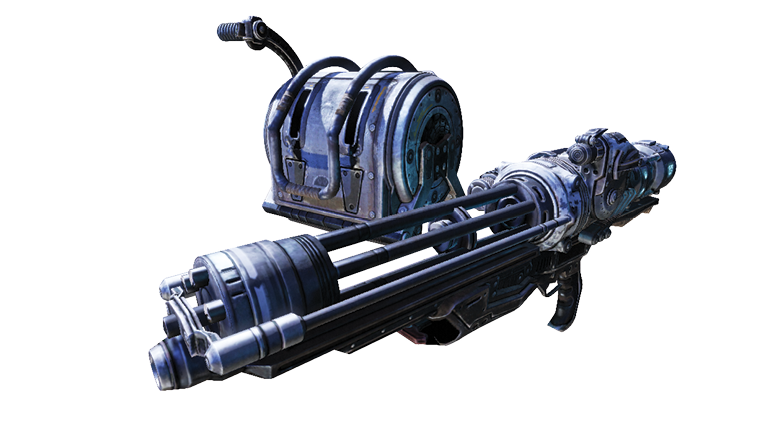
The Vulcan is another new edition to the COG arsenal. This extremely heavy and absurdly powerful chaingun shoots at an unprecedented rate of fire. In fact, it consumes so much ammo that it actually comes with a separate Vulcan ammo box, which a separate person must carry if the Vulcan’s user wishes to relocate to a new position. The Vulcan represents the latest in crowd control and can cut an entire Locust battalion to pieces in mere seconds.
You’ll never forget your first time using the Vulcan. Between the whirr of the motor that feeds the ammo belt, the continuous buzz of bullets escaping the gun’s half-dozen barrels, and the instant evisceration of your target, it’s an absolute feast for the senses. But there are drawbacks to using this heavy weapon. For starters, you can’t get into low cover with the Vulcan—one can use it only while standing. Secondly, the weapon is essentially tethered to the Vulcan ammo box. One can use it solo by repeatedly pressing the Reload button to feed the weapon manually, but it’s more effective when one has a partner. The player carrying the Vulcan ammo box can walk with the gun carrier, feeding a steady supply of bullets to the weapon.
Damage Statistics
| Difficulty | Standard Reload | Active Reload |
|---|---|---|
| Casual | 420 | N/A |
| Normal | 336 | N/A |
| Hardcore | 273 | N/A |
| Insane | 210 | N/A |
Active Reload does not apply to the Vulcan.
Field Notes
Long Range: The Vulcan’s accuracy over long range leaves a lot to be desired. Though it does a fine job of scaring the enemy back into cover, you shouldn’t expect to hit much.
Medium Range: As with the Mulcher, this is where the Vulcan becomes more effective. The Vulcan fires at such a fast rate that it can effectively overcome its own shortcomings with regard to accuracy. Just keep the weapon loaded and open fire. Anything within twenty yards will have a hard time surviving the assault.
Close Range: This is not for the squeamish. Quite simply, anything standing in front of the Vulcan at close range is reduced to giblets in no time. Of course, there is a brief windup period while the Vulcan spools up to speed. Be sure to keep the Vulcan firing if you expect close-range enemies—otherwise, you may find yourself overrun before the gun spins fast enough to fire.
Cleaver
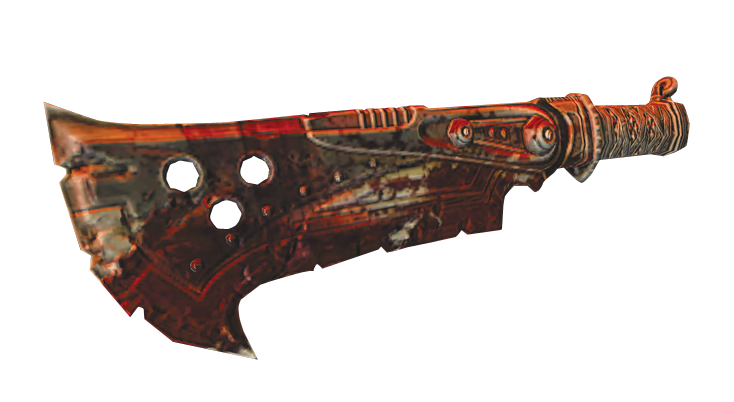
Weapon Stats
| Magazine Size | Max Ammo | Rate of Fire | Reload Speed |
|---|---|---|---|
| N/A | 12 | N/A | N/A |
The Cleaver is a fun but not very practical weapon. Wielded by Savage Therons and Butchers, the Cleaver is the game’s singular melee weapon. Naturally, it fires no projectiles, so it’s useful only in extreme close-quarters situations. Avoid using it against armed foes. Unlike other heavy weapons, you can still Roadie Run with the Cleaver—sort of—though it drags behind, slowing progress. The Cleaver swings in a slow, wide path capable of inflicting lethal damage to nearly all lesser Locust.
Put Wretches or Formers on the chopping block, but don’t bother trying it against gun-toting Locust unless you’re playing on a lower difficulty or a squad of friends backs you up in co-op mode. The Cleaver breaks after twelve hits.
Damage Statistics
| Difficulty | Standard Reload | Active Reload |
|---|---|---|
| Casual | 1000 | N/A |
| Normal | 800 | N/A |
| Hardcore | 650 | N/A |
| Insane | 500 | N/A |
Active Reload increases the damage dealt by roughly 30%.
Field Notes
Long Range: The Cleaver is a melee weapon and has no ranged capabilities.
Medium Range: The Cleaver is a melee weapon and has no ranged capabilities.
Close Range: This is the only range at which you can use the Cleaver effectively—or even not so effectively. The Cleaver can hit any enemy within arm’s reach, but it is slow to swing and leaves you defenseless from all sides and distances. You cannot use the Cleaver from behind cover. It’s best to use this implement against other melee combatants, such as a pack of Formers or Wretches. Against any other enemy, you’re quite literally bringing a knife into a gunfight—and that typically doesn’t end well.
Boomshield
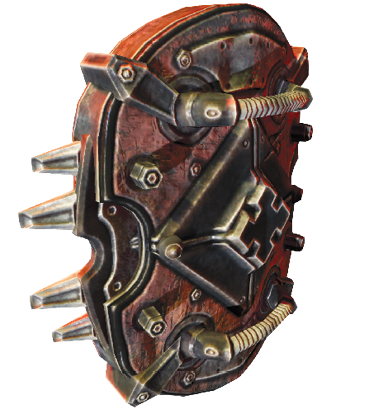
Weapon Stats
| Magazine Size | Max Ammo | Rate of Fire | Reload Speed |
|---|---|---|---|
| N/A | N/A | N/A | N/A |
The problem with cover is that you can never take it with you—that is, unless you have the Boomshield. This heavy-duty shield isn’t so much a weapon as it is a handheld piece of armor that deflects nearly all frontal fire. In fact, only a shot from an Active-Reloaded OneShot can penetrate the Boomshield.
When you carry it, your character automatically switches to a pistol-class weapon. All other weapons are two-handed, and switching to one automatically drops the Boomshield. You can move around and even Roadie Run without deploying the Boomshield, but this negates its usefulness. Hold the Aim Weapon button to raise the Boomshield in front you. This slows your movement speed dramatically, but it almost completely conceals you behind the Boomshield’s warm and cozy protection. The Boomshield can withstand most frontal assaults, but it leaves you incredibly vulnerable to flanking attacks.
You can also plant the Boomshield into the ground as a static piece of cover. Hold the Aim Weapon button and press the Roadie Run button to plant it. Now players can take cover behind it, switch to a rifle or power weapon, and move independently of the Boomshield. This is particularly useful when you need to block the Locust’s advance, although some Locust can kick over the Boomshield to continue their pursuit.
Damage Statistics
| Difficulty | Standard Reload | Active Reload |
|---|---|---|
| Casual | N/A | N/A |
| Normal | N/A | N/A |
| Hardcore | N/A | N/A |
| Insane | N/A | N/A |
Field Notes
Long Range: The Boomshield is a defensive weapon with no ranged capabilities.
Medium Range: The Boomshield is a defensive weapon with no ranged capabilities.
Close Range: You can’t use the Boomshield to melee attack an enemy, aside from performing an execution attack. However, it still plays a big role in close-range combat. Hold the Aim Weapon button to keep the Boomshield deployed while you close on your target. Continue to fire the pistol to soften the enemy, and then swing away to deliver a fatal pistol whip once you’re in range. This aggressive frontal push toward the enemy is every bit as effective as it is intimidating—as long as the enemy doesn’t target your feet or fire some explosives to your side!