
Gears of War 3 Guide Multiplayer Multiplayer Maps
Checkout
Versus
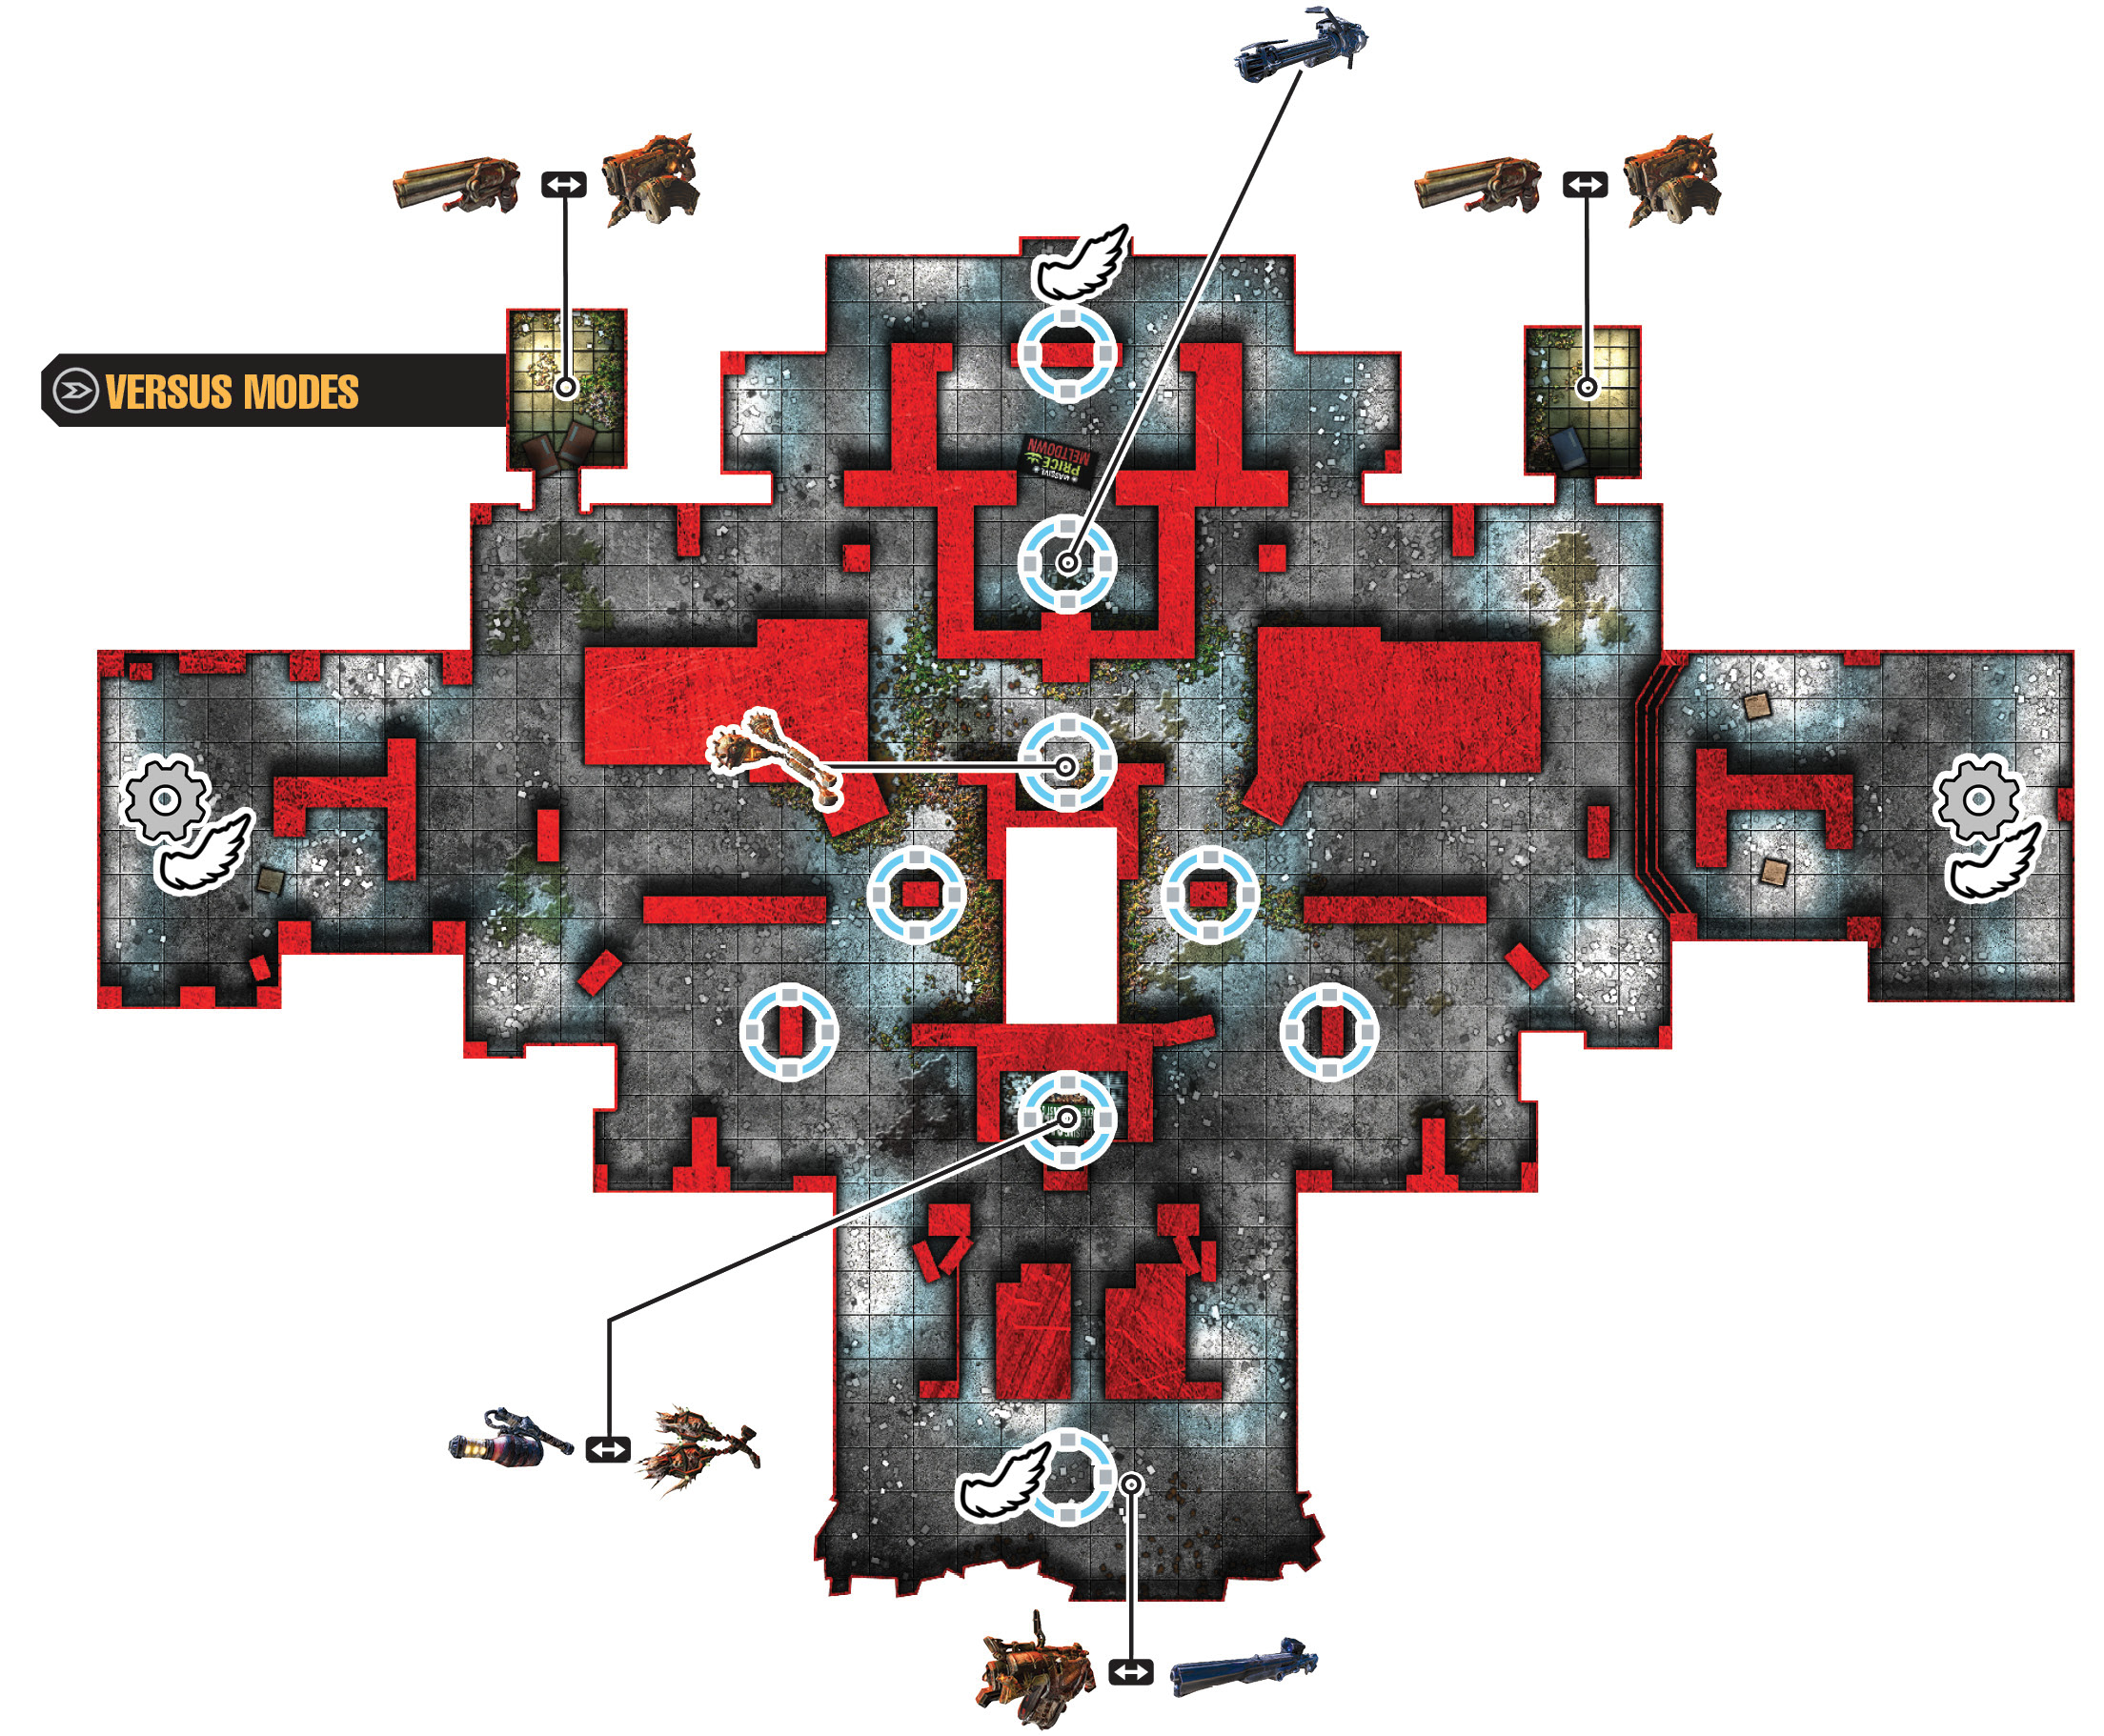
The remains of an old supermarket are the stage for battles on this map. Long aisles on the map’s east and west sides create linear lines of fire. The center is split into a northern photo booth and the southern checkout lanes.
The northern photo booth area sees a lot of action. Be very careful about spending too much time in that area unsupported, as it comes under constant attack. The southern checkout area has a raised platform with excellent line of sight over the map’s center. Because a power weapon spawns near the platform, controlling it is important, but be aware that you are a priority target if you try to hold the area.
Horde
 Command Post South, Checkout
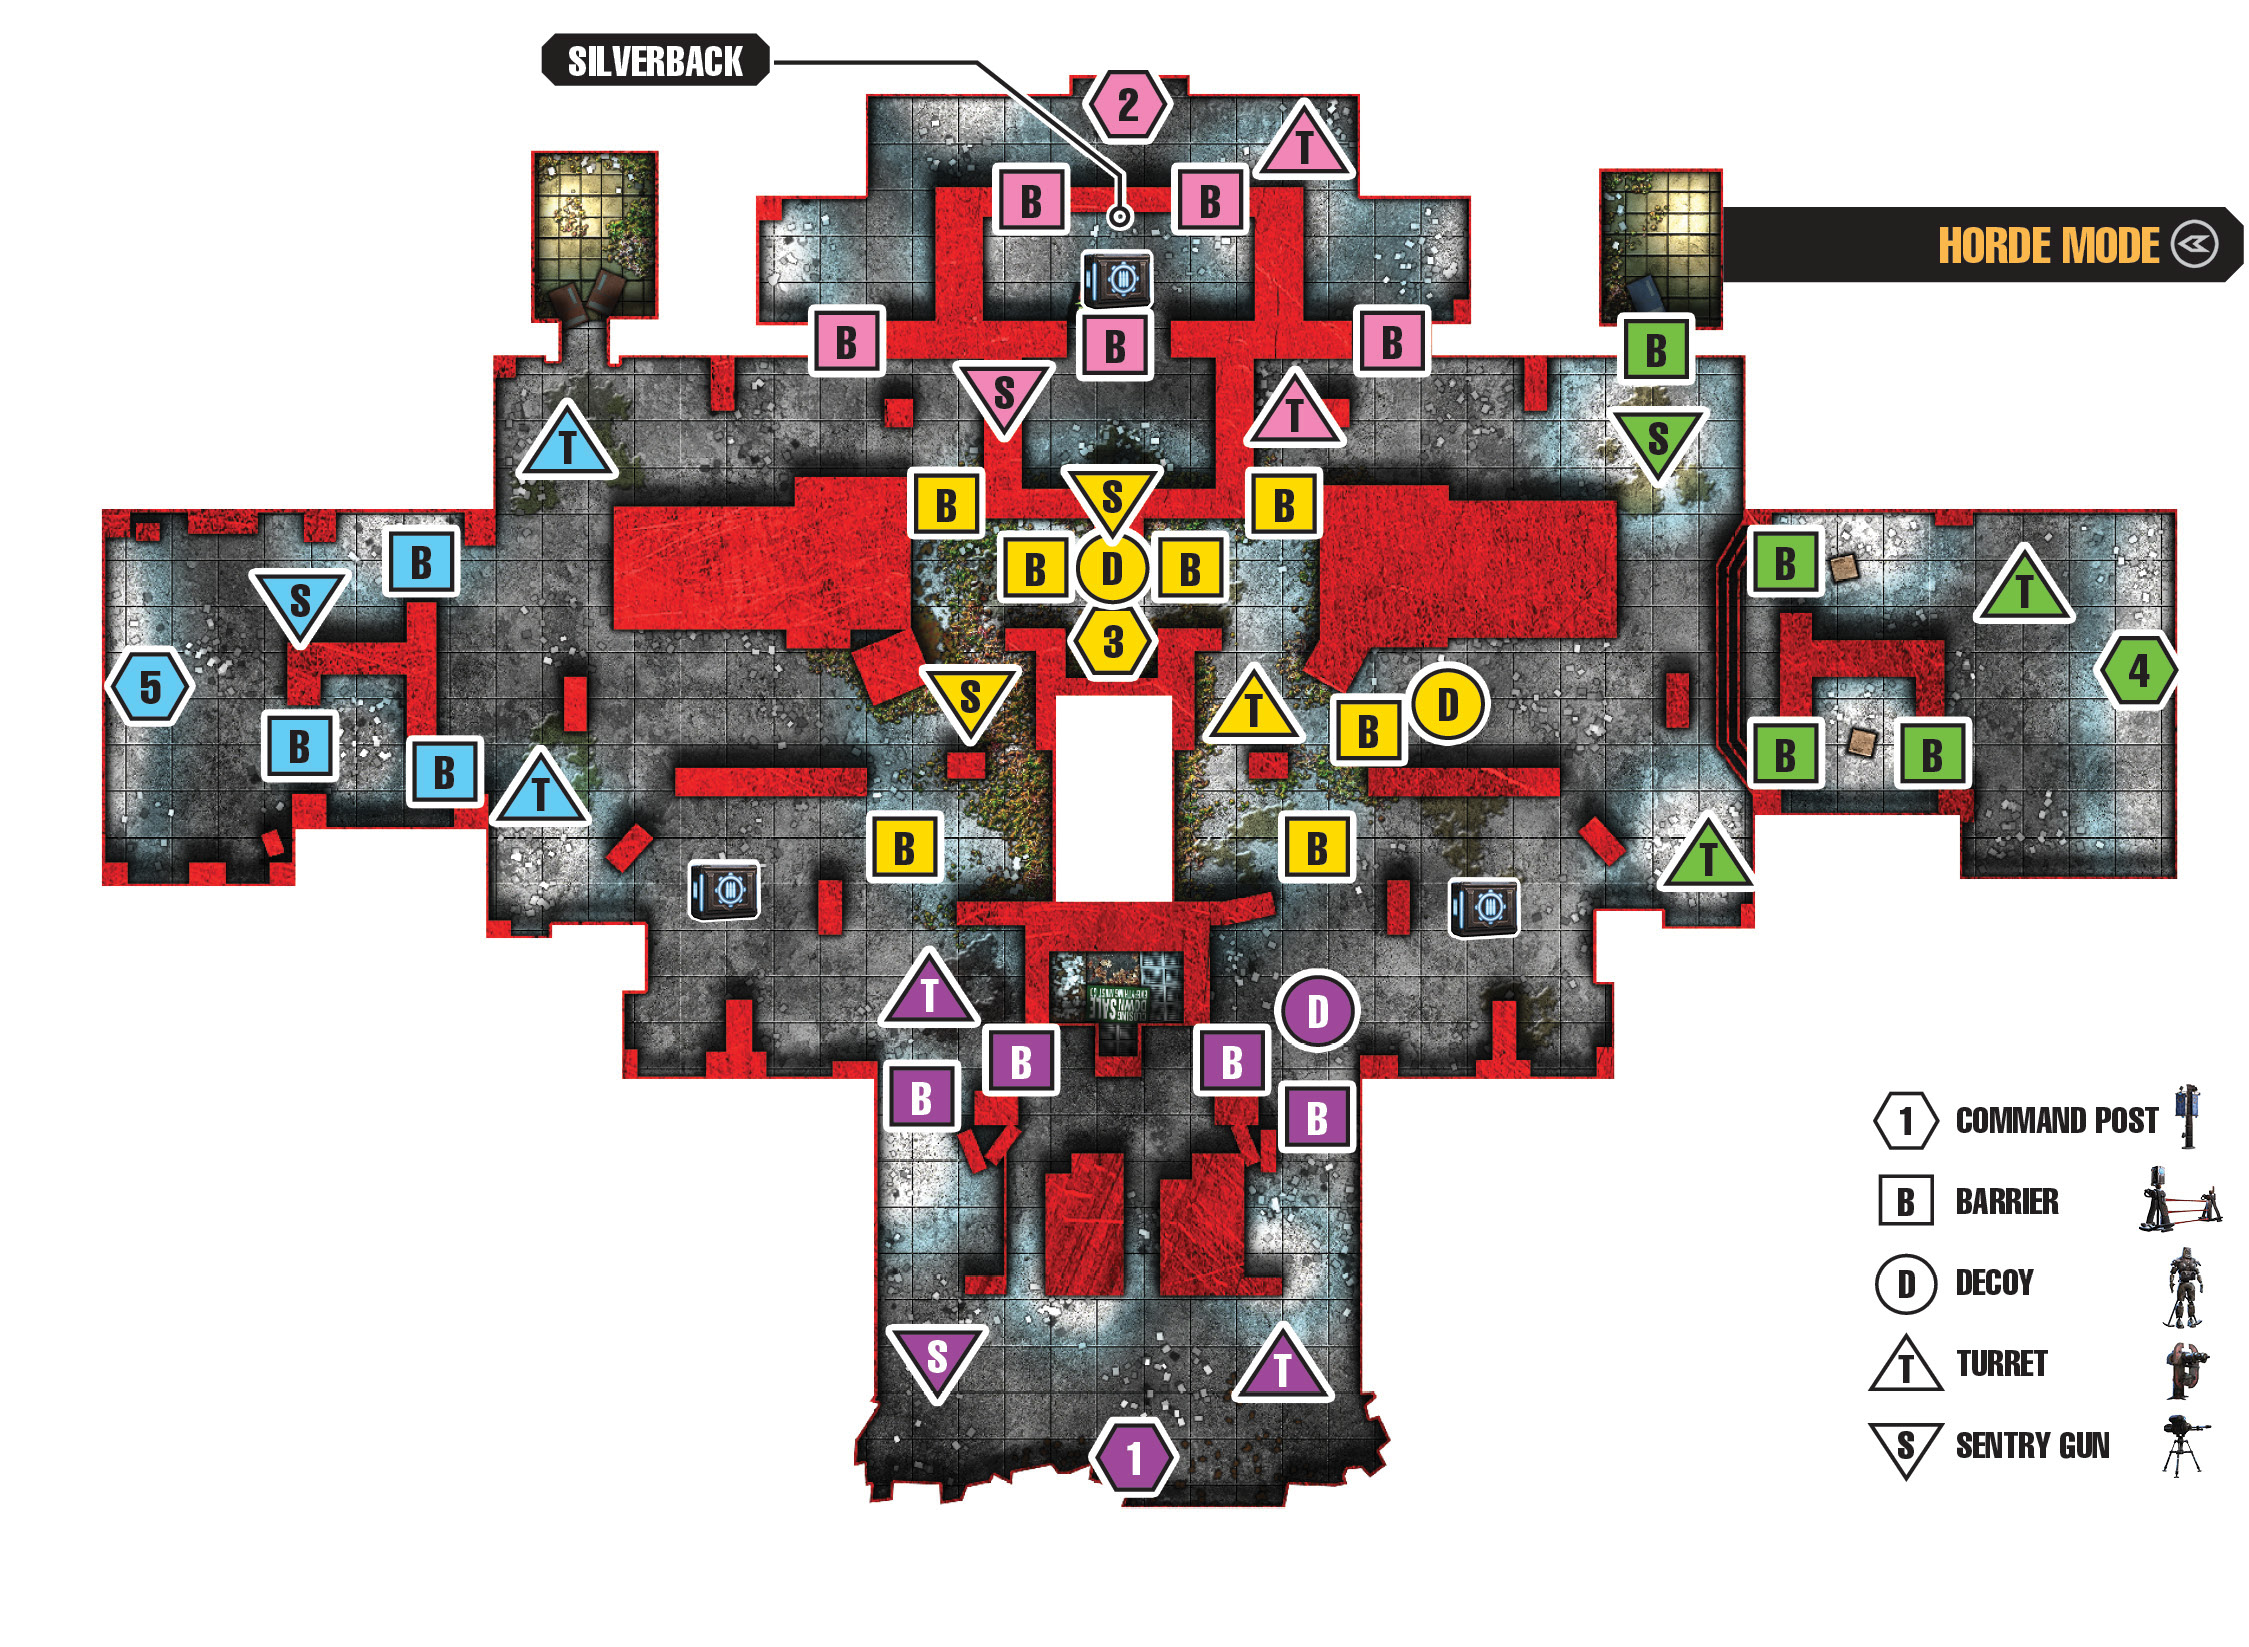
This position is all about controlling the grenade platform and fending off the assault from the east, west, and north. The western side has a turret to help hold the lines, while the east has a decoy to aid with distracting incoming enemies. If the enemy breaks through, a turret and a sentry are back in the ‘base’ behind the checkout lines. However, getting trapped in that area is extremely dangerous, so consider retreating to the east or west instead, if necessary.
The grenade platform is a strong defensive position, but you need to have teammates cover the east side, as the turret on the west makes the eastern side is more vulnerable.
 Command Post North, Photo Center
The east side has a pair of turrets, the west side a pair of sentries. The outer western sentry has good line of sight to most enemies in the west and southwest. The eastern turret, despite its off-center position, is still useful for covering the midfield and even parts of the western approach to the counter. Be wary of getting overwhelmed on the western side, as the turret can usually fend off most enemies on the east.
You should deal with Tickers and Savage Boomers swiftly, as the Digger is very dangerous to your team in this Command Post’s cramped confines. A few sets of walls and an inner sentry and turret can act as a fallback if the outer defenses are compromised. But be ready to retreat from this Command Post entirely if necessary, as there is very little room to evade in the interior.
 Command Post Center
We don’t recommend this Command Post unless you’re looking for a very tough fight. Your team is vulnerable to assault from all sides, and forming any sort of concentrated defense is difficult. Rather than holding this point exclusively, you can instead use it as assistance for the northern point, employing the extra fortifications to help in holding that position.
 Command Post East, Home Goods Spawn
A turret in the southeast is matched by the sentry in the northeast. Four walls are here, one in the north guarding the pistol bathroom: not a particularly good defensive position. The other three guard a fallback turret next to the Command Post flag in the far east.
Take advantage of the well-placed southern turret, and upgrade it fully. Be sure to repair it each round. Then upgrade the northern sentry before you worry about the walls or the eastern fallback turret. Use the Hammerburst to take advantage of the long sightlines here, picking off enemies before they can get close. Be sure to have an extra player in the north aisle, as the southern turret does not have line of sight to the photo booth area.
 Command Post West, Pharmacy Spawn
This post is largely a mirror of the eastern point, with a notable exception: it’s better! The two turrets here are positioned perfectly on the spawn’s north and south sides, with the sentry gun back inside the base. Consequently, you can reap a bloody harvest on incoming Horde forces with the well-positioned turrets. Just be prepared to retreat from your base toward the checkout lanes or photo booth spawn if you are overrun.
Beast
Barriers block the east and west spawns. Use a Naked Ticker to clear the path immediately. Turrets on this level are extremely dangerous due to long lines of sight. Shoot them from a distance with Savage Drones in early rounds. Or use a Kantus Ink Grenade or Mauler to block for you.
Thanks to the chokepoints created in the shopping lanes, the Mauler/Kantus combo is especially powerful here. You can block almost all incoming fire while your team moves up behind the Boomshield blocker. Wild Tickers can chew on defenses easily, as the shelves provide good cover for you. The same is true for the Serapede later; it can take advantage of the high cover to get close to the COG base.