
Elder Scrolls V: Skyrim Guide The Atlas Solstheim: Southern Ash Lands
Raven Rock
Related Quests
Dragonborn Main Quest: Dragonborn
Solstheim Side Quest: The Final Descent
Solstheim Side Quest: March of the Dead
Solstheim Side Quest: Reluctant Steward
Solstheim Side Quest: Served Cold
Solstheim Side Quest: The Great Solstheim Strongbox Hunt*
Solstheim Regional Activity: Take Your Pick*
Solstheim Regional Activity: Emberbrand Embargo*
Solstheim Regional Activity: Jelly from Netch to Fetch*
Solstheim Regional Activity: Tomb Eradicator*
Solstheim Regional Activity: Sadri’s Sujamma*
Solstheim Regional Activity: All Are Welcome*
Solstheim Regional Activity: Tome Raider*
Solstheim Regional Activity: Thievery and the Karstaag Connection*
Habitation: Solstheim Capital
Services
Follower: Teldryn Sero [DB3/7]
Trader (Apothecary): Milore Ienth [DB2/16]
Trader (Blacksmith): Glover Mallory [DB6/16]
Trader (Ferryman): Gjalund Salt-Sage [DB7/16]
Trader (Food Vendor): Garyn Ienth [DB8/16]
Trader (General Goods): Fethis Alor [DB9/16]
Trader (Innkeeper): Geldis Sadri [DB13/16]
Trainer (Alchemy: Expert): Milore Ienth [DB1/1]
Trainer (Restoration: Journeyman): Aphia Velothi [DB1/1]
Special Area
Black Book: The Winds of Change
Shrine of Azura [DB1/1]
Shrine of Boethiah [DB1/1]
Shrine of Mephala [DB1/1]
Word Wall: Dragon Aspect [DB2/3]
Crafting
Alchemy Lab
Arcane Enchanter
Blacksmith’s forge
Cooking pot
Grindstone
Smelter
Tanning rack
Workbench
Wood chopping block
Dangers
Magic caster trap
Swinging blade trap
Puzzle
Runic Door of Bloodskal
Collectibles
East Empire Strongbox [Expert] [DB15/33]
East Empire Strongbox [Expert] [DB16/33]
East Empire Strongbox [Expert] [DB17/33]
East Empire Strongbox [Expert] [DB18/33]
East Empire Strongbox [Expert] [DB19/33]
East Empire Strongbox [Expert] [DB20/33]
East Empire Strongbox [Expert] [DB21/33]
East Empire Strongbox [Expert] [DB22/33]
East Empire Strongbox [Expert] [DB23/33]
East Empire Strongbox [Expert] [DB24/33]
Unique Item: Blackguard’s Armor [DB13/31]
Unique Item: Blackguard’s Boots [DB14/31]
Unique Item: Blackguard’s Gloves [DB15/31]
Unique Item: Blackguard’s Hood [DB16/31]
Unique Item: Exquisite Sapphire [DB17/31]
Unique Item: Zahkriisos [DB19/31]
Unique Weapon: Bloodskal Blade [DB4/11]
Miscellaneous
Area is locked
Chest
Potions aplenty
Loose gear
Lots o’ gold
 Lore: Settlement Overview
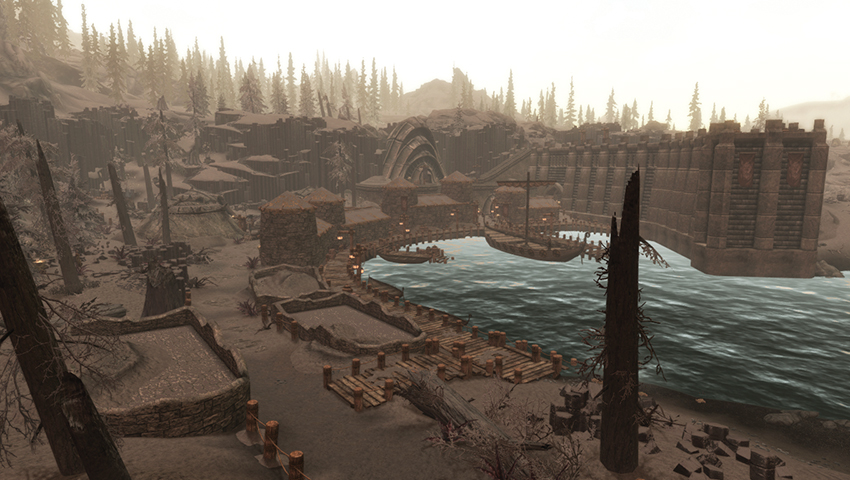
Raven Rock is a settlement located in the remains of the Hirstaang Forest. It is situated strategically in a small cove on the southern end of Solstheim. In the town’s glory days, a pair of large docks jutted out into the cove, which provided access to the cargo ships the East Empire Company needed to ship ebony out and bring supplies into the colony. Now, only a single, rickety dock remains. The eastern end of the city is dominated by the Bulwark, a massive stone wall once used to protect the town from relentless marauders and indigenous creatures. A long, tall cliff encompasses the northern side of the town, sheltering it from Solstheim’s harsh conditions. Ever since the Red Mountain’s eruption, the once lush pine forest has been transformed into a wasteland. The Shield Wall now serves as a different kind of barrier...protecting its inhabitants from ash storms. Over the years, the ash has formed large dunes against the wall, obscuring most of the stonework.
Lore: A History of Raven Rock
During the year 3E 427, the colony of Raven Rock was established by the East Empire Company in response to a rich ebony mine discovered on the southern tip of Solstheim. Five years later, the town was a bustling throng with over 30 inhabitants, all of whom depended on the mine for their livelihood. Ebony was shipped by the boatload to the mainland. Raven Rock remained largely untouched during the Oblivion crisis, but a few mining families left anyway, fearing that their town might be the next to fall at the hands of Mehrunes Dagon’s forces.
After the destruction of Ald’ruhn in the early Fourth Era, House Redoran became divided. Brara Morvayn, one of the six Redoran Council members, led a small group of Dark Elves to Raven Rock. After striking a deal with the East Empire Company (and some hefty payments), the Dark Elves were allowed to settle in the colony provided that they worked in the mines and kept the best interests of the East Empire Company at heart. But in the fourth year, Raven Rock was attacked by Rieklings. The Factor of Raven Rock and six miners were slain in the assault. Brara and her men fought off the Rieklings and prevented the entire town from being overrun. The East Empire Company was grateful for Brara’s assistance and named her the new Factor of Raven Rock.
One year later, in 4E 5, the explosion of Red Mountain sent a shock wave cutting across most of Solstheim. The town suffered damage from the blast, and the southern portion of the island was buried under the ash. A second boatload of refugees arrived in Raven Rock, and Brara immediately took them in, offering food, protection, and shelter in exchange for their assistance in the mines. By 4E 7, ash from the wastes made life exceedingly difficult in Raven Rock. In order to protect the town from the ash storms and the massive ash drifts it left behind, Brara had the miners build a mighty wall on the eastern side of the town. The construction took almost a year, and the people of Raven Rock took to calling it “the Bulwark.”
By 4E 16, Solstheim passed into the hands of the Dunmer people. The East Empire Company relinquished its rights to Raven Rock but negotiated a deal with Brara Morvayn to continue trading ebony ore for supplies and gold. Most of the Imperial population left Solstheim for good. Brara continued to welcome the Dunmer that elected to settle on Solstheim. Some chose to stay in Raven Rock; others began a nomadic life in the ash wastes. After almost 50 years of prosperity, in the year 4E 65, Brara Morvayn succumbed to old age and died. Her son, Lleril Morvayn, took her place.
Thirty years later, an attempt was made on Lleril Morvayn’s life. The culprit was captured and identified himself as Vilur Ulen of House Hlaalu. The Redoran Guard investigated and discovered that Vilur had been organizing a coup in an attempt to wrest control of the colony. Vilur and his conspirators were executed and the coup quelled.
By 4E 130, several improvements were made to the Bulwark to strengthen it. Over time, the ash dunes piling up on the outer side of the curtain wall placed tremendous pressure on the structure. Lleril Morvayn spent a good deal of what was left of his fortune bringing in builders from the mainland to help permanently reinforce the wall.
In 4E 150, a small Argonian strike force landed at Raven Rock. Lleril Morvayn was there with his Redoran Guard to repel them. Fortunately, Lleril was able to speak to the Argonian commander and convince him to stand down. This moment is remembered quite fondly by most of the citizens of Raven Rock, who admire their leader and consider him their savior.
By 4E 170, the ebony mines under Raven Rock had begun to dry up. A few of the miners and their families left for Skyrim. Trade with the mainland slowed to a trickle. Eleven years later, the ebony mines were fully exhausted. The mining operations fully shut down, and the town shrunk in size, leaving more abandoned houses and buildings. The town turned to hunting and fishing to sustain itself.
At present, Lleril Morvayn is still the de facto ruler of Raven Rock. His meager Redoran Guard maintains order within the town and the surrounding area, keeping Raven Rock’s residents safe and in line. If even so much as a rumor of dissent reaches Lleril’s ears, he has it quashed immediately. He’s well aware that there may be a few Hlaalu loyalists still present among the population that would see him killed. He keeps his distance from the Nords in the Skaal Village, and in turn, they leave him alone as well, each having their own issues to deal with.
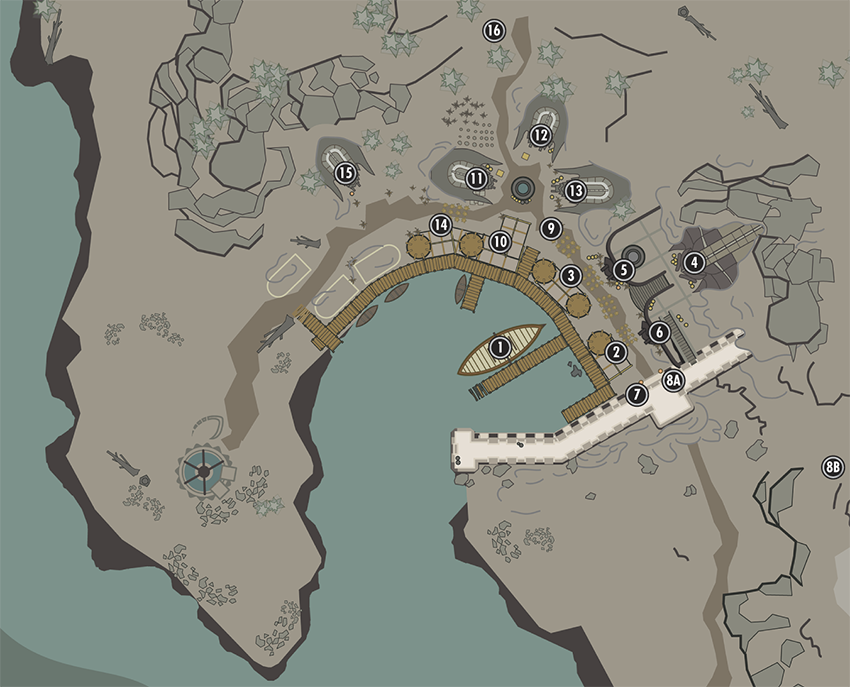
Important Areas of Interest
1. Raven Rock Docks and Northern Maiden
Gjalund Salt-Sage
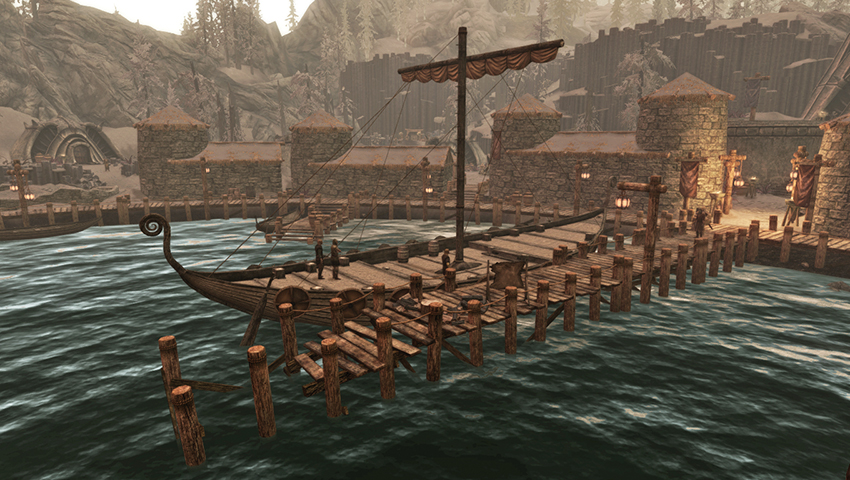
Gjalund’s surname is born from his love of the sea. He’s the proud captain of the Northern Maiden, one of Raven Rock’s only lifelines to the mainland, and commands a great deal of respect. Gjalund’s passion for the sea is evidenced by his commitment to his ship, which he keeps in fine working order. Ferrying individuals and supplies to and from Windhelm has kept him occupied for a better part of the last 20 years, and he insists he’ll keep doing it until he dies.
Lygrleid
Sogrlaf
The docks of Raven Rock, once bustling with activity, are long overgrown, rotten, and barely standing. Only one ship, the Northern Maiden, makes Raven Rock its port. The first time you visit Raven Rock, you arrive here and are met by Second Councilor Adril Arano, who recommends you abide by all local laws. The slightly ragged banners on the docks bear the mark of the Dunmer House Redoran. Expect a few guards wandering these docks. Check under the dock for an East Empire Strongbox [Expert].
- Tanning Rack
- East Empire Strongbox [Expert] [DB15/33]
- East Empire Pendant
- Trader (Ferryman): Gjalund Salt-Sage [DB7/16]
2. Caerellius House
Crescius Caerellius
Crescius Caerellius is a direct descendant of Gratian Caerellius, one of the original inhabitants of Raven Rock (Gratian was his great-grandfather). Crescius comes from a long line of miners but was never able to fully ply his trade. By the time he was of age, the ebony mines in Raven Rock had already been depleted, casting Crescius into a deep depression. At one point, he outright refused to even leave his home, forcing Lleril Morvayn to order the Redoran Guard to break in his door for fear that the old man was starving himself to death. When they found him, he was on the edge of death, but Aphia Velothi was able to use her healing arts to bring him back. Ever since that day, Aphia has remained by Crescius’s side. Crescius was grateful for Aphia’s support, and in time, they grew to care for each other quite deeply. Even though it broke Dunmer tradition, Lleril Morvayn allowed them to wed and they’ve been living together as man and wife ever since.
Aphia Velothi
Aphia Velothi was originally an acolyte at the Temple. Under the tutelage of Elder Othreloth, she studied the healing arts and was beginning to learn the traditions of the House of Reclamations. The idea that the Tribunal was gone was unbelievable to her; she firmly believed that the eruption of the Red Mountain wasn’t a punishment from the Daedra but from the Tribunal. This view led to many arguments between Aphia and Elder Othreloth, which culminated in her being stripped of her duties and excommunicated from the temple. Elder Othreloth wished her exiled from Raven Rock altogether, but Lleril Morvayn refused his request, citing the fact that she had nowhere to go. She married Crescius after nursing him back to health.
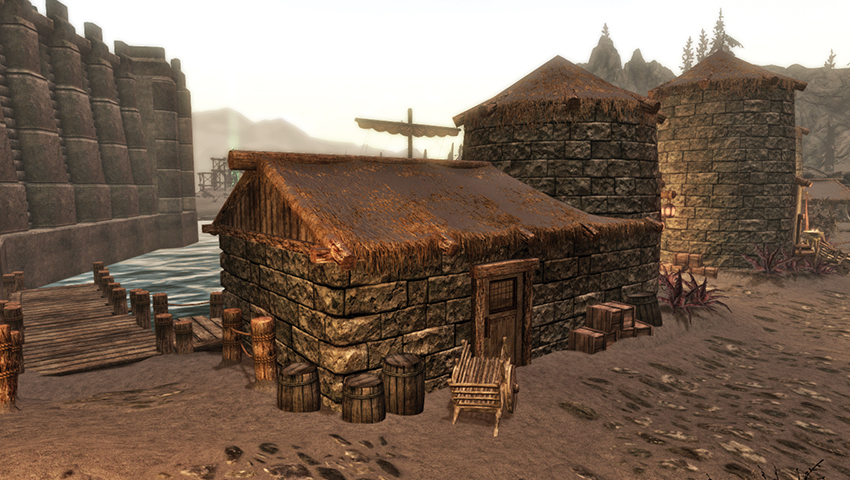
This is the home of Crescius Caerellius, the sole remaining descendant of the Imperial settlers who once lived in the Raven Rock colony. His family has maintained this house since Raven Rock was founded in the Third Era. The house is strictly Imperial in design, bearing absolutely no Dunmer decoration or construction whatsoever. Crescius’s wife, Aphia, is a Dunmer but has forsaken their ways and chosen to live a “purely Imperial lifestyle” in honor of her husband, whom she loves dearly. This has led to quite a bit of animosity with the rest of the town.
Inside the house there are various scattered books (read up on the history of Raven Rock here), along with a bounty of food, a cooking pot, and an East Empire Strongbox [Expert]. The stairwell has more food, while the small upstairs bedroom has coin purses, an owned bed, and a chest.
- Chest
- Cooking pot
- East Empire Strongbox [Expert] [DB16/33]
- East Empire Pendant
- Trainer (Restoration: Journeyman): Aphia Velothi [DB1/1]
3. Morvayn Manor
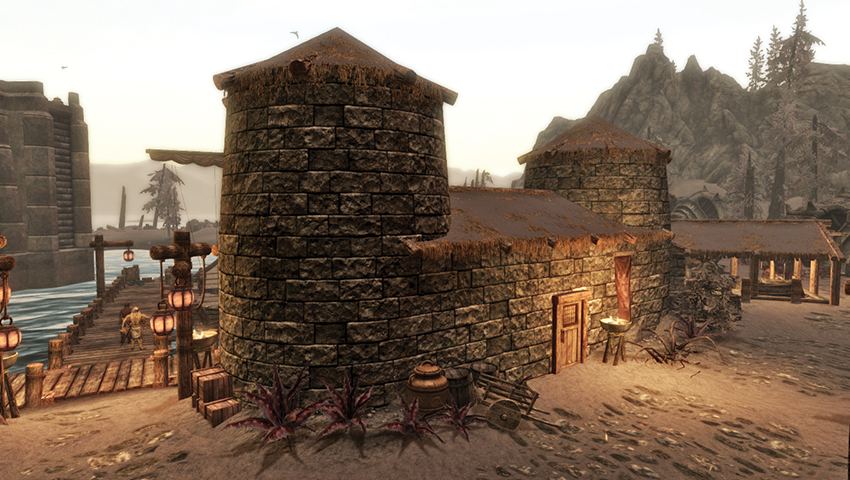
Lleril Morvayn
Lleril Morvayn is the son of Brara Morvayn, the House Redoran Councilor who settled in Raven Rock after the devastation of Vvardenfell. He took over as councilor from his mother when Brara died early in the Fourth Era. On more than one occasion, attempts on his life have been made by members of House Hlaalu, which has made Lleril quite paranoid. The dire economic and security situation has been weighing heavily on his shoulders.
Adril Arano
Adril Arano and Lleril Morvayn have been the best of friends ever since they rose through the ranks together in House Redoran. Whenever trouble threatened the warrior-house, the two of them could be found on the front lines, fighting back with everything they had. This bond persisted, and when the Red Year came, Adril was granted passage on Lleril’s vessel that set out from Vvardenfell. Adril and Lleril remained close while living in Raven Rock, even helping out in the mines and patrolling the Bulwark when necessary. When Brara Morvayn finally passed away and Lleril was made councilor of Raven Rock, he immediately took Adril as his adviser. Even though Lleril is technically Adril’s superior, he treats Adril as his equal, even allowing him to live in Morvayn Manor.
Cindiri Arano
Cindiri Arano is Adril Arano’s wife. Cindiri arrived on one of the few refugee ships that escaped Vvardenfell and struck out for less “volcanic” pastures. Shortly after her arrival on Solstheim, she met Adril and they quickly fell in love. She’s been quite supportive of her husband but takes exception to the danger he keeps placing himself in. She understands the close relationship between Lleril and Adril but fears that the violence targeting the councilor might bring harm to her husband as well. Cindiri can usually be found within Morvayn Manor or out on the streets when she needs some time to herself.
Once an opulent mansion, Morvayn Manor now serves as the government building for Raven Rock. In addition to Councilor Morvayn’s hall, it also contains his living quarters and those of his advisor Adril. The banners of House Redoran are hung on the building’s circular tower as a stark reminder of who’s in charge.
Enter the manor to visit Lleril, sit on his throne, and check his local book collection. There’s plenty of food, a Redoran Guard to ensure you don’t eat any, an Arcane Enchanter, more food, and a cooking pot in the stairwell chamber. Upstairs are the Morvayn Manor Chambers [Adept]. Sneak in here to find a fair few bottles of wine and an East Empire Strongbox [Expert]. The private bed chambers include a display case [Expert] with Chitin Armor and a Helmet, a book called Deathbrand that begins a quest, gems, and Adril’s Survey Results regarding the upkeep of the city, along with a reply from House Redoran.
- Arcane Enchanter
- Cooking pot
- East Empire Strongbox [Expert] [DB17/33]
- East Empire Pendant
- Book: Deathbrand
4. Temple
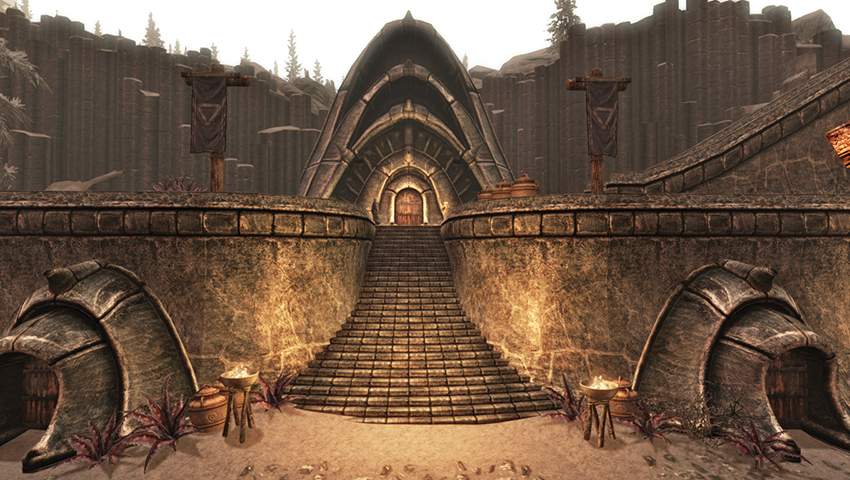
Elder Othreloth
Elder Othreloth has been the Elder (in actuality he’s the only priest, but the title is honorary) at the Temple since he established it after arriving at the town at the beginning of the Fourth Era. The Temple honors “the House of Reclamations,” the return to worship of the Daedra after the loss of the Tribunal. Elder Othreloth has been quite instrumental in stabilizing the beliefs of the residents in Raven Rock ever since the destruction of their homeland. He’s convinced almost everyone that the eruption was punishment for forsaking the Daedra, making him quite feared and revered in town. This has kept the Temple completely free from the political mechanizations going on in Raven Rock, as neither House Redoran nor the remnants of House Hlaalu wish to anger him.
Galdrus Hlervu
Galdrus Hlervu is a relatively recent addition to the Temple. Hoping to pass along the “new old” ways of thinking to someone else, Elder Othreloth has taken Galdrus under his wing and has spent a good deal of his time prepping him for the inevitable. Unbeknownst to Elder Othreloth, Galdrus has been tampering with a bit of necromancy research on the side, using the ash pit in the lower level (where the Dunmer are interred) as his laboratory.
Raven Rock’s temple is dedicated to the renewal of the ancient Dark Elven faith, with shrines to the three Daedra who traditionally aided the Dunmer: Azura, Mephala, and Boethiah. After the downfall of the Tribunal at the end of the Third Era, these temples have begun to replace the Tribunal temples as the Dark Elves return to the old ways. While these Daedric Princes were originally seen as the “Anticipations” to Almalexia, Vivec, and Sotha Sil, they have now been cast in a new light, as a part of the “House of Reclamations”...signifying the Dunmer’s return to the old ways and an offset to the House of Troubles (the other Daedra). The city’s Ancestral Tomb is located in the basement area (the lowest level) of the temple. This is where the Dunmer that have fallen are interred.
Enter the temple if you wish to speak to either Elder Othreloth or his equally haughty assistant. If you’re collecting ash yams, there are over 60 between the urns outside and within these chambers. On the main floor are pyres and unique shrines to Azura, Boethiah, and Mephala. There are purses to steal here too. Downstairs in the tomb cellar are two chambers. To the left (west) is Otherloth’s, with a number of bone meal servings, books, and a Strong Box [Expert], which you can open easily if you have the Raven Rock Temple Key (carried by both priests). To the right is Hlervu’s room, with scattered books (including Deathbrand) and a chest. Ahead is a door to the Temple Ancestral Tomb (which is also accessible via the Morvayn Ancestral Tomb). You will visit the tomb during Solstheim Regional Activity: Tomb Eradicator*.
- Book: Deathbrand
- Chest
- Raven Rock Temple Key (2)
- Shrine of Azura [DB1/1]
- Shrine of Boethiah [DB1/1]
- Shrine of Mephala [DB1/1]
- Strong Box [Expert]
Interior: Temple Ancestral Tomb
These chambers are unlocked during Solstheim Regional Activity: Tomb Eradicator*, once you receive the Raven Rock Tomb Key from Otherloth. The pyres are laid out in a similar fashion to those in the upstairs temple area. The side exits to the Morvayn and Ulen ancestral tombs can be opened using the same key.
- Raven Rock Tomb Key
- Ash Spawn
- East Empire Strongbox [Expert] [DB18/33]
5. Morvayn Ancestral Tomb
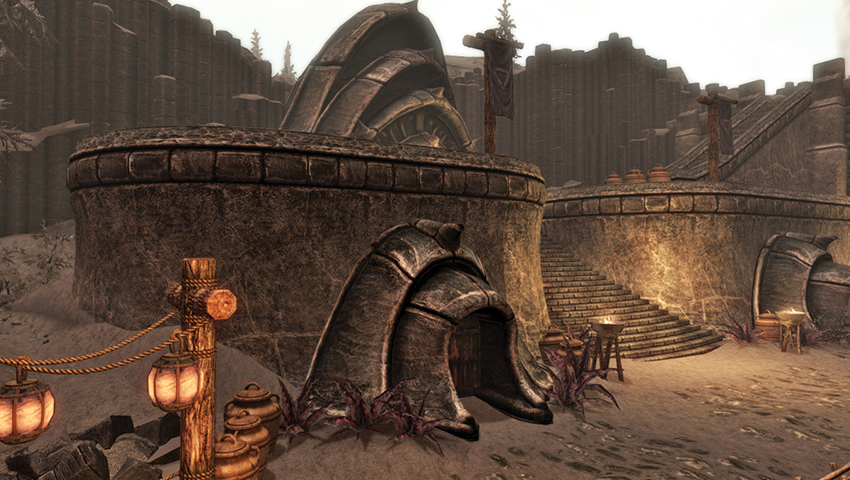
You can enter this tomb by picking the lock [Expert] or using the Raven Rock Tomb Key. This is a smaller tomb with only a single door to the Temple Ancestral Tomb. Inspect the many urns for ash yams, and slay any Ash Spawn you see. Otherwise, this tomb is relatively empty.
- Ash Spawn
6. Ulen Ancestral Tomb
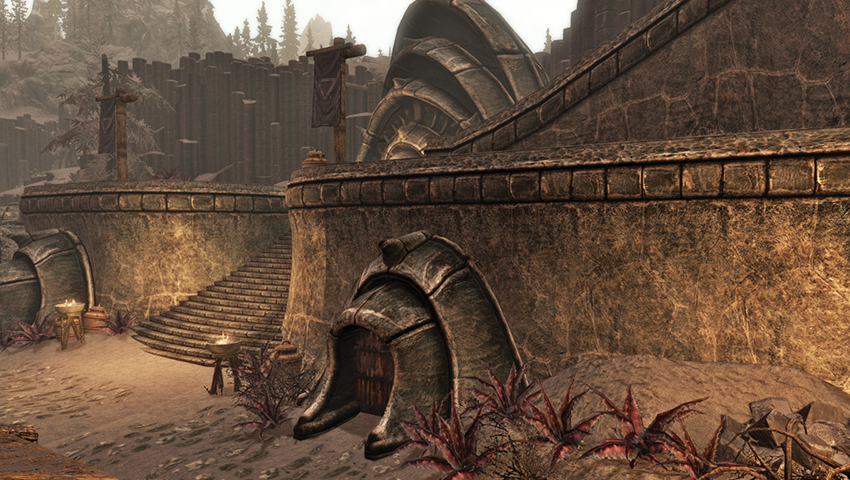
You can easily enter this crypt without a key, although you need the Raven Rock Tomb Key to unlock the door leading to the Temple Ancestral Tomb. Check the urns for ash yams, deal with any Ash Spawn, and wait for Tilisu Severin to arrive, as part of Solstheim Side Quest: Served Cold.
- Ash Spawn
7. The Bulwark
Captain Modyn Veleth
Modyn Veleth is the captain of the Redoran Guard, a job he takes extremely seriously. With the myriad of attempts on Lleril Morvayn’s life, he’s well aware that there are still forces out there aligning against the councilor. He’s kept the Redoran Guard in good shape, teaching them how to maintain their weapons and armor and various battle techniques. Modyn previously served as a military officer in Vvardenfell and was sent here by the Redoran Council to protect Raven Rock (which it sees as one of its holdings). He wishes he was serving House Redoran back on the mainland but never complains about his current posting. When Modyn arrived at Raven Rock, the Bulwark was merely a shadow of how it appears today. Using his knowledge, he was able to enhance the wall’s strength and suggest improvements, such as the massive protective gate.
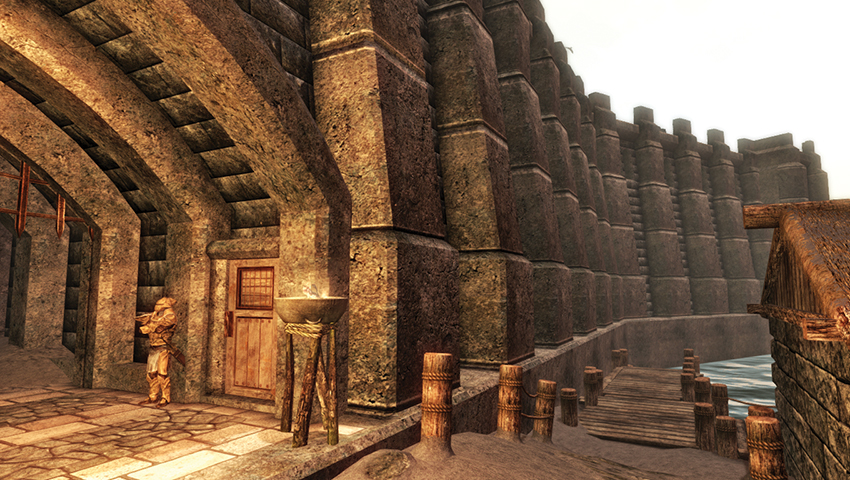
The massive wall constructed after the eruptions on Vvardenfell serves multiple purposes. In addition to holding back the waves of ash and fell creatures that assault Raven Rock, the wall also houses the guard barracks, the captain of the guard’s living quarters, and the city’s jail. The wall also features a large set of steps that climbs the northern cliff face and ends in a watchtower with a large pyre. If the pyre is ever lit, this signals those on the wall below that a threat approaches from the north. The Bulwark has a large gate, one of the only defenses keeping the ash abominations from overrunning the small town.
The exterior of the Bulwark, accessed from the basalt cliffs above, the main gate below, or the balcony steps near the Temple, offers views of the Sea of Ghosts, Red Mountain, and the harbor.
The interior of the Bulwark, accessed from the main gate, has a guard presence. There are various (owned) cots and a bed, a fireplace with a cooking spit, an evidence chest should you need to retrieve belongings, and an East Empire Strongbox [Expert] sitting on the table at the end of the interior corridor.
- Cooking spit
- East Empire Strongbox [Expert] [DB19/33]
- East Empire Pendant
- Evidence Chest
- Redoran Guard
8A.The Bulwark Jail
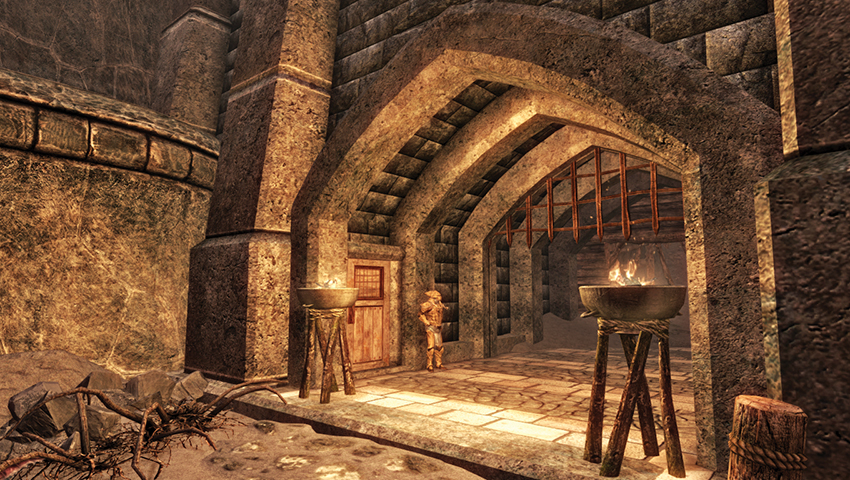
The Redoran Guard maintain the peace and see to the defense of Raven Rock. Crimes committed against the residents of Raven Rock are judged by Lleril, and prisoners are placed in the tiny prison in an antechamber of the massive Bulwark.
Aside from a couple of books, the jail cell features a solid door lock [Expert] and a guard who isn’t the most perceptive of chaps. This allows you to sneak out if you wish, sleep in the cell’s bed, or locate the hidden exit—the grate [Novice] in the fireplace. This leads to an ash and cobweb-lined passage to a second grate (under the belongings chest, allowing you to snag your stuff), which drops you down to a stone tunnel dug by Draugr. This ends at a door to Coldcinder Cave.
- Prisoner Belongings Chest
- Redoran Guard
8B.Coldcinder Cave
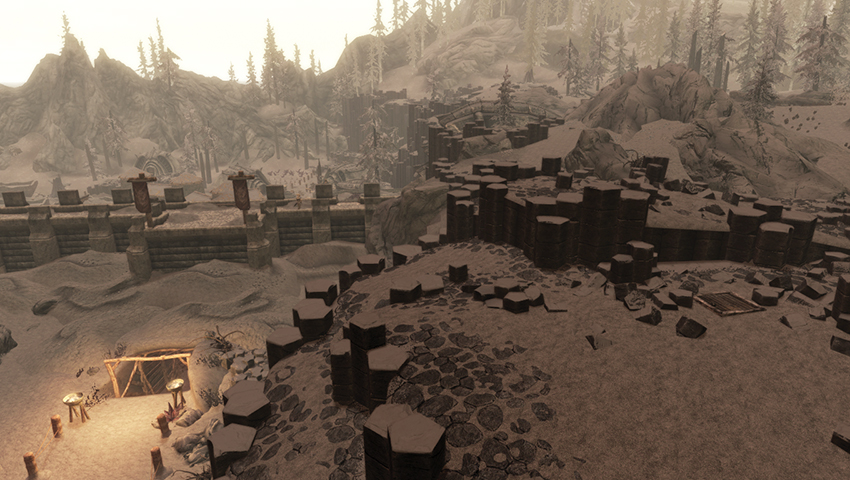
This picture shows the exit trapdoor just outside Raven Rock. You can enter from here, but for a full exploration, begin inside Bulwark Jail.
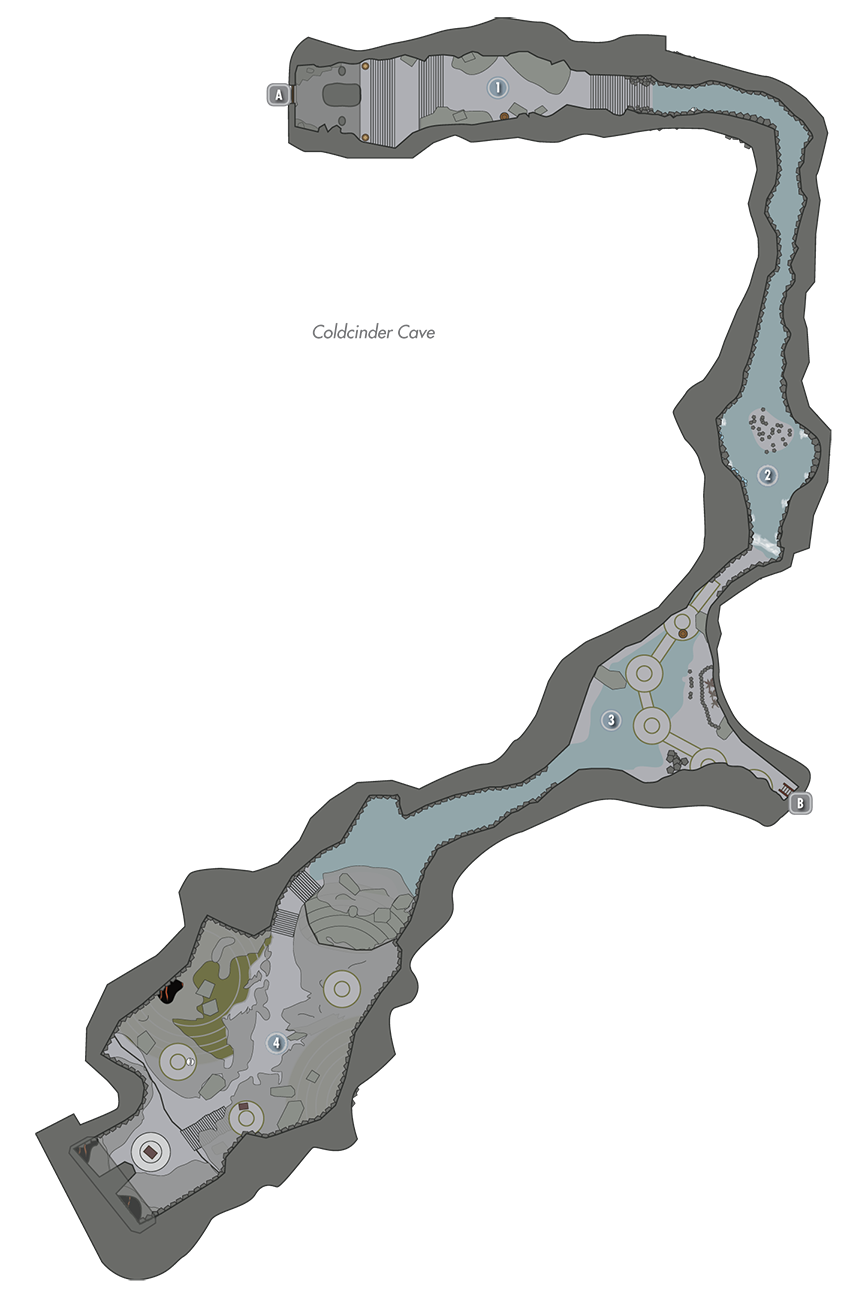
 Door to the Bulwark Jail
 Dry Bones
A set of ancient steps leads down, past the ruins of a nasty spike trap with scattered skeletons near it, and out into a narrow basalt corridor with a Skeever and a skeleton jammed up into the columns.
- Skeever
 Netch Hatchery
A small group of Netch are floating about in the gloom of this basalt clearing.
- Betty Netch
- Netch Calf (2)
 Draugr Causeway
 Trapdoor to Solstheim
Up a stone causeway is an exit ladder, bringing you out at location 8B on the Raven Rock map, a trapdoor just outside (and southeast) the main gates.
 Coldcinder Barrow Ruins
Head through this easily overlooked narrow basalt passage to reach the tumbledown remains of a barrow. Approach and an Ash Spawn will appear, with two more foes emerging from alcoves as you approach the large chest. There’s a second chest [Novice] on a circular platform to jump to and some Heart Stones to mine.
- Ash Spawn
- Chest [1, Novice]
- Heart Stone (3)
9. Main Thoroughfare
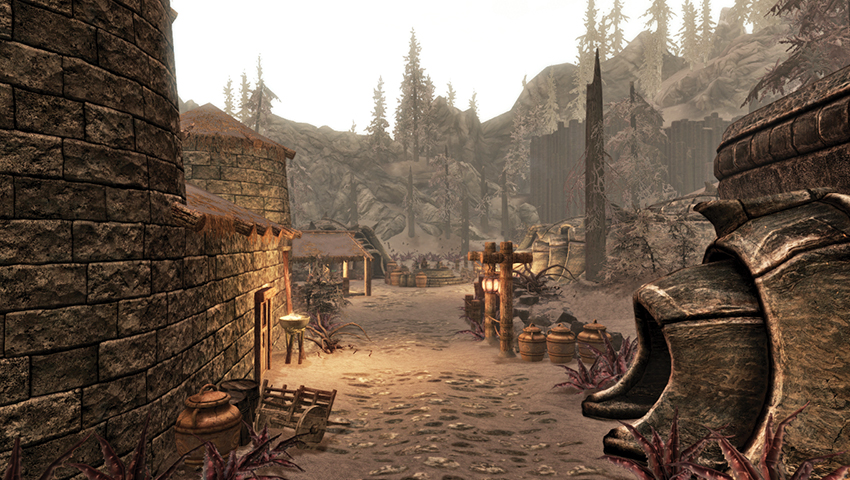
The main route from the bulwark gate to the east, around to the Earth Stone to the west, is where you’ll find most of Raven Rock’s inhabitants.
- Redoran Guard
10. Glover Mallory’s House
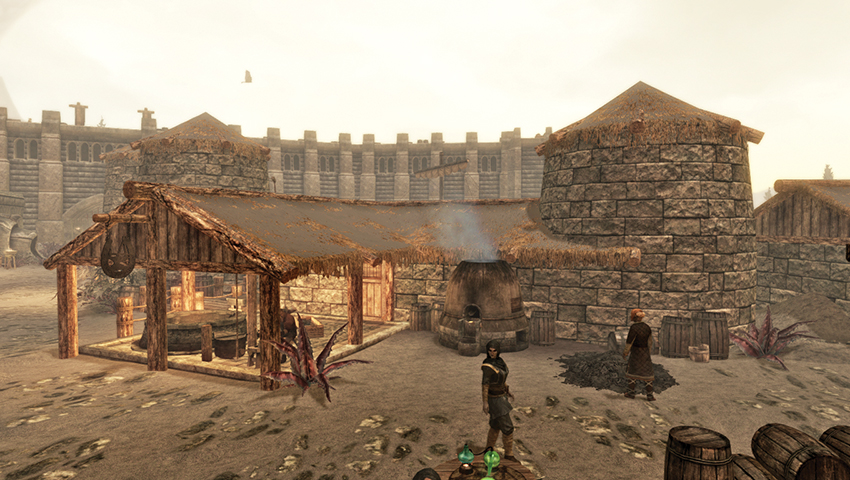
Glover Mallory
Glover Mallory is one of the most prominent non-Dunmer citizens in Raven Rock. He arrived in town almost 20 years ago and constructed a full blacksmith’s workshop with Lleril Morvayn’s blessing. Glover quickly befriended many of the locals, who admired his earnestness in keeping Raven Rock alive and his prowess at the forge. Most of the residents treat Glover as a complete equal, including him in all of the town’s decisions and even inviting him to some of their more personal ceremonies. He’s integral to the Redoran Guard as well, providing equipment and repairs to the soldiers. Glover is very evasive about his past and has never publicly stated why he left the mainland and struck out for Solstheim. He’s jovial and warm, and when he isn’t at his anvil, he can be found hoisting a mug at The Retching Netch.
This is the home of the town’s blacksmith, who works his smithy, known as the Ebony Anvil. Glover is a Breton, making him stand out a bit in this almost exclusively Dunmer town, but he has integrated quite well with everyone. He’s proven to be quite adept at his trade and has even voluntarily contributed to the town’s meager coffers. Outside, you can trade with Glover, ask about his Regional Activities, and use his crafting areas. Particularly observant members of the Thieves Guild might notice the Shadowmark displayed near the door to the interior of the home.
Inside his house is a variety of food, some books, a cooking pot, and an East Empire Strongbox [Expert]. Upstairs is a chest and a copy of Ahzidal’s Descent, which begins Solstheim Side Quest: Unearthed.
After successfully completing Solstheim Regional Activity: Thievery and the Karstaag Connection*, you’re given the Key to Glover Mallory’s House, which allows you to open the locked door downstairs. Inside is a thief’s treasure trove, including a weapon and shield on a rack [leveled], poisons and potions, sweetrolls, a Thief Cache barrel with a Shadowmark on it, a generic strongbox, a set of Blackguard’s Armor, and Glover’s Letter, which reveals his past and his daughter, the thief Sapphire. If you meet up with Sapphire in Riften’s Ragged Flagon and talk to her about this note, she offers you an exquisite gem bearing her name.
- Chest
- Crafting: Blacksmith’s forge, cooking pot, grindstone, smelter, workbench
- Trader (Blacksmith): Glover Mallory [DB6/16]
- East Empire Strongbox [Expert] [DB20/33]
- East Empire Pendant
- Book: Ahzidal’s Descent
- Key to Glover Mallory’s House
- Unique Item: Blackguard’s Armor [DB13/31]
- Unique Item: Blackguard’s Boots [DB14/31]
- Unique Item: Blackguard’s Gloves [DB15/31]
- Unique Item: Blackguard’s Hood [DB16/31]
- Unique Item: Exquisite Sapphire (reward from Sapphire if Glover’s letter is given to her) [DB17/31]
- Sword and Shield [leveled]
- Strong box
- Thief Cache
- Glover’s Letter
11. Ienth Farm
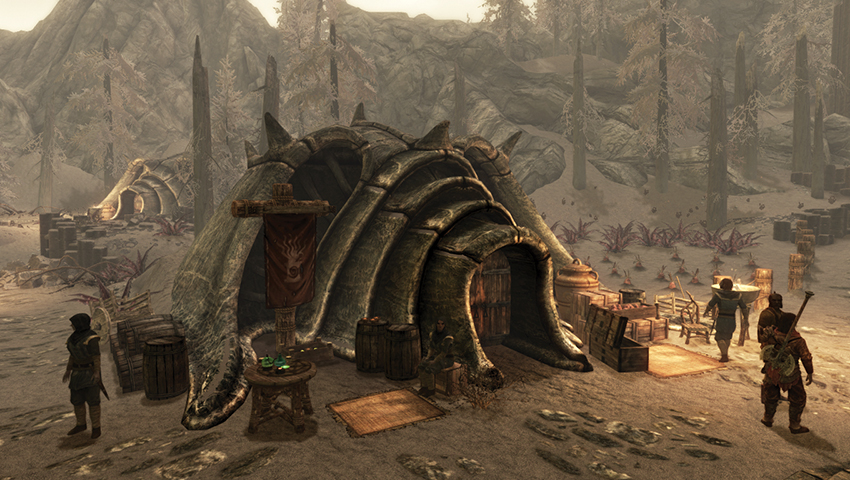
Garyn Ienth
Milore Ienth
Garyn and Milore Ienth are recent additions to Raven Rock. Seeking a home after theirs was lost, they wandered the mainland of Skyrim for a while until they settled in Windhelm. After staying there for a few years, they heard about the Dunmer settlement at Raven Rock and decided to take their chances. They packed up their things, boarded a boat, and never looked back. Garyn brought his knowledge of agriculture to Raven Rock and has become an integral part of the community. He provides quite a bit of grain and other dry goods to the town in exchange for other services, only keeping what he and Milore need to survive. Thanks in part to Milore’s alchemical prowess, she’s been able to accelerate the growth of some of the crops, producing higher yields.
Having descended from a long line of farmers, the Ieniths’ struggle to raise their crops as they did when they lived in Morrowind. Fortunately, after years of trial and error, the farm is flourishing. This has provided quite the boon to the food supplies of the town, and Lleril Morvayn now considers the farm important enough to post a permanent guard there. Milore Ienth has taken on alchemy as a hobby and has recently converted the area in front of their home into a makeshift apothecary shop.
The grounds of the farm are filled with ash yam and scathecraw, and there are dozens more to steal at the stall in front of their home. There is also an Alchemy Lab where Milore trades (you can complete a Regional Activity for her). Inside the house are dozens more ash yams, a cooking pot, and a note to Milore from Nilara. Downstairs is where more ash yams are kept, along with an Alchemy Lab and various ingredients. Through the door is a bedroom with a few books and a chest.
- Crafting: Alchemy Lab (2), cooking pot
- Chest
- Note: To Milore from Nilara
- Trader (Apothecary): Milore Ienth [DB2/16]
- Trader (Food Vendor): Garyn Ienth [DB8/16]
- Trainer (Alchemy: Expert): Milore Ienth [DB1/1]
12. Alor House
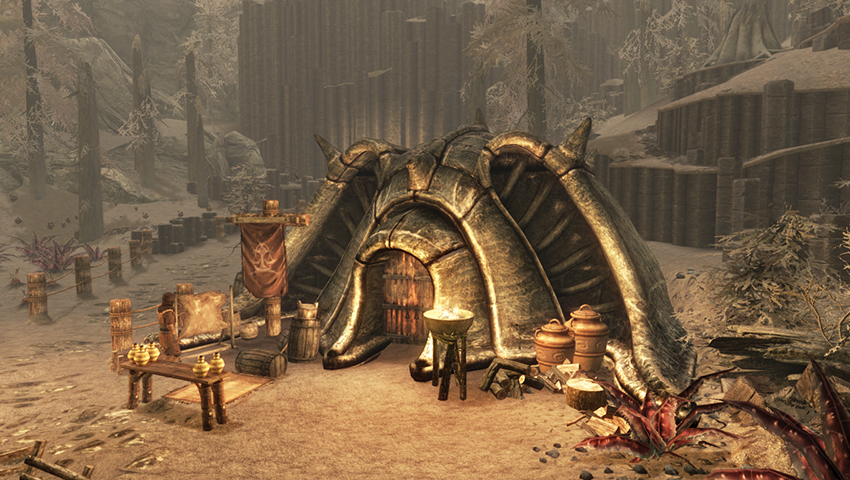
Fethis Alor
Fethis owns this house and runs his general goods business from it. He’s gained the reputation of being the town curmudgeon, but his presence is tolerated and his shop frequented due to the supply of decent goods he brings into Raven Rock through his old East Empire Company contacts. Fethis is quite proud of his connections within the company and constantly brings it up in conversation. He considers them an “ally” that would protect him if he ever needed it and uses this as leverage whenever a disagreement arises between himself and one of his customers.
Dreyla Alor
Dreyla is the daughter of Fethis and works at her father’s shop doing mostly housekeeping and menial chores. Dreyla’s mother recently died during an Ash Spawn attack on Raven Rock, so she’s taken it upon herself to handle her mother’s duties. She loves her father dearly but doesn’t share his views of the East Empire Company.
This is a general goods shop that sells all sorts of supplies. It’s seen its share of hard times, which is evidenced by the reduced inventory available. The owners do their best to maintain the shop, convinced that Raven Rock isn’t finished yet. Outside the house is a tanning rack, a wood chopping block, and usually Fethis Alor, who offers an island-spanning Regional Activity: The Great Solstheim Strongbox Hunt*.
Enter the house to discover a cooking pot and a note: Dearest Dinya, as well as an assortment of books and a large number of barrels and crates. Downstairs is a second tanning rack, a grindstone, a workbench, and some iron ingots. The southwest bedroom has assorted apples and books and a chest. Remember to check the southeast bedroom of the cellar for a purse, chest, copy of Hallgerd’s Tale (Heavy Armor Skill Book) on the bedside table, and an East Empire Strongbox [Expert] on the larger table.
- Chest (2)
- Crafting: Cooking pot, grindstone, tanning rack (2), wood chopping block, workbench
- Trader (General Goods): Fethis Alor [DB9/16]
- Skill Book: Hallgerd’s Tale (Heavy Armor)
- East Empire Strongbox [Expert] [DB21/33]
13. The Retching Netch
Geldis Sadri
Geldis is one of the longest inhabitants of Raven Rock, arriving at the small town just after the mass exodus from Vvardenfell. Originally a miner in the ebony mines, Geldis earned a respectable amount of money and was able to amass a small fortune for himself. When the East Empire Company abandoned the town and as the population slowly changed from Imperial to Dunmer, he purchased the town’s only inn. Lleril Morvayn provided some of his own funds to augment the inn to their liking.
Drovas Relvi
Drovas is friendly but a bit scatterbrained. He tends to be a bit naive and has made a couple of foolish decisions in his life. One of them was borrowing money from Mogrul. Drovas is apprenticing under Geldis Sadri, which basically means he’s doing all of the jobs around the place that Geldis doesn’t want to do. He does his job passably but has bigger aspirations. For the moment, he desperately wishes to flee Raven Rock before the orc that’s after him demands pieces of flesh, rather than bags of coin.
Teldryn Sero
A Dunmeri Spellsword with a brash and boastful demeanor, Teldryn is resting up at The Retching Netch after his previous backer ordered an attack on a particularly large and well-defended lair of bandits. He is outfitted with light Chitin Armor, which he normally refuses to remove, and is skilled in both sword and magic. He spent his youth in Blacklight (in Morrowind) and professes to have met Saint Jiub (prior to the latter’s disappearance) before plying his talents in Windhelm.
Mogrul
Slitter
Mogrul is a two-septim thug who usually runs a small-time gambling operation. But currently he’s in Raven Rock with his murmuring associate Slitter to settle an outstanding debt. Mogrul is a heartless bastard. People who don’t pay up tend to get hurt. If a debtor dies or flees the island, he has no compunctions about going after their relatives or friends to collect. He even has access to thugs and bandits to do some of the dirty work.
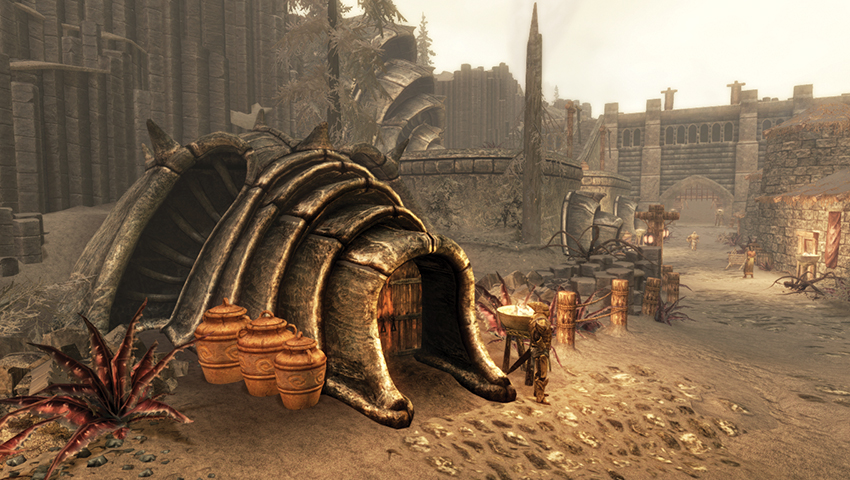
In recent years, The Retching Netch Cornerclub has served as Raven Rock’s main watering hole. The meager common room can barely accommodate the small population of the town, but nevertheless, at night, the inn is filled with a good deal of the town’s residents as they contemplate their bleak futures. A single room for rent is available here but hasn’t been used in quite a long time. A Redoran Guard stands outside, in case of trouble.
Inside is a hearth (close to where Teldryn Sero usually sits) and cooking pot, and stairs lead down to the large cellar cornerclub itself, where Geldis is propped up behind the bar (guarding an East Empire Strongbox [Expert]). To the southwest and west are bedrooms, the larger of which has two chests and a large amount of cheese to steal. To the north is another bedroom (usually your room if you spend the night) with a chest and a copy of Deathbrand to read. The locked room [Apprentice] leads to another room with a chest.
- Book: Deathbrand
- Crafting: Cooking pot
- Chest (4)
- East Empire Strongbox [Expert] [DB22/33]
- East Empire Pendant
- Follower: Teldryn Sero [DB3/7]
- Trader (Innkeeper): Geldis Sadri [DB13/16]
- Food, room, and board
- Quest rumors
14. Abandoned Building
Bralsa Drel
Bralsa is a sujamma addict. She began drinking the potent beverage when she was in her teens and still imbibes the liquor today. She worked the mines for years before they were shut down, and then turned to the sujamma to drown her sorrows. Bralsa performs odd jobs around town occasionally (when she can remember), but instead of saving her coin or using it to clothe or feed herself, she plunks the money on the bar at the cornerclub and drinks it all away. Geldis Sadri usually cuts her off when he thinks she’s had enough, and oftentimes she can be found sleeping on a bedroll in the back room of the tavern. On the rare occasions she is encountered sober, she’s quite a bitter woman, lamenting about being stuck in Raven Rock and musing that she’d have been better off dying in the eruption like so many others.
Rirns Llervu
If every town has an odd man out, Rirns would be Raven Rock’s. Arriving as a stowaway on the Northern Maiden a few decades ago, the Redoran Guard had to remove him from his hiding spot in a crate of supplies. He was shivering uncontrollably and talking in nonsensical whispers about “fish men” that walk the bottom of the sea. When pressed about this, he was unable to give a coherent answer. A few folks in Raven Rock have tried to give Rirns a chance at odd jobs, but he can barely form a sentence, let alone perform menial tasks.
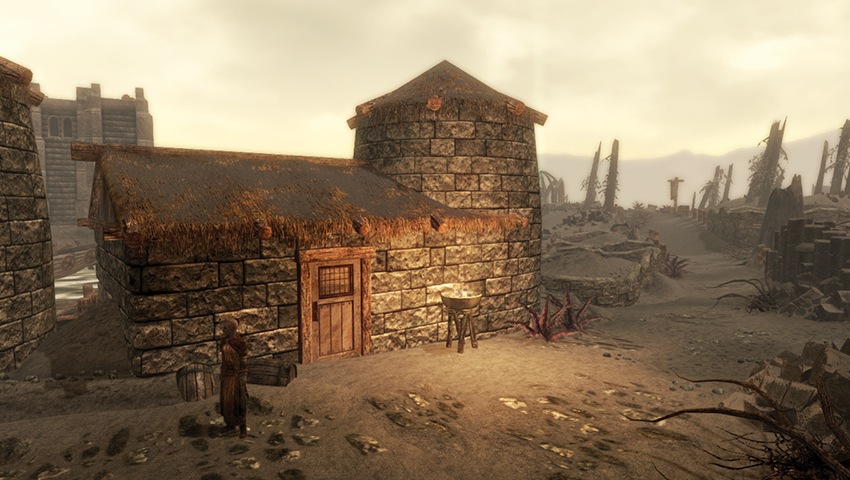
You can find one run-down and two collapsed buildings on the outskirts of town. These are the remnants of homes and businesses that were left when the people and prosperity abandoned Raven Rock. The relatively intact home is occupied by some of the destitute members of the colony. One of them (Bralsa Drel) has a Regional Activity you can help her with. A few tattered books and Nord mead bottles are the only items among the cobwebs in here.
15. Severin Manor (House to Own)
Vendil Severin
Tilisu Severin
Mirri Severin
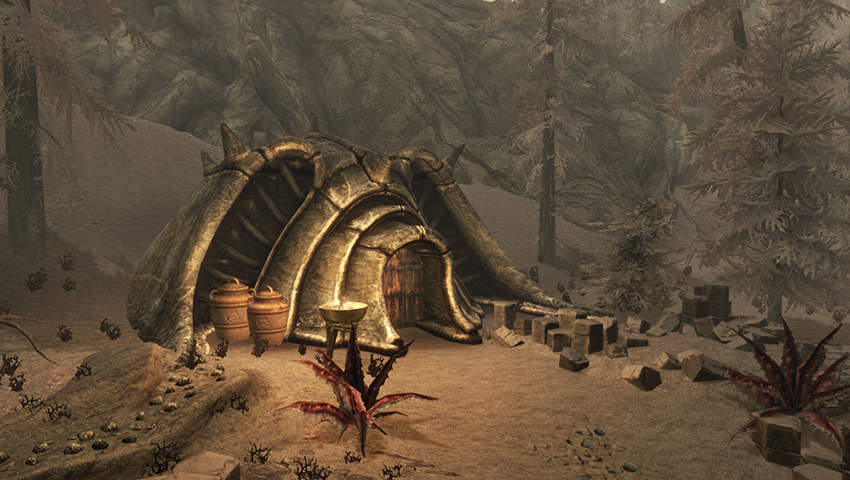
The Severin family are an enigma to Raven Rock. Arriving in the small town only ten years ago, they brought large amounts of wealth with them and built their own manor house. No one in town is certain how the family attained their wealth, but since they’ve contributed so much of it to the town, most don’t care. Lleril Morvayn has always been a bit wary of new faces in Raven Rock (because House Hlaalu has a price on his head), but after getting to know the family, his suspicions were averted. A few in town have noticed how oddly close in age Mirri Severin is to her father but haven’t paid it much mind.
In actuality, all three Severin are not who they appear to be (his real name is Ulen, descendant of Vilur Ulen from House Hlaalu). They are aligned with House Hlaalu, specifically hired to kill Lleril Morvayn to avenge the death of Vilur Ulen. The Severin name had been created as a cover for the trio, whose sole purpose is to lay the groundwork for their plan. Knowing that the enterprise would be quite difficult, the trio has hired a small cadre of Morag Tong in a ruined fort not far from Raven Rock. When the time is right, they feel they’ll be able to strike, taking out the Redoran Guard and Lleril at the same time.
This house becomes yours after the successful completion of Solstheim Side Quest: Served Cold. It cannot be furnished, but it does come with a full complement of helpful clutter to adorn your weapons, equipment, clothing, and other items. Enter the place to view the hearth, then head downstairs. To the southeast is a large bedroom with a chest and ash yam–growing area. To the northeast is a blacksmith’s smelter, forge, and training area with a number of ingots and other crafting areas. To the east is an Alchemy Lab alcove and many ingredients. To the west is an Arcane Enchanter alcove and weapon plaques. To the west is the main bedroom with three chests, display cases, and a variety of pleasantly positioned skulls. Hidden near a bookcase is the Severin Family Safe [Expert], which you can unlock with a key Mirri carries. It contains an interesting note inside.
- Crafting: Cooking pot, Alchemy Lab, Arcane Enchanter, blacksmith forge, grindstone, smelter, tanning rack, workbench
- Chest (4)
- Potions
- Severin Safe Key
- Severin Family Safe
- The Ulen Matter
16. Raven Rock Mine
- Underground Connection
Gratian Caerellius (Deceased)
Millius (Deceased)
Evul Seloth*
Meden Maren*
Naris Mavani *
Tolenos Omoren *
Exterior
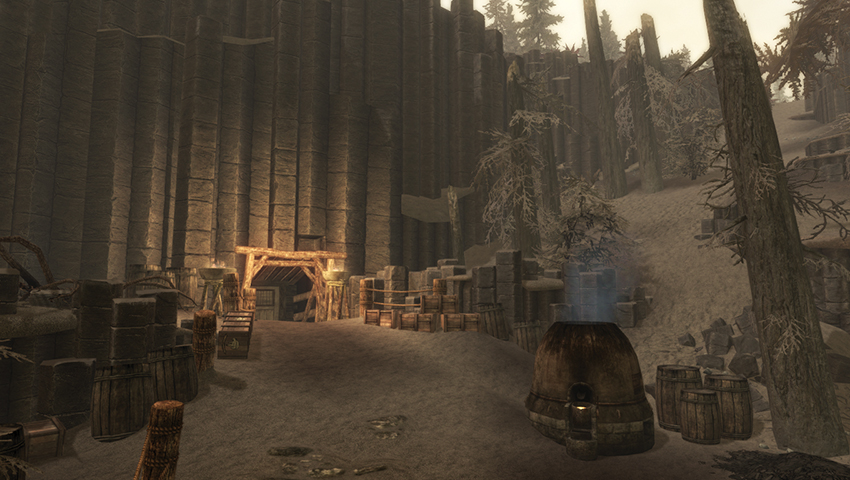
Raven Rock Mine, once one of the most abundant sources of ebony in Morrowind, was shut down in 4E 170. This led to a mass exodus from the town, cutting the population in half. Follow the path up behind Alor House, passing a wood chopping block, smelter, and various old East Empire crates. Then enter the mine.
- Crafting: Smelter, wood chopping block
Interior
Door to Solstheim
Mine Entrance
In the gloom, you’ll find Crescius Caerellius and his wife, Aphia Velothi, bickering about his precarious ventures deep in the mine. To progress farther into this mine, it’s wise to speak to Crescius for his key and begin Solstheim Side Quest: The Final Descent. A quick check of the area finds a grindstone, pickaxes, and an East Empire Strongbox [Expert] under the balcony table upstairs. When you’re ready for a descent, step onto the wooden floor and peer down the steps. They are hooked by chains to a gigantic mine shaft with an almost bottomless drop. Nimbly descend onto the wooden platform to the west.
- Crafting: Grindstone
- Pickaxe (3)
- East Empire Strongbox [Expert] [DB23/33]
- East Empire Pendant
- Raven Rock Mine Key
- Ebony Ore (9)
Floating Balconies and the Pit
Planks
Follow the precarious floating balconies down to the opening in the south wall of this epic hole, watching for Skeever here before continuing past a Frostbite Spider and another alcove to the east, with a spider and some rickety platforms. Back in the central pit, continue north to a third alcove leading down a stepped tunnel to the west, then the south and east, with more spiders, escaping gas, planks, and a web to cut as you burst through into a locked gate next to an East Empire Strongbox. Open the gate using the key you received from Crescius.
- Danger! Explosive gas trap
- Pickaxe (3)
- Skeever
- Frostbite Spider
- East Empire Strongbox [Expert] [DB24/33]
Waterlogged Draugr Crypt
Cross into a roughly mined area, which breaks through into a Draugr tomb that is ankle-deep in water. There’s movement here, as Draugr rise from their walled resting places to delay you. Fight four or five as you work your way through the crypt. Check the left area for a chest before heading east and avoiding the floor plate and swinging wall trap.
- Chest
- Danger! Swinging wall trap
- Draugr
The Dead Slumbering on Their Thrones
Head up the steps and around to the west. Here, four thrones are occupied by two slumbering dead (one on each side, with potions between them), who awaken to attack, along with a third foe farther along the hall and a locked chest [Master]. Be sure to defeat these enemies, as the circular chamber ahead features at least six Draugr of varying degrees of toughness.
- Chest [Master]
- Potions
- Draugr
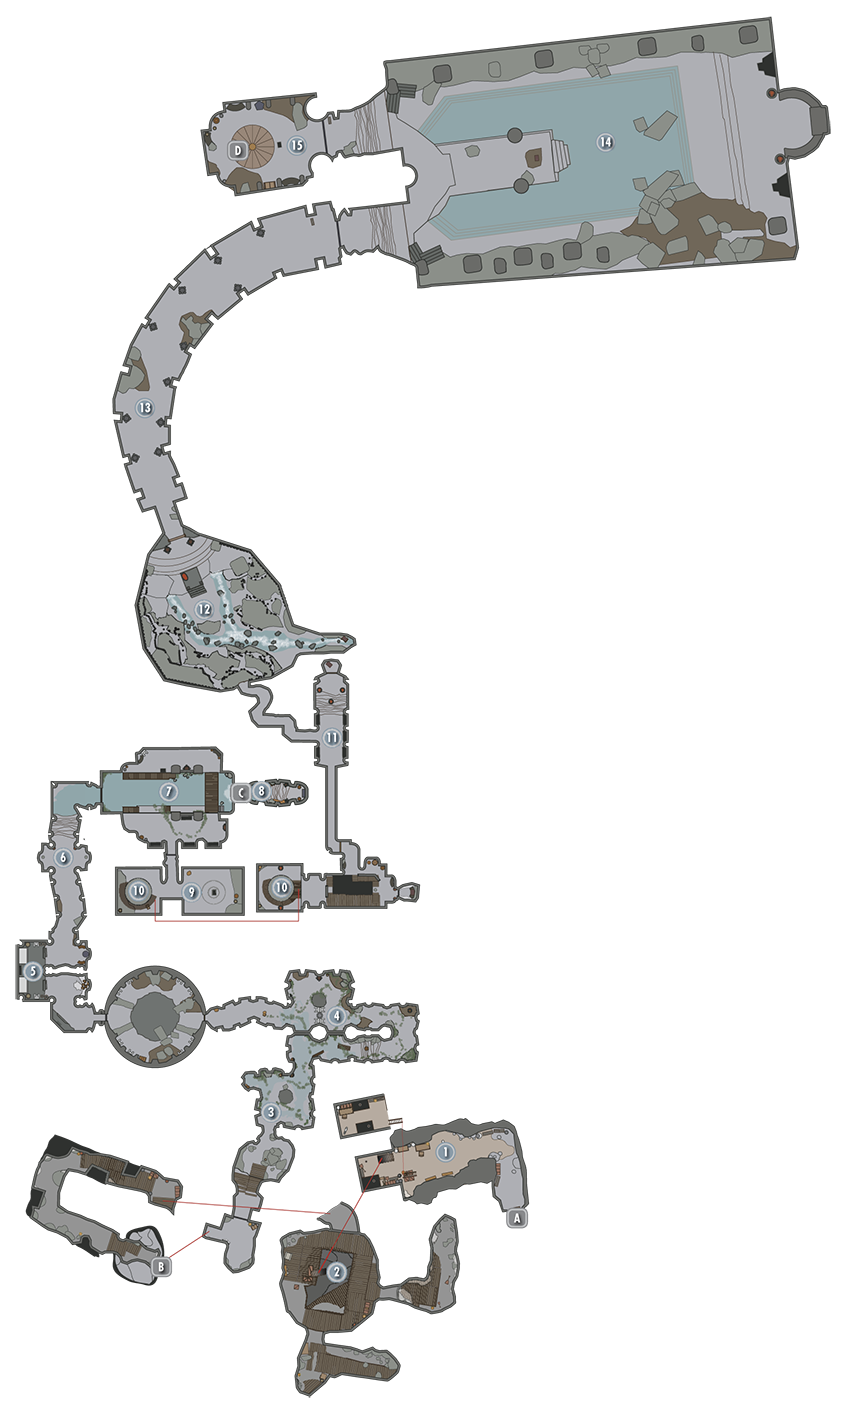
 Stalhrim Sarcophagus Corridor
Open the door to the west and wind your way through a narrow crypt corridor, passing a tomb with a Stalhrim deposit embedded into it. Check the area for Draugr and potions, as well as scattered ingredients.
- Potions
- Stalhrim Deposit
- Draugr
 Stepped Passage
Pass the Alchemy Lab and shelves of ingredients (snag the Netch Jelly here if you’re completing the Solstheim Regional Activity for Milore Ienth), then move north along a stepped passage, watching for magic caster traps in the shallow alcoves (race through or knock the Soul Gems off their pedestals). Back in the water, open the iron doors and ready yourself for combat with some particularly hardy Draugr.
- Alchemy Lab
- Netch Jelly (2)
- Danger! Magic caster trap
 Interior Canal
Battle the Draugr around this interior canal and on the precarious wooden bridge. Climb up to the alcoves and cross the wooden bridge to a high alcove with a chest [Expert] and an Arcane Enchanter. Yank the handle on the nearby pedestal, which opens a door on the chamber’s eastern upper side. Move back across the bridge to reach it.
- Arcane Enchanter
- Chest [Expert]
- Draugr
 Door to Bloodskal Barrow Alcove [Apprentice]
 Bloodskal Barrow Alcove
Behind the waterfall is a door that leads to Bloodskal Barrow Alcove and the following:
- Stalhrim Deposit
 Spell Pedestal
Head south to a corridor junction. Left (east) is a pedestal surrounded by candles, where a Spell Tome for Ice Spike is located.
- Danger! Magic caster trap
- Spell Tome: Ice Spike
 Spiral Steps to Cage Bridge
Head right (west), up the spiral steps to the balconies overlooking the Spell Tome pedestal. Dodge or remove the Soul Gem from the lightning trap, and work your way around to an open wooden door and a narrow cage bridge to the north, above the interior canal.
- Danger! Magic caster trap
 Trapped Alcove and Low Tunnel
Carefully tread on the ground near the torch and steps, as a dart trap is easily activated. Rush through or avoid it before opening the wooden door, securing goods from a locked chest [Adept]. Head back down the steps and check the low tunnel to the west. This brings you out onto a high chasm.
- Chest [Adept]
 High Chasm and Runic Door of Bloodskal
Two cave streams and numerous interlocking basalt columns offer a tremendous view of a strange and dimly lit wall of odd carvings. Carefully descend to the ground and inspect the old bones of Gratian Caerellius, near the runic door. Gratian’s Journal is on the corpse, along with a strange and wondrous blade. Grab both, check downstream for an alcove with a chest, then inspect the runic door.
- Gratian’s Journal
- Unique Weapon: Bloodskal Blade [DB4/11]
- Chest
Puzzle Solution: The Bloodskal Blade is your key. Equip this two-handed weapon, stand so you’re targeting the red slit in the outer arch, and make a horizontal power attack with the blade (sidestep, hold down your Attack button, release). If you’re successful, you’ll hear stone grinding and part of the arch will move up. A vertical glow appears.
Make a vertical power attack (hold down your Attack button, release), and be sure the ribbon of red hits close to the glow in the arch. A section indents, clicks, and the outer piece slides farther toward the apex of the arch. This time a horizontal glowing slit is formed. Execute a horizontal power attack, and the entire left side of the outer arch slots into place.
Now move to view the right side of the outer arch. Perform exactly the same power attacks, and watch the sections of archway maneuver into new and unlocked positions. Assuming you’ve correctly slashed, the entire arch glows red, and a massive vertical slit appears through the circular door. Launch a final, vertical power attack from the Bloodskal Blade and the door opens.
 Nord Curved Hall of Traps
Head through the long Nord hall, deftly avoiding the swinging blade traps. Activate the lever at the far end to open the heavy gate, allowing access into the lair of Zahkriisos, one of Miraak’s Acolyte Priests.
- Danger! Swinging blade trap
 Lair of Zahkriisos
The powerful Acolyte Priest Zahkriisos confronts you in this chamber. This fiend can summon Seekers and strike you with a powerful blast of lightning. Swap to your preferred weapons and engage this troublesome foe. If you’re currently completing Solstheim Side Quest: Masks of the Acolyte Priests*, this is one of the masks you’re looking for. Grab it from the ash pile you’ve reduced Zahkriisos to, and learn a Word of the Dragon Aspect Shout.
- Chest
- Seeker
- Zahkriisos
- Unique Item: Zahkriisos [DB19/31]
- Word Wall: Dragon Aspect [DB2/3]
 Black Book: The Winds of Change
Move west, through the arch to a pedestal at the bottom of a spiral set of steps and small waterfall. Check the alcoves for a chest and Arcane Enchanter. On this plinth is a legendary Black Book.
- Arcane Enchanter
- Chest
- Black Book: The Winds of Change
 Door to Bloodskal Barrow
Ascend the spiral steps to the door and enter Bloodskal Barrow. Move along the rough tunnel to the handle, which reveals a secret rock door. Enter the subsequent Draugr tomb and engage a motley collection of Reavers, one singing a witty tune. This area is mapped and described in the Primary Location: Bloodskal Barrow.
- Reaver