
Elder Scrolls V: Skyrim Guide Essentials Training
Skill Constellations
This section explores the entirety of the Skill Constellations. These are color-coded for combat skills: the Path of Might (red), Stealth skills; the Path of Shadow (green); and Magic skills: the Path of Magic (blue).
Dawnguard introduces Skill Constellations for Vampire Lords: The Path of Undeath (purple) and Werewolves: The Path of the Lycanthrope (orange).
Dawnguard allows you to create Dragonbone Weapons, as part of your Smithing skill.
Dragonborn allows you to create new types of armor and weapons (Bonemold, Chitin, Nordic, and Stalhrim) as part of your Smithing skill.
Dragonborn allows you to craft and enchant staffs.
As a reward for completing Dragonborn Main Quest: At the Summit of Apocrypha, you are able to expend a Dragon Soul to reset all of the perks in one of the
Skill Constellations. So, if you decide you don’t like your previous perk selections or want to try something different, this is now possible.
There are three general categories of perks that deserve special mention:
- Skill-improvement perks: Many constellations offer a perk that simply makes you better at that skill’s primary effect (e.g., Agile Defender for Light Armor, Juggernaut for Heavy Armor, Stealth for Sneak). Choosing these perks is akin to receiving a huge number of skill increases for that skill all at once. These perks may not be as “flashy” or instantly gratifying as some of the other perks, but they are always a strong, effective choice.
- Magic rank perks: The five schools of magic each have a series of “rank” perks (Novice, Apprentice, Adept, Expert, and Master) that dramatically decrease the cost of spells from that school. These perks are absolutely critical to your ability to use magic effectively and should be a top priority for any serious mage.
- Tiered perks: Some perks can be selected multiple times for increased effect. These bonuses do not stack. For example, Heavy Armor’s Juggernaut 1 perk increases your armor rating by 20%, while Juggernaut 2 increases your armor rating by 40%. After taking Juggernaut 2, you will have a bonus of 40%, not 60%.
Combat Skills: The Path of Might – Smithing
Smithing is the art of creating and improving weapons and armor. Smithing workstations include the blacksmith forge, grindstone (for weapons), and workbench (for armor). Any improvements made at any of these stations count toward your Smithing skill; the amount of increase is based on the value of the item you craft or improve. To increase this skill as quickly as possible, forge your own items and then improve them. You can make hide and iron items without taking any perks. You can improve any item without taking any perks. However, you need perks to create any advanced items, such as dwarven or ebony weapons and armor.
Mining, smelting, and tanning provide raw materials for smithing, although they do not count toward this skill. Smithing synergizes well with Enchanting, since it guarantees you a ready supply of items to enchant. For more information on all of these activities, see the Crafting section.
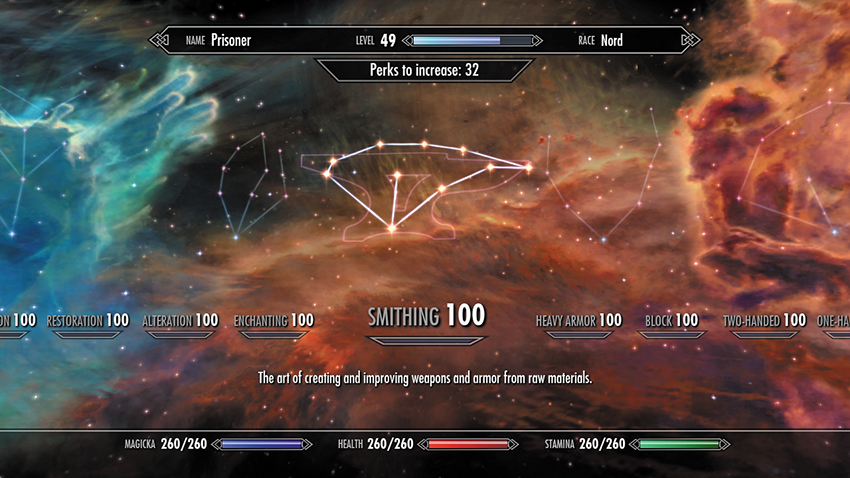
The main choice presented by your Smithing perks is obvious: Are you interested in making and improving Light Armor, like Elven, Scale, Glass, and Dragonscale? Or Heavy Armor, like Steel, Dwarven, Orcish, Ebony, Daedric, and Dragonplate? Focus on the side of the constellation that appeals most to you.
- Constellation: Path of Might
- Available Perks: 10
Available Smithing Perks
1. Steel Smithing
- You can create Steel and Bonemold armor and weapons at forges and improve them twice as much.
- Requires: Smithing 20
2. Arcane Blacksmith ★
- You can improve magical weapons and armor.
- Requires: Smithing 60
This is one of the most useful Smithing perks, especially if you plan to focus on Enchanting as well. If your Enchanting skill is low, you can improve a piece of gear that has a powerful enchantment but a weak armor rating to keep it viable for longer or you can make an already great item even better. If you’re a master artisan, you can make your own gear from scratch, enchant it, temper it, and then either use it or sell it for a considerable profit.
3. Elven Smithing
- You can create Elven armor and weapons (as well as Chitin and Heavy Chitin Armor) at forges and improve them twice as much.
- Requires: Smithing 40, Steel Smithing
4. Advanced Armors
- You can create Scaled and Steel Plate armor (as well as Nordic carved armor and weapons) at forges and improve them twice as much.
- Requires: Smithing 50, Elven Smithing
5. Glass Smithing
- You can create glass armor and weapons at forges and improve them twice as much.
- Requires: Smithing 70, Advanced Armors
6. Dwarven Smithing ★
- You can create dwarven armor and weapons at forges and improve them twice as much.
- Requires: Smithing 30, Steel Smithing
Once you begin exploring Dwarven Ruins, you’ll discover tons of scrap metal that you can smelt down into ingots. This is a great source of free, convenient crafting materials for your smithing practice. Taking this perk allows you to make better (and thus more valuable) dwarven items from these ingots, which improves your Smithing skill even more quickly and allows you to turn a nice profit too.
7. Orcish Smithing
- You can create Orcish armor and weapons at forges and improve them twice as much.
- Requires: Smithing 50, Dwarven Smithing
8. Ebony Smithing
- You can create ebony armor and weapons (as well as Stalhrim Armor, Light Stalhrim Armor, and Stalhrim Weapons*) at forges, and improve them twice as much.
- Requires: Smithing 80, Orcish Smithing
9. Daedric Smithing
- You can create Daedric armor and weapons at forges and improve them twice as much.
- Requires: Smithing 90, Ebony Smithing
Daedric weapons and armor are not available in shops, so the only way to get them is to find or make them.
10. Dragon Armor
- You can create Dragon Armor and Dragonbone Weapons at forges and improve them twice as much.
- Requires: Smithing 100, Glass Smithing, OR Daedric Smithing
Dragonplate and Dragonscale armors are not available in shops, so the only way to get them is to find or make them.
Racial Benefits
- +5 Smithing
- Nord
- Orc
- Redguard
Trainers
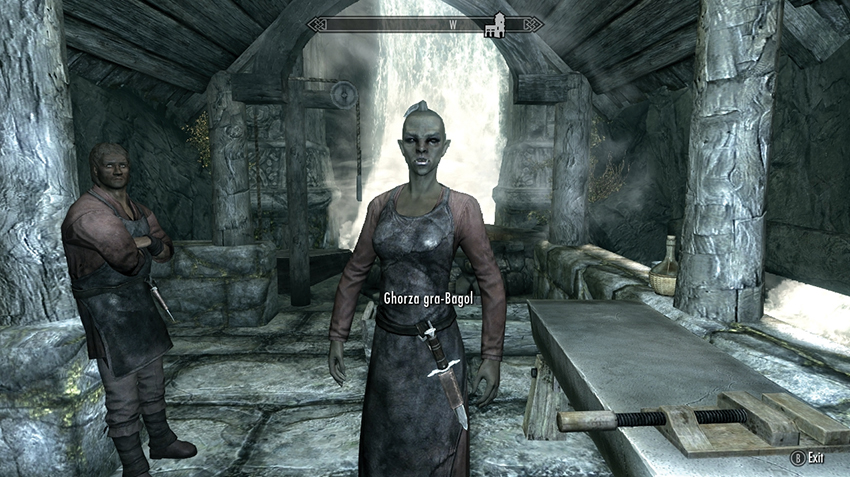
- Journeyman: Ghorza gra-Bagol, Blacksmith’s, in Markarth.
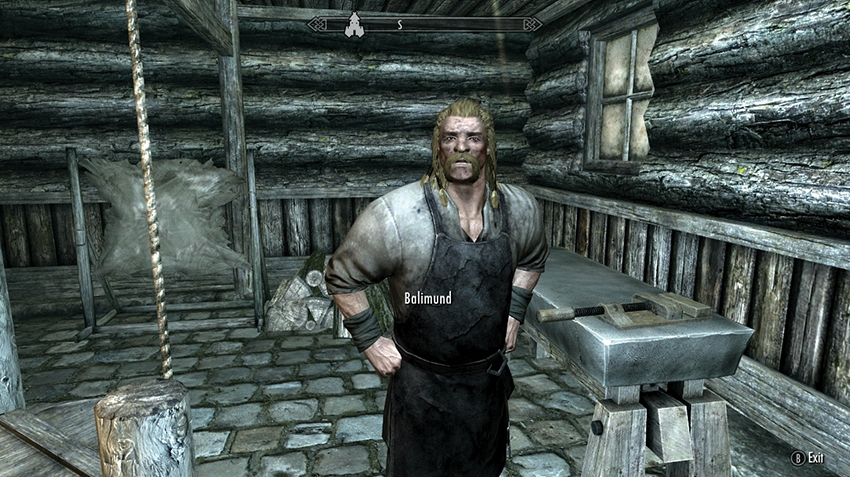
- Expert: Balumund, Blacksmith’s, in Riften.
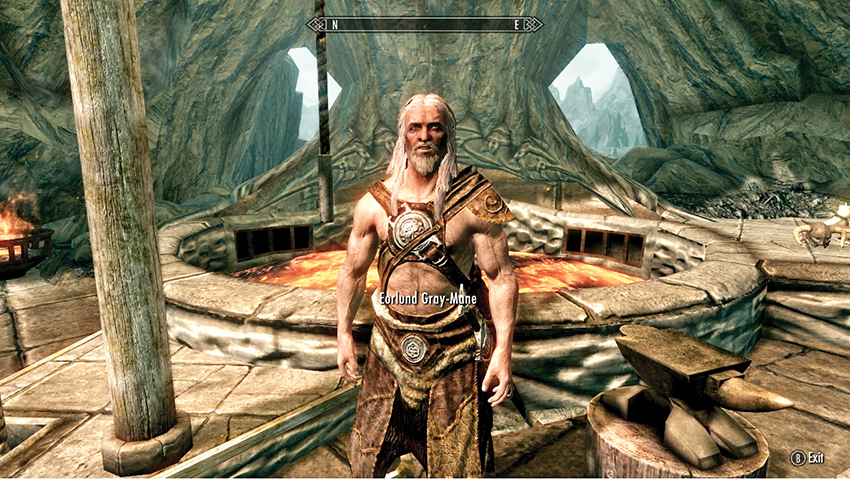
- Master: Eorlund Gray-Mane, Skyforge, in Whiterun.
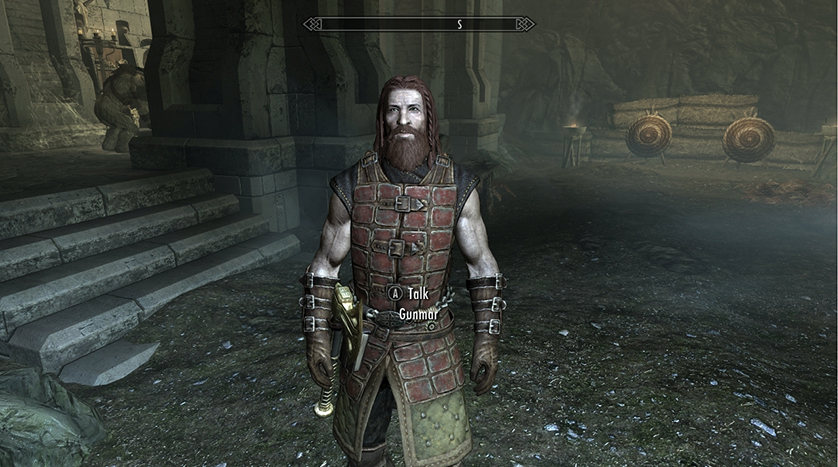
- Master: Gunmar, Blacksmith’s, in Fort Dawnguard.
Other Resources
- Use the guide search for a list of Smithing Skill Books, and where to look for them.
- You can find a list of Smithing Recipes later in this Training chapter.
- The following quests can also increase this skill:
- Other Factions Quest: Rjorn’s Drum.
- Daedric Quest: Discerning the Transmundane.
- Miscellaneous Objectives: The Reach: The Last Scabbard*.
- Favor: Item Retrieval (Cave)*.
- Favor: Rare Item Hunt*.
Combat Skills: The Path of Might – Heavy Armor
Heavy Armor allows you to make more effective use of Iron, Steel, Dwarven, Orcish, Ebony, Dragonplate, Daedric, and related armors. It offers excellent protection, though its weight will slow you down and reduce the amount of gear you can carry. High-end sets of heavy armor are especially rare, so you may wish to consider Smithing so you can craft your own when the time comes.
Your Heavy Armor skill increases when you take damage while wearing heavy armor, based on the damage of the incoming blow. If you’re wearing more than one kind of armor, the incoming damage is divided up among the pieces before being used to calculate skill uses. So, the more heavy armor you’re wearing, the more damage will be assigned to it, and the faster this skill will increase.
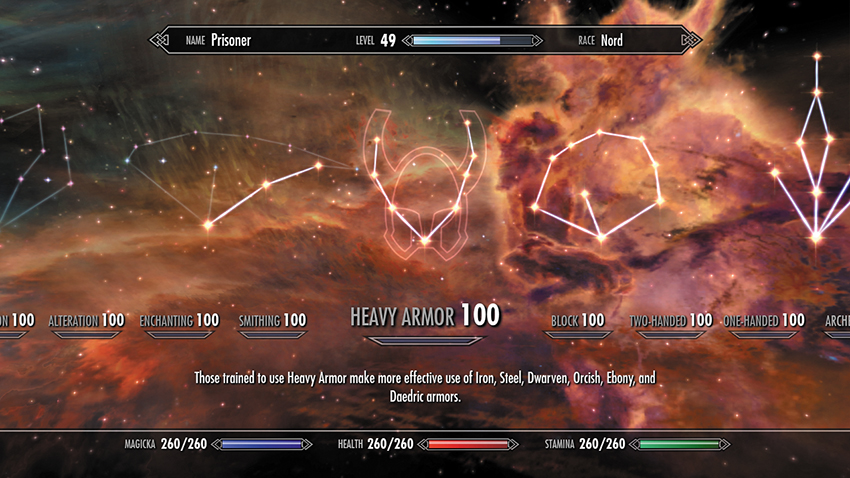
The Heavy Armor constellation has two main themes: the left arc focuses on unusual perks or those useful in specific situations, while the right arc emphasizes statistically powerful perks for Heavy Armor purists.
- Constellation: Path of Might
- Available Perks: 12
Available Heavy Armor Perks
1–5. Juggernaut (5 ranks) ★
- Rank 1: Increases the armor rating of your heavy armor by 20%.
- Requires: None
- Rank 2: Increases the armor rating of your heavy armor by 40%.
- Requires: Heavy Armor 20, Juggernaut 1
- Rank 3: Increases the armor rating of your heavy armor by 60%.
- Requires: Heavy Armor 40, Juggernaut 2
- Rank 4: Increases the armor rating of your heavy armor by 80%.
- Requires: Heavy Armor 60, Juggernaut 3
- Rank 5: Increases the armor rating of your heavy armor by 100%.
- Requires: Heavy Armor 80, Juggernaut 4
6. Fists of Steel
- Unarmed attacks with heavy armor gauntlets do their armor base rating in extra damage.
- Requires: Heavy Armor 30, Juggernaut 1
Although unarmed combat doesn’t increase any of your skills, it can still be a viable option, especially for Khajiits (whose Claws racial ability also improves unarmed attacks). This perk makes brawls dramatically easier.
7. Well Fitted ★
- Get a 25% Armor bonus if wearing all heavy armor: head, chest, hands, feet.
- Requires: Heavy Armor 30, Juggernaut 1
This bonus stacks with Juggernaut and Matching Set—a must-have for anyone serious about using Heavy Armor.
8. Cushioned
- Half-damage from falling if wearing all heavy armor: head, chest, hands, feet.
- Requires: Heavy Armor 50, Fists of Steel
Worth considering if you enjoy climbing mountains and scampering up rocks and don’t want to worry about fall damage.
9. Tower of Strength
- Get 50% less stagger when wearing only heavy armor.
- Requires: Heavy Armor 50, Well Fitted
10. Conditioning
- Heavy armor weighs nothing and doesn’t slow you down.
- Requires: Heavy Armor 70, Cushioned
Conditioning reduces the weight of heavy armor you’re wearing (it doesn’t affect the weight of armor in your inventory) and eliminates the speed penalty for wearing it. If that appeals to you but you aren’t excited about having to take Fists of Steel and Cushioned to reach this perk, try out the Steed Stone ability (from one of the Standing Stones): it has almost the same effect and won’t cost you any perks.
11. Matching Set
- Additional 25% Armor bonus if wearing a matched set of heavy armor.
- Requires: Heavy Armor 70, Tower of Strength
This bonus stacks with Juggernaut and Well Fitted. It’s challenging to acquire a complete set of the high-end heavy armor (unless you’re specializing in Smithing), so make sure you have a matching set before taking this perk.
12. Reflect Blows
- Gain a 10% chance to reflect melee damage back to the enemy while wearing all heavy armor: head, chest, hands, feet.
- Requires: Heavy Armor 100, Matching Set
Racial Benefits
- +10 Heavy Armor
- Nord
- +5 Heavy Armor
- Imperial
Trainers
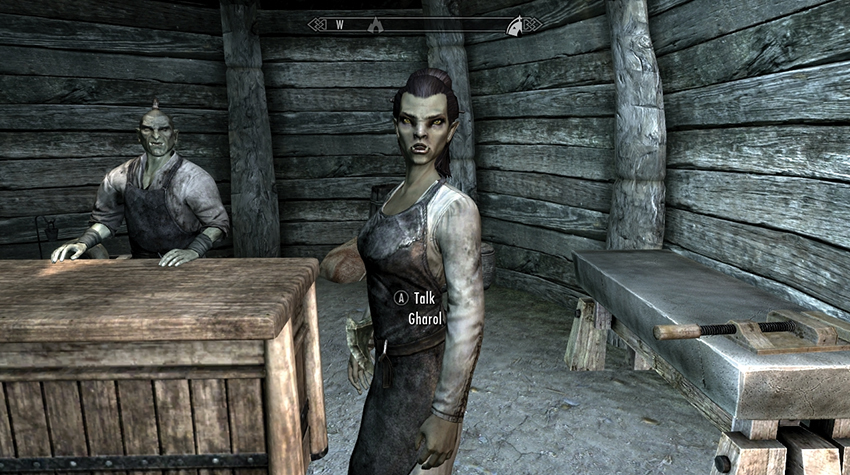
- Expert: Gharol, Dushnikh Yal, in The Reach.
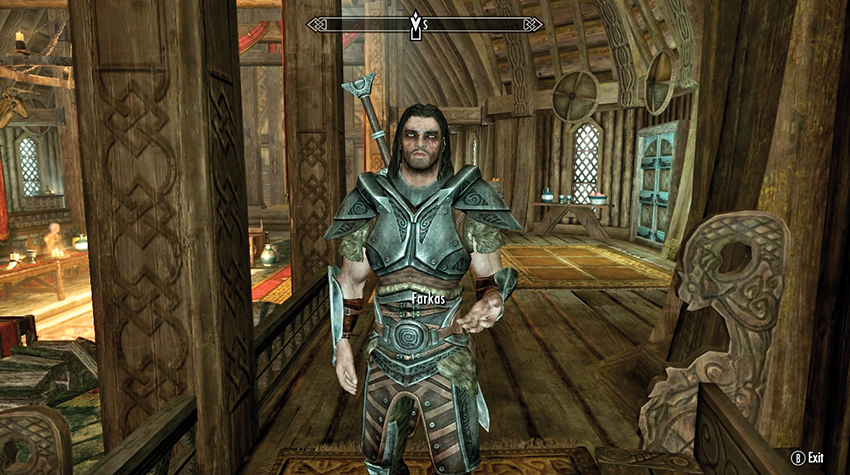
- Master: Farkas, the Companions of Jorrvaskr, in Whiterun.
- Master: Isran, Fort Dawnguard, in The Rift.
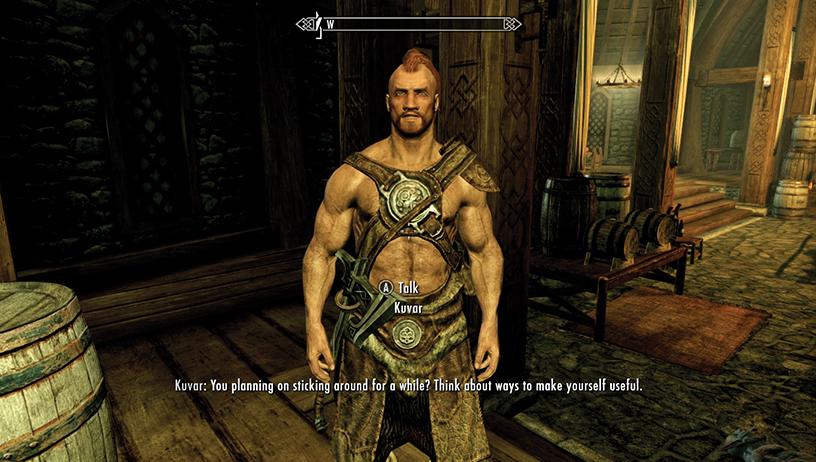
- Master: Kuvar, Bujold’s Retreat, then Thirsk Mead Hall, in Solstheim.
Other Resources
- Use the guide search for a list of Heavy Armor Skill Books, and where to look for them.
- You can find a list of Heavy Armor items in the Inventory.
- The following quests can also increase this skill:
- Other Factions Quest: Rjorn’s Drum.
- Daedric Quest: Discerning the Transmundane.
- Favor: The Bandit Slayer*
- Solstheim Side Quest: Filial Bonds
Block is the art of deflecting an enemy’s blows with your shield or weapon. Your Block skill reduces the damage you take and the amount you stagger when you block an attack. Your skill increases when you successfully block damage (based on the damage of the blow before it was blocked) or when you successfully bash an enemy with a weapon or shield.
Parries with one- or two-handed weapons are also improved by your Block skill and by many Block perks—you don’t have to use a shield to benefit from this skill. But remember that if you have a second weapon or spell equipped in your left hand, you can’t block at all.
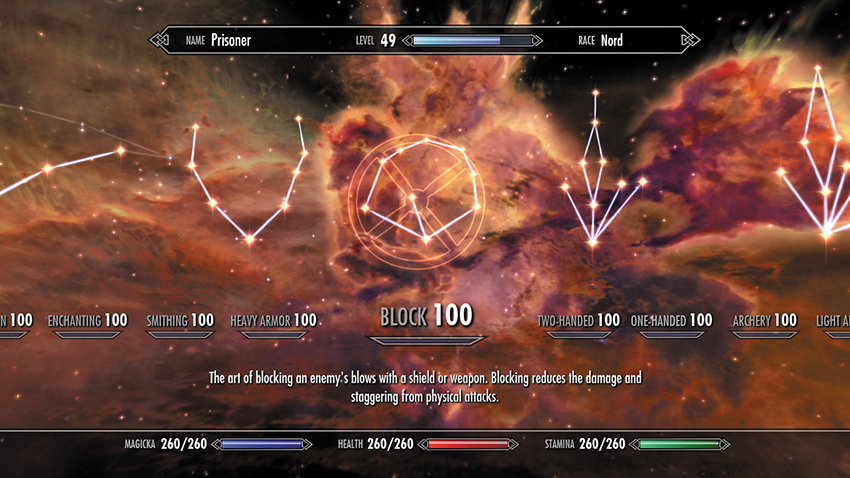
In the Block constellation, the left arc offers shield-specific damage-reduction perks, while the right arc focuses on Bash and Power Bash perks that work with both shield and weapon blocks.
- Constellation: Path of Might
- Available Perks: 13
1–5. Shield Wall (5 ranks)
- Rank 1: Blocking is 20% more effective.
- Requires: None
- Rank 2: Blocking is 25% more effective.
- Requires: Block 20, Shield Wall 1
- Rank 3: Blocking is 30% more effective.
- Requires: Block 40, Shield Wall 2
- Rank 4: Blocking is 35% more effective.
- Requires: Block 60, Shield Wall 3
- Rank 5: Blocking is 40% more effective.
- Requires: Block 80, Shield Wall 4
6. Deflect Arrows
- When you block with a shield, arrows that hit the shield do no damage.
- Requires: Block 30, Shield Wall 1
This perk greatly reduces the damage you take while rushing archers, but it’s much less effective once you’ve engaged the enemy, since your shield may not be in the right place at the right time.
7. Power Bash
- Able to do a Power Bash.
- Requires: Block 30, Shield Wall 1
This perk unlocks a new Power Bash move that sends enemies flying. This is a great addition to your arsenal, especially if you’re employing a weapon-and-shield combat style.
8. Quick Reflexes
- Time slows down if you are blocking during an enemy’s power attack.
- Requires: Block 30, Shield Wall 1
Quick Reflexes gives you a chance to react and dodge or (better yet) respond with a bash to counter the attack.
9. Deadly Bash
- Bashing does five times more damage.
- Requires: Block 50, Power Bash
While this sounds powerful, bashes don’t do much damage to start with. The damage bonus certainly doesn’t hurt, but it’s still much faster to kill enemies with your weapon than with your shield.
10. Elemental Protection ★
- Blocking with a shield reduces incoming fire, frost, and shock damage by 50%.
- Requires: Block 50, Deflect Arrows
This perk is especially powerful when fighting mages. Combine with the Breton’s Magic Resistance or the Alteration Magic Resistance perks for almost impenetrable defense, allowing you to shrug off enemy spells with ease!
11. Block Runner
- Able to move faster with a shield raised.
- Requires: Block 70, Elemental Protection
Block Runner helps you close the distance with a ranged mage or archer and allows you to cover more ground when making a Shield Charge.
12. Disarming Bash ★
- Chance to disarm when power bashing.
- Requires: Block 70, Deadly Bash
Disarming Bash gives you a chance to knock away an enemy’s equipped weapon if he is in the middle of executing a power attack. While many enemies have backup weapons (often daggers), they’re significantly less powerful, so you can usually crush a disarmed foe with ease. This is a great perk, at least until you learn the Disarm Shout, which does this more reliably. Consult the Shouts section to find out how to acquire this; you may wish to ignore this perk if the Shout becomes more useful to you.
13. Shield Charge
- Sprinting with a shield raised will knock down most targets.
- Requires: Block 100, Block Runner OR Disarming Bash
Shield Charge is great for forcing your way out of a mob of enemies if you get surrounded or buying a few moments to recover in the middle of a difficult battle.
Racial Benefits
- +5 Block
- Imperial
- Nord
- Orc
- Redguard
Trainers
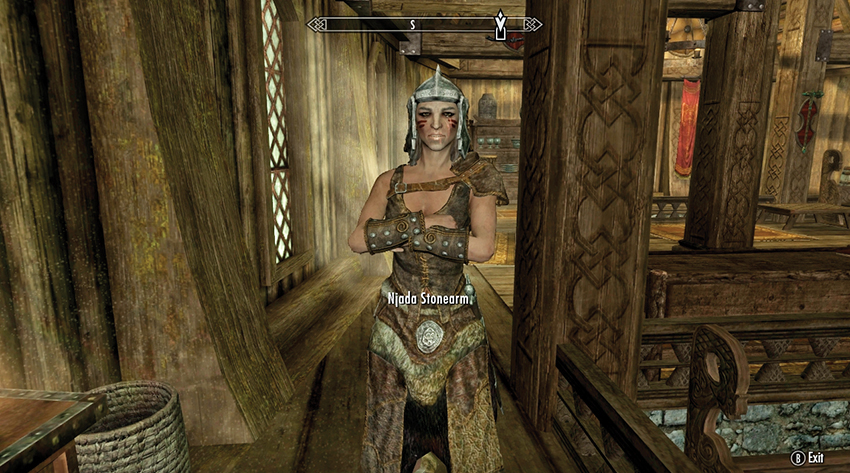
- Expert: Njada Stonearm, the Companions of Jorrvaskr, in Whiterun.
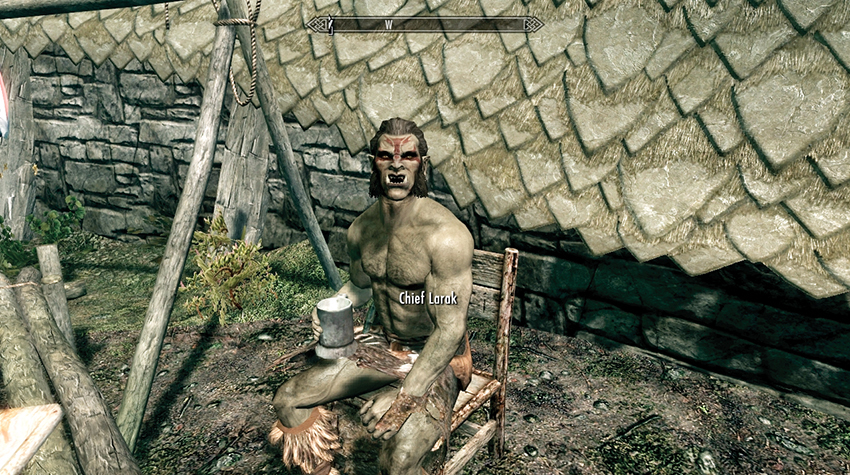
- Master: Chief Larak, Mor Khazgur, in The Reach.
Other Resources
- The following quests can also increase this skill:
- Other Factions Quest: Rjorn’s Drum.
- Daedric Quest: Discerning the Transmundane.
- Miscellaneous Objectives: Haafingar Hold (Dragon Bridge): Dragon’s Breath Mead*.
- Miscellaneous Objectives: The Reach: The Ghost of Old Hroldan*.
- Favor: Item Retrieval (Bandit Camp)* Favor: Item Retrieval (Cave)*
- Solstheim Side Quest: Filial Bonds
Combat Skills: The Path of Might – Two-Handed
The Two-Handed skill governs the use of large weapons such as greatswords, battle-axes, and warhammers. Those trained in this skill deliver more lethal and powerful blows. To improve this skill, damage enemies with a Two-Handed weapon. The skill improves based on the amount of damage you do (minus any enchantments), not the number of swings you take, so you get the same increase regardless of how many hits it takes to fell your foe.
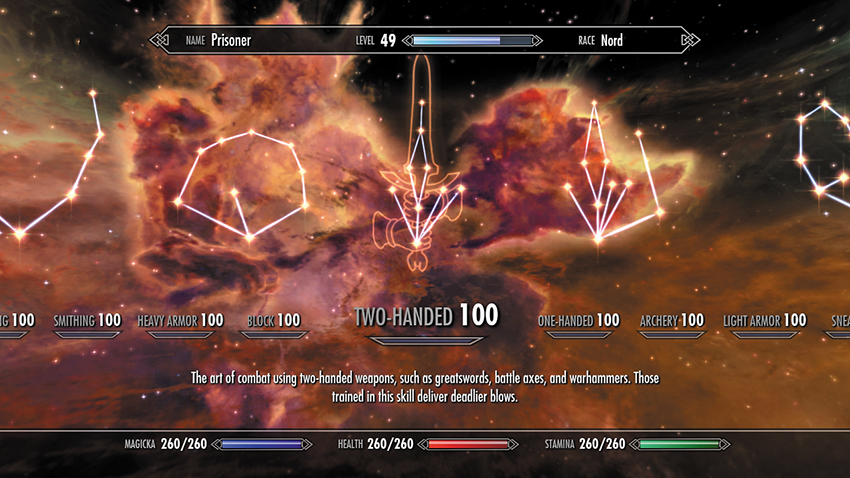
A number of perks in the Two-Handed constellation improve a specific type of Two-Handed weapon. If you generally use the best weapon you can find (no matter what type it is), it’s wiser to invest your perks elsewhere: better to have a bonus you can rely on than one you see only occasionally.
- Constellation: Path of Might
- Available Perks: 19
Available Two-Handed Perks
1–5. Barbarian (5 ranks) ★
- Rank 1: Two-Handed weapons do 20% more damage.
- Requires: None
- Rank 2: Two-Handed weapons do 40% more damage.
- Requires: Two-Handed 20, Barbarian 1
- Rank 3: Two-Handed weapons do 60% more damage.
- Requires: Two-Handed 40, Barbarian 2
- Rank 4: Two-Handed weapons do 80% more damage.
- Requires: Two-Handed 60, Barbarian 3
- Rank 5: Two-Handed weapons do twice as much damage.
- Requires: Two-Handed 80, Barbarian 4
This perk provides a massive +20% bonus to your Two-Handed weapon damage with each rank. This is a huge boost; make this perk your top priority whenever your skill level permits.
6. Champion’s Stance ★
- Power attacks with Two-Handed weapons cost 25% less stamina.
- Requires: Two-Handed 20, Barbarian 1
In effect, this perk allows you to power attack more often. Two-Handed weapons excel at devastating power attacks, so this is a solid choice.
7–9. Deep Wounds (3 ranks)
- Rank 1: Attacks with greatswords have a 10% chance of doing critical damage.
- Requires: Two-Handed 30, Barbarian 1
- Rank 2: Attacks with greatswords have a 15% chance of doing even more critical damage.
- Requires: Two-Handed 60, Deep Wounds 1
- Rank 3: Attacks with greatswords have a 20% chance of doing even more critical damage.
- Requires: Two-Handed 90, Deep Wounds 2
When a weapon scores a critical hit, it deals 50% more damage, more for Ranks 2 and 3. Statistically, this perk works out to a 5% boost in your average damage over time at Rank 1 and a 15% boost by Rank 3. That’s not nothing, but Barbarian is still better.
10–12. Limbsplitter (3 ranks)
- Rank 1: Attacks with battle-axes cause extra bleeding damage.
- Requires: Two-Handed 30
- Rank 2: Attacks with battle-axes cause more bleeding damage.
- Requires: Two-Handed 60, Limbsplitter 1
- Rank 3: Attacks with battle-axes cause even more bleeding damage.
- Requires: Two-Handed 90, Limbsplitter 2
The exact amount of bleeding damage depends on the axe, but in general, this perk causes each hit to do 1 to 3 points of damage each second for 3 to 6 seconds, with the higher ranks pushing higher into that range, making this roughly equivalent to a short-lived lingering poison.
13–15. Skullcrusher (3 ranks)
- Rank 1: Attacks with warhammers ignore 25% of armor.
- Requires: Two-Handed 30
- Rank 2: Attacks with warhammers ignore 50% of armor.
- Requires: Two-Handed 60, Skullcrusher 1
- Rank 3: Attacks with warhammers ignore 75% of armor.
- Requires: Two-Handed 90, Skullcrusher 2
This perk has no effect against unarmored enemies, but it can make it significantly easier to take down a heavily armored foe, such as many bosses.
16. Devastating Blow
- Standing power attacks do 25% bonus damage with a chance to decapitate your enemies.
- Requires: Two-Handed 50, Champion’s Stance
This is a strong, reliable damage bonus. The decapitation adds a grotesquely satisfying visual touch but applies only if your attack already killed the enemy (this perk doesn’t give you a chance of an instant kill).
17. Great Critical Charge
- You can do a Two-Handed power attack while sprinting that does double critical damage.
- Requires: Two-Handed 50, Champion’s Stance
Less powerful than it might appear, the “double critical damage” bonus applies only if you land a critical hit in the first place. More importantly, you have to remember to use it for it to be effective. Take this if you find yourself making “berserker rushes” on your own.
18. Sweep
- Sideways power attacks with Two-Handed weapons hit all targets in front of you.
- Requires: Two-Handed 70, Devastating Blow OR Great Critical Charge
Great at clearing out swaths of enemies in a single blow.
19. Warmaster
- Backward power attacks have a 25% chance to paralyze the target.
- Requires: Two-Handed 100, Sweep
Racial Benefits
- +10 Two-Handed
- Nord
- +5 Two-Handed
- Orc
Trainers
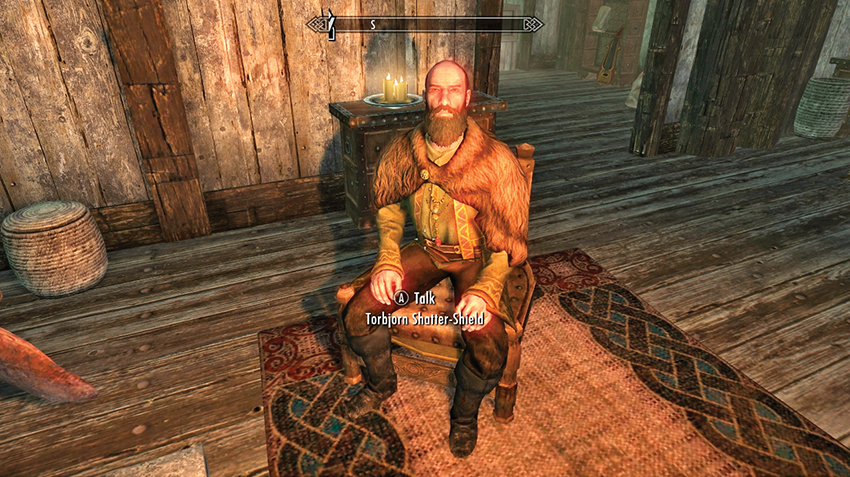
- Expert: Torbjorn Shatter-Shield, Candlehearth Hall and the streets of Windhelm.
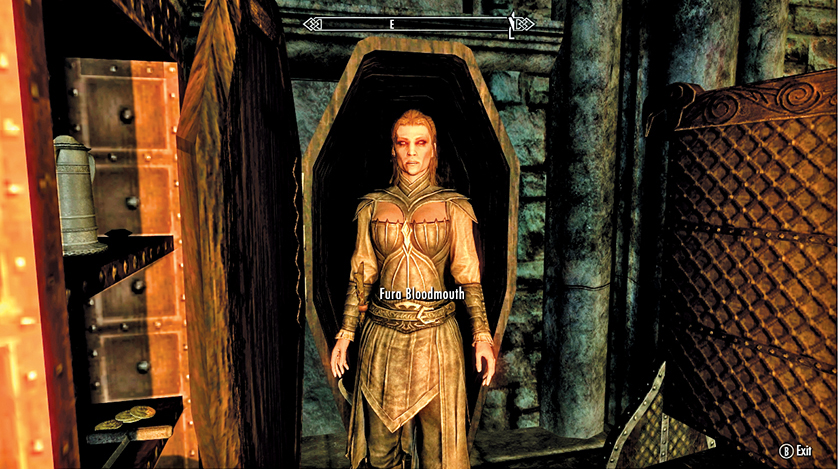
- Master: Fura Bloodmouth, Castle Volkihar, in Haafingar Hold (Sea of Ghosts).
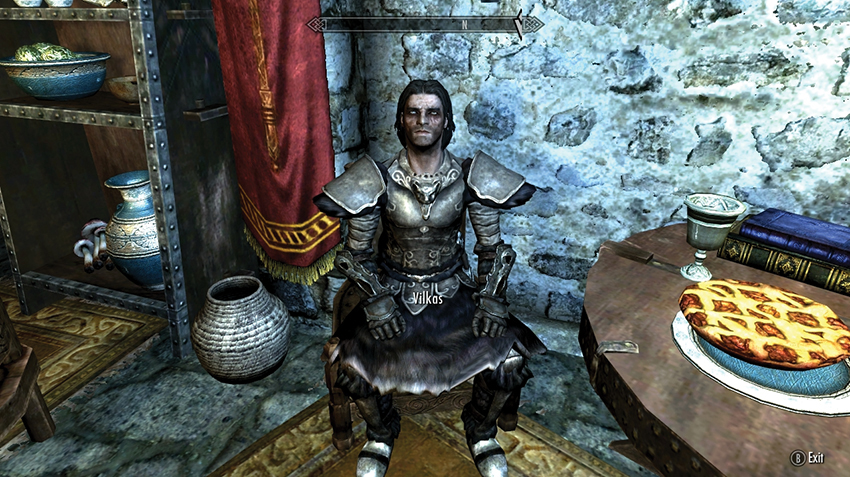
- Master: Vilkas, the Companions of Jorrvaskr, in Whiterun.
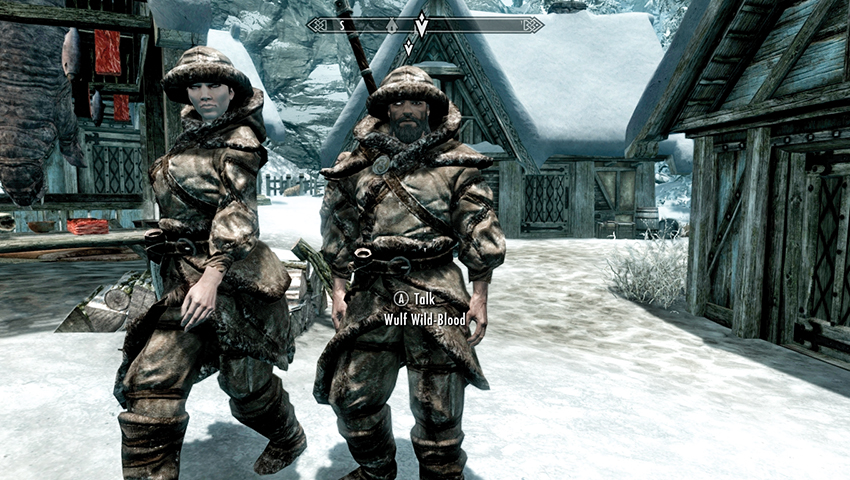
- Master: Wulf Wild-Blood, of Skaal Village, in Solstheim.
Other Resources
- The following quests can also increase this skill:
- Other Factions Quest: Rjorn’s Drum.
- Daedric Quest: Discerning the Transmundane.
- Favor: A Good Talking To*.
Combat Skills: The Path of Might – One-Handed
The One-Handed skill governs the use of weapons like the sword, war axe, mace, and dagger. Those trained in this skill deliver more deadly blows. To improve this skill, you must damage enemies with a One-Handed weapon. The skill improves based on the amount of damage you do (minus any enchantments), not the number of swings you take; therefore, while it might take 10 hits to kill a bandit with a dagger, you would get the same skill increase for killing him in three hits with a mace.
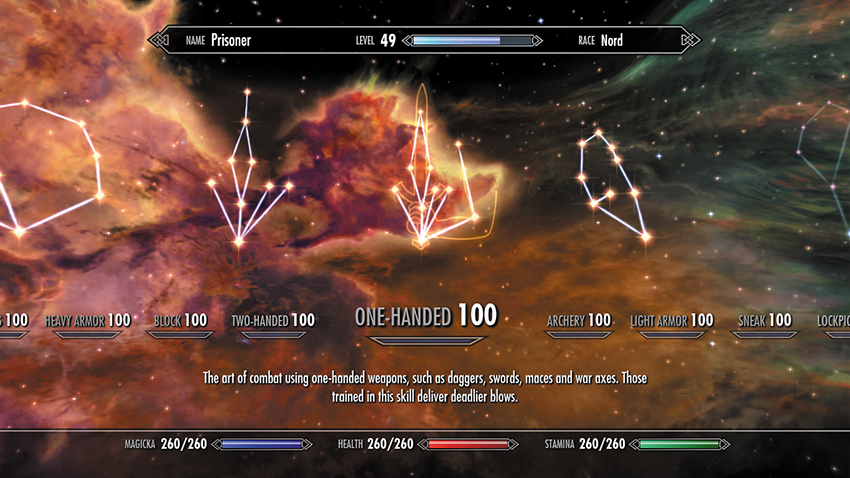
A number of perks in the One-Handed constellation improve a specific type of One-Handed weapon. If you generally use the best weapon you can find (no matter what type it is), it’s wiser to invest your perks elsewhere: better to have a bonus you can rely on than one you see only occasionally.
- Constellation: Path of Might
- Available Perks: 21
Available One-Handed Perks
1–5. Armsman (5 ranks) ★
- Rank 1: One-Handed weapons do 20% more damage.
- Requires: None
- Rank 2: One-Handed weapons do 40% more damage.
- Requires: One-Handed 20, Armsman 1
- Rank 3: One-Handed weapons do 60% more damage.
- Requires: One-Handed 40, Armsman 2
- Rank 4: One-Handed weapons do 80% more damage.
- Requires: One-Handed 60, Armsman 3
- Rank 5: One-Handed weapons do twice as much damage.
- Requires: One-Handed 80, Armsman 4
This perk provides a massive +20% bonus to your One-Handed weapon damage with each rank. This is a huge boost; make this perk your top priority whenever your skill level permits.
6. Fighting Stance ★
- Power attacks with One-Handed weapons cost 25% less stamina.
- Requires: One-Handed 20, Armsman 1
By conserving your stamina, this perk allows you to power attack or bash more often. A solid choice, especially if you dual-wield One-Handed weapons, as this bonus works well with the Dual Flurry and Dual Savagery perks.
7–9. Bladesman (3 ranks)
- Rank 1: Attacks with swords have a 10% chance of doing critical damage.
- Requires: One-Handed 30, Armsman 1
- Rank 2: Attacks with swords have a 15% chance of doing more critical damage.
- Requires: One-Handed 60, Bladesman 1
- Rank 3: Attacks with swords have a 20% chance of doing even more critical damage.
- Requires: One-Handed 90, Bladesman 2
When a weapon scores a critical hit, it deals 50% more damage—more for ranks 2 and 3. Statistically, this perk works out to a 5% boost in your average damage over time at Rank 1 and a 15% boost by Rank 3. That’s not insignificant, but Armsman is still better.
10–12. Bone Breaker (3 ranks)
- Rank 1: Attacks with maces ignore 25% of armor.
- Requires: One-Handed 30, Armsman 1
- Rank 2: Attacks with maces ignore 50% of armor.
- Requires: One-Handed 60, Bone Breaker 1
- Rank 3: Attacks with maces ignore 75% of armor.
- Requires: One-Handed 90, Bone Breaker 2
This perk has no effect against unarmored enemies, but it can make it significantly easier to take down a heavily armored foe, such as many bosses.
13–15. Hack and Slash (3 ranks)
- Rank 1: Attacks with war axes cause extra bleeding damage.
- Requires: One-Handed 30, Armsman 1
- Rank 2: Attacks with war axes cause more bleeding damage.
- Requires: One-Handed 60, Hack and Slash 1
- Rank 3: Attacks with war axes cause even more bleeding damage.
- Requires: One-Handed 90, Hack and Slash 2
The exact amount of bleeding damage depends on the axe, but in general, this perk causes each hit to do 1 to 3 points of damage each second for 3 to 6 seconds, with the higher ranks pushing farther into that range. This is roughly equivalent to a short-lived lingering poison.
16–17. Dual Flurry (2 ranks)
- Rank 1: Dual-wielding attacks are 20% faster.
- Requires: One-Handed 30, Armsman 1
- Rank 2: Dual-wielding attacks are 35% faster.
- Requires: One-Handed 50, Dual Flurry 1
18. Critical Charge
- Can do a One-Handed power attack while sprinting that does double critical damage.
- Requires: One-Handed 50, Fighting Stance
This perk still requires that you land a critical hit in the first place in order to receive the damage bonus. Worth taking if you find yourself making berserker rushes on your own, if you’ve taken the Bladesman perks, or if you’re dual-wielding (since you’ve got a better chance of getting a critical hit with at least one weapon).
19. Savage Strike
- Standing power attacks do 25% bonus damage with a chance to decapitate your enemies.
- Requires: One-Handed 50, Fighting Stance
This is a strong, reliable damage bonus, though the decapitation only applies if you’ve already killed the enemy. But standing over the headless corpse of your kill is a satisfying way to temper your bloodlust!
20. Dual Savagery ★
- Duel-wielding power attacks do 50% more damage.
- Requires: One-Handed 70, Dual Flurry 1
A great pick if you’re focused on dual wielding; this is stronger than Savage Strike or Critical Charge and stacks with both of them, making your power attacks incredibly deadly.
21. Paralyzing Strike
- Your backward power attack has a 25% chance to paralyze the target.
- Requires: One-Handed 100, Savage Strike OR Critical Charge
Paralyzing Strike is a powerful ability...if you remember to use it. When it works, you can inflict massive damage and often kill your foes outright, before they can get back on their feet. But how often do you use backward power attacks?
Racial Benefits
- +10 One-Handed
- Redguard
- +5 One-Handed
- Imperial
- Khajiit
- Nord
- Orc
Trainers
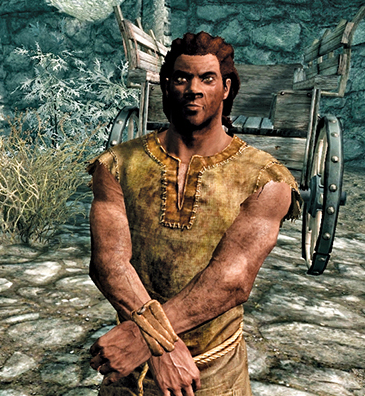
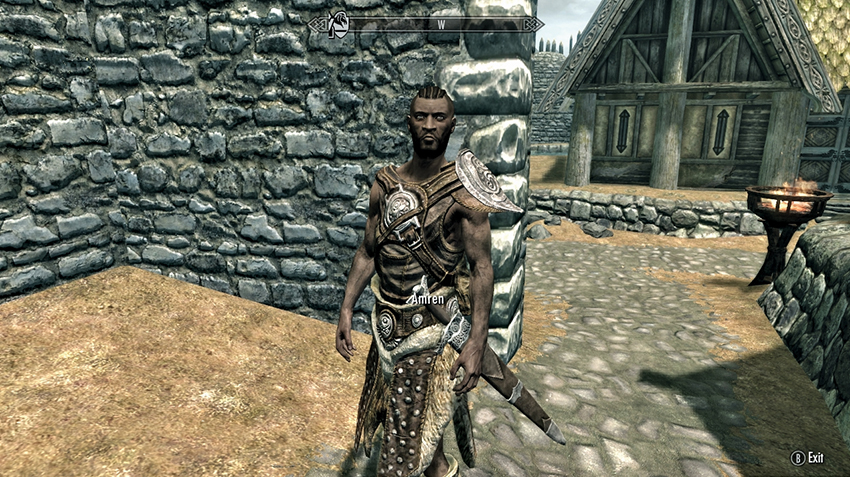
- Journeyman: Amren, in his house or the streets of Whiterun.
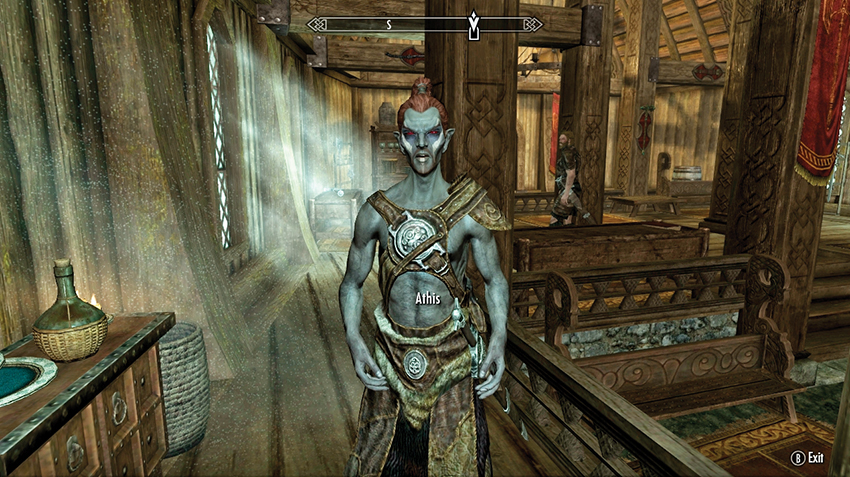
- Expert: Athis, the Companions of Jorrvaskr, in Whiterun.
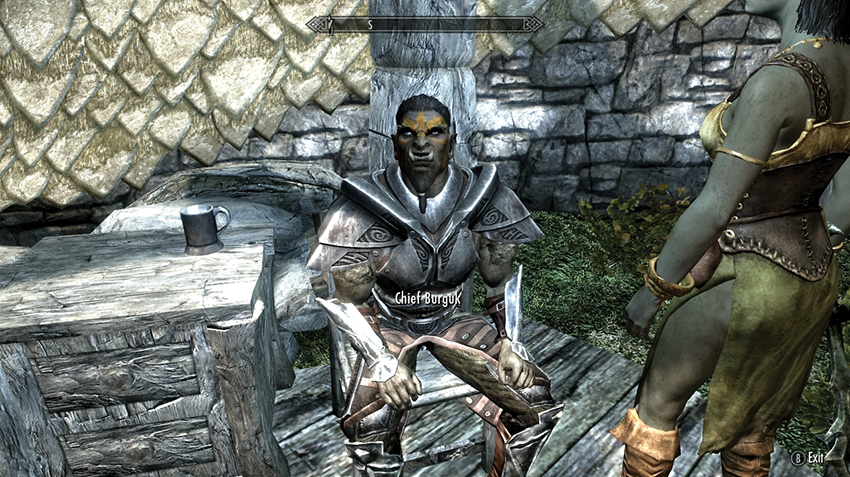
- Master: Chief Burguk, Dushnikh Yal, in The Reach.
Other Resources
- The following quests can also increase this skill:
- Other Factions Quest: Rjorn’s Drum.
- Daedric Quest: Discerning the Transmundane.
- Miscellaneous Objectives: The Reach: The Ghost of Old Hroldan*.
- Favor: Item Retrieval (Bandit Camp)*
- Solstheim Side Quest: Filial Bonds
Combat Skills: The Path of Might – Archery
Archery represents the skill and training needed to wield a bow effectively in combat. The greater your skill, the more deadly your shots. Your Archery skill improves when you damage enemies with a bow and arrows. The amount of increase is based on the damage that you do (minus any enchantments). Of course, only shots that hit their mark will count.
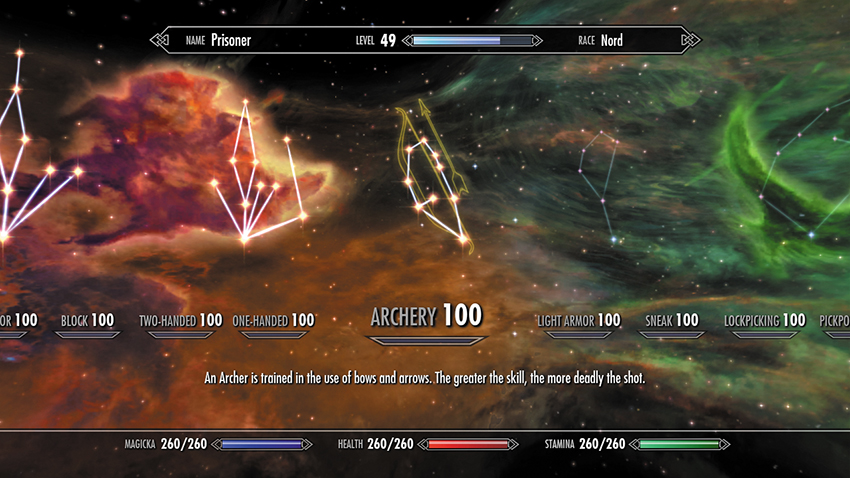
- Constellation: Path of Might
- Available Perks: 16
Available Archery Perks
1–5. Overdraw (5 ranks) ★
- Rank 1: Bows do 20% more damage.
- Requires: None
- Rank 2: Bows do 40% more damage.
- Requires: Archery 20, Overdraw 1
- Rank 3: Bows do 60% more damage.
- Requires: Archery 40, Overdraw 2
- Rank 4: Bows do 80% more damage.
- Requires: Archery 60, Overdraw 3
- Rank 5: Bows do twice as much damage.
- Requires: Archery 80, Overdraw 4
This perk provides a massive +20% bonus to your bow damage with each rank. This is a huge boost; make this perk your top priority whenever your skill level permits.
6–8. Critical Shot (3 ranks)
- Rank 1: 10% chance of a critical hit that does extra damage.
- Requires: Archery 30, Overdraw 1
- Rank 2: 15% chance of a critical hit that does 25% more critical damage.
- Requires: Archery 60, Critical Shot 1
- Rank 3: 20% chance of a critical hit that does 50% more critical damage.
- Requires: Archery 90, Critical Shot 2
When a weapon scores a critical hit, it deals 50% more damage. Statistically, this perk works out to a 5% boost in your average damage over time at Rank 1 and a 15% boost by Rank 3. That’s not insignificant, but Overdraw is still better.
9. Eagle Eye ★
- Pressing Block while aiming will zoom in your view.
- Requires: Archery 30, Overdraw 1
This perk allows you to snipe enemies more accurately from a greater distance. This is a great choice for stealth archers: Since you may get only one shot, make it count!
10–11. Steady Hand (2 ranks)
- Rank 1: Zooming in with a bow slows time by 25%.
- Requires: Archery 40, Eagle Eye
- Rank 2: Zooming in with a bow slows time by 50%.
- Requires: Archery 60, Steady Hand 1
This perk is useful for minimizing the chance that your target will move while you line up a stealth shot or for making sure an important shot hits its mark. It’s especially effective against dragons in the air; you’ll still have to lead your shot a little (i.e., aim at where you think the creature will be when the arrow arrives, not where it is when you fire), but this improves your odds of hitting them significantly.
12. Hunter’s Discipline
- Recover twice as many arrows from dead bodies.
- Requires: Archery 50, Critical Shot 1
A fine choice if you find yourself running out of arrows frequently or use a lot of high-end arrows. If you mainly use basic iron or steel arrows, take something else; they’re so cheap and so common that recovering more of them just isn’t worth the perk.
13. Power Shot ★
- Arrows stagger all but the largest opponents 50% of the time.
- Requires: Archery 50, Eagle Eye
Power Shot is surprisingly strong: In the time it takes an enemy to stagger and recover, you may be able to fire off another shot or two. The stagger will also interrupt an enemy’s charge or block, briefly giving you a clear opening. Or when all else fails, take that second or two to put some space between you and your opponent.
14. Ranger
- Able to move faster with a drawn bow.
- Requires: Archery 60, Hunter’s Discipline
15. Quick Shot
- Can draw a bow 30% faster.
- Requires: Archery 70, Power Shot
16. Bullseye
- You have a 15% chance of paralyzing the target for 10 seconds.
- Requires: Archery 100, Quick Shot OR Ranger
Bullseye gives you a chance to paralyze opponents with each shot. This is fantastic at medium and short ranges, where it can take an enemy out of a fight and allows you to finish them off quickly. It’s somewhat less effective at long range, since enemies fall over when paralyzed, making it more difficult (or impossible) to hit them again from that distance.
Racial Benefits
- +10 Archery
- Wood Elf
- +5 Archery
- Khajiit
- Redguard
Trainers
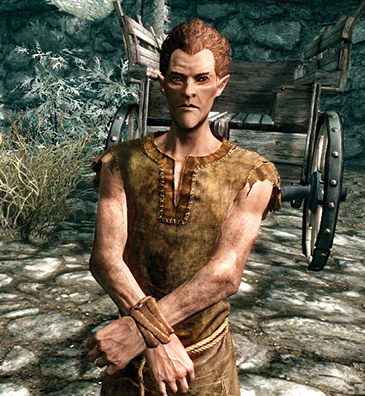
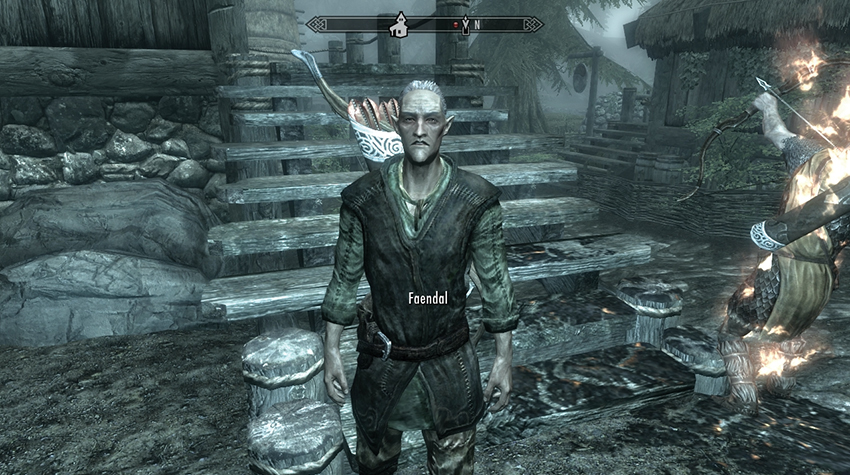
- Journeyman: Faendal, of Riverwood, in Whiterun Hold.
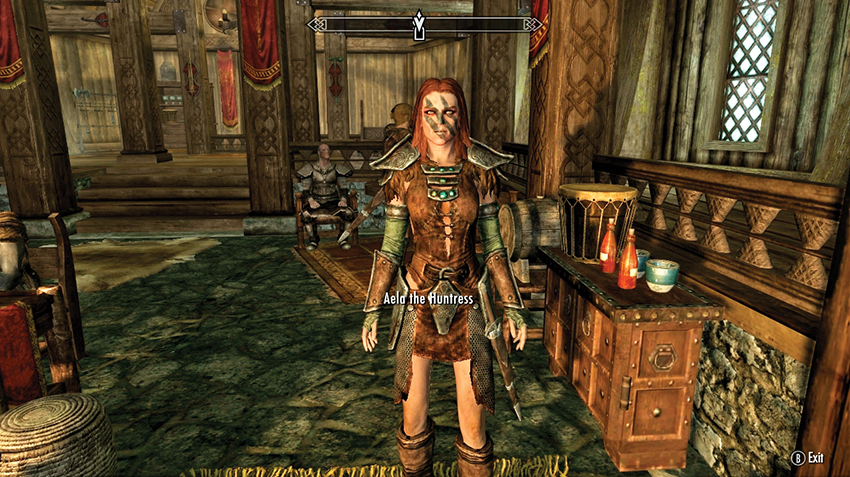
- Expert: Aela the Huntress, the Companions of Jorrvaskr, in Whiterun.
- Master: Niruin, the Thieves Guild, The Ragged Flagon, in Riften.
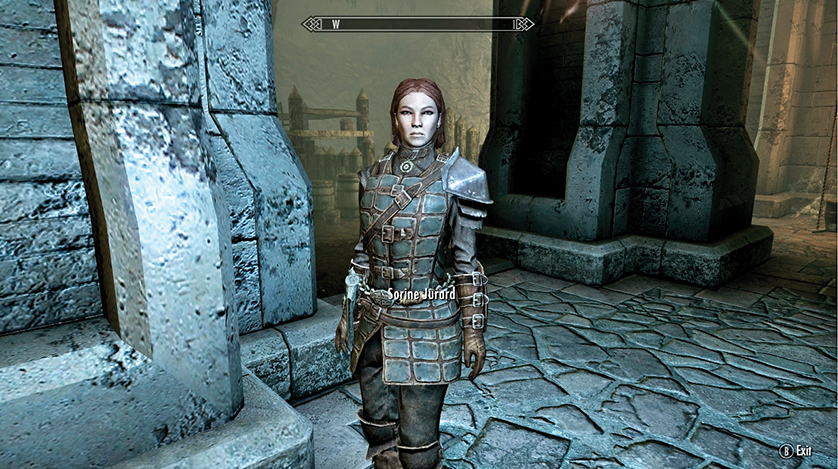
- Master: Sorine Jurard, in Fort Dawnguard, The Rift.
Other Resources
- The following quests can also increase this skill:
- Other Factions Quest: Rjorn’s Drum.
- Daedric Quest: Discerning the Transmundane.
- Dungeon Quest: Angi’s Camp: Composure, Speed, and Precision*.
- Solstheim Side Quest: Filial Bonds
Stealth Skills: The Path of Shadow – Light Armor
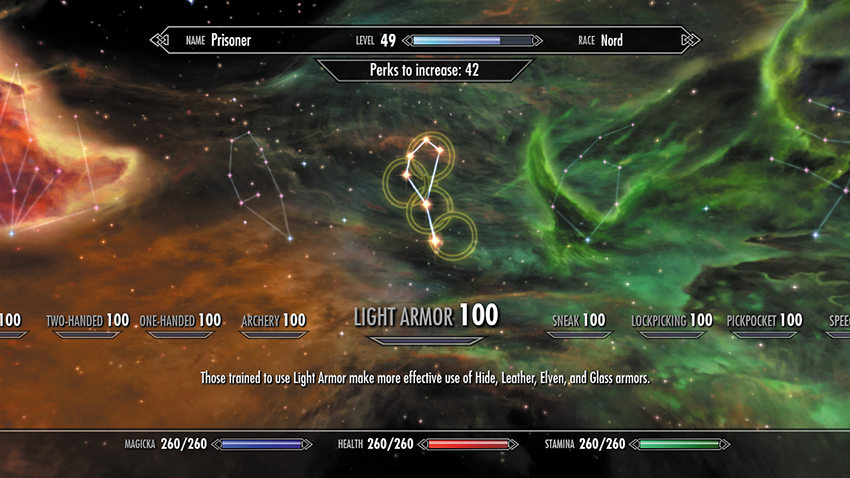
Light Armor allows you to make more effective use of hide, leather, Elven, glass, Dragonscale, and related armors. Light Armor offers a good balance between weight, protection, and mobility and is recommended for stealthy characters or those with other forms of protection (such as a good shield or the occasional ward) to supplement their defenses.
Your Light Armor skill increases when you take damage while wearing light armor, based on the damage of the incoming blow. If you’re wearing more than one kind of armor, the incoming damage is divided up among the pieces before being used to calculate skill uses, so wearing more light armor will allow this skill to develop faster.
- Constellation: Path of Shadow
- Available Perks: 10
Available Light Armor Perks
1–5. Agile Defender (5 ranks) ★
- Rank 1: Increase armor rating for Light Armor by 20%.
- Requires: None
- Rank 2: Increases the armor rating of your light armor by 40%.
- Requires: Light Armor 20, Agile Defender 1
- Rank 3: Increases the armor rating of your light armor by 60%.
- Requires: Light Armor 40, Agile Defender 2
- Rank 4: Increases the armor rating of your light armor by 80%.
- Requires: Light Armor 60, Agile Defender 3
- Rank 5: Increases the armor rating of your light armor by 100%.
- Requires: Light Armor 80, Agile Defender 4
6. Custom Fit ★
- You get a 25% armor bonus if wearing all light armor: head, chest, hands, feet.
- Requires: Light Armor 30, Agile Defender 1
This bonus stacks with Agile Defender and Matching Set—a must-have for anyone serious about using light armor.
7. Unhindered
- Light armor weighs nothing and doesn’t slow you down when worn.
- Requires: Light Armor 50, Custom Fit
This perk reduces the weight of the light armor you’re wearing (it doesn’t affect the weight of armor in your inventory) and eliminates its movement penalty. If you’re not sure whether this perk is for you, try out the Steed Stone ability (from one of the Standing Stones) first: it has almost the same effect and won’t cost you a perk.
8. Wind Walker
- Stamina regenerates 50% faster in all light armor: head, chest, hands, feet.
- Requires: Light Armor 60, Unhindered
9. Matching Set
- Additional 25% armor bonus if wearing a matched set of light armor.
- Requires: Light Armor 70, Custom Fit
This bonus stacks with Agile Defender and Custom Fit. Make sure you have a matching set before taking this perk, though.
10. Deft Movement
- You have a 10% chance of avoiding all damage from a melee attack while wearing all light armor: head, chest, hands, feet.
- Requires: Light Armor 100, Wind Walker OR Matching Set
This perk gives you a 10% chance of avoiding all damage from a hit when wearing a full set of light armor. It’s a noticeable but unreliable bonus: if you’re lucky, it might spare you from a lethal blow.
Racial Benefits
- +5 Light Armor
- Argonian
- Dark Elf
- Nord
- Wood Elf
Trainers
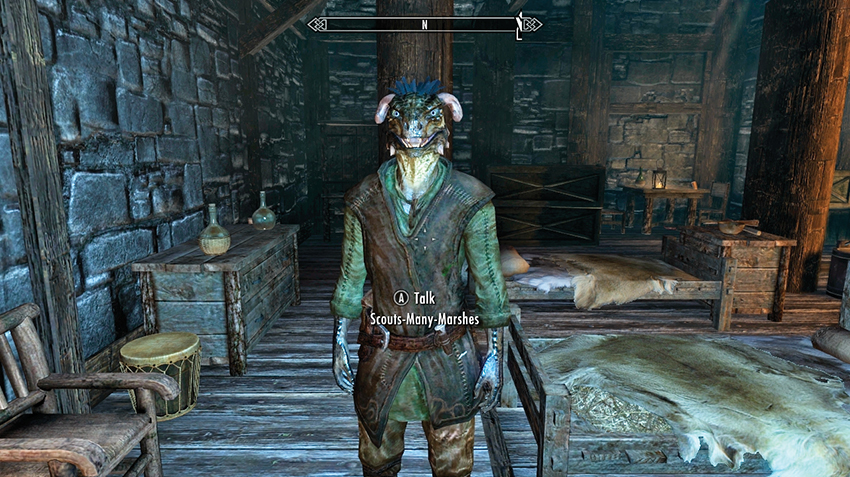
- Journeyman: Scouts-Many-Marshes, the docks of Windhelm.
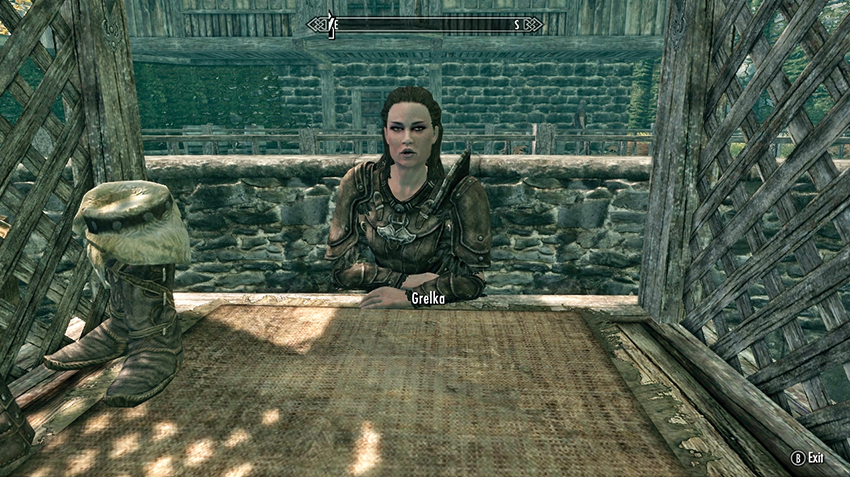
- Expert: Grelka, the marketplace or streets of Riften.
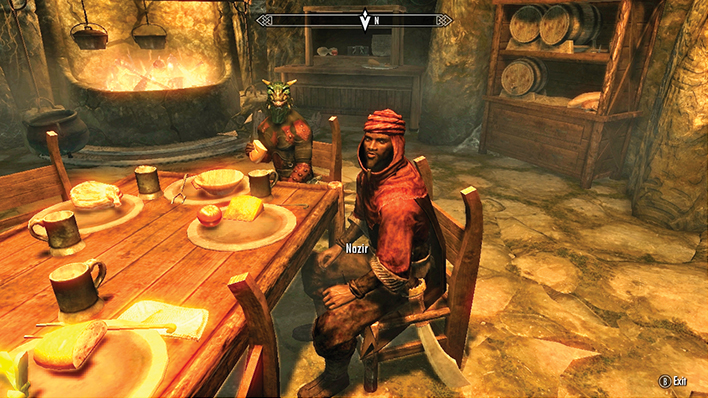
- Master: Nazir, Assassin of the Dark Brotherhood, Falkreath Hold Sanctuary.
Other Resources
- The following quests can also increase this skill:
- Other Factions Quest: Finn’s Lute.
- Daedric Quest: Discerning the Transmundane.
- Favor: The Bandit Slayer*
- Favor: Item Retrieval (Bandit Camp)*
Stealth Skills: The Path of Shadow – Sneak
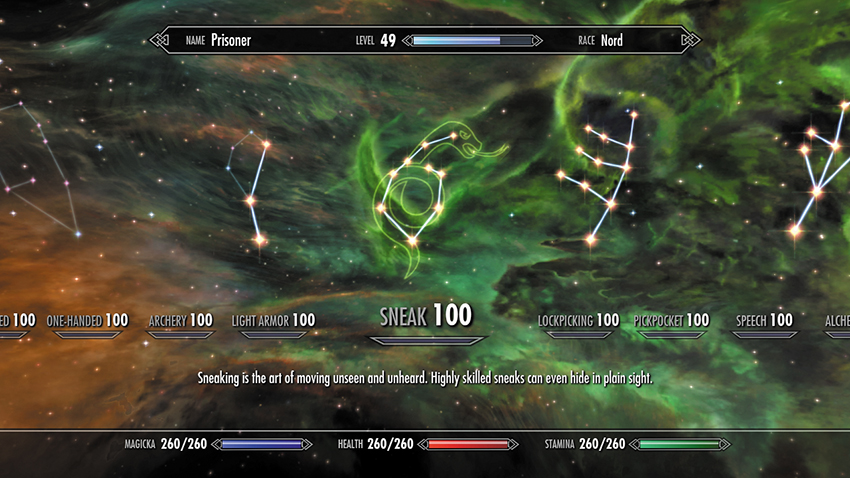
Sneak is the art of moving unseen and unheard. This skill improves when you sneak past someone or perform a successful sneak attack. You don’t get credit for sneaking in an empty hallway or for just standing around—you must be sneaking (crouched) near someone who can detect you. Avoiding detection is also critical: the moment you are spotted, your sneak attempt has failed and you can no longer perform a sneak attack (until you hide again).
- Constellation: Path of Shadow
- Available Perks: 13
Available Sneak Perks
1–5. Stealth (5 ranks) ★
- Rank 1: You are 20% harder to detect when sneaking.
- Requires: None
- Rank 2: You are 25% harder to detect when sneaking.
- Requires: Sneak 20, Stealth 1
- Rank 3: You are 30% harder to detect when sneaking.
- Requires: Sneak 40, Stealth 2
- Rank 4: You are 35% harder to detect when sneaking.
- Requires: Sneak 60, Stealth 3
- Rank 5: You are 40% harder to detect when sneaking.
- Requires: Sneak 80, Stealth 4
This perk makes it dramatically easier to sneak past enemies unnoticed. The first rank in this skill (+20%) is absolutely critical to being able to sneak effectively. Subsequent ranks have diminishing returns but are still a good choice if you’re focused on stealth and find yourself being detected too quickly. Even if Stealth isn’t your focus, it’s worth taking the basic Stealth perk just in case you someday need to sneak out of a dangerous situation.
6. Backstab
- Sneak attacks with one-handed weapons now do six times damage.
- Requires: Sneak 30, Stealth 1
Backstab doubles your sneak attack damage (to 6x normal). If you’re skilled enough to reliably sneak up behind enemies, this can make one-hit kills a real possibility, especially on weaker foes.
7. Muffled Movement
- Noise from armor is reduced by 50%.
- Requires: Sneak 30, Stealth 1
This perk is good at low levels but is much less useful later on, when it’s eclipsed by Silence, Muffle-enchanted equipment, or the Muffle spell (Illusion skill), all of which silence your movement entirely.
8. Deadly Aim ★
- Sneak attacks with bows now do three times damage.
- Requires: Sneak 40, Backstab
Deadly Aim increases the sneak attack damage done by bows (from 2x to 3x). The extra damage is noticeable, though not as dramatic as Backstab’s bonus.
9. Light Foot
- You won’t trigger pressure plates.
- Requires: Sneak 40, Muffled Movement
This perk presents an interesting dilemma. While you’ll no longer have to worry about almost half the traps you encounter, your enemies and your Followers can still set them off, which generally gives you less warning than you might otherwise have had. Also, you can no longer deliberately use traps to kill enemies, which limits your options and takes some of the fun out of them. So think carefully before taking this perk, or just be cautious and avoid pressure plates in the first place.
10. Assassin’s Blade
- Sneak attacks with daggers now do a total of 15 times normal damage.
- Requires: Sneak 50, Deadly Aim
This perk affects only daggers, but it does make them significantly more effective at sneak attacks. With this perk, daggers do about twice the sneak attack damage of a full-sized weapon like a sword or a mace. That’s a solid improvement and a good reason to choose daggers, at least for your first blow.
11. Silent Roll
- Sprinting while sneaking executes a silent forward roll.
- Requires: Sneak 50, Light Foot
Silent Roll allows you to quickly dodge behind cover while sneaking, although the drain on your Stamina prevents you from using it to roll long distances.
12. Silence
- Walking and running does not affect detection.
- Requires: Sneak 70, Silent Roll
This perk gives you a permanent Muffle effect. However, since you can receive the same effect from a spell or piece of enchanted armor, consider whether it’s really worth spending one of your perk selections on.
13. Shadow Warrior
- Crouching stops combat for a moment and forces distant opponents to search for a target.
- Requires: Sneak 100, Silence
Shadow Warrior can give you a chance to recover or make a hasty getaway if your stealth attempt goes terribly wrong. It’s most effective if you can put some distance between yourself and your foes; if you use it right in front of an enemy, they’ll spot you again almost immediately.
Racial Benefits
- +10 Sneak
- Khajiit
- +5 Sneak
- Argonian
- Dark Elf
- Wood Elf
Trainers
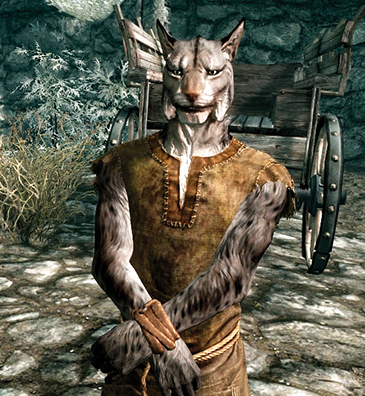
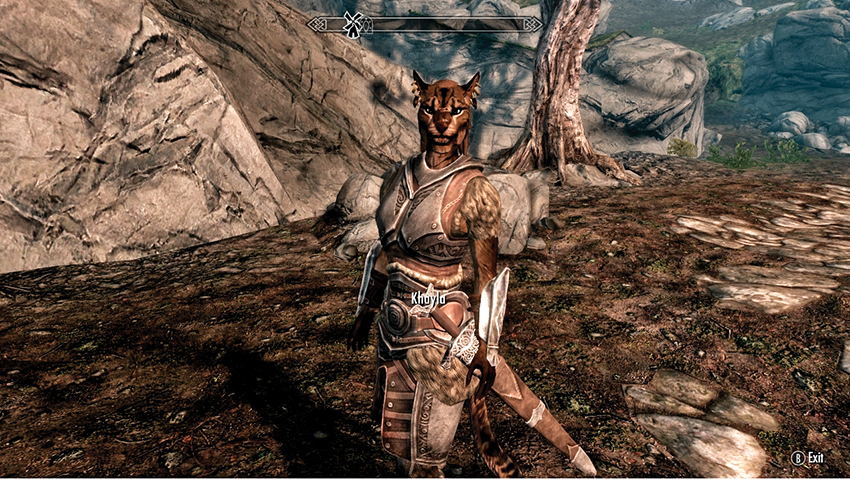
- Journeyman: Khayla, Ri’saad’s Khajiit Caravans, outside Markarth or Whiterun.
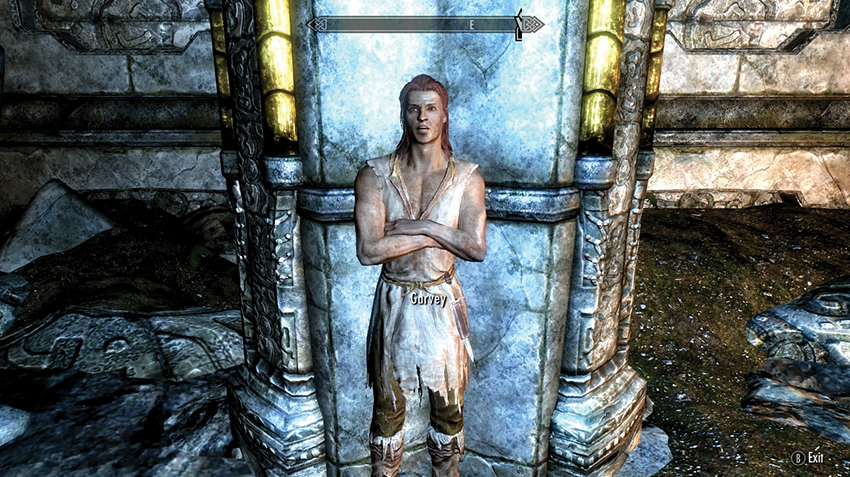
- Expert: Garvey, the Warrens of Markarth.
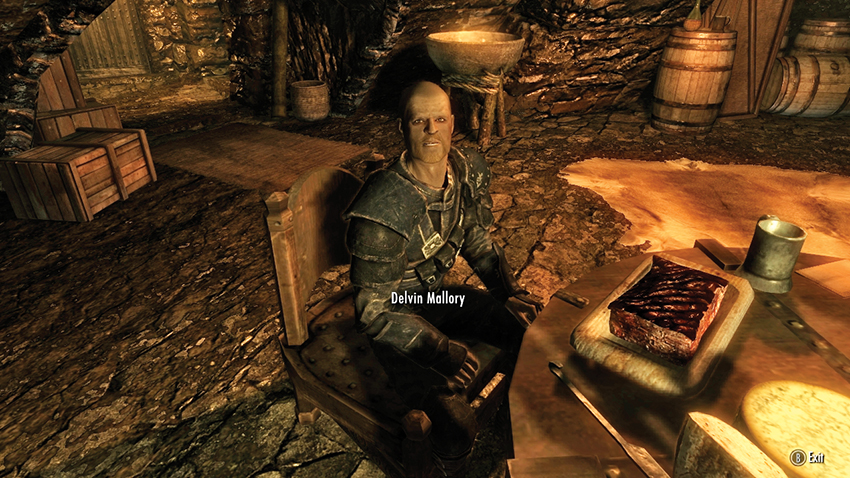
- Master: Delvin Mallory, the Thieves Guild, The Ragged Flagon, in Riften.
Other Resources
- The following quests can also increase this skill:
- Other Factions Quest: Finn’s Lute.
- Daedric Quest: Discerning the Transmundane.
- Favor: The A Little Light Thievery*.
- Favor: Item Retrieval (Cave)*.
Stealth Skills: The Path of Shadow – Lockpicking
Lockpicking allows you to open locked doors and containers faster, more easily, and with fewer broken lockpicks. This skill increases when you pick the lock on a door, container, or trap trigger hinge, based on the lock’s difficulty. It also increases slightly if you break a pick, so if you try picking a difficult lock and fail, it isn’t a total loss.
The Novice, Apprentice, Adept, Expert, and Master Locks perks decrease the difficulty of picking locks of the corresponding level. This helps save on lockpicks (and frustration), but depending on your Lockpicking skill and your own personal prowess at lockpicking, you may not find them necessary.
Note that the fabled Skeleton Key gives you the high-end Unbreakable perk while you possess it, though you must surrender the Skeleton Key as a part of the Thieves Guild questline. While you have it, take the opportunity to unlock any Expert or Master locks you wish and quickly level your Lockpicking skill.
- Constellation: Path of Shadow
- Available Perks: 11
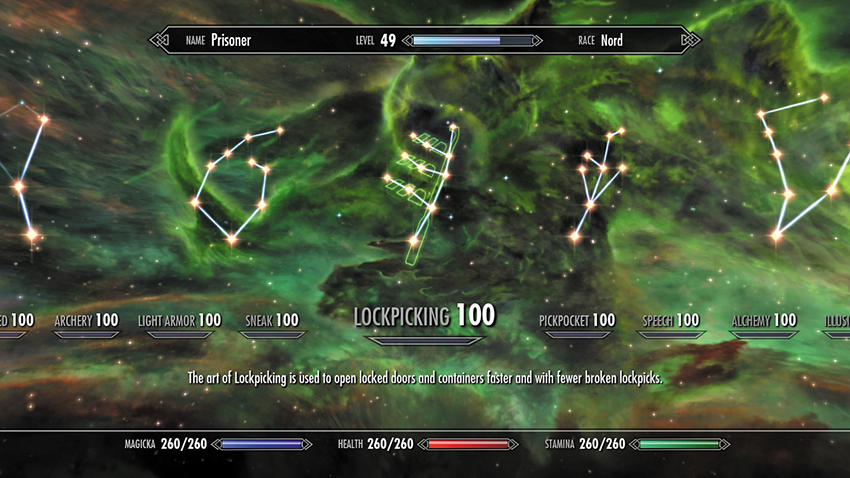
Available Lockpicking Perks
1. Novice Locks
- Novice locks are much easier to pick.
- Requires: None
2. Apprentice Locks
- Apprentice locks are much easier to pick.
- Requires: Lockpicking 25, Novice Locks
3. Quick Hands
- Able to pick locks without being noticed.
- Requires: Lockpicking 40, Apprentice Locks
Quick Hands allows you to pick locks without a crime being detected. This is sometimes useful for breaking into homes and containers without attracting too much attention, although trespass and theft will still be noticed.
4. Wax Key
- Automatically gives you a copy of a picked lock’s key if it has one.
- Requires: Lockpicking 50, Quick Hands
In essence, this perk allows you to automatically reopen most doors you’ve picked in the past. This may be useful if you find a couple of wealthy houses you can rob repeatedly (after their treasures have been replaced), or if you find yourself back in a dungeon you’ve been to before.
5. Adept Locks
- Adept locks are much easier to pick.
- Requires: Lockpicking 50, Apprentice Locks
6. Golden Touch ★
- Find more gold in chests.
- Requires: Lockpicking 60, Adept Locks
Golden Touch adds a fair amount of gold to most chests (up to +100 gold pieces per chest). This stacks with the Imperial Luck racial ability, though it’s significantly better.
7. Treasure Hunter ★
- You have a 50% greater chance of finding special treasure.
- Requires: Lockpicking 70, Golden Touch
This perk significantly increases your chance of finding special loot in some chests, especially large ones. What kind of loot? It could be anything, from an Iron Sword to a Dragonplate Cuirass. This is always a gamble, but it occasionally gives you something that’s far better than anything you can get through any normal means. Are you feeling lucky?
8. Expert Locks
- Expert locks are much easier to pick.
- Requires: Lockpicking 75, Adept Locks
9. Locksmith
- Pick starts close to the lock opening position.
- Requires: Lockpicking 80, Expert Locks
10. Unbreakable
- Lockpicks never break.
- Requires: Lockpicking 100, Locksmith
With this perk and enough patience, you can eventually pick the lock on any chest with a single pick. Take this, and you won’t need the Master Locks perk.
11. Master Locks
- Master Locks are much easier to pick.
- Requires: Lockpicking 100, Expert Locks
Racial Benefits
- +10 Lockpicking
- Argonian
- +5 Lockpicking
- Khajiit
- Wood Elf
Trainers
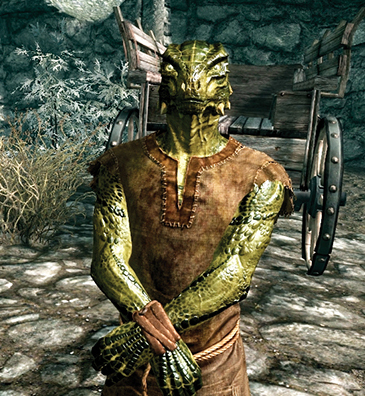
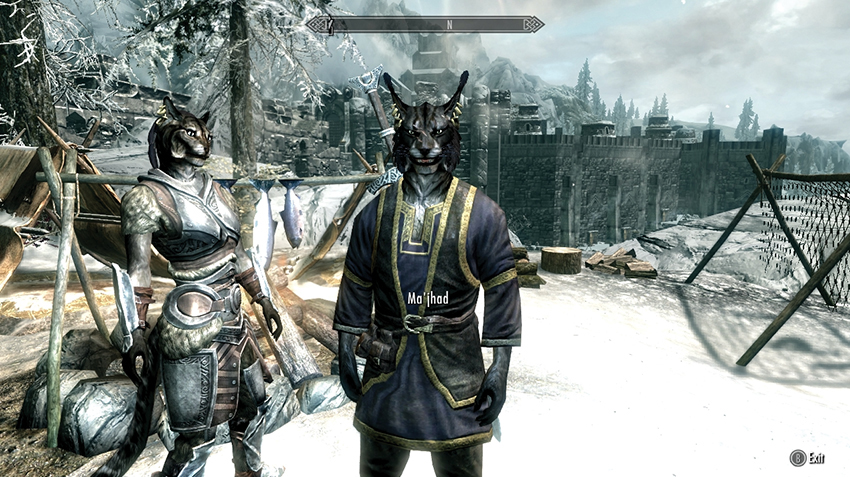
- Expert: Ma’jhad, of Ma’dran’s Khajiit Caravans, outside Solitude or Windhelm.
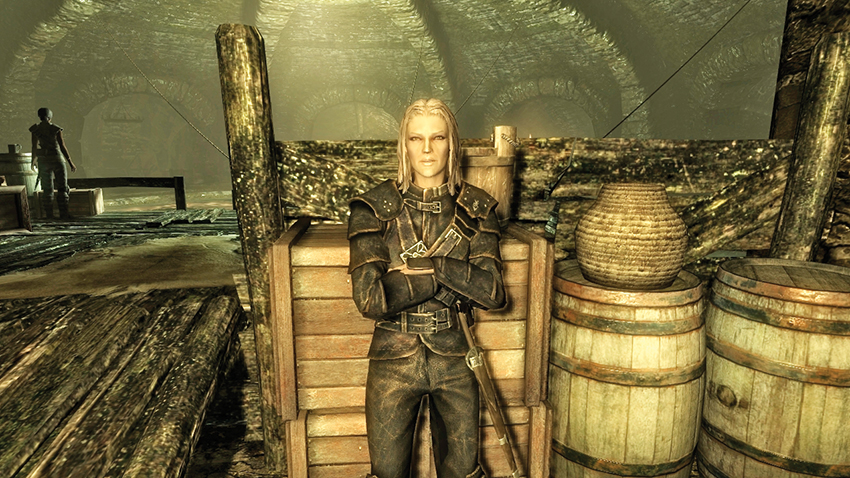
- Master: Vex, the Thieves Guild, The Ragged Flagon, in Riften.
Other Resources
- The following quests can also increase this skill:
- Other Factions Quest: Finn’s Lute.
- Daedric Quest: Discerning the Transmundane.
- Favor: Item Retrieval (Bandit Camp)*.
Stealth Skills: The Path of Shadow – Pickpocket
Pickpocket is the stealthy art of lifting gold and other valuables from an unsuspecting target. This skill increases whenever you successfully steal an item, based on the item’s value. Fail to pickpocket something, and you don’t receive credit for the attempt. Of course, that’s probably the least of your worries at that point!
The highest-level Pickpocket perks, Misdirection and Perfect Touch, allow you to steal equipped weapons and armor off of a creature. This is an excellent trick for a stealthy assassin, as there are few more satisfying ways to take down a difficult foe than by stripping them down to their underwear before stabbing them in the back...
- Constellation: Path of Shadow
- Available Perks: 12
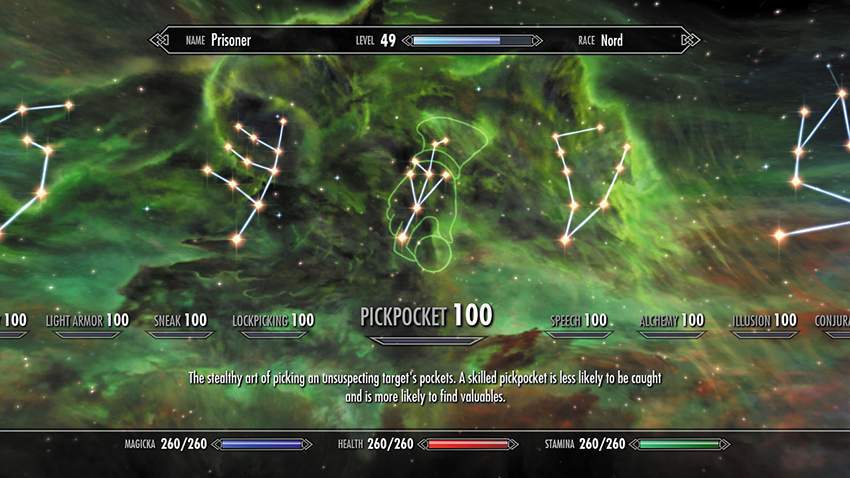
Available Pickpocket Perks
1–5. Light Fingers (5 ranks)
- Rank 1: Pickpocketing bonus of 20%. Item weight and value reduce pickpocketing odds.
- Requires: None
- Rank 2: Pickpocketing bonus of 40%. Item weight and value reduce pickpocketing odds.
- Requires: Pickpocket 20, Light Fingers 1
- Rank 3: Pickpocketing bonus of 60%. Item weight and value reduce pickpocketing odds.
- Requires: Pickpocket 40, Light Fingers 2
- Rank 4: Pickpocketing bonus of 80%. Item weight and value reduce pickpocketing odds.
- Requires: Pickpocket 60, Light Fingers 3
- Rank 5: Pickpocketing bonus of 100%. Item weight and value reduce pickpocketing odds.
- Requires: Pickpocket 80, Light Fingers 4
6. Night Thief
- You have a +25% chance to pickpocket if the target is asleep.
- Requires: Pickpocket 20
Night Thief makes pickpocketing a sleeping character much easier. Find out where your target sleeps, hide nearby, wait for nightfall, and then rob them at your leisure. Stacks with Light Fingers.
7. Cutpurse
- Pickpocketing gold is 50% easier.
- Requires: Pickpocket 40, Night Thief
8. Poisoned
- Silently harm enemies by placing poison in their pockets.
- Requires: Pickpocket 40, Night Thief
This is a good way to sap an enemy’s strength and can kill many civilians outright. This is a great tactic for some Dark Brotherhood assassinations.
9. Extra Pockets ★
- Carrying capacity is increased by 100 points.
- Requires: Pickpocket 50, Night Thief
Increases your Max Carry weight by 100. This great for any character, especially if you’ve been neglecting your stamina when leveling up.
10. Keymaster
- Pickpocketing keys always works.
- Requires: Pickpocket 60, Cutpurse
Gold and items are great, but keys can be even better once you have access to a good Fence. Go rob a well-to-do character’s house while they’re out, and the haul will often be worth far more than what they were carrying. If you need someone to fence your stolen goods, join the Thieves Guild or take the Speech skill’s Fence perk.
11. Misdirection
- Can pickpocket equipped weapons.
- Requires: Pickpocket 70, Cutpurse
12. Perfect Touch
- Can pickpocket equipped items.
- Requires: Pickpocket 100, Misdirection
Racial Benefits
- +5 Pickpocket
- Argonian
- Khajiit
- Wood Elf
Trainers
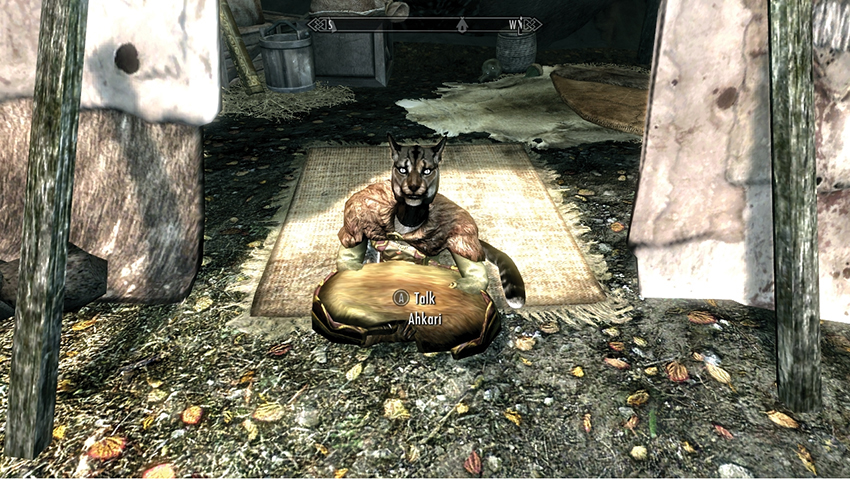
- Journeyman: Ahkari, of Zaynabi’s Khajiit Caravans, outside Dawnstar or Riften.
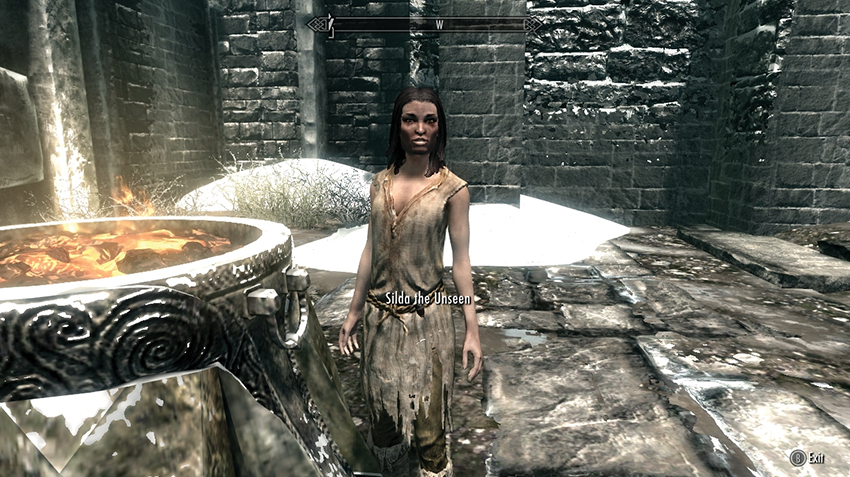
- Expert: Silda the Unseen, begging on the streets of Windhelm.
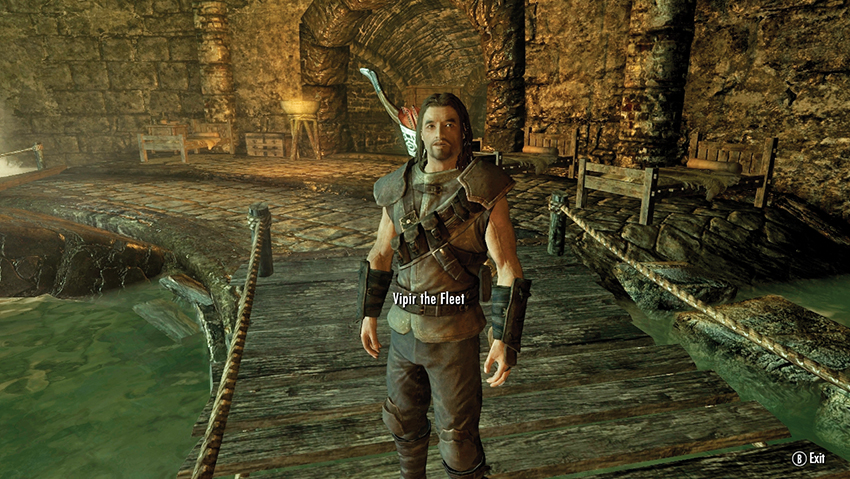
- Master: Vipir the Fleet, the Thieves Guild, The Ragged Flagon, in Riften.
Other Resources
- The following quests can also increase this skill:
- Other Factions Quest: Finn’s Lute.
- Daedric Quest: Discerning the Transmundane.
Stealth Skills: The Path of Shadow – Speech
Speech allows you to haggle, bribe, persuade, and intimidate others to do as you ask. The higher your Speech skill, the better the prices you get when buying or selling items, and the greater your odds of success at dialogue challenges. Your Speech skill doesn’t require any special effort to raise: It increases naturally when you sell items to a merchant (based on the item’s value) or when you succeed at a Persuade or Intimidate challenge (based on its difficulty).
- Constellation: Path of Shadow
- Available Perks: 13
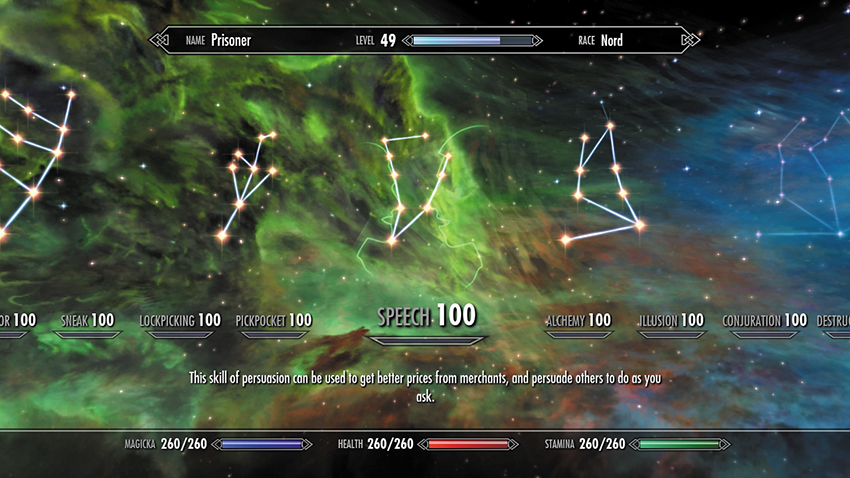
Available Speech Perks
1–5. Haggling (5 ranks) ★
- Rank 1: Buying and selling prices are 10% better.
- Requires: None
- Rank 2: Buying and selling prices are 15% better.
- Requires: Speech 20, Haggling 1
- Rank 3: Buying and selling prices are 20% better.
- Requires: Speech 40, Haggling 2
- Rank 4: Buying and selling prices are 25% better.
- Requires: Speech 60, Haggling 3
- Rank 5: Buying and selling prices are 30% better.
- Requires: Speech 80, Haggling 4
Haggling significantly improves the prices you get in shops, though with diminishing returns after the first rank. Even if you don’t plan to focus on Speech, it’s worth picking up the first rank of this perk.
6. Allure
- You have 10% better prices with the opposite sex.
- Requires: Speech 30, Haggling 1
Allure allows you to get slightly better prices from some merchants. While this can add up over time, make sure to take advantage of it by finding merchants of the correct gender. Stacks with Haggling.
7. Bribery
- Can bribe guards to ignore crimes.
- Requires: Speech 30, Haggling 1
This perk allows you to bribe guards to overlook nonviolent crimes. The crime doesn’t go away; guards just don’t arrest you right now. If you’re already a member of the Thieves Guild, you can do this for free, so there’s no need to spend a perk on it. This is also unimportant if you’re a law-abiding citizen of Skyrim.
8. Merchant ★
- Can sell any type of item to any kind of merchant.
- Requires: Speech 50, Allure
The Merchant perk makes the process of selling your loot significantly faster, since you no longer need to visit multiple vendors to sell everything.
9. Persuasion
- Persuasion attempts are 30% easier.
- Requires: Speech 50, Bribery
This perk increases your effective Speech score for the purpose of Persuade challenges. This is rarely necessary, although it can help if you find yourself struggling with them.
10. Intimidation
- Intimidation is twice as successful.
- Requires: Speech 70, Persuasion
Like Persuasion, this perk increases your effective Speech score for the purpose of Intimidate challenges. Also like Persuasion, it’s rarely necessary, and there’s no real reason to take both this and Persuasion, unless you have a strong role-playing preference.
11. Investor
- Can invest 500 gold with a shopkeeper to increase his available gold permanently.
- Requires: Speech 70, Merchant
Permanently increases the amount of gold that merchants have to trade with you. Coupled with the Merchant perk, this makes it even easier to sell your loot to just one convenient merchant, reducing your downtime between quests.
12. Fence
- Can barter stolen goods with any merchant in whom you have invested.
- Requires: Speech 90, Investor
If you’re already a member of the Thieves Guild, you may not need another Fence, although this will make it more convenient to sell stolen items, as it increases the number of Fences to which you have access.
13. Master Trader
- Every merchant in the world gains 1,000 gold for bartering.
- Requires: Speech 100, Fence
Racial Benefits
- +5 Speech
- Breton
- Nord
Trainers
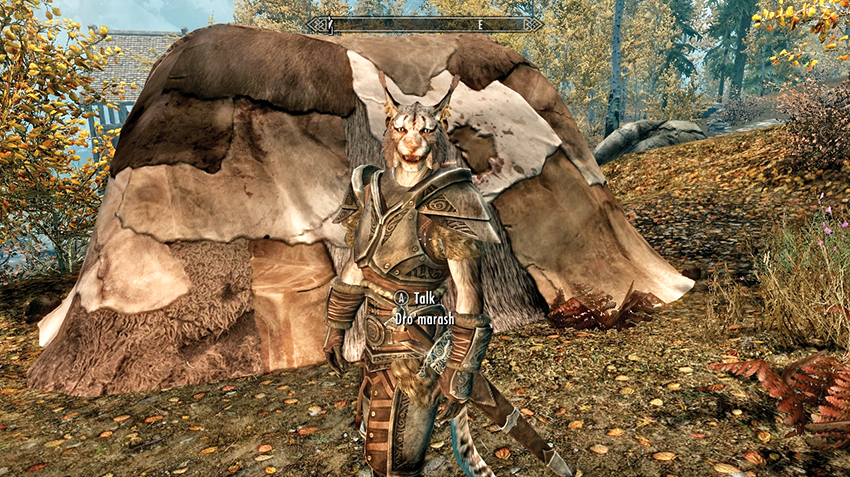
- Journeyman: Dro’marash, of Ahkari’s Khajiit Caravans, outside Dawnstar or Riften.
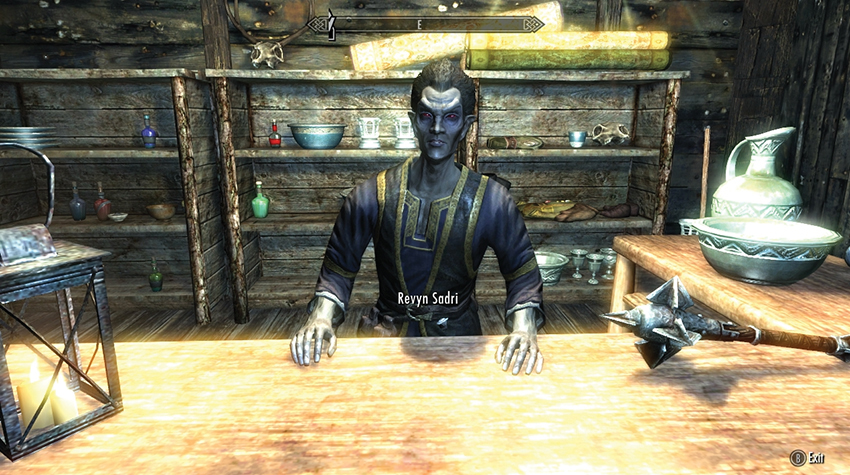
- Journeyman: Revyn Sadri, of Sadri’s Used Wares, in Windhelm.
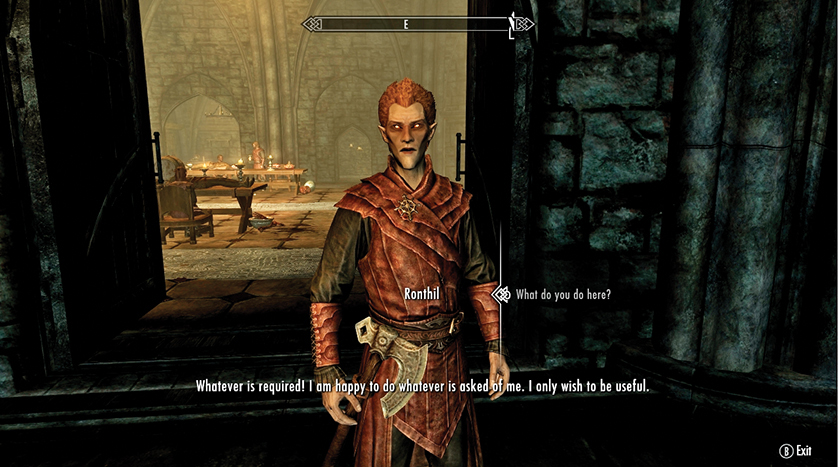
- Journeyman: Ronthil, the vampire merchant in Castle Volkihar (Sea of Ghosts).
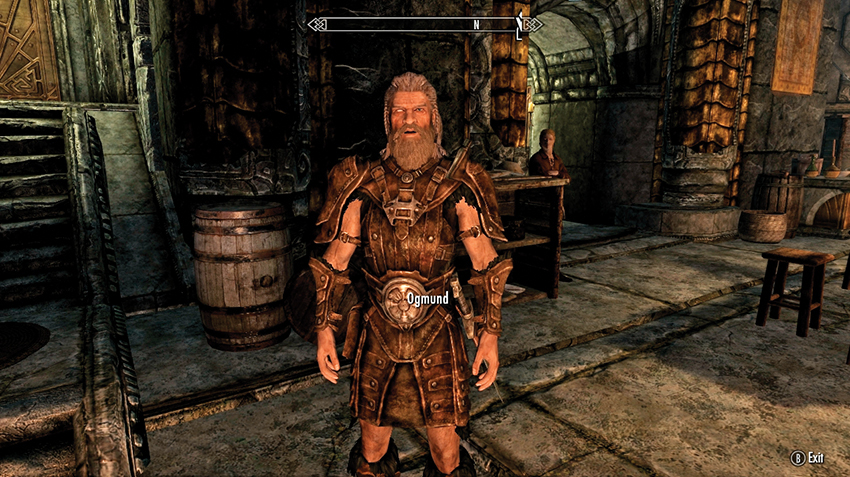
- Expert: Ogmund, bard of the Silver-Blood Inn, in Markarth.
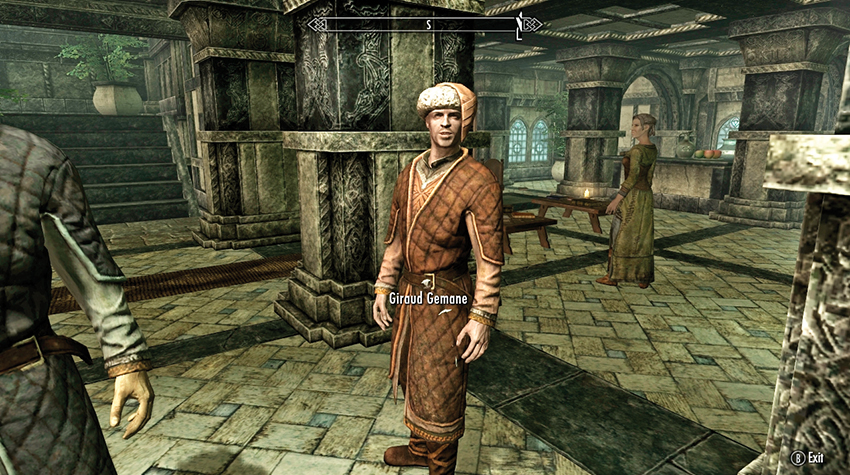
- Master: Giraud Gemane, of the Bard’s College in Solitude.
Other Resources
- The following quests can also increase this skill:
- Other Factions Quest: Finn’s Lute.
- Daedric Quest: Discerning the Transmundane.
- Dungeon Quest: Bard’s Leap Summit: Leap Before You Look*.
- Favor: A Little Light Thievery*.
- Favor: Rare Item Hunt.
Stealth Skills: The Path of Shadow – Alchemy
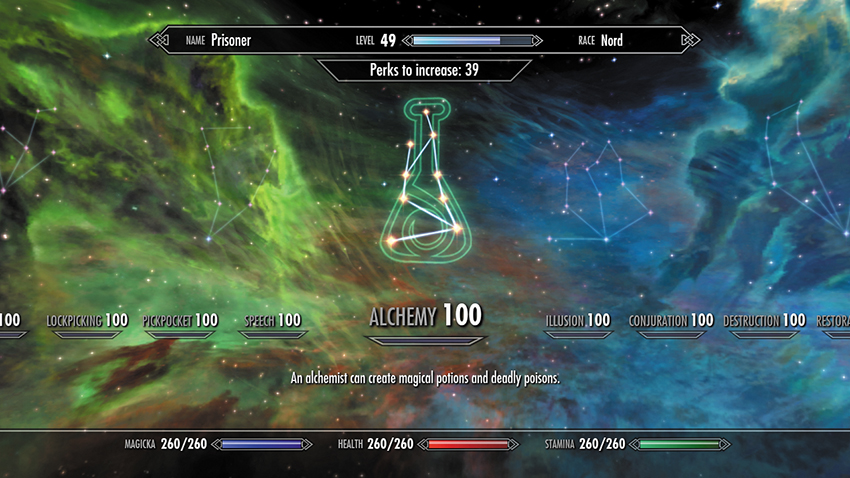
Alchemy allows you to create potent potions and deadly poisons. Their effects are determined by the ingredients you use, but their potency is based on your Alchemy skill. Your skill increases when you discover a new ingredient effect or successfully craft a potion (based on the potion’s value). It also increases slightly if you attempt to craft a potion but fail—while you may lose the ingredients, the experiment isn’t a complete loss.
The Crafting section has extensive details about the Alchemy system, including a full list of ingredients and their effects.
- Constellation: Path of Shadow
- Available Perks: 15
- Available Alchemy Perks
1–5. Alchemist (5 ranks) ★
- Rank 1: Potions and poisons you make are 20% stronger.
- Requires: None
- Rank 2: Potions and poisons you make are 40% stronger.
- Requires: Alchemy 20, Alchemist 1
- Rank 3: Potions and poisons you make are 60% stronger.
- Requires: Alchemy 40, Alchemist 2
- Rank 4: Potions and poisons you make are 80% stronger.
- Requires: Alchemy 60, Alchemist 3
- Rank 5: Potions and poisons you make are twice as strong.
- Requires: Alchemy 80, Alchemist 4
6. Physician
- Potions you mix that restore Health, Magicka, or Stamina are 25% more powerful.
- Requires: Alchemy 20, Alchemist 1
Physician stacks with the Alchemist perks to make significantly more powerful restorative potions.
7. Benefactor
- Potions you mix with beneficial effects have an additional 25% greater magnitude.
- Requires: Alchemy 30, Physician 1
Benefactor stacks with both the Alchemist and Physician perks but improves a broader range of potions than Physician.
8. Poisoner
- Poisons you mix are 25% more effective.
- Requires: Alchemy 30, Physician 1
9–11. Experimenter (3 ranks)
- Rank 1: Eating an ingredient reveals first two effects.
- Requires: Alchemy 50, Benefactor
- Rank 2: Eating an ingredient reveals first three effects.
- Requires: Alchemy 70, Experimenter 1
- Rank 3: Eating an ingredient reveals all its effects.
- Requires: Alchemy 90, Experimenter 2
The Experimenter perks allow you to learn more effects just by eating ingredients. If mixing and matching ingredients isn’t something you’re interested in, this can help you learn effects faster. There’s a complete table of Ingredient effects in the Inventory section, so you don’t need to learn an Ingredient’s effects (in the game) to use it in a potion or poison.
12. Concentrated Poison
- Poisons applied to weapons last for twice as many hits.
- Requires: Alchemy 60, Poisoner
Since poisons normally last for only one hit, Concentrated Poison effectively doubles the strength of all your poisons. It’s definitely worth taking if you use poisons frequently.
13. Green Thumb ★
- Two ingredients are gathered from plants.
- Requires: Alchemy 70, Concentrated Poison
This perk doubles the plant ingredients you have at your disposal. More ingredients means more opportunities to craft potions and poisons, which helps your Alchemy skill increase even faster. Unless you buy all your ingredients from shops, this is worth taking as soon as possible.
14. Snakeblood
- You gain +50% Poison Resistance.
- Requires: Alchemy 80, Experimenter 1 OR Concentrated Poison
Increases your resistance to poison, which is helpful when fighting Falmer, Chaurus, or Frostbite Spiders. This stacks with any racial abilities you may have.
15. Purity
- All negative effects are removed from created potions, and all positive effects are removed from created poisons.
- Requires: Alchemy 100, Snakeblood
Purity “cleans up” your Alchemy results, if they need it. You may be better off just finding a better combination of ingredients to achieve the effect you want, though.
Racial Benefits
- +5 Alchemy
- Breton
- Dark Elf
- Khajiit
- Wood Elf
Trainers
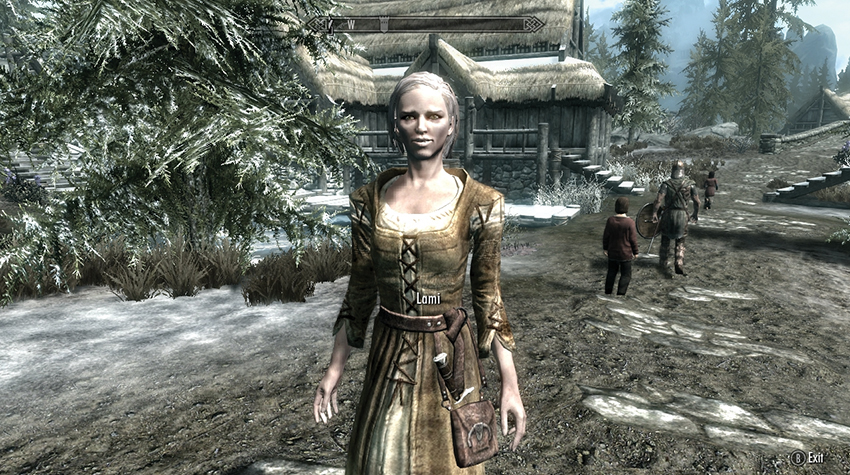
- Journeyman: Lami, of the Thaumaturgist’s Hut, in Morthal.
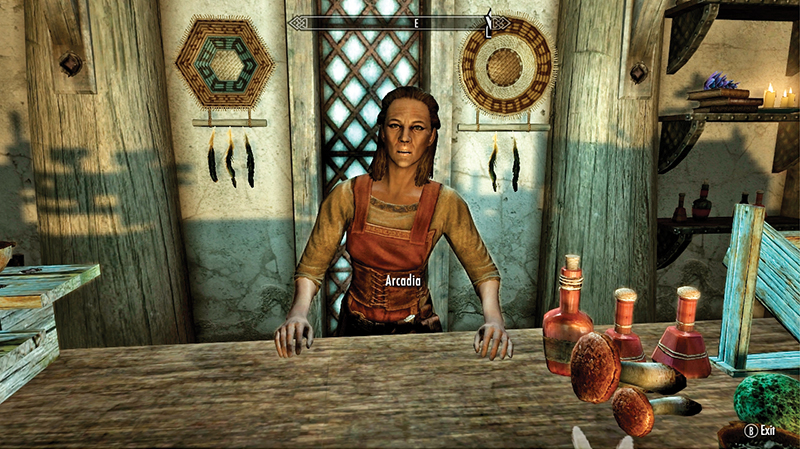
- Expert: Arcadia, of Arcadia’s Cauldron, in Whiterun.
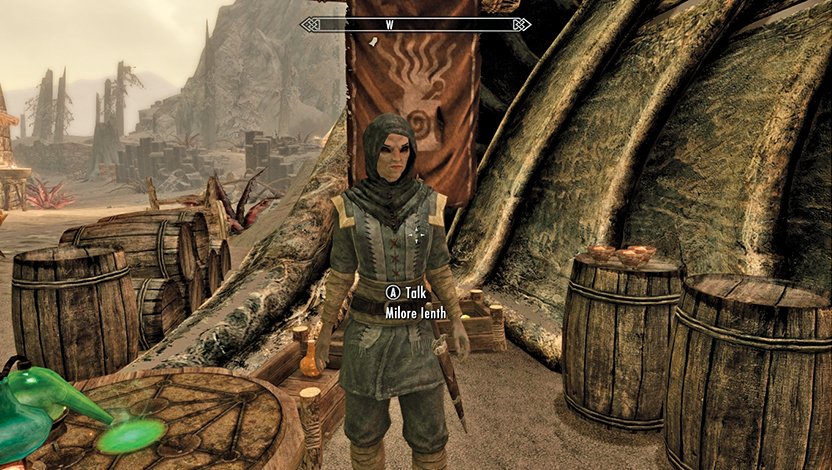
- Expert: Milore Ienth, of Ienth Farm in Raven Rock, Solstheim.
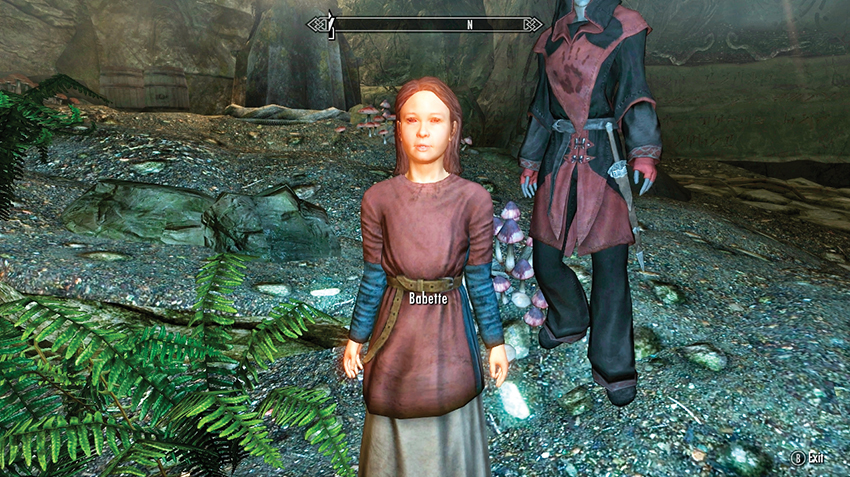
- Master: Babette, of the Dark Brotherhood, Falkreath Hold Sanctuary.
Other Resources
- The following quests can also increase this skill:
- Other Factions Quest: Finn’s Lute.
- Daedric Quest: Discerning the Transmundane.
- Favor: Rare Item Hunt*.
- Favor: Item Retrieval (Cave)*.
Magic Skills: The Path of Magic – Illusion
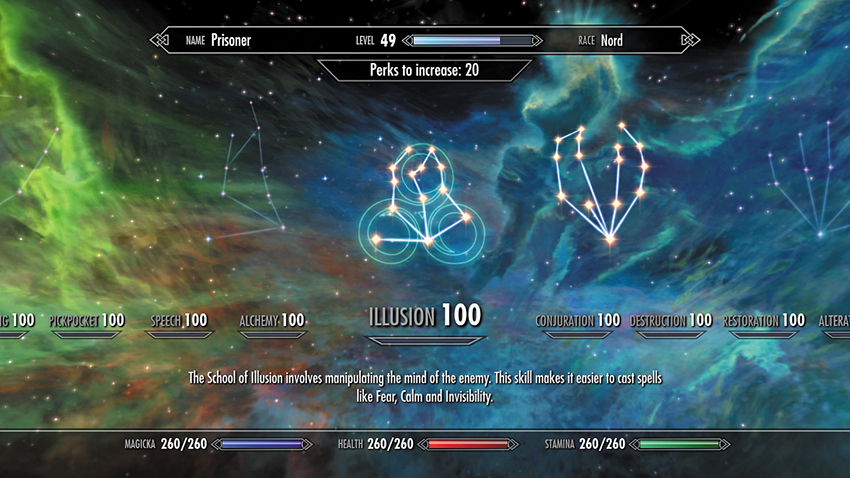
Illusion Magic manipulates the minds of those around you, sending them into a frenzy or compelling them to flee in terror. Illusion also offers several useful spells for a stealthy character, such as Invisibility and Muffle. Your Illusion skill increases when you cast a useful Illusion spell on a valid target. For example, you don’t get credit for casting Fear on a character who’s immune to the spell or for casting Invisibility when no one is around to see you.
Many Illusion perks are designed to help you overcome the major limitation of Illusion magic: the level restrictions on who your spells can affect. See the Spell List for the individual level restrictions on each spell, and see the Bestiary for a guide to identifying enemies by level.
- Constellation: Path of Magic
- Available Perks: 13
Available Illusion Perks
1. Novice Illusion ★
- Cast Novice-level Illusion spells for half Magicka.
- Requires: None
2. Animage
- Illusion spells now work on higher-level animals.
- Requires: Illusion 20, Novice Illusion
Illusion spells now affect animals up to 8 levels higher than the spell’s usual limit. Stacks with all other perks.
3. Illusion Dual Casting ★
- Dual casting an Illusion spell overcharges the effects into an even more powerful version.
- Requires: Illusion 20, Novice Illusion
Dual Casting more than doubles the duration of your Illusion spells and allows them to affect targets twice as high as the spell’s level cap would normally permit. This dramatically increases the effectiveness of all Illusion spells, especially until you begin taking other perks in this school to raise those level restrictions. It also works well for the stealth-focused spells (Invisibility, Muffle), which could give you away if they wear off too early.
4. Apprentice Illusion ★
- Cast Apprentice-level Illusion spells for half Magicka.
- Requires: Illusion 25, Novice Illusion
5. Hypnotic Gaze
- Calm spells now work on higher-level opponents. Cumulative with Kindred Mage and Animage.
- Requires: Illusion 30, Novice Illusion
Calm spells now affect enemies up to 8 levels higher than the spell’s usual limit. Stacks with all other perks.
6. Kindred Mage
- All Illusion spells work on higher-level people.
- Requires: Illusion 40, Animage
Illusion spells now affect people up to 10 levels higher than the spell’s usual limit. Stacks with all other perks.
7. Adept Illusion ★
- Cast Adept-level Illusion spells for half Magicka.
- Requires: Illusion 50, Apprentice Illusion
8. Aspect of Terror
- Fear spells work on higher-level opponents. Cumulative with Kindred Mage and Animage.
- Requires: Illusion 50, Hypnotic Gaze
Fear spells now affect enemies up to 10 levels higher than the spell’s usual limit. Stacks with all other perks.
9. Quiet Casting
- All spells you cast from any school of magic are silent to others.
- Requires: Illusion 50, Kindred Mage
A great choice for any stealth-focused character dabbling in magic or any mage interested in stealth. With this perk, you can cast spells like Fear or Frenzy while remaining hidden, or you can recast Invisibility if it wears off unexpectedly.
10. Rage
- Frenzy spells work on higher-level opponents. Cumulative with Kindred Mage and Animage.
- Requires: Illusion 70, Aspect of Terror
Frenzy spells now affect enemies up to 12 levels higher than the spell’s usual limit. Stacks with all other perks.
11. Expert Illusion ★
- Cast Expert-level Illusion spells for half Magicka.
- Requires: Illusion 75, Adept Illusion
12. Master of the Mind ★
- Illusion spells work on undead, Daedra, and automatons.
- Requires: Illusion 90, Rage OR Quiet Casting
13. Master Illusion
- Cast Master-level Illusion spells for half Magicka.
- Requires: Illusion 100, Expert Illusion
Racial Benefits
- +10 Illusion
- High Elf
- +5 Illusion
- Breton
- Dark Elf
Trainers
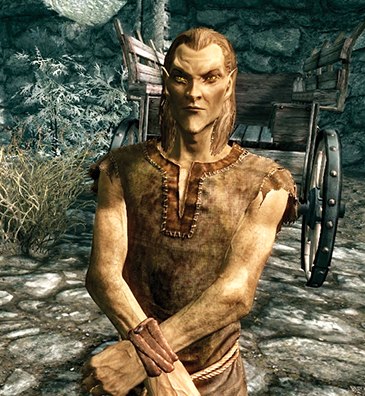
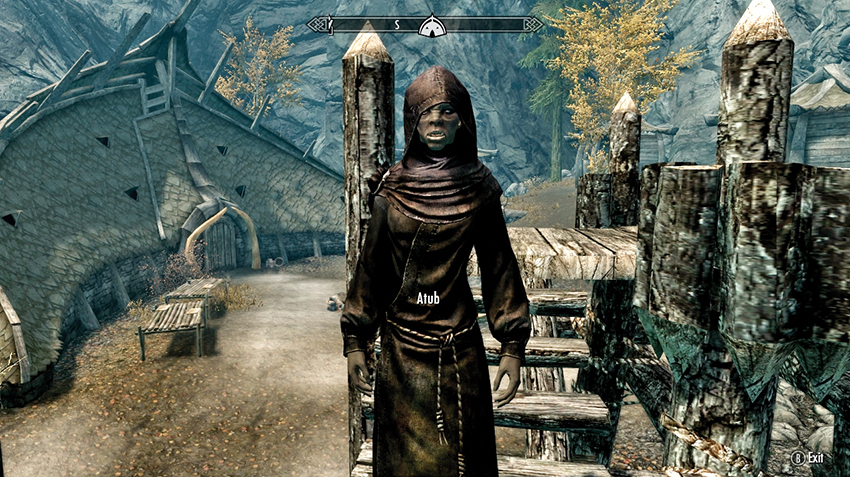
- Expert: Atub, of Largashbur, in The Rift.
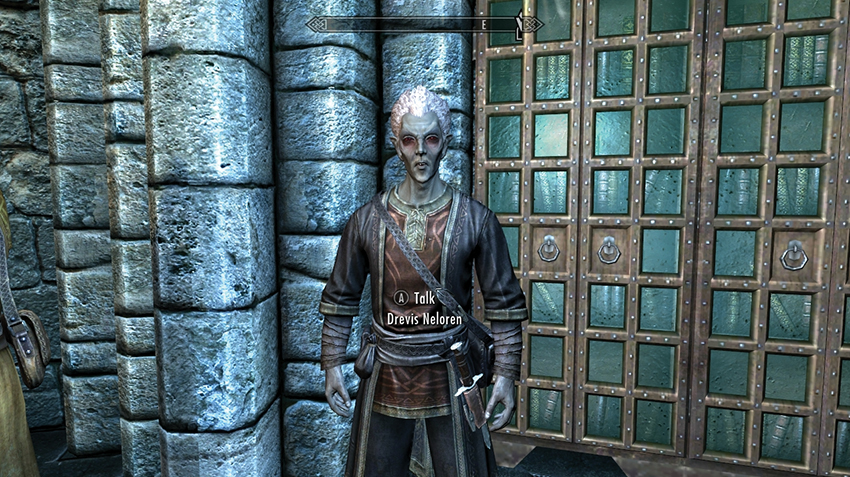
- Master: Drevis Neloren, instructor at The College of Winterhold.
Other Resources
- The following quests can also increase this skill:
- The College of Winterhold Quests: Radiant Quests: Shalidor’s Insights.
- Other Factions Quest: Pantea’s Flute.
- Daedric Quest: Discerning the Transmundane.
- Favor: Vampire Slayer*.
Magic Skills: The Path of Magic – Conjuration
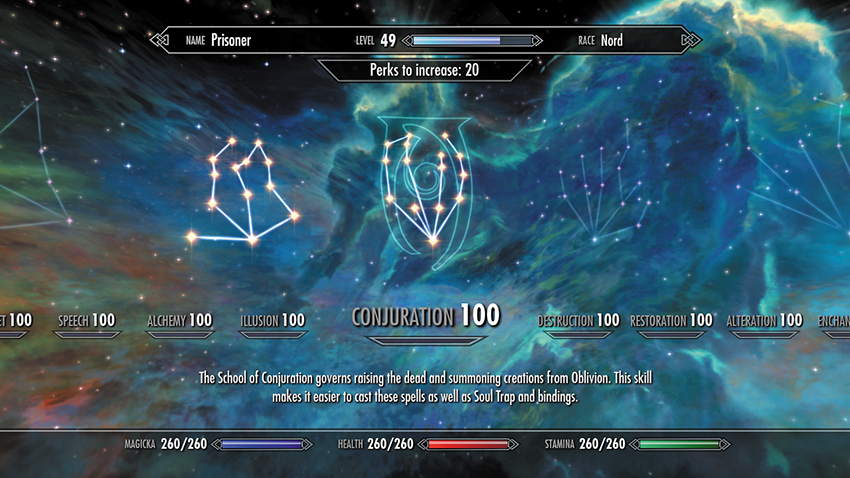
Conjuration spells allow you to raise the dead, summon creatures from Oblivion, draw powerful bound weapons from thin air, and trap the souls of your defeated foes. Your Conjuration skill increases when you cast a Conjuration spell and use it effectively, such as sending your summoned creature into battle, doing damage with a bound weapon, or successfully trapping a soul.
- Constellation: Path of Magic
- Available Perks: 16
Available Conjuration Perks
1. Novice Conjuration ★
- Cast Novice-level Conjuration spells for half Magicka.
- Requires: None
2. Mystic Binding
- Bound weapons do more damage.
- Requires: Conjuration 20, Novice Conjuration
Improves the damage of bound weapons by 50%. If you use them, that’s a noticeable improvement.
3. Conjuration Dual Casting
- Dual casting a Conjuration spell overcharges the spell, allowing it to last longer.
- Requires: Conjuration 20, Novice Conjuration
Dual Casting increases the duration of your Conjuration spells, not their strength. This is useful if you raise undead frequently—you’ll get more use from your zombies before they turn to ash—but it’s less effective if you primarily conjure creatures, since you can always conjure them again if the battle is taking a long time to conclude.
4. Apprentice Conjuration ★
- Cast Apprentice-level Conjuration spells for half Magicka.
- Requires: Conjuration 25, Novice Conjuration
5–6. Summoner (2 ranks)
- Rank 1: Can summon Atronachs or raise undead twice as far away.
- Requires: Conjuration 30, Novice Conjuration
- Rank 2: Can summon Atronachs or raise undead three times as far away.
- Requires: Conjuration 70, Summoner 1
This perk allows you to summon Atronachs or raise undead at a distance. This is less useful in the tight confines of many dungeons but works very well outdoors, where you can “throw” an Atronach well out ahead of you and let it wreak havoc on your enemies before you even get close (or remain in cover and let your minion fight for you).
7. Soul Stealer
- Bound weapons cast Soul Trap on targets.
- Requires: Conjuration 30, Mystic Binding
Casts Soul Trap on targets hit with your bound weapons. If you’re interested in Enchanting and keep a ready supply of empty Soul Gems on hand, this is a great combination. But make sure you have a gem appropriate to the creature you’re killing; don’t trap that Skeever soul in your Grand Soul Gem. Check the Enchanting section for more information on Soul Gems.
8. Atromancy
- Double duration for conjured Atronachs.
- Requires: Conjuration 40, Summoner 1
Again, the duration of your conjured creatures is rarely an issue, since you can just resummon them if necessary.
9. Necromancy
- Greater duration for reanimated undead.
- Requires: Conjuration 40, Novice Conjuration
Since undead disintegrate when your spell wears off, Necromancy significantly increases the effectiveness of these spells. For best results, take Conjuration Dual Casting and dual cast your spell for an even longer duration!
10. Adept Conjuration ★
- Cast Adept-level Conjuration spells for half Magicka.
- Requires: Conjuration 50, Apprentice Conjuration
11. Oblivion Binding
- Bound weapons will banish summoned creatures and turn raised ones.
- Requires: Conjuration 50, Soul Stealer
Oblivion Binding works like a powerful Turn Undead or Expel Daedra spell. It’s a good alternative to the single-target versions of those spells, since it works repeatedly and without any Magicka cost.
12. Dark Souls
- Reanimated undead have 100 points more health.
- Requires: Conjuration 70, Necromancy
Increases the health of your undead, allowing you to squeeze more “life” out of them before they collapse.
13. Expert Conjuration ★
- Cast Expert-level Conjuration spells for half Magicka.
- Requires: Conjuration 75, Adept Conjuration
14. Elemental Potency ★
- Conjured Atronachs are 50% more powerful.
- Requires: Conjuration 80, Atromancy
Elemental Potency makes all Atronachs, including the top-tier Elemental Thralls, dramatically more powerful without increasing their casting cost.
15. Master Conjuration ★
- Cast Master-level Conjuration spells for half Magicka.
- Requires: Conjuration 100, Expert Conjuration
16. Twin Souls ★
- You can have two Atronachs or reanimated zombies.
- Requires: Conjuration 100, Dark Souls OR Elemental Potency
Twin Souls allows you to have two summoned or reanimated creatures (or one of each) active at once. Add a Follower to your adventuring party, and few enemies will be able to get close to you!
Racial Benefits
- +10 Conjuration
- Breton
- +5 Conjuration
- High Elf
Trainers
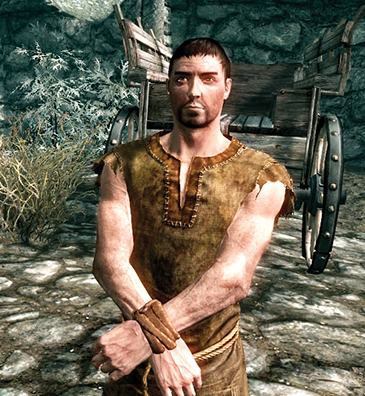
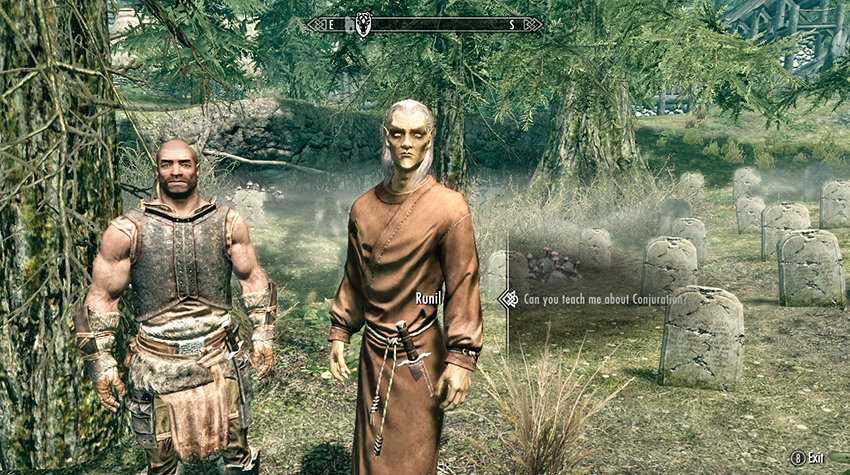
- Journeyman: Runil, Priest of Arkay, in Falkreath.
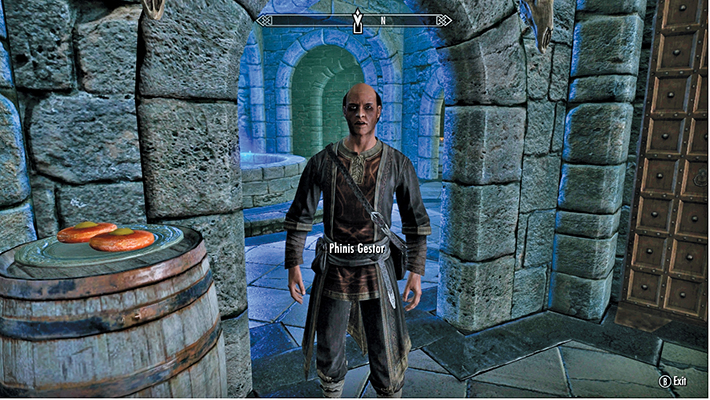
- Expert: Phinis Gestor, of The College of Winterhold.
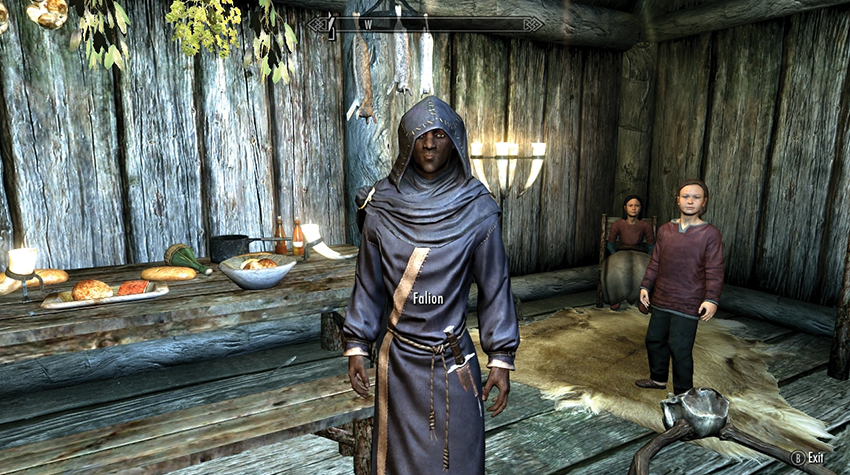
- Master: Falion, wizard of Morthal.
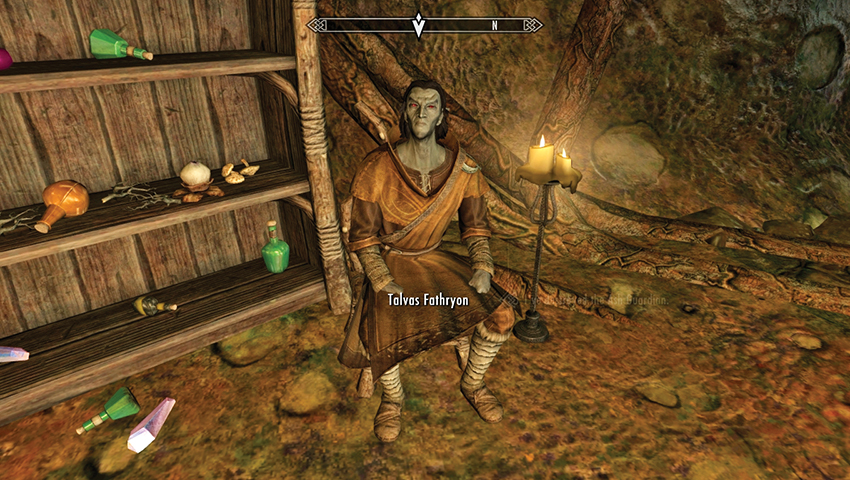
- Master: Talvas Fathryon, conjurer of Tel Mithryn, Solstheim.
Other Resources
- The following quests can also increase this skill:
- The College of Winterhold Quests: Radiant Quests: Shalidor’s Insights.
- Other Factions Quest: Pantea’s Flute.
- Daedric Quest: Discerning the Transmundane.
Magic Skills: The Path of Magic – Destruction
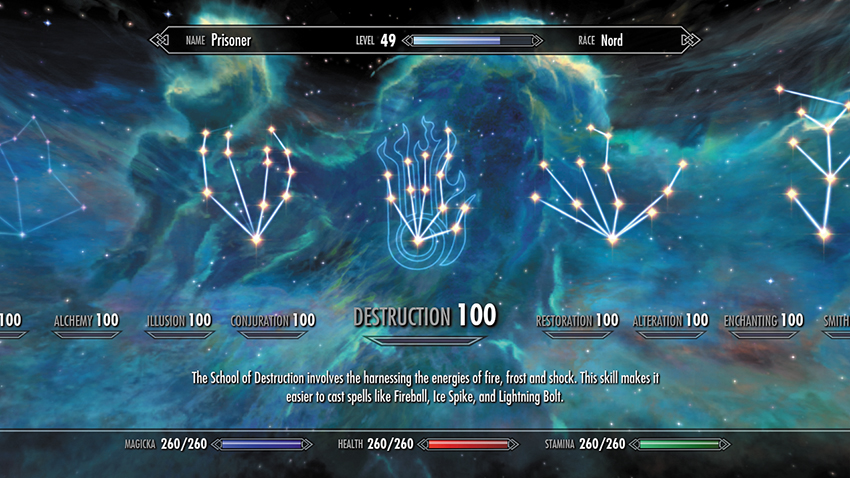
Destruction Magic harnesses the elemental forces of fire, frost, and shock to obliterate your foes. This skill improves when you damage enemies with Destruction spells, based on the amount of damage you do. You get the same increase for killing a Frost Troll with one Fire Storm as for killing it with ten Lightning Bolts, and no increase at all if the spell misses its target.
In addition to its listed damage, each element has its own innate effect: Flame spells set your enemies on fire (doing damage over time), Frost spells slow your foes and sap their stamina, and Shock spells drain their Magicka.
- Constellation: Path of Magic
- Available Perks: 17
Available Destruction Perks
1. Novice Destruction ★
- Cast Novice-level Destruction spells for half Magicka.
- Requires: None
2. Destruction Dual Casting ★
- Dual casting a Destruction spell overcharges the effects into an even more powerful version.
- Requires: Destruction 20, Novice Destruction
Dual Casting more than doubles the damage of your Destruction spells. This is a great choice, especially at early levels, where inflicting that extra damage with Flames or Frostbite often means the difference between life and death.
3. Apprentice Destruction ★
- Cast Apprentice-level Destruction spells for half Magicka.
- Requires: Destruction 25, Novice Destruction
4–5. Augmented Flames (2 ranks)
- Rank 1: Fire spells do 25% more damage.
- Requires: Destruction 30, Novice Destruction
- Rank 2: Fire spells do 50% more damage.
- Requires: Destruction 60, Augmented Flames 1
6–7. Augmented Frost (2 ranks)
- Rank 1: Frost spells do 25% more damage.
- Requires: Destruction 30, Novice Destruction
- Rank 2: Frost spells do 50% more damage.
- Requires: Destruction 60, Augmented Frost 1
8–9. Augmented Shock (2 ranks)
- Rank 1: Shock spells do 25% more damage.
- Requires: Destruction 30, Novice Destruction
- Rank 2: Shock spells do 50% more damage.
- Requires: Destruction 60, Augmented Shock 1
10. Impact
- Most destruction spells will stagger an opponent when dual cast.
- Requires: Destruction 40, Destruction Dual Casting
Impact adds a stagger effect to most dual-cast spells. Flames, Frostbite, and Sparks are not included in this set, so you can’t stagger enemies at will, but this can still be a powerful effect, allowing you to slow an enemy who’s trying to close in on you or giving you a chance to run if you are overwhelmed.
11. Rune Master
- Can place runes five times farther away.
- Requires: Destruction 40, Apprentice Destruction
Rune spells allow you to create traps that enemies can trigger. The Rune Master perk allows you to place them dramatically farther away, making it much easier to throw them into an enemy’s path or place them near an existing trap (to create a “killing zone”) without being detected.
12. Adept Destruction ★
- Cast Adept-level Destruction spells for half Magicka.
- Requires: Destruction 50, Apprentice Destruction
13. Intense Flames
- Fire damage causes targets to flee if their health is below 20%.
- Requires: Destruction 50, Augmented Flames 1
Sure, by the time this perk takes effect, your enemy was almost dead anyway, but watching a flaming foe run screaming off the edge of a cliff is just priceless.
14. Deep Freeze
- Frost damage paralyzes targets if their health is below 20%.
- Requires: Destruction 60, Augmented Frost 1
Deep Freeze paralyzes enemies near death, allowing you to kill them with impunity or turn your attention to more pressing threats. It often prevents a foe from completing their last attack (or two), which may be a lifesaver if your health is also low.
15. Disintegrate
- Shock damage disintegrates targets if their health is below 15%.
- Requires: Destruction 70, Augmented Shock 1
Disintegrate effectively increases your damage output, instantly killing an enemy whenever your shock spells reduce their health below 15%. For pure efficiency, this is the best of the three low-health perks.
16. Expert Destruction ★
- Cast Expert-level Destruction spells for half Magicka.
- Requires: Destruction 75, Adept Destruction
17. Master Destruction ★
- Cast Master-level Destruction spells for half Magicka.
- Requires: Destruction 100, Expert Destruction
Racial Benefits
- +10 Destruction
- Dark Elf
- +5 Destruction
- High Elf
- Imperial
- Redguard
Trainers
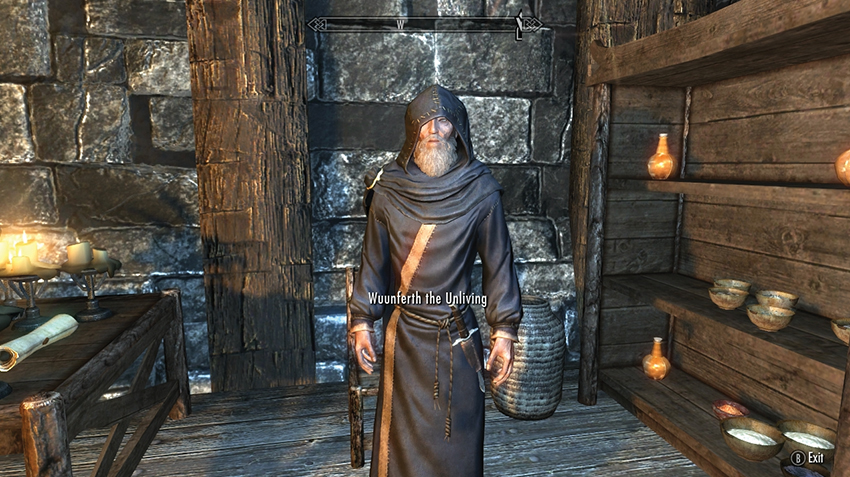
- Journeyman: Wuunferth the Unliving, sorcerer of Windhelm.
- Expert: Garan Marethi, of Castle Volkihar (Sea of Ghosts)
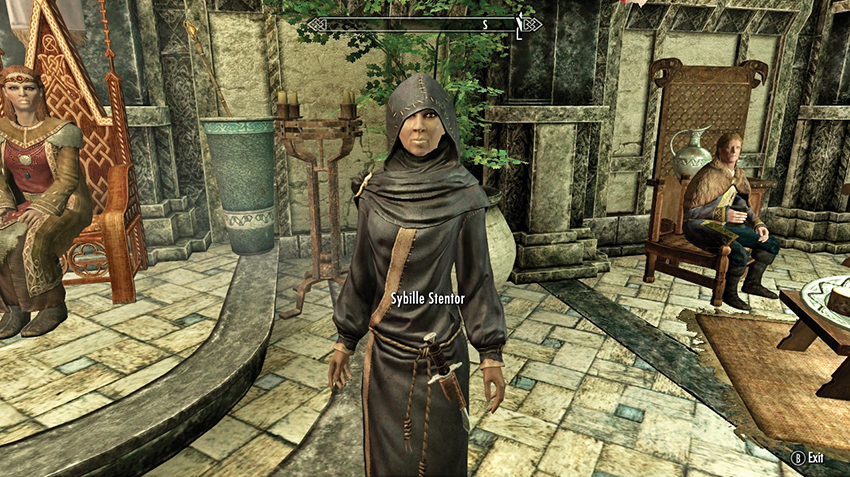
- Expert: Sybille Stentor, wizard at the Blue Palace, in Solitude.
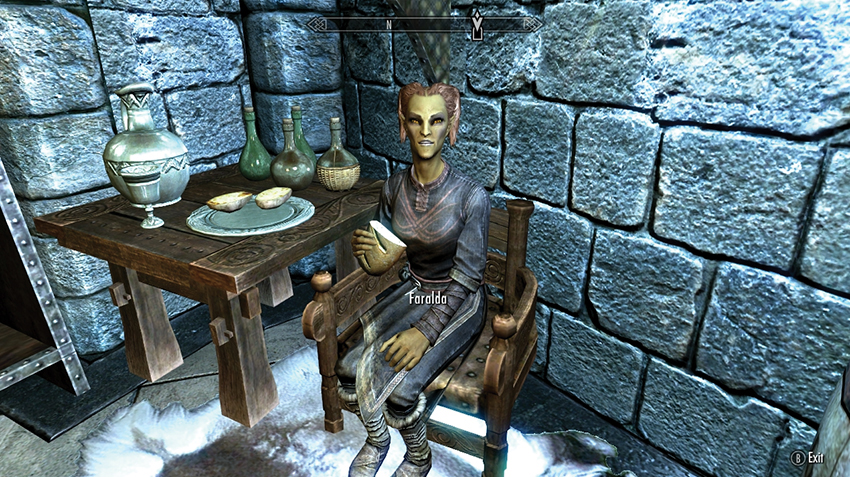
- Master: Faralda, sorceress at The College of Winterhold.
Other Resources
- The following quests can also increase this skill:
- The College of Winterhold Quests: Radiant Quests: Shalidor’s Insights.
- Other Factions Quest: Pantea’s Flute.
- Daedric Quest: Discerning the Transmundane.
Magic Skills: The Path of Magic – Restoration
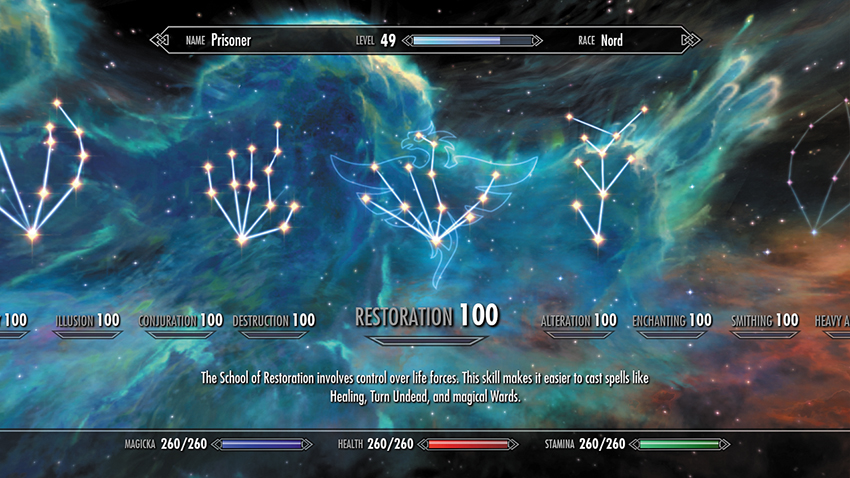
Restoration spells shape life energy, allowing you to heal yourself and your companions, drive back the undead, and create protective wards. Your Restoration skill increases when you use these spells effectively: to heal damage, turn undead, or shield yourself in combat. It does not increase if you heal someone who is already at full health or if you cast a Turn Undead spell when no undead are around.
- Constellation: Path of Magic
- Available Perks: 13
Available Restoration Perks
1. Novice Restoration ★
- Cast Novice-level Restoration spells for half Magicka.
- Requires: None
2. Regeneration ★
- Healing spells cure 50% more.
- Requires: Restoration 20, Novice Restoration
Regeneration makes all healing spells more effective. It has a low skill requirement and is definitely worth taking early, when the concentration spell Healing may be your only restorative spell. Those few extra points of health a second can make all the difference during a particularly dangerous battle.
3. Restoration Dual Casting
- Dual casting a Restoration spell overcharges the effects into an even more powerful version.
- Requires: Restoration 20, Novice Restoration
Dual Casting doubles the effectiveness of some Restoration spells (Healing, Wards) and the duration of others (Turn Undead). But except in the most dire of circumstances, you’re far more likely to want a weapon in your other hand than a second Restoration spell.
4. Apprentice Restoration ★
- Cast Apprentice-level Restoration spells for half Magicka.
- Requires: Restoration 25, Novice Restoration
5–6. Recovery (2 ranks) ★
- Rank 1: Magicka regenerates 25% faster.
- Requires: Restoration 30, Novice Restoration
- Rank 2: Magicka regenerates 50% faster.
- Requires: Restoration 60, Recovery 1
A fantastic perk for any mage—after all, who can resist having more Magicka? It’s also a fine choice for nonmages who still want to use magic occasionally, as it helps make up for the Magicka regeneration they miss out on by not wearing mage robes.
7. Respite ★
- Healing spells also restore Stamina.
- Requires: Restoration 40, Novice Restoration
Respite is ideal for warriors but is less effective for a pure mage, since you may not use Stamina except when sprinting away.
8. Adept Restoration ★
- Cast Adept-level Restoration spells for half Magicka.
- Requires: Restoration 50, Apprentice Restoration
9. Ward Absorb
- Wards recharge your Magicka when hit with spells.
- Requires: Restoration 60, Novice Restoration
This perk allows your Wards to absorb 25% of the Magicka from incoming spells. This is handy if you use Wards extensively, as the additional Magicka helps to offset their cost and allows you to maintain them for longer.
10. Necromage
- All spells are more effective against undead.
- Requires: Restoration 70, Regeneration
Necromage improves all of your spells, not just Turn Undead spells. Spells with a duration last 50% longer; spells with a magnitude are 25% stronger. So your Destruction spells now do 25% more damage to undead.
11. Expert Restoration ★
- Cast Expert-level Restoration spells for half Magicka.
- Requires: Restoration 75, Adept Restoration
12. Avoid Death
- Once a day, heals 250 points automatically if you fall below 10% health.
- Requires: Restoration 90
Effectively an “extra life,” Avoid Death is a free, passive power that automatically activates to restore your health when you need it most. The Restoration skill requirement is steep, but if you can meet it, it’s well worth your time.
13. Master Restoration ★
- Cast Master-level Restoration spells for half Magicka.
- Requires: Restoration 100, Expert Restoration
Racial Benefits
- +10 Restoration
- Imperial
- +5 Restoration
- Argonian
- Breton
- High Elf
Trainers
- Journeyman: Aphia Velothi, of Raven Rock, Solstheim.
- Expert: Colette Marence, instructor at The College of Winterhold.
- Expert: Keeper Carcette, Keeper of the Vigil, Hall of the Vigilant.
- Master: Danica Pure-Spring, priestess of Kynareth, in Whiterun.
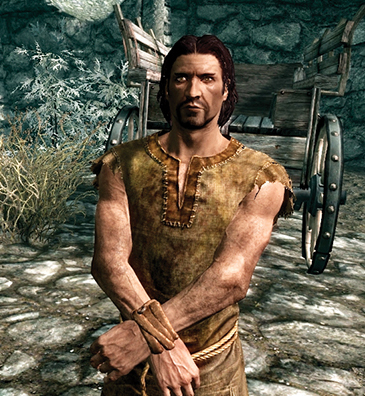
- Master: Florentius Baenius, monk of Fort Dawnguard, The Rift.
Other Resources
- The following quests can also increase this skill:
- The College of Winterhold Quests: Radiant Quests: Shalidor’s Insights.
- Other Factions Quest: Pantea’s Flute.
- Daedric Quest: Discerning the Transmundane.
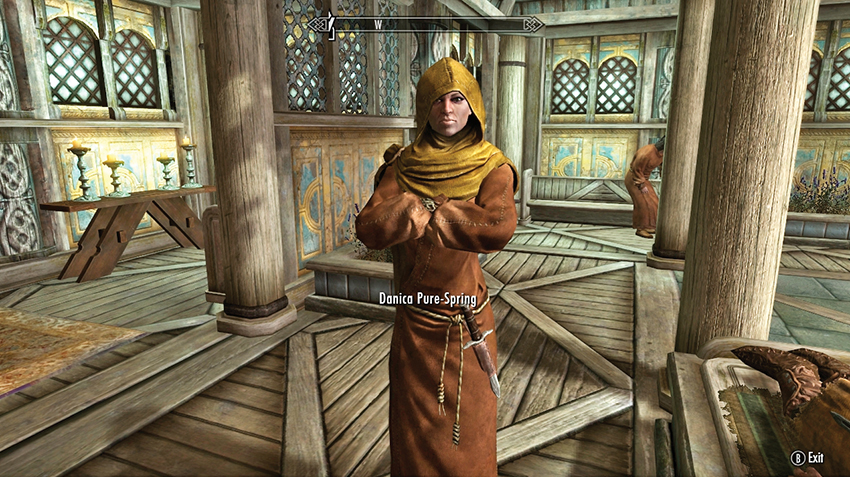
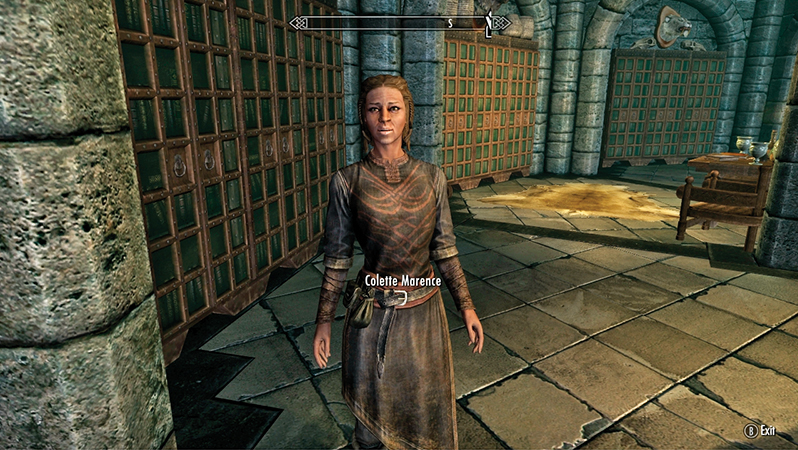
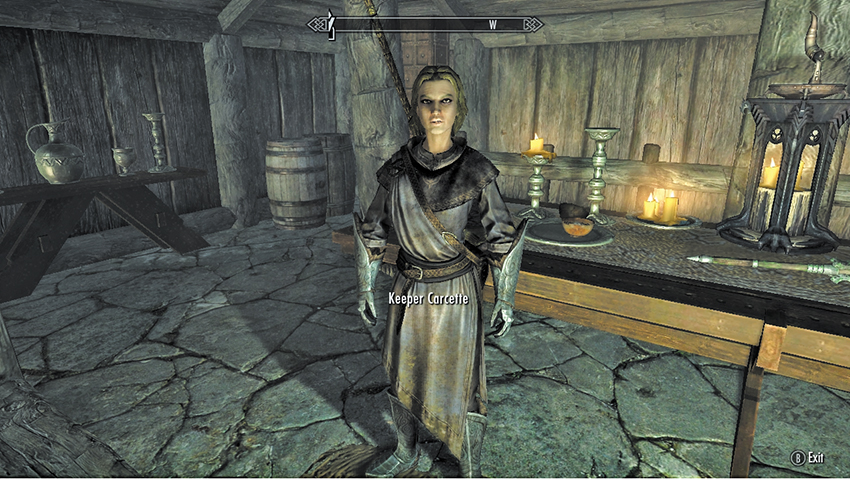
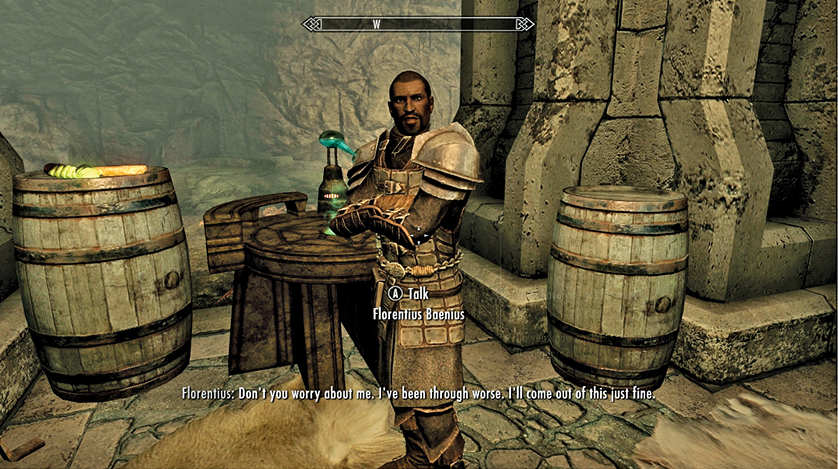
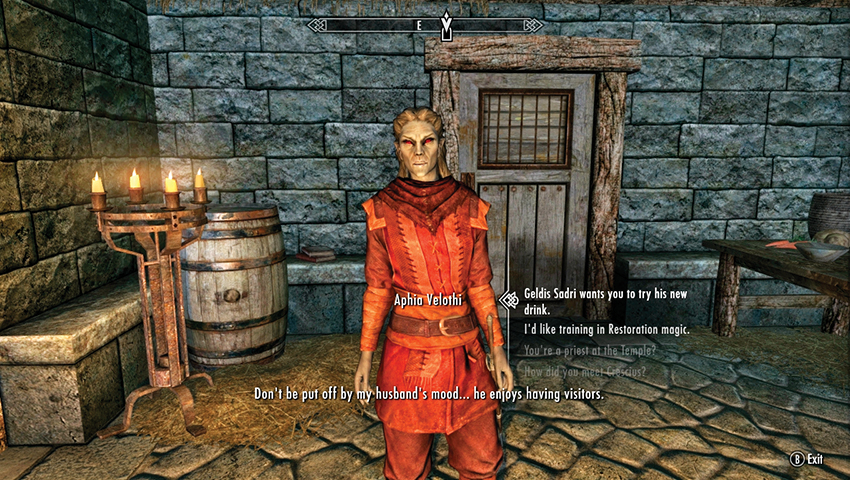
Magic Skills: The Path of Magic – Alteration
Alteration spells manipulate the physical world and its natural properties. This school includes some of the best defensive spells available (the Flesh spells) and a wide range of utility spells like Waterbreathing, Telekinesis, and Paralysis. Your Alteration skill increases when you cast a useful Alteration spell on a valid target. For example, you don’t get credit for casting Oakflesh but never entering combat, casting Waterbreathing but never entering the water, or casting Detect Life if no one is around.
- Constellation: Path of Magic
- Available Perks: 14
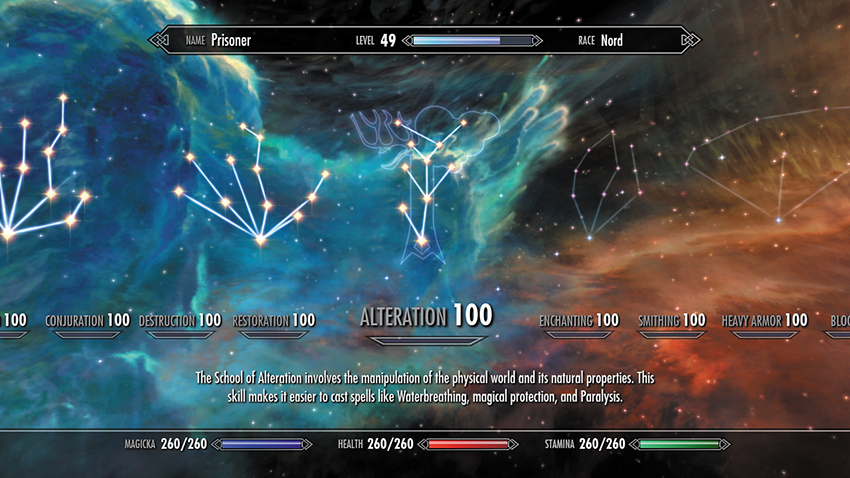
Available Alteration Perks
1. Novice Alteration ★
- Cast Novice-level Alteration spells for half Magicka.
- Requires: None
2. Alteration Dual Casting
- Dual casting an Alteration spell overcharges the effects into an even more powerful version.
- Requires: Alteration 20, Novice Alteration
Dual casting doubles the duration of most Alteration spells. Especially at early levels, this primarily affects the Flesh line of spells, so make sure you’re using them frequently enough and really need that extra time before taking this perk.
3. Apprentice Alteration ★
- Cast Apprentice-level Alteration spells for half Magicka.
- Requires: Alteration 25, Novice Alteration
4–6. Mage Armor (3 ranks) ★
- Rank 1: Protection spells like Stoneflesh are twice as strong if not wearing armor.
- Requires: Alteration 30, Apprentice Alteration
- Rank 2: Protection spells like Stoneflesh are two and a half times as strong if not wearing armor.
- Requires: Alteration 50, Apprentice Alteration
- Rank 3: Protection spells like Stoneflesh are three times as strong if not wearing armor.
- Requires: Alteration 70, Apprentice Alteration
The Mage Armor perks significantly increase the effectiveness of the Flesh line of spells if you’re not wearing any armor. If you’re willing to commit to these spells as your primary means of defense, these perks are incredibly useful. But be sure you’re willing to accept the “no armor” restriction before you invest in them.
7–9. Magic Resistance (3 ranks) ★
- Rank 1: Blocks 10% of a spell’s effects.
- Requires: Alteration 30, Apprentice Alteration
- Rank 2: Blocks 20% of a spell’s effects.
- Requires: Alteration 50, Apprentice Alteration
- Rank 3: Blocks 30% of a spell’s effects.
- Requires: Alteration 70, Apprentice Alteration
These perks are a great way of boosting your defense against magic, instead of, or in addition to, the Restoration line of Ward spells. This is a solid choice for any caster and is especially good for Bretons, as it stacks with their racial magic resistance.
10. Adept Alteration ★
- Cast Adept-level Alteration spells for half Magicka.
- Requires: Alteration 50, Apprentice Alteration
11. Stability
- Alteration spells have greater duration.
- Requires: Alteration 70, Adept Alteration
Stability increases the duration of all Alteration spells by 50%. At this point in the Alteration tree, you may have begun to experiment with spells like Paralysis, where the longer duration can definitely make a difference. If you plan to use it extensively or need even longer-lasting Flesh spells, it’s worth taking Stability (and possibly Alteration Dual Casting) to get the most from each cast.
12. Expert Alteration ★
- Cast Expert-level Alteration spells for half Magicka.
- Requires: Alteration 75, Adept Alteration
13. Atronach
- Absorb 30% of the Magicka of any spells that hit you.
- Requires: Alteration 100, Expert Alteration
This perk is worthwhile if you are running low on Magicka at high levels.
14. Master Alteration ★
- Cast Master-level Alteration spells for half Magicka.
- Requires: Alteration 100, Expert Alteration
Racial Benefits
- +5 Alteration
- Argonian
- Breton
- Dark Elf
- High Elf
- Redguard
Trainers
- Expert: Dravynea the Stoneweaver, mage of Kynesgrove, Eastmarch.
- Master: Tolfdir, mage at The College of Winterhold.
Other Resources
- The following quests can also increase this skill:
- The College of Winterhold Quests: Radiant Quests: Shalidor’s Insights.
- Other Factions Quest: Pantea’s Flute.
- Daedric Quest: Discerning the Transmundane.
- Miscellaneous Objectives: Eastmarch Hold: Salt for the Stoneweaver*.
Magic Skills: The Path of Magic – Enchanting
Enchanting allows you to enchant your own magic arms and armor. Your Enchanting skill increases whenever you enchant or disenchant an item (based on the value of the enchantment) and when you recharge an enchanted item.
While initially more difficult to level than Smithing or Alchemy, Enchanting is especially powerful in allowing you to maximize your potential with the right combination of enchantments. If you plan to explore Enchanting later in your adventure, it’s worth disenchanting the magic items you find early on to build up your Enchanting skill and learn a wide variety of effects. You may also want to develop your Smithing skill to ensure you have a ready supply of weapons and armor to work with. See the Crafting section for more details.
In addition, Neloth of Tel Mithryn (in Solstheim) has constructed a Staff Enchanter; augmenting staffs at this crafting station also increases your Enchanting skill.
- Constellation: Path of Magic
- Available Perks: 13
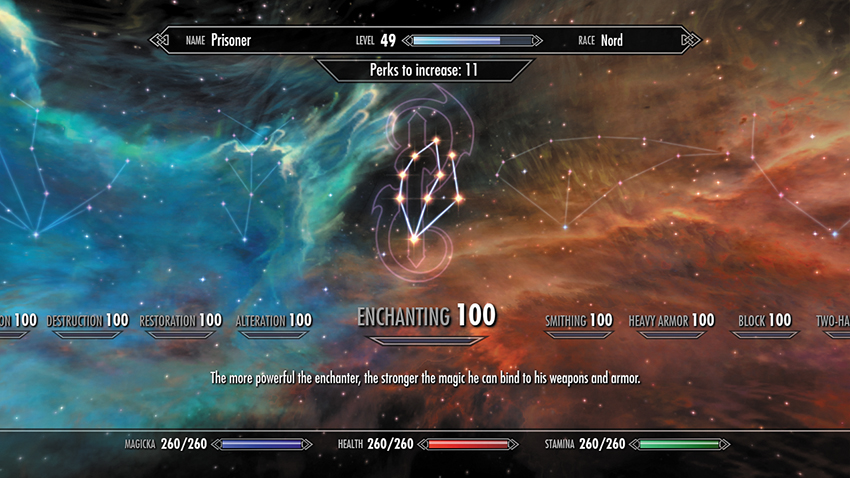
Available Enchanting Perks
1–5. Enchanter (5 ranks) ★
- Rank 1: New enchantments are 20% stronger.
- Requires: None
- Rank 2: New enchantments are 40% stronger.
- Requires: Enchanting 20, Enchanter 1
- Rank 3: New enchantments are 60% stronger.
- Requires: Enchanting 40, Enchanter 2
- Rank 4: New enchantments are 80% stronger.
- Requires: Enchanting 60, Enchanter 3
- Rank 5: New enchantments are 100% stronger.
- Requires: Enchanting 80, Enchanter 4
The Enchanter perks increase the strength of your Enchantments across the board, making weapons use fewer charges per hit and armor enchantments more powerful. At +20% per rank, it’s almost as effective as the other Enchanting perks and much more broadly useful. Take ranks in this whenever your skill level permits.
6. Soul Squeezer
- Soul Gems provide 250 extra energy for recharging items.
- Requires: Enchanting 20, Enchanter 1
7. Fire Enchanter
- Fire enchantments on weapons and armor are 25% stronger.
- Requires: Enchanting 30, Enchanter 1
The Fire, Frost, and Storm Enchanter perks enhance enchantments of their element. While these effects appear on both weapons and armor, they’re most important on weapons. Because you need only one weapon at a time, you may want to take the Fire Enchanter perk early and save the other two for later.
8. Frost Enchanter
- Frost enchantments on weapons and armor are 25% stronger.
- Requires: Enchanting 40, Fire Enchanter
9. Soul Siphon
- Death blows to creatures but not people trap 5% of the victim’s soul, recharging the weapon.
- Requires: Enchanting 40, Soul Squeezer
10. Insightful Enchanter
- Skill enchantments on armor are 25% stronger.
- Requires: Enchanting 50, Enchanter 1
11. Storm Enchanter
- Shock enchantments on weapons and armor are 25% stronger.
- Requires: Enchanting 50, Frost Enchanter
12. Corpus Enchanter
- Health, Magicka, and Stamina enchantments on armor are 25% stronger.
- Requires: Enchanting 70, Insightful Enchanter
13. Extra Effect ★
- Can put two enchantments on the same item.
- Requires: Enchanting 100, Storm Enchanter OR Corpus Enchanter
Extra Effect allows you to apply two enchantments to any item. Double-enchant everything you have, and you’ll notice a tremendous leap in your power level!
Racial Benefits
- +5 Enchanting
- Imperial
- High Elf
- Orc
Trainers
- Expert: Sergius Turrianus, instructor at The College of Winterhold.
- Master: Hamal, priestess of Dibella, in Markarth.
- Master: Neloth, enchanter of Tel Mithryn, Solstheim.
Other Resources
- The following quests can also increase this skill:
- Other Factions Quest: Pantea’s Flute.
- Daedric Quest: Discerning the Transmundane.