
Elder Scrolls V: Skyrim Guide The Atlas Hold 1: Haafingar
Primary Locations
[1.01] Northwatch Keep
Related Quests
- Side Quest: Missing in Action
Recommended Level: 12
Habitation: Military Fort
- Northwatch Archer
- Northwatch Guard
- Northwatch Interrogator
- Northwatch Mage
- Northwatch Prisoner
- Thorald Gray-Mane
Crafting
- Blacksmith Forge
Collectibles
- Skill Book [One-Handed]: 2920, Morning Star, v1 [A1/10]
- Skill Book [Two-Handed]: The Legendary Sancre Tor [D1/10]
- Chest(s)
- Potions
- Loose gear
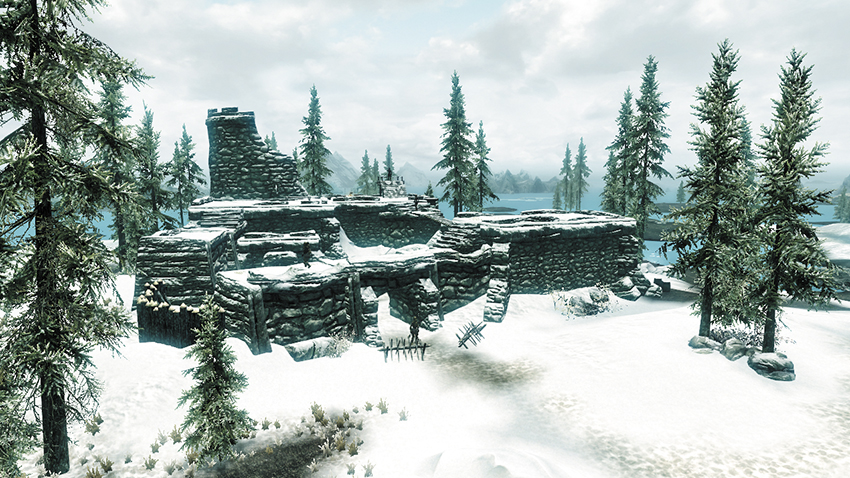
This mighty stronghold lies along Haafingar’s northwest coastline and serves as the primary location for a Side Quest involving a prisoner who’s being held captive here. Depending on your allegiances, you may be able to bribe or persuade the guards into letting the prisoner go without a fight. When you visit this fort without the “Missing in Action” quest, you’ll find a small army of hardened Northwatch Guards here, ready to give their lives in defense of their coastal keep.
Exterior
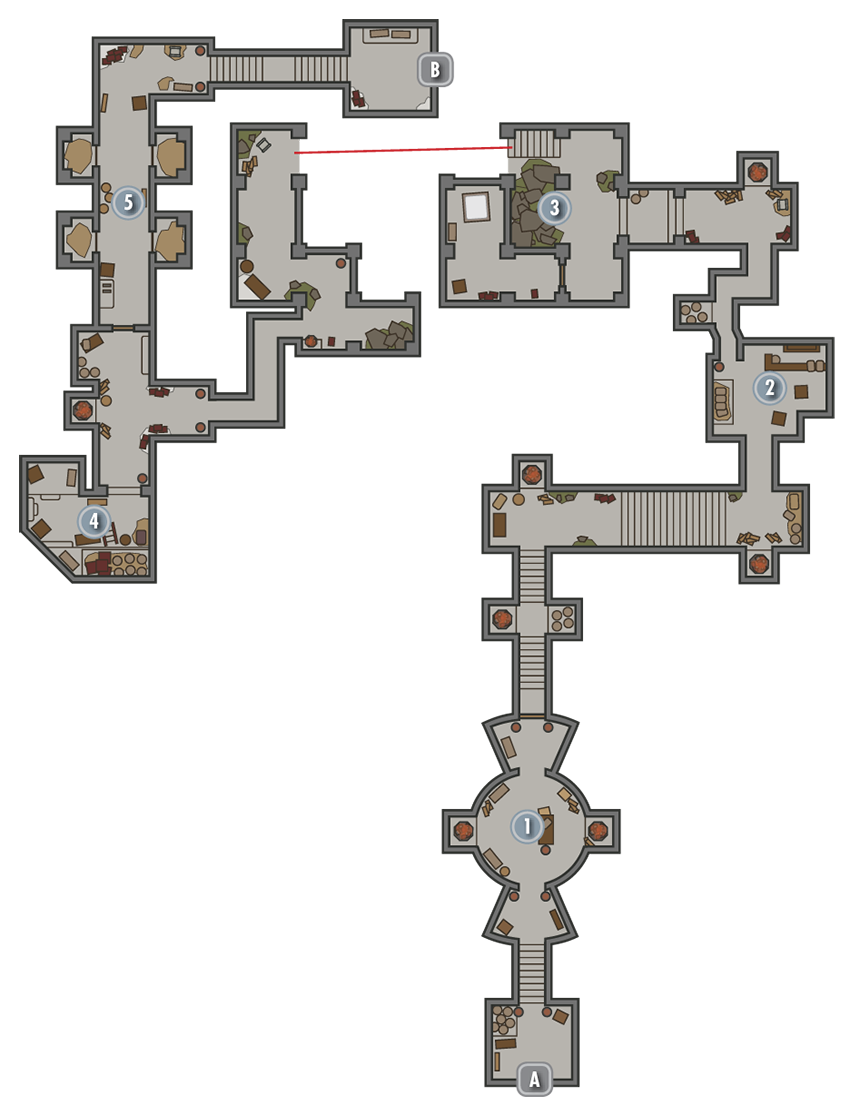
The keep’s exterior is heavily defended by a host of well-armored guards and archers. However, the troops have foolishly left the keep’s northern gate unlocked—exploit this to get the drop on them if you desire. Secure the outdoor area before infiltrating the keep via its only unlocked door.
- Crafting: Blacksmith Forge
 Door to Skyrim
 Entry Chamber
Slay a mage and guard in this first chamber, then loot a chest before pressing on.
- Chest
- Loose gear
 Kitchen
Dispatch a few more guards in this small kitchen, where a variety of food items and a few bits of loose gear can be obtained, such as the weapons mounted to the walls. Swipe the Skill Book on the shelf behind the bar.
- Skill Book [One-Handed]: 2920, Morning Star v1 [A1/10]
- Loose gear
 Crumbling Hall
Slay a couple more guards in this large chamber, which has fallen into disrepair. The lower door features an Expert-level lock, and you’ll find a Skill Book in the small room beyond. Ignore the locked door and loot an upstairs chest before pressing on to [4].
- Skill Book [Two-Handed]: The Legendary Sancre Tor [D1/10]
- Chest
- Knapsack
- Loose gear
 Interrogation Chamber
Slay a magic-wielding interrogator in this horrific room, then raid a large chest and snatch up an array of potions. Swipe a special key from the bloodstained table here as well—it unlocks the keep’s exit door, which is just ahead.
- Northwatch Keep Key
- Chest
- Potions
- Loose gear
 Holding Cells
Wipe out the guards and then pull the levers to free several prisoners here, if you wish. However, the prisoners own nothing of interest, and neither do their cells. Use the key you found in [4] to unlock the keep’s far exit door.
- Loose gear
 Door to Skyrim (Master)
[1.02] Rimerock Burrow
Related Quests
- Daedric Quest: A Daedra’s Best Friend
Recommended Level: 6
Dungeon: Warlock Lair
- Atronach
- Warlock
Crafting
- Arcane Enchanter
Quest Items
- The Rueful Axe
Collectibles
- Skill Book [Conjuration]: 2920, Hearth Fire, v9 [B1/10]
- Unique Weapon: The Rueful Axe [3/80]
- Chest(s)
- Loose gear
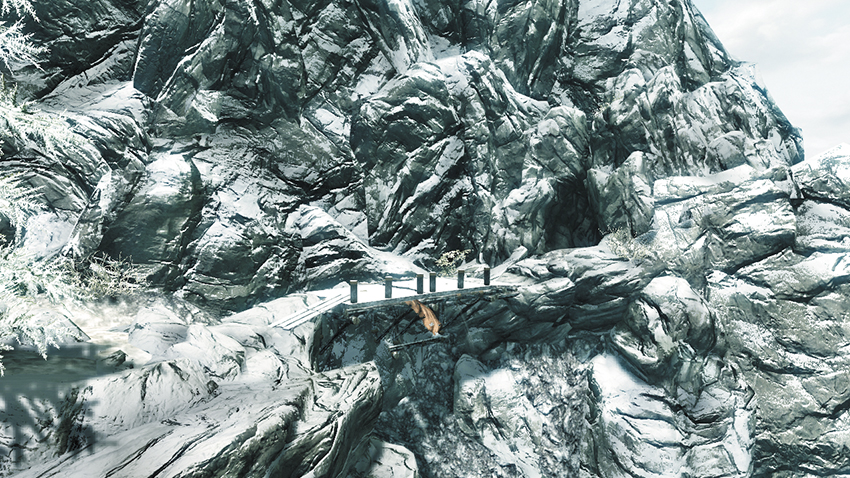
At the northeastern corner of Haafingar, a narrow, snowy mountain trail descends toward a small, frozen cave. A dangerous Flame Atronach and Master Conjurer reside within the cave. Slay these villains so that you may safely utilize their Arcane Enchanter and raid the cave’s far chest. Grab the nearby Skill Book off the end table as well.
During the Daedric Quest: A Daedra’s Best Friend, this site contains the Rueful Axe.
[1.03] Pinefrost Tower
Recommended Level: 6
Dungeon: Animal Den
- Ice Wraith
- Frost Troll
- Chest (Locked: Apprentice)
- Loose gear
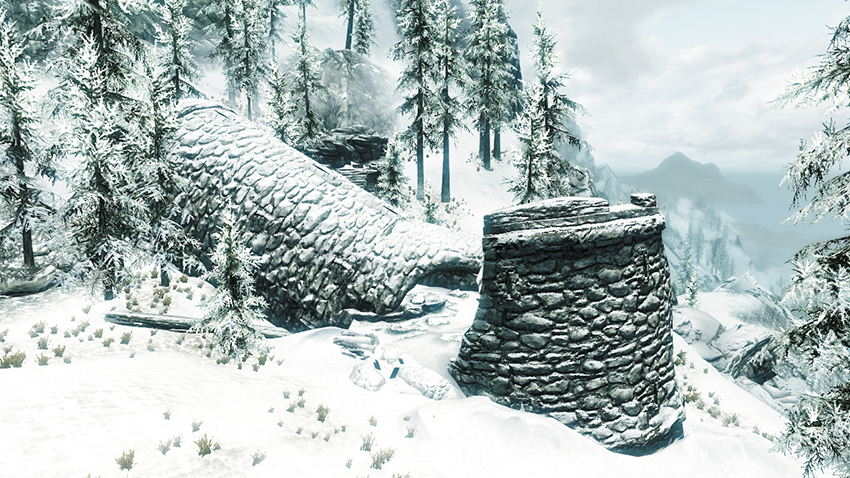
This fallen tower lies atop Haafingar’s western mountains, a short distance south of Northwatch Keep [1.01]. Gory remains hint at the presence of a vicious Ice Wraith and ferocious Frost Troll that have taken up residence here. Cross the ramp near the far firepit to reach a chest and some gear at the end of a snowy trail.
[1.04] Volskygge
Related Quests
- Side Quest: Masks of the Dragon Priests*
- Dungeon Activity
Recommended Level: 24
Dungeon: Dragon Priest Lair
- Bandit
- Draugr
- Volsung
Dangers
- Battering Ram Traps (pressure plates)
- Swinging Blade Trap (pressure switch)
- Swinging Wall Trap (pressure plates)
- Dart Trap (pressure plates)
Puzzles
- Nordic Pillars (Snake, Bear, Fox, Wolf)
Collectibles
- Dragon Priest Mask: Volsung [3/80]
- Skill Book [Lockpicking]: Surfeit of Thieves
Special Objects
- Word Wall: Whirlwind Sprint [1/2]
- Chest(s)
- Potions
- Loose gear
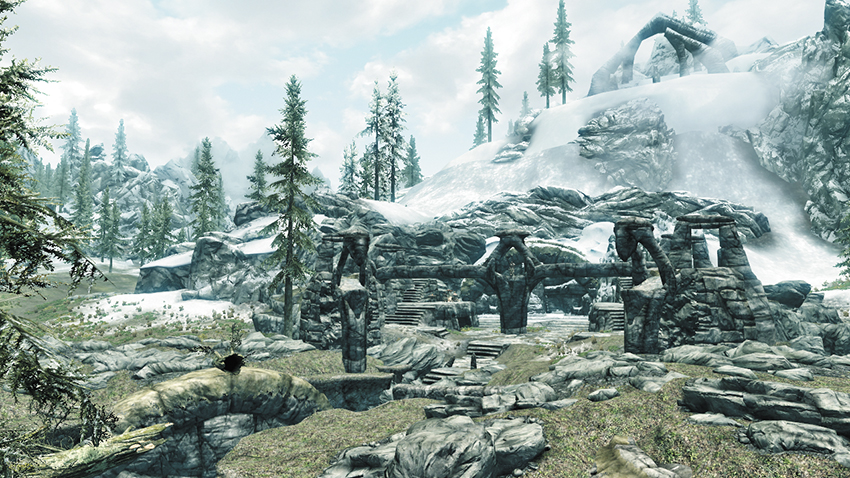
Along Haafingar’s southwest edge, a collection of crumbling ruins surround a shattered staircase that leads to ancient burial tunnels.
Exterior
Search the outdoor ruins to the north and south of the staircase to find a few urns with some coin; then scale the stairs and enter the interior ruins.
- Loose gear
Exit to Skyrim
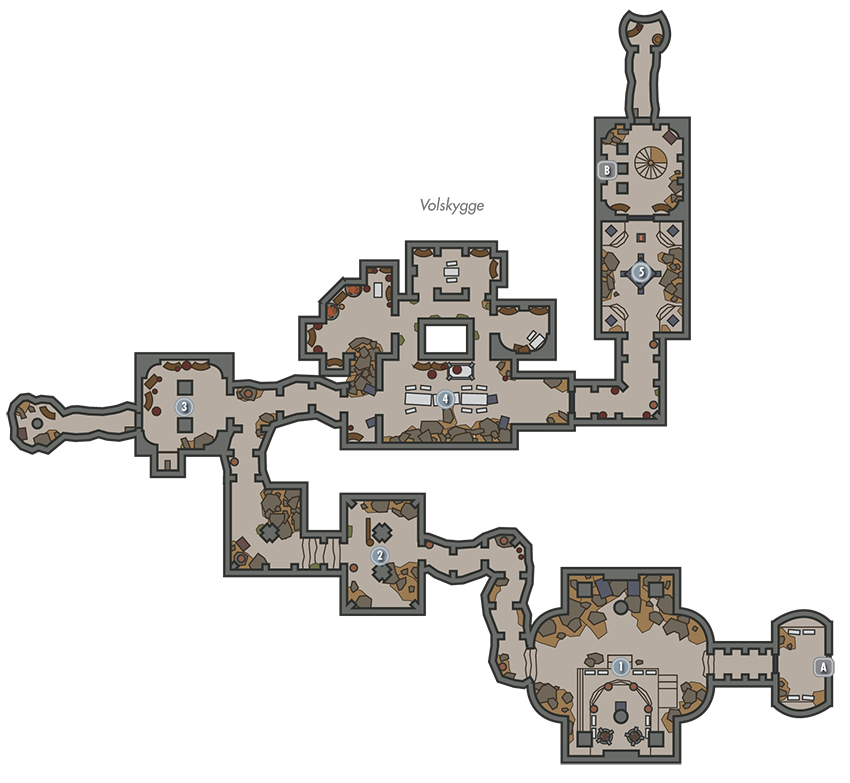
Throne Room
A couple of bandit scouts patrol the first fire-lit chamber. Beware the pressure plate near the elevated throne—stepping on it causes arrows to fly out from the surrounding walls.
- Danger! Dart Trap (pressure plate)
Swinging Wall Passage
Avoid the pressure plate on the ground in the center of this hall—take a side passage to avoid being impaled by a swinging wall of spikes. Slay a few more bandits and raid a chest at the hall’s far end.
- Danger! Swinging Wall (pressure plate)
- Chest (Locked: Apprentice)
Lever Nook
Dispatch a couple of bandits at this dead end, then swipe a Skill Book off a shelf and unlock an Adept-level gate to access a lever that opens a secret passage in the nearby wall. Go through to discover some potions and a chest.
- Skill Book [Lockpicking]: Surfeit of Thieves
- Chest
- Potions
Dining Hall
A grotesque scene of a bloody Draugr splayed across an elegant dining table greets you here. Swipe a few potions from the shelves before entering the northern caverns to slay more bandits, score a few more potions, and loot some urns.
- Potions
Nordic Pillars Chamber
Gates slam shut as you enter the passage’s end, trapping you near a sort of glyph puzzle and forcing you to solve it. The book on the pedestal provides clues as to the puzzle’s solution. Activate the glyphs in the following order: Snake, Bear, Fox, Wolf. Don’t miss the chest in the stairwell chamber beyond, and pull a lever before heading downstairs to open a secret passage. Explore the passage to reach a trapped room that features an urn and a few valuable potions.
- Danger! Battering Ram Trap (pressure plate)
- Chest
- Potions
Door to Volskygge Passages
 Door to Volskygge
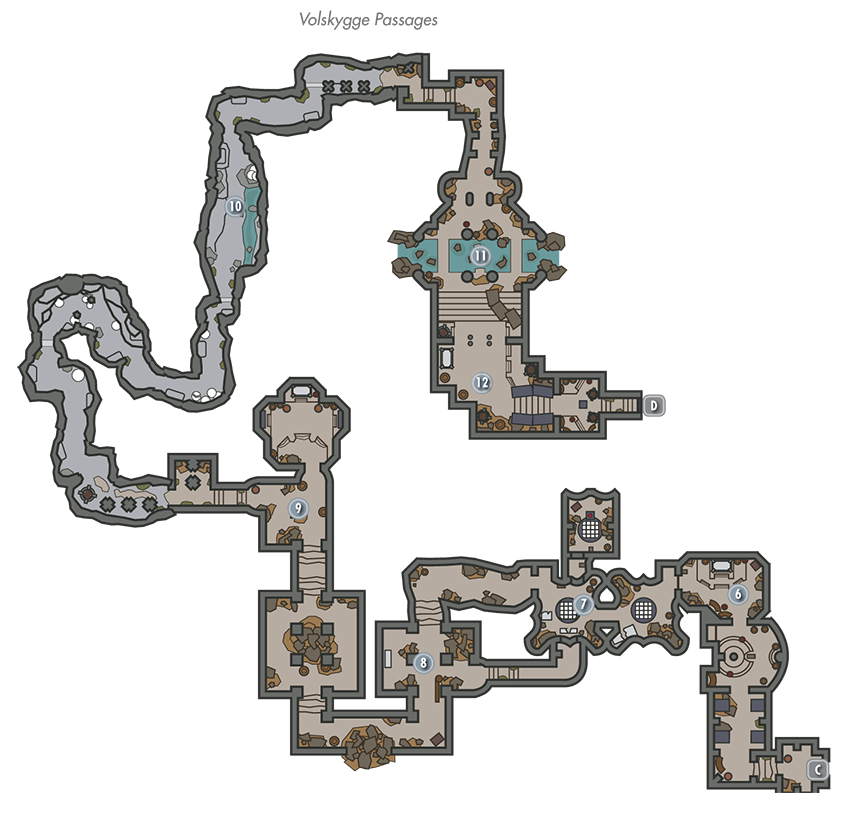
 Lever Chamber
Pulling a lever in this quiet chamber opens a nearby holding cell, but there’s no need to do so. Press onward and wipe out a Draugr so you may safely raid a chest in the next room. The chest is rigged with a trap hinge connected to the chest’s left side. Unlock the hinge trap before opening the chest to avoid a dart trap.
- Chest
 Trap Door Chambers
Avoid the pressure plate in the center of this odd chamber and avoid falling into the next room’s central pit, or you’ll have to take a dangerous Draugr-filled passage to the next chamber. Assuming you avoid the pitfall, look for the dead bandit next to a lever. This leads to a secret chamber with a chest and a health potion on a pedestal. Careful when grabbing the potion: it triggers a spear trap from the grate below.
- Danger! Swinging Blade Trap (pressure switch)
- Chest
 Burial Chamber
Loot the many urns and resting Draugr in this chamber, but beware the trap that’s triggered by a central pressure plate. Don’t miss the chest in the passage that follows, and beware a host of Dragur that ambush you on the way to [9].
- Danger! Swinging Wall (pressure plate)
- Chest (Locked: Apprentice)
 Altar Chamber
A lone Draugr guards a quiet altar chamber here. Loot the many urns, then beware a battering ram trap as you scale the stairs that lead toward [10].
- Battering Ram Trap (pressure plate)
- Potion
 Spider Passage
Slay a host of Frostbite Spiders and rip through thick webs on your way through this long, winding passage, harvesting ingredients from egg sacs as you go. Don’t miss looting the chest or urns just before you arrive at [11].
- Chest
 Brook Chamber
A gentle stream flows through this Draugr-filled chamber. Find a chest at one end of the brook along with an Orichalcum ore vein. Loot a few urns after laying the undead to rest here.
- Chest
 Exit Chamber
Slay one final Draugr and loot several more urns and a large chest on your way out to the ruins’ exterior peaks.
- Potions
- Loose gear
 Door to Volskygge Peak
Volskygge Peak
A mighty wizard named Volsung awaits you on the ruins’ exterior peaks. Slay this powerful adversary to acquire the valuable gear that he owns, including a precious mask. Scale the nearby steps afterward to locate a Word Wall that bestows the Word of Power: Whirlwind.
- Dragon Priest Mask: Volsung [1/10]
- Word Wall: Whirlwind Sprint [1/2]
- Chest
[1.05] Steepfall Burrow and Lower Steepfall Burrow
Dungeon: Animal Den
- Frost Troll
- Ice Wolf
Collectibles
- Skill Book [Destruction]: Mystery of Talara, v3 [C1/10]
- Chest(s)
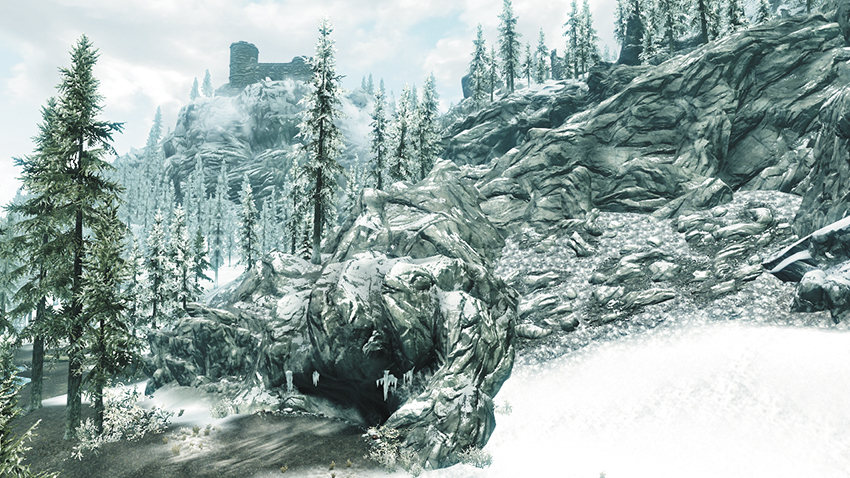
High in the northern peaks of Haafingar’s central mountains lies the yawning mouth of a frozen cave. Steepfall Burrow also features a lower exit, which registers as a separate location on the world map. This connection can be exploited by travelers to facilitate their trek through Haafingar’s treacherous mountains.
Upper Troll Cave
Beware when crossing the cavern’s natural footbridge—it’s a long way down. Attack the dangerous Frost Troll from range and see if you can knock the beast into the abyss for an easier kill (trolls carry little of value). Slay another troll in the far cave, then loot the chest in the nearby fissure for valuables. Don’t miss the Skill Book by the skeleton.
- Skill Book [Destruction]: Mystery of Talara, v3 [C1/10]
- Chest
Lower Wolves’ Lair
If you’re feeling daring, drop from the natural footbridge and plummet into the icy water far below. The fall won’t harm you, and you can potentially unlock a sunken chest down below for even more loot. To escape the watery cavern, search for an underwater passage to the west, which lies just below the waterline—this will lead you to an Ice Wolf lair, where another chest is located. Loot the wolves’ lair and then step outside via the burrow’s lower exit.
- Chest
- Chest (Locked: Apprentice)
[1.06] Lost Echo Cave
Recommended Level: 8
Dungeon: Falmer Hive
- Animal
- Falmer
Collectibles
- Skill Book [One-Handed]: 2920, Morning Star, v1 [A2/10]
- Chest(s)
- Potions
- Loose gear
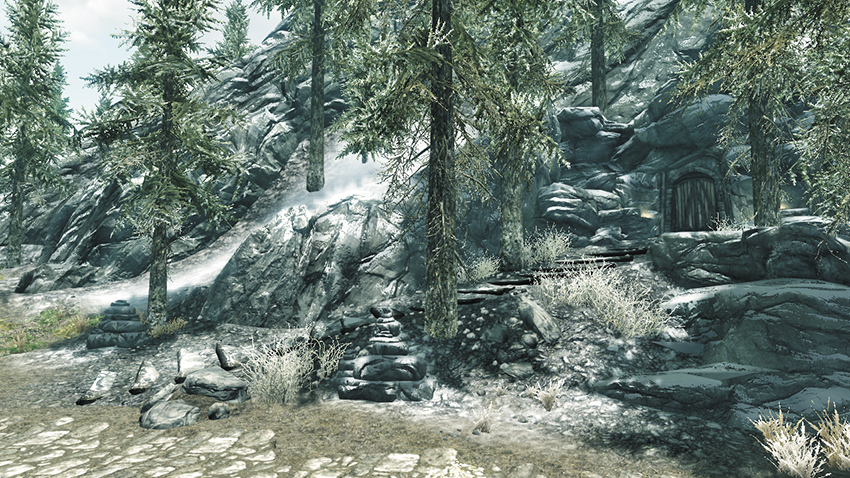
Wooden stairs lead from the main road to this mountain cave, which someone—or something—has outfitted with a functional front door.
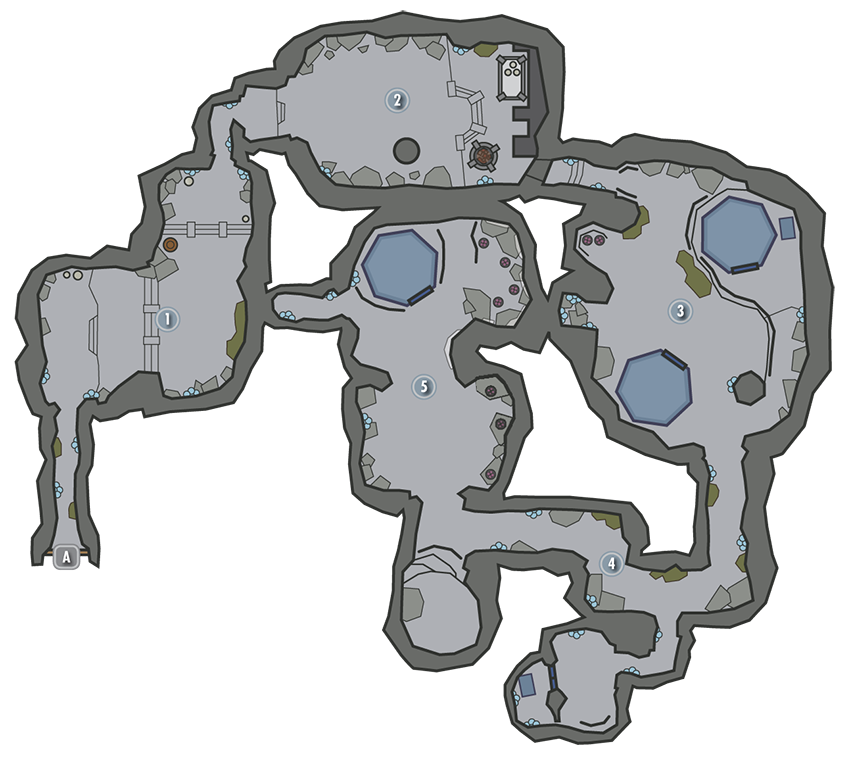
Door to Skyrim
Bioluminescent Cavern
Harvest plenty of Glowing Mushrooms as you pass through the cave’s first few passages.
Ceremony Chamber
Peruse the gear that rests on the next chamber’s ornate table, then activate the ceremonial brazier to start a fire, fry up a Glowing Mushroom, and cause a nearby passage to open. Collect a Skill Book from the stone table here as well before advancing.
- Skill Book [One-Handed]: 2920, Morning Star, v1 [A2/10]
- Loose gear
Falmer Cavern
The cave’s vile denizens finally reveal their presence in this third cavern. Slay the nimble Falmer and loot the nearby egg sacks for Chaurus Eggs; then scale the east path to locate an odd-looking chest near a tent.
- Chest
Ambush Passage
Look up and beware the odd holes in the walls of the next passage. Falmer warriors may emerge from these elevated spawning holes in surprise ambushes! Duck into a southern nook to discover a chest, then continue along until you can leap onto a small ledge to locate a potion, a coin purse, and a satchel as you make your way to the final cavern.
- Chest
- Satchel
- Potion
Chaurus Chamber
The final cavern is home to a mob of insectlike Chaurus. Secure the cavern, slay one last Falmer that emerges from a high spawning hole, and enter a tent to find a large chest. Activate a handle on the wall near the west passage to open a far door, then proceed through the find yourself back near the cave’s entrance.
- Chest
[1.07] Orphan’s Tear
Recommended Level: 6
Dungeon: Bandit Camp
- Bandit
- Chest(s)
- Potions
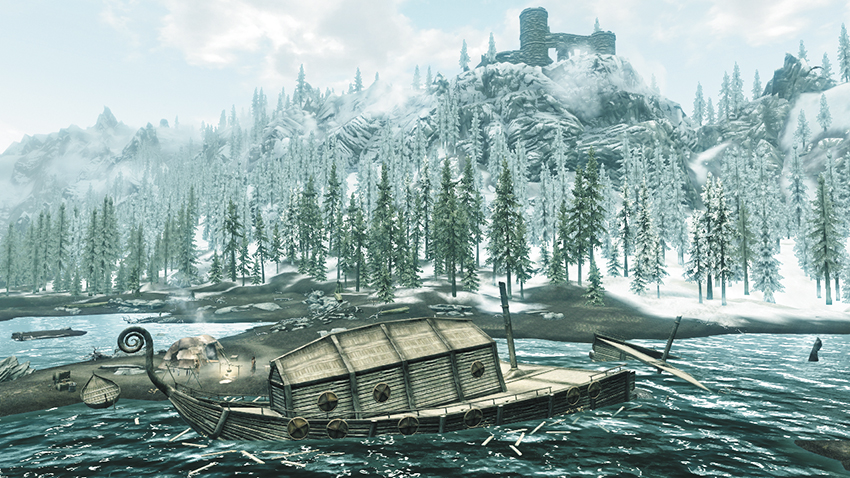
A ship called the Orphan’s Tear has been hit by a storm and wrecked against Haafingar’s treacherous northern coastline. Now this site serves as a bandit camp. Little of interest is found around the campsite, but a chest awaits looting inside the remnants of the Tear, while another can be found at the bottom of her submerged hull.
[1.08] Fort Hraggstad
Related Quests
- Civil War Quest: Joining the Legion
- Civil War Quest: Liberation of Skyrim
- Civil War Quest: The Battle for Fort Hraggstad
Recommended Level: 6
Habitation: Military Fort
- Bandit (Prequest)
- Stormcloak/Imperial Soldier (depending on your allegiance during the Civil War)
Crafting
- Blacksmith Forge
Collectibles
- Skill Book [Archery]: The Gold Ribbon of Merit
- Chest(s)
- Potions
- Loose gear
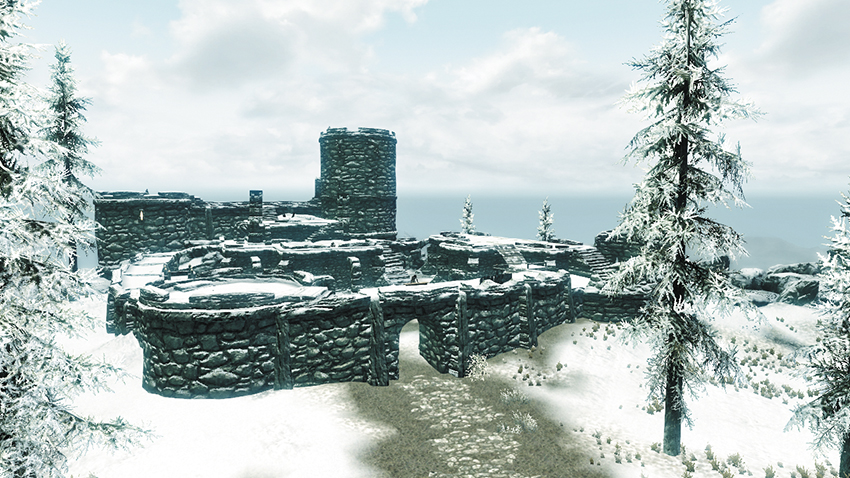
This bandit-filled fortress stands tall at the west end of Haafingar’s central mountain range and serves as a point of contention during the Civil War Quest.
Exterior
A host of lowly bandits fight hard to keep the fort secure, with archers firing down from elevated ramparts. Fight hard to secure the stronghold’s exterior, using cover to prevent the bandits from overwhelming you with ranged attacks. Loot the chest near the blacksmith forge, and slay two powerful bandits atop the two highest towers (located to the west) to gain some worthy loot from their corpses.
- Crafting: Blacksmith Forge
- Chest
- Loose gear
Fort Hraggstad (Interior)
A mighty bandit lurks inside the fort, backed by a few powerful underlings. If you can slay these foes, you’ll reap a host of precious loot from their bodies. Claim a Skill Book from the far upstairs table.
- Skill Book [Archery]: The Gold Ribbon of Merit
- Chest
- Chest (Locked: Adept)
- Potions
- Loose gear
Prison
A small group of worthy bandits guard the prison, but there’s little of interest here besides the loot you’ll find on the bandits themselves.
- Loose gear
[1.09] Widow’s Watch Ruins
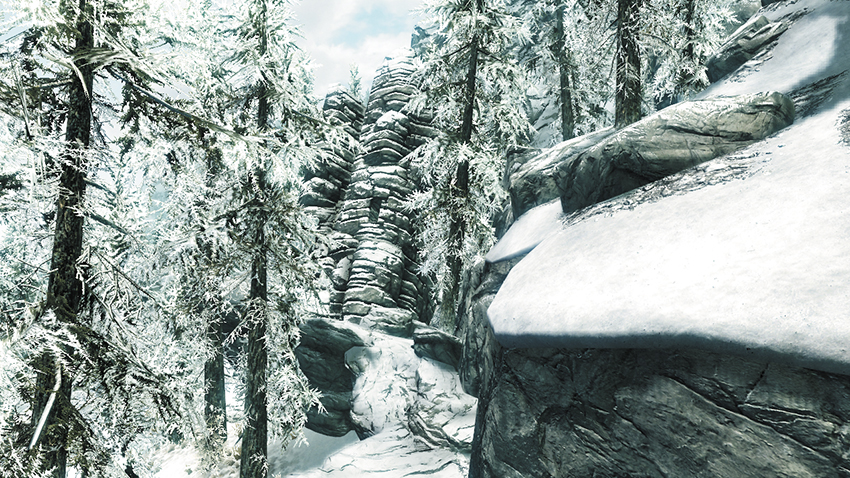
Recommended Level: 6
Dungeon: Hagraven Nest
- Witch
Collectibles
- Skill Book [Restoration]: 2920, Rain’s Hand, v4
- Chest (Locked: Expert)
This crumbling tower is home to a vile hag. Slay the vicious witch, then scale the toppled tower. When you exit the structure, continue looping around the tower’s exterior until you’re able to reenter through a higher door. Go to the top to discover an ornate chest that’s hidden amongst debris.
[1.10] Pinemoon Cave
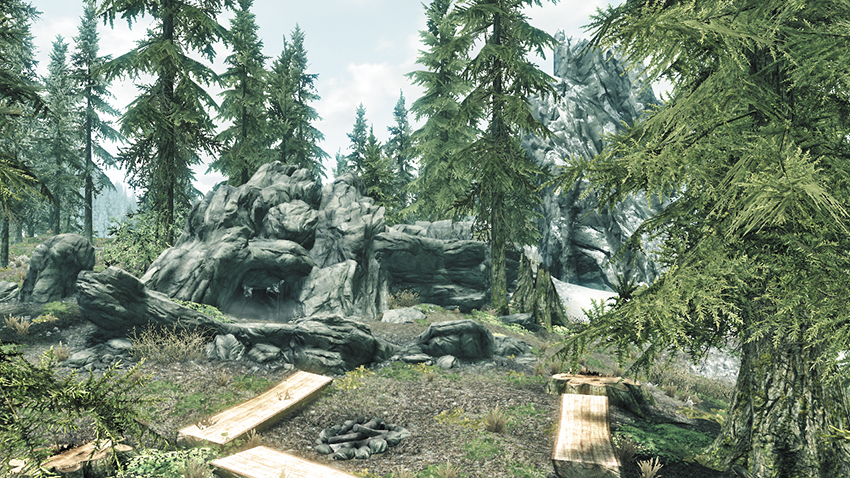
Recommended Level: 6
Dungeon: Vampire Lair
- Master Vampire
- Vampire
- Wolf
Collectibles
- Skill Book [Illusion]: Incident at Necrom [C1/10]
- Chest
- Chest (Locked: Novice)
- Potions
- Loose gear
A grove of trees in Haafingar’s Tundra opens to a small campsite. If you visit here during the nighttime, you may notice vampires milling about the exterior camp. Otherwise, you’ll find the creatures lurking within the nearby cave.
Slay a couple of wolves in the first chamber, then dispatch a handful of vampires in the second, including a powerful Master Vampire. Unlock a simple chest and claim a Skill Book from the table near the large chest before heading back outside.
[1.11] Clearpine Pond
Related Quests: Dungeon Activity
Recommended Level: 8
Dungeon: Spriggan Grove
- Spriggan
- Spriggan Matron
- Chest (Locked: Novice)
Collectibles
- Skill Book [Alchemy]: De Rerum Dirennis [B1/10]
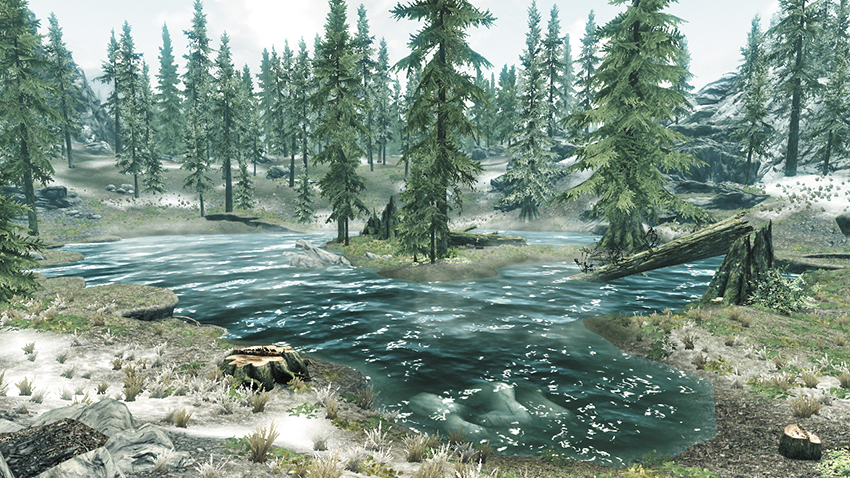
A handful of mythical creatures called Spriggan are said to protect this small hot-water spring, where a wealth of wild ingredients grow. If you merely pass by, the Spriggans will take no notice of you. But disturb anything on the island, and one to three Spriggans will emerge to confront you. Defeat them, and the treasures of a deceased alchemist and a locked chest will be yours.
[1.12] Ravenscar Hollow
Recommended Level: 14
Dungeon: Hagraven Nest
- Bandit
- Hagraven
- Animal
Dangers
- Bone Alarm Trap
Collectibles
- Skill Book [Destruction]: The Art of War Magic [E1/10]
- Ravenscar Hollow Cage Key (Hagraven)
- Chest
- Potions
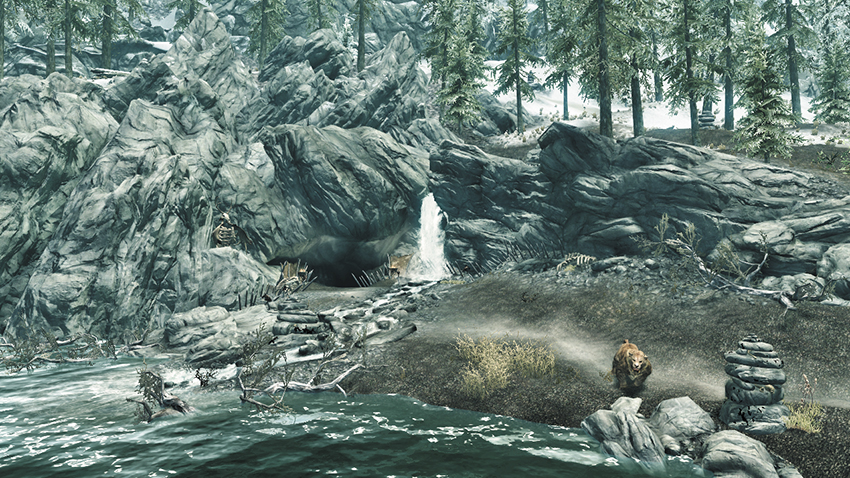
This cave burrows into the north base of Haafingar’s northern mountains—a tranquil waterfall flows just outside. Beware the hanging rattles inside the cave. Sneak directly between them to avoid contact, or creep through the water instead. Slay a dangerous Hagraven and its familiar, then search the Hagraven’s remains to find a key. Pull a nearby lever to open a secret passage. Use the Hagraven’s key to free the imprisoned bandit in the passage, who’ll help you slay the remaining Hagraven before turning on you. Loot a giant chest and collect the nearby Skill Book before making your way back outside.
[1.13] The Steed Stone
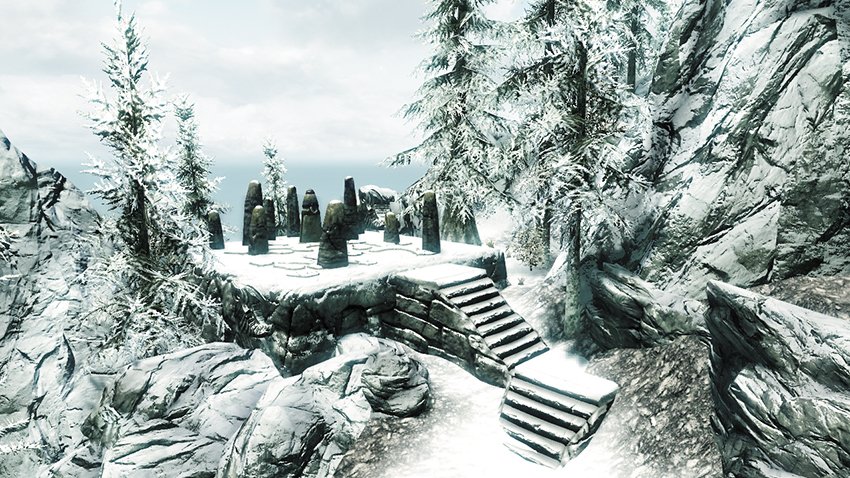
Recommended Level: 6
Special Objects
- Standing Stone: The Steed Stone [1/13]
Scale Haafingar’s snowcapped central mountains to discover an ancient stone with curious markings. Inspect the stone to gain its power—those under the sign of the Steed can carry more and do not suffer a movement penalty from their armor. Note that activating this Standing Stone will override any previous sign blessing you’ve received from a similar stone, because only one can be active at a time.
[1.14] Ironback Hideout
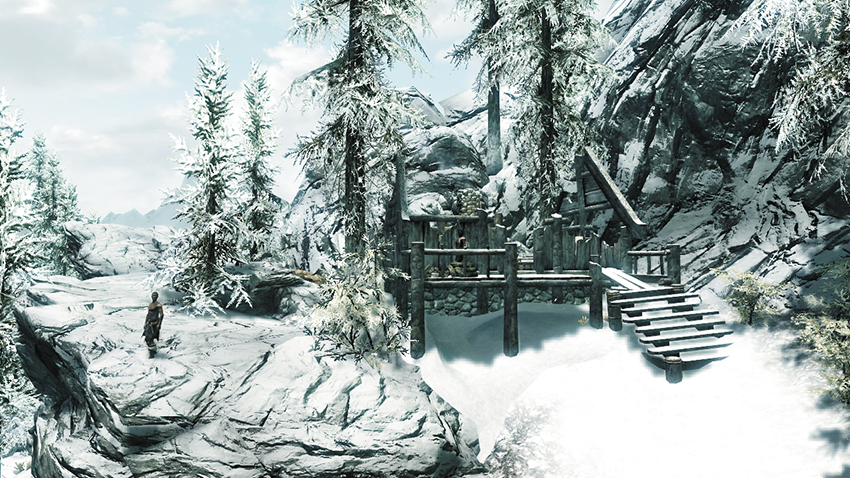
Recommended Level: 6
Dungeon: Bandit Camp
- Bandit
Crafting
- Tanning Rack
Collectibles
- Skill Book [Pickpocket]: Beggar
- Chest (Locked: Novice)
A powerful bandit and a handful of lesser cohorts have made camp in Haafingar’s frigid central mountains. Neutralize the vile outlaws here, then raid their campsite for valuables, including a Skill Book that lies on the table near the locked chest.
[1.15] Wolfskull Cave
Related Quests
- Side Quest: The Man Who Cried Wolf
Recommended Level: 8
Dungeon: Warlock Lair
- Bandit
- Draugr
- Mage
Dangers
- Oil Lamp Trap
- Bone Alarm Trap
- Oil Pool Traps
Collectibles
- Skill Book [Light Armor]: The Refugees
- Chest(s)
- Potions
- Loose gear
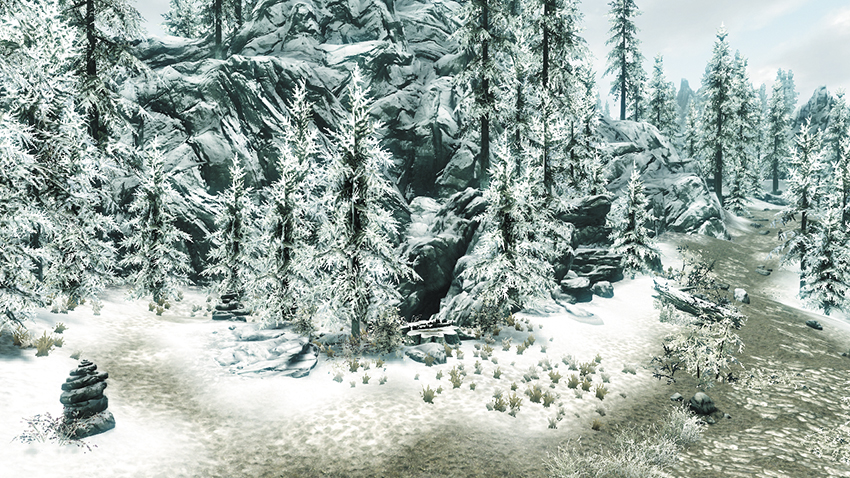
Marker stones highlight a snowy side trail that leads to this sizable cave, which you must visit during Side Quest: The Man Who Cried Wolf. Inside, take either the higher or lower trail as you head toward the rear cavern, which several low-level bandits patrol. A more powerful bandit lurks within the far structure, where a large chest is located. Beware: The center of the floor gives way inside the structure, dropping you into a lower chamber. Follow the passage to reach the Wolfskull Ruins.
- Chest
- Loose gear
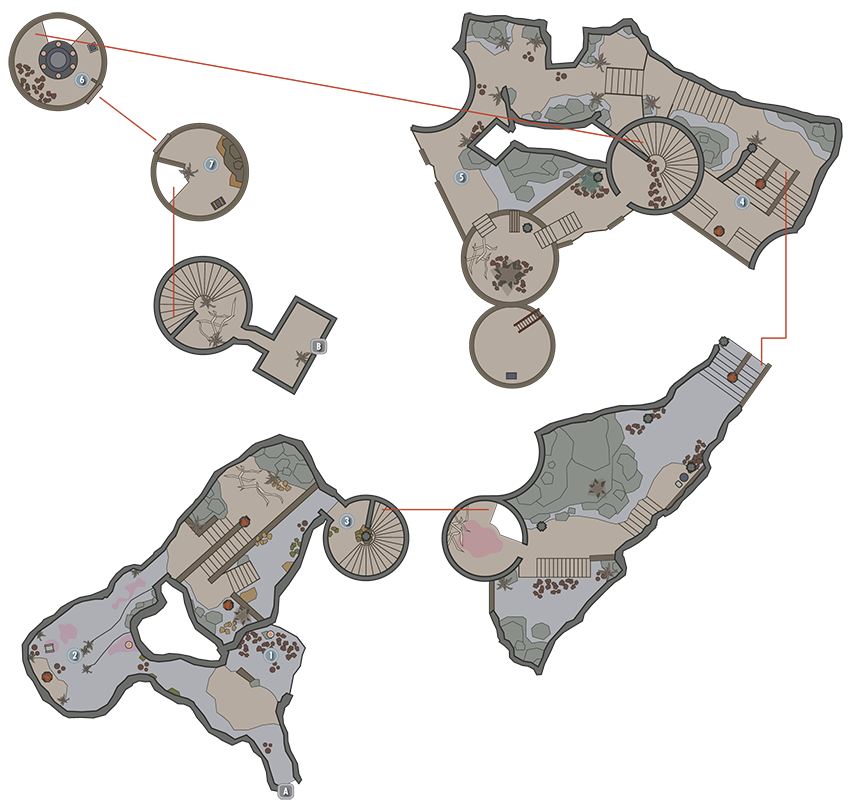
Wolfskull Ruins
Door to Wolfskull Cave
Ruins Lookout
View the attempts to revive the terrible entity known as Potema the Wolf Queen, and the patrol patterns of the Draugr guarding the summoners.
Tunnel Descent
Knock down flaming lamps to burn enemies and ignite oil spills here. Watch for the Bone Alarm Traps as you exit into the open, watching for enemies firing down from above. Continue down the snaking sets of steps.
- Danger! Oil Lamp Traps
- Danger! Oil Pool Traps
- Danger! Bone Alarm Traps
Lower Tower
Face Necromancers and Draugr as you ascend this first tower, with oil and lamps to utilize on the upper landing, if you wish. Then exit out, heading up the stairs and checking for foes attacking from the battlements above.
- Loose gear
- Potion
- Satchel
Parapets
There are a couple more enemies to face as you continue up the steps, around to the west, still climbing.
Gnarled Tree Battlements
Follow this path across to the top of a second tower, and into the main, tallest tower structure.
Top of the Tower
This is where you face the summoners duing the quest. Check the summoning circle for a Skill Book, and lower the bridge using the nearby lever.
Skill Book [light Armor]: The Refugees
Last Tower Exit
Check the chest before heading down the spiral stairs to a small antechamber and exit.
- Chest
Exit to Wolfskull Cave
[1.16] Statue to Meridia and Kilkreath Ruins
Related Quests
- Daedric Quest: The Break of Dawn
Recommended Level: 24
Dungeon: Draugr Crypt
- Corrupted Shade
- Malkoran
- Malkoran’s Shade
Crafting
- Arcane Enchanter
Dangers
- Swinging Blade Trap (tripwire/lever)
- Spear Trap (door)
Quest Items
- Dawnbreaker
Collectibles
- Skill Book [Block]: Battle of Red Mountain
- Unique Weapon: Dawnbreaker [4/80]
Special Objects
- Word Wall: Elemental Fury [1/3]
- Area Is Locked (quest required)
- Chest(s)
- Potions
- Loose gear
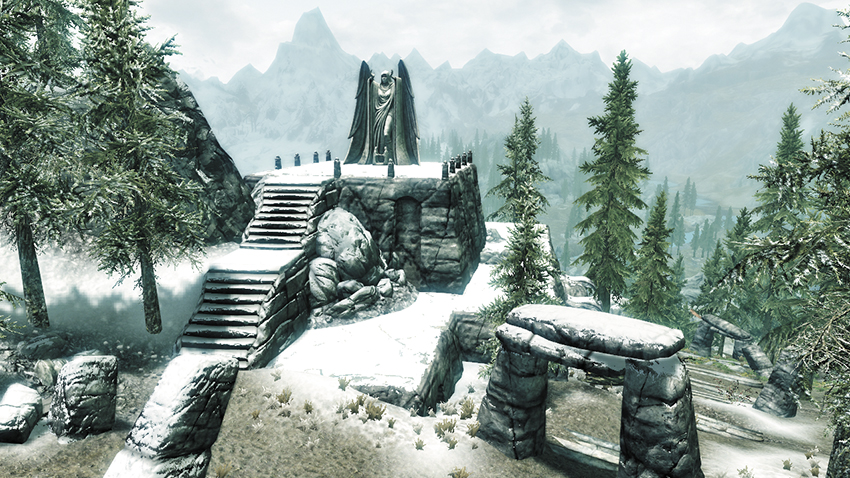
Located atop Mount Kilkreath, near the heart of Haafingar, a majestic statue in the form of the goddess Meridia stands at the top of ancient, defiled ruins. A special object called Meridia’s Beacon, which appears randomly inside of special chests, steers you toward this site—insert the Beacon into the statue’s hands to initiate a vertigo-inducing dialogue with Meridia in the heavens, then go downstairs and venture into Kilkreath Temple at the goddess’s command.
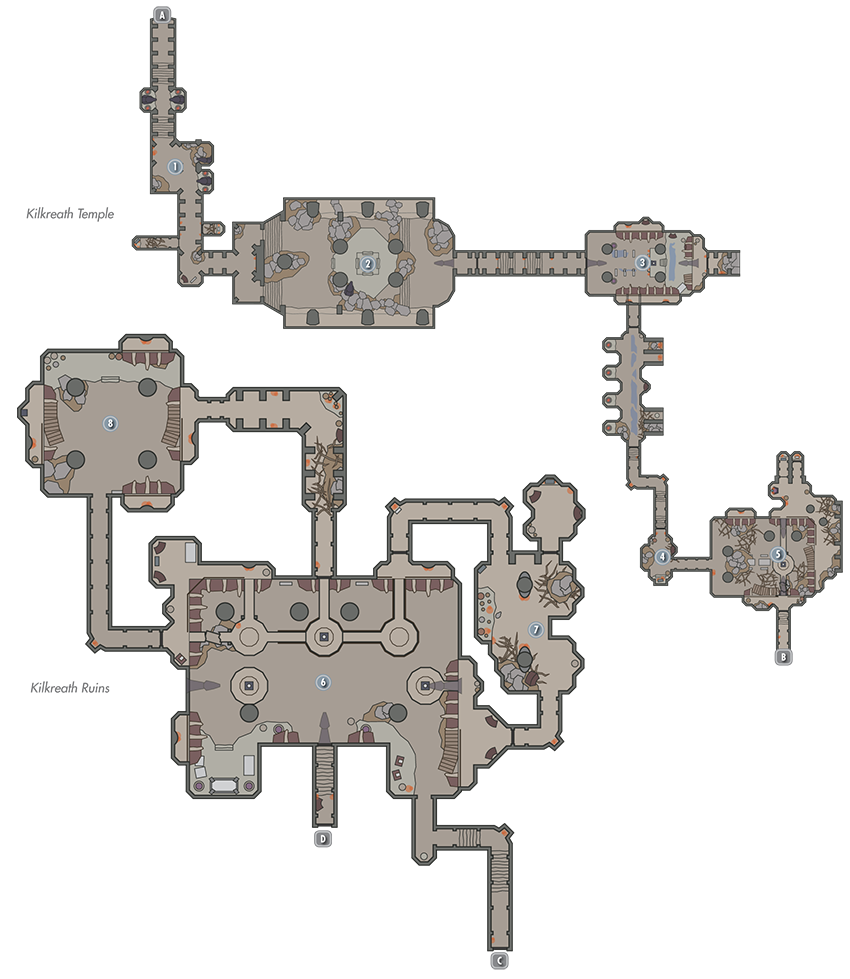
Exit to Skyrim
Entry Passage
Loot corpses and burial urns as you navigate the Temple’s entry passage. Unlock an Adept-level door along the way to access a lever that raises the west portcullis, exposing a chest.
- Chest
- Burial Loose gear
Pedestal Chamber A
Activate this wide chamber’s central pedestal to open the way forward with a potent ray of Meridia’s magical light. Be careful not to step into the light ray or you’ll suffer damage.
Pedestal Chamber B
Slay three Corrupted Shades in this chamber, then activate another pedestal to open a door above, allowing a ray of light to shine through. Proceed through the lower south door to visit [4].
South Passage and Chest Nook
Raid a chest here after navigating a long passage guarded by Corrupted Shades.
- Chest
- Potion
Pedestal Chamber C
Slay a few more Shades in this large chamber, then go upstairs and activate a third pedestal to open another door. Before going through, cross the walkway and unlock an Expert-level door (if possible) to discover a lever that raises the nearby portcullis. Raid the chest beyond, then backtrack across the walkway and proceed through the door to exit out to an exterior balcony.
- Crafting: Arcane Enchanter
- Chest
- Burial
Exit to Kilkreath Balcony
Kilkreath Balcony
Sprint east to locate a locked chest on the freezing exterior balcony, then scale the nearby stairs and enter the Kilkreath Ruins to continue your quest.
Exit to Kilkreath Balcony
Pedestal Chamber D
Cut down the Corrupted Shades that guard this giant chamber’s ground floor. Backtrack to the entry and go upstairs afterward to find a few potions. Activate the pedestal up here to open the nearby door.
Traps and Treasure
Raid a chest in this area, then stand back when opening the northeast wooden door—spikes stab up from the floor before the door when you open it. (Alternatively, you may attempt to disable the trapped door’s activation hinge.) Loot another chest in the nook beyond before making your way back to [6], dodging a tripwire on your way to avoid triggering a nasty trap.
- Danger! Swinging Blade Trap (tripwire/lever), Spear Trap (door)
- Chests (2)
- Potions
- Loose gear
Pedestal Chamber D Revisited
Follow the caged walkway, then leap over to a pedestal and activate it to open the west door. Jump back across and slay the shades that emerge from behind the door; then cross over, looting a chest and claiming a Skill Book from a dark corner on your way to [8].
- Skill Book [Block]: Battle of Red Mountain
- Chest (Locked: Novice)
- Potions
- Loose gear
Trapped Pedestal Chamber
Lay more Corrupted Shades to rest in this sizeable chamber, then go up the west stairs and stand to one side of a pedestal before removing its tantalizing potion—spears stab out from the wall when you collect the item. Scale the east stairs afterward and take the east passage back to [6], activating yet another pedestal to finally open the ground floor’s east door. Carefully drop down and proceed through the door to visit Kilkreath’s final area.
- Danger! Spear Trap (pedestal pressure plate)
- Potion
Door to Kilkreath Catacombs
Kilkreath Catacombs
Raid a chest in the Catacomb’s entry chamber before activating the central pedestal to open the way into the final chamber, where a mighty foe awaits. Defeat a powerful mage named Malkoran in the final room, then slay Malkoran’s Shade, which emerges from his corpse, to at last free Kilkreath from the villain’s grip. Search the room thoroughly before taking Dawnbreaker from the glowing pedestal, completing your quest.
- Unique Weapon: Dawnbreaker [4/80]
- Chest
- Potions
Pedestal Chamber E
Raid a chest here before activating the central pedestal to open the way into the final chamber, where a mighty foe awaits.
- Chest
- Burial Potions
Malkoran’s Chamber
Defeat a powerful mage named Malkoran in this final room, then slay Malkoran’s Shade, which emerges from his corpse, to at last free Kilkreath from the villain’s grip. Search the room thoroughly before taking Dawnbreaker from the glowing pedestal, completing your quest.
- Unique Weapon: Dawnbreaker [4/80]
[1.17] Dragon Bridge
Related Quests
- Civil War Quest: Liberation of Skyrim
- Civil War Quest: A False Front
- Dark Brotherhood Quest: Breaching Security
- Side Quest: Innkeeper Rumors (Four Shields Tavern)
- Side Quest: Dragon Breath Mead* (Olda)
- Favor (Activity): Chopping Wood* (Horgeir)
- Favor (Activity): Harvesting Crops* (Azzada Lylvieve)
Habitation: Town
- Azzada Lylvieve
- Clinton Lylvieve
- Commander Maro
- Faida (Innkeeper)
- Gaius Maro
- Horgeir
- Imperial Soldier
- Julienne Lylvieve
- Lodvar
- Michel Lylvieve
- Olda
- Penitus Oculatus Agent
Crafting
- Tanning Rack
- Workbench
Services
- Trader (Innkeeper): Faida [2/15]
- Food, Room and Board
- Quest Rumors
Collectibles
- Skill Book [Two-Handed]: King [B1/10]
- Chest(s)
- Potions
- Loose gear
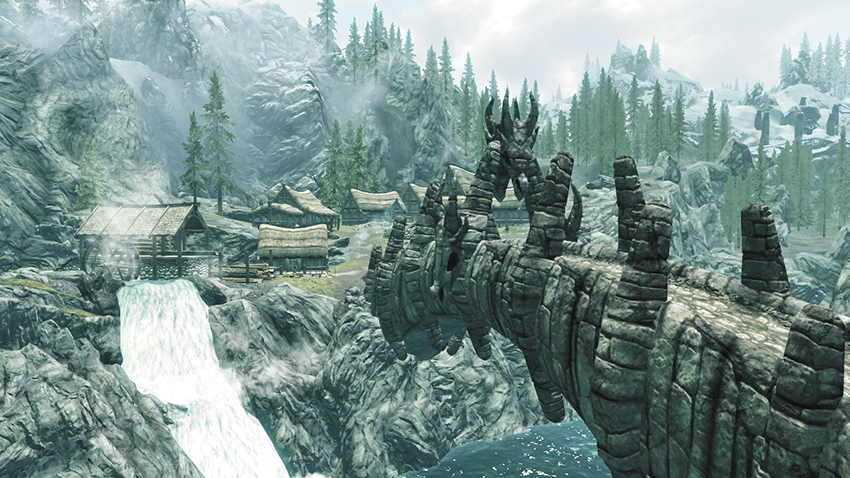
Haafingar’s southernmost Primary Location is a small yet bustling logging community that has sprung up near a renowned bridge that spans the mighty Karth River. You must venture here during a Dark Brotherhood Quest in search of a special target that must be eliminated.
Exterior
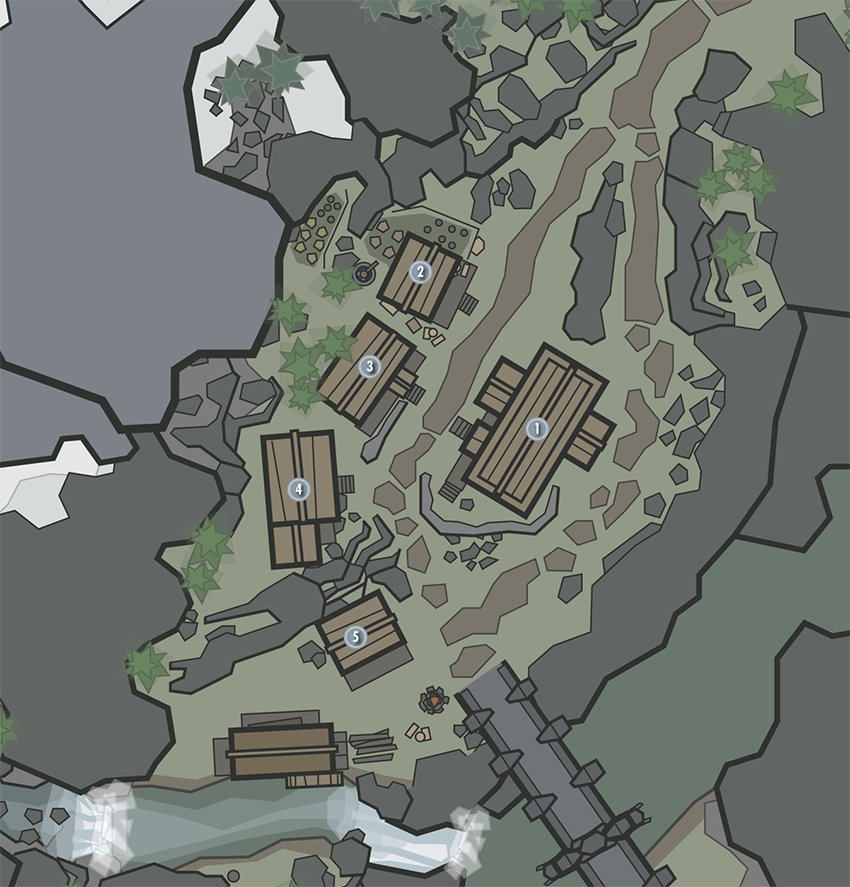
Life moves at a steady pace at Dragon Bridge—you’ll find many villagers out and about during the daytime. Check near the Penitus Oculatus Outpost to find a few useful crafting stations.
- Crafting: Tanning Rack, Workbench
Four Shields Tavern
Stop by the local tavern for a hot meal and warm bed.
- Trader (Innkeeper): Faida [2/15]
- Chests (2)
- Loose gear
Lylvieve Family’s House
This humble abode is unlocked during the day but difficult to steal from without being noticed.
- Chests (2)
- Potions
Horgeir’s House
Horgeir must have a sweet tooth, because his cabin is filled with all sorts of tasty treats. Don’t miss the sword that rests on the fireplace mantel.
- Area Is Locked (Novice)
- Chest
- Loose gear
Penitus Oculatus Outpost
This cabin serves as the local Imperial Soldiers’ barracks. Loot its three chests, if you dare. A Skill Book rests on an end table.
- Skill Book [Two-Handed]: King [B1/10]
- Chests (3)
- Potions
- Loose gear
Dragon Bridge Lumber Camp
One chest upstairs, one chest downstairs—two enticing reasons to break into this locked establishment.
- Area Is Locked (Apprentice)
- Chests (2)
[1.18] Haafingar Stormcloak Camp
Related Quests
- Civil War Quest: Liberation of Skyrim
- Civil War Quest: The Battle for Fort Greenwall
Habitation: Military: Stormcloak Camp
- Stormcloak Quartermaster (Weapons/Armor Vendor)
- Stormcloak Soldier
Services
- Trader (Blacksmith): Stormcloak Quartermaster [2/33]
- Weapons, Apparel, Misc
Crafting
- Anvil
- Grindstone (2)
- Workbench
Collectibles
- Chest(s)
- Loose gear
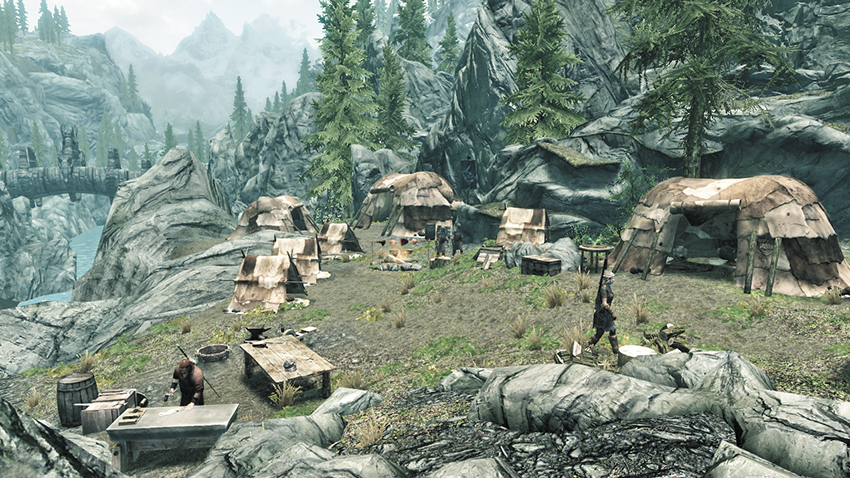
A band of brazen Stormcloak Soldiers has made camp deep in the heart of enemy territory. The Stormcloak Quartermaster offers an array of exceptional gear, and many crafting tools can be utilized here. Note that this site may not exist unless the Civil War Quest is active.
[1.19] Broken Oar Grotto
Related Quests
- Side Quest: Lights Out!
Recommended Level: 6
Dungeon: Bandit Camp
- Blackblood Bandit
- Captain Hargar
- Jaree-Ra
Crafting
- Blacksmith Forge
- Grindstone
- Smelter
- Tanning Rack
- Workbench
Dangers
- Oil Lamp Traps
- Oil Pool Traps
Collectibles
- Skill Book [Smithing]: Cherim’s Heart
- Chest(s)
- Potions
- Loose gear
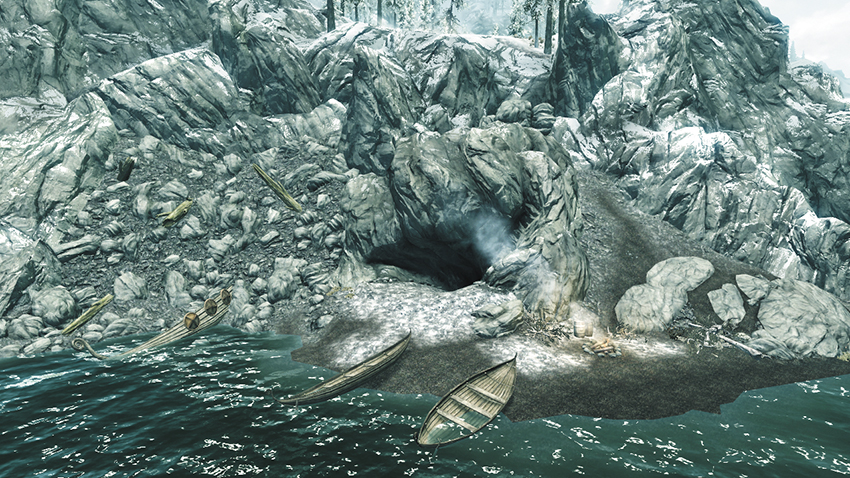
A burning campfire gives away this small, watery cavern, which lies along Haafingar’s harsh northeast coast. This site is visited during Side Quest: Lights Out! You must clear the cave to get your revenge against double-crossing bandits.
Exit to Skyrim
Crushed Ship Cavern
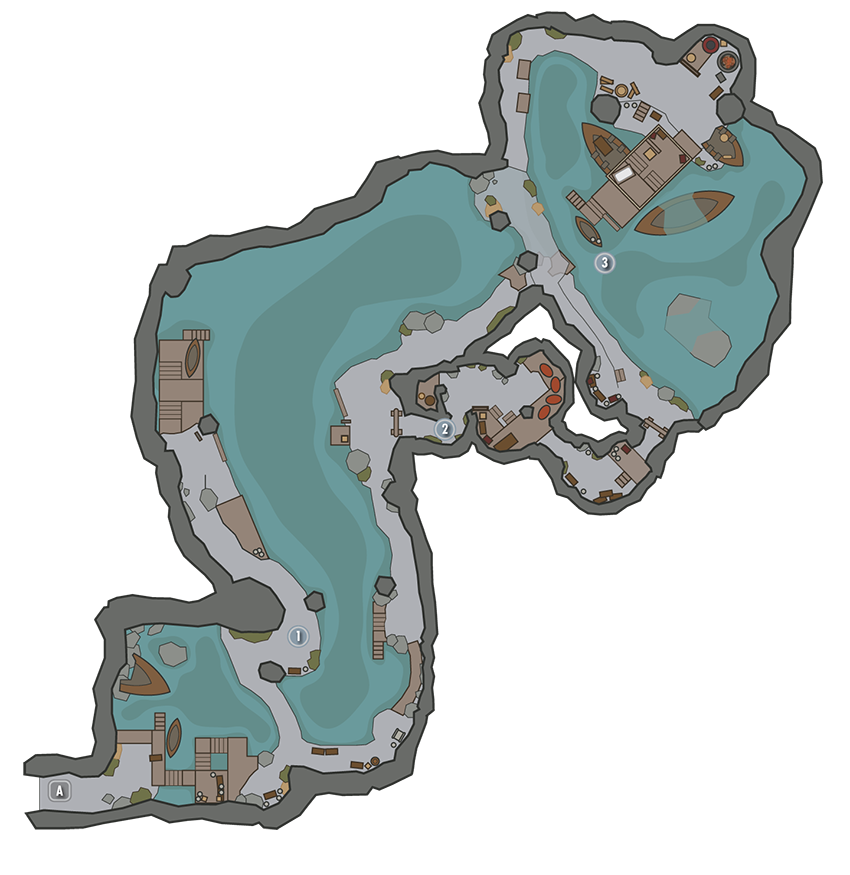
This large cavern features a ship that’s been crushed in half by a rockfall. Blackblood Bandits swarm the place. Slay them to obtain worthy loot from their corpses. Find two chests deep underwater (one lies farther to the north) and a third chest on a high southeast ledge. Pull one of the two levers on either side of the north drawbridge to lower it so you may advance along the elevated ledges.
- Danger! Oil Lamp Trap
- Chests (3)
East Passage
After lowering the drawbridge, enter the passage in the east wall to face a few more Blackbloods in a side passage. Dispatch the first bandit you see by knocking down the overhead hanging lamp, which will then ignite the surrounding oil on the floor. Loot a few chests and nab a few potions on your way to [3].
- Danger! Oil Lamp Trap, Oil Pool Trap
- Chests (2)
- Potions
Dock Platform
Either swim through the water or take the elevated east ledge or passage from [2] to reach the grotto’s far cavern, where several ships have moored. (Pull a lever if you entered from either of the east passages to extend a drawbridge over to the dock platform.) Wipe out many more Blackbloods here, looking to exploit volatile hanging lamps and oil spills as you navigate the central dock platform. Slay Jaree-Ra and Captain Hargar at the top of the shipwright platforms (north end of the cavern) to complete the Lights Out! quest and obtain a key that unlocks the captain’s special treasure chest, which you’ll find aboard the nearby sunken ship in this cavern. Use a variety of crafting stations here, and snag a Skill Book that sits atop the Workbench.
- Danger! Oil Lamp Trap, Oil Pool Trap
- Crafting: Blacksmith Forge, Grindstone, Smelter, Tanning Rack, Workbench
- Skill Book [Smithing]: Cherim’s Heart
- Hargar’s Chest Key
- Chest (Locked: Master)
- Potions
- Loose gear
[1.20] Shadowgreen Cavern
Recommended Level: 8
Dungeon: Spriggan Grove
- Bear
- Spriggan
- Wolf
Collectibles
- Chest
- Chest (Locked: Apprentice)
- Chest (Locked: Adept)
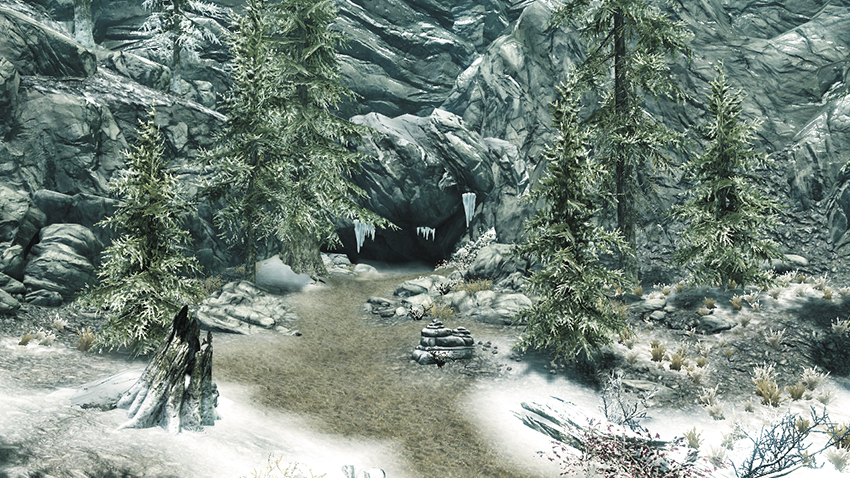
It would be easy to miss this widemouthed cave if not for several stacked rocks that mark a dirt path leading inside.
A locked chest can be found in a crumbling stump atop the first ledge, overlooking the stream. Wolves guard a path to the east, along with several dangerous Spriggan and a more ferocious predator. When you’ve nearly come full circle and arrive at a drop-off to a deep pool, look for a narrow trail leading up the central rock formation. Slay more Spriggan as you climb, along with more beasts when you reach the summit, where a giant chest rests in soft sunlight.
For the thrill-seeker, look northeast from the summit to where another large chest rests on a tiny ledge on the cavern’s outer wall. Use the Whirlwind Sprint Shout to reach this platform and escape with your loot. Then cross the rock bridge to a ledge that looms over the water below. Instead of diving straight down, step carefully off the upper ledge to land on one just beneath it, where a final chest awaits. Then take the plunge into the lake below before leaving this wondrous place.
[1.21] Thalmor Embassy
Related Quests
- Main Quest: Diplomatic Immunity
- Thieves Guild Radiant Quest: No Stone Unturned
- Favor (Activity): A Drunk’s Drink* (Razelan)‡
Habitation: Town
- Brelas
- Elenwen
- Etienne Rarnis
- Gissur
- Malborn
- Razelan
- Rulindil
- Thalmor Soldier
- Thalmor Wizard
- Tsavani
Quest Items
- Dragon Investigation: Current Status
Collectibles
- Skill Book [Illusion]: Before the Ages of Man
- Area Is Locked (Master; quest required)
- Chests
- Potions aplenty
- Loose gear
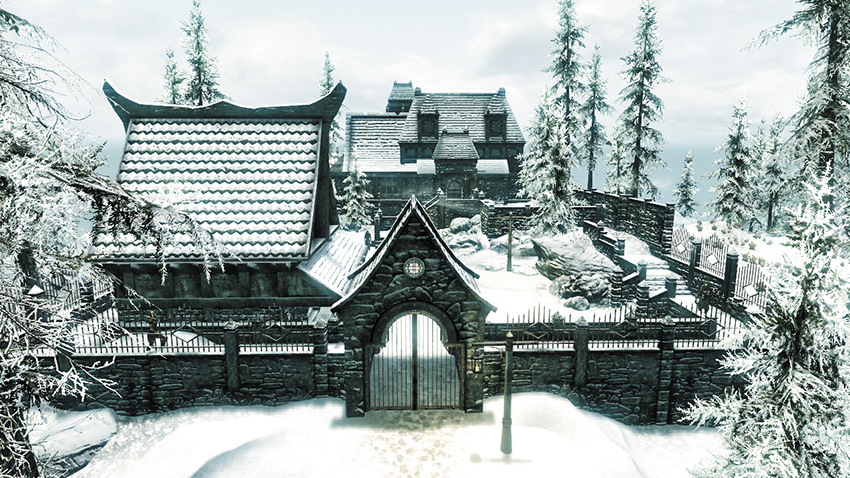
This gated estate stands tall among Haafingar’s central mountains and remains securely locked until you advance to Main Quest: Diplomatic Immunity. Those skilled in the shady arts can find plenty of chances for stealth and thievery here.
Exterior
No guards patrol the embassy’s outer courtyard, and there’s nothing of particular interest out here. The embassy’s inner courtyard is patrolled by powerful soldiers and wizards, but you must first pass through the central structure in order to get there.
Barracks
The barracks are unlocked, and a few hardened soldiers lie in wait here, along with a couple of spellcasters—these eager troops will attack you on sight. Either flee immediately or slay these challenging adversaries so that you may loot the many chests within the barracks.
- Chests (4)
- Potion
- Loose gear
Thalmor Embassy (Interior)
Swipe the odd potion from a shelf or table as you explore the embassy. Tsavani waits in the locked northwest kitchen, but you cannot enter until you’re let in during the Main Quest. Upstairs, an elf named Elenwen is hosting a marvelous dinner party. Collect many more potions around the dining room, then head for the southwest exit to return outside.
- Area Is Locked (Master)
- Potions aplenty
Elenwen’s Solar
Upon entering this small structure, eavesdrop on the conversation between Gissur and Rulindil. Loot a chest to the north to obtain special quest-related documents and a key; you can obtain this key from Rulindil by either slaying the man or picking his pocket. Search closets and shelves for potions, and don’t miss the upstairs chest or a third chest that’s hidden beneath the west basement stairs.
- Interrogation Chamber Key
- Chests (3)
- Potions
- Loose gear
Dungeon
The Thalmor Embassy dungeon lies directly below Elenwen’s Solar. This area is strictly off-limits, but you can obtain a key that grants you entry by looting a chest within Elenwen’s Solar or by slaying Rulindil at the same location and then looting his corpse or picking Rulindil’s pocket. Open a particular chest down here to obtain the final quest-related document you seek. If you like, open a holding cell and speak with a prisoner named Etienne Rarnis to free him. The dungeon also sports a trapdoor that leads to a nearby cave. Obtain a key from any of the dungeon’s guards (kill or pickpocket).
- Area Is Locked (Master)
- Trapdoor Key (Thalmor Soldier)
- Chests (2)
Reeking Cave
A lone Frost Troll lurks within this frigid cave, which you can only access via the locked trapdoor within the embassy dungeon. Either slay the troll or run for your life before it can harm Etienne or Malborn as you all escape. Pause only to claim an Unusual Gem, as well as a Skill Book that lies near the corpse of a fallen mage.
- Area Is Locked (Key)
- Skill Book [Illusion]: Before the Ages of Man
- Unusual Gem: [3/24]
[1.22] Solitude Sawmill
Related Quests
- Favor (Activity): Chopping Wood* (Hjorunn)
Habitation: Lumber Mill
- Hjorunn
- Kharag gro-Shurkul
- Solitude Guard
Crafting
- Grindstone
- Chest(s)
- Potions
- Loose gear
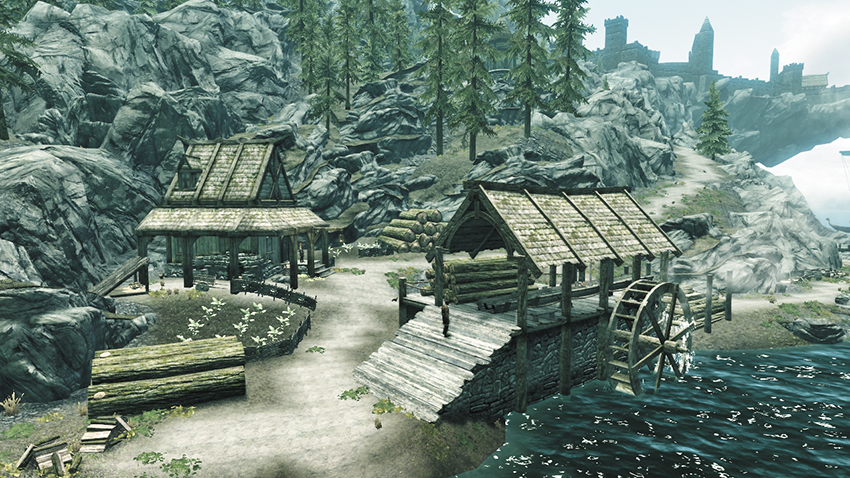
This humble logging site consists of little more than a mill and a few surrounding cabins.
Exterior
A few crafting stations are available outdoors.
- Crafting: Grindstone
- Loose gear
Solitude Sawmill (Interior)
The mill structure holds a locked chest and a few lesser valuables.
- Area Is Locked (Novice)
- Chest
- Potion
- Loose gear
[1.23] Katla’s Farm
Related Quests
- Favor (Activity): Harvesting Crops* (Katla)
Habitation: Farm
- Blaise
- Fridrika
- Geimund (Trader: Stables)
- Horm
- Katla
- Knud
- Snilling
Services
- Trader (Stables): Geimund [1/5]
Quest Items
- Party Boots
- Party Clothes
Collectibles
- Unique Item: Party Boots [4/112]
- Unique Item: Party Clothes [5/112]
Special Objects
- Business Ledger
- Chest(s)
- Potions
- Loose gear
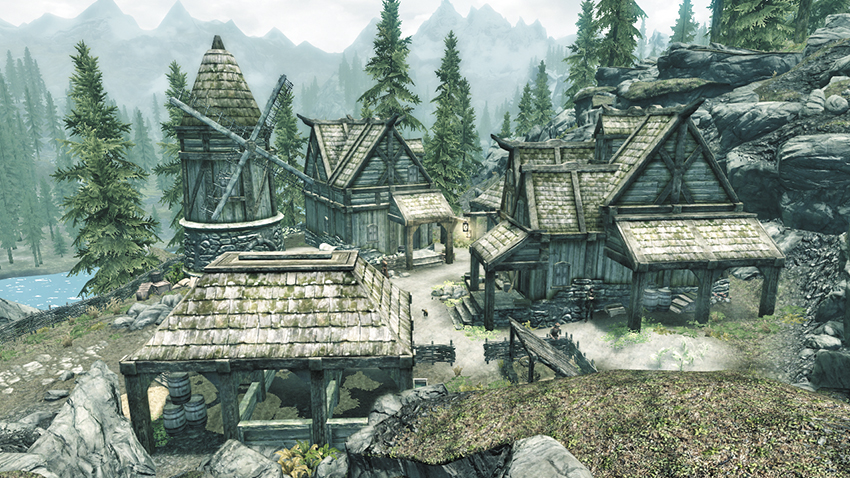
You see a windmill as you approach this small yet prosperous farm. Here you may hasten your travels by purchasing (or stealing) a horse or by hiring a carriage to quickly reach a capital city you’ve yet to visit. During Main Quest: Diplomatic Immunity, you receive two unique pieces of apparel here.
Exterior
Speak with Geimund at the stables to purchase a horse, or head up the nearby hill and talk to Thaer if you’d like to rent a carriage. If you’re in the mood for honest work, harvest Katla’s crops and then sell them back to her for easy coin.
- Trader (Stables): Geimund [1/5]
- Loose gear
Katla’s Farm (Interior)
If you like, break into Katla’s farmhouse and pillage its many attractive valuables. Don’t miss the knapsack on the shelf downstairs.
- Area Is Locked (Novice)
- Chest
- Knapsack
- Potion
- Loose gear
Solitude Stables
Unlike Katla’s homestead, the stables are unlocked and fully accessible during the day. There’s a chest downstairs and another one upstairs, along with an upstairs strongbox and an array of valuable ingots. An upstairs table also sports a business ledger.
- Business Ledger
- Chests (2)
- Strongbox (Expert)
- Potion
- Loose gear
[1.24] East Empire Company Warehouse
Related Quests
- Side Quest: Lights Out!
- Dark Brotherhood Quest: Hail Sithis!
- Dark Brotherhood Quest: Side Contract: Kill Safia
- Thieves Guild Quest: Scoundrel’s Folly
- Thieves Guild Radiant Quest: Larceny Targets*
- Thieves Guild City Influence Quest: The Dainty Sload
- Dungeon Activity
Recommended Level: 8
Habitation: Special
- Deeja
- East Empire Dockworker
- East Empire Guard
- Gulum-Ei
- Sabine Nytte
- Solitude Guard
- Vittoria Vici
- Underground Connection: Brinewater Grotto [1.25]
Collectibles
- Larceny Target: East Empire Shipping Map [1/7]
- Skill Book [Smithing]: Heavy Armor Forging
- Skill Book [Sneak]: Legend of Krately House
- Chests
- Potions aplenty
- Loose gear
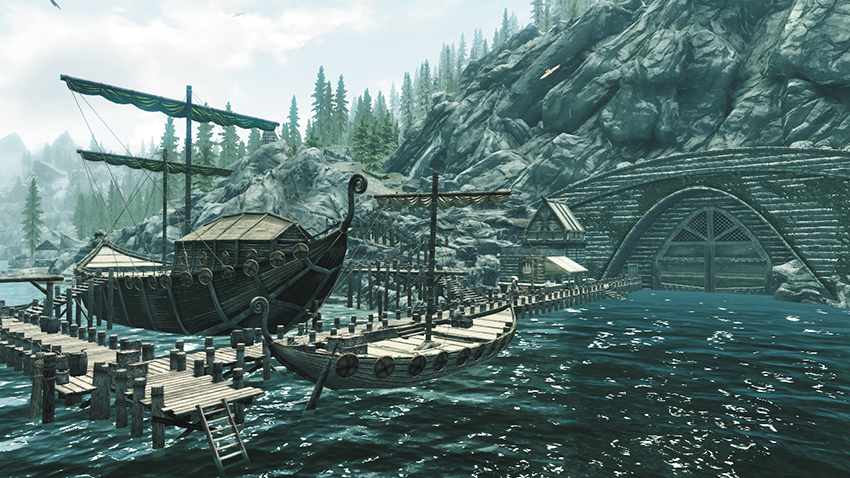
This area, located just south of Solitude, consists of a network of docks and an interior harbor, where workers patch up Haafingar’s sea-worn vessels. A large merchant ship called the Red Wave remains docked to the south as well.
 Jolf (Ferryman) [1/3]
During Thieves Guild Quest: Scoundrel’s Folly, you must tail an Argonian named Gulum-Ei through the warehouse. Continue to follow Gulum-Ei until you spy him changing a business ledger. Then shadow him through a passage hidden among the shelves along the northeastern wall of the warehouse into Brinewater Grotto. Here you will find an underground river where Gulum-Ei and his goons have been moving goods stolen from the warehouse. This is only open after starting this quest.
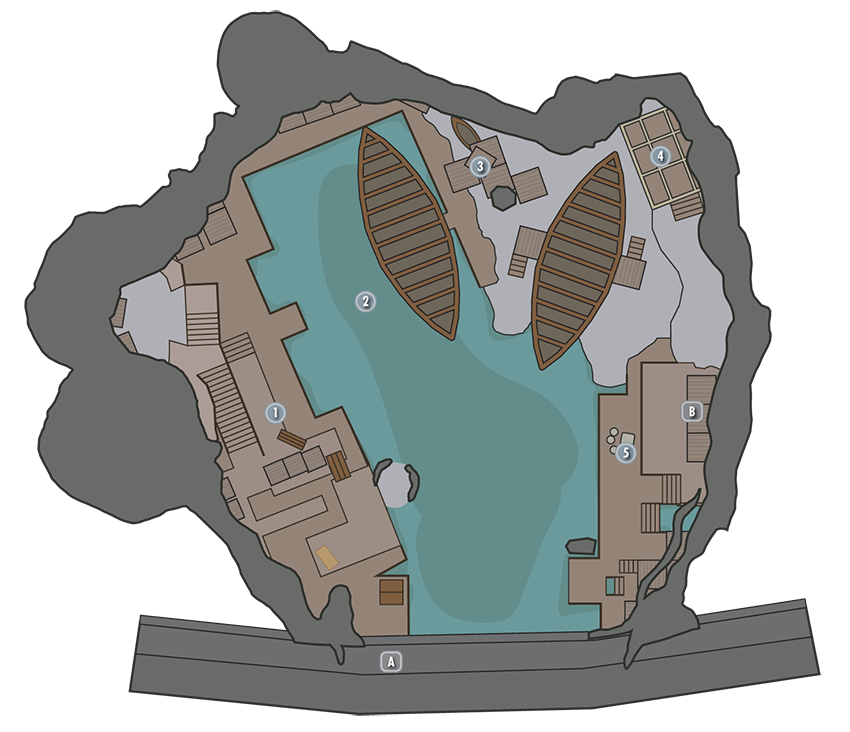
Exterior
At first, it seems there’s little of interest along the exterior docks. However, if you dive into the nearby water, you’ll discover a sunken chest not far from the warehouse doors.
- Chest
East Empire Company Warehouse (Interior)
The cavernous warehouse is home to a network of docks and a small reservoir featuring two small docked ships. Don’t let the guards or dockworkers spot you snooping around in here—they’ll attack you on sight.
Exit to Skyrim
Southwest Docks
A Smithing Skill Book, along with several ingots, are located on the shelves here, near the southwest docks’ first flight of stairs. Go upstairs and spy a locked chest atop some shelves on the docks’ second level. Scale more stairs to find a second locked chest on the docks’ top tier. From up here, you can sneak along a narrow ledge as you head north toward [2].
- Skill Book [Smithing]: Heavy Armor Forging
- Chest [Locked: Novice]
- Chest [Locked: Apprentice]
- Loose gear
Sunken Chest
Dive underwater to stealthily swim over to the north docks—you’ll find a sunken chest here.
- Chest
North Docks and Ships
Find alocked chest aboard the west ship, and slip around the tip of the east ship to preserve stealth (there’s nothing of interest on board).
- Chest [Locked: Apprentice]
- Loose gear
Foreman’s Office
Climb some stairs and take a narrow ledge up to the foreman’s office. Here, you discover a unique shipping map that pertains to a Thieves Guild Addidional Quest.
- Larceny Target: East Empire Shipping Map [1/7]
- Loose gear
East Docks
Discover a bunch of potions on a shelf near a ladder over here, along with a business ledger that rests on the small table at the end of the docks.
- Special: Business Ledger
- Potions aplenty
- Loose gear
Door to East Empire
Red Wave
This vessel is docked just south of the East Empire Company Warehouse. Board it from the southernmost dock and enter the ship’s hull to snatch a host of potions. You’ll also find a Skill Book hidden atop a tall shelf inside.
- Skill Book [Sneak]: Legend of Krately House
- Potions aplenty
- Loose gear
[1.25] Brinewater Grotto
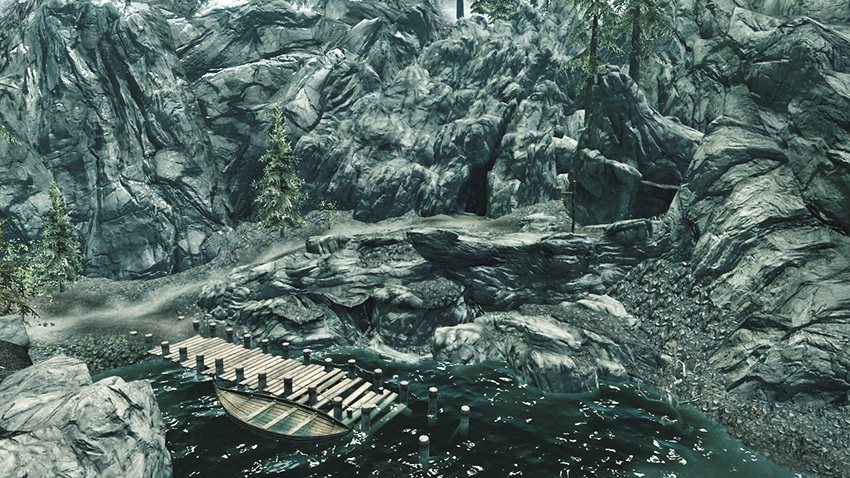
Related Quests
- Thieves Guild Quest: Scoundrel’s Folly
- Dungeon Activity
Recommended Level: 6
Dungeon: Bandit Camp
- Animal
- Bandit
Dangers
- Bear Trap
- Bone Alarm Trap
- Flail Trap (tripwire)
- Battering Ram Trap
Underground Connection: East Empire Company Warehouse [1.24]
Collectibles
- Chest(s)
- Potions
- Loose gear
This sizable cave is located along Haafingar’s frigid northeast shoreline; however, this location actually marks the cave’s exit, not its entrance. Entering from this shoreline site only allows you to visit the cave’s final, Horker-filled chamber. To fully explore Brinewater Grotto, you must enter from the East Empire Company Warehouse [1.24]. This can only be accomplished by properly spying on Gulum-Ei during Thieves Guild Quest: Scoundrel’s Folly. Regardless, when exiting the cave, be sure to loot the exterior chest.
- Chest
- Loose gear
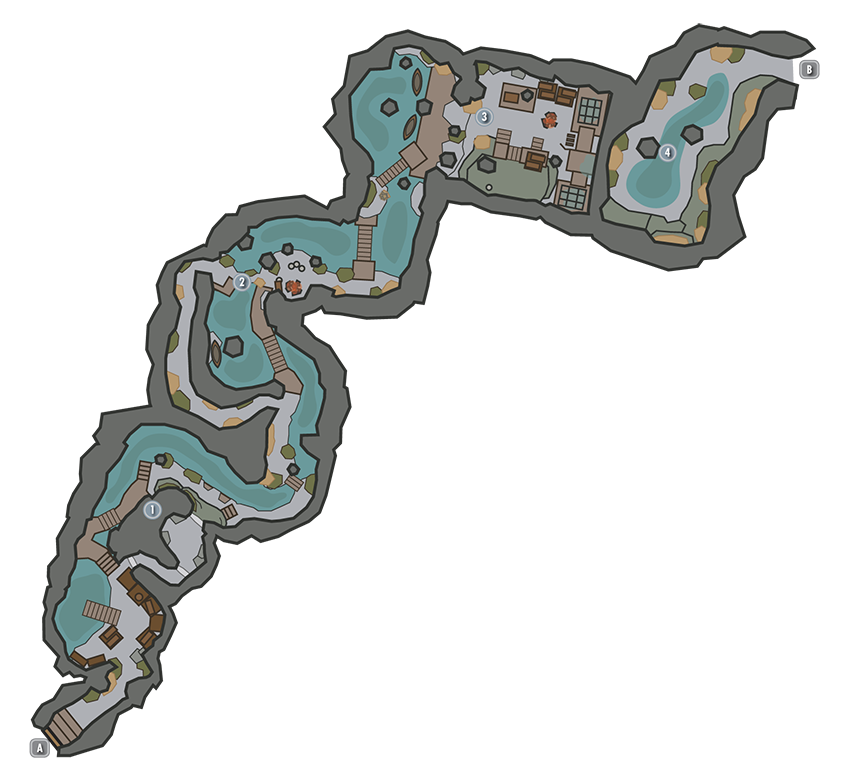
Door to East Empire Company Warehouse
Watery Path
Slay or sneak past bandits as you navigate this winding passage, and don’t miss the chest that’s hidden underwater to the north. If you like, you can tear through some thick spiderwebs here to expose a spider-filled passage that can help you slip past the guards.
- Chest
Trapped Passage Cavern
More bandits lurk near a campfire in this area—the goons guard a chest with a tricky lock. Hanging rattles have been strung to prevent you from sneaking along the water. If you like, you can creep through a trap-filled passage in the west wall to get the drop on the bandits. Just beware of the passage’s array of tripwires and bear traps, as well as a feisty guard dog.
- Danger! Bear Trap, Bone Alarm Trap, Flail Trap (trip wire), Battering Ram Trap
- Chest (Locked: Adept)
Lever Chamber
Slay more rugged bandits here, then find several chests—two aboard the docked rowboats you pass on your way into the cavern and five more near the east shelving—along with some valuable loose gear, including a Skill Book. Don’t miss the coin purses hidden on the southwest ledge, either. Use the east levers to open the two nearby cages and reveal a secret passage that leads to the final cavern.
- Chest (Locked: Apprentice)
- Chest (Locked: Master)
- Chests (2) (Locked: Expert)
- Loose gear
Horker Cavern
Slay a few giant Horkers as you move through the final cavern, and don’t miss the exterior chest, which is located just outside the cave (as previously detailed).
Exit to Skyrim
[1.26] Solitude Lighthouse
Related Quests
- Side Quest: Lights Out!
Habitation: Lighthouse
- Ma’zaka
Collectibles
- Skill Book [Alteration]: The Lunar Lorkhan [E1/10]
- Area Is Locked (Apprentice)
- Chest
- Loose gear
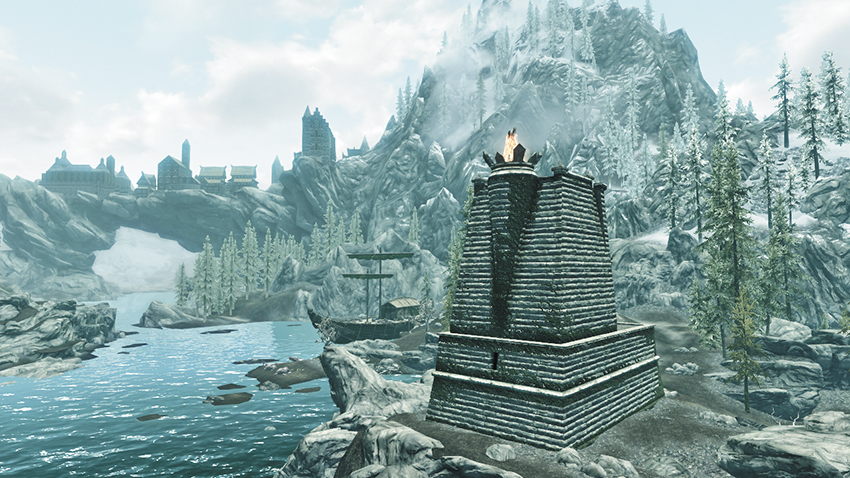
While anyone can climb to this tower’s top and take in a breathtaking view, a touch of lockpicking skill is needed to enter the lighthouse’s small interior. Inside, you’ll find an annoyed Khajiit named Ma’zaka who insists upon your immediate departure. You can find a Skill Book on the shelf behind the bar in Ma’zaka’s quarters. During Side Quest: Lights Out!, make your way to the top of the lighthouse without alerting Ma’zaka to extinguish the beacon.
[1.27] Dainty Sload
Related Quests
- Thieves Guild Radiant Quest: No Stone Unturned
- Thieves Guild City Influence Quest: The Dainty Sload
Recommended Level: 8
Dungeon: Shipwreck
- First Mate
- Sailor
Collectibles
- Skill Book [Speech]: A Dance in Fire, v6
- Unusual Gem: [4/24]
- Dainty Sload Footlocker Key (First Mate)
- Chest
- Chest (Locked: Adept)
- Captain’s Chest (Locked: Adept)
- Knapsack
- Potions aplenty
- Loose gear
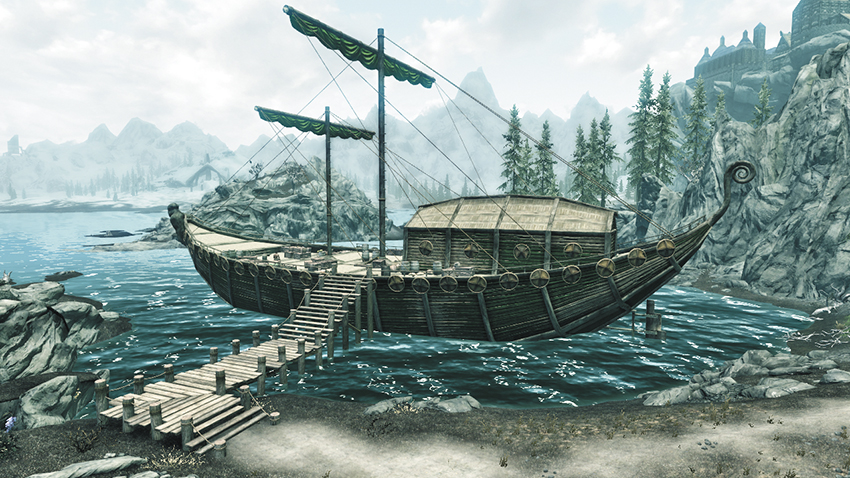
A Thieves Guild Quest steers you toward this docked vessel. Loot the corpses of slain sailors on your way inside. Pillage a chest and knapsack in the first room before heading downstairs. Fight or avoid the crew of hostile sailors on the lower decks, and collect a useful key by slaying or pickpocketing the first mate; this unlocks the Captain’s Chest, into which you must stash an illicit substance as part of your quest. Loads of potions and several tantalizing chests are located on the bottom deck as well. One cabin’s table holds a collectible Unusual Gem and Skill Book—the former pertains to Thieves Guild Quest: No Stone Unturned.
[1.28] The Katariah
Related Quests
- Dark Brotherhood Quest: Hail Sithis!
- Dungeon Activity
Recommended Level: 6
Dungeon: Special
- Captain Avidius
- Emperor Titus Mede II
- Lieutenant Salvarus
- Penitus Oculatus Agent
- Sailor
Crafting
- Alchemy Lab
- Anvil
- Grindstone
- Workbench
Collectibles
- Skill Book [Two-Handed]: King
- Unique Weapon: Windshear [5/80]
- Area Is Locked (quest required)
- Chest(s)
- Potions
- Loose gear
Emperor Titus Mede II
Emperor Titus Mede II is the current Emperor of Tamriel. He is reviled by the Stormcloaks for his “betrayal” in signing the White-Gold Concordat that outlawed the worship of Talos, and he is admired by the Imperials for his steadfastness during the Great War. He is somewhat of a tragic figure, being forced by the weakness of the Empire to make “deals with the devil” (Thalmor) in order to preserve his realm from total destruction.
Exterior
Anchor Chain to The Katariah
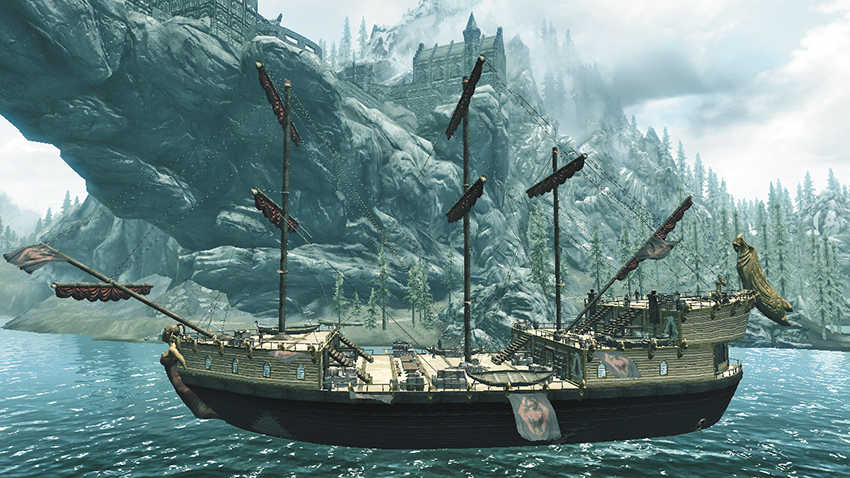
Emperor Titus Mede II’s mighty vessel only appears during Dark Brotherhood Quest: Hail Sithis! Sneak aboard the ship via the anchor chain.
Interior
Anchor Chain to Skyrim
Lower Deck
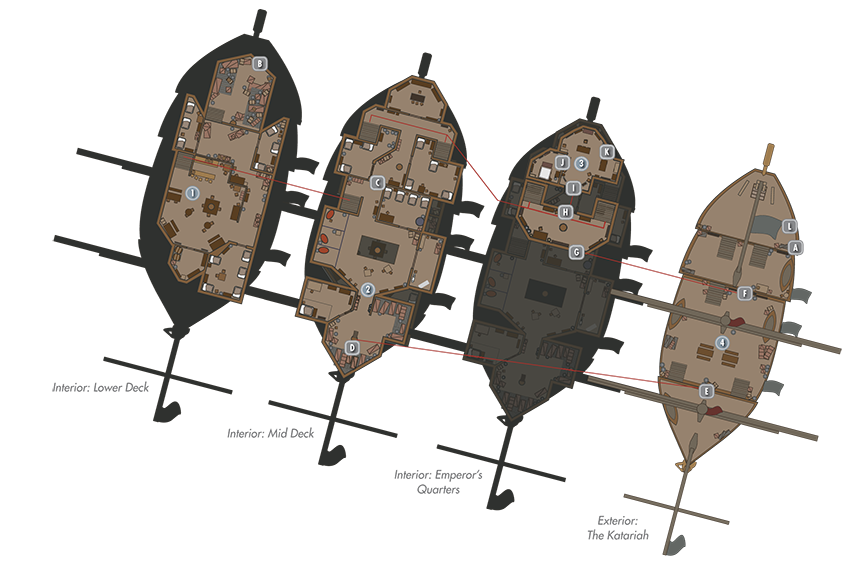
Sneak past or slay the lowly sailors who guard the lower decks, but be careful of the Penitus Oculatus guards. There’s a locked chest in the lower hold, and minor valuables to find throughout.
- Chest (Locked: Apprentice)
- Apothecary’s Satchel
- Potions
- Loose gear
Locked Door [Expert]
Upper Deck
Sneak past the Penitus Oculatus Agents upstairs, or slay them outright if you’re in a rush. Open the southwest door to confront the ship’s captain in his quarters. Collect a useful key from his corpse, then open his locked chest. Cross the ship and enter the east workshop, where an array of gear and crafting stations are located. Use the captain’s key to open the north door and sneak to avoid rousing Lieutenant Salvarus and his men. Go upstairs and enter the Emperor’s quarters.
- Crafting: Alchemy Lab, Anvil, Grindstone, Workbench
- Katariah Master Key (Captain Avidius/Lieutenant Salvarus)
- Chest (Locked: Master)
- Satchel
- Apothecary’s Satchels (2)
- Potion
- Loose gear
Ladder to Katariah Deck
 Trapdoor to Katariah Deck
 Door to The Katariah
 Door to Katariah Deck
 Door to Emperor’s Quarters [Master]
Emperor’s Quarters
The Emperor’s life rests in your hands—speak with him before seeing the job through, then open the nearby door to loot the late Emperor’s bedchamber. Make a hasty escape afterward by exiting through the nearby balcony door, or return to the previous area and exit out to the ship’s deck, where more soldiers and loot can be found.
- Satchel
- Apothecary’s Satchel
- Potions
- Loose gear
 Door to The Katariah
 Locked Door [Expert]
 Door to Skyrim
Exterior Deck
Raid the ship’s topside deck to finish off the last of the Emperor’s guards and claim more precious plunder, including a Skill Book that sits near the high throne. Cross the ship and find some potions in a crate on the opposite end, then carefully inch across the long forward mast to discover a unique sword lodged in its far end. Loot a locked chest that’s just downstairs to complete your pillaging of the Emperor’s vessel.
- Skill Book [Two-Handed]: King
- Unique Weapon: Windshear [5/80]
- Chest (Locked: Novice)
- Potions
 Door to The Emperor’s Quarters