
Elder Scrolls V: Skyrim Guide The Atlas Hold 8: Falkreath Hold
Primary Locations
[8.01] Bilegulch Mine
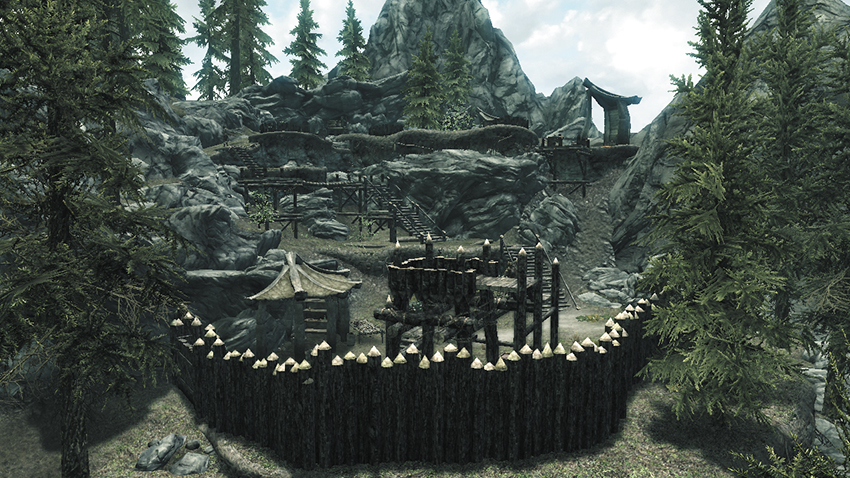
Recommended Level: 6
Dungeon: Bandit Camp
- Bandit
Crafting
- Blacksmith Forge
- Smelter
- Workbench
Dangers
- Bone Alarm Trap
Collectibles
- Skill Book [Smithing]: The Armorer’s Challenge
- Chest(s)
- Potions
- Loose gear
- Mineable ore (Orichalcum)
Merciless bandits have taken over this remote Orichalcum mine, which lies at Falkreath’s western edge.
Exterior
The bandits have fortified their position around the mine with a wooden wall and several watchtowers. You must enter through the wall’s main gate, which lies to the southwest. Loot a locked chest before scaling some stairs to face powerful bandits near the mine’s entrance. Another locked chest and several crafting stations are found up here.
- Crafting: Blacksmith Forge, Smelter, Workbench
- Chest (Locked: Novice)
- Chest (Locked: Apprentice)
- Potions
- Loose gear
Bilegulch Mine (Interior)
Avoid hanging rattles as you descend into the mine—they’ll alert the bandits’ nearby leader. Obtain a key from the Bandit Chief and use it to open the nearby chest. Find a Skill Book on a wooden table at the end of the mine shaft, and if you like, dig plenty of Orichalcum Ore from this mine before heading outside.
- Danger! Bone Alarm Trap
- Skill Book [Smithing]: The Armorer’s Challenge
- Bilegulch Mine Key (Bandit Chief)
- Chest (Locked: Expert)
- Loose gear
- Mineable ore (Orichalcum)
[8.02] Sunderstone Gorge
Related Quests
- Thieves Guild Radiant Quest: No Stone Unturned
Dungeon: Warlock Lair
- Animal
- Atronach
- Mage
- Skeleton
Crafting
- Alchemy Labs (2)
- Arcane Enchanter
Dangers
- Oil Lamp Traps
- Bone Alarm Trap
- Oil Pool Traps
- Rockfall Trap (pressure plate)
- Mammoth Skull Trap (pressure plate)
- Magic Trap
- Swinging Wall Trap (pressure plate)
- Dart Trap (trapped door)
Collectibles
- Skill Book [Conjuration]: 2920, Frostfall, v10 [A2/10]
- Unusual Gem: Stone of Barenziah [20/24]
Special Objects
- Word Wall: Fire Breath [2/2]
- Chest(s)
- Potions
- Loose gear
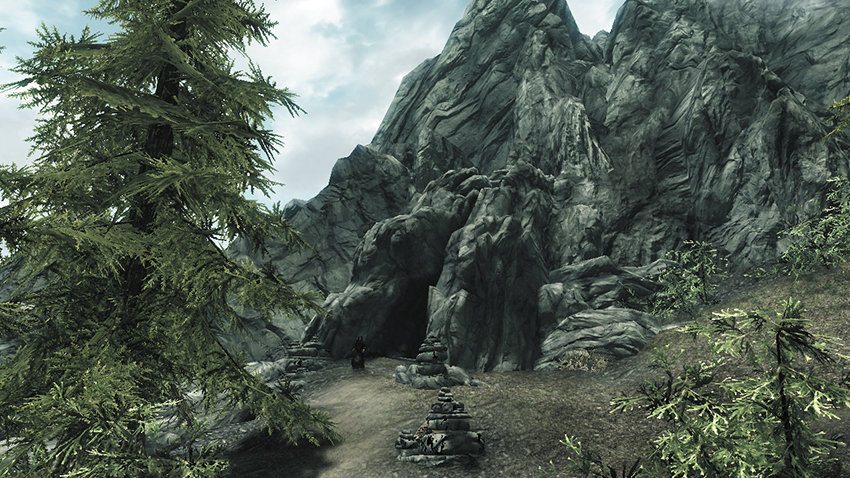
Bones and bloodstains mark the entrance to this small cave, and a powerful mage stands watch outside. Nearly every square inch of this treacherous cave’s interior is filled with traps and dangers—sneak and avoid rushing forward, or you’ll suffer dearly. Protection against fire can be invaluable here.
 Exit to Skyrim
 Entry Passages
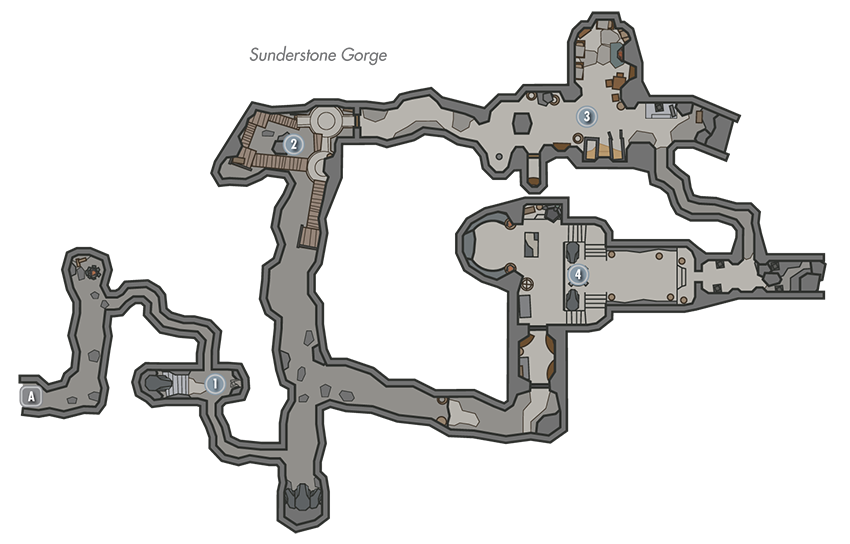
Avoid a pressure plate that releases a lethal rockfall as you sneak toward an unwary mage who’s tending a fire inside the cave. Beware of another dangerous pressure plate trap in the small cavern that follows, which is guarded by a lowly skeleton. Hug the right wall to dodge hanging rattles, then ignite the next tunnel’s oily floor to scorch more foes.
- Danger! Oil Lamp Traps, Bone Alarm Trap, Oil Pool Traps, Rockfall Trap (pressure plate), Mammoth Skull Trap (pressure plate)
 Stair Chamber
Knock down a hanging lamp to make a mage flee from his advantageous perch in the oily passage that leads to this small area. Beware of a lethal pressure plate trap at the passage’s end, and find a chest in a nook near the wooden stairs. Another chest is tucked away atop the stairs as well.
- Danger! Oil Lamp Traps, Oil Pool Traps, Wall Trap (pressure plate)
- Chest (Locked: Apprentice)
- Chest (Locked: Adept)
 Lab
Lab
Watch your step before reaching the bottom of these stairs, as there is a magic trap waiting in a nook to the side. Ignite the oily floor here to scorch more mages, and crouch before opening the south wooden door; there’s a chest in the closet beyond, but arrows will puncture you from behind if you’re standing tall. (Alternatively, you can disable the trap’s trigger on the door.) Mix some potions at the Alchemy Lab here, then loot a large, locked chest that lies in the west rubble—if you’re able to pick its tricky lock.
- Danger! Dart Trap (trapped door), Magic Trap
- Crafting: Alchemy Lab
- Chest
- Chest (Locked: Master)
- Apothecary’s Satchel
- Potion
- Loose gear
 Word Wall Chamber
Beware the large amount of oil on the floor here—the far mages and Fire Atronach will quickly ignite it if they detect you. Sneak past this hazard, or sprint past it before your enemies can react. Approach the Word Wall to learn a new Word of Power, then raid the nearby chest and collect a Skill Book off the nearby pedestal. Exploit an Arcane Enchanter if you like, then pull a wall chain to access another Alchemy Lab. The Unusual Gem found here pertains to a Thieves Guild Radiant Quest. Pull a second wall chain to open the passage that leads back to the cave’s entry tunnel.
- Danger! Oil Pool Trap
- Crafting: Alchemy Lab, Arcane Enchanter
- Skill Book [Conjuration]: 2920, Frostfall, v10 [A2/10]
- Unusual Gem: Stone of Barenziah [20/24]
- Word Wall: Fire Breath [3/3]
- Chest
- Potions
- Loose gear
[8.03] Glenmoril Coven
Related Quests
- The Companions Quest: Blood’s Honor
- The Companions Radiant Quest: Purity
Recommended Level: 14
Dungeon: Hagraven Nest
- Animal
- Glenmoril Witch (only during “Blood’s Honor”)
- Hag (does not appear during “Blood’s Honor”)
Crafting
- Arcane Enchanter
Collectibles
- Skill Book [Destruction]: Horrors of Castle Xyr [B2/10]
- Skill Book [Enchanting]: A Tragedy in Black [A1/10]
- Chest (Locked: Novice)
- Chests (2)
- Potions
- Loose gear
Exterior
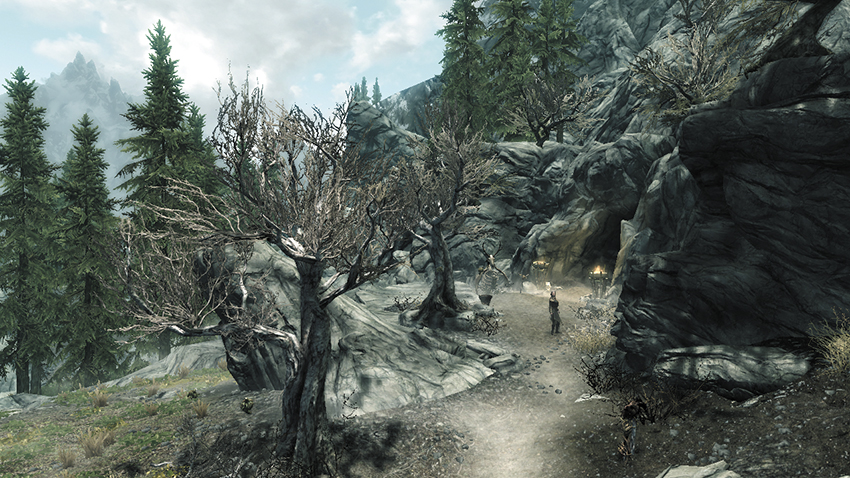
In the northeast reaches of Falkreath, a coven of nefarious witches have occupied a sizeable cave. You visit this site during two different quests, for very different reasons. At the entrance, prepare to fight a mage (and mages inhabit this cave complex if you aren’t specifically hunting for Hagravens as part of the Companions Quests.
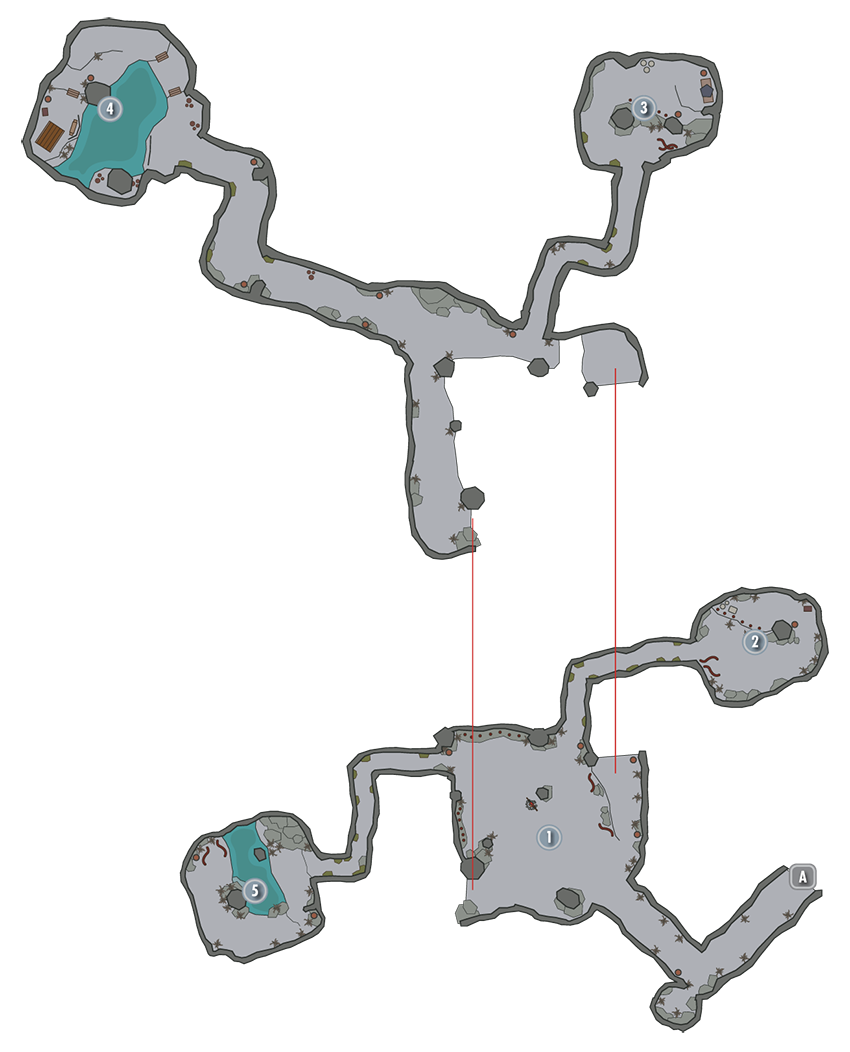
Door to Skyrim
Main Cavern
Discover a locked chest in the dark nook of the cave’s first passage from the entrance. Then expect a vicious animal and Hag (or Mage) fight in this main cavern. When the coast is clear, look around the room for four separate tunnels (in addition to the entrance tunnel). Finding them is half the fun; don’t confuse them during your exploration!
- Chest [Novice]
Spiked Pole Lair
Accessed via the ground tunnel to the north of the Main Cavern. This leads to a small cave with a row of spiked poles, a few ingredients, and a baying enemy to slay.
Spider Lair
Accessed via the upper tunnel to the north of the Main Cavern. This opens to a cave with a ferocious animal that sometimes moves into the Main Cavern. Check the skill book on the table with the Arcane Enchanter.
- Arcane Enchanter
- Skill Book (Enchanting): A Tragedy in Black
Fetid Pond Lair
Accessed via the upper tunnel to the west of the Main Cavern. A winding tunnel opens up into the largest of the lairs, with a small pond of murky water. Expect a Hagraven (and familiar) here, or a Mage, close to a Forsworn tent and various plunder:
- Potions
- Chest
 Waterfall Lair
Accessed via the lower tunnel to the west of the Main Cavern. A narrow tunnel leads to the final antechamber, complete with a small waterfall and a final foe. This is otherwise empty.
[8.04] Falkreath Imperial Camp
Related Quests
- Civil War Quest (when active, depending on who you side with)
Habitation: Military: Imperial Camp
- Imperial Quartermaster (Blacksmith)
- Imperial Soldier
Services
- Trader (Blacksmith): Imperial Quartermaster [26/33]
- Weapons, Apparel, Misc
Crafting
- Alchemy Lab
- Anvil
- Grindstone
- Workbench
Special Objects
- Civil War: Map of Skyrim
- Chests (2)
- Potions
- Loose gear
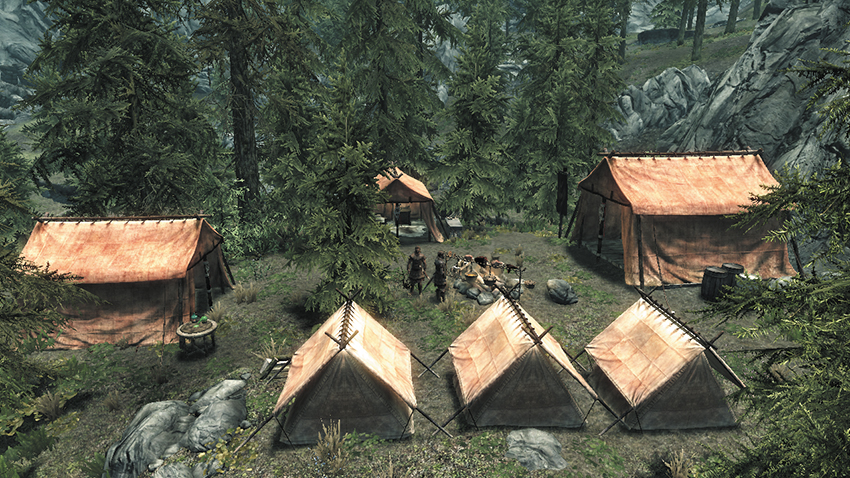
Depending on the status of the Civil War quest line, you may or may not find this small Imperial campsite in Falkreath. When the camp is present, you may trade with the Imperial Quartermaster, or utilize his selection of crafting stations. One tent’s tabletop map can potentially grant you new map data. Loot the camp if you like before moving on.
[8.05] Moss Mother Cavern
Related Quests
- Dungeon Quest: Hunter and Hunted*
Recommended Level: 8
Dungeon: Spriggan Grove
- Spriggan
- Bear
- Valdr
Dangers
- Bear Traps
Collectibles
- Unique Weapon: Valdr’s Lucky Dagger [54/80]
- Chest(s)
- Loose gear
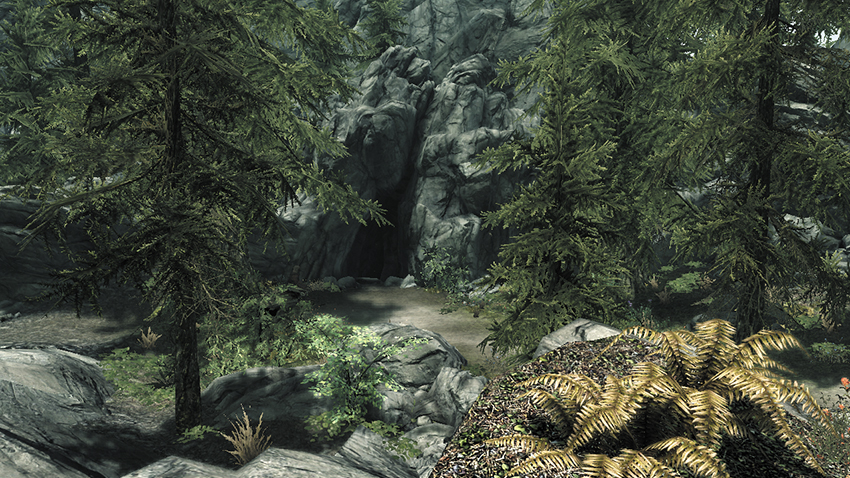
This rocky cave lies just off of Falkreath’s main western road. A wounded hunter named Valdr sits on a log just outside the entrance, calling out for help.
Exterior
Speak with Valdr to hear his story, then heal him with a potion or Restoration Spell to address his immediate problem. Valdr asks for your help in clearing out the cavern; decide if you wish to go alone or have Valdr lend you his aid.
Moss Mother Cavern (Interior)
Loot the body of Valdr’s fallen friend Ari, then leap up the nearby ledges to locate a hidden chest. Slay a Spriggan and Bear as you venture deeper in, being careful to avoid bear traps that are hidden among shrubbery. Defeat a few more Spriggans in the large, sunlit cavern that follows to clear the cave and complete your quest. Raid the large chest that sits on a south ledge and swipe the gear that rests at the bottom of the pool. Then speak with Valdr for your reward.
- Danger! Bear Traps
- Chest
- Chest (Locked: Novice)
- Loose gear
[8.06] Hunter’s Rest
Recommended Level: 8
Habitation: Hunter Camp
- Hunter
Crafting
- Tanning Rack
Collectibles
- Skill Book [Archery]: Father of the Niben [A2/10]
- Chest
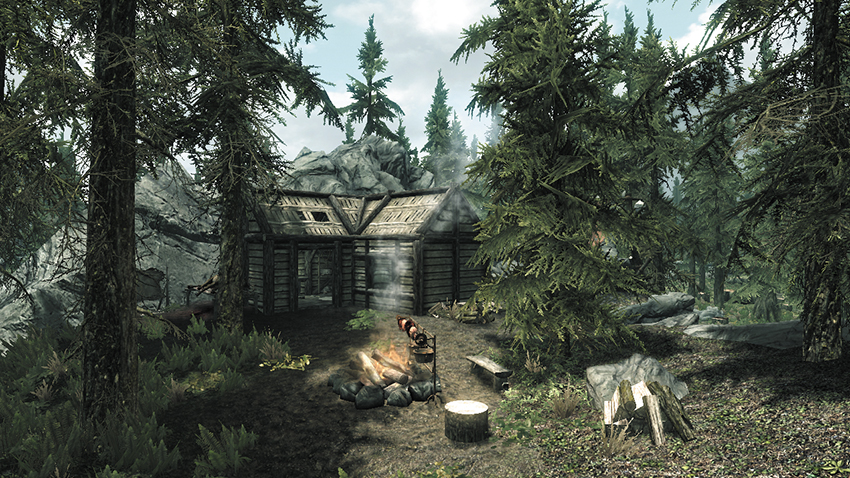
This small open-air cabin lies due west of Lake Ilinalta, just across the main road. The friendly hunters who live here enjoy a simple life. A chest inside the cabin can be looted if you’ve no qualms about stealing. There’s a Skill Book between the bedrolls as well.
[8.07] Knifepoint Ridge
Related Quests
- Daedric Quest: Boethiah’s Calling
- Dungeon Activity
Recommended Level: 6
Dungeon: Bandit Camp
- Bandit
Crafting
- Alchemy Lab
- Blacksmith Forge
- Grindstones
- Smelter
- Tanning Rack
- Workbench
Dangers
- Oil Lamp Trap
- Oil Pool Trap
- Rockfall Trap (lever)
Quest Items
- Ebony Mail
Collectibles
- Skill Book [Archery]: Vernaccus and Bourlor [E1/10]
- Unique Item: Ebony Mail [67/112]
- Chests
- Potions
- Loose gear
- Mineable ore (Corundum, Iron)
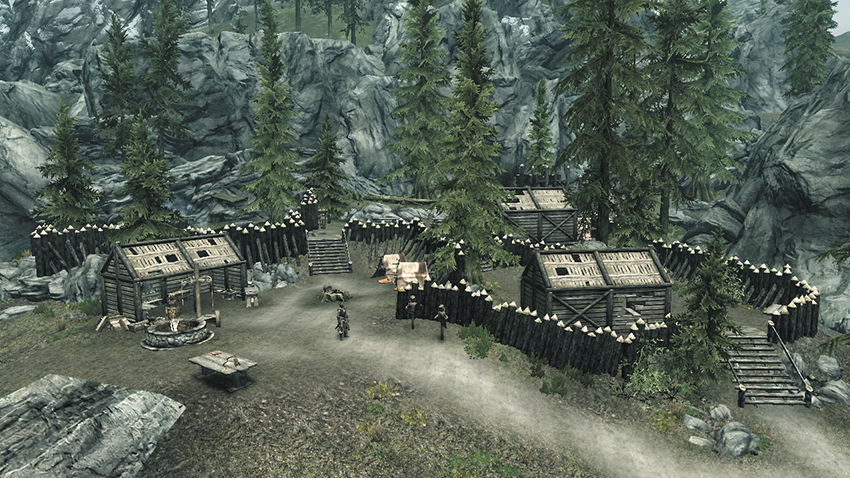
The bandit camp of Knifepoint Ridge is located on a high bluff in the foothills of Falkreath’s western mountains and has been overrun and fortified by bandits. During Daedric Quest: Boethiah’s Calling, you are sent to this location to defeat a challenging adversary and obtain the Ebony Mail.
Exterior
The bandits have built a sizeable camp around the mine. Beware the rockfall trap that the watchtower guard will set off if he spots you. Sneak carefully or take him out from a distance before he can throw the lever that triggers it. Check each of the open-air cabins to discover an array of valuables, and collect the Skill Book on the table near the Blacksmith Forge.
- Crafting: Alchemy Lab, Blacksmith Forge, Grindstone, Workbench
- Skill Book [Archery]: Vernaccus and Bourlor [E1/10]
- Chest (Locked: Novice)
- Apothecary’s Satchel
- Potions
- Loose gear
Exit to Skyrim
Knifepoint Mine Entry
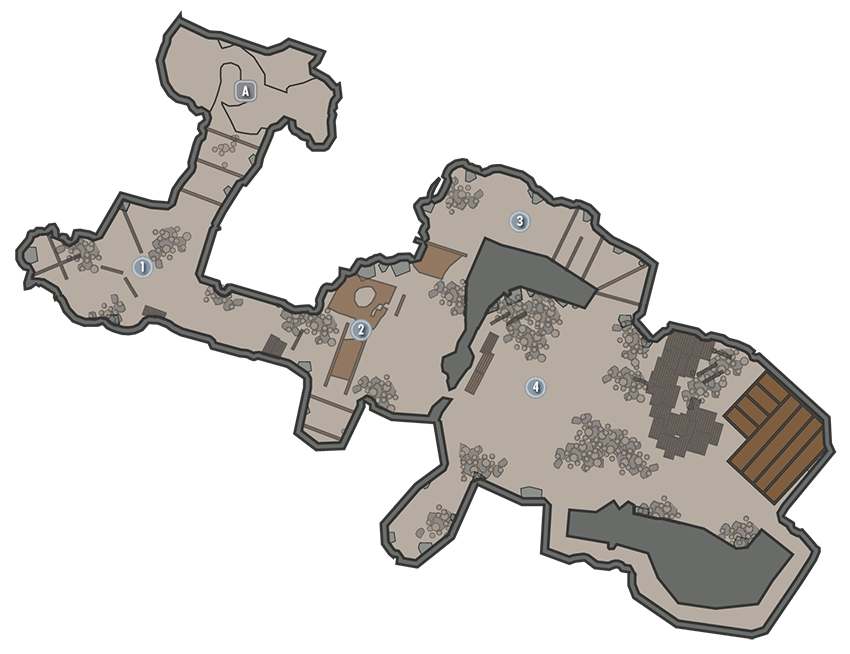
If you’re not on the quest, then the bandits’ formidable leader lurks just inside the mine, and you can’t explore beyond the first room. See if you can ignite the oil beneath the chief’s feet with a fire-based attack. Opening the Expert-level holding cell puts you close to a thick Iron Ore vein, but the same ore can be more easily mined from the vein that’s just outside the cell.
During “Boethiah’s Calling,” the mines are significantly larger—the bandits have tunneled much farther into the rock. A lowly bandit guard will be stationed here instead of a powerful leader.
- Danger! Oil Pool Trap
- Chest
- Loose gear
- Mineable ore (Iron)
Lab
If you have decent sneaking skills, backstabbing this bandit should be a breeze. Then mix up potions at the Alchemy Lab and grab a couple poisons the bandit was brewing up.
- Crafting: Alchemy Lab
- Potions
North Passage
Knock down a hanging lamp to ignite the oily floor here and sear another unsuspecting bandit or sneak up on him while he is busy mining.
- Danger! Oil Lamp Trap, Oil Pool Trap
- Mineable ore (Corundum)
Grand Cavern
Pick a Novice-level gate to enter this wide cavern from the west, or loop around and take the north passage to get here. If you choose the north passage, you can use a narrow space beneath the scaffolding to your left to sneak across the open chamber easier. Sneak around and slay the lone bandit worker, then mine plenty of ore from the surrounding veins and exploit the crafting stations to improve your gear. You can proceed up the ramp and go through the front door, or use the smaller cave hallway on the south end of this chamber to loop around to the back of the shack. Approaching from the rear will allow you to jump on a pile of crates and enter the shack through a hole in the roof, dropping directly into shadow and giving you an easy chance to backstab the Champion of Boethiah. Slay the Champion of Boethiah by whatever method you prefer, then don his Ebony Mail to complete your quest. Raid the nearby large chest before backtracking outside.
- Crafting: Grindstone, Smelter, Tanning Rack
- Unique Item: Ebony Mail [67/112]
- Chest
- Satchel
- Loose gear
- Mineable ore (Corundum)
[8.08] Twilight Sepulcher
Related Quests
- Side Quest: Kyne’s Sacred Trials
- Thieves Guild Quest: Darkness Returns
Recommended Level: 8
Dungeon: Special
- Karliah
- Nocturnal
- Nightingale Sentinel
- Gallus
Crafting
- Alchemy Lab
- Dangers Battering Ram Trap (trapped door)
- Dart Trap (pressure plates/tripwires)
- Lethal Light
- Spear Trap (pressure plate)
- Swinging Blade Trap (proximity)
Collectibles
- Skill Book [Lockpicking]: Proper Lock Design
- Skill Book [Sneak]: Sacred Witness
- Area Is Locked (quest required)
- Chests
- Potions aplenty
- Loose gear
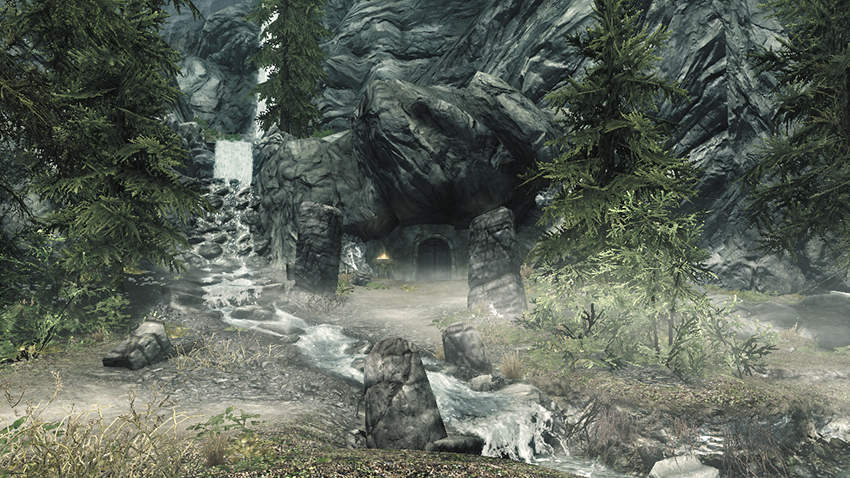
This large burial site has been carved into Falkreath’s western mountains and holds several trials to test those who would probe its depths. You cannot enter this place until you’ve obtained the “Darkness Returns” quest from the Thieves Guild.
Exit to Skyrim
Entry Chamber
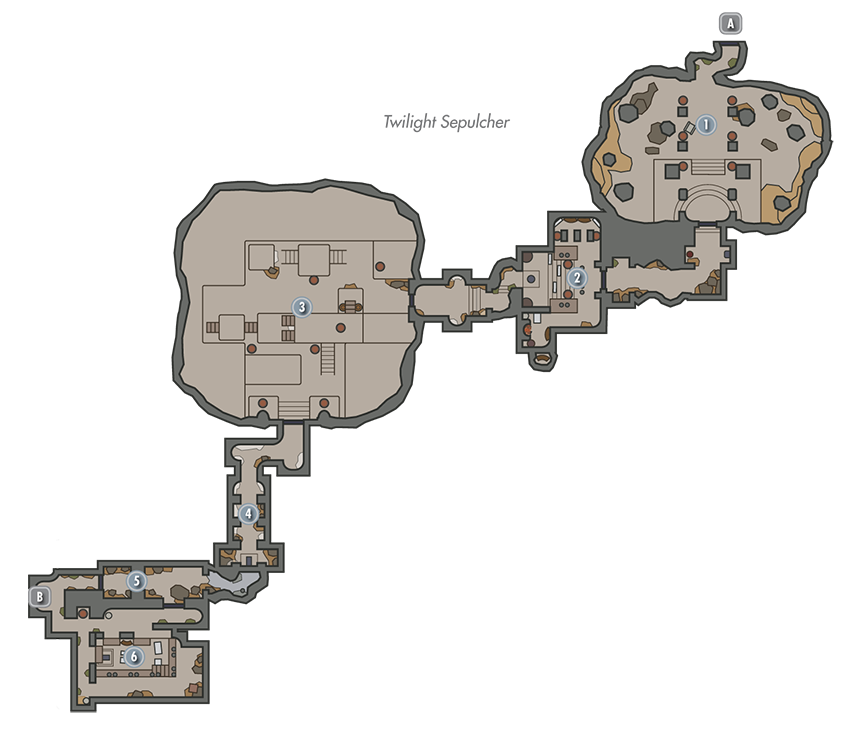
Speak with the friendly Nightingale Sentinel in the first chamber to advance your quest, and question him thoroughly to obtain an optional side objective that leads you to the nearby remains of an adventurer named Nystrom, whose journal provides clues on how to survive the trials ahead.
- Nystrom’s Satchel
- Loose gear
First Trial: Sentinels of the Dark
Sneak to avoid the two vicious Nightingale Sentinels in this chamber—they’ll quickly cut you to ribbons. If you can head into the upper southwest study, press a button on the ground near the table to expose a secret nook containing treasure. Sidestep a pressure plate as you sneak through the passage that leads to [3], avoiding another Nightingale Sentinel as you go.
- Danger! Dart Trap (pressure plate)
- Crafting: Alchemy Lab
- Chest
- Knapsack
- Potions aplenty
Second Trial: Vigilance Everlasting
Avoid the light and keep to the darkness as you navigate this massive chamber—for the light here is fatal. Equip a light source of your own, such as a torch, to help you spot traps that are concealed in the dark. No enemies lurk here.
- Danger! Lethal Light, Dart Trap (trip wires)
Third Trial: The Offering
Loot a chest as you make your way to this quiet shrine. Collect the offerings near the statue if you like before pulling two wall chains near the side torches to open a passage behind the statue.
- Chest
Fourth Trial: Path to Salvation
Don’t let this passage’s swinging blades stupefy you into stepping on the pressure plate that lies before them. If you can, open the Master-level iron door to the south to sneak through [6] and bypass the blades altogether. Otherwise, you must time it right and sprint straight through—you’ll trigger another pressure plate midway through, so move to the left the moment you clear the passage to avoid being shot by arrows. Beware of another as you exit the blade passage, and stand back before opening the iron door ahead to avoid being struck by a battering ram (or simply disable its trap hinge). Proceed through the door that follows to reach the inner sanctum.
- Danger! Battering Ram Trap (door), Swinging Blade Trap (proximity), Spear Trap (pressure plate), Dart Trap (pressure plates)
 Great Hall
Pick a locked door to enter this large chamber and avoid the swinging blade passage altogether. A few items of interest are found in the chamber’s lower central area, including a pair of Skill Books. Sneak through here to avoid alerting the two roaming Nightingale Sentries.
- Skill Book [Lockpicking]: Proper Lock Design
- Skill Book [Sneak]: Sacred Witness
- Potions
- Loose gear
 Door to Twilight Sepulcher Inner Sanctum
Final Trial: Hesitate Not
Sprint down a long, empty corridor to reach this deep pit. Drop down—you’ll suffer a bit of damage—then loot a skeleton to discover an informative note. You seem trapped but are soon whisked away to an alternate version of the pit chamber by the magic of the Skeleton Key that you possess. Insert the key into the central lock on the floor to summon Nocturnal. Speak with Karliah after Nocturnal departs, then watch her reunion with Gallus. Afterward, decide which portal to enter—each grants you a different (and substantial) bonus to a certain thieving discipline.
[8.09] Bannermist Tower
Recommended Level: 6
Dungeon: Bandit Camp
- Bandit
Crafting
- Tanning Rack
Collectibles
- Skill Book [Lockpicking]: Advances in Lockpicking
- Chests (2)
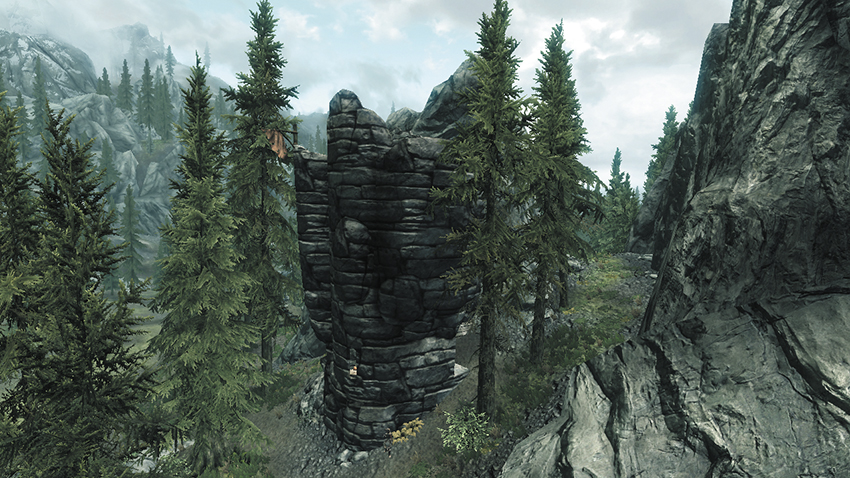
Bandits have assumed control of this tall tower, which stands on the west bank of the mountains west of Lake Ilinalta. Ignore the locked gate on the ground floor and head upstairs to discover a Skill Book. Open the chest beneath the stairs that lead up to the lookout’s nest, then head back downstairs and open the locked gate you ignored before to access another chest and some valuables.
[8.10] Evergreen Grove
Recommended Level: 8
Dungeon: Spriggan Grove
- Spriggan
Collectibles
- Skill Book [Alchemy]: Mannimarco, King of Worms [D2/10]
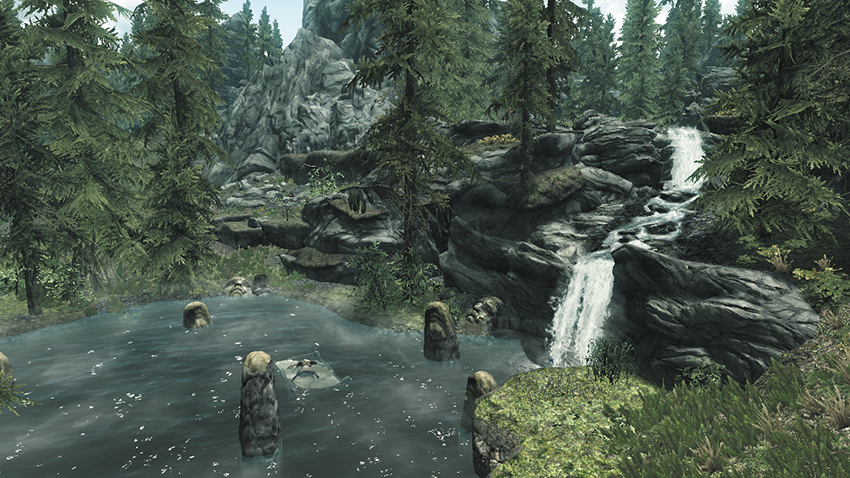
Dangerous Spriggan guard this sacred grove, where a tranquil waterfall fills a calm pond. Slay the Spriggan, then search the deceased Alchemist who floats in the pond’s center to obtain a Skill Book.
[8.11] Half-Moon Mill
Related Quests
- Dark Brotherhood Quest: Whispers in the Dark
- Dark Brotherhood Quest: Side Contract: Hern
Habitation: Lumber Mill
- Hert
Crafting
- Tanning Rack
- Chest(s)
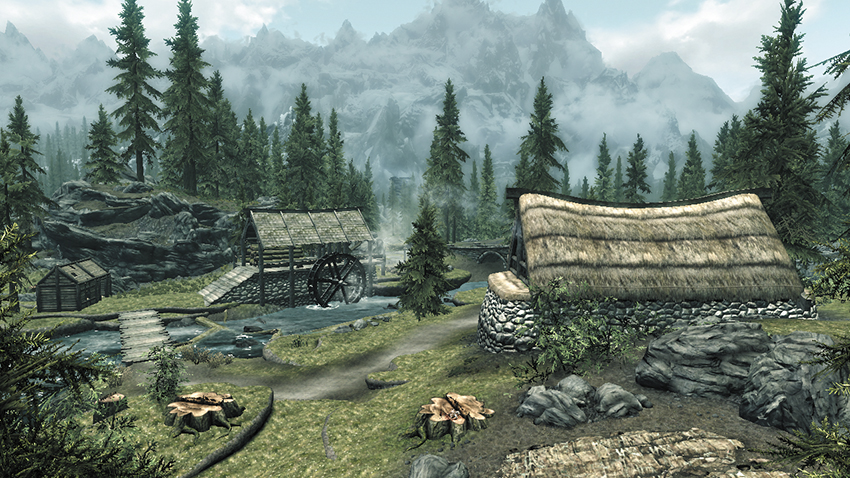
This tranquil lumber mill sits on the west end of Falkreath’s Lake Ilinalta.
Exterior
Take up a Woodcutter’s Axe and chop up some wood near the mill’s only cabin, then sell the wood back to a woman named Hert for some honest coin.
Half-Moon Mill (Interior)
Break into Hert’s cabin unseen and raid the lone chest within to pocket some ill-gotten loot.
- Area Is Locked (Novice)
- Chest
[8.12] Bloated Man’s Grotto
Related Quests
- Daedric Quest: Ill Met By Moonlight
- Dungeon Activity
Recommended Level: 6
Dungeon: Spriggan Grove
- Animal
- Spriggan
- Spriggan Matron
Unique Weapon
- Bolar’s Oathblade
Collectibles
- Unique Item: Savior’s Hide [68/112]
- Unique Weapon: Bolar’s Oathblade [55/80]
Special Objects
- Shrine of Talos [14/17]
- Note: Bolar’s Writ
- Chests (2)
- Chest (Locked: Apprentice)
- Chest (Locked: Master)
Note that this area changes significantly during (and after) Daedric Quest: Ill Met by Moonlight. If you’re here for the quest, see the quest walkthrough for details on what to expect.
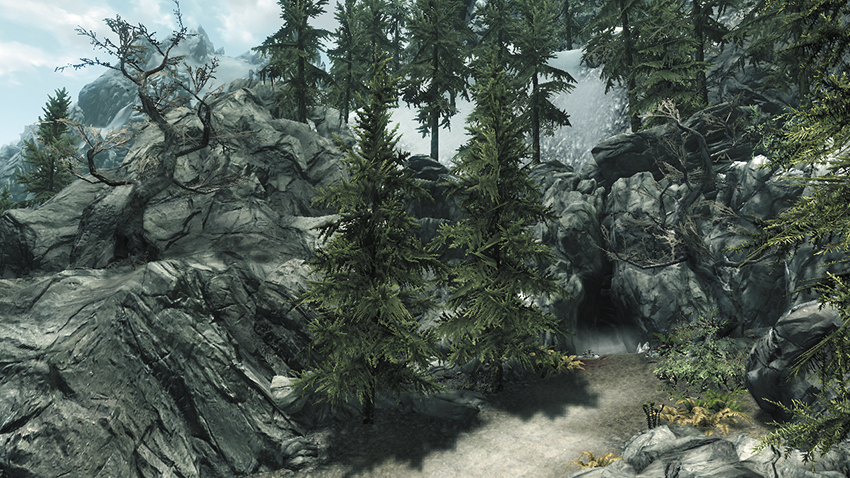
The entrance to this cave lies just off the east–west road that runs across the southern Tundra. Kill the predators that lurk just inside, then hop onto the low ledge on the south side of the first clearing to discover a locked chest. Dive into a pond near the waterfall to discover another chest at the bottom.
You must next take one of two paths: for the purposes of this walkthrough, proceed along the trail closest to the pond, dispatching another predator and a Spriggan who emerges from a tree as you pass. Scale the stone steps that follow to locate a quiet shrine, where a large chest is found. Pray at the Shrine of Talos for a blessing. Then inspect the pedestal at the base of a statue for a note and a unique Blades Sword.
Descend the following stairs, slaughtering more animals and Spriggans as you proceed along the path. When you reach the clearing with the dead deer, look up to spot a rocky promontory. Scale the rocks here if you can (you may find it easier to backtrack and climb up the central ridgeline first) to claim a chest in a small nook behind the promontory.
Then continue down the path, and you’ll find that you have come full circle, returning to the waterfall pond with the cave fully explored.
[8.13] North Brittleshin Pass
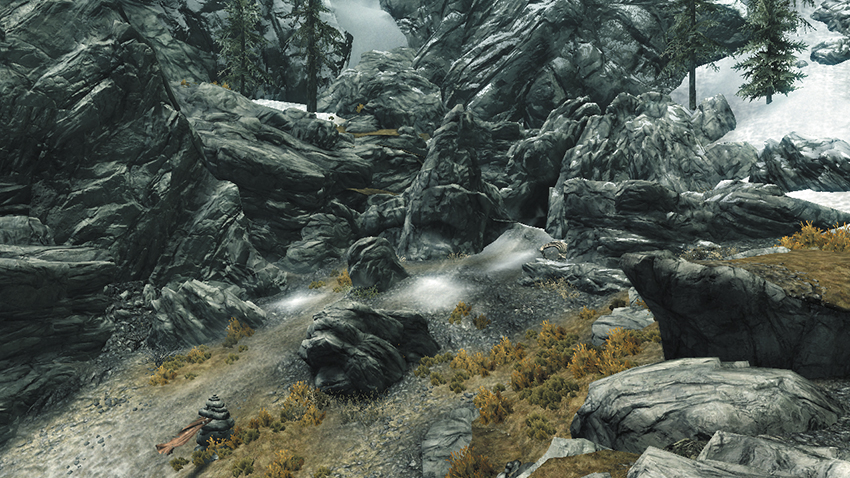
Recommended Level: 6
Dungeon: Warlock Lair
- Mage
- Skeletons
Crafting
- Arcane Enchanter
Dangers
- Rune Trap (floor)
- Trapped Chest
Underground Connection: South Brittleshin Pass [8.14]
Collectibles
- Skill Book [Conjuration]: The Warrior’s Charge [E2/10]
- Chest
- Apothecary’s Satchel
- Potions
- Loose gear
This site marks the north entrance of a short pass that runs through the mountains north of Lake Ilinalta.
Brittleshin Pass (Interior)
Slay a few skeletons in the first sunlit cavern, then scale a ramshackle collection of winding ramps to reach its high central platform. Cross a small footbridge and loot a large chest. Crush a few more skeletons and a powerful mage in the cavern that follows, which features an Arcane Enchanter and Skill Book. Scale some steps to reach the next windy chamber, where a trapped chest sits on a left ledge as you enter. Disable the trap hinge, or stand to one side of the chest and lift its lid from afar to avoid being struck by the mace that swings down when you open it. Keep going to reach some open doors, then back up and use a ranged attack to detonate the rune trap on the floor beyond from a safe distance. Proceed through the nearby exit to complete your journey through the mountain and emerge at South Brittleshin Pass [8.14].
[8.14] South Brittleshin Pass
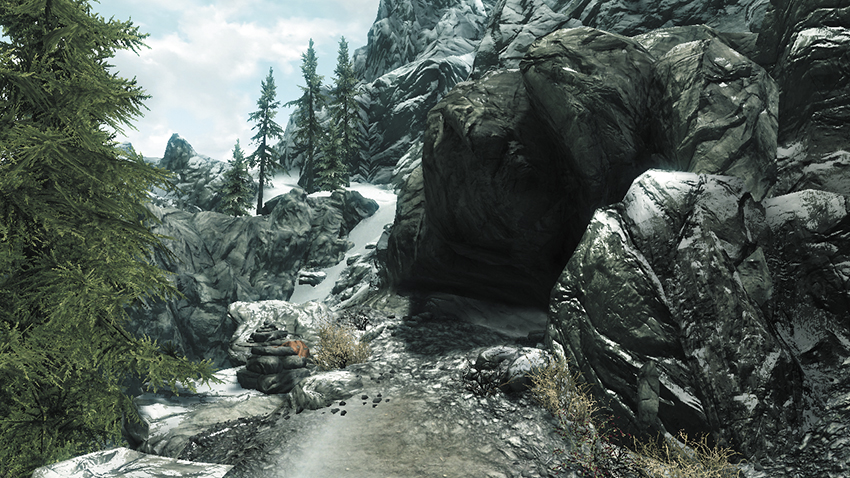
Recommended Level: 6
Dungeon: Warlock Lair
Underground Connection: North Brittleshin Pass [8.13]
This site marks the south entrance to Brittleshin Pass, which acts as a shortcut through the mountains north of Lake Ilinalta. See the previous location entry for North Brittleshin Pass [8.13] for details on what awaits you within the pass.
[8.15] Ilinalta’s Deep
Related Quests
- Daedric Quest: The Black Star
Recommended Level: 8
Dungeon: Warlock Lair
- Animal
- Mage
- Skeleton
Crafting
- Alchemy Lab
- Arcane Enchanter
Quest Items
- Broken Azura’s Star
Collectibles
- Skill Book [Alteration]: Breathing Water [A2/10]
- Skill Book [Conjuration]: The Doors of Oblivion
- Skill Book [Enchanting]: A Tragedy in Black [A2/10]
- Chests
- Potions aplenty
- Loose gear
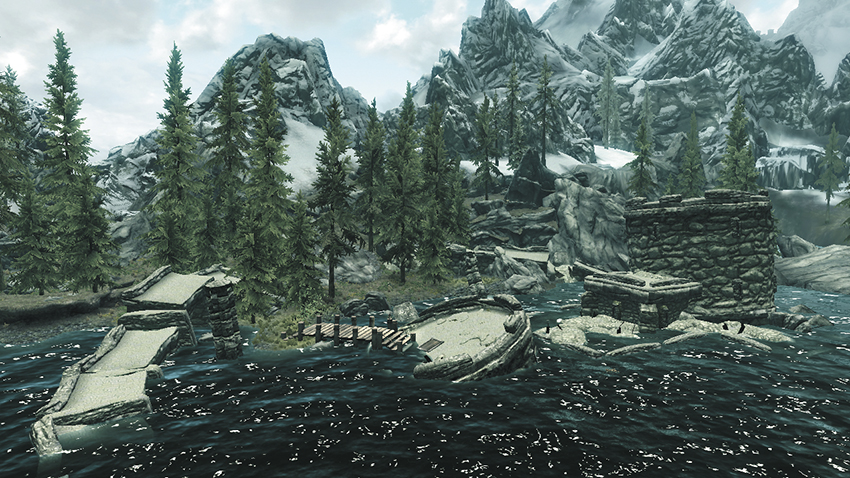
This pair of sunken towers lies along Lake Ilinalta’s north bank. You venture here during Daedric Quest: The Black Star in search of a special item known as Azura’s Star; however, a powerful mage named Maylyn Varen guards the mysterious object.
Exterior
Both towers feature rooftop trapdoors, but only the west tower’s trapdoor is within your reach. Before entering, dive into the surrounding waters to discover a sunken chest between the towers, near the fort’s southern wall.
- Chest
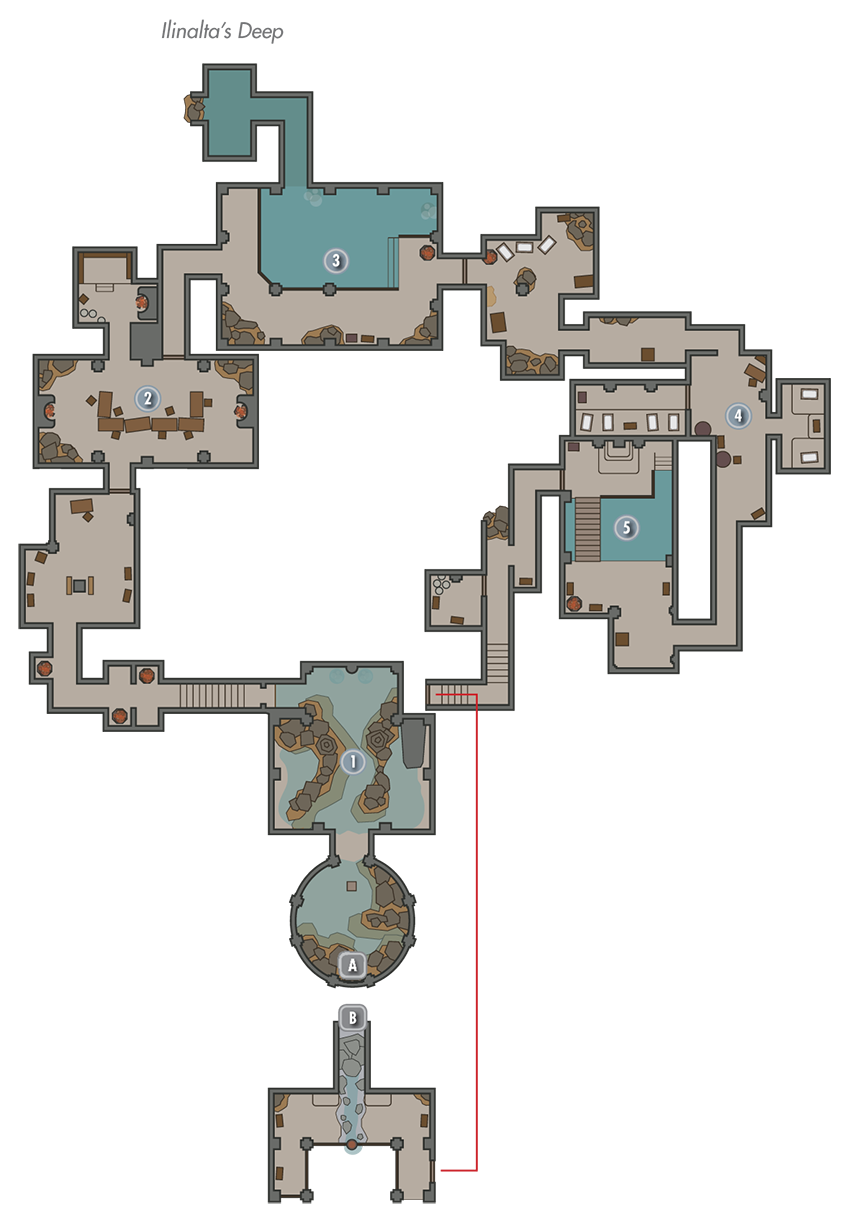
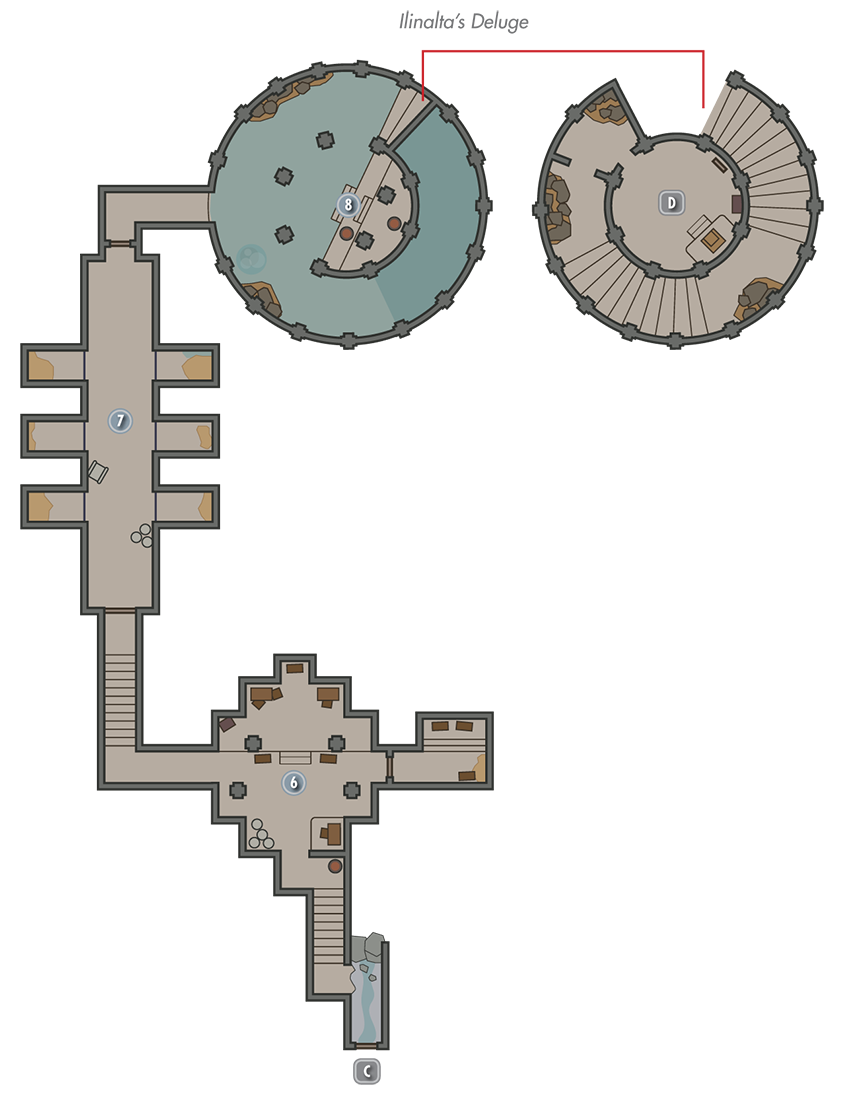
Exit to Skyrim
Entry Chamber
A forboding shackled skeleton greets you just inside the sunken stronghold. Loot the knapsack near the skeleton to discover an informative journal, then proceed to [2].
- Knapsack
Dinning Area
Slay a few powerful mages and a skeleton on your way to the dining hall. Find several useful potions here and in the north kitchen. Open a wooden door afterward and proceed to [3].
- Potions aplenty
- Loose gear
Waterlogged Chamber
This chamber is rapidly taking on water. Eliminate the mages, then dive into the pool and swim through a submerged passage to locate a sunken chest. A soaked Skill Book rests atop the nearby dresser, also underwater.
- Skill Book [Alteration]: Breathing Water [A2/10]
- Chest
Crafting Area
Slay a couple of powerful mages to secure this small chamber, where a Skill Book sits on a table across from a pair of crafting stations. Unlock the Apprentice-level door to access a sleeping area with a chest.
- Crafting: Alchemy Lab, Arcane Enchanter
- Skill Book [Enchanting]: A Tragedy in Black [A2/10]
- Apothecary’s Satchel
- Potions aplenty
Head Mage’s Chamber
Confront a powerful mage in this watery chamber, then dive underwater and open the Apprentice-level door to discover a sunken chest. Use the steps to exit the water and loot a large chest before entering a winding passage that leads back to [1]. Pick another Apprentice-level door as you navigate the passage to pocket a few more potions on your way. When you return to [1], take the north door to Ilinalta’s Deluge. (This door is only accessible during “The Black Star” quest.)
- Chests (2)
- Potions
- Loose gear
Door to Ilinalta’s Deluge
 Door to Ilinalta’s Deep
Deluge Entry
Slay a few more foul mages in the Deluge’s first room, then loot a chest and grab the Skill Book on the table. Go through the east door to visit a small storage room filled with potions. Backtrack out and head west toward [7].
- Skill Book [Conjuration]: The Doors of Oblivion
- Chest
- Potions aplenty
 Holding Cells
Slay a powerful mage in this long prison area. There’s little of interest in the cells, but you can hone your lockpicking art.
 Tower
Tower
Dispatch another deadly mage who guards the tower’s entry floor, then proceed upstairs to reach a quiet throne room. Loot a large chest here, then claim the Broken Azura’s Star from Malyn Varen’s skeletal remains. Read the nearby tome to learn a bit more about Varen and his motives before climbing the nearby ladder to take your leave.
- Broken Azura’s Star
- Chest
 Exit to Skyrim
[8.16] The Lady Stone
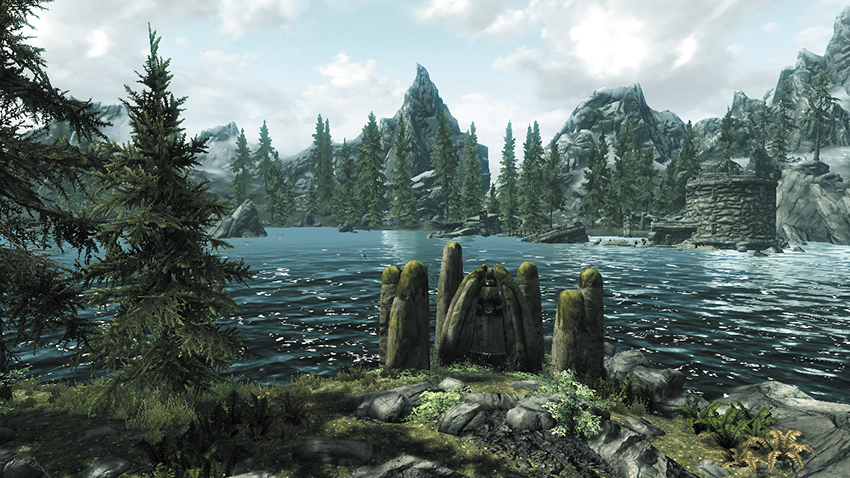
Recommended Level: 6
Dungeon: Special
Special Objects:
- Standing Stone: The Lady Stone [9/13]
Swim out to Lake Ilinalta’a tiny western isle to locate an ancient Standing Stone. Touch this stone to gain a new sign blessing. Those under the sign of the Lady regenerate Health and Stamina more quickly. Note that you can have only one sign blessing at a time, so activating this Standing Stone will replace your current blessing (if any).
[8.17] Secunda’s Kiss
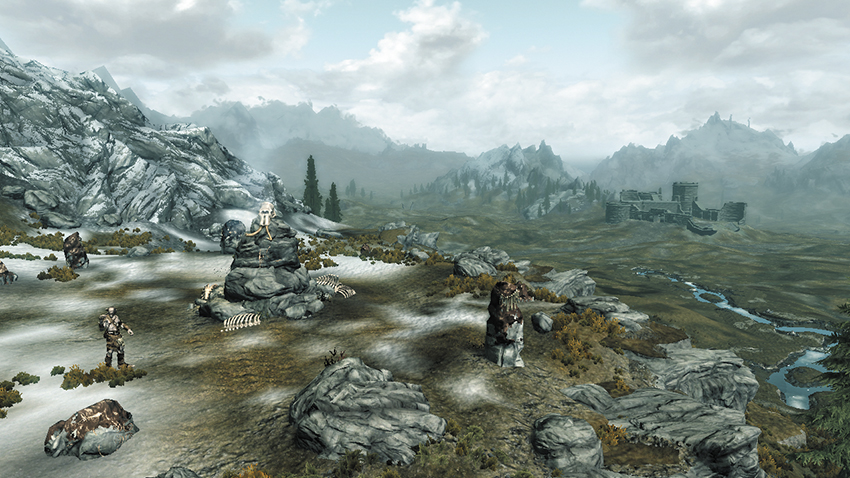
Dungeon: Giant Camp
Giant
Collectible
Chest
This site holds special significance to giants, who make regular pilgrimages here for some mysterious reason. Slay the sites’ protective guardians if you can, then plunder gold and valuables from their corpses and from the chest near the bonfire.
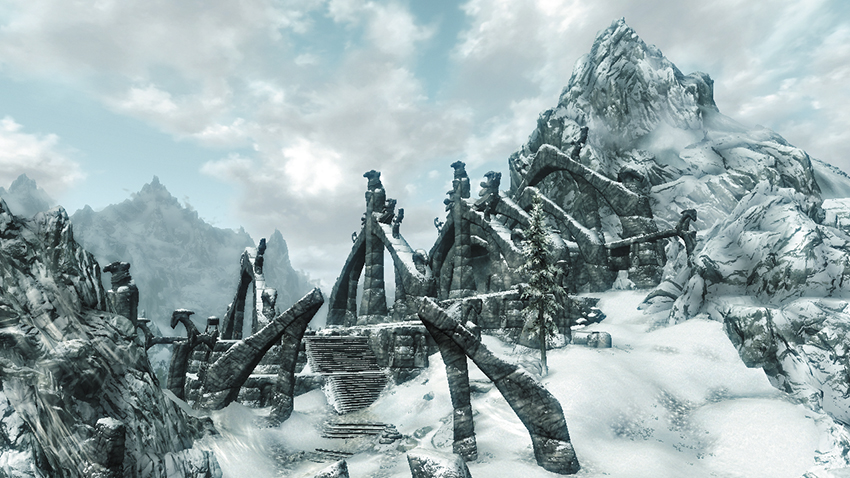
[8.18] Bleak Falls Barrow
Related Quests
- Main Quest: Bleak Falls Barrow
- Side Quest: The Golden Claw
Recommended Level: 6
Dungeon: Draugr Crypt
- Arvel the Swift
- Bandit
- Draugr
- Draugr Scourge Lord
- Frostbite Spider
- Skeever
- Wounded Frostbite Spider
Dangers
- Oil Lamp Traps
- Oil Pool Traps
- Swinging Blade Trap (wall chains)
- Swinging Wall Trap (pressure plate)
Puzzles
- Nordic Puzzle Door (Golden Claw)
- Nordic Pillars
Quest Items
- Dragonstone (Draugr Scourge Lord)
- Golden Claw (Arvel)
Collectibles
- Dragon Claw: Golden Claw [6/10]
- Skill Book [Pickpocket]: Thief [D2/10]
Special Objects
- Word Wall: Unrelenting Force [1/1]
- Chest(s)
- Potions
This large, striking ruin stands atop the mountains north of Lake Ilinalta and can be easily seen for miles. Ascend the snowy mountain trails, navigating a raging blizzard as you head for Bleak Falls Barrow’s ominous exterior.
Exterior
Slay the exterior guards before entering the doors that lead into the Bleak Falls Temple—there’s nothing else of interest outside in the cold.
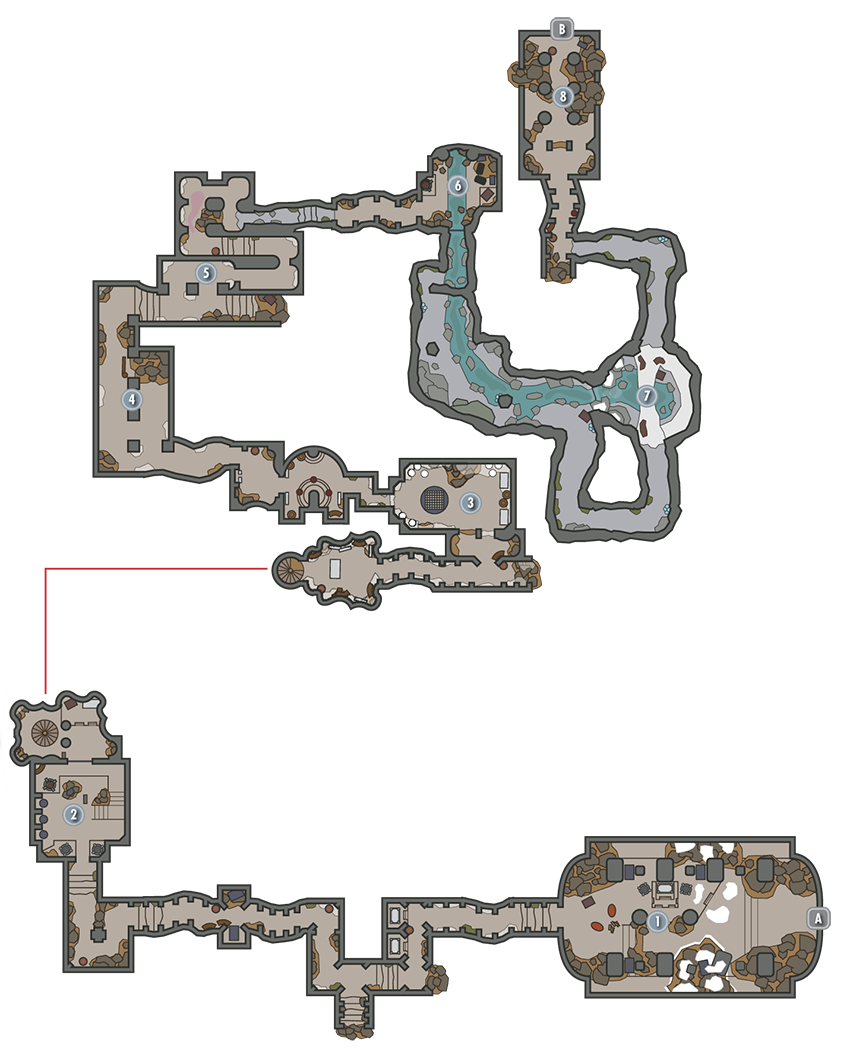
Exit to Skyrim
Entry Chamber
Cut down the two bandits at the end of this first, large chamber, then loot the chest they were guarding before navigating a long, uneventful passage on your way to [2].
- Chest (Locked: Novice)
Nordic Pillars Puzzle
Before pulling this chamber’s tempting central lever, rotate the three pillars in the west wall to match the sequence of glyphs that can be seen around the north wall (Snake, Snake, Whale). Then pull the lever to safely raise the north portcullis. Go through and raid a chest, then claim the nearby Skill Book. Descend a spiral staircase on your way to [3], slaughtering several Skeevers at the bottom.
- Skill Book [Pickpocket]: Thief [D2/10]
- Chest
- Potions
Spider Lair
Chop through thick webs to enter this small chamber, then slay the hulking Wounded Frostbite Spider that silently descends from the ceiling. Carefully free Arvel afterward, who’s been caught up in a thick web. The fool quickly rushes deeper into the ruins—hurry after him!
South Burial Passages
Chase Arvel into these passages, where undead Draugr warriors begin to rise. Arvel is quickly slain; retreat as you combat the Draugr, then return to this chamber and collect the vital Golden Claw and informative journal that Arvel possesses. Be careful to avoid the pressure plate on the floor that triggers a lethal trap on your way to [5].
- Danger! Swinging Wall Trap (pressure plate)
- Dragon Claw: Golden Claw [6/10] (Arvel)
North Burial Passages
Slay more Draugr in this next chamber, then quickly sprint through the hall of swinging blades—you can sprint through unscathed if you time it right. Once through, pull a wall chain to deactivate the trap. Burn up the many Draugr in the passage that follows by knocking down hanging lamps to ignite oil on the floor.
- Danger! Oil Lamp Traps, Oil Pool Trap, Swinging Blade Trap (wall chain)
Waterfall Cavern
Loot a chest in this small cavern, then pull a wall chain to raise a portcullis and advance to [7].
- Chest
Sunlit Cavern
Raid another chest on your way into this large, open-air cavern. Descend to the bottom to find another chest, then go back up and proceed to [8].
- Chest
- Chest (Locked: Novice)
Sanctum Access
Slay a powerful Draugr here, then loot one more chest before opening the door and entering the Bleak Falls Sanctum.
- Chest (Locked: Apprentice)
Door to Bleak Falls Sanctum
Bleak Falls Sanctum
Swinging blades slice through the hall that leads to the Sanctum’s first chamber. Before sprinting through, lure a patrolling Draugr to its doom by striking the monster with a ranged attack to make it charge recklessly into the blades. Sprint past the trap afterward, then quickly pull the wall chain on the opposite side to deactivate it—this lets you safely retreat as the undead begin to swarm.
Next, inspect the Golden Claw that you found on poor Arvel, and notice the three glyphs that run down its palm. Mimic this same sequence of glyphs (bear, moth, owl) on the strange mural at the end of this passage by spinning its three glyph rings. Once the glyphs have been properly aligned, activate the claw insignia in the mural’s center to insert the Golden Claw and open the way forward.
Make your way to the far end of the large, sunlit cavern that follows the Nordic Puzzle Door. Raid a giant chest and then follow the sound of chanting to discover a Word Wall, which grants you a new Word of Power. Learning this new talent causes a powerful enemy to rise from the nearby sarcophagus—fight hard to slay this worthy adversary, then obtain a special item from its remains. Check behind the Word Wall for a hidden chest before leaving. Scale the nearby steps afterward and exit this unholy place via the west passage, looting one last chest on your way out. Find a potion on the exterior ledge before fast-traveling away.
- Danger! Oil Lamp Traps
- Danger! Oil Pool Traps
- Danger! Swinging Blade Trap (wall chain)
- Word Wall: Unrelenting Force [1/1]
- Dragonstone (Draugr Scourge Lord)
- Chests (3)
[8.19] Anise’s Cabin
Related Quests
- Dungeon Activity
Dungeon: Special
- Anise
Crafting
- Alchemy Lab
- Arcane Enchanter
Recommended Level: 6
Collectibles
- Skill Book [Alchemy]: Song of the Alchemists [E2/10]
- Knapsack
- Apothecary’s Satchels (2)
- Potions
- Loose gear
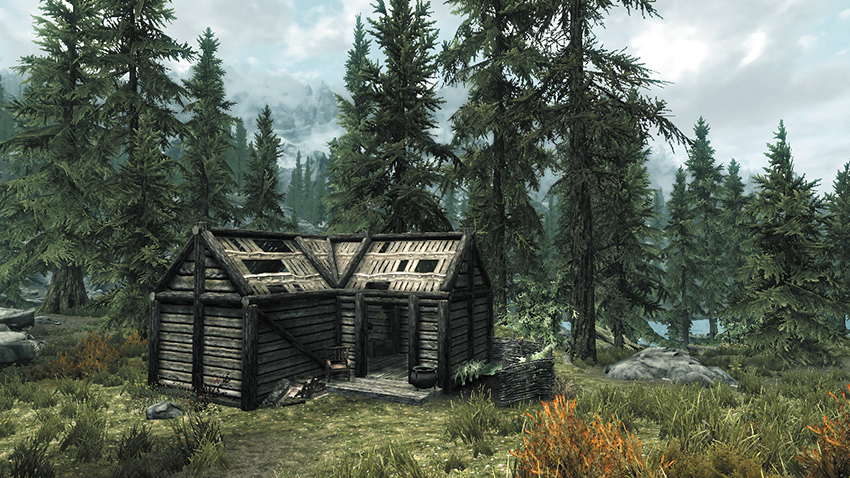
In northern Falkreath, not far from the town of Riverwood, a kindly old woman named Anise lives in a simple cabin. Take the Skill Book near the bed inside, then pick the Novice-level trapdoor and slip into Anise’s cellar to discover a small alchemist’s study. A note on a bench down here reveals that Anise is in fact a witch! Beware: the old woman will attack you when you leave, hoping to protect her secret.
[8.20] Cracked Tusk Keep
Related Quests
- Daedric Quest: Pieces of the Past
Recommended Level: 6
Dungeon: Bandit Camp
- Ghunzul
- Orc
Crafting
- Alchemy Lab
- Blacksmith Forge
- Grindstone
- Workbench
Dangers
- Dart Trap (pedestal pressure plate)
- Swinging Wall Trap (tripwire)
Quest Items
- Shards of Mehrune’s Razor
Collectibles
- Skill Book [Light Armor]: Rislav the Righteous [C2/10]
- Skill Book [Smithing]: Light Armor Forging
- Chests
- Potions aplenty
- Loose gear
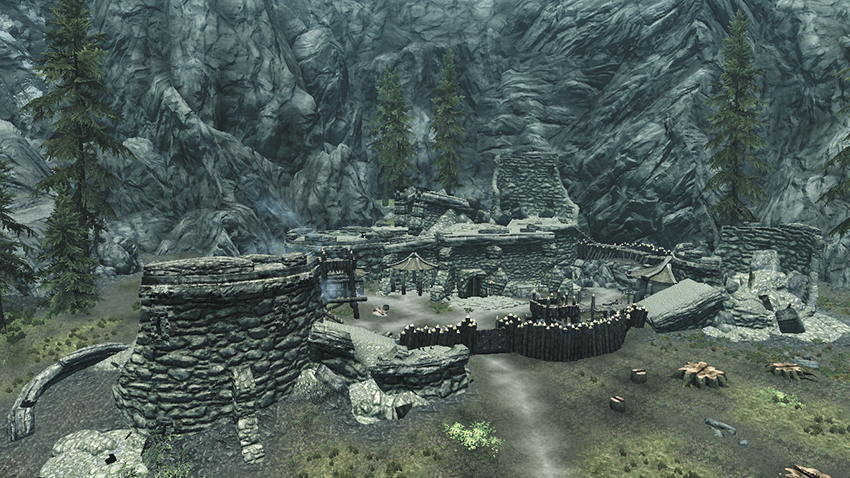
This old, abandoned Imperial Fort on Falkreath’s western border has been taken over by Orcish bandits. Unlike a true Orcish stronghold, the Orcs here are implacably hostile and will attack you on sight. The leader of these brigands, the warlord Ghunzul, is a follower of Mehrunes Dagon and possesses the shattered blade fragments of Mehrunes’ Razor—a quest item for Daedric Quest: Pieces of the Past.
Exterior
Try to pick off the exterior guards from range, or sneak into the fort via one of the two crumbling northern towers. After dispatching the guards, search the forge area for loose gear, then claim the two chests: one in the northwest tower and one high atop the roof of the keep. A Skill Book sits on a table near the Workbench.
- Crafting: Blacksmith Forge, Grindstone, Workbench
- Skill Book [Smithing]: Light Armor Forging
- Chest (Locked: Master)
- Chest (Locked: Apprentice)
- Loose gear
Cracked Tusk Keep (Interior)
The keep features three access points: a front door, a basement door to the north, and a rooftop trapdoor atop the southeast tower (cross the lookout platforms along the stronghold’s exterior walls to reach it).
If you have solid lockpicking skills, pick the locked basement door (Locked: Novice) and the wall cage just inside and to the right (Locked: Expert), and you can enter the vaults without having to fight any of the enemies in the Keep.
Otherwise, enter the front door and dispatch the two Orcs there, then take the southeast door to the tower. There, you’ll find a brute named Ghunzul—slay or pickpocket him to obtain a useful key (the same key can be found on a nearby nightstand). Loot the large chest in Ghunzul’s room before heading down into the keep’s basement, where you can use the key you found on Ghunzul to open the wall cage. Then press the button to lower the gate that blocks the stairwell. Continue down to the lower vaults.
- Crafting: Alchemy Lab
- Cracked Tusk Vault Key
- Cracked Tusk Vault Key (Ghunzul)
- Chest
- Potions
- Loose gear
Cracked Tusk Keep Vaults
Loot the two side rooms as you enter the Vaults, finding a Skill Book on a bench in one of the rooms. Then raid a chest that lies near a pair of levers that open a gate. Slowly walk forward to safely trigger the Vault’s central trip wires without suffering harm. The trip wire to the left triggers a lethal swinging spike trap and is best avoided. Loot a chest among the room’s side rubble and stand to one side of the far pedestal before removing the Shards of Mehrunes’ Razor—darts shoot down from the ceiling in front of the pedestal when you remove them.
- Area Is Locked (Expert/Key)
- Danger! Dart Trap (trip wire, pressure pedestal), Swinging Wall Trap (trip wire)
- Shards of Mehrune’s Razor
- Skill Book [Light Armor]: Rislav the Righteous [C2/10]
- Chest
- Chest (Locked: Novice)
- Potions aplenty
- Loose gear
[8.21] Halldir’s Cairn
Related Quests
- Other Factions: Bards College Quest: Rjorn’s Drum
- Dungeon Activity
Recommended Level: 6
Dungeon: Draugr Crypt
- Draugr
- Ghost
- Halldir
Dangers
- Battering Ram Trap (trip wire)
- Bone Alarm Trap
- Flamethrower Trap (hinge trigger)
- Swinging Wall Trap (pressure plate)
Puzzles
- Nordic Pillars
Collectibles
- Unique Weapon: Halldir’s Staff [56/80]
- Chest(s)
- Potions
- Loose gear
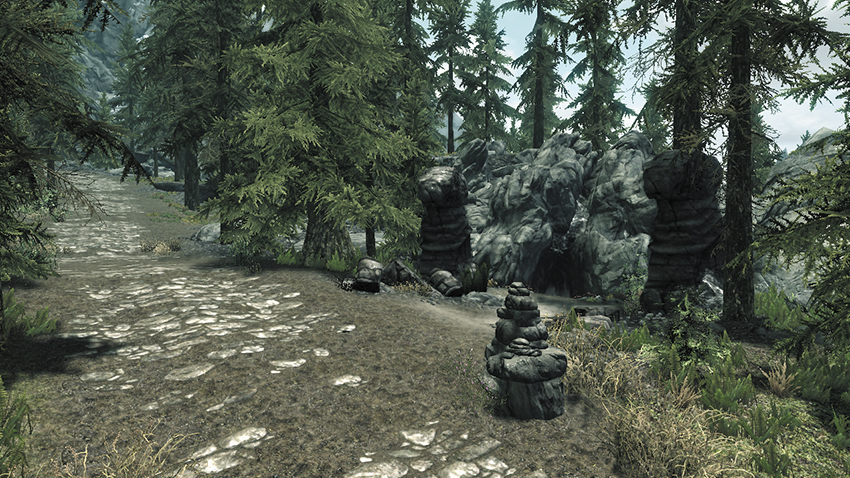
Take the southwest road out of Falkreath’s capital, and you’ll end up discovering this long-forgotten tomb.
Cairn Chamber
A spectral beam of energy rises from the large cairn in the tomb’s first chamber, and the bodies of several adventurers lie strewn around it. Collect a key and informative journal from a nearby pedestal, then use the key to open the nearby door and head upstairs.
- Key to Halldir’s Crypt
- Loose gear
Ghostly Catacombs
Slay the ghosts of the fallen that materialize around you as you navigate the catacombs upstairs. When you come to a pressure plate, stand on it to safely trigger the swinging wall trap ahead. Slip around the trap after triggering it to locate a valuable potion. Pick up the path again and do your best to avoid the cluster of hanging bones that can alert the Ghosts and Draugr ahead. When you reach a portcullis, pull the lever behind the nearby throne to raise it.
- Danger! Bone Alarm Trap, Swinging Wall Trap (pressure plate)
- Potion
- Loose gear
Nordic Pillars
Rotate three pillars in the passages that follow, facing each pillar’s glyphs to match the pair of glyphs that appear on the opposite wall (Hawk, Snake, Whale). Pull the nearby lever to open a passage that leads deeper into the crypts. Before heading through, see if you can unlock the Adept-level iron door near the Snake glyphs to access a small treasure nook.
- Chest (Locked: Adept)
- Potions
- Loose gear
Secret Passage
Ignore the stairs to the north and carefully set off a trip wire as you follow the secret passage to its far end, where you find a trapped chest. Disarm the hinge trigger or stand as far north of the chest as possible when opening it to avoid being burned alive by flames that spray from a nearby statue. Double back after looting the chest and take the north stairs to reach Halldir’s Tomb.
- Danger! Battering Ram Trap (tripwire), Flamethrower Trap
- Potion
- Loose gear
Halldir’s Tomb
As you set foot in Halldir’s Tomb, his spirit materializes in the energy beam in the room’s center and steps forward to confront you. Halldir’s ghost wields a range of powerful Destruction spells, including a unique special ability: When reduced to about two-thirds of his health, he splits his essence into three elemental forms. Quickly take out one of these (the Storm form by the throne is a good choice), or you’ll be overwhelmed. Once you defeat all three forms, Halldir coalesces once more and fights until you reduce him to ash.
Search Halldir’s remains to obtain a unique weapon, then scour the room for items, gold, and a boss chest. When you’re ready to leave, open the central trapdoor and carefully drop from ledge to ledge as you descend to the crypt’s entry chamber.
- Unique Weapon: Halldir’s Staff [56/80] (Halldir)
- Chest
- Loose gear
[8.22] Dark Brotherhood Sanctuary
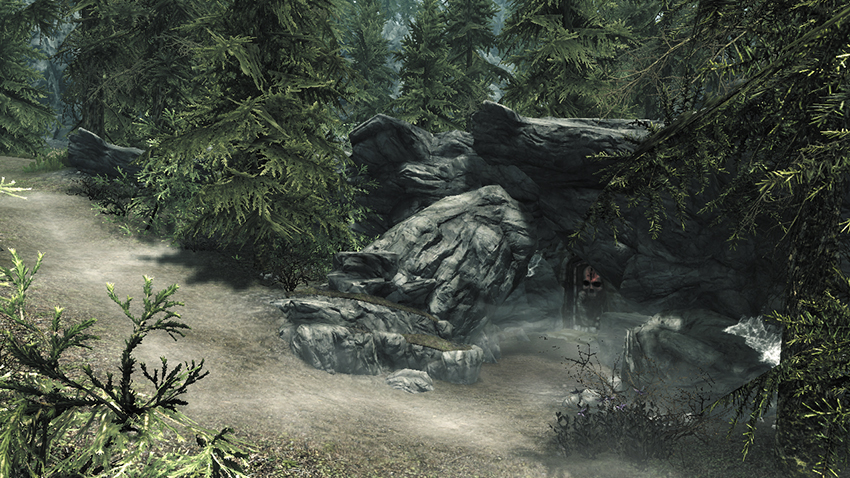
Related Quests
- Dark Brotherhood Quest: With Friends Like These...
- Dark Brotherhood Quest: Sanctuary
- Dark Brotherhood Quest: Mourning Never Comes
- Dark Brotherhood Quest: Whispers in the Dark
- Dark Brotherhood Quest: The Silence Has Been Broken
- Dark Brotherhood Quest: Bound Until Death
- Dark Brotherhood Quest: Breaching Security
- Dark Brotherhood Quest: The Cure for Madness
- Dark Brotherhood Quest: Recipe for Disaster
- Dark Brotherhood Quest: To Kill an Empire
- Dark Brotherhood Quest: Death Incarnate
- Dark Brotherhood Quest: Hail Sithis!
- Dark Brotherhood Quest: Honor Thy Family
- Dark Brotherhood Quest: The Feeble Fortune*
- Dark Brotherhood Quest: Side Contracts (All)
- Thieves Guild Radiant Quest: No Stone Unturned
Recommended Level: 8
Habitation: Special
- Astrid
- Arnbjorn
- Babette (Alchemy Trader/Trainer: Alchemy)
- Cicero
- Festus Krex
- Gabriella
- Lis (Frostbite Spider)
- Nazir (Trainer: Light Armor)
- The Night Mother
- Veezara
Services
- Trader (Apothecary): Babette [10/12]
- Potions, Ingredients, Misc
- Trainer (Alchemy: Master): Babette [3/3]
- Trainer (Light Armor: Master): Nazir [2/3]
- Unique Weapon: Blade of Woe [57/80]
- Unusual Gem: Stone of Barenziah [21/24]
Crafting
- Alchemy Lab
- Anvil
- Arcane Enchanter
- Grindstone
- Workbench
Collectibles
- Skill Book [Alteration]: Sithis [D2/10]
- Skill Book [Sneak]: Sacred Witness [C2/10]
- Unique Item: Shrouded Armor [69/112]
- Unique Item: Shrouded Boots [70/112]
- Unique Item: Shrouded Cowl [71/112]
- Unique Item: Shrouded Gloves [72/112]
- Unique Item: Shrouded Cowl Maskless [73/112]
- Unique Item: Shrouded Hand Wraps [74/112]
- Unique Item: Shrouded Hood [75/112]
- Unique Item: Shrouded Robes [76/112]
- Unique Item: Shrouded Shoes [77/112]
- Unique Item: Nightweaver’s Band [78/112]
- Unusual Gem: Stone of Barenziah [21/24]
Special Objects
- Word Wall: Marked for Death [2/3]
- Area Is Locked (quest required)
- Chest(s)
- Potions
- Loose gear
Follow the road west out of Falkreath until you spy a dirt trail running downhill to your right. The trail leads down to the foreboding “Black Door”—the ominous entrance to the Dark Brotherhood’s hidden haven. You’re denied entry to this clandestine lair until you manage to impress the Dark Brotherhood; do this by completing their first quest, “Innocence Lost.” Wait until you receive a message from the Dark Brotherhood. Then, the next time you sleep, you’ll automatically begin their second quest, “With Friends Like These...” That’s your chance to get in good with the Brotherhood!
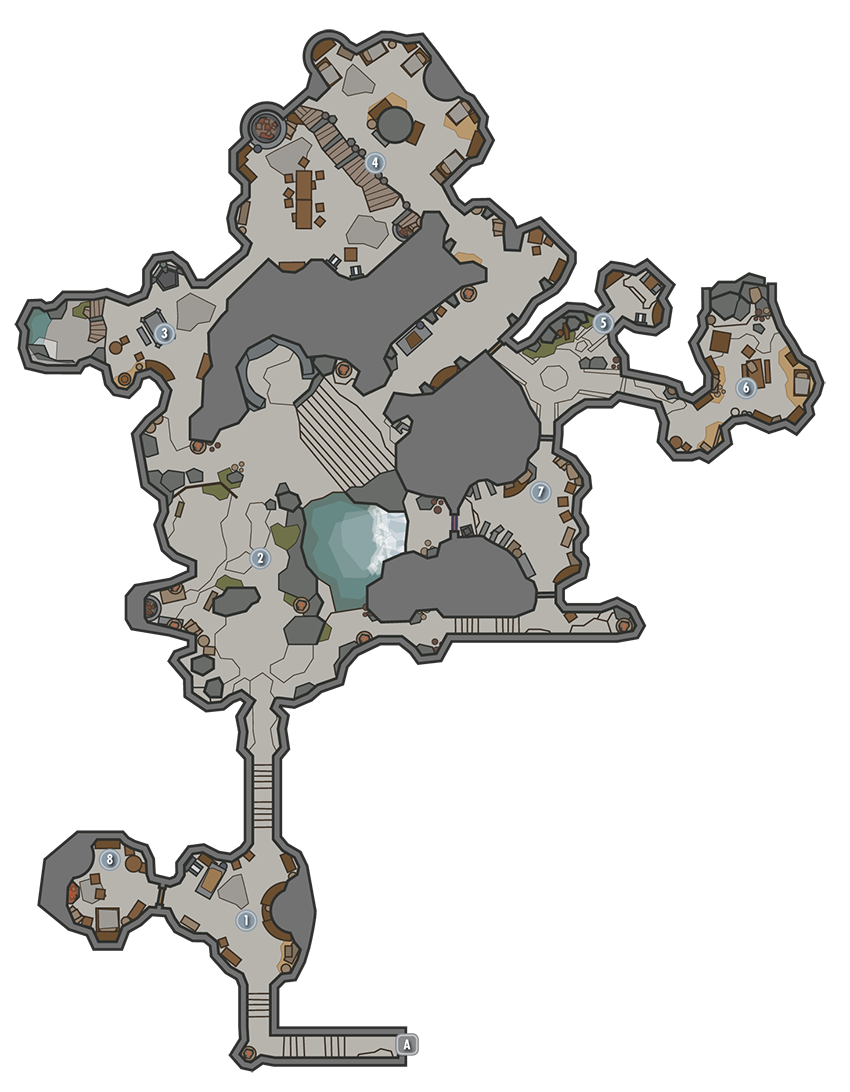
Exit to Skyrim
Astrid’s Foyer and Bedroom
Claim a Skill Book from the pedestal shelf in the foyer, then find an Unusual Gem in Astrid’s bedchamber to the west. This is a part of Thieves Guild Radiant Quest: No Stone Unturned.
- Skill Book [Alteration]: Sithis [D2/10]
- Unique Item: Shrouded Cowl Maskless [73/112]
- Unique Item: Shrouded Hand Wraps [74/112]
- Unique Item: Shrouded Hood [75/112]
- Unique Item: Shrouded Robes [76/112]
- Unique Item: Shrouded Shoes [77/112]
- Unusual Gem: Stone of Barenziah [21/24]
- Loose gear
Main Chamber
Meet the Family for the first time in this wide cavern, then approach the nearby Word Wall to gain a new Word of Power.
- Crafting: Anvil, Grindstone, Workbench
- Word Wall: Marked for Death [2/3]
- Loose gear
Laboratory
Find a few ingredients in this side chamber, along with the Alchemy and Enchanting stations. Gabriella’s pet Frostbite Spider, Lis, resides in the small cavern down below—leave it be, for it won’t harm you. Search the remains of a poor soul named Gaston Bellefort near the watery pool to find a note that indicates how he came to meet his end.
- Crafting: Alchemy Lab, Arcane Enchanter
- Apothecary’s Satchel
- Loose gear
Dining Hall and Sleeping Quarters
Other than food, there’s little of interest in the dining area, but a chests awaits looting upstairs.
- Chest (Locked: Novice)
- Loose gear
Babette’s Room
Swipe a valuable Skill Book from Babette’s small bedchamber.
- Skill Book [Sneak]: Sacred Witness [C2/10]
Storage Room/Cicero’s Room
Initially just an unused junk room, this chamber is cleaned up (slightly) when Cicero arrives in the Sanctuary.
- Loose gear
Night Mother’s Chamber
A unique stained glass window dominates this room, which features secure iron doors. When Cicero and the Night Mother arrive, her coffin is given the place of honor in this chamber. Pillage a knapsack on a shelf here.
Astrid’s Safe Room
A wardrobe in Astrid’s bedroom conceals the entrance to this long-forgotten room. This chamber is only accessible during Dark Brotherhood Quest: Death Incarnate; consult that quest for further details.
[8.23] Roadside Ruins
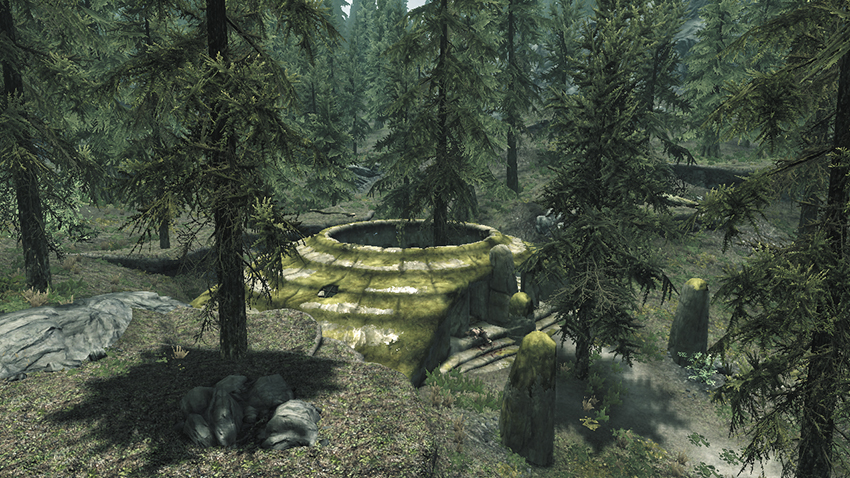
Recommended Level: 6
Dungeon: Spriggan Grove
- Spriggan
Collectibles
- Skill Book [Enchanting]: Catalogue of Weapon Enchantments [C2/10]
- Chest
As you might expect, these ruins lie along the road and are found just west of Falkreath’s capital. Slay a Spriggan here and loot the bodies of dispatched bandits, along with a chest. Claim the Skill Book that lies against the chest as well.
[8.24] Falkreath Watchtower
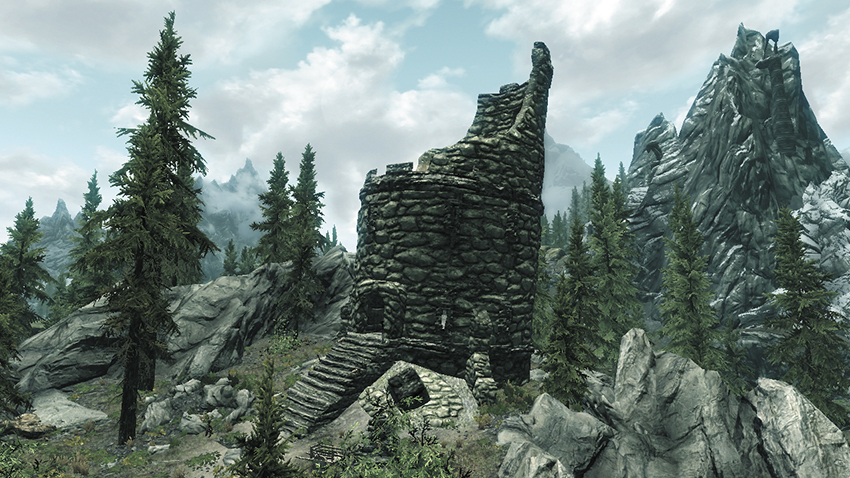
Recommended Level: 6
Dungeon: Warlock Lair
- Mage
Collectibles
- Skill Book [Conjuration]: Liminal Bridges [C2/10]
- Chest
This ruined tower lies between Falkreath’s capital and Lake Ilinalta and has become the home of a powerful, twisted mage. Slay the wicked spellweaver so you may scale the tower and raid a chest at its apex. A Skill Book rests inside the tent up here.
[8.25] North Shriekwind Bastion
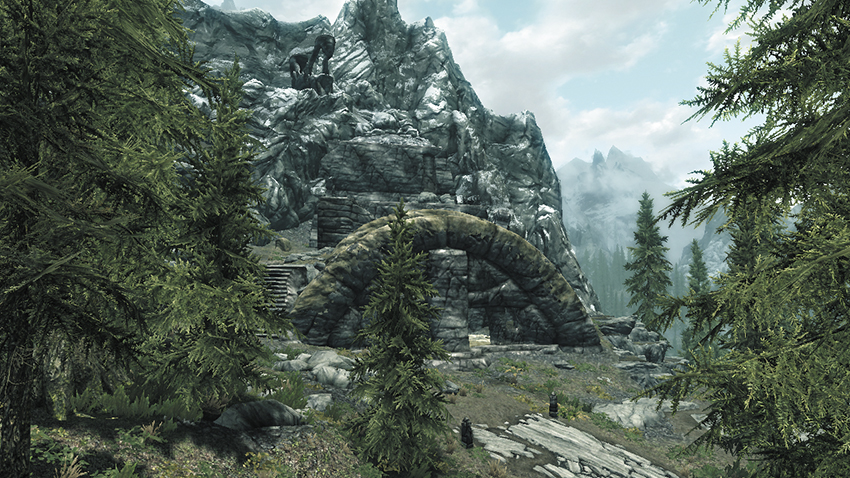
Dungeon: Vampire Lair
- Skeleton
- Vampire
Dangers
- Battering Ram Traps (pressure plates)
- Flamethrower Traps (handle)
Underground Connection: South Shriekwind Bastion [8.26]
Collectibles
- Skill Book [Speech]: 2920, Second Seed, v5
Special Objects
- Word Wall: Elemental Fury [3/3]
- Chest(s)
- Potions
- Loose gear
This site marks the northern entrance to Shriekwind Bastion, a cave passage that runs through the mountains north of Falkreath’s capital. Passing through this cave allows you to quickly cut through the mountains and places you near a Word Wall.
Exterior
Before entering North Shriekwind Bastion (or after exiting the pass, if you’ve traveled up from the south), make a long trek up a snowy path that leads to the exterior ruin. You’ll find a locked chest at the top.
- Chest (Locked: Novice)
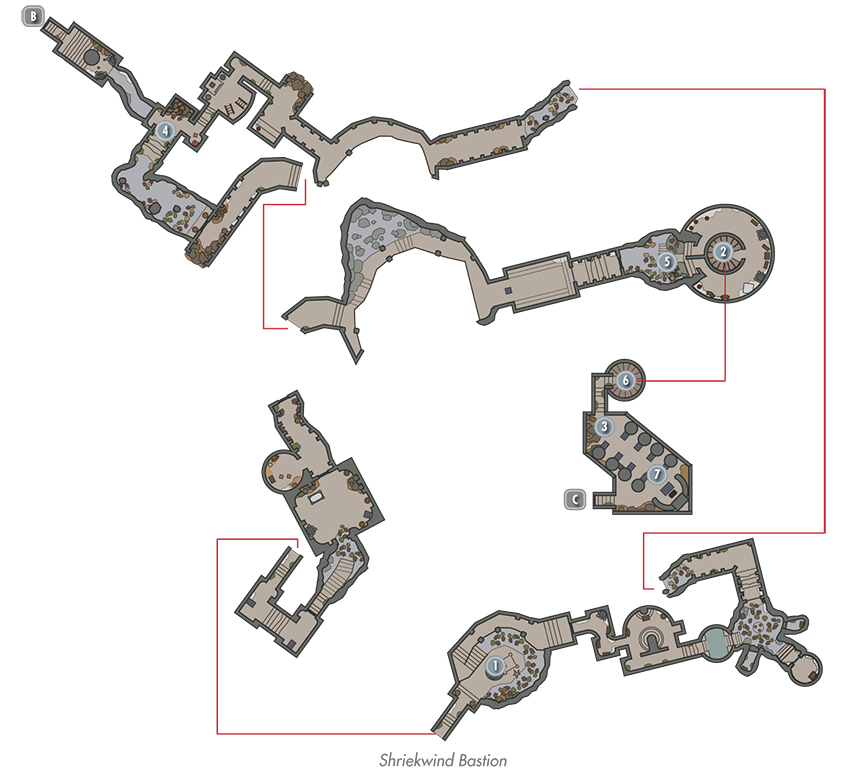
Exit to Skyrim (North Shriekwind Bastion)
Main Cavern
Slay a vampire and loot a chest in the bastion’s first few chambers, making your way to this massive cavern. A handle here activates a rising floor trap in the lower chamber, but ignore this and head upstairs, slaying a Skeleton Archer on your way to [2].
- Chest
- Potions
- Loose gear
Altar Chamber
Claim loot from several receptacles in this small, quiet chamber before advancing to [3].
- Chest
- Potions
Junction Chamber
Pull a wall chain to raise a portcullis and enter this small chamber, where three handles are found on a central dais. Turn each handle to open two secret nooks that each contain loose gear, along with the room’s south portcullis. Loot the chest to the south, then notice three chains on the wall above. Pull the left chain to open the north portcullis and make your way back to [1], smashing more skeletons and avoiding a pair of pressure plates along the way.
- Danger! Battering Ram Traps (pressure plates)
- Chest (Locked: Apprentice)
- Loose gear
South Access Entry
Slaughter skeletons and sidestep pressure plates in the long tunnel that leads back to [1]. Navigate the next passage to reach this small, dark alcove, where you find valuable gear. Search the alcove’s walls to discover a chain that exposes a secret passage when pulled. The passage leads outside to South Shriekwind Bastion [8.26]. Head through if you’re in a hurry to cut through the mountains. Ignore the passage and continue exploring the bastion otherwise, making your way back to [1] on your way to [5].
Exit to Skyrim (South Shriekwind Bastion)
- Loose gear
Fire Trap Passage
This chamber lies above [2], but the two rooms are not connected. Turn the handle on the pedestal here to open the far portcullis. Unfortunately, this also causes multiple flamethrowers to ignite in the room’s center. Crouch and creep past the flames, slipping between the high points where opposing spouts intersect.
- Danger! Flamethrower Traps (handle)
Master Vampire’s Lair
Open the door beyond the flamethrowers to at last arrive at the head vampire’s lair. Slay the master vampire, then search the rear circular passage to locate a large chest. Claim a Skill Book that rests atop a podium near the steps, then scale the spiral staircase that follows to ascend to the bastion’s highest levels.
- Skill Book [Speech]: 2920, Second Seed, v5
- Chest
Word Wall Chamber
Slay the powerful Draugr that bursts out from this large chamber’s central sarcophagus, then approach the nearby Word Wall to gain a new Word of Power. Claim potions from the nearby pedestals and raid the chest that’s nestled between the statues before stepping outside via the nearby door for a spectacular view provided by the Shriekwind Overlook.
- Word Wall: Elemental Fury [3/3]
- Chest
- Potions
Exit to Skyrim (Shriekwind Overlook)
[8.26] South Shriekwind Bastion
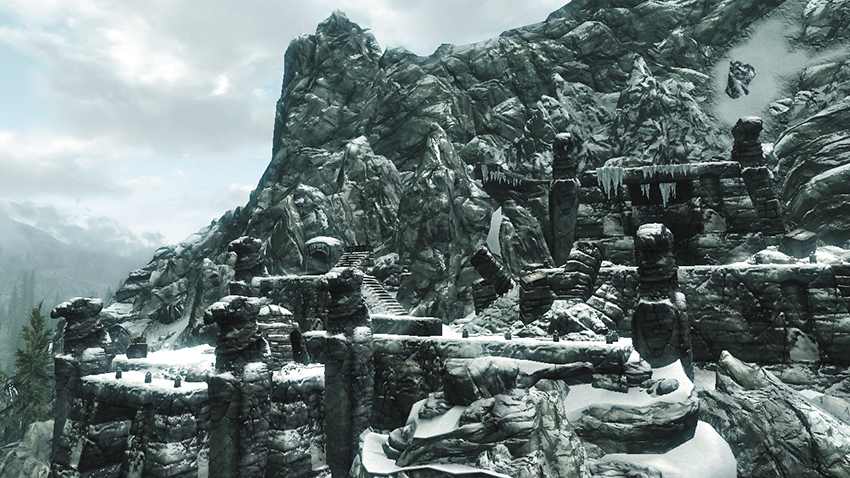
Recommended Level: 6
Dungeon: Vampire Lair
- Draugr
- Skeleton
Underground Connection: North Shriekwind Bastion [8.25]
- Chest
This site marks the southern entrance to Shriekwind Bastion, a large and cavernous passage through the mountains north of Falkreath’s capital. Beware the undead Draugr that guard the bastion’s southern ruins and search the snowy ledge below the pass’s entry point to discover a chest. See the previous location entry for North Shriekwind Bastion [8.25] and learn what lies within the pass.
[8.27] Peak’s Shade Tower
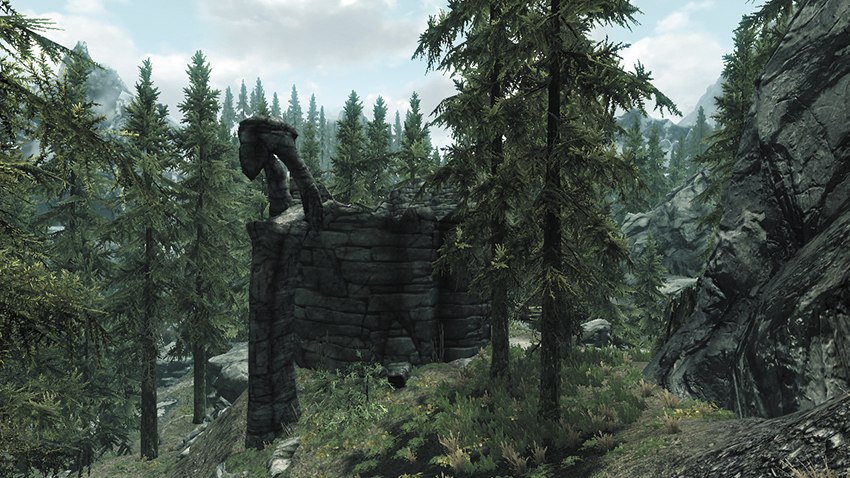
Related Quests
- Daedric Quest: Ill Met By Moonlight
Recommended Level: 6
Dungeon: Spriggan Grove
- Spriggan
Collectible
- Chest
This small, shattered tower lies just east of Falkreath’s capital. Dispatch the lone Spriggan that guards the place, then loot the long-forgotten chest inside, which is hidden by growth.
[8.28] Pinewatch
Related Quests
- Thieves Guild Radiant Quest: No Stone Unturned
- Thieves Guild City Influence Quest: Silver Lining
- Dungeon Activity
Recommended Level: 6
Dungeon: Bandit Camp
- Bandit
- Rhorlak
- Rigel Strong-Arm
Crafting
- Grindstone
- Tanning Rack
- Workbench
Dangers
- Battering Ram Trap (pressure plates)
- Bear Traps
- Bone Alarm Trap
- Dart Trap (pressure plate)
- Flail Trap (trapped door)
- Spear Trap (pressure plate)
- Swinging Blade Trap (pressure plate)
- Trapped Chest
Quest Items
- Endon’s Silver Mold
Collectibles
- Skill Book [Sneak]: The Red Kitchen Reader
- Unusual Gem: Stone of Barenziah [22/24]
- Chest(s)
- Potions aplenty
- Loose gear
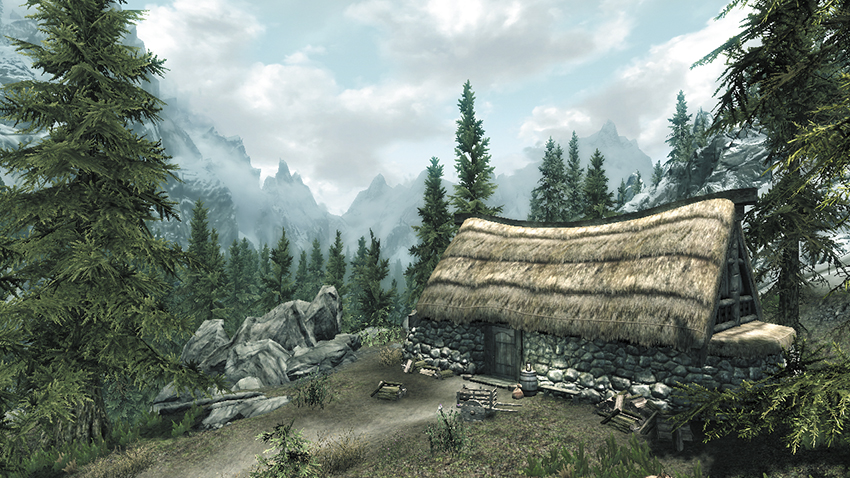
Follow the main road east out of Falkreath’s capital to locate this small cabin. Use the simple crafting stations around back if you like, then pick the Adept-level door lock to enter and raid the cabin.
Exit to Skyrim
Cabin
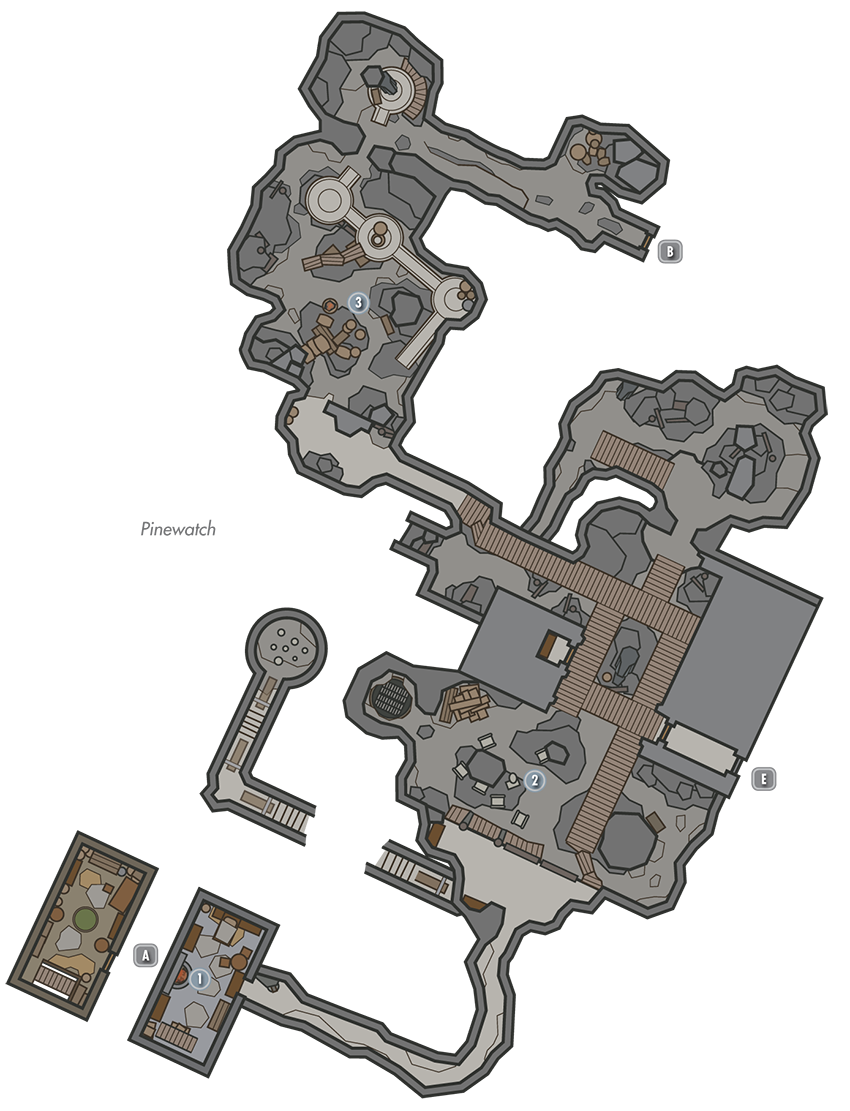
Find a note in the cabin’s basement that reveals the existence of a hidden passage. Spy a shelf with wind gusting out from its base, then locate a button on the nearby wall and press it to shift the shelf and expose a secret passage.
Body Disposal
Claim some potions and a Skill Book from a shelf to your left as you enter this first wide cavern. Slay the two guards who patrol the wooden walkways and see if you can open the Expert-level wooden door to access a potion-filled closet. Beware of bear traps on the ground floor, and raid a locked chest to the east. Enter the south tunnel to visit a gruesome pit with several lootable corpses.
- Danger! Bear Traps
- Skill Book [Sneak]: The Red Kitchen Reader
- Potions aplenty
- Loose gear
Crumbling Cavern
Cross the wooden walkways to visit this chamber, which is guarded by a few more bandits. Secure the place and then loot the lopsided chest on the central rubble. Scale a winding ramp to find another chest up north before proceeding through the east door to the Bandit’s Sanctuary.
- Crafting: Grindstone
- Chest
- Chest (Locked: Novice)
Door to Pinewatch Bandit’s Sanctuary
Door to Pinewatch
Sanctuary Entry
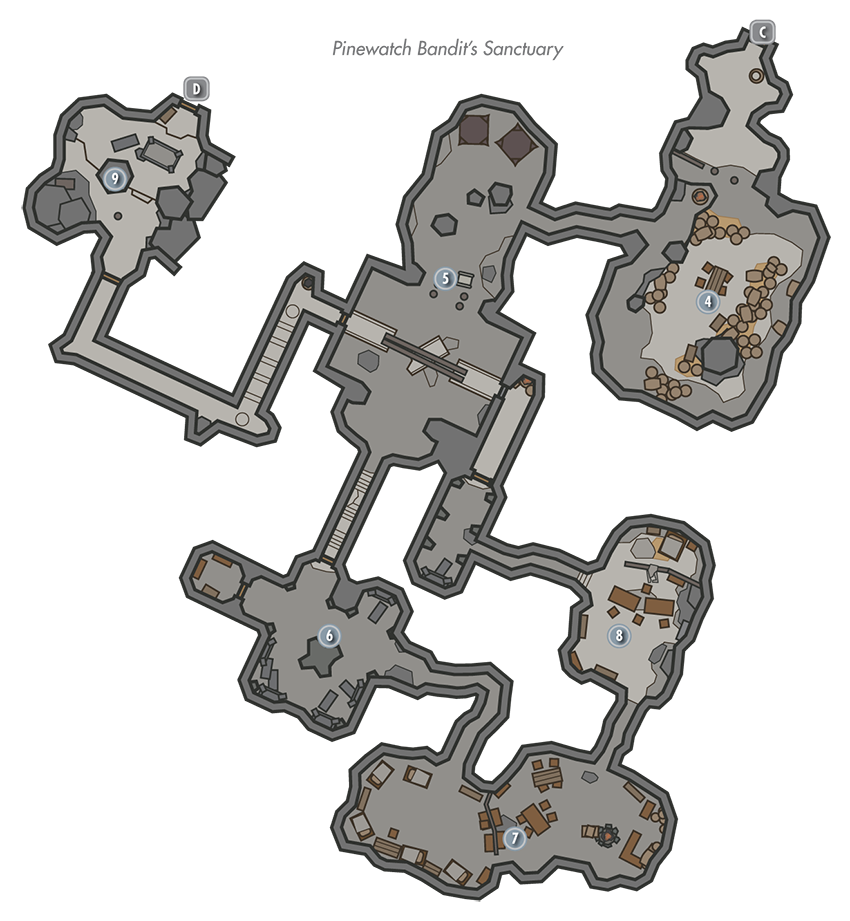
Hug the southeast wall to sneak past the bandits that are gathered around a table in the sanctuary’s first chamber, but beware of bear traps. If you fight the men, you’ll find that each possesses a letter that hints of treachery. Unfortunately, none of them carry keys for the two locked chests here.
- Danger! Bear Traps, Bone Alarm Trap
- Chest (Locked: Novice)
- Chest (Locked: Expert)
Cage Cavern
Slay or pickpocket the lone patrolling guard here to obtain a key that unlocks one of the nearby cages.
- Danger! Bear Traps
- Pinewatch Key (Bandit)
Sarcophagi Room
Cut down another bandit here, then open the Adept-level locked door to access a treasure nook with a plethora of valuables. Stand to one side of the chest when opening it to avoid being impaled. The Unusual Gem you find here pertains to Thieves Guild Radiant Quest: No Stone Unturned.
- Danger! Trapped Chest
- Unusual Gem: Stone of Barenziah [22/24]
- Potions
- Loose gear
Sleeping Area and Bar
Read one of the many notes that are pinned to the wall on your way to this area—it confirms the treachery hinted at before, as does another note on a table here. Silently dispatch a sleeping bandit, then kill the group of ruffians to the east, near the bar. Find worthy gear and a few potions behind the counter.
- Potions
- Loose gear
Rigel’s Quarters
Rigel Strong-Arm, leader of the bandits, sleeps behind this room’s wooden wall—dodge the hanging rattles or you’ll wake her. Loot the chest near Rigel’s bed and see if you can pickpocket a few useful keys off of her without being caught. Try sneaking away if she wakes up. Open the far Master-locked door with the Pinewatch Treasure Room Key.
- Danger! Bone Alarm Trap
- Crafting: Workbench
- Pinewatch Key (Rigel Strong-Arm)
- Pinewatch Treasure Room Key (Rigel Strong-Arm)
- Chest (Locked: Apprentice)
- Potions
- Loose gear
 Treasure Room
Due to the attempts by her crew to steal her plunder, Rigel has placed a large amount of traps blocking the path to her treasure room. Watch out for a pressure plate on either end of the narrow bridge, as they will trigger a wide volley of darts traps. A set of blade traps cover the hall just after this. Find the rhythm of their swings, then sprint through, but stop just short of the next hall—there is a pressure plate there that will trigger a battering ram to slam into the side of your head if you are not careful! Crouch and stand back while opening the room’s door to avoid being struck by a mace that swings through. Beware of another pressure plate near the table that holds Endon’s Silver Mold, among other valuables. Raid the large nearby chest before exiting through the door to return to Pinewatch’s entry chamber.
- Danger! Battering Ram Trap (pressure plates), Swinging Blade Trap (pressure plate), Spear Trap (pressure plate), Flail Trap (trapped door), Dart Trap (pressure plate)
- Endon’s Silver Mold
- Chest
- Potion
- Loose gear
Door to Pinewatch
 Door to Pinewatch Bandit’s Sanctuary
[8.29] Angi’s Camp
Related Quests
- Side Quest: The Great Skyrim Treasure Hunt*
- Dungeon Quest: Composure, Speed, and Precision*
- Angi
Recommended Level: 12
Crafting
- Tanning Rack
- Workbench
Collectibles
- Skill Book [Archery]: The Gold Ribbon of Merit [C2/10]
- Treasure Map V [9/11]
- Unique Weapon: Angi’s Bow [58/80]
- Chest
- Loose gear
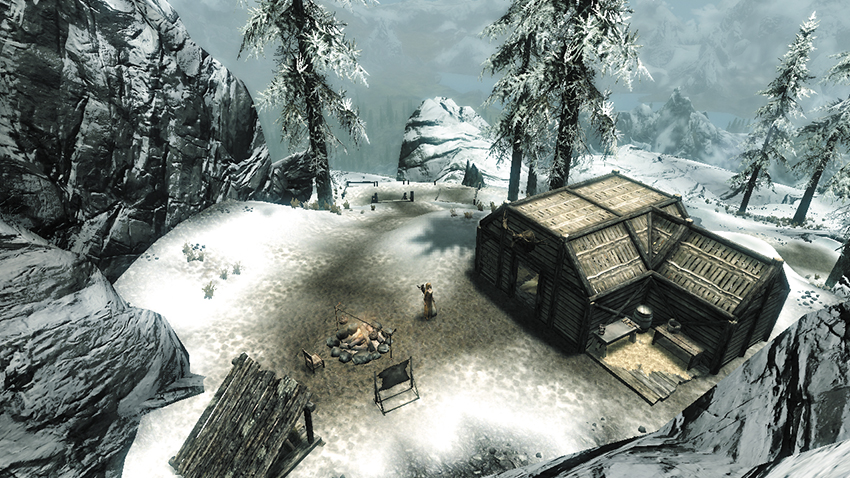
In Falkreath’s frigid southern mountains, a female hunter named Angi struggles to make a life for herself at a remote cabin. Loot a chest and collect the Skill Book inside the cabin, then find a Treasure Map stashed in the end table. A few crafting stations can be found outside.
Angi is friendly, as long as you don’t threaten her. She’ll even give you a bow and offer to teach you how to use it—follow Angi to a nearby practice range, ask her for some practice arrows, then shoot the targets exactly as she instructs. Your Archery skill will increase as you impress Angi with your marksmanship. Complete all of Angi’s challenges to receive a unique bow.
[8.30] The Guardian Stones
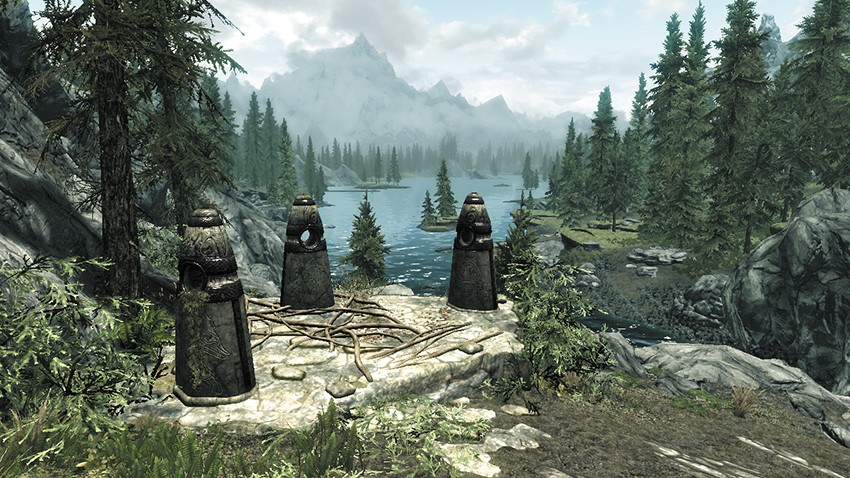
Recommended Level: 6
Dungeon: Special
Special Objects
- Standing Stone: The Mage Stone [10/13]
- Standing Stone: The Thief Stone [11/13]
- Standing Stone: The Warrior Stone [12/13]
On a rocky bluff overlooking the spot where Lake Ilinalta flows into the White River, a trio of rune-covered stones keep watch. You may have noticed this site while making your way to Riverwood [6.27] after fleeing from Helgen [8.32] at the start of your adventure. Inspect each Standing Stone to view and accept one of three sign blessings, each of which will allow you to improve a particular set of skills more quickly. Note that you can have only one sign blessing at a time, so activating any of these Stones will replace your current sign blessing (if any).
[8.31] Embershard Mine
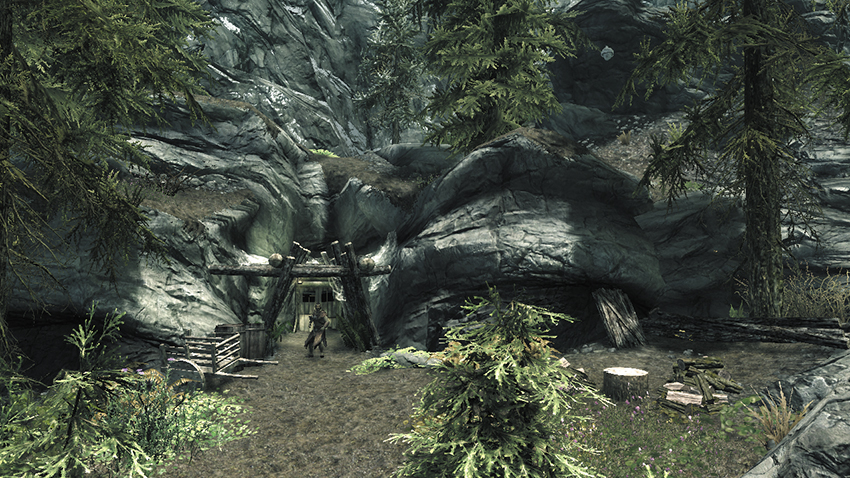
Recommended Level: 6
Dungeon: Bandit Camp
- Bandits
Crafting
- Blacksmith Forge
- Grindstone
- Workbench
Dangers
- Rockfall (trip wire)
Collectibles
- Skill Book [Smithing]: Light Armor Forging [D2/10]
- Chest(s)
- Loose gear
These mines, which lie just southwest of Riverwood [6.27], have been overrun by ruthless bandits. Slay the exterior guard before heading inside.
Drawbridge Cavern
Carefully stand back and trigger the trip wire in the entry tunnel, then wait for a guard to fall asleep in the cavern that follows before slaying him and his comrade. Run past a raised drawbridge and take a side passage to locate a lever that lowers the bridge. If you’ve taken out the bandits in this cavern, be prepared for more as you lower the bridge. Alternatively, if you somehow lower the drawbridge without dispatching the bandits, then they will have no backup.
- Danger! Rockfall (trip wire)
Prison Cell Passage
Cross the drawbridge to reach a passage with several holding cells. Slay the inattentive guard and collect a key from his corpse. Use the key to open the nearby gate and loot a large chest. Proceed to the next chamber afterward.
- Embershard Mine Key (Bandit)
- Chest
- Loose gear
Crafting Cavern
Dispatch several stalwart bandits in the next cavern, entering via the left wooden walkway to maintain an elevated vantage. Collect the Skill Book that lies on the table near the crafting stations. Search the small side cavern to the south to locate a chest, then take a winding passage to discover a second chest on a ledge near the main cavern’s waterfall. When you’re ready to move along, cross the rope bridge and exit the mine via its rear entrance.
- Crafting: Blacksmith Forge, Grindstone, Workbench
- Skill Book [Smithing]: Light Armor Forging [D2/10]
- Chest
- Chest (Locked: Novice)
- Loose gear
[8.32] Helgen
Related Quests
- Main Quest: Unbound
- Main Quest: Before the Storm
- Civil War Quest: Joining the Legion
- Civil War Quest: Joining the Stormcloaks
Habitation: Town
- Animal
- Gunjar
- Hadvar
- Imperial Captain
- Imperial Soldier
- Jarl Ulfric Stormcloak
- Priestess of Arkay
- Ralof
- Stormcloak Soldier
- General Tullius
- Torturer
Dangers
- Oil Pool Trap
Collectibles
- Chests
- Potions
- Loose gear
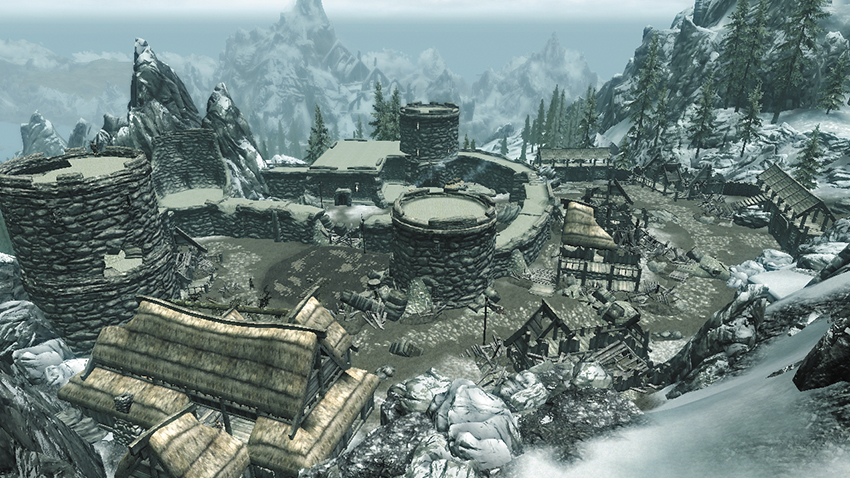
The village of Helgen is the very first location that you visit in Skyrim—you’re brought here to be executed at the adventure’s onset. Things don’t go as planned, however, and you’re soon making a frantic run through Helgen Keep. The soldier you choose to follow through the keep determines the enemies you face within.
After your escape from Helgen, the village remains in ruins for the rest of the game. Bandits will eventually move in; you can return here and wipe them out if you choose.
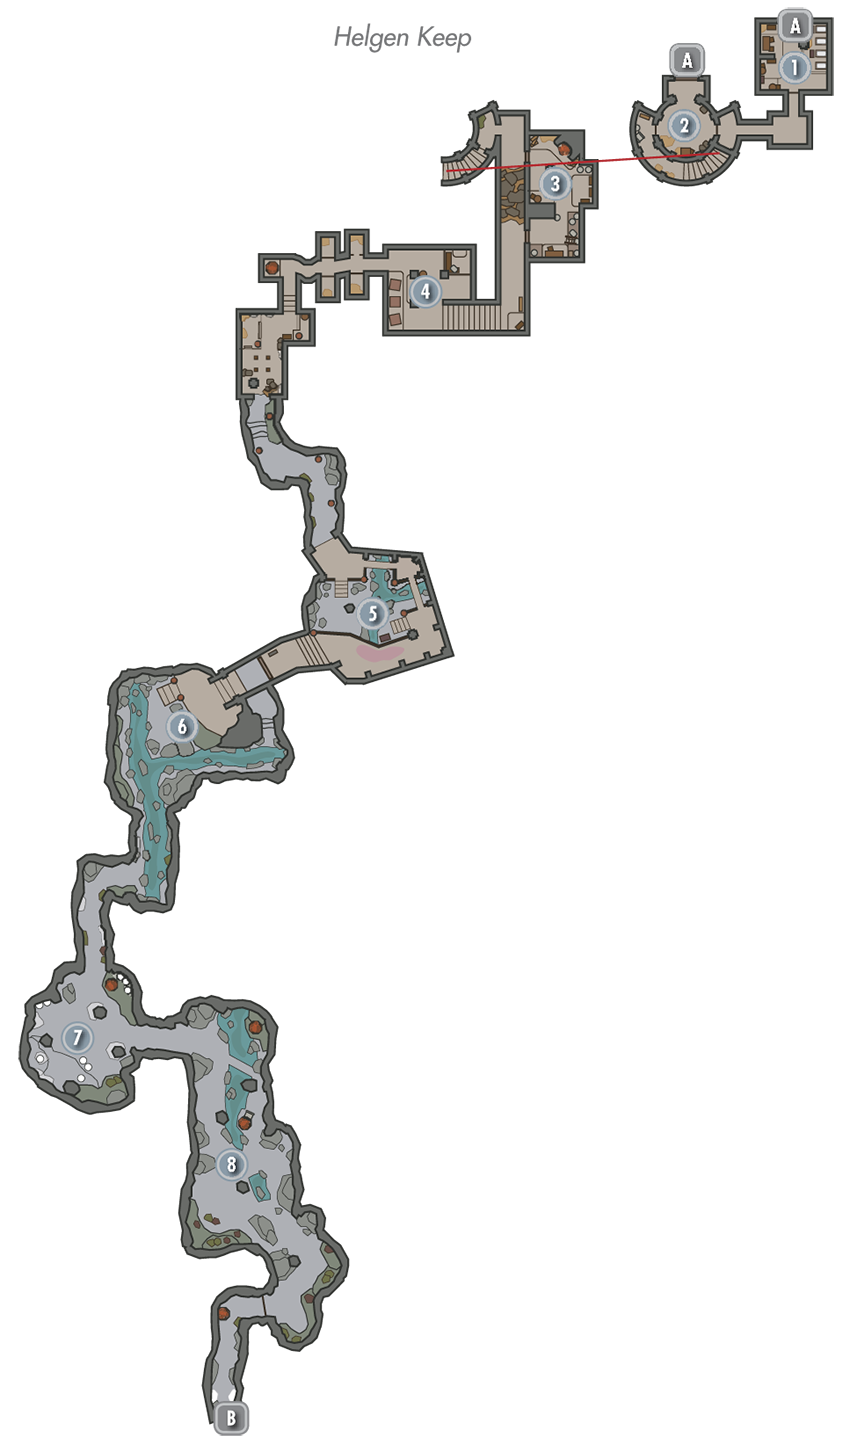
Exit to Skyrim
Northwest Entry
This is the room you enter if you choose to enter the keep with Hadvar. Allow him to free you from your bonds, then loot two chests in this first room to obtain vital gear. Grab the weapons that are scattered about as well, and be sure to equip everything you’ve just claimed. A special key rests within the Warden’s Chest as well.
- Warden’s Chest
- Helgen Keep Key (Warden’s Chest)
- Chest
- Loose gear
North Entry
This is where you enter the keep if you choose to follow Ralof. Let him untie your bonds, then loot the body of a fallen Stormcloak Soldier named Gunjar to obtain vital gear. Take cover and slay the Imperial Captain and Soldier who storm the room after a few moments; then loot their bodies for improved arms. Stop by [1] to raid the place before following Ralof to [3].
Kitchen
A sudden cave-in, courtesy of the attacking dragon, forces you to take a detour through the kitchen. Dispatch a few more enemy soldiers here, then search the barrel that your comrade indicates to discover valuable potions. Additional potions can be found around the room.
- Potions aplenty
Torture Room
Secure this frightening chamber, then search around to obtain more gear. If the Torturer encountered here is slain, claim his unique hood. Find some lockpicks on the counter and more in a knapsack on the central table and use them to open the cages. This improves your Lockpicking skill and lets you claim the goods within, including a spell tome that grants you a new spell once examined. Take the interesting book near the knapsack as well for future reference.
- Book: The Book of the Dragonborn
- Knapsack
- Potion
- Loose gear
Waterfall Chamber
Open some jail cells to discover a coin purse on your way to this wide chamber, where more enemy soldiers await. See if you can ignite the oily floor beneath the distant archers’ feet to burn them up. Relieve them of their bows and arrows after the fight.
- Danger! Oil Pool Trap
Drawbridge Cavern
The raging dragon attacks again as you enter this cavern, sealing off the drawbridge passage that you took to get here. Your ally rushes off to the south, but follow the east stream first to locate a potion and coin purse near a skeleton.
- Potion
Spider Nest
A pack of ravenous Frostbite Spiders descend on you in this webby cavern. Slaughter them without mercy.
Bear Den
Sneak past the wild bear here by crouching and moving very slowly along the east wall. Or take aim and try and slay the dangerous animal with your newfound bow before it can close in.
Exit to Skyrim
[8.33] South Skybound Watch
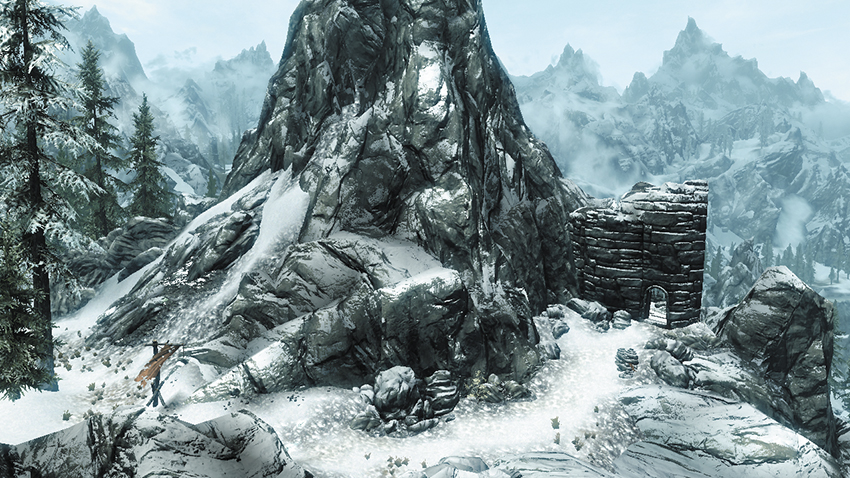
Recommended Level: 6
Underground Connection: North Skybound Watch [8.34]
- Chest (Locked: Novice)
This abandoned tower marks the southern entrance to Skybound Watch Pass, which runs through Falkreath’s frosty eastern mountains. Navigate the pass to emerge at North Skybound Watch [8.34]. See that location’s section for complete details on what awaits you within the pass.
Climb the tower to claim a chest and take in the amazing view of Falkreath to the west. When leaving, beware the Wispmother that haunts the woods just outside—you may find it easier to Fast-Travel away or return through the pass than to venture out along the cliffside.
[8.34] North Skybound Watch
Related Quests
- College of Winterhold Radiant Quest: Destruction Ritual Spell
Dungeon: Bandit Camp
- Animal
- Bandit
Dangers
- Battering Ram Trap (pressure plate)
- Dart Trap (hinge trigger)
Underground Connection: South Skybound Watch [8.33]
Collectibles
- Skill Book [Block]: Battle of Red Mountain [B1/10]
- Chest(s)
- Potions
- Loose gear
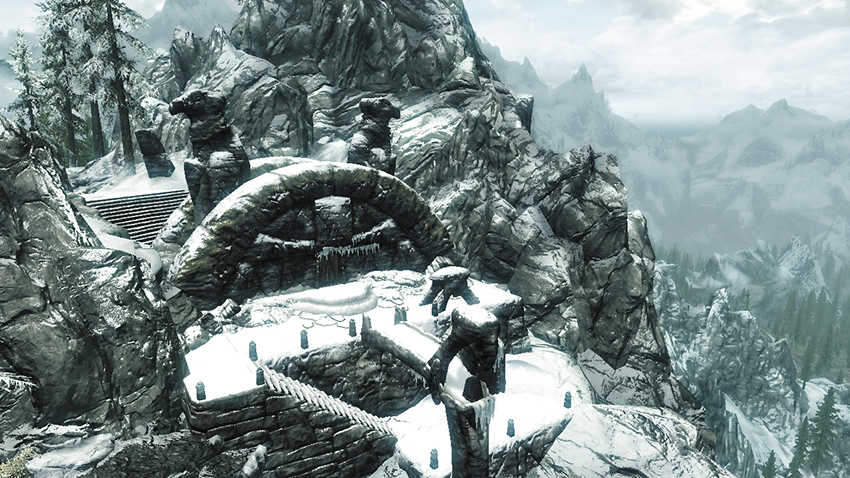
An underground passage runs through Falkreath’s frigid eastern mountains. This site, located north of Orphan Rock [8.35], marks the passage’s north entrance, which is surrounded by ruins.
Exterior
Dispatch the bandits within the ruins, then open the wooden door behind them to exit onto the northern balcony. Take a moment to admire the view; if the weather is just right, you can even see the ocean in the distance. The pedestal here is the second of three you need for the College of Winterhold Radiant Quest: Destruction Ritual Spell.
Loot a chest to the left and swipe a Skill Book off the nearby shelf before descending some steps to locate the door that serves as the pass’s northern entrance.
- Chest (Locked: Novice)
Skybound Watch Pass (Interior)
No matter which way you enter the pass, it’s a straight sprint to the other end. Slaughter several bandits and a Giant Frostbite Spider as you navigate this relatively short passage, and beware the trapped chest at the tunnel’s south end; disarm it or open it carefully to avoid the dart trap. Find another chest near the north campfire, along with a potion and Skill Book.
- Danger! Battering Ram Trap (pressure plate)
- Danger! Dart Trap (hinge trigger)
- Skill Book [Block]: Battle of Red Mountain [B1/10]
- Chest
- Potion
- Loose gear
[8.35] Orphan Rock
Related Quests
- Temple Quest: The Blessings of Nature
- Dungeon Activity
Dungeon: Hagraven Nest
- Hag
- Hagraven
Crafting
- Arcane Enchanter
Dangers
- Rune Trap (ground)
- Spikes (ground)
Quest Items
- Nettlebane (Hagraven)
Collectibles
- Unique Weapon: Nettlebane [59/80]
- Chest
- Chest (Locked: Adept)
- Loose gear
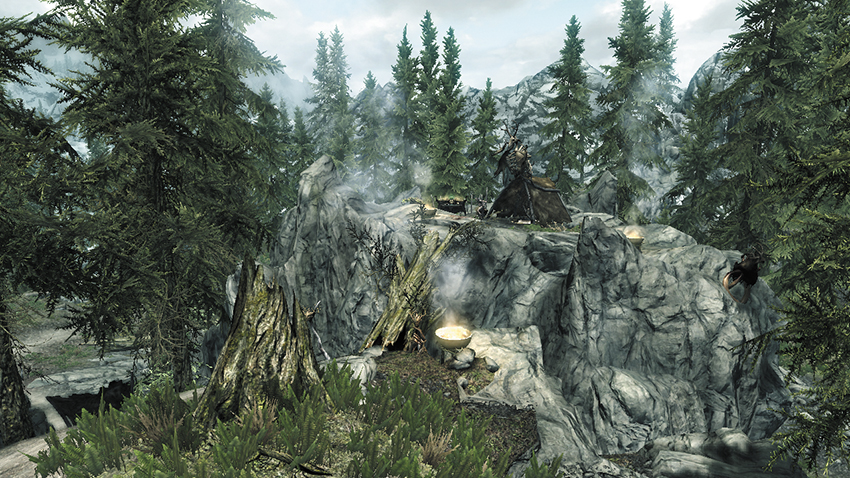
At the east edge of Falkreath, near the Throat of the World’s [6.38] western base, a massive boulder towers over a mossy fallen log. Unless you’re playing Temple Quest: Blessings of Nature, there’s little to do here aside from looting a skeleton that lies inside the log. During the “Blessings of Nature” quest, beware of rune traps and sharp spikes placed around the boulder as you slay a few hags and a dangerous Hagraven to obtain a quest-related item—a fallen log now lets you reach the top of the boulder, where a chest and Arcane Enchanter are found. Loot a locked chest in one of the hags’ surrounding tents as well.
[8.36] Falkreath Stormcloak Camp
Related Quests
- Civil War Quest: Liberation of Skyrim
- Civil War Quest: Rescue from Fort Neugrad
Habitation: Military: Stormcloak Camp
- Stormcloak Quartermaster (Blacksmith)
- Stormcloak Soldier
Services
- Trader (Blacksmith): Stormcloak Quartermaster [27/33]
- Weapons, Apparel, Misc
Crafting
- Alchemy Lab
- Anvil
- Grindstone
- Workbench
Special Objects
- Civil War: Map of Skyrim
- Chests (2)
- Potions
- Loose gear
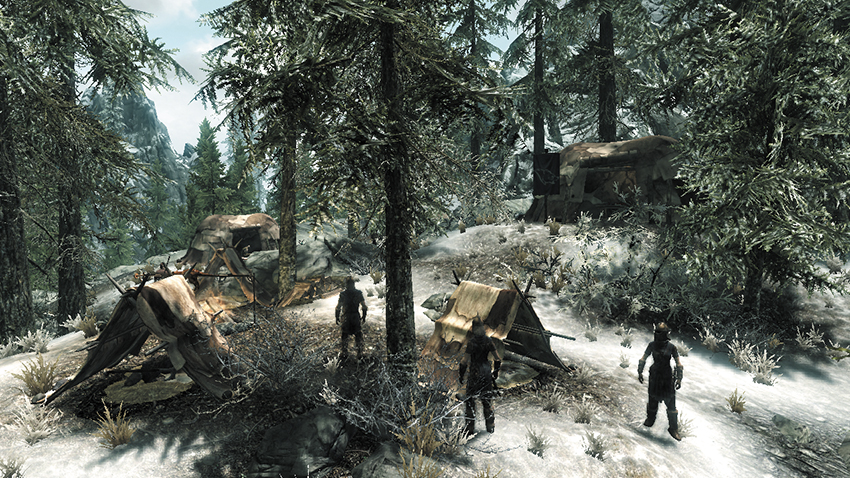
The Sons of Skyrim have set up camp in the freezing eastern mountains of Falkreath, though this site may not exist, depending on your progress through the Civil War quest line. Trade with the quartermaster here if you like, or use his array of crafting stations. Inspect the tabletop map in the largest tent to potentially gain new map data. Steal goods from around the camp if your thieving skills are up to the task.
[8.37] Haemar’s Shame
Related Quests
- Daedric Quest: A Daedra’s Best Friend
Recommended Level: 6
Dungeon: Vampire Lair
- Animal
- Vampire
Crafting
- Alchemy Lab
- Arcane Enchanter
Collectibles
- Skill Book [Destruction]: Response to Bero’s Speech [D2/10]
- Unique Item: Masque of Clavicus Vile [79/112]
- Chest(s)
- Loose gear
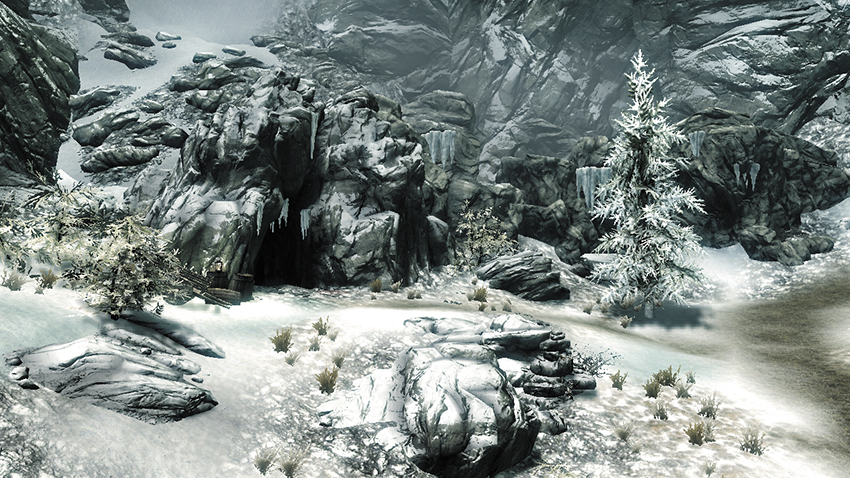
This frozen cave lies at the eastern reaches of Falkreath. Traveling through it leads to Haemar’s Shame—but you must contend with a number of vicious vampires in this forboding place. You visit this site during Daederic Quest: A Daedra’s Best Friend.
Haemar’s Cavern
Wipe out a vampire’s thrall in the first cavern, then scale a ramp to discover a chest atop the wooden lookout. Avoid a lethal trap by sidestepping a pressure plate in the passage that follows, then slay a vampire and descend some wooden stairs. Battle several vampires in the following area, where you find another chest and an Alchemy Lab. Take a narrow passage to reach a wide cavern, where more vampires prowl. Find a Skill Book on a table in a nook surrounded by shelves, then descend more wooden stairs and proceed to Haemar’s Shame.
- Crafting: Alchemy Lab
- Skill Book [Destruction]: Response to Bero’s Speech [D2/10]
- Chests (2)
- Loose gear
Haemar’s Shame
Squash a grotesque Frostbite Spider in the Shame’s entry passage, then advance to a blood-soaked room with a chest and Arcane Enchanter. Navigate the winding passage that follows to reach a wide chamber with several lively vampires, including their powerful master. Clear the room, then check behind the large statue to find a giant chest. Pull a nearby wall chain to open an exit passage that leads outside.
- Crafting: Arcane Enchanter
- Chests (2)
- Loose gear
[8.38] Bonechill Passage
Dungeon: Animal Den
- Animal
Underground Connection: Ancient’s Ascent [8.39]
Collectibles:
- Skill Book [Heavy Armor]: 2920, MidYear, v6
- Knapsack
- Potions
- Loose gear
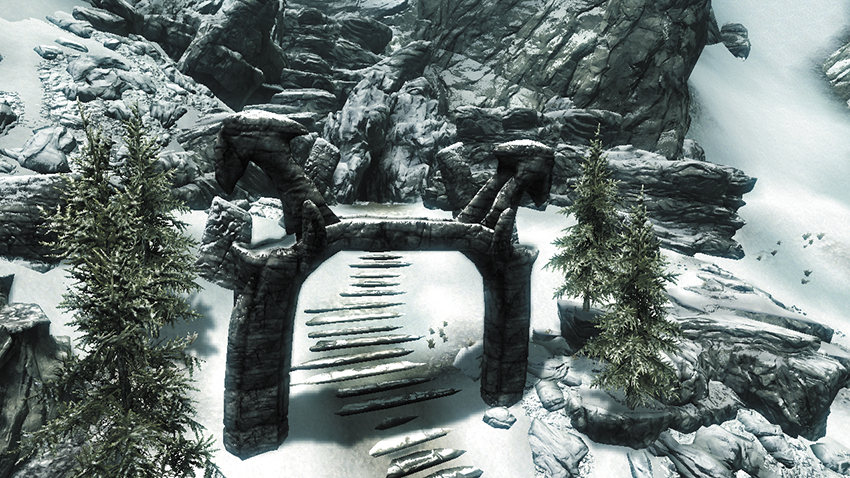
At the northern base of Falkreath’s southern mountains, wide stone steps lead up to the mouth of a frozen cave. Enter to explore a short, icy passage that leads deeper into the mountains. This passage is the only means of reaching Ancient’s Ascent [8.39]. Slay a few dangerous Ice Wraiths within Bonechill Passage, and collect the Skill Book that lies near a fallen bandit.
[8.39] Ancient’s Ascent
Dungeon: Dragon Lair
- Ice Wraith
- Dragon (after Main Quest: Dragon Rising)
Special Objects
- Word Wall: Animal Allegiance [2/3]
- Chest
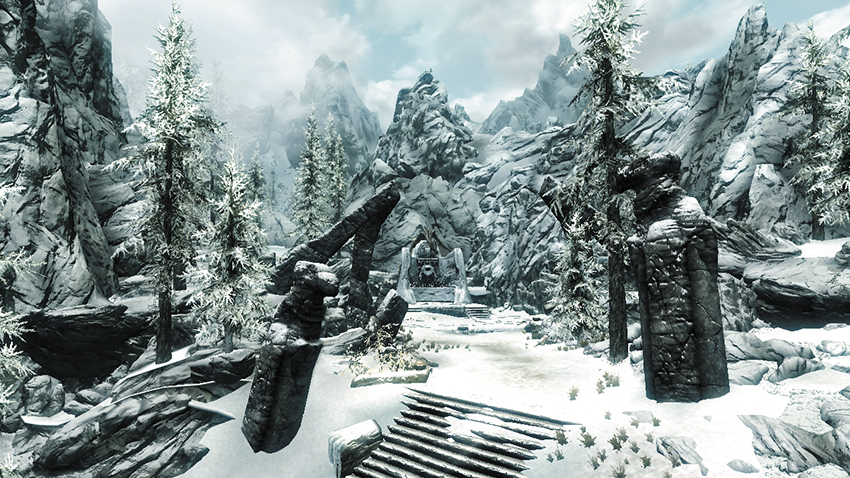
One must navigate through Bonechill Passage [8.38] to reach this remote site, which lies high among Falkreath’s southern peaks. Dispatch gossamer Ice Wraiths as you ascend the snow-covered steps here, which lead up to an ancient Word Wall. After you complete the “Dragon Rising” quest, a great dragon will make its home here. Slay the beast and obtain your new Word of Power.
[8.40] Bloodlet Throne
Recommended Level: 6
Dungeon: Vampire Lair
- Animal
- Vampire
Crafting
- Alchemy Lab
- Arcane Enchanter
Dangers
- Flamethrower Traps (pressure plate)
- Oil Lamp Traps
- Oil Pool Traps
Collectibles
- Skill Book [Illusion]: Incident at Necrom [C2/10]
- Chests
- Potions aplenty
- Loose gear
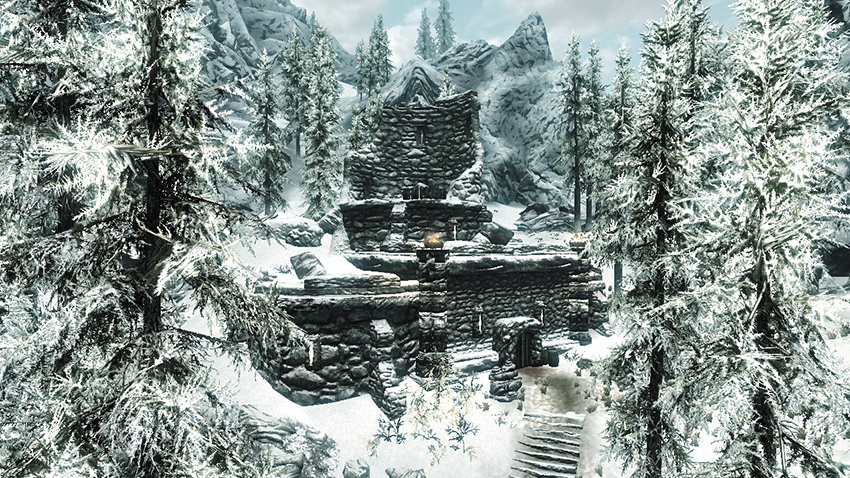
This ominous fortress stands at the edge of Skyrim, deep within Falkreath’s southern mountains.
Exterior
Before heading inside, circle around the structure and explore the broken tower on its roof to discover a chest.
- Chest
- Loose gear
Entry Chambers
Avoid a pressure plate in the small entry chamber and progress until you reach a large chamber with a vampire and thrall. Knock down the hanging lamps here to ignite the oil on the floor and sear these foes. Go downstairs afterward and slay another vampire in the following chamber, which features several potions and an Arcane Enchanter.
- Danger! Flamethrower Traps (pressure plate), Oil Lamp Traps, Oil Pool Traps
- Apothecary’s Satchel
- Potions
Rope Bridge Cavern
Proceed through a snowy passage to reach a sizable snowy cavern with a rope bridge. Dispatch the vampires and thralls here, then scale the north stairs and take a passage to reach the vampires’ sleeping quarters.
- Crafting: Arcane Enchanter
Sleeping Area
A large pack of vampires and thralls reside in their sleeping quarters, which are located north of the rope bridge cavern. Slaughter them all to secure a chest, several potions, and an Alchemy Lab. For a bit more sport, release a wolf from its cage here by picking the cage’s Adept-level lock. Open another Adept-level gate in this area to access a storage room with several potions and a Skill Book. When you’ve finished looting the area, proceed across the rope bridge and pull a wall chain to open the gate you encounter.
- Crafting: Alchemy Lab
- Skill Book [Illusion]: Incident at Necrom [C2/10]
- Chests (2)
- Potions aplenty
Wolf Pit
Cross the Rope Bridge Cavern’s hanging bridge and open a gate to enter a wide cavern filled with corpses. A nefarious Master Vampire sits on high and taunts you before releasing a few wolves. Slay the beasts and then pull the chain on the west wall to escape your predicament. Defeat the Master Vampire and then loot a large chest as you make your way south, unbarring a door and heading through to return to find yourself back at the entry chambers.
[8.41] Greywater Grotto
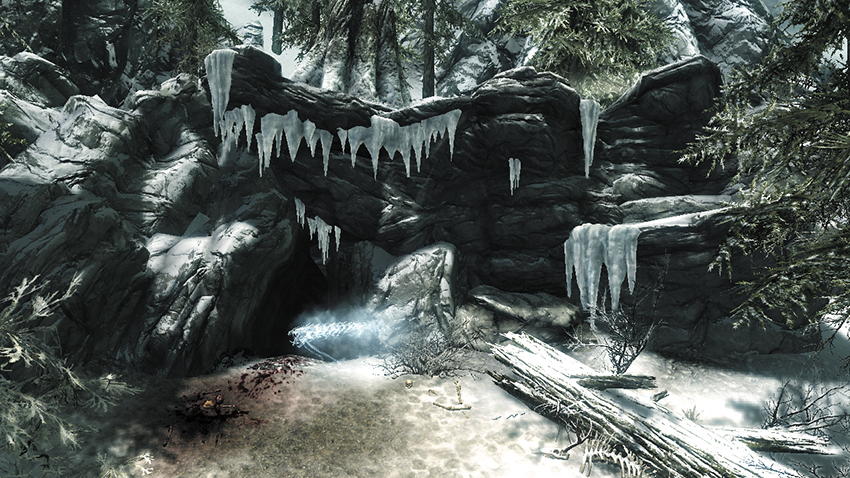
Dungeon: Animal Den
- Animal
Collectibles
- Chest
- Loose gear
Bones and bloodstains litter the ground at the mouth of this frozen cave, which lies just south of Helgen [8.32]. Beware the dangerous Snowy Saber Cat that prowls outside—you’ll face another inside the cave, along with several wolves and Ice Wolves. Loot the corpses of slain bandits and raid the chest at the cave’s far end.
[8.42] Fort Neugrad
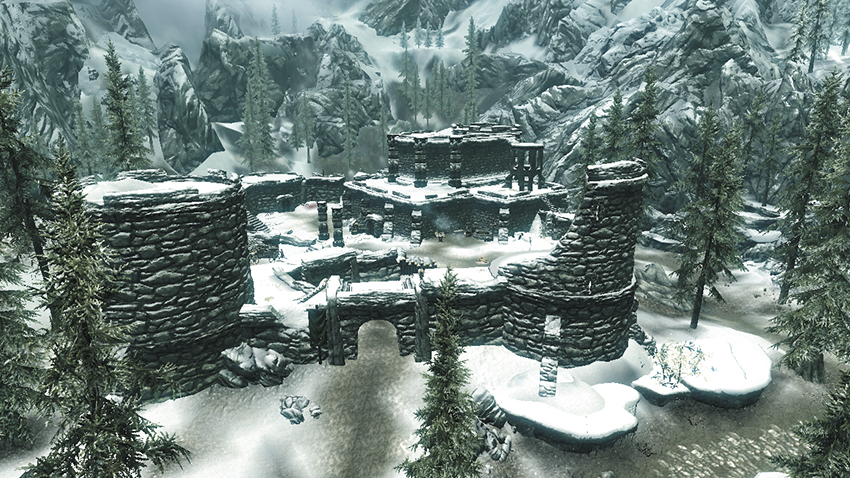
Related Quests
- Civil War Quest: Liberation of Skyrim
- Civil War Quest: Rescue from Fort Neugrad
- Side Quest: The Great Skyrim Treasure Hunt*
Recommended Level: 6
Habitation: Military Fort
- Bandit (pre-Civil War)
- Soldier (Imperial/Stormcloak, depending on the state of the Civil War)
Crafting
- Anvil
- Forge
- Workbench
Dangers
- Bear Traps
Collectibles
- Skill Book [Light Armor]: Jornibret’s Last Dance [B1/10]
- Treasure Map (Fort Neugrad Treasure Map): [10/11]
- Chest(s)
- Potions
- Loose gear
This sizable stronghold stands among Falkreath’s frigid southern mountains, close to the main road. This fort is a point of contention for the Imperials and Stormcloaks during the Civil War and is filled with ruthless bandits when the Civil War is not active. Attack the fort from the front like a warrior, or sneak around to discover a small gap in the north stockade wall to slip inside. You may also want to take a dip in the southeast lake, where you can find an underwater cave that leads into the prison.
Exterior
Loot the locked chest near the north wooden wall and use some crafting stations before entering the keep’s interior or the prison. There’s also a treasure chest on the roof of the main tower, though you must pass through the keep to reach it. This chest contains a Treasure Map.
- Crafting: Anvil, Forge, Workbench
- Treasure Map (Fort Neugrad Treasure Map): [10/11]
- Chest (Locked: Novice)
- Chest (Locked: Apprentice)
- Loose gear
Fort Neugrad Keep
There’s only one way inside the Keep, and that’s through the main door. Cut down the guards in the entry chamber, then enter either the east or west door and make your way upstairs. Secure the entry chamber’s balcony, then go through the southeast door to face the bandits’ leader, who carries a useful key and informative journal. Loot the giant chest in the chief’s room and claim the nearby Skill Book, then return to the entry chamber and use his key to unlock the door to the library. Downstairs, deal with a powerful Bandit Mage, then claim a second giant chest. Finish exploring the fort to claim more loot, then take the ladder in the second-floor armory to reach a locked chest on the roof.
- Skill Book [Light Armor]: Jornibret’s Last Dance [B1/10]
- Fort Neugrad Library Key (Bandit Chief)
- Chests (2)
- Potions
- Loose gear
Fort Neugrad Prison
If you’re sneaking in through the prison, beware the bear trap at the end of the entry tunnel. More bandits lurk in the prison—loot a chest in an upstairs side room, along with a locked chest in the basement that’s tucked behind a shelf with potions and a satchel.
- Danger! Bear Traps
- Chest
- Chest (Locked: Apprentice)
- Satchel
- Potions
- Loose gear
[8.43] Southfringe Sanctum
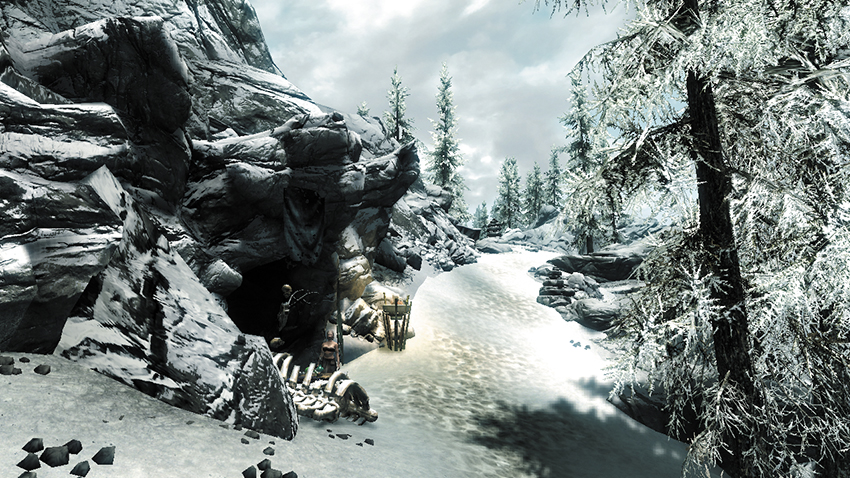
Related Quests
- Dungeon Quest: The Savior of Selveni Nethri*
Recommended Level: 6
Dungeon: Special
- Animal
- Bashnag
- Pumpkin
- Selveni Nethri
- Spellsword
Crafting
- Alchemy Lab
- Arcane Enchanter
Dangers
- Rune Trap (gate)
Collectibles
- Chests
- Potions
- Loose gear
This aptly named cave lies deep in Falkreath’s southern mountains, on the fringe of Skyrim. A poor soul named Selveni Nethri has gotten herself into quite a sticky situation here...
Exterior
Slay a Spellsword to secure the cave’s entrance. If you like, use the nearby Alchemy Lab to mix up some potions before entering the cave.
- Crafting: Alchemy Lab
- Apothecary’s Satchel
Southfringe Sanctum (Interior)
Loot a chest that’s hidden among growth as you navigate the cave’s first passage. Beware the rune trap on the wooden gate that leads to the main, sunlit cavern. You now have a choice: either head uphill and slay more Spellswords or take a low, web-filled passage that’s teeming with Frostbite Spiders (see the sections that follow). Both options lead toward the same destination: the cave’s far end, where a nefarious mage named Bashnag awaits.
- Danger! Rune Trap (gate)
- Chest
Uphill Ascent
Dispatch several additional Spellswords as you scale the entry chamber’s snowy slopes. If you like, release the caged fox named Pumpkin that you encounter after a short distance. Continue uphill, unlocking a wooden gate on your way to the cave’s far end, where Bashnag awaits.
- Crafting: Arcane Enchanter
Spider Tunnel
As you might expect, the web-filled passage that stems from the sunlit entry cavern is filled with Frostbite Spiders. Loot a chest that’s nestled near the wall as you go. After slaying a Giant Frostbite Spider, search the nearby nook to locate a poor soul named Selveni Nethri, who’s stuck in a web. Carefully attack the web to free Selveni without harming him, then speak with Selveni to gain a new Objective that involves clearing the cave so that he can safely escape on his own. Tell Selveni to wait for now, and continue along to battle Bashnag.
- Chest
Bashnag’s Chamber
Slay a cruel mage named Bashnag at the cave’s far end, then raid the nearby chest and ensure that the entire cave is clear of hostiles before returning to Selveni and telling him that it’s safe to leave. Follow Selveni out of the cave to ensure her survival and complete the quest.
- Chest