Elder Scrolls V: Skyrim Guide Essentials Training
Crafting
When not delving into crumbling ruins in search of treasure, there are several other skills any would-be adventurer should explore. This section reveals just how rewarding the skills of alchemy, enchanting, smithing, and the lesser crafting activities can be.
The Dragonborn expansion adds the ability to create a variety of spiders, which you can “cast” (i.e., throw them) and are treated a little like scrolls in your inventory. Like the Atronach Forge in the College of Winterhold.
Alchemy
Alchemic Experimentation: An Overview
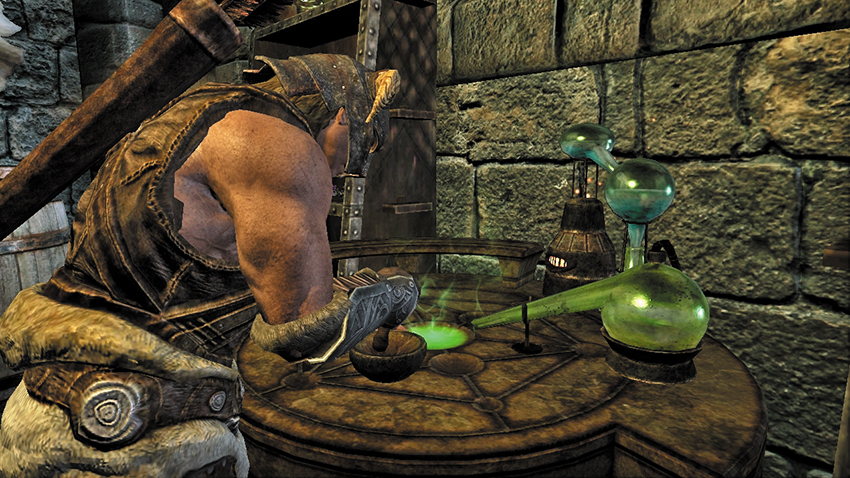
With an Alchemy Lab, combinations of ingredients become great elixirs or potent poisons.
Alchemy is the craft of combining ingredients to create beneficial potions or debilitating poisons. The key to mastering this art is experimentation: When you smith or enchant an item, you already know what the end result of what the crafting process is going to be; the recipes or combinations of materials are clearly laid out in advance. Not so with alchemy; you often have no idea what you’re making, and discovering a powerful new potion or effect is a thrill unto itself.
In short: The process of alchemy involves foraging for ingredients, learning their effects, and then experimenting by combining them with other ingredients to make potions and poisons.
Foraging for Ingredients
The Foraging Process
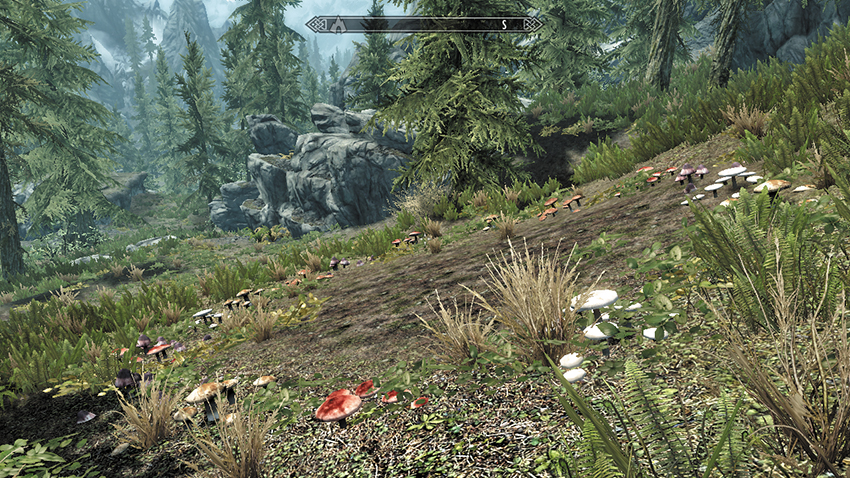
Living off the land is more than just farming crops: Scour Skyrim for ingredients.
The realm of Skyrim is filled with dozens of unique ingredients, which can be categorized into three major groups: those that are grown (such as flowers, mushrooms, and crops), those that are alive (such as dragonflies or butterflies), and those taken from an enemy’s corpse (such as Falmer Ears, Hagraven Feathers, or Troll Fat). All of these are stored in the Ingredients menu in your inventory.
Learning Ingredient Effects
Once you’ve collected one or more ingredients, you can study it in your inventory. Notice that under its weight and value, there are four effects—the ingredient’s alchemic properties—which are all initially “unknown.” Your ongoing task is to learn what all four of these effects are. Until you do, your initial attempts at crafting potions can be a little hit or miss.
Ingredient digestion: The easiest way to learn the properties of an ingredient is to eat it! This always reveals the first effect, and depending on your Alchemy perks, it may reveal more. The advantage of eating ingredients is that you always receive the first property; it always works. The downside is that for rare items, you’ll have to consume the item for no directly beneficial effect.
Experimental potions: Or you can learn an ingredient’s properties by attempting to craft a potion with the ingredient. Constant use of a particular ingredient will gradually allow you to learn its effects and discover good combinations with other ingredients.
Crib sheets: Or you can consult this guide, which helpfully lists the four alchemic properties for every ingredient in Skyrim.
Crafting Potions
In order to craft potions, you must use an Alchemy Lab. If you plan to focus on alchemy, you’ll want to find an Alchemy Lab that you can access quickly and return to it frequently. Near the start of your adventure, one good location is the Alchemy Lab inside the Sleeping Giant Inn in Riverwood. Later on, you may want to purchase a house for convenient access to your own Alchemy Lab and plenty of storage space for ingredients.
Selecting ingredients: Step up to the Alchemy Lab, pick two distinct ingredients (you cannot combine two identical ingredients), and mix them together. You can optionally add a third ingredient if you wish (and want to further experiment).
Experimental potions: If you don’t know what effects the ingredients share, the Alchemy Lab will caution you that the result is a “Potion of Unknown Effect,” but you can still try it.
When you combine ingredients, the Alchemy Lab checks the complete list of the two (or three) ingredients’ effects. If none of those effects match, the crafting fails. If there is one or more match, it succeeds.
Failure: If there were no matches, you receive nothing and use up the ingredients, but still receive a small Alchemy skill improvement. The Alchemy Lab remembers that the combination failed and grays it out, indicating you don’t need to try it again.
Success: If there was a match, the resulting potion or poison has all of the effects that matched, in a much more potent form than simply eating one of the ingredients would have given you. Most of the time, you receive an item with only one effect, but you may end up with two, three, or even four matches.
Potion or poison? The resulting mixture is classified as a potion if its primary effect is beneficial; it’s a poison if its primary effect is harmful. You can have potions with lesser negative effects and poisons with lesser positive effects, although these aren’t usually worth making more than once during experimentation. The Purity perk allows you to remove these side effects from your mixtures, creating wholly positive potions and negative poisons.
Effect reference: The Alchemy Lab menu handles all the bookkeeping for you—it knows which ingredients you have, which effects you’ve learned, and which combinations you’ve tried before without success. Based on this information, it even recommends ingredients that you know you can combine to produce a specific result, like “Restore Health.” While these recommendations are great for quickly creating just the potion you need, don’t forget to experiment to continue learning new effects.
Advanced Alchemy
Alchemy Skill and Potion Creation
Your Alchemy skill improves the effectiveness of the potions and poisons you craft:
- If an effect has only a magnitude (e.g., Restore 50 Health), your skill increases it.
- If an effect has only a duration (e.g., Invisibility for 30 seconds), your skill extends it.
- If an effect has both a magnitude and a duration, only one of the two values will increase, never both. For potions and poisons that affect regeneration rate, the duration increases; for everything else, the magnitude increases.
In addition to your raw skill, the perks in the Alchemy tree dramatically increase the effectiveness of potions you craft. Because of the number of factors that can affect the potency of these potions, exact statistics are not listed in this guide. Consult the exact values in the Alchemy Lab to see what you can create given your current skill and perks. Your Alchemy skill increases when:
- You learn a new effect for an ingredient.
- You successfully craft a potion.
- You attempt to craft a potion but fail (a very small increase).
Three-Ingredient Potions
Potions with three ingredients are more likely to succeed (with 12 effects between them, there’s a greater chance of at least one match). However, they are also more likely to produce results with multiple effects...which may or may not be a good thing. You might end up with an excellent potion that has three or even four positive effects—or one that has a bizarre mix of positive and negative properties. These can still be helpful when trying to learn ingredient effects as quickly as possible, but you may not be able to get much use out of the resulting potion.
Alchemic Recipes and Combinations
Novice Recipes
If you’re just starting out on your adventure, here are a few good recipes to try:
Health Potions
| Potion Effect | Ingredient #1 | Ingredient #2† |
|---|---|---|
| Restore Health | Blue Mountain Flower | Butterfly Wing |
| Fortify Health | Giant’s Toe | Hanging Moss |
| Regenerate Health | Juniper Berries | Nordic Barnacle |
Magicka Potions
| Potion Effect | Ingredient #1 | Ingredient #2† |
|---|---|---|
| Restore Magicka | Creep Cluster | Red Mountain Flower |
| Fortify Magicka | Red Mountain Flower | Tundra Cotton |
| Regenerate Magicka | Garlic | Salt Pile |
Stamina Potions
| Potion Effect | Ingredient #1 | Ingredient #2† |
|---|---|---|
| Damage Health (Weak) | Falmer Ear | Imp Stool |
| Damage Health (Strong) | Falmer Ear | River Betty |
| Damage Magicka | Butterfly Wing | Hanging Moss |
| Paralysis | Canis Root | Imp Stool |
Resistance Potions
| Potion Effect | Ingredient #1 | Ingredient #2† |
|---|---|---|
| Resist Fire | Fly Amanita | Snowberries |
| Resist Frost | Snowberries | Thistle Branch |
| Resist Shock | Glowdust | Snowberries |
Utility Potions
| Potion Effect | Ingredient #1 | Ingredient #2† |
|---|---|---|
| Restore Stamina | Pine Thrush Egg | Purple Mountain Flower |
| Fortify Stamina | Garlic | Lavender |
| Regenerate Stamina | Bee | Mora Tapinella |
Poisons
| Potion Effect | Ingredient #1 | Ingredient #2† |
|---|---|---|
| Invisibility | Chaurus Eggs | Nirnroot |
| Waterbreathing | Chicken’s Egg | Nordic Barnacle |
Advanced Recipes
At higher levels, once you have a wider range of ingredients at your disposal, you can begin to construct potions with more and more complex effects. Here are just a few examples:
Two-Effect Potions
| Potion Effect | Ingredient #1 | Ingredient #2 | Ingredient #3† |
|---|---|---|---|
| Regen Magicka, Resist Frost, Resist Fire, Restore Magicka | Fire Salts | Moon Sugar | Snowberries |
| Invisibility, Regen Health, Fortify Light Armor, Cure Disease | Hawk Feathers | Luna Moth Wing | Vampire Dust |
Three-Effect Potions
| Potion Effect | Ingredient #1 | Ingredient #2 | Ingredient #3† |
|---|---|---|---|
| Fortify Heavy Armor, Fortify Block, Resist Frost | Briar Heart | Slaughterfish Scales | Thistle Branch |
| Fortify One-handed, Fortify Sneak, Fortify Light Armor | Beehive Husk | Hawk Feathers | Rock Warbler Egg |
| Fortify Magicka, Fortify Destruction, Restore Magicka | Briar Heart | Ectoplasm | Glowdust |
| Regen Magicka, Fortify Magicka, Restore Magicka | Briar Heart | Jazbay Grapes | Moon Sugar |
Four-Effect Potions
| Potion Effect | Ingredient #1 | Ingredient #2 | Ingredient #3† |
|---|---|---|---|
| Restore Health and Fortify Health | Blue Mountain Flower | Wheat | None |
| Invisibility and Regen Health | Luna Moth Wing | Vampire Dust | None |
| Paralysis and Damage Health | Canis Root | Imp Stool | River Betty |
Enchanting
Arcane Enchanting: An Overview
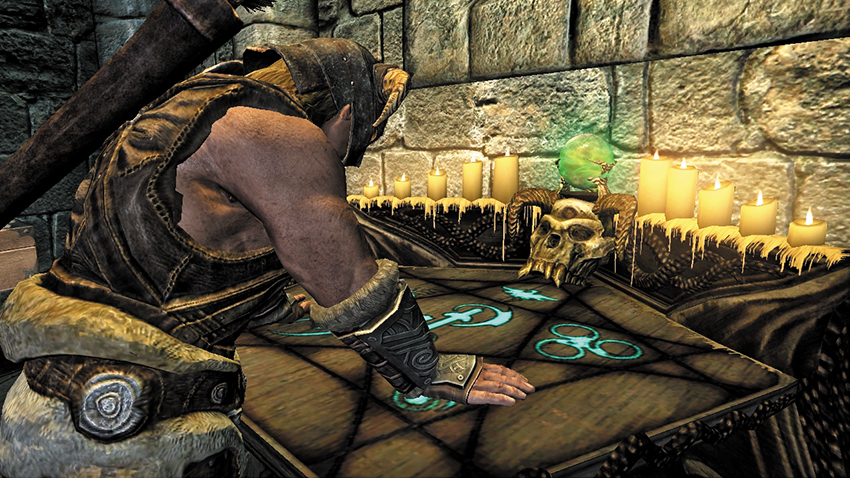
With an Arcane Enchanter, items are both ruined and reborn as new and more powerful objects.
Enchanting requires you to make short-term sacrifices for long-term rewards. The important (and sometimes difficult) choices you make throughout this process determine what items you can create and how powerful they will be. In short, enchanting is the art of imbuing an item with magical enchantments powered by soul energy. However, this is done at the expense of other enchanted items. To enchant an item, you need:
- An enchantment. Before you can imbue an item with an enchantment, you must first learn that enchantment by disenchanting an item with the same base effect.
- A filled Soul Gem. While you can find filled Soul Gems in the world, you can also create them by using an empty Soul Gem and the Soul Trap spell (Conjuration) or a weapon enchanted with the Soul Trap enchantment.
- An unenchanted item. These are easy to find, though you may wish to smith your own in order to have a ready supply of items to enchant.
- The Arcane Enchanter: To enchant an item, you will also need to use an Arcane Enchanter. If you plan to focus on enchanting, locate an Arcane Enchanter you can return to quickly and easily and make a point of visiting it often. Two locations close to your starting point of Helgen are Anise’s Cabin, across the river from Riverwood, and Farengar’s study in Whiterun’s palace of Dragonsreach. Later on, you may want to purchase a house with an Arcane Enchanter.
Disenchanting Items
The only way to learn new enchantments is to disenchant an existing enchanted item. The disenchanting process destroys the original item and teaches you the item’s base enchantment—that is, its fundamental ability (e.g., Fortify Health), not its specific value (e.g., Fortify Health 50). Once you learn an enchantment, you can apply it to as many other items as you wish.
Early on, disenchanting may be a difficult, even painful decision. Enchanted items are both useful and extremely valuable, while the enchantment you learn does nothing in and of itself. You should definitely use enchanted items you find, rather than rush to disenchant them all. But when you outgrow an item or find something you aren’t interested in, consider disenchanting it instead of selling it—you’re making an investment in your future.
It is important to remember that you learn only the base (or general) enchantment and not the specific enchantment that appears on the item. Because of this, disenchanting a more valuable item doesn’t give you a better enchantment, as these examples show:
The conclusion? That to start with, at least, it is better to destroy a low-value item rather than a high-value one, especially if you want to use or sell the higher-value item.
However, there is one advantage to disenchanting more expensive items: disenchanting helps increase your Enchanting skill, and your skill will increase faster when you disenchant a high-value item than when you disenchant a lower-value one.
If you plan to focus on enchanting, disenchant enchanted items early and often, as soon as they’re no longer of use to you, to quickly build your repertoire of effects. If you’re coming to enchanting at a later level (20+), you may want to disenchant higher-valued items to help your skill advance more quickly. You can only learn each base enchantment once, so don’t expect to disenchant your way to 100.
Soul Gems
Acquiring Soul Gems
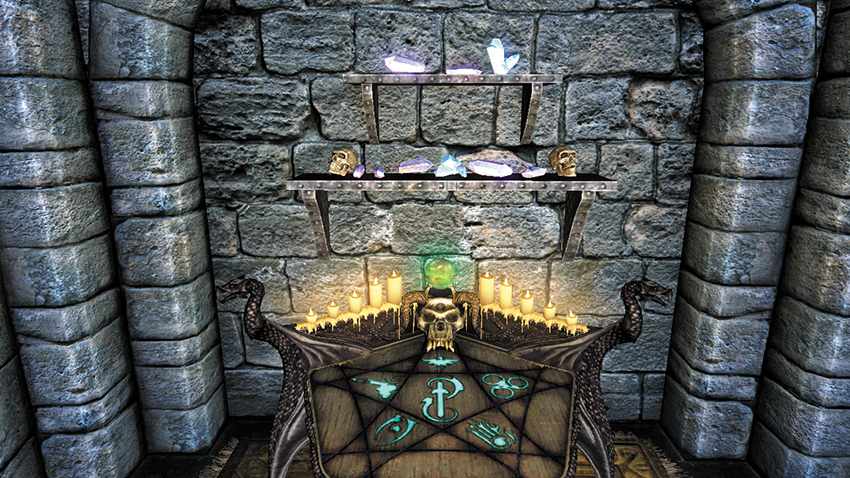
A collection of Soul Gems, just ready to be gathered up and filled.
You can acquire Soul Gems in a number of ways:
- Purchasing filled Soul Gems: You can buy filled Soul Gems from merchants. However, this is an extremely expensive proposition, as a filled gem is three to four times more expensive than a comparable empty one.
- Purchasing empty Soul Gems: If you need to buy a Soul Gem, you’re better off purchasing an empty one and filling it yourself. Although this takes a little more work, the savings can help you break even (or even turn a profit) on the item you enchant.
- Finding Soul Gems: An even better option is to find (or steal) the Soul Gems you need:
- Any Dwarven city, warlock den, vampire lair, or Nordic ruin will usually have Soul Gems lying around. Enemies in these areas (especially Dwarven Automatons) often carry Soul Gems as well.
- There are several areas in the College of Winterhold where you can simply take Soul Gems for free.
- Or you can steal them from other mages, such as the Court Wizards or the mages of the College.
Filling Soul Gems
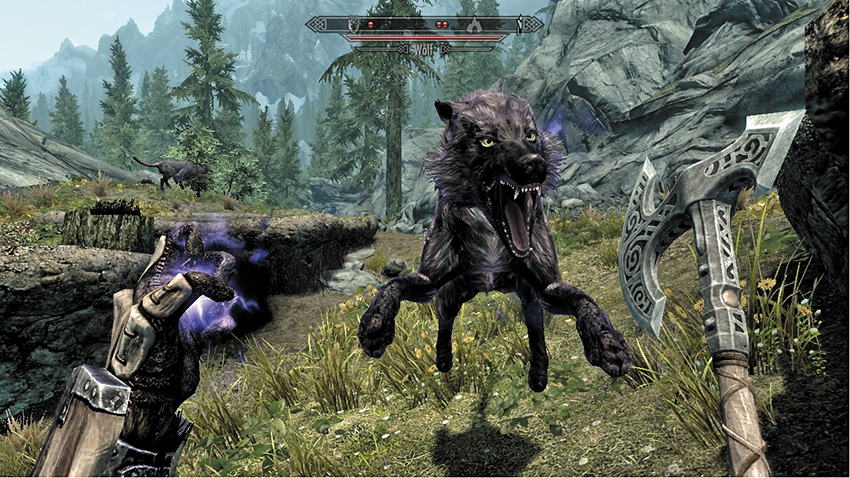
A successful Soul Trap captures a wild animal’s essence for your arcane antics.
In order to trap a creature’s soul in an empty Soul Gem, you will need either:
- The Soul Trap Spell: Cast this spell on a creature and kill it before the spell wears off to snare its soul. If you plan to focus on enchanting, purchase this spell from Farengar, the Court Wizard of Whiterun, as soon as possible.
- A Soul Trap Enchantment: If casting Soul Trap becomes a nuisance, look for a weapon with the Soul Trap enchantment imbued in it. Then all you need to do is slay the creature using the weapon to capture its soul. You can obviously enchant a weapon for this purpose, as well as find one.
Chaos Enchantments
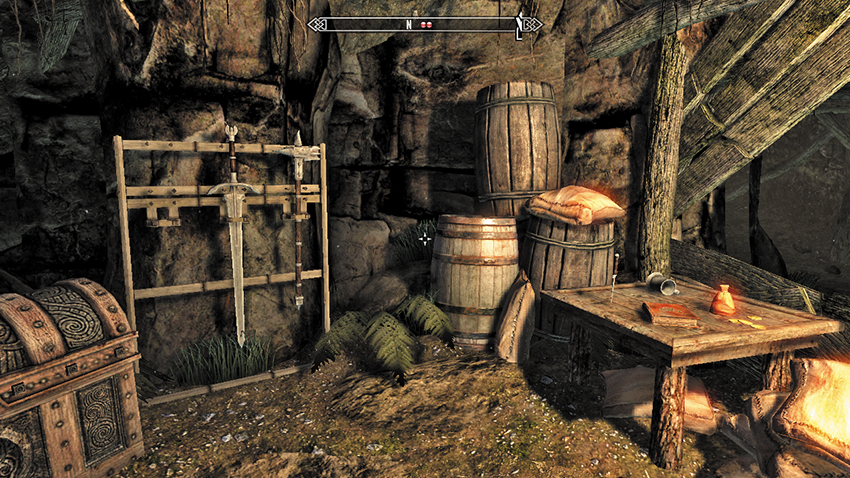
This selection of weaponry looks good enough to try your enchanting on.
Unenchanted weapons and armor can be obtained in one of three ways:
- By purchasing them: This is obviously the fastest and most straightforward option, as most merchants have a wide variety of unenchanted items for sale. However, if you hope to turn a profit with your enchanting, you’ll need a high Speech skill (in order to barter the prices down), or the merchant’s cut (both when you buy the original item and then sell the enchanted version of it back to them) will leave you with a loss, not a profit.
- By finding them: This is a much better plan. Simply grab them while on your travels.
- By smithing them: True artisans should consider smithing their own weapons and armor (on a forge), enchanting them, improving them (on a grindstone or workbench), and then selling them for incredible profits. If you’re not motivated by money, smithing also allows you to create and enchant exactly the item you want.
Enchanting
Enchanting a Weapon
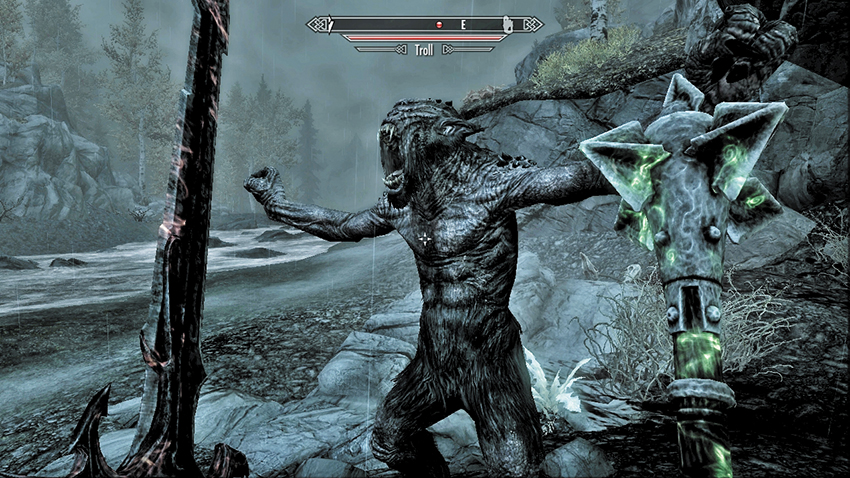
The tell-tale glow of an enchanted weapon, made stronger by a professional imbuer!
Now that your preparations are complete, journey to any Arcane Enchanter with the items you wish to enchant in your inventory. Select the weapon and the Soul Gem first, and then pick the enchantment. This is important, because the type of Soul Gem you use has a huge impact on the next decision you must make: how strong to make the enchantment. Remember, enchanting is all about choices!
Enchanted Weapons and Charges
All enchanted weapons have charges. These represent the amount of soul energy that remains within the weapon. When all of an item’s charges are expended, the weapon’s enchantment ceases to function (and it essentially becomes a “normal” or unenchanted weapon) until you recharge it.
Think of this as a formula: Charge Capacity ÷ Enchantment Cost = Charges.
Charge Capacity: The item’s capacity is determined by the strength of the soul used during the enchanting process. For example, a Grand Soul Gem containing a Grand Soul has a greater capacity than a Petty Soul Gem containing a Petty Soul. Note that capacity is determined by the soul, not the gem—a Grand Soul Gem containing a Petty Soul is no better than a Petty Soul Gem with that soul.
Enchantment Cost: The item’s Enchantment Cost depends on three factors:
- Inherent strength. Some enchantments are simply more powerful (and thus more expensive) than others.
- Selected strength. When you select a weapon enchantment, you can use the slider to choose how powerful to make the enchantment. The stronger you make it, the higher the cost and the fewer total uses you can get from the item.
- Your Enchanting skill. The higher your skill, the lower the cost and the more total uses you can get from the item.
- The soul and your Enchanting skill also determine the maximum strength of the enchantment you can apply to the item.
- The right balance: This choice is entirely up to you—experiment and see what works best for your play style. If you keep a large supply of Soul Gems on hand, recharging a weapon frequently may not be much of an issue. If you don’t, or keep forgetting to recharge your weapon, a weaker but longer-lasting enchantment may work out better.
Recharging Weapons
To recharge an enchanted weapon, you need a partially or completely depleted weapon and a filled Soul Gem. Select the weapon in your inventory, pick Recharge, and then select the Soul Gem you want to use.
Enchanting Armor
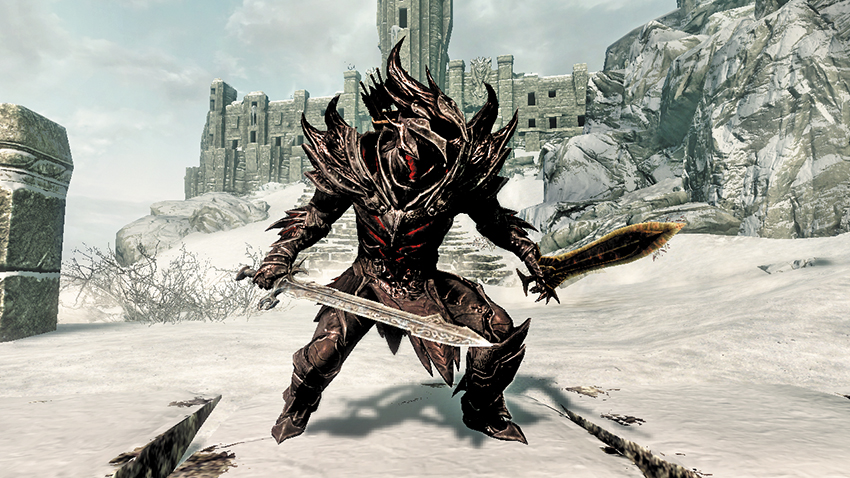
Crafting a set of armor and enchanting it gives you the very best in outfits.
To enchant a piece of armor, visit an Arcane Enchanter with the items in your inventory. Always choose the armor piece first, then the enchantment, and then the soul gem. Enchantment Restrictions: Not all armor enchantments can be applied to all pieces of armor. Sometimes, these restrictions are logical. Muffle (quiet movement) can only be placed on boots. Waterbreathing can be placed on helmets but never boots. But other restrictions are more complex and less obvious. Fortunately, the armor enchantment chart in the Inventory chapter has all the details.
Enchanted Armor Strength: Once you’ve selected a piece of armor and an enchantment you want to apply to it, you still need to choose a Soul Gem. Unlike enchanted weapons, enchanted armor does not have charges: The armor grants you a constant bonus as long as you wear it. Instead, the soul’s capacity, in combination with your Enchanting skill, determines the strength of the enchantment you can create. In effect, your skill allows you to squeeze more power from a given Soul Gem.
General Advice
- If you want to make money with enchanting, find or make most of the components yourself. Otherwise, the merchant’s markup on the item and Soul Gem will wipe out the additional value you create by adding the enchantment.
- Your character level and the item you are enchanting have no effect on the strength of the enchantment. You can infuse the same enchantment into an Iron Helm as into a Daedric Helm.
- All armor enchantments stack, so a cuirass and gauntlets that both increase your Heavy Armor skill by +10% will together give you a bonus of +20%. Stacking is especially powerful with Elemental Resistance enchantments (to Fire, Frost, or Shock): keep a few items on hand and equip them as appropriate if a dragon attacks. Note that there is a limit to this—at most, you can have an 85% Resistance to Magic, Fire, Frost, or Shock damage. Beyond that point, any further bonuses are wasted.
- If you wield two weapons, don’t forget to enchant them with complementary enchantments! Two Fire, Frost, or Shock damage enchantments are great for causing maximum damage, or combine Absorb Health and Absorb Stamina enchantments to sustain you in a long battle.
- Disenchant junk. If you don’t need the gold, it pays to disenchant any cheap enchanted items you find so you can take advantage of their effects later on. If an enchanted item has outlived its usefulness and been drained of charges, instead of recharging it, you may want to disenchant it, learn its effect, and apply that effect to another item instead.
- Get Soul Trap. The Soul Trap spell is critical to enchanting and worth picking up as soon as possible if you plan to focus on this skill. Provided you have the Soul Gems, Soul Trap everything you can so you have filled gems to power and recharge your items.
- Combine both smithing and enchanting to get the maximum benefit from both skills; craft and enchant incredibly powerful weapons and armor to enhance your style of play.
 Chaos Enchantments
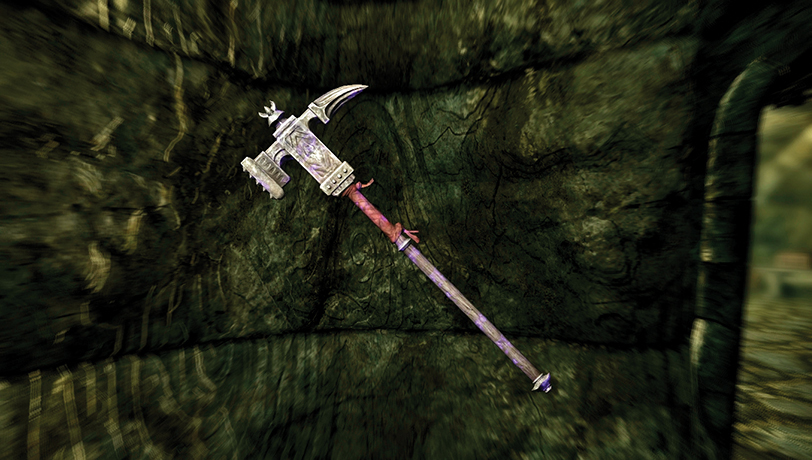
There is a new weapon enchantment available in Dragonborn: the Chaos enchantment. When a weapon is imbued with such an enchantment, it inflicts a random mixture of Fire or Frost or Shock damage. Each element has a 50% chance of happening on each hit. So it’s possible to get no extra damage, only one element, two elements, or even all three elements adding to damage. Regardless of which elements are generated, the enchantment power goes down by the same amount.
Staff Enchanting
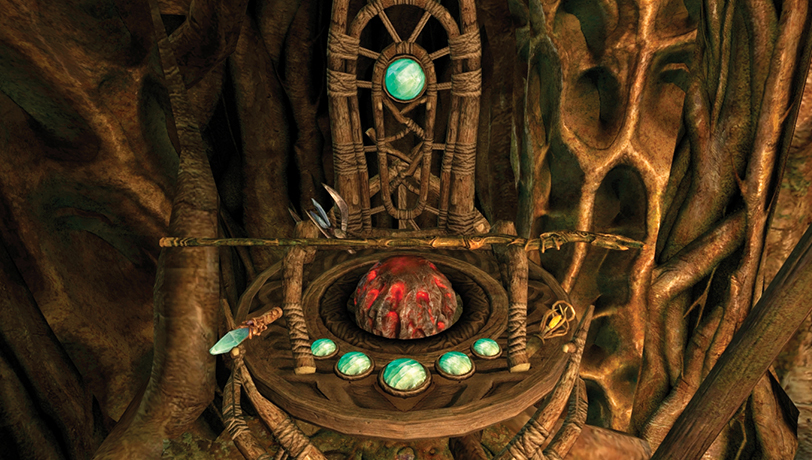
Dragonborn adds the ability to enchant (create) your own staffs. You can only attempt staff enchanting at the Staff Enchanting workbench in Tel Mithryn (shown in the previous picture). This workbench is located in a locked room that becomes accessible after you complete Solstheim Side Quest: Reluctant Steward. The key that accesses the room with the Staff Enchanter is part of your reward for the quest.
In order to create a staff, you will need:
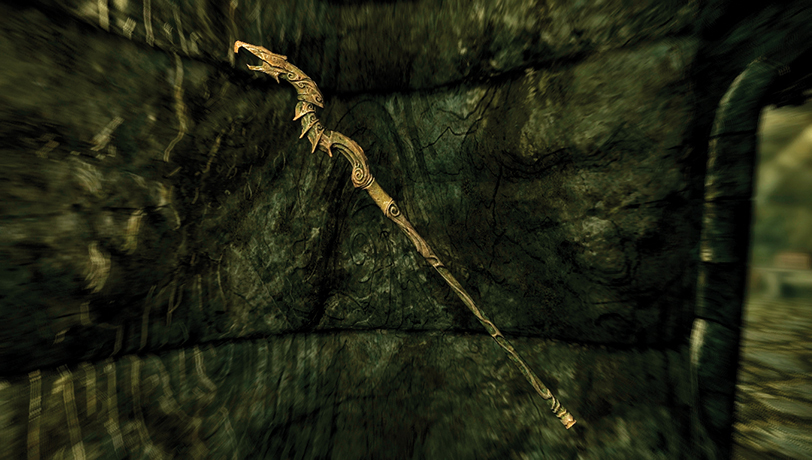
- An unenchanted staff of the correct type. You must purchase this from Neloth. Unenchanted staffs cannot be crafted or found as treasure.
- One or more Heart Stones. You must mine or find these yourself—you can’t buy them. They are found in deposits across the ash-filled parts of Solstheim.
- To know the spell you want to place into the staff. For example, you can only create a Staff of Thunderbolts if you already know the Thunderbolt spell.
Creating a staff works like forging an item—you just select the item you want to create and select “Craft.” Your Enchanting skill has no effect on the result. However, creating staffs will increase your Enchanting skill based on the value of the staff you create.
Smithing
Forging Ahead: An Overview
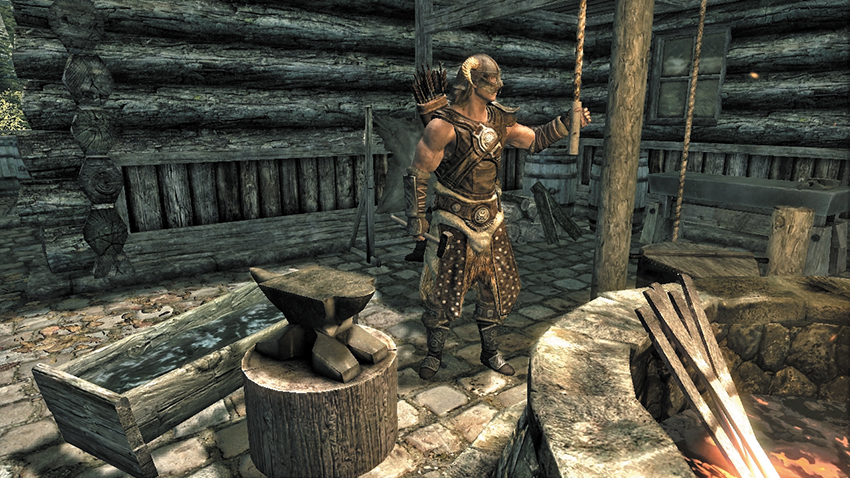
A noble Nord profession, a trade of gruff artisans occurring across the realm.
Smithing is the art of creating and improving weapons and armor, accomplished through a series of progressive improvements. Smithing is straightforward, fast, and reliable. Unlike alchemy and enchanting, there are no complicated choices or arcane experiments to perform: You know precisely what is needed to construct or improve an item, and what the end result of your sweat and toil will be. In short, smithing involves forging and progressively improving items.
Forging
The Forging Process
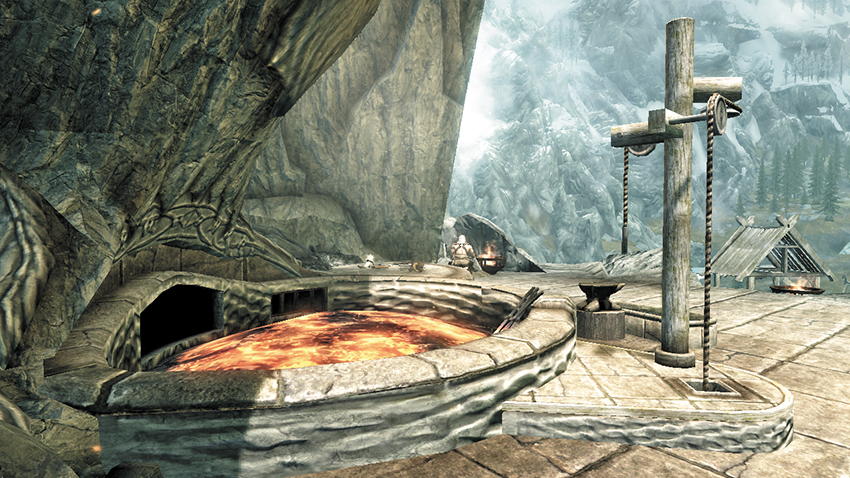
The Blacksmith’s Forge: Mold raw materials into fabled weapons and armor.
The first step in smithing is to locate a Blacksmith’s Forge or Anvil, where the process of making new weapons and armor first begins. When you interact with a forge, a complete list of the items you can create, and the components you need to make them is shown. This list expands dramatically as you take perks in your Smithing skill. If you have the necessary materials, simply choose the item you wish to craft, and it is hammered out on the forge. Simple!
As your adventure begins, your Smithing skill is low, meaning you can only work with a few kinds of basic materials, such as iron, hide, and leather. However, as your Smithing skill increases and you begin to choose perks in the Smithing constellation, you gradually unlock the ability to forge more and more varieties of materials into weapons and armor. At the highest levels, this includes the fabled Daedric, Dragonplate, and Dragonscale gear!
Forging Materials
Forging usually requires components like metal ingots, leather, and leather strips. However, the highest-quality items may also require more or expensive materials, such as quicksilver, dragon scales, or Daedra hearts. Knowing what is needed to forge your next level of gear is imperative so you can keep an eye out for it on your travels.
Purchasing materials: The easiest way to acquire materials is simply to purchase them. In towns (such as Riverwood), you’ll almost always find a Blacksmith working the forge. These craftsmen and women typically have ingots, ore, leather, and leather strips for sale. As your level increases, smiths begin to carry higher-level materials too. However, you will always have to search for the rarest of components.
The purist smithy: The purist won’t settle for purchasing materials when they’re free for the taking in the wild! Instead, they seek out mines (or ore veins dotted throughout the wilderness) to mine your own ore with a trusty pickaxe and use the smelter to smelt your own ingots. Hunt wild animals, gather their pelts, and use Tanning Racks to turn their hides into the leather and leather strips you require. You’re free to live off the land, not fill some Blacksmith’s sweaty pockets!
In short, purchasing materials is far faster and easier. Finding your own materials takes time but allows you to turn a better profit.
The Economics of Forging
Unless you’re aggressively focusing your Smithing skill, you can often find or purchase gear of a particular type before you’re able to forge it yourself. Forging is still great for completing a set of armor (e.g., hammering out a Dwarven Helmet to go with your Dwarven Armor), so you can qualify for the Matching Set (Heavy Armor Perk) or Custom Fit (Light Armor Perk) bonuses.
The very best weapons and armor (Ebony, Daedric, Dragonscale, and Dragonplate) can never be bought in shops, so you must either find them in dungeons or forge them yourself. Smithing really pays off here. While it’s still challenging to forge a complete set of Daedric or Dragonplate gear, it’s far easier than scrounging through dungeon after dungeon in the hope of finding just the right piece to complete a set. Smithing is also excellent for creating nonenchanted items you’re planning to enchant later using your Enchanting skill.
While you can make money by forging your own items and then selling them, you need to be careful in how you go about it. Purchasing materials from a merchant, taking them to a forge to create an item, and then returning to sell the item back to the merchant may help you improve your Smithing skill, but financially, it’s always a losing proposition. If you want to use Smithing to make money, it’s always better to gather materials from the wild, although that can be time-consuming.
If you decide to focus on smithing, you’ll occasionally find you require certain materials before they’re commonly available from merchants. Once again, this is when foraging in the wilderness or swinging a pickaxe at an ore vein is your best option. Check the “Mining” section for locations where you can find rare ore.
Improving Items
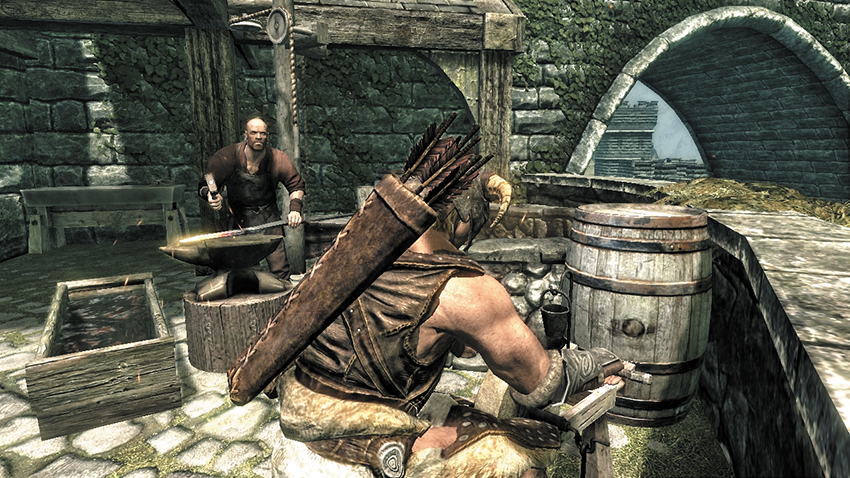
The Grindstone: Sharpen a blade to improve its damage and value.
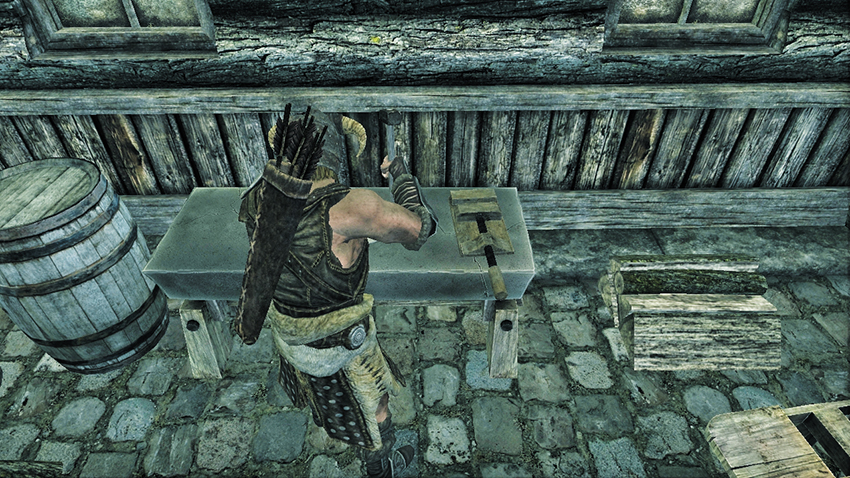
The Workbench: Temper armor into defensive and wearable works of art.
Contrary to what you might believe, the heart of smithing lies not in crafting items but in improving them. As with forging, these improvements are simple and result in equally straightforward bonuses to your attack (weapons) and defense (armor) that can significantly improve your combat effectiveness. As you might expect, arms and armor improved in this way also command a premium when sold to merchants.
The grindstone: You improve weapons by sharpening them at a grindstone.
The workbench: You improve armor by tempering it at a workbench.
When interacting with either of these crafting stations, you are given a complete list of the items you have (whether they were found, bought, stolen, or made by you) that can be improved, along with the materials you need to improve each of them. Improving a weapon or piece of armor always requires one piece of that item’s primary material, so sharpening an iron sword requires one Iron Ingot, while tempering a Dragonscale Cuirass requires one Dragon Scale. The clue is in the name!
In exchange for using this material, you receive a bonus to your weapon’s damage or armor’s defense rating based on your Smithing skill and perks. As your Smithing skill improves, you’re able to return to a grindstone or workbench and improve the same item again (at the cost of one material each time), to increase that bonus still further, if you wish.
Rules to Remember
Bonuses are not cumulative: Having sharpened an iron sword with a Smithing skill of 25 (using an Iron Ingot), you return to the grindstone with a Smithing skill of 50 (and expend another Iron Ingot) to receive a better bonus. However, if you’d waited and brought the sword to the grindstone for the first time at Skill 50, the bonus would be the same.
Bonuses stack with enchantments: However, if you’re a skilled craftsman in the arts of smithing and enchanting, you can forge an item, then both improve and enchant it for maximum damage. Note that you need the Arcane Blacksmith perk in order to improve enchanted weapons and armor, so if you don’t have it, make sure to sharpen or temper the item before you enchant it! Otherwise, the order doesn’t matter.
Nomenclature: When you improve an item, it receives a modifier that indicates the amount of improvement you’ve made to the weapon. This modifier is based on your Smithing skill and perks. After you’ve improved an item, you can only improve it again once your Smithing skill and perks will allow you to raise it to the next modifier rank. For example:
- If you have a Smithing skill of 39 and the Steel Smithing perk, and you improve a steel sword at a grindstone, the sword will receive the “Superior” modifier and a [+3] damage bonus.
- Return with a Smithing skill of 40, and your skill has reached the next threshold, allowing you to improve the sword again. This gives it the “Exquisite” modifier and a better bonus, [+5].
- If you come back with a Smithing skill of 55, your skill has not yet reached the next threshold, so you can’t improve that sword again. If you have a different steel sword you want to improve, it will also receive the “Exquisite” modifier and a [+5] bonus.
The Economics of Improvements
Improving the items you find (and those you forge) is simple, quick, and relatively inexpensive, making this an excellent way to both increase your Smithing skill and earn some extra gold. Simply collect weapons and armor throughout your travels, then improve them before selling them for a profit.
At lower levels, this yields dividends, as you’re constantly using your skill and may even make your money back (especially if you mine, smelt, or tan your own materials). At higher levels, with good smithing (and Speech skills for bartering), you can easily rake in hundreds or even thousands of additional gold for each haul of loot.
General Advice
Improve and sharpen everything. As discussed above, this is one of the fastest and easiest ways to make money, especially later in the game, with high Smithing and Speech skills.
Stop overpaying for materials. Smithing can be an expensive hobby if you have to buy all your components from local merchants. If you’re tired of paying a premium on leather or ingots, and you have some time to spare, make them yourself!
Delve into Dwarven Ruins. One of the easiest ways to level your Smithing skill is to clear out a Dwarven Ruin, then go back and make a second trip to haul out all of the scrap metal you can carry. Smelt it down into Dwarven Metal Ingots, and you’ll have more materials than you know what do to with.
Save those Daedra Hearts. These are among the rarest ingredients, but they’re essential for forging Daedric weapons and armor. If you find any early in your adventure, save them until you’re ready for them. Otherwise, you’ll have to make them yourself with an equally rare ingredient (in College of Winterhold Radiant Quest: The Atronach Forge) or track down the one merchant who sells them (Enthir, also at the College of Winterhold) and pay an outrageous premium.
Dawnguard: Smithing
Arrow Crafting
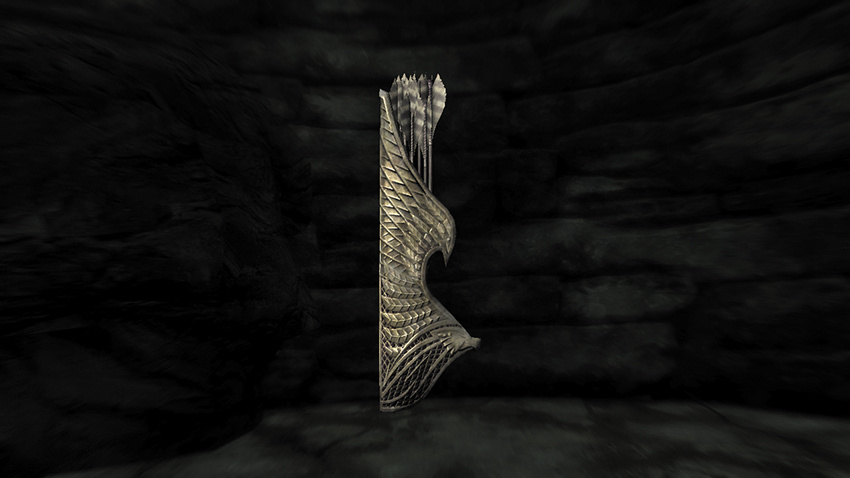
You can now construct arrows at any forge, meaning you no longer have to search for or buy them if you don’t wish to. However, for arrows of a particular type (such as Orcish or Glass Arrows, as shown), you need to have the appropriate Smithing Perk (such as Orcish Smithing or Glass Smithing).
Dragonbone Weapons
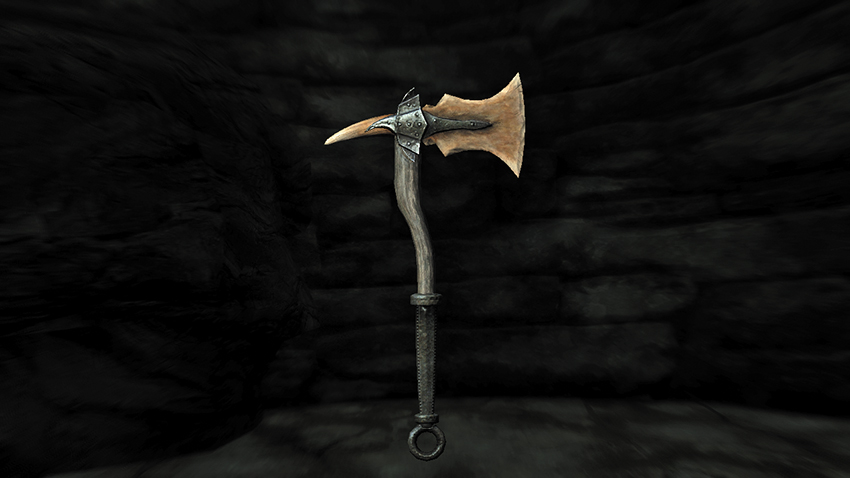
You are now able to construct Dragonbone weapons at any forge, as long as you have the Dragon Armor Perk. Dragonbone weapons (such as the one shown above) inflict more damage than Daedric weapons, although they are (very slightly) heavier. Dragonbone weapons are extremely rare; they are almost never found as loot, so smithing them is by far the easiest and most reliable method for master Blacksmiths to acquire them.
Crossbows and Crossbow Bolts
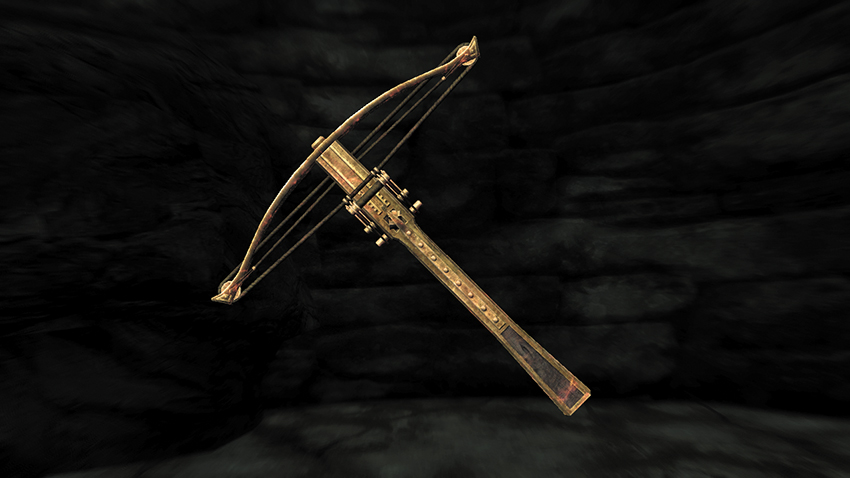
Provided you meet several requirements, you are now able to construct Crossbows and Crossbow Bolts. For this to occur, you must first complete Dawnguard Main Quest: A New Order. As only adventurers allied with the Dawnguard can finish this quest, only Dawnguard-allied players can forge these weapons. However, anyone can loot them from Dawnguard agents or occasionally purchase bolts from some vendors.
Once you complete this quest, speak to Sorine Jurard in Fort Dawnguard about making a Crossbow; this unlocks the ability to forge the basic Crossbow and Steel Bolts. Then, through repeated completion of Dawnguard Faction Quest: Ancient Technology, you and Sorine can unlock “recipes” (schematics) for a variety of improved weapons and bolts, including Dwarven Crossbows, Dwarven Bolts, Enhanced Crossbows, and Exploding Bolts (inflicting Fire, Frost, or Shock damage).
You still need to have the correct tools for making these weapons and bolts: Although you can forge basic Steel Bolts and (once learned) Dwarven Bolts at any forge, you can construct only Crossbows and the explosive advanced bolts at Gunmar’s Forge inside Fort Dawnguard. In addition, you need the Steel Smithing Perk to fashion basic Crossbow and Steel Bolts (they are found in the “Steel” Smithing Menu). Similarly, you need the Dwarven Smithing Perk to make the Dwarven Crossbow and Dwarven Bolts (they are found in the “Dwarven” Smithing menu).
Miscellaneous and Jewelry Recipes
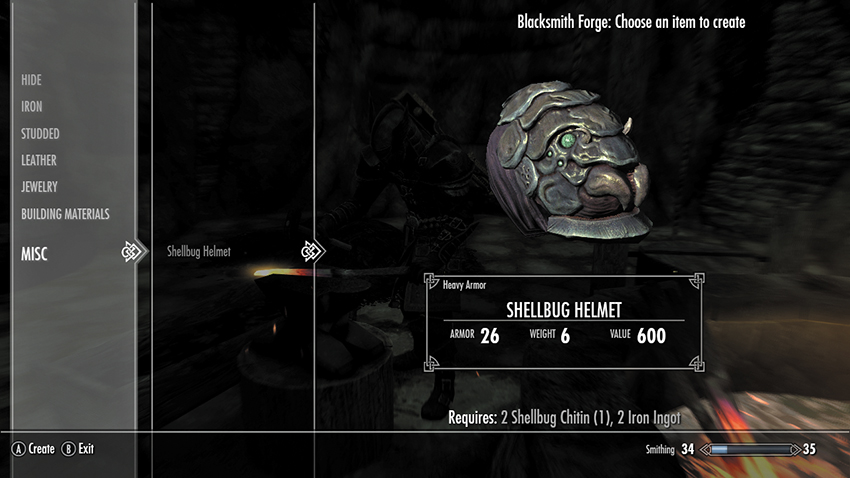
There are also two Miscellaneous Recipes that you can craft—the Shellbug Helmet (shown) and Bone Hawk Amulet.
Aetherium Items
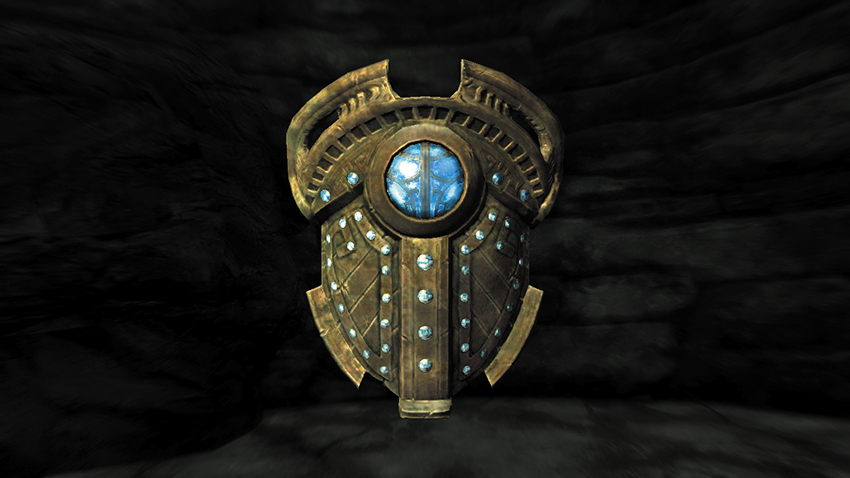
At the end of Side Quest: Lost to the Ages, your reward is the crafting of one of three unique Aetherium items at the Aetherium Forge, located deep below the Ruins of Bthalft in the Rift. Aetherium is an incredibly rare material, so much so that only one item—the Aetherial Crown, Shield, or Staff—can be made. A Smithing skill isn’t necessary for this creation.
Hearthfire: Smithing
Building Materials
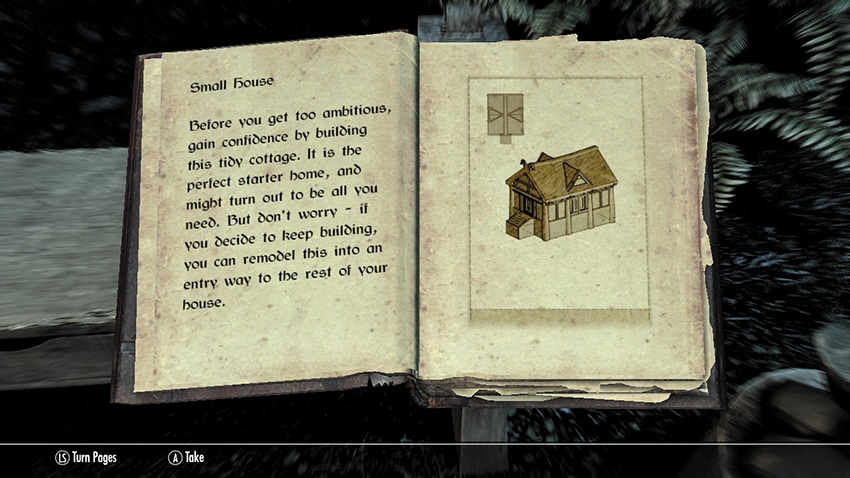
Hearthfire adds Building Materials to your Smithing menu list. These are small items needed in the construction of a house, such as nails, fittings, hinges, and locks. Most require Iron Ingots to make (and locks require Corundum). None of these items require any Smithing Perk prerequisites, so you can forge them even without a prior knowledge of Smithing.
Dragonborn: Smithing
Dragonborn adds four new sets of recipes: Bonemold, Chitin, Nordic, and Stalhrim.
Bonemold Smithing
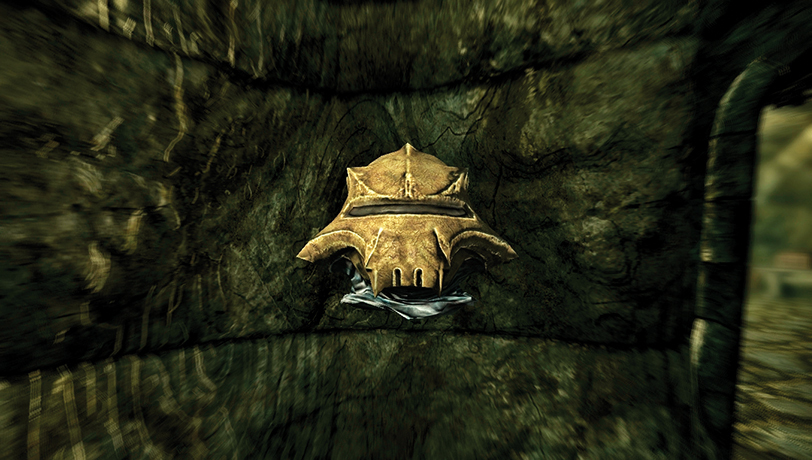
Bonemold items require the Steel Smithing perk to create. Basic Bonemold items have no special prerequisites, but improved Bonemold items, a variant with better statistics, can be crafted only after you complete both Thieves Guild Quest: Meet the Family and Solstheim Regional Activity: Thievery and the Karstaag Connection*. The ability to craft these items is part of your reward for the quest. The armor has a rating similar to Steel armor but is lighter.
Chitin Smithing
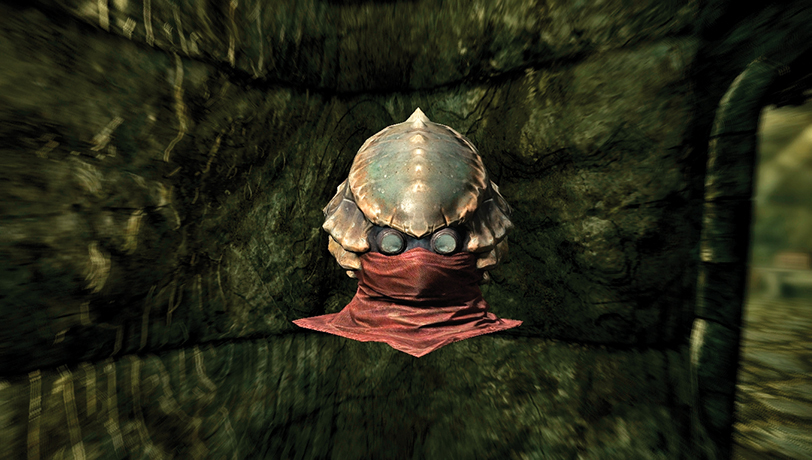
Chitin items require the Elven Smithing perk to create. They have no special prerequisites. The armor has a rating similar to Steel armor but it weighs less. There is also a rare variant—Morag Tong Armor—worn by the infamous clan of Dunmeri assassins.
Nordic Smithing
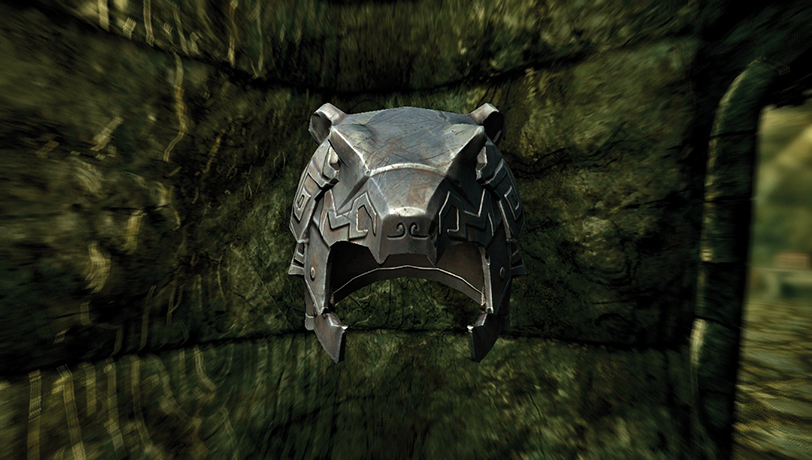
Nordic Carved items require the Advanced Armors perk to create. They have no special prerequisites. Note that these items are distinct from Ancient Nord (Draugr) items, which can’t be crafted, and from Nord Hero items, which are a reward for completing the Companions Quest: Glory of the Dead. It has a similar rating to Ebony and Orcish armor but is lighter.
Stalhrim Smithing
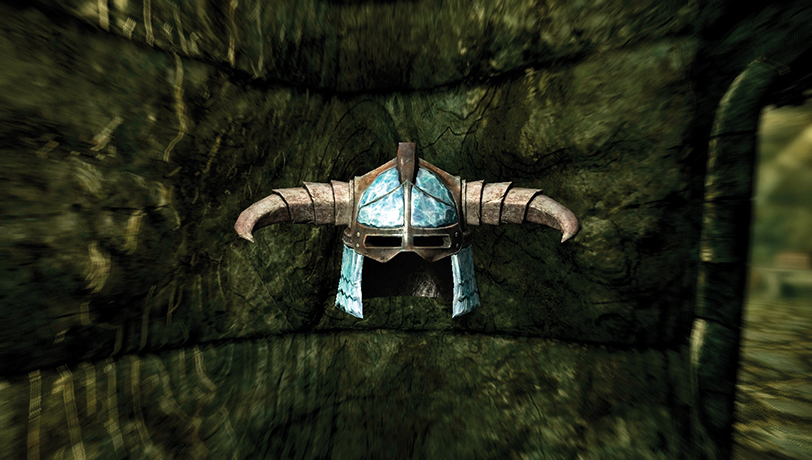
Stalhrim items require the Ebony Smithing perk to create. You must also complete Solstheim Side Quest: A New Source of Stalhrim to unlock the ability to craft them. Stalhrim items require Stalhrim Ore, a rare material found only on Solstheim. Think of Stalhrim armor as being like Dragonplate Armor but lighter.
Note that these recipes require ore, not ingots. Stalhrim, a type of elemental ice, can’t be smelted into ingots. You can buy Stalhrim from Halbarn (the blacksmith in Skaal village) or mine it yourself (see below). All Stalhrim items have an innate property: any Frost enchantments placed on them (e.g., frost damage for weapons, frost resistance for armor) are 10% stronger than normal.
Smithing Recipes
Smithing Improvement Modifiers
| Name | Skill (with perks) |
|---|---|
| Fine | 0–19 |
| Superior | 20–39 |
| Exquisite | 40–59 |
| Flawless | 60–79 |
| Epic | 80–99 |
| Legendary | 100 |
Hide
| Ingredients | Name | Dmg/Amr | Weight | Value |
|---|---|---|---|---|
| 3 Leather Strips, 4 Leather | Hide Armor | 20 | 5 | 50 |
| 2 Leather Strips, 2 Leather | Hide Boots | 5 | 1 | 10 |
| 2 Leather Strips, 1 Leather | Hide Bracers | 5 | 1 | 10 |
| 1 Leather Strips, 2 Leather | Hide Helmet | 10 | 2 | 25 |
| 2 Leather Strips, 4 Leather | Hide Shield | 15 | 4 | 25 |
Iron
| Ingredients | Name | Dmg/Amr | Weight | Value |
|---|---|---|---|---|
| 3 Leather Strips, 5 Iron Ingot, Corundum Ingot | Banded Iron Armor | 28 | 35 | 200 |
| 1 Leather Strip, 4 Iron Ingot, Corundum Ingot | Banded Iron Shield | 22 | 12 | 100 |
| 3 Leather Strips, 5 Iron Ingot | Iron Armor | 25 | 30 | 125 |
| 2 Leather Strips, 4 Iron Ingot | Iron Battleaxe | 16 | 20 | 55 |
| 2 Leather Strips, 3 Iron Ingot | Iron Boots | 10 | 6 | 25 |
| 1 Leather Strip, 1 Iron Ingot | Iron Dagger | 4 | 2 | 10 |
| 2 Leather Strips, 2 Iron Ingot | Iron Gauntlets | 10 | 5 | 25 |
| 2 Leather Strips, 4 Iron Ingot | Iron Greatsword | 15 | 16 | 50 |
| 2 Leather Strips, 3 Iron Ingot | Iron Helmet | 15 | 5 | 60 |
| 2 Leather Strips, 3 Iron Ingot | Iron Mace | 9 | 13 | 35 |
| 1 Leather Strip 4 Iron Ingot | Iron Shield | 20 | 12 | 60 |
| 1 Leather Strip, 2 Iron Ingot | Iron Sword | 7 | 9 | 25 |
| 2 Leather Strips, 2 Iron Ingot | Iron War Axe | 8 | 11 | 30 |
| 3 Leather Strips, 4 Iron Ingot | Iron Warhammer | 18 | 24 | 60 |
Studded
| Ingredients | Name | Dmg/Amr | Weight | Value |
|---|---|---|---|---|
| 3 Leather Strips, 4 Leather, 1 Iron Ingot | Studded Armor | 23 | 6 | 75 |
Imperial
| Ingredients | Name | Dmg/Amr | Weight | Value |
|---|---|---|---|---|
| 3 Leather Strips, 2 Leather, 4 Steel Ingot | Imperial Armor | 25 | 35 | 100 |
| 2 Leather Strips, 1 Leather, 2 Steel Ingot | Imperial Boots | 10 | 8 | 20 |
| 2 Leather Strips, 1 Leather, 2 Steel Ingot | Imperial Bracers | 10 | 4 | 15 |
| 1 Leather Strip, 1 Leather, 2 Steel Ingot | Imperial Helmet | 15 | 5 | 50 |
| 2 Leather Strips, 4 Steel Ingot | Imperial Shield | 20 | 12 | 50 |
Steel
| Ingredients | Name | Dmg/Amr | Weight | Value |
|---|---|---|---|---|
| 3 Leather Strips, 2 Leather, 3 Steel Ingot, 2 Corundum Ingot | Scaled Armor | 32 | 6 | 350 |
| 2 Leather Strips, 1 Leather, 2 Steel Ingot, 1 Corundum Ingot | Scaled Boots | 9 | 2 | 70 |
| 2 Leather Strips, 1 Leather, 1 Steel Ingot, 1 Corundum Ingot | Scaled Bracers | 9 | 2 | 70 |
| 1 Leather Strip, 1 Leather, 2 Steel Ingot, 1 Corundum Ingot | Scaled Helmet | 14 | 2 | 175 |
| 3 Leather Strips, 4 Steel Ingot, 1 Iron Ingot | Steel Armor | 31 | 35 | 275 |
| 2 Leather Strips, 4 Steel Ingot, 1 Iron Ingot | Steel Battleaxe | 18 | 21 | 100 |
| 2 Leather Strips, 3 Steel Ingot, 1 Iron Ingot | Steel Cuffed Boots | 12 | 8 | 55 |
| 1 Leather Strip, 1 Steel Ingot, 1 Iron Ingot | Steel Dagger | 5 | 2.5 | 18 |
| 3 Leather Strips, 4 Steel Ingot, 2 Iron Ingot | Steel Greatsword | 17 | 17 | 90 |
| 2 Leather Strips, 2 Steel Ingot, 1 Iron Ingot | Steel Helmet | 17 | 5 | 125 |
| 2 Leather Strips, 2 Steel Ingot, 1 Iron Ingot | Steel Horned Helmet | 17 | 5 | 125 |
| 2 Leather Strips, 2 Steel Ingot, 1 Iron Ingot | Steel Imperial Gauntlets | 12 | 4 | 55 |
| 1 Leather Strip, 3 Steel Ingot, 1 Iron Ingot | Steel Mace | 10 | 14 | 65 |
| 2 Leather Strips, 2 Steel Ingot, 1 Iron Ingot | Steel Nordic Gauntlets | 12 | 4 | 55 |
| 3 Leather Strips, 3 Steel Ingot, 1 Iron Ingot, 1 Corundum Ingot | Steel Plate Armor | 40 | 38 | 625 |
| 2 Leather Strips, 2 Steel Ingot, 1 Iron Ingot, 1 Corundum Ingot | Steel Plate Boots | 14 | 9 | 125 |
| 2 Leather Strips, 2 Steel Ingot, 1 Iron Ingot, 1 Corundum Ingot | Steel Plate Gauntlets | 14 | 6 | 125 |
| 2 Leather Strips, 2 Steel Ingot, 1 Iron Ingot, 1 Corundum Ingot | Steel Plate Helmet | 19 | 6 | 300 |
| 1 Leather Strips, 3 Steel Ingot, 1 Iron Ingot | Steel Shield | 24 | 12 | 150 |
| 2 Leather Strips, 3 Steel Ingot, 1 Iron Ingot | Steel Shin Boots | 12 | 8 | 55 |
| 1 Leather Strip, 2 Steel Ingot, 1 Iron Ingot | Steel Sword | 8 | 10 | 45 |
| 2 Leather Strips, 2 Steel Ingot, 1 Iron Ingot | Steel War Axe | 9 | 12 | 55 |
| 3 Leather Strips, 4 Steel Ingot, 1 Iron Ingot | Steel Warhammer | 20 | 25 | 110 |
Leather
| Ingredients | Name | Dmg/Amr | Weight | Value |
|---|---|---|---|---|
| 3 Leather Strips, 4 Leather | Leather Armor | 26 | 6 | 125 |
| 2 Leather Strips, 2 Leather | Leather Boots | 7 | 2 | 25 |
| 2 Leather Strips, 1 Leather | Leather Bracers | 7 | 2 | 25 |
| 1 Leather Strip, 2 Leather | Leather Helmet | 12 | 2 | 60 |
Dwarven
| Ingredients | Name | Dmg/Amr | Weight | Value |
|---|---|---|---|---|
| 3 Leather Strips, 3 Dwarven Metal Ingot, 1 Iron Ingot, 1 Steel Ingot | Dwarven Armor | 34 | 45 | 400 |
| 2 Leather Strips, 2 Dwarven Metal Ingot, 1 Iron Ingot, 2 Steel Ingot | Dwarven Battleaxe | 20 | 23 | 300 |
| 2 Leather Strips, 2 Dwarven Metal Ingot, 1 Iron Ingot, 1 Steel Ingot | Dwarven Boots | 13 | 10 | 85 |
| 2 Dwarven Metal Ingot, 1 Iron Ingot | Dwarven Bow | 12 | 10 | 270 |
| 1 Leather Strip, 1 Dwarven Metal Ingot, 1 Iron Ingot, 1 Steel Ingot | Dwarven Dagger | 7 | 3.5 | 55 |
| 2 Leather Strips, 1 Dwarven Metal Ingot, 1 Iron Ingot, 1 Steel Ingot | Dwarven Gauntlets | 13 | 8 | 85 |
| 3 Leather Strips, 2 Dwarven Metal Ingot, 2 Iron Ingot, 2 Steel Ingot | Dwarven Greatsword | 19 | 19 | 270 |
| 2 Leather Strips, 2 Dwarven Metal Ingot, 1 Iron Ingot, 1 Steel Ingot | Dwarven Helmet | 18 | 12 | 200 |
| 1 Leather Strip, 2 Dwarven Metal Ingot, 1 Iron Ingot, 1 Steel Ingot | Dwarven Mace | 12 | 16 | 190 |
| 1 Leather Strip, 2 Dwarven Metal Ingot, 1 Iron Ingot, 1 Steel Ingot | Dwarven Shield | 26 | 12 | 225 |
| 1 Leather Strip, 1 Dwarven Metal Ingot, 1 Iron Ingot, 1 Steel Ingot | Dwarven Sword | 10 | 12 | 135 |
| 2 Leather Strips, 1 Dwarven Metal Ingot, 1 Iron Ingot, 1 Steel Ingot | Dwarven War Axe | 11 | 14 | 165 |
| 3 Leather Strips, 2 Dwarven Metal Ingot, 1 Iron Ingot, 2 Steel Ingot | Dwarven Warhammer | 22 | 27 | 325 |
Elven
| Ingredients | Name | Dmg/Amr | Weight | Value |
|---|---|---|---|---|
| 3 Leather Strips, 1 Leather, 4 Refined Moonstone, 1 Iron Ingot | Elven Armor | 29 | 4 | 225 |
| 2 Leather Strips, 2 Refined Moonstone, 2 Iron Ingot, 1 Quicksilver Ingot | Elven Battleaxe | 21 | 24 | 520 |
| 2 Leather Strips, 1 Leather, 2 Refined Moonstone, 1 Iron Ingot | Elven Boots | 8 | 1 | 45 |
| 2 Refined Moonstone, 1 Quicksilver Ingot | Elven Bow | 13 | 12 | 470 |
| 1 Leather Strips, 1 Refined Moonstone, 1 Iron Ingot, 1 Quicksilver Ingot | Elven Dagger | 8 | 4 | 95 |
| 2 Leather Strips, 1 Leather, 1 Refined Moonstone, 1 Iron Ingot | Elven Gauntlets | 8 | 1 | 45 |
| 3 Leather Strips, 4 Refined Moonstone, 1 Iron Ingot, 1 Quicksilver Ingot | Elven Gilded Armor | 35 | 4 | 550 |
| 3 Leather Strips, 2 Refined Moonstone, 2 Iron Ingot, 1 Quicksilver Ingot | Elven Greatsword | 20 | 20 | 470 |
| 1 Leather Strips, 1 Leather, 2 Refined Moonstone, 1 Iron Ingot | Elven Helmet | 13 | 1 | 110 |
| 1 Leather Strips, 2 Refined Moonstone, 1 Iron Ingot, 1 Quicksilver Ingot | Elven Mace | 13 | 17 | 330 |
| 2 Leather Strips, 4 Refined Moonstone, 1 Iron Ingot | Elven Shield | 21 | 4 | 115 |
| 1 Leather Strips, 1 Refined Moonstone, 1 Iron Ingot, 1 Quicksilver Ingot | Elven Sword | 11 | 13 | 235 |
| 2 Leather Strips, 1 Refined Moonstone, 1 Iron Ingot, 1 Quicksilver Ingot | Elven War Axe | 12 | 15 | 280 |
| 3 Leather Strips, 2 Refined Moonstone, 2 Iron Ingot, 1 Quicksilver Ingot | Elven Warhammer | 23 | 28 | 565 |
Orcish
| Ingredients | Name | Dmg/Amr | Weight | Value |
|---|---|---|---|---|
| 3 Leather Strips, 4 Orichalcum Ingot, 1 Iron Ingot | Orcish Armor | 40 | 35 | 1000 |
| 2 Leather Strips, 4 Orichalcum Ingot, 1 Iron Ingot | Orcish Battleaxe | 19 | 25 | 165 |
| 2 Leather Strips, 3 Orichalcum Ingot, 1 Iron Ingot | Orcish Boots | 15 | 7 | 200 |
| 2 Orichalcum Ingot, 1 Iron Ingot | Orcish Bow | 10 | 9 | 150 |
| 1 Leather Strips, 1 Orichalcum Ingot, 1 Iron Ingot | Orcish Dagger | 6 | 3 | 30 |
| 2 Leather Strips, 2 Orichalcum Ingot, 1 Iron Ingot | Orcish Gauntlets | 15 | 7 | 200 |
| 3 Leather Strips, 4 Orichalcum Ingot, 2 Iron Ingot | Orcish Greatsword | 18 | 18 | 75 |
| 2 Leather Strips, 2 Orichalcum Ingot, 1 Iron Ingot | Orcish Helmet | 20 | 8 | 500 |
| 1 Leather Strip, 3 Orichalcum Ingot, 1 Iron Ingot | Orcish Mace | 11 | 15 | 105 |
| 1 Leather Strip, 3 Orichalcum Ingot, 1 Iron Ingot | Orcish Shield | 30 | 14 | 500 |
| 1 Leather Strip, 2 Orichalcum Ingot, 1 Iron Ingot | Orcish Sword | 9 | 11 | 75 |
| 2 Leather Strips, 2 Orichalcum Ingot, 1 Iron Ingot | Orcish War Axe | 10 | 13 | 90 |
| 3 Leather Strips, 4 Orichalcum Ingot, 1 Iron Ingot | Orcish Warhammer | 21 | 26 | 180 |
Ebony
| Ingredients | Name | Dmg/Amr | Weight | Value |
|---|---|---|---|---|
| 3 Leather Strips, 5 Ebony Ingot | Ebony Armor | 43 | 38 | 1,500 |
| 2 Leather Strips, 5 Ebony Ingot | Ebony Battleaxe | 23 | 26 | 1,585 |
| 2 Leather Strips, 3 Ebony Ingot | Ebony Boots | 16 | 7 | 275 |
| 3 Ebony Ingot | Ebony Bow | 17 | 16 | 1,440 |
| 1 Leather Strip, 1 Ebony Ingot | Ebony Dagger | 10 | 5 | 290 |
| 2 Leather Strips, 2 Ebony Ingot | Ebony Gauntlets | 16 | 7 | 275 |
| 3 Leather Strips, 5 Ebony Ingot | Ebony Greatsword | 22 | 22 | 1,440 |
| 2 Leather Strips, 3 Ebony Ingot | Ebony Helmet | 21 | 10 | 750 |
| 1 Leather Strip, 3 Ebony Ingot | Ebony Mace | 16 | 19 | 1,000 |
| 1 Leather Strips, 4 Ebony Ingot | Ebony Shield | 32 | 14 | 750 |
| 1 Leather Strip, 2 Ebony Ingot | Ebony Sword | 13 | 15 | 720 |
| 2 Leather Strips, 2 Ebony Ingot | Ebony War Axe | 15 | 17 | 865 |
| 3 Leather Strips, 5 Ebony Ingot | Ebony Warhammer | 25 | 30 | 1,725 |
Glass
| Ingredients | Name | Dmg/Amr | Weight | Value |
|---|---|---|---|---|
| 3 Leather Strips, 1 Leather, 4 Refined Malachite, 2 Refined Moonstone | Glass Armor | 38 | 7 | 900 |
| 2 Leather Strips, 2 Refined Malachite, 2 Refined Moonstone | Glass Arrow | 18 | 0 | 6 |
| 2 Leather Strips, 1 Leather, 2 Refined Malachite, 1 Refined Moonstone | Glass Battleaxe | 22 | 25 | 900 |
| 2 Refined Malachite, 1 Refined Moonstone | Glass Boots | 11 | 2 | 190 |
| 1 Leather Strip, 1 Refined Malachite, 1 Refined Moonstone | Glass Bow | 15 | 14 | 820 |
| 2 Leather Strips, 1 Leather, 1 Refined Malachite, 1 Refined Moonstone | Glass Dagger | 9 | 4.5 | 165 |
| 3 Leather Strips, 2 Refined Malachite, 2 Refined Moonstone | Glass Gauntlets | 11 | 2 | 190 |
| 1 Leather Strip, 1 Leather, 2 Refined Malachite, 1 Refined Moonstone | Glass Greatsword | 21 | 22 | 820 |
| 3 Leather Strips, 2 Refined Malachite, 1 Refined Moonstone | Glass Helmet | 16 | 2 | 450 |
| 1 Leather Strip, 2 Refined Malachite, 1 Refined Moonstone | Glass Mace | 14 | 18 | 575 |
| 2 Leather Strips, 4 Refined Malachite, 1 Refined Moonstone | Glass Shield | 27 | 6 | 450 |
| 1 Leather Strip, 1 Refined Malachite, 1 Refined Moonstone | Glass Sword | 12 | 14 | 410 |
| 2 Leather Strips, 1 Refined Malachite, 1 Refined Moonstone | Glass War Axe | 13 | 16 | 490 |
| 3 Leather Strips, 3 Refined Malachite, 2 Refined Moonstone | Glass Warhammer | 24 | 29 | 985 |
Dragon
| Ingredients | Name | Dmg/Amr | Weight | Value |
|---|---|---|---|---|
| 3 Leather Strips, 3 Dragon Scales, 2 Dragon Bone | Dragonplate Armor | 46 | 40 | 2,125 |
| 2 Leather Strips, 3 Dragon Scales, 1 Dragon Bone | Dragonplate Boots | 17 | 8 | 425 |
| 2 Leather Strips, 2 Dragon Scales, 1 Dragon Bone | Dragonplate Gauntlets | 17 | 8 | 425 |
| 2 Leather Strips, 2 Dragon Scales, 1 Dragon Bone | Dragonplate Helmet | 22 | 8 | 1,050 |
| 1 Leather Strip, 3 Dragon Scales, 1 Dragon Bone | Dragonplate Shield | 34 | 15 | 1,050 |
| 3 Leather Strips, 1 Leather, 4 Dragon Scales, 2 Iron Ingot | Dragonscale Armor | 41 | 10 | 1,500 |
| 2 Leather Strips, 1 Leather, 2 Dragon Scales, 1 Iron Ingot | Dragonscale Boots | 12 | 3 | 300 |
| 2 Leather Strips, 1 Leather, 2 Dragon Scales, 1 Iron Ingot | Dragonscale Gauntlets | 12 | 3 | 300 |
| 1 Leather Strip, 1 Leather, 2 Dragon Scales, 1 Iron Ingot | Dragonscale Helmet | 17 | 4 | 750 |
| 2 Leather Strips, 4 Dragon Scales, 2 Iron Ingot | Dragonscale Shield | 29 | 6 | 750 |
Daedric
| Ingredients | Name | Dmg/Amr | Weight | Value |
|---|---|---|---|---|
| 3 Leather Strips, 5 Ebony Ingot, 1 Daedra Heart | Daedric Armor | 49 | 50 | 3,200 |
| 2 Leather Strips, 5 Ebony Ingot, 1 Daedra Heart | Daedric Battleaxe | 25 | 27 | 2750 |
| 2 Leather Strips, 3 Ebony Ingot, 1 Daedra Heart | Daedric Boots | 18 | 10 | 625 |
| 3 Ebony Ingot, 1 Daedra Heart | Daedric Bow | 19 | 18 | 2,500 |
| 1 Leather Strip, 1 Ebony Ingot, 1 Daedra Heart | Daedric Dagger | 11 | 6 | 500 |
| 2 Leather Strips, 2 Ebony Ingot, 1 Daedra Heart | Daedric Gauntlets | 18 | 6 | 625 |
| 3 Leather Strips, 5 Ebony Ingot, 1 Daedra Heart | Daedric Greatsword | 24 | 23 | 2,500 |
| 2 Leather Strips, 3 Ebony Ingot, 1 Daedra Heart | Daedric Helmet | 23 | 15 | 1,600 |
| 1 Leather Strip, 3 Ebony Ingot, 1 Daedra Heart | Daedric Mace | 16 | 20 | 1,750 |
| 1 Leather Strip, 4 Ebony Ingot, 1 Daedra Heart | Daedric Shield | 36 | 15 | 1,600 |
| 1 Leather Strip, 2 Ebony Ingot, 1 Daedra Heart | Daedric Sword | 14 | 16 | 1,250 |
| 2 Leather Strips, 2 Ebony Ingot, 1 Daedra Heart | Daedric War Axe | 15 | 18 | 1,500 |
| 3 Leather Strips, 5 Ebony Ingot, 1 Daedra Heart | Daedric Warhammer | 27 | 31 | 4,000 |
Jewelry
| Ingredients | Name | Dmg/Amr | Weight | Value |
|---|---|---|---|---|
| 1 Flawless Diamond, 1 Gold Ingot | Gold Diamond Necklace | 0 | 0.5 | 1,200 |
| 1 Diamond, 1 Gold Ingot | Gold Diamond Ring | 0 | 0.25 | 900 |
| 1 Emerald, 1 Gold Ingot | Gold Emerald Ring | 0 | 0.25 | 700 |
| 2 Flawless Amethyst, 1 Gold Ingot | Gold Jeweled Necklace | 0 | 0.5 | 485 |
| 1 Gold Ingot | Gold Necklace | 0 | 0.5 | 120 |
| 1 Gold Ingot | 2 Gold Ring | 0 | 0.25 | 75 |
| 1 Flawless Ruby, 1 Gold Ingot | Gold Ruby Necklace | 0 | 0.5 | 550 |
| 1 Sapphire, 1 Gold Ingot | Gold Sapphire Ring | 0 | 0.25 | 500 |
| 1 Amethyst, 1 Silver Ingot | Silver Amethyst Ring | 0 | 0.25 | 180 |
| 1 Flawless Emerald, 1 Silver Ingot | Silver Emerald Necklace | 0 | 0.5 | 830 |
| 1 Garnet, 1 Silver Ingot | Silver Garnet Ring | 0 | 0.25 | 160 |
| 1 Flawless Garnet, 1 Silver Ingot | Silver Jeweled Necklace | 0 | 0.5 | 380 |
| 1 Silver Ingot | Silver Necklace | 0 | 0.5 | 60 |
| 1 Silver Ingot | 2 Silver Ring | 0 | 0.25 | 30 |
| 1 Ruby, 1 Silver Ingot | Silver Ruby Ring | 0 | 0.25 | 260 |
| 1 Flawless Sapphire, 1 Silver Ingot | Silver Sapphire Necklace | 0 | 0.5 | 580 |
Draugr (Skyforge Only, after Glory of the Dead)
| Ingredients | Name | Dmg/Amr | Weight | Value |
|---|---|---|---|---|
| 3 Leather Strips, 3 Steel Ingot, 1 Ancient Nord Battleaxe | Nord Hero Battleaxe | 32 | 20 | 239 |
| 3 Leather Strips, 3 Steel Ingot, 1 Ancient Nord Greatsword | Nord Hero Greatsword | 30 | 16 | 199 |
| 2 Leather Strips, 2 Steel Ingot, 1 Ancient Sword | Nord Hero Sword | 30 | 9 | 107 |
| 2 Leather Strips, 2 Steel Ingot, 1 Ancient Nord War Axe | Nord Hero War Axe | 32 | 11 | 131 |
| 4 Leather Strips, 2 Leather, 2 Iron Ingot, 5 Steel Ingot | Ancient Nord Armor | 25 | 28 | 125 |
| 3 Leather Strips, 2 Leather, 2 Iron Ingot, 4 Steel Ingot | Ancient Nord Boots | 10 | 5 | 25 |
| 3 Leather Strips, 2 Leather, 2 Iron Ingot, 3 Steel Ingot | Ancient Nord Gauntlets | 10 | 4 | 25 |
| 3 Leather Strips, 2 Leather, 2 Iron Ingot, 3 Steel Ingot | Ancient Nord Helmet | 15 | 4 | 60 |
 Dawnguard Smithing Recipes
This table lists the recipes for forging the new items available in Dawnguard.
Arrows
| Ingredients | Name | Dmg/Amr | Weight | Value |
|---|---|---|---|---|
| 1 Firewood, 1 Iron Ingot | Iron Arrow (24) | 8 | 0 | 1 |
| 1 Firewood, 1 Steel Ingot | Steel Arrow (24) | 10 | 0 | 2 |
| 1 Firewood, 1 Dwarven Metal Ingot | Dwarven Arrow (24) | 14 | 0 | 4 |
| 1 Firewood, 1 Refined Moonstone | Elven Arrow (24) | 16 | 0 | 5 |
| 1 Firewood, 1 Orichalcum Ingot | Orcish Arrow (24) | 12 | 0 | 3 |
| 1 Firewood, 1 Ebony Ingot | Ebony Arrow (24) | 20 | 0 | 7 |
| 1 Firewood, 1 Malachite Ingot | Glass Arrow (24) | 18 | 0 | 6 |
| 1 Firewood, 1 Ebony Ingot, 1 Daedra Heart | Daedric Arrow (24) | 24 | 0 | 8 |
| 1 Firewood, 1 Dragon Bone | Dragonbone Arrow (24) | 25 | 0 | 9 |
Dragon
| Ingredients | Name | Dmg/Amr | Weight | Value |
|---|---|---|---|---|
| 2 Leather Strips, 2 Ebony Ingot, 3 Dragon Bone | Dragonbone Battleaxee | 26 | 30 | 3,000 |
| 1 Ebony Ingot, 2 Dragon Bone | Dragonbone Bow | 20 | 20 | 2,725 |
| 1 Leather Strip, 1 Dragon Bone | Dragonbone Dagger | 12 | 6.5 | 600 |
| 3 Leather Strips, 1 Ebony Ingot, 4 Dragon Bone | Dragonbone Greatsword | 25 | 27 | 2,725 |
| 1 Leather Strip, 1 Ebony Ingot, 2 Dragon Bone | Dragonbone Mace | 17 | 22 | 2,000 |
| 1 Leather Strips, 1 Ebony Ingot, 1 Dragon Bone | Dragonbone Sword | 15 | 19 | 1,500 |
| 2 Leather Strips, 1 Ebony Ingot, 1 Dragon Bone | Dragonbone War Axe | 16 | 21 | 1,700 |
| 3 Leather Strips, 2 Ebony Ingots, 3 Dragon Bones | Dragonbone Warhammer | 28 | 33 | 4275 |
Miscellaneous
| Ingredients | Name | Dmg/Amr | Weight | Value |
|---|---|---|---|---|
| 2 Leather Strips, 1 Bone Hawk Skull, 6 Bone Hawk Feathers | Bone Hawk Amulet | 0 | 1 | 100 |
| 2 Shellbug Chitin, 2 Iron Ingot | Shellbug Helmet | 22 | 6 | 600 |
Crossbows and Bolts
| Ingredients | Name | Dmg/Amr | Weight | Value |
|---|---|---|---|---|
| 3 Firewood, 3 Steel Ingot | Crossbow | 19 | 14 | 120 |
| 1 Steel Crossbow, 2 Corundum Ingots | Enhanced Crossbow | 19 | 15 | 200 |
| 5 Dwarven Ingots | Dwarven Crossbow | 22 | 20 | 350 |
| Dwarven Crossbow, 2 Quicksilver Ingots | Enhanced Dwarven Crossbow | 22 | 21 | 550 |
| 1 Firewood, 1 Steel Ingot | Steel Bolt (10) | 10 | 0 | 1 |
| 10 Steel Bolts, 1 Fire Salts | Exploding Steel Bolt of Fire (10) | 10 | 0 | 5 |
| Explodes for 10 points of fire damage. | ||||
| 10 Steel Bolts, 1 Frost Salts | Exploding Steel Bolt of Ice (10) | 10 | 0 | 5 |
| Explodes for 10 points of frost damage to Health and Stamina. | ||||
| 10 Steel Bolts, 1 Void Salts | Exploding Steel Bolt of Shock (10) | 10 | 0 | 5 |
| Explodes for 10 points of shock damage to Health and half that to Magicka. | ||||
| 1 Firewood, 1 Dwarven Ingot | Dwarven Bolt (10) | 14 | 0 | 3 |
| 1 Dwarven Bolt, 1 Fire Salts | Exploding Dwarven Bolt of Fire (10) | 14 | 0 | 15 |
| Explodes for 10 points of fire damage. | ||||
| 1 Dwarven Bolt, 1 Frost Salts | Exploding Dwarven Bolt of Ice (10) | 14 | 0 | 15 |
| Explodes for 10 points of frost damage to Health and Stamina. | ||||
| 1 Dwarven Bolt, 1 Void Salts | Exploding Dwarven Bolt of Shock (10) | 14 | 0 | 15 |
| Explodes for 10 points of shock damage to Health and half that to Magicka. |
Aetherium (Aetherium Forge only)
| Ingredients | Name | Dmg/Amr | Weight | Value |
|---|---|---|---|---|
| 1 Aetherium Crest, 2 Flawless Sapphires, 2 Dwarven Ingots, 2 Gold Ingots | Aetherial Crown | 0 | 2 | 2250 |
| 1 Aetherium Crest, 4 Dwarven Ingots, 2 Malachite Ingots | Aetherial Shield | 26 | 12 | 2000 |
| 1 Aetherium Crest, 2 Dwarven Ingots, 2 Ebony Ingots, 1 Gold Ingot | Aetherial Staff | 0 | 8 | 1970 |
Hearthfire Smithing Recipes
Building Materials (Hearthfire only)
| Ingredients | Name | Dmg/Amr | Weight | Value |
|---|---|---|---|---|
| 1 Iron Ingot | Iron Fittings | 1 | 4 | |
| 1 Iron Ingot | Hinge (2) | 0.5 | 4 | |
| 1 Iron Ingot | Nails (10) | 0.1 | 1 | |
| 1 Iron Ingot, 1 Corundum Ingot | Lock | 0.5 | 10 |
Dragonborn Smithing Recipes
This table lists the additional recipes for forging the new items available in Dragonborn. You should also reference the previous Smithing recipes for a complete list.
Bonemold
| Ingredients | Name | Dmg/Amr | Weight | Value |
|---|---|---|---|---|
| 2 Netch Leather, 10 Bone Meal, 1 Iron Ingot | Bonemold Armor | 32 | 34 | 290 |
| 1 Netch Leather, 1 Iron Ingot, 6 Bone Meal | Bonemold Boots | 12 | 7 | 60 |
| 1 Netch Leather, 4 Bone Meal, 1 Iron Ingot | Bonemold Gauntlets | 12 | 3.5 | 60 |
| 1 Netch Leather, 6 Bone Meal, 1 Iron Ingot | Bonemold Helmet | 17 | 4.5 | 135 |
| 1 Netch Leather, 8 Bone Meal, 1 Iron Ingot | Bonemold Shield | 22 | 8 | 95 |
| 2 Netch Leather, 10 Bone Meal, 1 Iron Ingot, 1 Void Salts, 1 Stalhrim Ore, 1 Netch Jelly | Improved Bonemold Armor | 35 | 43 | 290 |
| 1 Netch Leather, 6 Bone Meal, 1 Iron Ingot, 1 Void Salts, 1 Stalhrim Ore, 1 Netch Jelly | Improved Bonemold Boots | 13 | 9 | 60 |
| 1 Netch Leather, 4 Bone Meal, 1 Iron Ingot, 1 Void Salts, 1 Stalhrim Ore, 1 Netch Jelly | Improved Bonemold Gauntlets | 13 | 7 | 60 |
| 1 Netch Leather, 6 Bone Meal, 1 Iron Ingot, 1 Void Salts, 1 Stalhrim Ore, 1 Netch Jelly | Improved Bonemold Helmet | 18 | 11 | 135 |
| 1 Netch Leather, 8 Bone Meal, 1 Iron Ingot, 1 Void Salts, 1 Stalhrim Ore, 1 Netch Jelly | Improved Bonemold Shield | 26 | 11 | 95 |
Chitin
| Ingredients | Name | Dmg/Amr | Weight | Value |
|---|---|---|---|---|
| 2 Netch Leather, 5 Chitin Plate, 1 Iron Ingot | Chitin Armor | 30 | 4 | 240 |
| 1 Netch Leather, 3 Chitin Plate, 1 Iron Ingot | Chitin Boots | 9 | 1 | 50 |
| 1 Netch Leather, 2 Chitin Plate, 1 Iron Ingot | Chitin Bracers | 9 | 2 | 50 |
| 2 Netch Leather, 6 Chitin Plate, 1 Corundum Ingot | Chitin Heavy Armor | 40 | 35 | 650 |
| 1 Netch Leather, 4 Chitin Plate, 1 Corundum Ingot | Chitin Heavy Boots | 14 | 6 | 135 |
| 1 Netch Leather, 3 Chitin Plate, 1 Corundum Ingot | Chitin Heavy Gauntlets | 14 | 5 | 135 |
| 1 Netch Leather, 4 Chitin Plate, 1 Corundum Ingot | Chitin Heavy Helmet | 19 | 5 | 135 |
| 1 Netch Leather, 3 Chitin Plate, 1 Iron Ingot | Chitin Helmet | 14 | 1 | 125 |
| 1 Netch Leather, 4 Chitin Plate, 1 Iron Ingot | Chitin Shield | 25 | 8 | 215 |
Nordic
| Ingredients | Name | Dmg/Amr | Weight | Value |
|---|---|---|---|---|
| 1 Firewood, 1 Steel Ingot, 1 Quicksilver Ingot | Nordic Arrow (24) | 12 | 0 | 3 |
| 5 Steel Ingot, 2 Leather Strips, 1 Quicksilver Ingot | Nordic Battleaxe | 21 | 23 | 650 |
| 3 Steel Ingot, 1 Quicksilver Ingot | Nordic Bow | 13 | 11 | 580 |
| 3 Leather Strips, 6 Steel Ingot, 1 Ebony Ingot, 1 Quicksilver Ingot | Nordic Carved Armor | 43 | 37 | 1600 |
| 2 Leather Strips, 4 Steel Ingot, 1 Ebony Ingot, 1 Quicksilver Ingot | Nordic Carved Boots | 15 | 6 | 220 |
| 2 Leather Strips, 3 Steel Ingot, 1 Ebony Ingot, 1 Quicksilver Ingot | Nordic Carved Gauntlets | 15 | 6 | 220 |
| 2 Leather Strips, 4 Steel Ingot, 1 Ebony Ingot, 1 Quicksilver Ingot | Nordic Carved Helmet | 20 | 7 | 550 |
| 1 Steel Ingot, 1 Leather Strips, 1 Quicksilver Ingot | Nordic Dagger | 8 | 3.5 | 115 |
| 5 Steel Ingot, 3 Leather Strips, 1 Quicksilver Ingot | Nordic Greatsword | 20 | 19 | 585 |
| 1 Leather Strips, 1 Steel Ingot, 1 Quicksilver Ingot | Nordic Mace | 13 | 16 | 410 |
| 1 Leather Strips, 4 Steel Ingot, 1 Quicksilver Ingot | Nordic Shield | 27 | 10 | 335 |
| 2 Steel Ingot, 1 Leather Strips, 1 Quicksilver Ingot | Nordic Sword | 11 | 12 | 290 |
| 2 Steel Ingot, 2 Leather Strips, 1 Quicksilver Ingot | Nordic War Axe | 12 | 14 | 350 |
| 5 Steel Ingot, 3 Leather Strips, 1 Quicksilver Ingot | Nordic Warhammer | 23 | 27 | 700 |
Stalhrim
| Ingredients | Name | Dmg/Amr | Weight | Value |
|---|---|---|---|---|
| 3 Leather Strips, 6 Stalhrim Ore, 1 Quicksilver Ingot | Stalhrim Armor | 46 | 38 | 2200 |
| 1 Firewood, 1 Stalhrim Ore | Stalhrim Arrow (24) | 20 | 0 | 7 |
| 5 Stalhrim Ore, 2 Leather Strips | Stalhrim Battleaxe | 24 | 25 | 2150 |
| 2 Leather Strips, 1 Quicksilver Ingot, 4 Stalhrim Ore | Stalhrim Boots | 17 | 7 | 450 |
| 3 Stalhrim Ore | Stalhrim Bow | 17 | 15 | 1800 |
| 1 Stalhrim Ore, 1 Leather Strips | Stalhrim Dagger | 10 | 4.5 | 395 |
| 2 Leather Strips, 3 Stalhrim Ore, 1 Quicksilver Ingot | Stalhrim Gauntlets | 17 | 7 | 450 |
| 5 Stalhrim Ore, 3 Leather Strips | Stalhrim Greatsword | 23 | 21 | 1970 |
| 2 Leather Strips, 4 Stalhrim Ore, 1 Quicksilver Ingot | Stalhrim Helmet | 22 | 7 | 1135 |
| 3 Leather Strips, 5 Stalhrim Ore, 1 Steel Ingot | Stalhrim Light Armor | 39 | 7 | 925 |
| 2 Leather Strips, 1 Steel Ingot, 3 Stalhrim Ore | Stalhrim Light Boots | 12 | 2 | 215 |
| 2 Leather Strips, 2 Stalhrim Ore, 1 Steel Ingot | Stalhrim Light Gauntlets | 12 | 2 | 215 |
| 2 Leather Strips, 3 Stalhrim Ore, 1 Steel Ingot | Stalhrim Light Helmet | 17 | 2 | 465 |
| 3 Stalhrim Ore, 1 Leather Strips | Stalhrim Mace | 16 | 18 | 1375 |
| 1 Leather Strips, 4 Stalhrim Ore, 1 Steel Ingot | Stalhrim Shield | 30 | 10 | 600 |
| 2 Stalhrim Ore, 1 Leather Strips | Stalhrim Sword | 13 | 14 | 985 |
| 2 Stalhrim Ore, 2 Leather Strips | Stalhrim Waraxe | 15 | 16 | 1180 |
| 5 Stalhrim Ore, 3 Leather Strips | Stalhrim Warhammer | 26 | 29 | 2850 |
Other Crafting Activities
Cooking
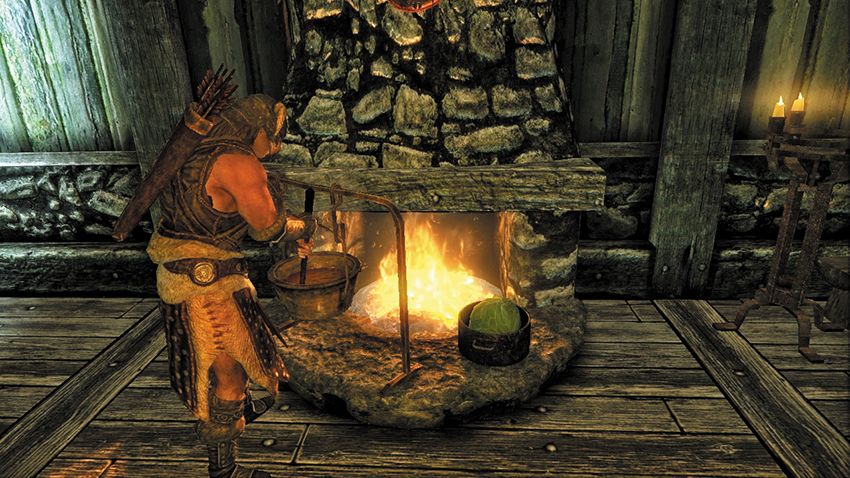
Throw the meat, plants, and other ingredients (often mead-related) into a pot. Stir and stave off the hunger pangs.
Cooking allows you to transform meat, vegetables, and other ingredients into better-tasting, higher-quality food. Cooking is a rudimentary method of living off the land and is far surpassed by alchemy (which is a skill and creates potions that are much more potent).
Cooking requires a cooking pot or cooking spit, which can easily be found in every town and village across Skyrim—almost every house has one by the fireplace. You can also find them in other inhabited locations like forts or bandit camps.
Interact with a cooking pot (or cooking spit) to bring up the Cooking menu, which lists the food you can cook. All of the cooking recipes are readily available at any cooking pot or spit, as long as you have the ingredients for them. If you’re missing ingredients, the recipe is still shown but grayed out.
Most of the food you can cook isn’t all that helpful, typically restoring 5 to 10 points of Health or Stamina—less than you’d receive from even the cheapest of potions. Moreover, the ingredients are often the same price or more expensive than the resulting food and can often be put to better use in alchemy instead.
However, for a new adventurer embarking on their travels across the realm and scrabbling to get by, cooked food is a way to recover a little health in a pinch. For those who wish to live as the Nords do, killing their own meats, harvesting their own vegetables, and cooking the resulting ingredients into a somewhat murky-looking stew, this is an authentic way to satiate hunger and fatigue. But for everyone else, alchemy is a better bet, as it helps to advance your level and makes significantly better restorative items...with one delicious exception: the Elsweyr Fondue is excellent.
Hearthfire and Dragonborn: Cooking
Recipes
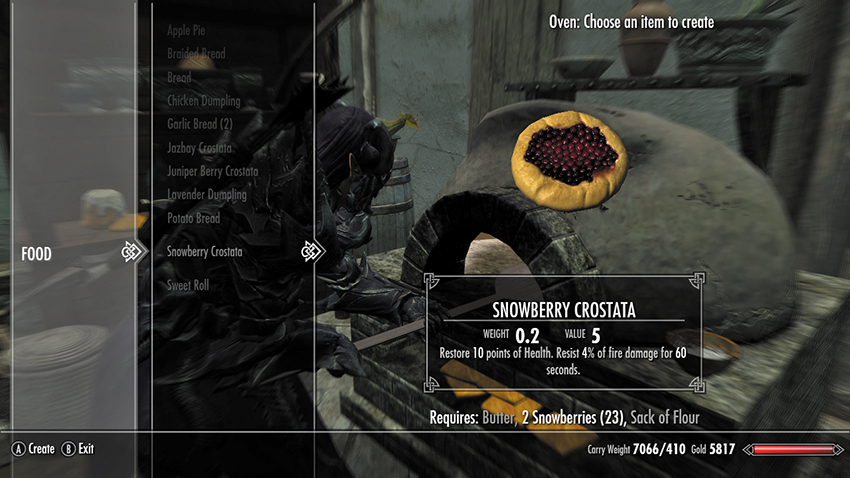
Hearthfire adds the following additions to your cooking:
- Cooking Recipes: There are two new recipes (Steamed Mudcrab Legs and Clam Chowder) that can be made at any cookpot.
- Baking Recipes: When you build your own house, you can construct a kitchen in the east wing addition. One of its unique furnishings is an oven. This allows you to bake any of these recipes (including the delicious apple pie and the ubiquitous sweetroll). The oven is the only place you can bake. The only way you can gain access to one is to build it.
- Milling Recipes: If you purchase land in the Pale and build Heljarchen Hall, you can construct the unique mill outbuilding. The mill allows you to convert wheat into a sack of flour. Flour is required for most baking recipes, so you might want to add a kitchen (and oven) to Heljarchen Hall and make it the epicenter of your pastry-based antics.
Cooking Recipes
The following tables show every recipe you can make, including the ingredients and the effects of the food once mixed together. After that is a table of baking recipes (requiring the Hearthfire Oven) and the single milling recipe (requiring the Hearthfire Flour Mill).
| Ingredients | Produces | Weight | Value | Effect |
|---|---|---|---|---|
| Cabbage, Red Apple, Salt Pile | Apple Cabbage Stew | 0.5 | 8 | Restore Health 10, Restore Stamina 15 |
| Carrot, Garlic, Raw Beef, Salt Pile | Beef Stew | 0.5 | 8 | Fortify Stamina 25/12m, Regenerate Stamina 2/12m |
| Cabbage, Leek, Potato, Salt Pile | Cabbage Potato Soup | 0.5 | 5 | Restore Health 10, Restore Stamina 10 |
| 1 Cabbage, 1 Salt Pile | Cabbage Soup | 0.5 | 5 | Restore Health 10, Restore Stamina 8 |
| 1 Clam Meat, 1 Potato, 1 Jug of Milk, 1 Butter | Clam Chowder | 0.5 | 5 | Restore Health 10, Restore Stamina 10 |
| Raw Beef, Salt Pile | Cooked Beef | 0.5 | 5 | Restore Health 10 |
| Ale, Eidar Cheese Wheel, Moon Sugar | Elsweyr Fondue | 0.5 | 5 | Fortify Magicka 100/12m, Regenerate Magicka 25%/12m |
| Chicken Breast, Salt Pile | Grilled Chicken Breast | 0.2 | 4 | Restore Health 5 |
| 1 Ash Yam, 1 Garlic, 1 Horker Meat | Horker and Ash Yam Stew | 0.5 | 8 | Restore Health 15, Restore Stamina 15, Regenerate Health 1/12m |
| Horker Meat, Salt Pile | Horker Loaf | 1 | 4 | Restore Health 10 |
| Garlic, Horker Meat, Lavender, Tomato | Horker Stew | 0.5 | 8 | Restore Health 15, Restore Stamina 15, Regenerate Health 1/12m |
| Horse Meat, Salt Pile | Horse Haunch | 2 | 4 | Restore Health 10 |
| Leg of Goat, Salt Pile | Leg of Goat Roast | 1 | 4 | Restore Health 10 |
| Mammoth Snout, Salt Pile | Mammoth Steak | 2 | 8 | Restore Health 10 |
| Pheasant Breast, Salt Pile | Pheasant Roast | 0.2 | 4 | Restore Health 5 |
| Raw Rabbit Leg, Salt Pile | Rabbit Haunch | 0.1 | 3 | Restore Health 5 |
| Salmon Meat, Salt Pile | Salmon Steak | 0.1 | 4 | Restore Health 5 |
| 1 Mudcrab Legs, 1 Butter | Steamed Mudcrab Legs | 0.1 | 4 | Restore Health 12 |
| Garlic, Leek, Tomato, Salt Pile | Tomato Soup | 0.5 | 5 | Restore Health 10, Restore Stamina 10 |
| Cabbage, Leek, Potato, Tomato | Vegetable Soup | 0.5 | 5 | Regenerate Health 1/12m, Regenerate Stamina 1/12m |
| Venison, Salt Pile | Venison Chop | 2 | 5 | Restore Health 5 |
| Leek, Potato, Salt Pile, Venison | Venison Stew | 0.5 | 8 | Restore Stamina 15, Regenerate Health 1/12m, Regenerate Stamina 1/12m |
Baking Recipes (Requires Hearthfire Oven)
| Ingredients | Produces | Weight | Value | Effect |
|---|---|---|---|---|
| 1 Sack of Flour, 1 Green Apple, 1 Red Apple | Apple Dumpling | 0.1 | 2 | Restore Health 5, Fortify Archery 5%/60s |
| 1 Sack of Flour, 1 Salt Pile, 1 Butter, 1 Chicken’s Egg, 2 Green Apples, 2 Red Apples | Apple Pie | 0.5 | 5 | Restore Health 10 |
| 1 Sack of Flour, 1 Salt Pile | Braided Bread | 0.2 | 2 | Restore Health 2, Fortify Carry Weight 5/30s |
| 1 Sack of Flour, 1 Salt Pile, 1 Jug of Milk, 1 Chicken’s Egg | Bread | 0.2 | 2 | Restore Health 2 |
| 1 Sack of Flour, 1 Salt Pile, 1 Chicken Meat, 1 Garlic, 1 Leek | Chicken Dumpling | 0.1 | 2 | Restore Health 15, Regenerate Health 1/2m |
| 1 Loaf of Bread, 1 Butter, 1 Garlic | Garlic Bread (2) | 0.1 | 2 | Restore Health 1, Cure Disease |
| 1 Sack of Flour, 2 Jazbays, 1 Butter | Jazbay Crostata | 0.2 | 2 | Restore Health 10, Fortify Magicka 4/60s |
| 1 Sack of Flour, 3 Juniper Berries, 1 Butter | Juniper Berry Crostata | 0.2 | 2 | Restore Health 4, Regen Health 2/60s |
| 1 Sack of Flour, 1 Moon Sugar, 2 Snowberries, 1 Lavender | Lavender Dumpling | 0.1 | 2 | Restore Health 5, Fortify Magicka 10/60s, Resist Magic 10%/60s |
| 1 Sack of Flour, 1 Jug of Milk, 1 Salt Pile, 1 Potato, 1 Chicken’s Egg | Potato Bread | 0.2 | 2 | Restore Health 3 |
| 1 Sack of Flour, 2 Snowberries, 1 Butter | Snowberry Crostata | 0.2 | 2 | Restore Health 10, Resist Fire 4%/60s |
| 1 Sack of Flour, 1 Jug of Milk, 1 Salt Pile, 1 Butter, 1 Chicken’s Egg | Sweetroll | 0.1 | 2 | Restore Health 5 |
Milling Recipes (Requires Hearthfire Flour Mill)
| Ingredients | Produces | Weight | Value | Effect |
|---|---|---|---|---|
| 3 Wheat | Sack of Flour | 0.5 | 1 | Restore Health 1 |
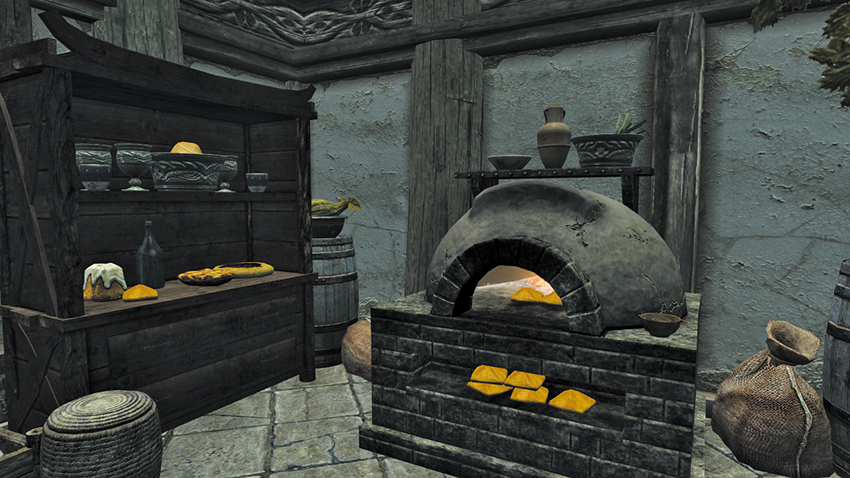
Construct an Oven in your Hearthfire abode and bake some delicious treats!
Mining
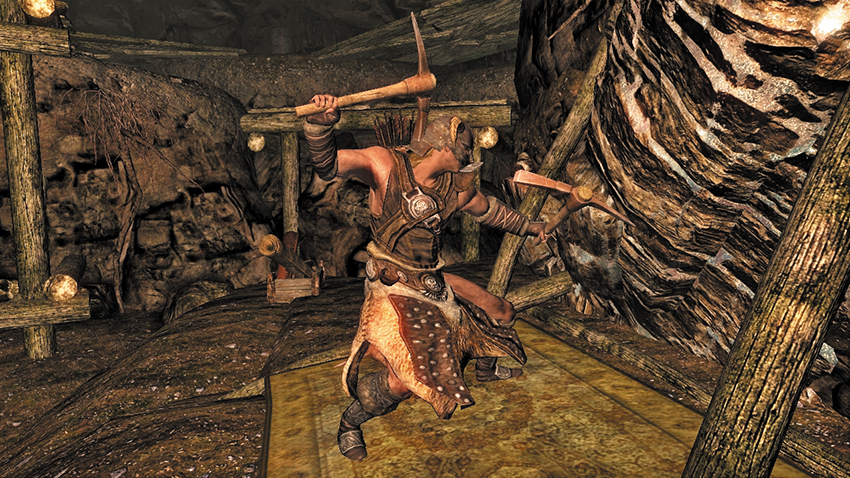
Assaulting an ore vein with dual-wielded pickaxes is the quickest (and craziest) way to mine.
Throughout Skyrim, there are a variety of natural mineral deposits, concentrated in ore veins. Extracting minerals and gems from these veins can make you a small amount of gold, but more importantly, it helps you gather raw materials for smithing (which can save you a huge amount of money if you aim to craft your own items). To extract the ore, you first need a pickaxe. You can purchase one from almost any Blacksmith or general store merchant, or find them (for free) in any mine.
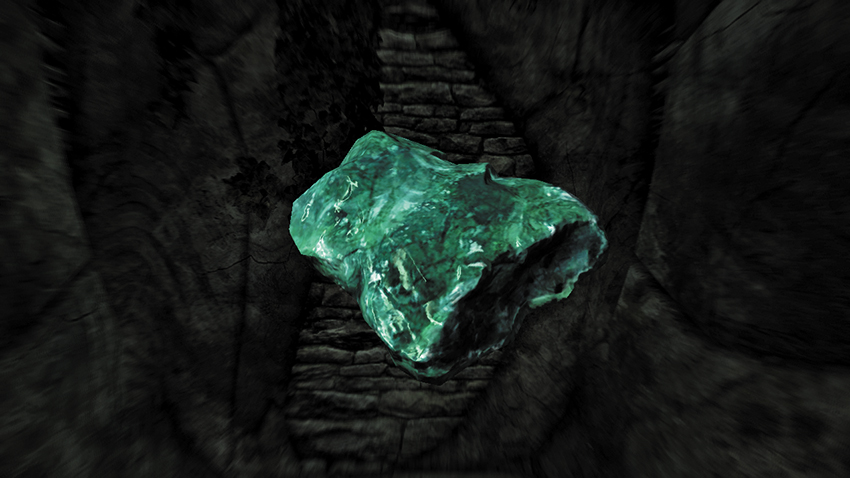
To mine ore, approach an ore vein with a pickaxe in your inventory and interact with it. Typically, a vein produces around three pieces of ore before becoming depleted. Along with each piece of ore, you also have a 10% chance of extracting a (random) gemstone.
Once mined, ore can be sold for a (generally small) amount of gold, or smelted down to make ingots (a slightly better way to earn money from your digging).
Where to Mine?
You can look for minerals in the wilderness of Skyrim’s windswept Holds, though the best and most reliable sources can be found inside the realm’s many mines. A few general tips if you plan to delve into mining:
- Keep a pickaxe handy. You never know where you might run into some valuable ore, whether out in the wilds or in the depths of a dungeon.
- Look for mines. Many settlements have mines, which give you easy access to a specific type of ore. When you befriend the Orc strongholds, you also get access to their rich Orichalcum and Ebony mines.
- Plan your return trip. Every in-game month or so, ore veins that have been depleted will replenish. Check back occasionally to strip them of their new ore.
The Holds of Skyrim and Beyond
If you’re scouring the landscape, here are some general tips for finding ore deposits:
- Falkreath Hold (near Helgen and Riverwood) has a slightly higher concentration of iron ore veins than usual.
- The central tundra of Whiterun Hold is a good place to look for Corundum ore.
- More valuable ores (Gold, Silver, Moonstone, Oricalchum, and Quicksilver) are most often found in more extreme environments, such as deep in the mountains or along the northern coast.
The Forgotten Vale has deposits of rarer minerals (such as Gold and Quicksilver), as well as Shellbugs (Falmer beasts bred for their hard coatings). Check the Atlas for further information.
Dragonborn: Mining
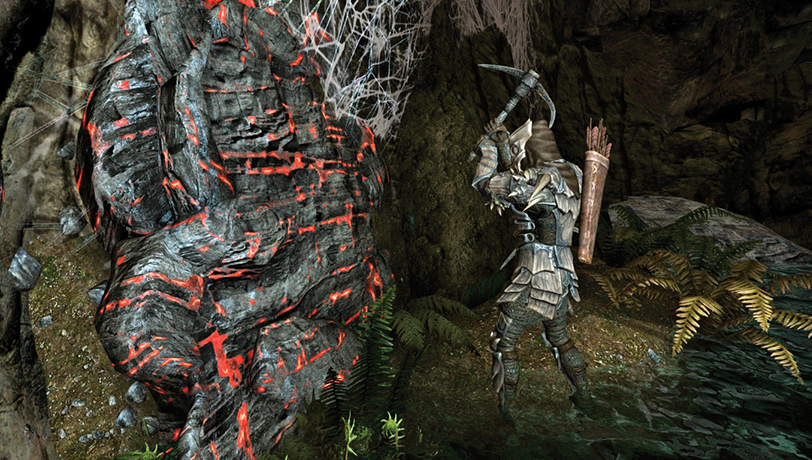
Dragonborn adds several new types of materials to mine:
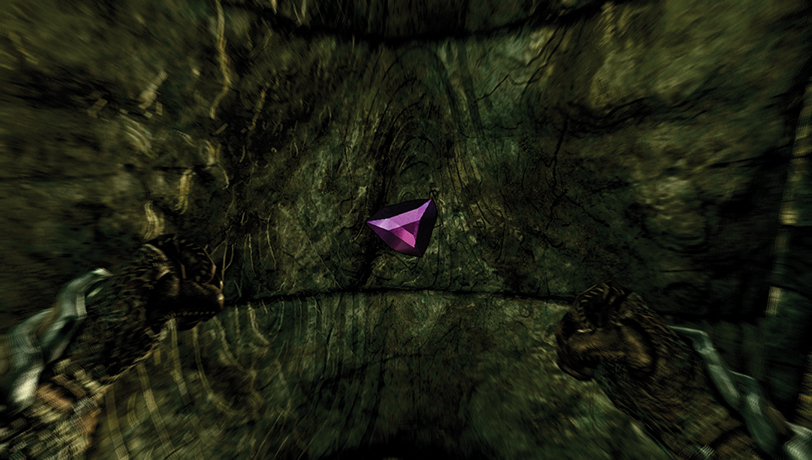
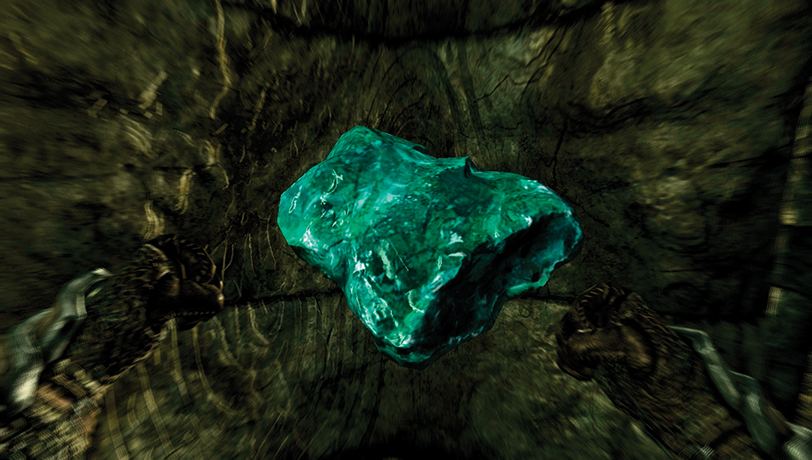
- Geodes are a special type of ore vein that produces gems of a particular type. You can find Amethyst, Emerald, Ruby, and Sapphire Geodes on Solstheim.
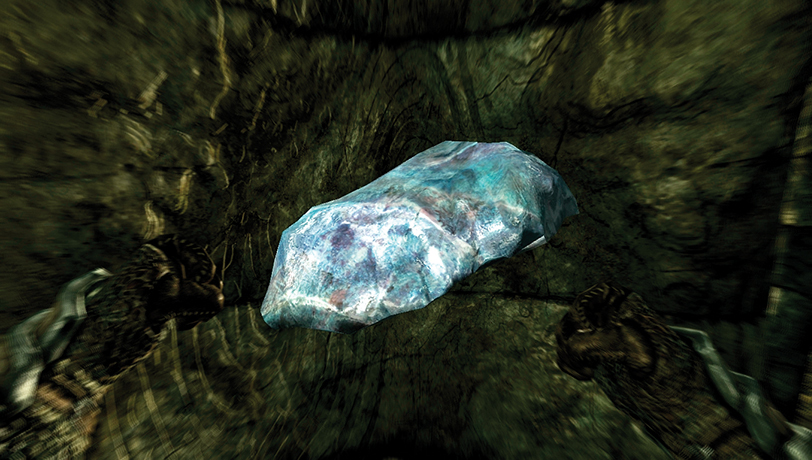
- Heart Stone is a rare material used in Staff Enchanting (see above) and as a reagent for the Ash Guardian spell.
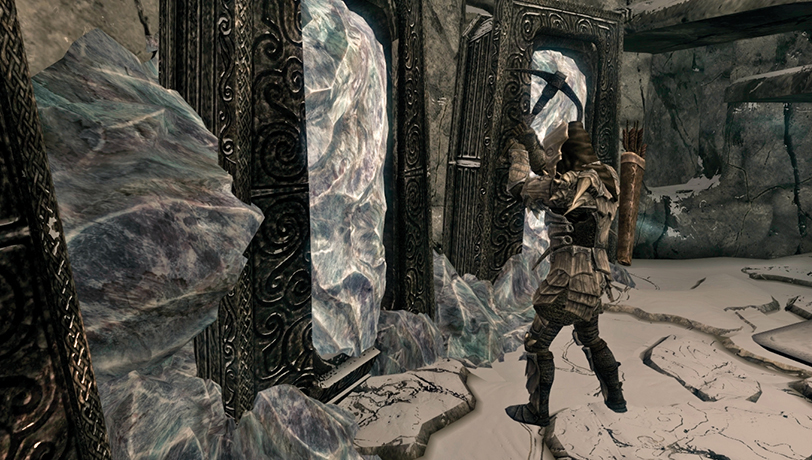
Stalhrim is a type of elemental ice found in the tombs of the ancient Nords buried on Solstheim. The Skaal of northern Solstheim use it in crafting weapons and armor.
In order to mine it, you need an Ancient Nord Pickaxe—normal pickaxes won’t work. These can be found randomly in chests or obtained as part of Solstheim Regional Activity: Take Your Pick* (which sends you to fetch one) or Solstheim Side Quest: Unearthed (Ralis’s unique pickaxe, Hoarfrost, is one).
The Minerals of Skyrim and Solstheim
The following tables reveal locations where minerals can be mined from veins, as well as where ore appears (having already been mined). Only the major locations, usually with two or more deposits, are shown. Note that some veins may be in the immediate vicinity of the location, and may require you to search for them.
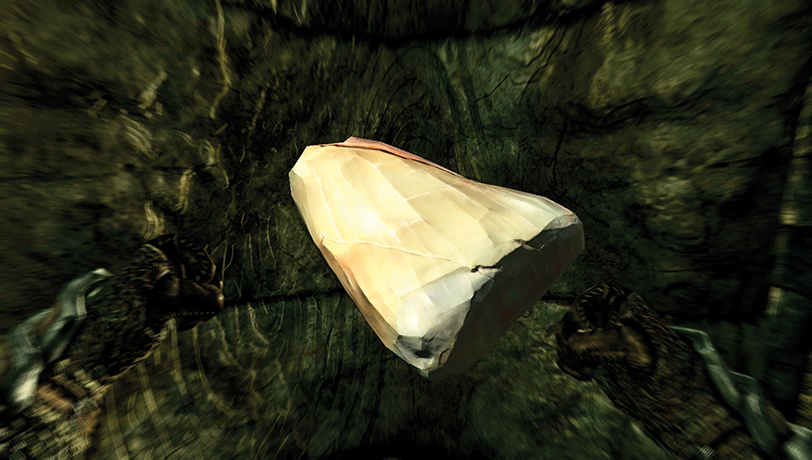
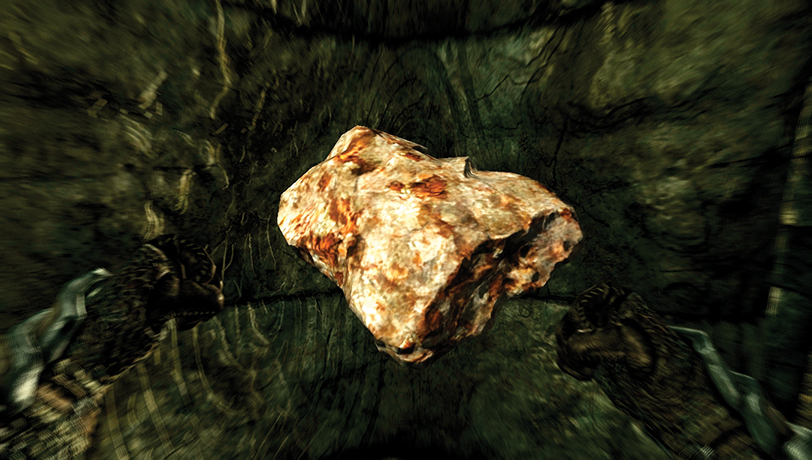
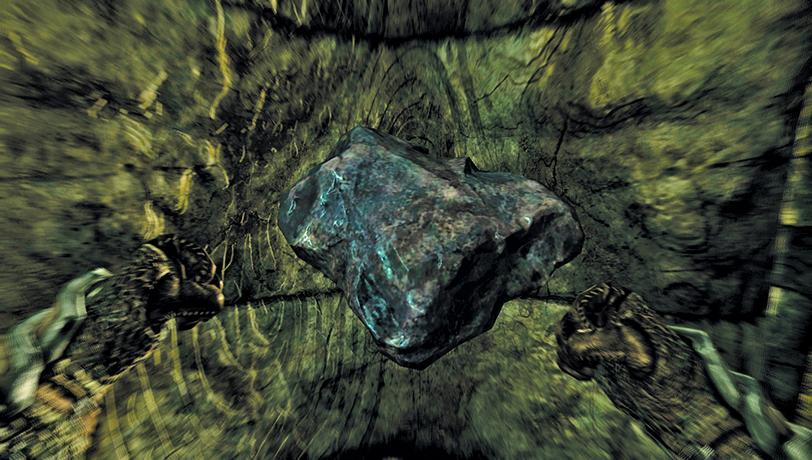
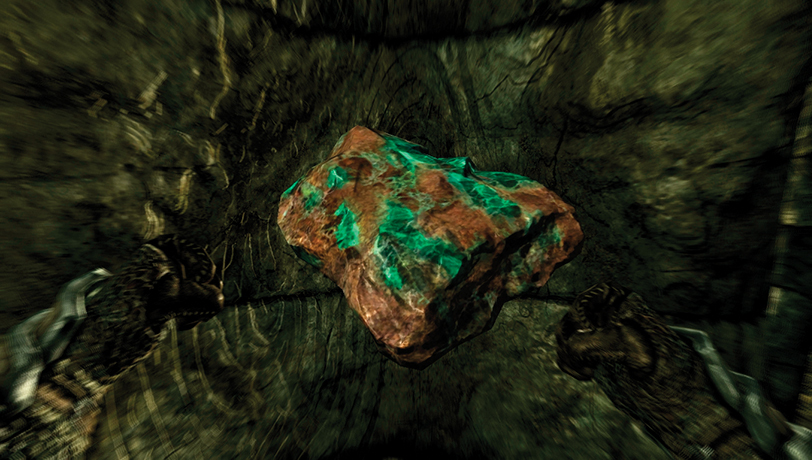
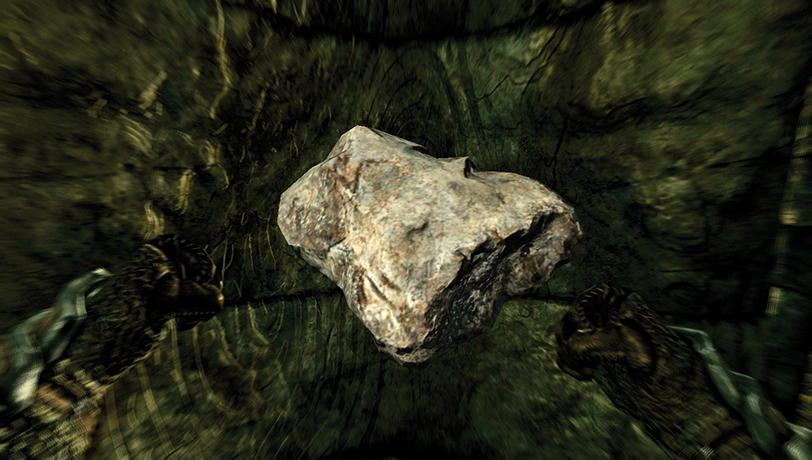
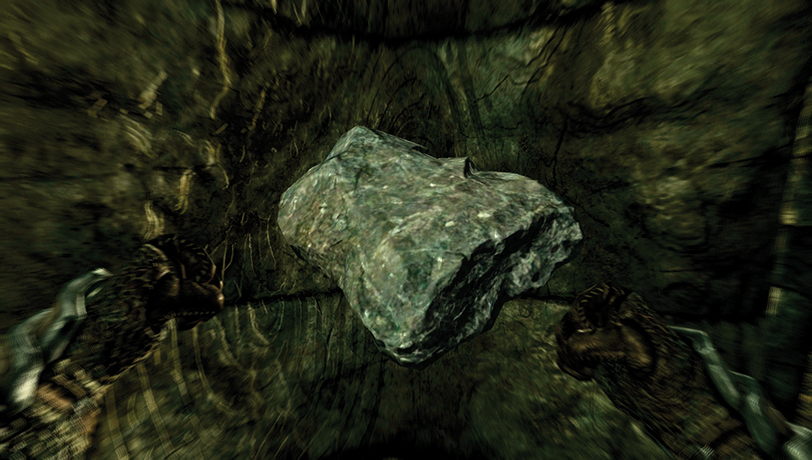
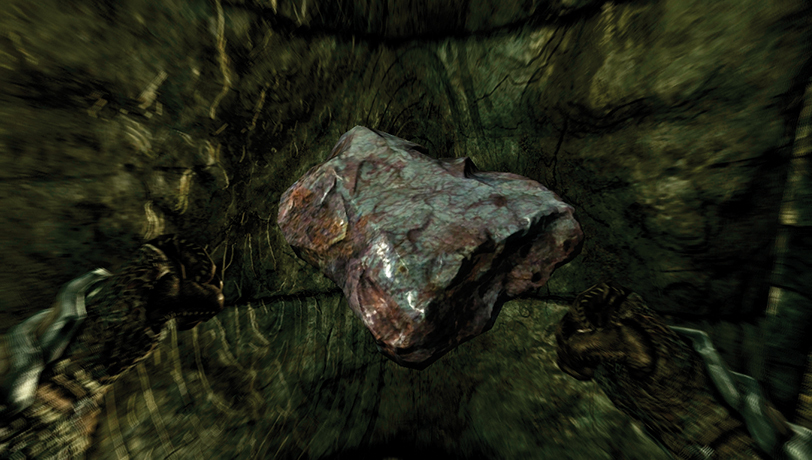
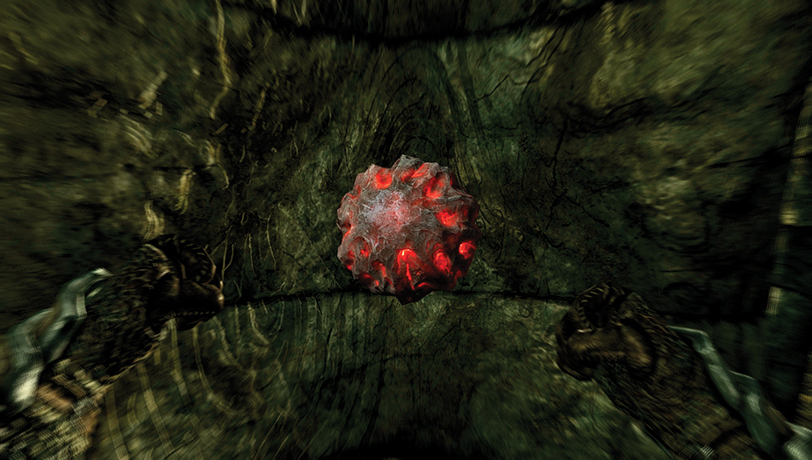
Minerals
Iron Veins and Ore
| Hold | Location | Veins | Ore |
|---|---|---|---|
| Whiterun | Halted Stream Camp | 16 | 4 |
| Winterhold | Fort Fellhammer | 10 | 10 |
| Falkreath Hold | Embershard Mine | 9 | 2 |
| The Rift | Treva’s Watch | 1 | 3 |
| Falkreath Hold | Knifepoint Ridge | 6 | 3 |
| The Reach | Blind Cliff Cave | 6 | 0 |
| Eastmarch | Gloombound Mine | 6 | 0 |
| The Pale | Iron-Breaker Mine | 6 | 1 |
| The Reach | Left Hand Mine | 5 | 0 |
| The Reach | Nchuand-Zel | 4 | 0 |
| Hjaalmarch | Rockwallow Mine | 4 | 0 |
| Eastmarch | Lost Knife Hideout | 3 | 0 |
| The Rift | Northwind Mine | 3 | 0 |
| Solstheim | Damphall Mine | 2 | 0 |
Orichalcum Veins and Ore
| Hold | Location | Veins | Ore |
|---|---|---|---|
| Falkreath Hold | Bilegulch Mine | 9 | 6 |
| The Reach | Dushnikh Yal Mine | 7 | 6 |
| The Reach | Mor Khazgur Mine | 7 | 1 |
| The Rift | Giant’s Grove | 4 | 0 |
| Winterhold | Blackreach | 3 | 0 |
| Solstheim | Highpoint Tower | 3 | 0 |
| Hjaalmarch | Skyborn Altar | 3 | 0 |
| The Rift | Fallowstone Cave | 2 | 0 |
| Hjaalmarch | Chillwind Depths | 2 | 0 |
| The Pale | High Gate Ruins | 2 | 0 |
| Solstheim | Haknir’s Shoal | 2 | 0 |
| The Pale | Nightgate Inn | 2 | 0 |
| Whiterun Hold | Guldun Rock | 2 | 0 |
| The Rift | Largashbur | 1 | 2 |
Silver Veins and Ore
| Hold | Location | Veins | Ore |
|---|---|---|---|
| The Reach | Sanuarach Mine | 7 | 4 |
| Markarth | Cidhna Mine | 6 | 0 |
| Solstheim | Benkongerike | 4 | 0 |
| Falkreath Hold | Sunderstone Gorge | 4 | 0 |
| The Rift | Fallowstone Cave | 3 | 0 |
| Whiterun Hold | Silent Moons Camp | 2 | 0 |
| Solstheim | Secondary Location: Shrine of Zenithar | 2 | 0 |
Corundum Veins and Ore
| Hold | Location | Veins | Ore |
|---|---|---|---|
| Falkreath Hold | Knifepoint Ridge | 19 | 0 |
| Winterhold | Blackreach | 14* | 2 |
| Eastmarch | Goldenrock Mine | 4 | 6 |
| The Reach | Liar’s Retreat | 4 | 0 |
| The Rift | Broken Helm Hollow | 3 | 0 |
| The Reach | Gloomreach | 3 | 0 |
| Eastmarch | Lost Knife Hideout | 3 | 0 |
| Whiterun Hold | Battle-Born Farm | 2 | 0 |
| Whiterun Hold | Cold Rock Pass | 2 | 0 |
| Eastmarch | Eldergleam Sanctuary | 2 | 0 |
| Haafingar | Ironback Hideout | 2 | 0 |
| Hjaalmarch | Ustengrav | 2 | 0 |
| Solstheim | Secondary Location: Shrine of Zenithar | 1 | 2 |
Ebony Veins and Ore
| Hold | Location | Veins | Ore |
|---|---|---|---|
| Eastmarch | Gloombound Mine | 16 | 16 |
| Solstheim | Raven Rock Mine | 9 | 0 |
| Winterhold | Blackreach | 6 | 0 |
| The Rift | Redbelly Mine | 3 | 3 |
| Whiterun Hold | Throat of the World | 2 | 0 |
Gold Veins and Ore
| Hold | Location | Veins | Ore |
|---|---|---|---|
| The Reach | Kolskeggr Mine | 17 | 3 |
| Hjaalmarch | Labyrinthian | 2 | 6 |
| The Pale | Raldbthar | 5 | 2 |
| Whiterun Hold | Darkshade | 4 | 0 |
| Solstheim | Frossel | 4 | 0 |
| Winterhold | Blackreach | 3 | 1 |
| Solstheim | Fort Frostmoth | 3 | 0 |
| The Rift | Lost Prospect Mine | 3 | 0 |
| The Reach | Bthardamz | 3 | 0 |
| Solstheim | Secondary Location: The Miner’s Lament | 2 | 5 |
| Solstheim | Secondary Location: Gold Miners’ Floodgate | 0 | 6 |
Heart Stone Deposits (Solstheim only)
| Location | Deposits |
|---|---|
| Brodir Grove | 3 |
| Broken Tusk Mine | 2 |
| Fort Frostmoth | 2 |
| Hrodulf’s House | 2 |
| White Ridge Barrow | 2 |
| Secondary Location: Impact Crater (Burnt Spriggan) | 2 |
| Secondary Location: Miner Immolation | 2 |
| Secondary Location: Impact Crater (Tel Mithryn) | 1 |
| Secondary Location: Reavers’ Folly | 1 |
Malachite Veins and Ore
| Hold | Location | Veins | Ore |
|---|---|---|---|
| Eastmarch | Steamscorch Mine | 7 | 2 |
| Whiterun Hold | Throat of the World | 2 | 0 |
| The Pale | Dimhollow Crypt | 8 | 0 |
| Solstheim | Nchardak | 4 | 0 |
| The Rift | Ruunvald Excavation | 4 | 0 |
| Solstheim | Glacial Cave | 2 | 0 |
Moonstone Veins and Ore
| Hold | Location | Veins | Ore |
|---|---|---|---|
| The Reach | Soljund’s Sinkhole | 5 | 3 |
| Eastmarch | Mzulft | 7 | 0 |
| Falkreath Hold | Southfringe Sanctum | 3 | 0 |
| Winterhold | Blackreach | 2 | 0 |
| The Reach | Darkfall Cave | 2 | 0 |
| Eastmarch | Kagrenzel | 2 | 0 |
| Whiterun Hold | Silent Moons Camp | 2 | 0 |
| Eastmarch | Stony Creek Cave | 2 | 0 |
Quicksilver Veins and Ore
| Hold | Location | Veins | Ore |
|---|---|---|---|
| The Pale | Quicksilver Mine | 5 | 2 |
| The Reach | Blind Cliff Cave | 3 | 0 |
| Winterhold | Blackreach | 3 | 0 |
| Solstheim | Altar of Thrond | 2 | 0 |
| The Rift | Arcwind Point | 2 | 0 |
| Falkreath Hold | Bloodlet Throne | 2 | 0 |
| The Reach | Druadach Redoubt | 2 | 0 |
| Whiterun Hold | Shimmermist Cave | 2 | 0 |
| The Pale | Silverdrift Lair | 2 | 0 |
| The Rift | Tolvald’s Cave | 2 | 0 |
| Winterhold | The Tower Stone | 2 | 0 |
Shellbugs (Dawnguard only)
| Hold | Location | Shellbugs |
|---|---|---|
| Forgotten Vale | Forgotten Vale Cave | 1 |
| Forgotten Vale | Sharpslope Cave | 1 |
Gem Geodes (Solstheim only)
| Location | Type | Geodes |
|---|---|---|
| Highpoint Tower | Amethyst | 1 |
| Secondary Location: The Miner’s Lament | Emerald | 2 |
| Highpoint Tower | Emerald | 1 |
| Kolbjorn’s Barrow | Emerald | 1 |
| White Ridge Barrow | Ruby | 13 |
| Fort Frostmoth | Ruby | 3 |
| Highpoint Tower | Ruby | 2 |
| Secondary Location: Spider Nest (Kagrumez) | Ruby | 1 |
| Highpoint Tower | Sapphire | 4 |
| White Ridge Barrow | Sapphire | 2 |
| Secondary Location: Shrine of Zenithar | Sapphire | 2 |
| Secondary Location: White Ridge Barrow Hut | Sapphire | 2 |
Stalhrim Deposits (Solstheim only)
| Location | Type | Geodes |
|---|---|---|
| Stalhrim Source | 10 | 0 |
| Gyldenhul Barrow | 2 | 0 |
| Kolbjorn Barrow | 2 | 0 |
| Secondary Location: Horker Iceberg | 2 | 0 |
Smelting
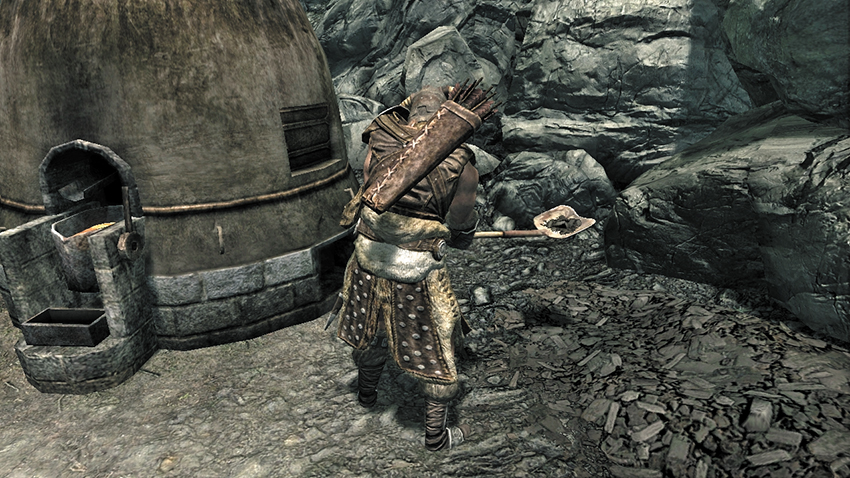
Approach the domed smelter, withstand the great heat, and transform your ore into ingots.
You can purchase ore from most Blacksmiths, or mine it yourself if money is a concern. But what do you do with the ore?
Raw ore isn’t useful on its own and doesn’t sell for many gold pieces. However, if you bring your ore to a smelter, you can smelt it into metal ingots, which you can then sell for more gold pieces or use it to smith your own weapons and armor.
An Ebony Ingot, smelted from two clumps of Ebony Ore.
Smelting Recipes
The following table lists all of the available smelting recipes and the type of ingots produced by each. All of these recipes are available to you immediately; you just need the ore or scrap metal required for them.
| Ingredients | Produces | Weight | Value |
|---|---|---|---|
| 2 Corundum Ore | Corundum Ingot | 1 | 40 |
| Large Decorative Dwemer Strut | Dwarven Metal Ingot (2) | 1 | 30 |
| Small Dwemer Plate Metal | Dwarven Metal Ingot (3) | 1 | 30 |
| Bent Dwemer Scrap Metal | Dwarven Metal Ingot (3) | 1 | 30 |
| Large Dwemer Strut | Dwarven Metal Ingot (3) | 1 | 30 |
| Large Dwemer Plate Metal | Dwarven Metal Ingot (3) | 1 | 30 |
| Solid Dwemer Metal | Dwarven Metal Ingot (5) | 1 | 30 |
| 2 Ebony Ore | Ebony Ingot | 1 | 150 |
| 2 Gold Ore | Gold Ingot | 1 | 100 |
| 1 Iron Ore | Iron Ingot | 1 | 7 |
| 2 Orichalcum Ore | Orichalcum Ingot | 1 | 45 |
| 2 Quicksilver Ore | Quicksilver Ingot | 1 | 60 |
| 2 Malachite Ore | Refined Malachite | 1 | 100 |
| 2 Moonstone Ore | Refined Moonstone | 1 | 75 |
| 2 Silver Ore | Silver Ingot | 1 | 50 |
| 2 Iron Ore | Steel Ingot | 1 | 20 |
Tanning
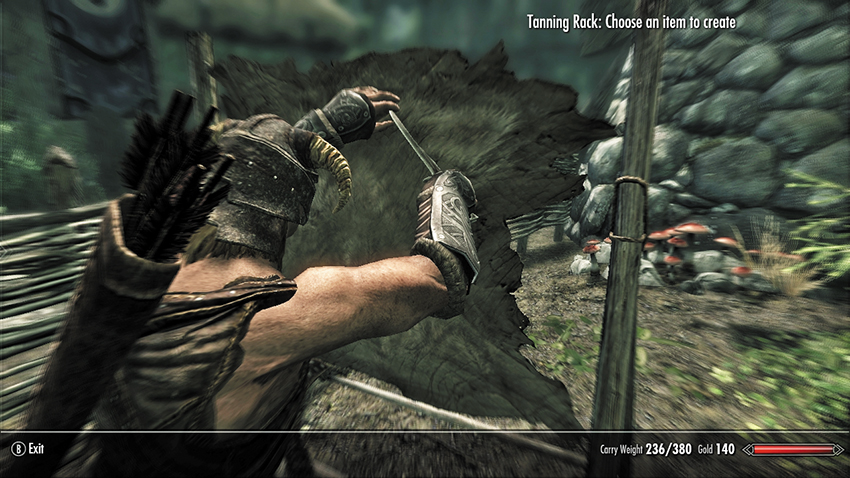
Approach a tanning rack and transform a wild animal hide into leather or leather strips.
Tanning is a simple process; it allows you to transform animal hides into leather or leather strips. These can then be sold or used in your own smithing. Larger pelts produce more leather...but are often more valuable as pelts, rather than broken down into their leather components. Therefore, it is wise to think twice before tanning everything you’ve skinned!
Tanning Recipes
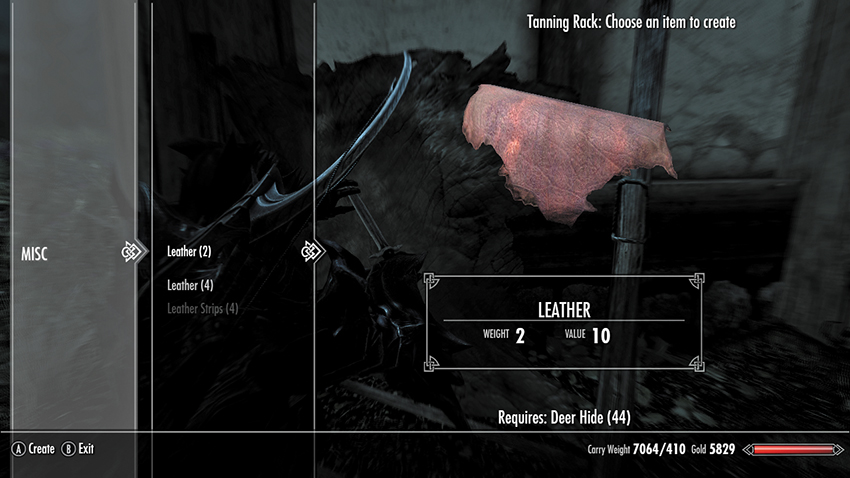
The following table lists all of the available tanning recipes. All of these recipes are available to you immediately; you just need the hides for them.
| Ingredients | Produces | Weight | Value |
|---|---|---|---|
| Leather | Leather Strips (4) | 0.1 | 10 |
| 2 Goat Hide | Leather | 2 | 10 |
| Fox Pelt | Leather | 2 | 10 |
| Snow Fox Pelt | Leather | 2 | 10 |
| Wolf Pelt | Leather | 2 | 10 |
| Ice Wolf Pelt | Leather | 2 | 10 |
| Deer Hide | Leather (2) | 2 | 10 |
| Cow Hide | Leather (3) | 2 | 10 |
| Horse Hide | Leather (3) | 2 | 10 |
| Bear Pelt | Leather (4) | 2 | 10 |
| Cave Bear Pelt | Leather (4) | 2 | 10 |
| Sabre Cat Pelt | Leather (4) | 2 | 10 |
| Sabre Cat Snow Pelt | Leather (4) | 2 | 10 |
| Snow Bear Pelt | Leather (4) | 2 | 10 |
| Vale Deer Hide | Leather (2) | 2 | 10 |
| Vale Sabre Cat Hide | Leather (4) | 2 | 10 |
Wood Chopping
Swing a woodcutter’s axe, cleaving a small log in twain. Now repeat until you’ve had enough.
There are several wood-chopping blocks throughout Skyrim, which allow you to execute this most simple of all crafting exercises: chopping wood. For this, you need a woodcutter’s axe, which you can purchase from almost any general store merchant or find (for free) at any lumber mill. Simply approach the wood-chopping block, interact with it, and you begin chopping. For each chop, two pieces of firewood are added to your Misc Inventory. When you’re finished, sell the firewood to any lumber foreman for 5 gold per piece of wood. You won’t get a better deal from any merchant.
Lumber Mill Locations
If you’re determined to sell your firewood for the best possible prices, do so at the following locations, where you can speak to (and obtain payment from) the lumber mill owner or operator. Note that not all of these lumber mills have a wood-chopping block.
| Lumber Mill | Location (Hold) |
|---|---|
| Dragon Bridge | Haafingar |
| Solitude Sawmill | Haafingar |
| Morthal | Hjaalmarch |
| Anga’s Mill | The Pale |
| Riverwood | Whiterun |
| Mixwater Mill | Eastmarch |
| Falkreath | Falkreath |
| Half-moon Mill | Falkreath |
| Heartwood Mill | The Rift |