
Elder Scrolls V: Skyrim Guide Essentials Training
Training Part 4: Hearthfire
Overview: A Place to Call Home
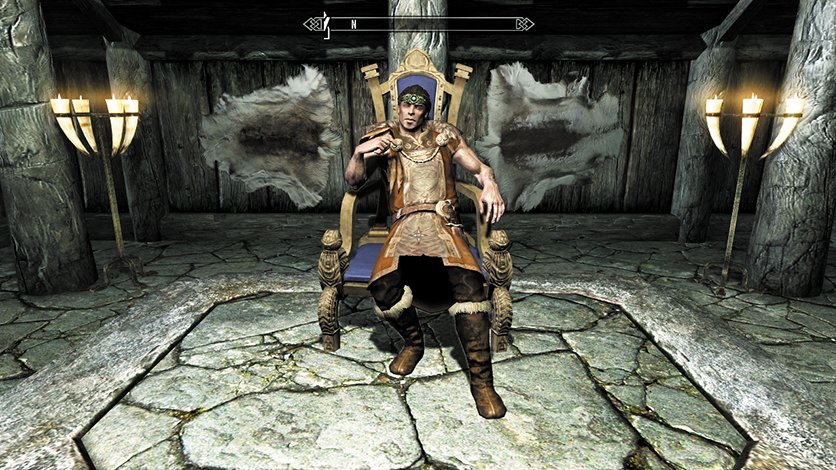
Meet Jarl Siddgeir of Falkreath, one of three Jarls with whom to curry favor.
Becoming a powerful and noble member of Skyrim’s society has its privileges; the title of “Thane” and a Housecarl and a home of your own are the main perks. But those seeking the approval from the Jarls of the smaller Holds—Jarl Igrod Ravencrone of Hjaalmarch, Jarl Skald the Elder of the Pale, or Jarl Siddgeir of Falkreath (or their Civil War replacements)—may be crestfallen at the lack of a property to purchase. Fortunately, this is about to change.
This chapter explains how to purchase land, improve it, construct a property you can be suitably proud of, and then stock it with as many household (and esoteric) items, ingredients, and added benefits as you wish.
Crafting: Build Your Own House
Part 1: Land Grab
Learning about land for sale and purchasing it.
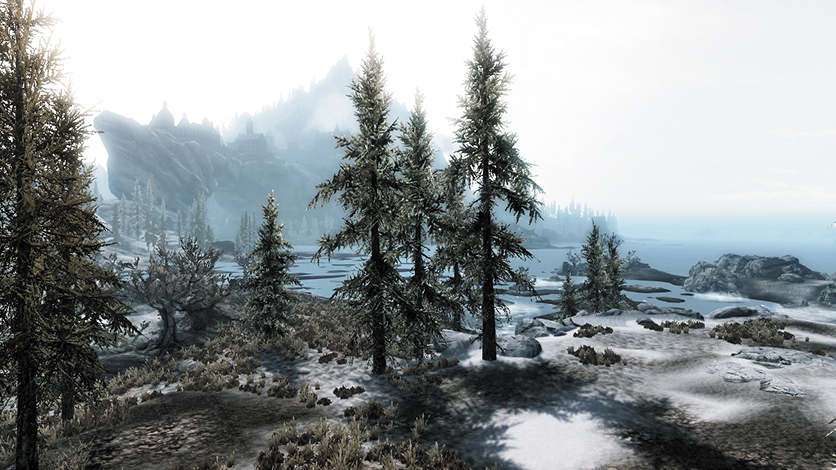
Hjaalmarch Hold: A rather pleasing view across the salt marshes toward Solitude. Expect amazing sunsets.
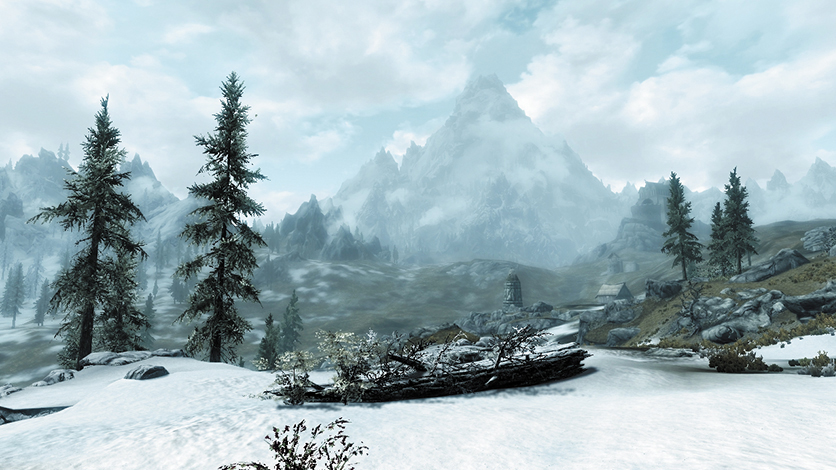
The Pale: A swath of Tundra with exceptional views of the Loreius Farm, Dragonsreach, and the Throat of the World in the distance.
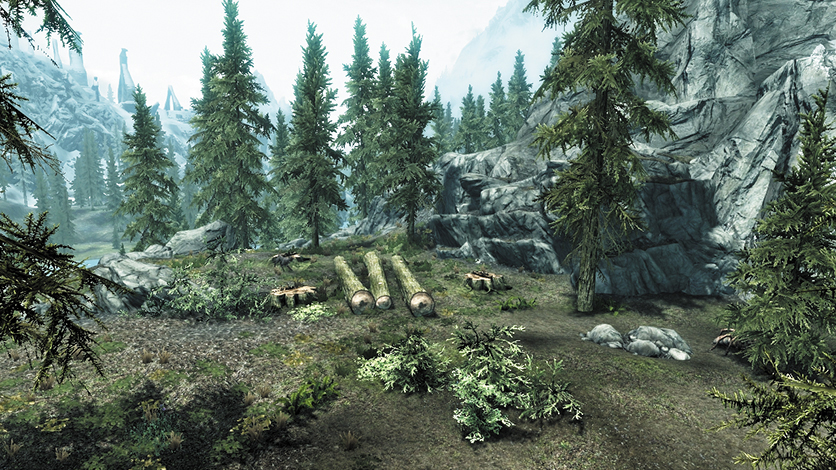
Falkreath Hold: The body of water is Lake Ilinalta. The view is fabulous, perched between the Shriekwind Hills.
In order to construct a dwelling fit for an adventurer of your stature, you must begin by purchasing a plot of land in your chosen Hold.
Learning About the Land
You can purchase land in one of two ways:
- If you’re Level 9, you eventually receive a letter (via a courier, when you enter a settlement) requesting you meet with the Jarl of Falkreath (provided you don’t have a Bounty in that Hold). The letter mentions the possibility of land being purchased once you complete a few Favors. From this point, you must complete Thane Task: Thane of Falkreath.
- If you’ve already attempted some Thane Tasks by working for any or all of the Jarls of Morthal, Dawnstar, or Falkreath, continue these Favors. Once you receive the title of Thane, you also receive news (delivered via courier) that land has become available. Simply return to the Steward (or Jarl) and purchase the land.
Purchasing the Land
Once you’ve befriended the Jarl, they will acknowledge your service to the Hold and inform you that a piece of property is for sale. Talk to the Jarl’s Steward (or, for the Pale, Jarl Skald) and tell them “I’d like to purchase a house.” There isn’t one available, but there is a plot of land. Agree to pay for it. Each plot is 5,000 gold. There is one plot per Hold, so your house is always in the same place. Pay the gold and you receive a charter for the land in question. Your world map updates to show the location of your plot.
- Miscellaneous Objective: Visit your new property in [the Hold in question]
- Windstad Manor Charter (Hjaalmarch Hold)
- Heljarchen Hall Charter (the Pale)
- Lakeview Manor Charter (Falkreath Hold)
Part 2: Outstanding in Your Field
Commencing construction on your manor house.
The remaining information applies to each of the three building plots available.
- Miscellaneous Objective: Use the drafting table to begin building your house
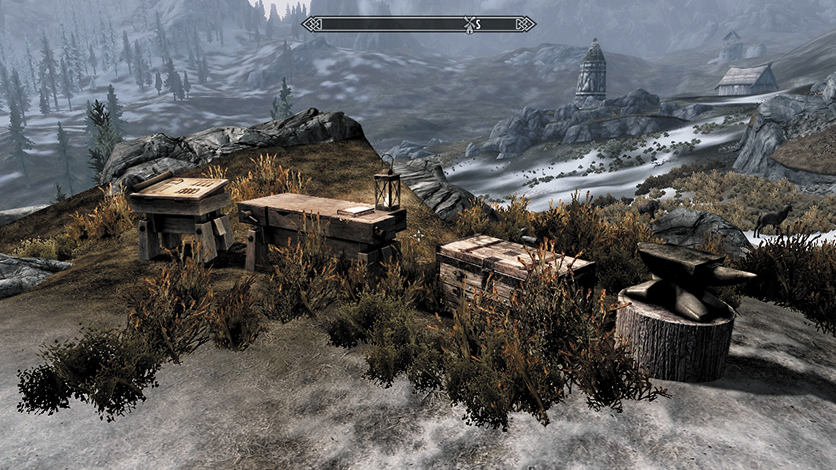
The tools of the home builder: the drafting table, carpenter’s workbench, storage chest, and anvil.
The Right Tools for the Job
Now that you have a deeded property, construction can begin. When you reach the cleared area of land, you come across four important workstations to aid you in this task: the drafting table, carpenter’s workbench, storage chest, and anvil.
The Drafting Table
Approach this first, as it allows you to create the plans for a basic small house layout. After that, you can return to the drafting table and add additional structures to this first one. For now, create the small house layout.
- Miscellaneous Objective: Use the carpenter’s workbench to build the foundation of your house
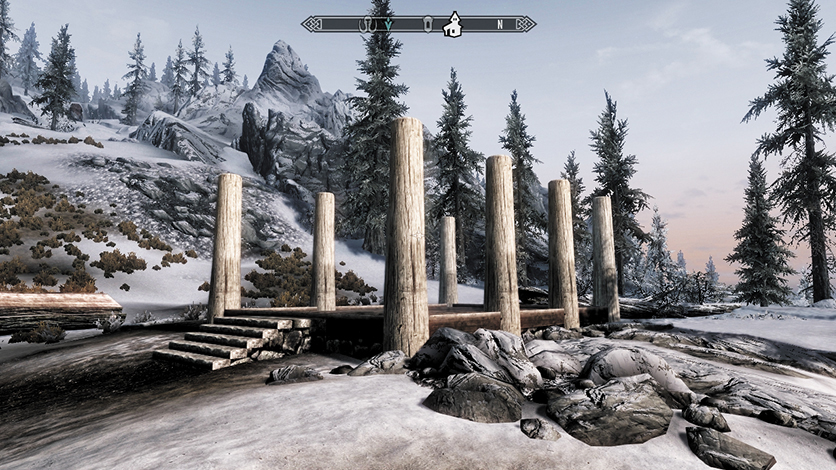
The small house layout, in mid construction.
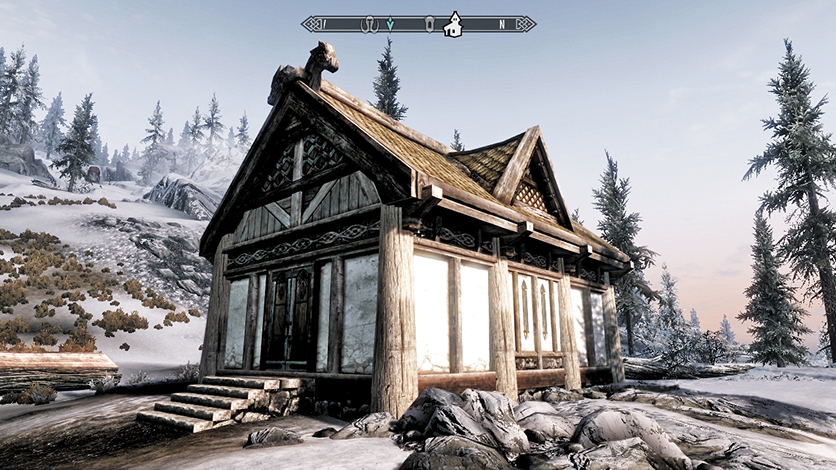
The final exterior construction is finished.
Carpenter’s Workbench
This allows you to take the drafted plans and realize them. The various elements of the structure are broken down into separate pieces so you know what components they require, much in the same way as smithing or alchemy. For now, build the “house, foundation” and “house, wall framing.” Then stop, turn around, and watch the skeletal form of your house take shape.
Return to the carpenter’s workbench and construct the “house, walls.” Then add the “house, floor” and “house, roof framing.” Then finally, add the “house, roof” and “house, door.” Congratulations! You’ve just built yourself a home!
At this point, you can add a variety of outbuildings (from the carpenter’s workbench), and your drafting table updates with another plan. This continues until you’ve finished a house with a main hall; a cellar; and east, west, and north wings.
The Beginner’s Guide to Homesteading
A riveting read, this book provides information and advice on building your home, as well as who can live in it and the types of structures you can create. Refer to it (or this book) if you get stuck.
Chest and Anvil
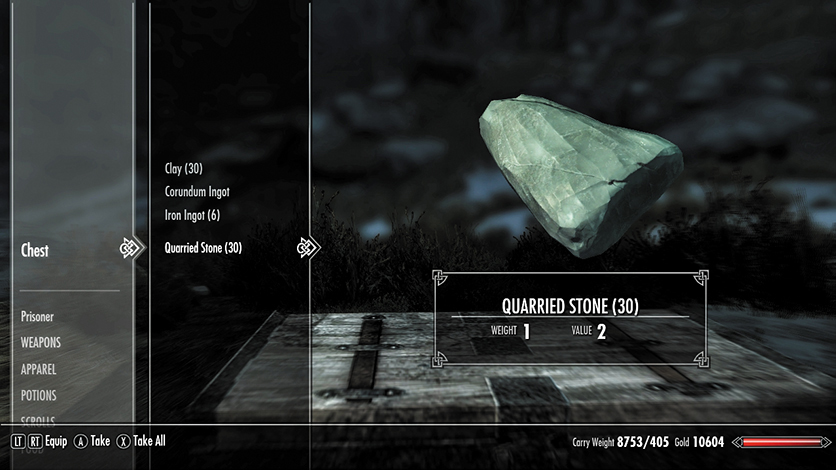
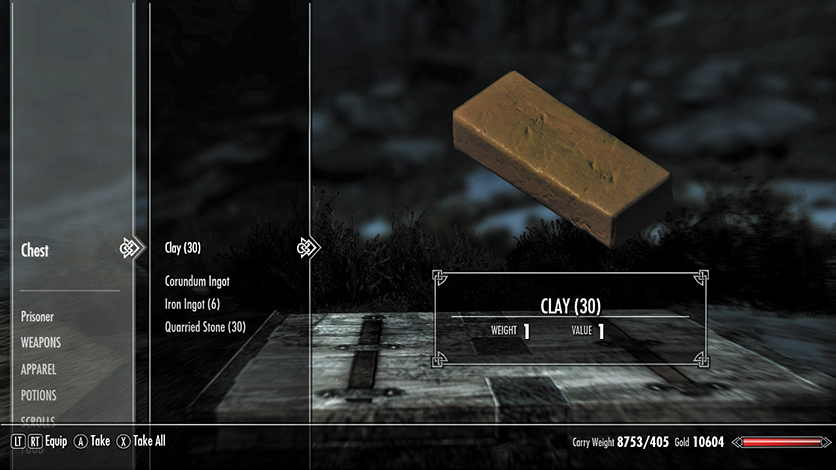
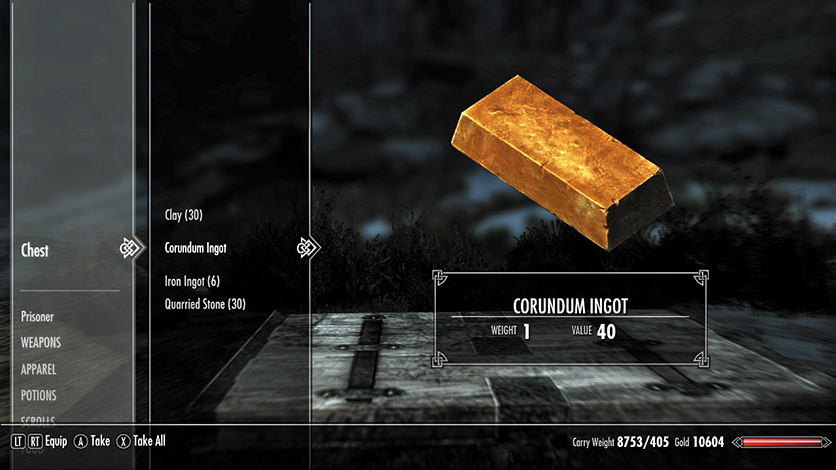
Inspect the chest. It is filled with components for creating the house. As you gather additional raw materials, you can store them here without fear of them being stolen. In fact, it’s an excellent plan to leave all the components you’re going to need in this chest so you aren’t encumbered, and you’ll know where all your building materials are. To help you get started, the Jarl has filled this chest with a supply of raw materials, so take the clay, Corundum Ingots, Iron Ingots, and Quarried Stone that you want from here.
Inspect the anvil (or indeed, any anvil you find in Skyrim), and you’ll see an additional menu: Building Materials. This is where you can mold your raw materials into components, if required. As each component is made up of two or more materials, you’re going to run out and will need to buy or forage for more. But return here and create all the hinges, iron fittings, locks, and nails you need (and many more components as your house becomes more grand).
Part 3: Measure Twice, Cut Once
Gathering supplies to turn into building components.
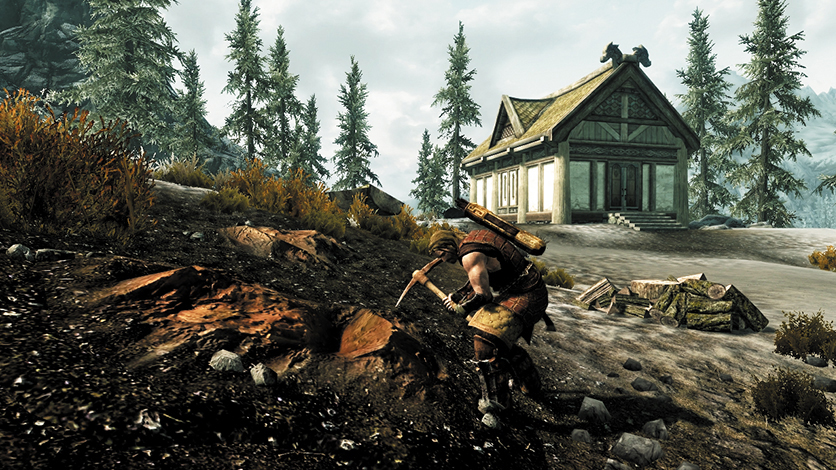
Taking a pickaxe to a clay deposit yields malleable building blocks.
Raw materials are the vital and literal building blocks for your homestead. So it is important to source them. The four main types are quarried stone, clay, sawn logs, and Iron and Corundum Ingots.
Quarried Stone: Fortunately, your house is located near an inexhaustible supply of stone. Of course, you’re the one who has to chip away at the stone quarry with a pickaxe to gather the stone you need. Quickly place the stone into your chest so you aren’t encumbered.
Clay: The grounds of your dwelling are nestled on clay soil. This is fortunate, as you also need to unearth clay in large quantities for much of your house’s structure. This is also quarried using the pickaxe. Quickly place the clay into your chest so you aren’t encumbered.
Sawn Logs: You aren’t equipped to fell trees, so you must source your supply of logs from a lumber mill. This can be done when prompted or at any time. Any settlement with a lumber mill has logs for your needs, but actual mills are perfect:
- Windstad Manor is reasonably close to Solitude Sawmill.
- Heljarchen Hall is in the middle of nowhere! The nearest mill is Anga’s Mill in Eastmarch, though it’s quite a distance up the road.
- Lakeview Manor is close to Half-Moon Mill (especially handy if you’re a vampire!).
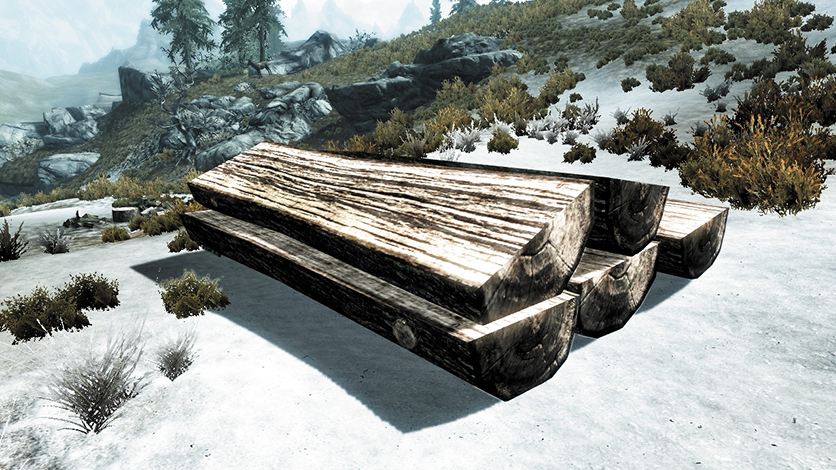
Visit the proprietor of the lumber mill, and request they provide you with logs. Twenty sawn logs cost 200 gold, so carry your coin purse with you. These are automatically added to the log pile at your dwelling.
Iron and Corundum Ingots: All of your basic hinges, fittings, locks, and nails require Iron Ingots, while a lock also needs a lesser metal called corundum. Just like before, these are sources from ore deposits scattered throughout the realm. Fortunately, there are a couple of iron ore veins around Lakeview Manor (Falkreath), while Heljarchen Hall has a corundum deposit nearby. When those run out, locate what you need from vendors or mines.
Part 4: Architectural Improvements (Advice)
The additional structures you can add to your abode.
Extending Your Abode: Outbuildings
Animal Pen
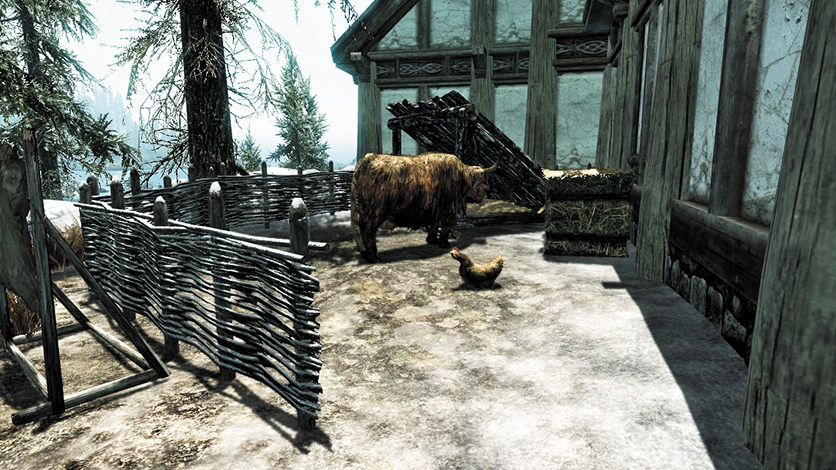
A small enclosure is built against the wall of your home. Initially empty, you can ask your Steward to populate it with a cow or up to three chickens (see below).
Apiary
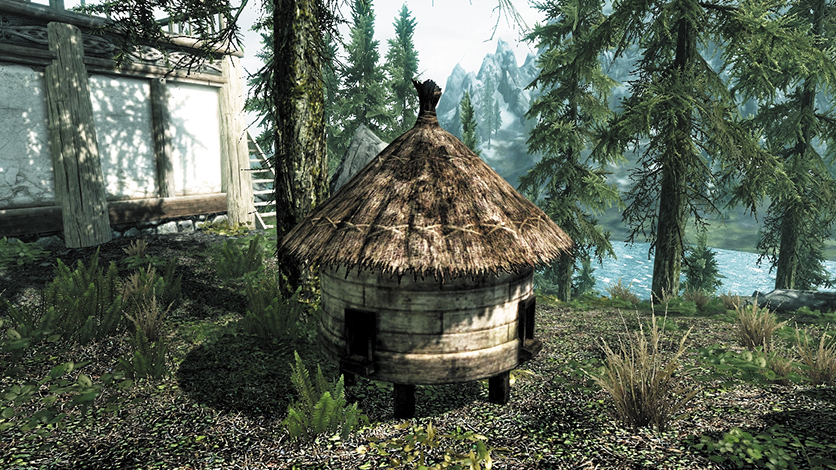
(Lakeview Manor only) For those wishing to harvest bees and honeycomb, build this beehive, which is much more flame-resistant than the ones in the Goldenglow Estate.
Armorer Workbench
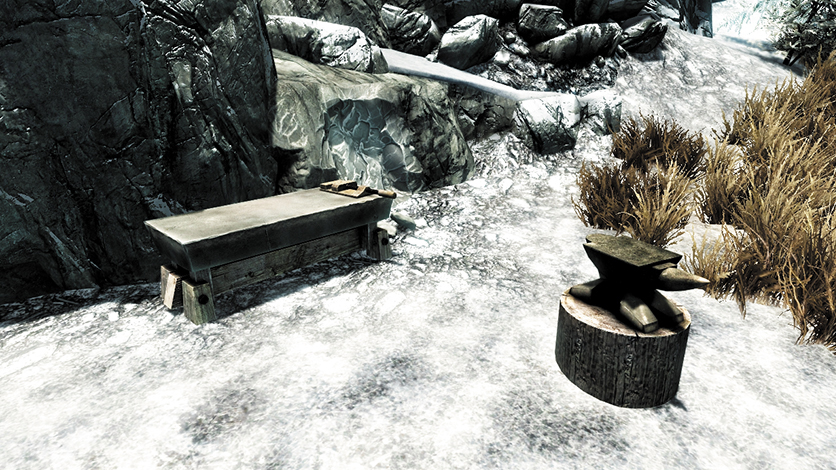
If you want to hone your smithing, you can construct a workbench where you can improve any type of armor, provided you have the necessary Smithing Perks.
Fish Hatchery
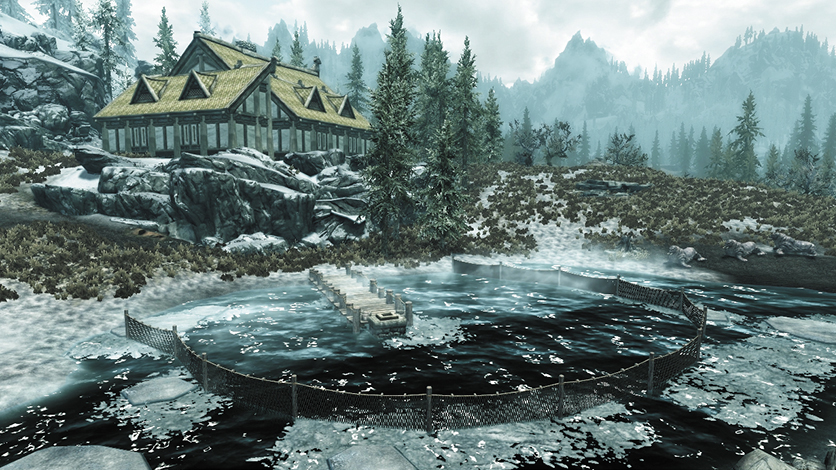
(Windstad Manor only) A small hatchery is constructed in the marsh lake just below Windstad Manor. Initially empty, you can add fish or fish eggs to it, which will hatch into fish of the same type after a day or so.
Fish Hatchery Ingredients
- Silverside Perch
- Abecean Longfin
- River Betty
- Cyrodilic Spadetail
- Histcarp
- Salmon Roe
- Slaughterfish Egg
- Clam Meat
Garden
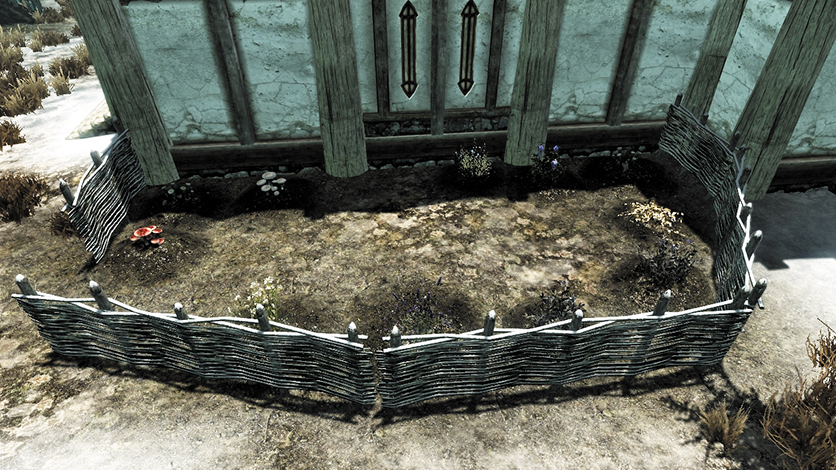
A large section of earth is tilled near the side of your house, and 11 patches of fertile soil are ready to receive food or ingredients that you’ve collected on your travels. Once planted, wait a day, and these sprout and can be harvested for several items of the same type. This is particularly handy if you use an ingredient in your potions that is usually difficult to obtain. Note that ingredients that don’t grow in regular weather conditions (such as Crimson Nirnroot) or that aren’t plants (such as Giant Toes) can’t be grown. For more planting spots, build a greenhouse addition.
| Plantable Ingredients | Quantity Grown |
|---|---|
| Bleeding Crown | 3 |
| Blisterwort | 4 |
| Blue Mountain Flower | 3 |
| Cabbage | 2 |
| Canis Root | 4 |
| Carrot | 4 |
| Creep Cluster | 5 |
| Deathbell | 3 |
| Dragon’s Tongue | 4 |
| Fly Amanita | 4 |
| Giant Luchen | 4 |
| Glowing Mushroom | 5 |
| Gourd | 3 |
| Grass Pod | 3 |
| Imp Stool | 4 |
| Jazbay Grapes | 3 |
| Juniper Berries | 4 |
| Lavender | 3 |
| Leek | 2 |
| Mora Tapinella | 3 |
| Namira’s Rot | 3 |
| Nightshade | 3 |
| Potato | 3 |
| Purple Mountain Flower | 3 |
| Red Mountain Flower | 3 |
| Scaly Pholiota | 5 |
| Snowberries | 4 |
| Swamp Fungal Pod | 3 |
| Thistle Branch | 3 |
| Tundra Cotton | 3 |
| Wheat | 4 |
| White Cap | 2 |
Grindstone
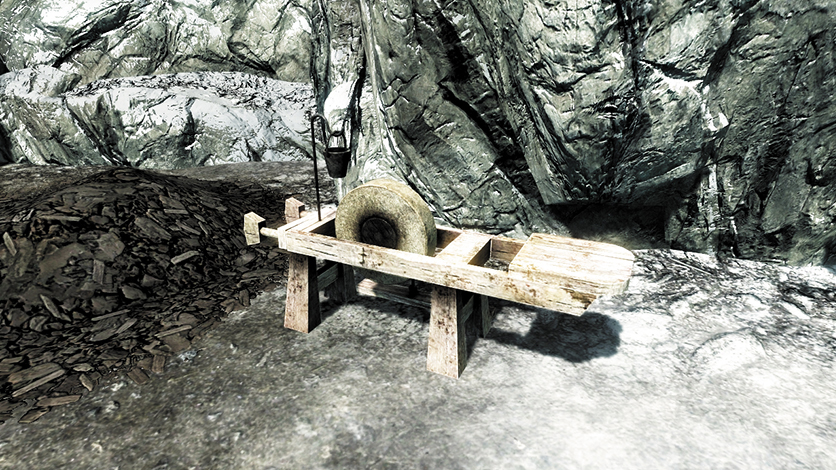
A grinding wheel with a place to sit and sharpen your blades is positioned close to the other crafting stations a Blacksmith uses (such as the workbench or smelter). As with any other grindstone, you can improve your weapons here.
Mill
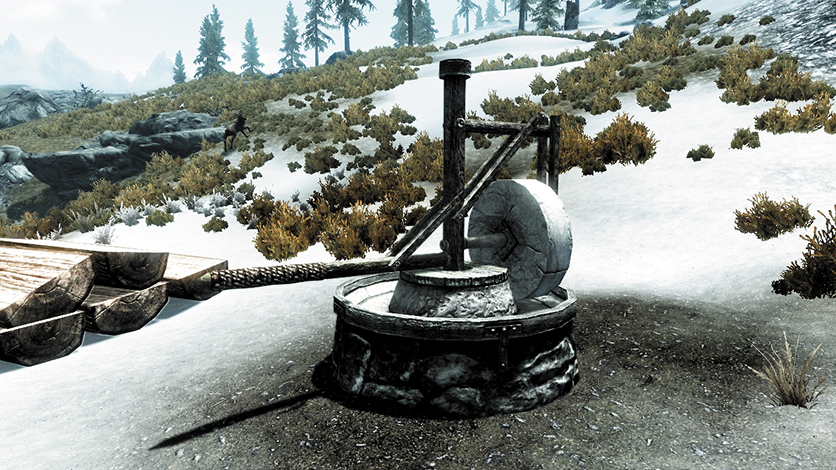
(Heljarchen Hall only) A small milling stone is sunk into the earth close to your dwelling. With three sheaves of wheat, you can create a bag of flour, which you use in many of your kitchen’s baking recipes. For this reason, you may wish Heljarchen Hall to be primarily a place where you grow crops in your garden and greenhouse, and you may want to install a kitchen addition.
Smelter
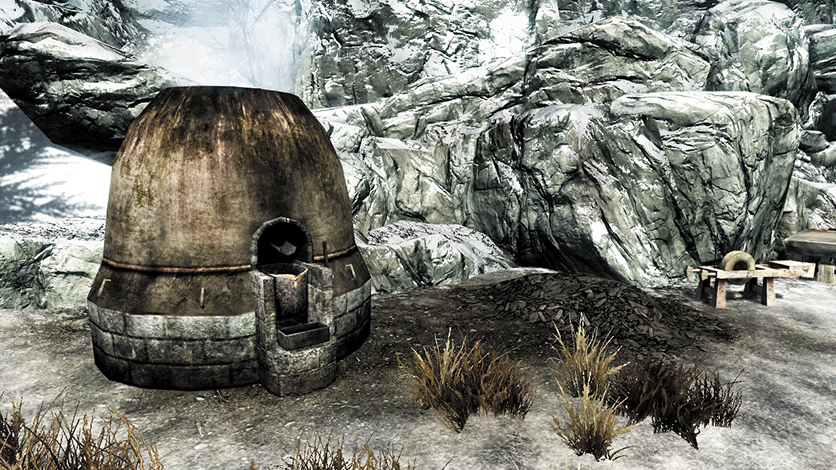
As with all smelters, you can reduce ore and raw materials (such as Dwarven scrap) into metal ingots, which are required to create and improve weapons and armor. Only now, you have a smelter in your backyard.
Stable
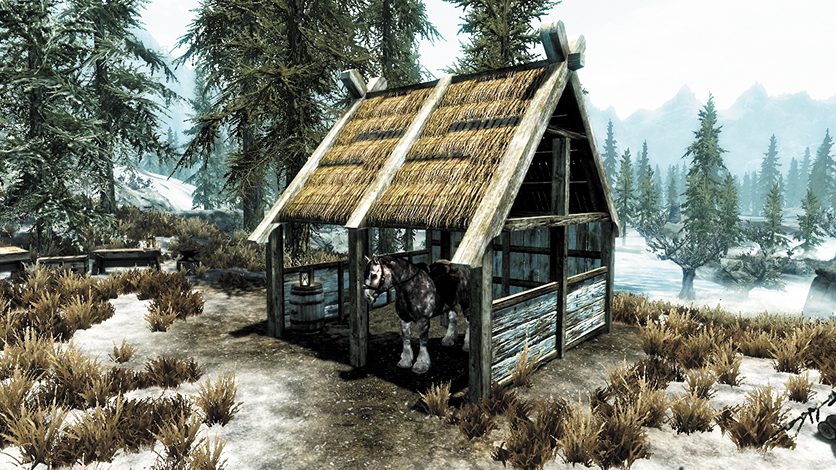
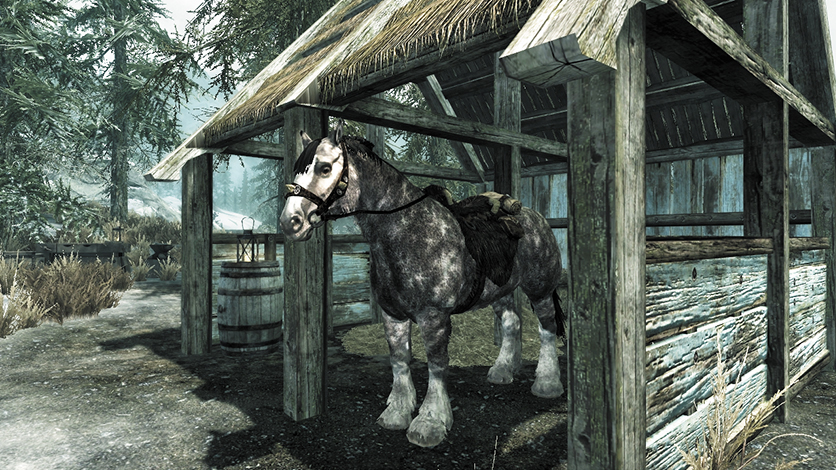
Do you want your Steward to purchase a horse of your own? Then construct a stable where your equine chums can whinny to their hearts’ content.
Extending Your Abode: Winging It
Choose your additions carefully; your properties can have aesthetic and functional differences, as shown in three finished home examples:
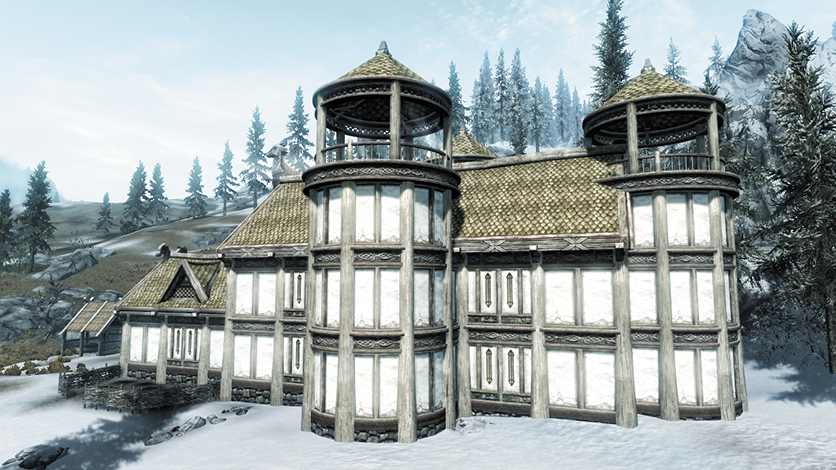
The Enchanter’s Tower, alchemy laboratory, and library create an imposing wizard’s domain.
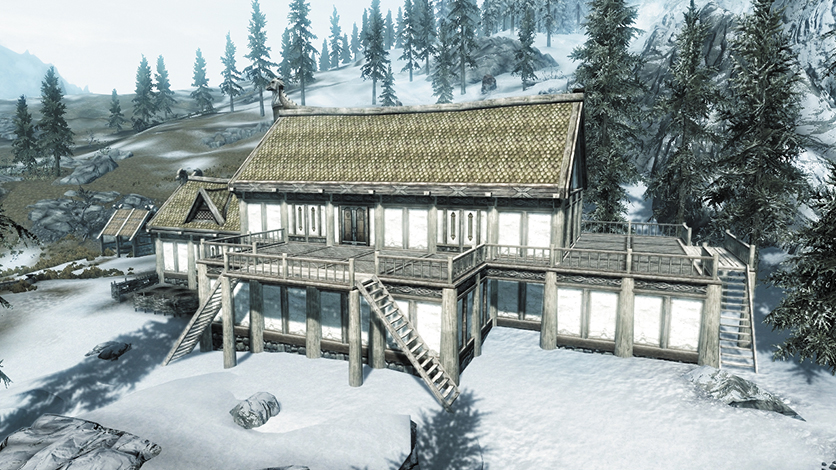
The bedrooms, storage room, and armory create a linked upper porch for panoramic views.
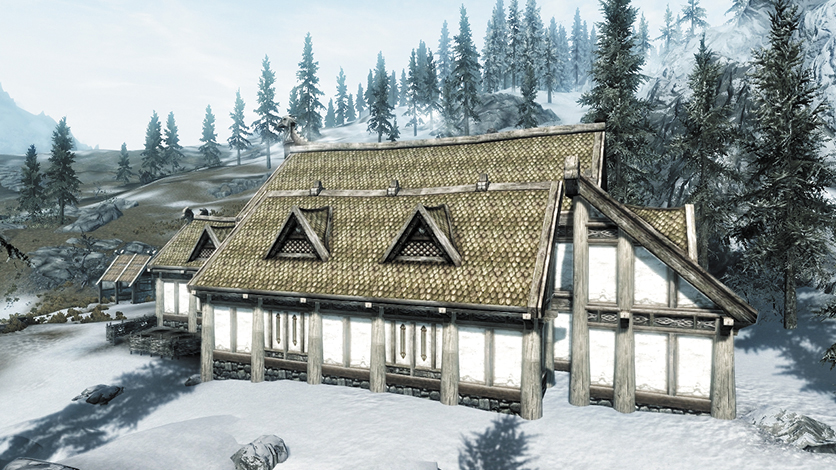
The greenhouse, trophy room, and kitchen create a hunter and collector’s paradise.
Once you’ve finished constructing a small house on your plot of land, your drafting table and carpenter’s workbench both have additional structures for you to build:
- The Drafting Table: This allows you to begin work on a main hall (a substantial, two-story extension), after which you can add a cellar and north, east, and west wings. You can also remodel your initial small house into an entryway (which opens up the far end of the original structure). As soon as you choose a plan, a series of perimeter markings appear on the ground where the section will be built.
- The Carpenter’s Workbench: This has a “Misc” menu to check out, which lists a number of outbuildings you can build (some of which are unique to that particular Hold, see above) and all the parts for the house structure you have selected in the drafting table.
Simply continue to collect the necessary components to build the structure you want. Your house can be as large or small as you wish. Once the main hall has been added and your building starts to look more like a manor and less like a hovel, inspect the various options available when constructing new “wing” additions.
When it comes to building a wing, you can build out in three directions (to the north, east, and west). For each wing, you must choose between three mutually exclusive options. For example, your west wing could house bedrooms, a greenhouse, or an Enchanter’s Tower, but only one of those. Look to the Beginner’s Guide to Homesteading (or the pictures below) for more information about what each wing adds to your home.
You can’t demolish an addition once it is built, so plan out what you want your finished manor to look like. Here are some design decisions to think about:
- Aesthetics: You may not think you need west wing bedrooms until you realize it comes with a large exterior porch. This offers elevated views of the scenery around your abode, so if your home is Heljarchen Hall (with arguably the best view), you might want this addition to show off the environment. Similarly, you might want a north, east, and west tower on each part of your domain so it looks imposing or symmetrical. But these decisions come down to your personal preferences.
- Functionality: The skills you’ve perfected and the items you enjoy collecting should dictate the manor you construct. Consult the lists that follow to find out what interior benefits you the most. For example, the Enchanter’s Tower allows you to construct an Arcane Enchanter. Is that crafting station important to you? Then favor the tower over an alternate west wing addition. Also consider how the additions relate to one another. For example, the storage room (north wing) has a porch you can connect to the east and west wings, provided you also build the bedrooms and armory additions.
- Maximizing: If you want to fully appreciate all three of the different options for each wing of the house, then you’ll need to build homes in all three Holds that offer them, and make sure you choose a different wing addition each time. This way, you can see and use every extension to your property that is available. Just don’t duplicate an Enchanter’s Tower if you don’t need two of them!
- Buyer’s Remorse: Don’t worry if you accidentally construct a bedroom when you really wanted a greenhouse! There’s no “wrong” addition, as you can always construct a different combination of rooms at a different manor.
The following sections cover all the different structures you can build together to create your main house.
Small House
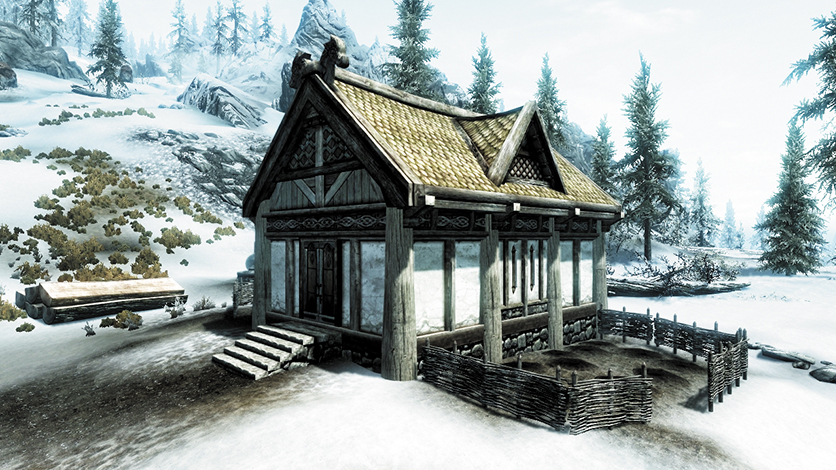
This tiny cottage may be all you require, and you don’t need to add to it if you aren’t interested in a sprawling mansion. However, if you do want to add to it, be sure to remodel this into an entryway (as it is more aesthetically pleasing and allows for more interior furnishings).
Main Hall
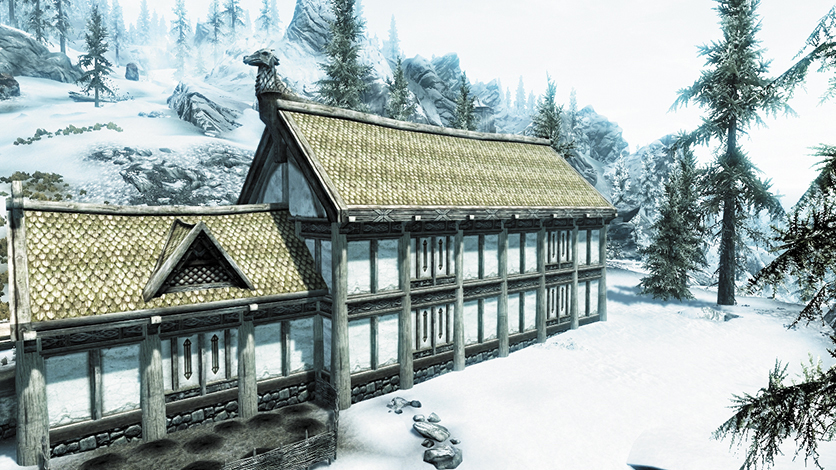
This expansion substantially improves the footprint of your house and adds a main hall with a dining area, an upstairs landing, two bedrooms, and a back room. When further additions are made, they all connect to your main hall. Note that an Arcane Enchanter, alchemy lab, and anvil can all be placed in this area.
Addition: Cellar
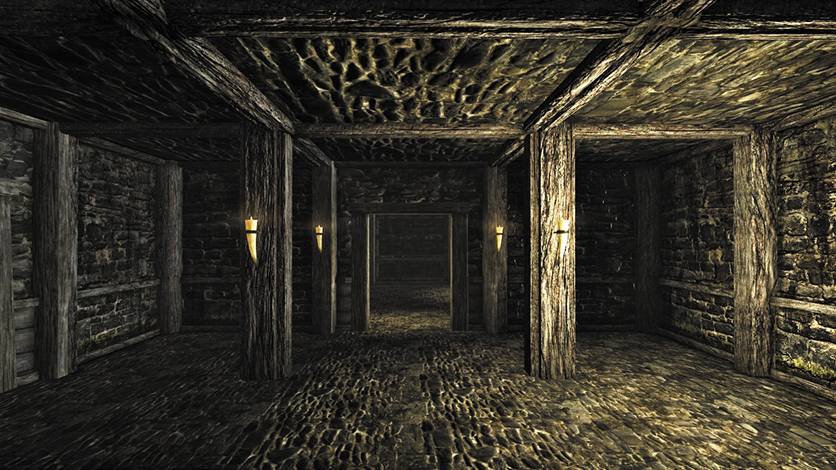
Don’t overlook the musty basement you can dig out underneath the main hall (this is the last part of the main hall to be built). With more furnishings than any other addition, the cellar gives you numerous storage and forging options. Best of all, you can create a shrine to rival the Temple of the Divines in Solitude, with nine divinities to receive blessings from!
Addition: West Wing—Bedrooms
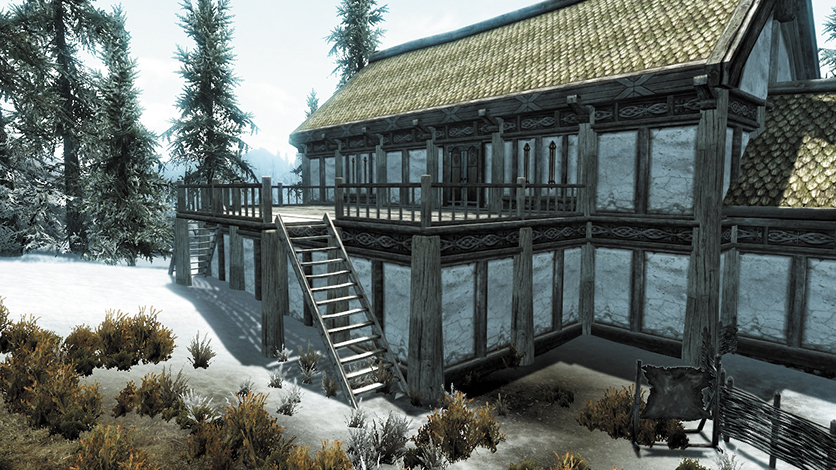
If you plan on adopting a child or just want more space to stretch out, choose this addition. There’s a master bedroom, two children’s beds, and several wardrobes and display cases with which to furnish the interior. The spacious exterior porch allows access on two floors and gives an excellent view of the wilderness around your house. It can be attached to the storage room for an even bigger platform.
Addition: West Wing—Greenhouse
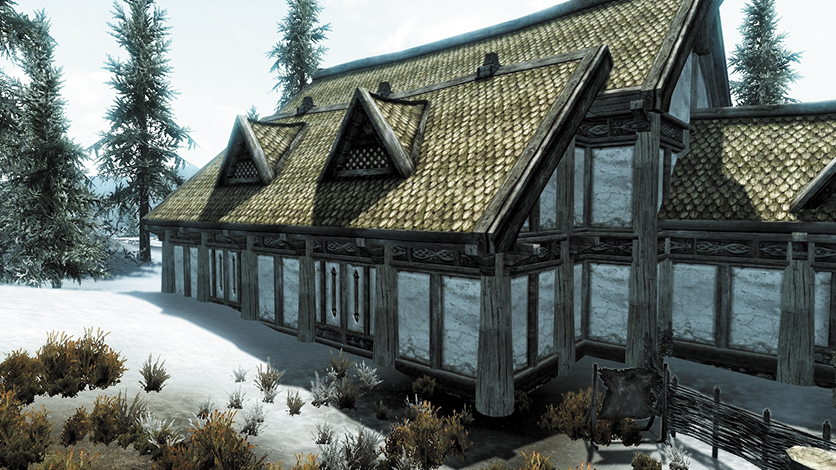
For the horticulturist, the greenhouse has planters you can furnish the room with, allowing you to take the plants that you have and grow them in more clement conditions (see the Plantable Ingredients list). When used in conjunction with the garden outside, you may never again run out of ingredients for your potions.
Addition: West Wing—Enchanter’s Tower
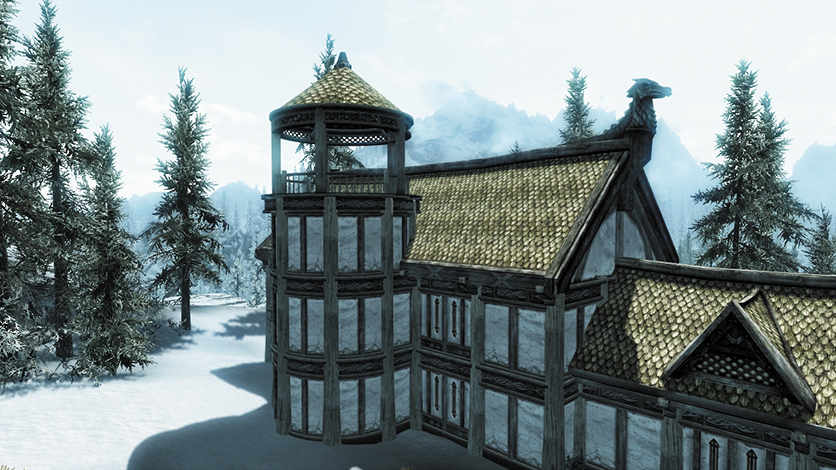
An imposing tower designed with the magician in mind, this addition allows you to furnish the area with an Arcane Enchanter, and there are numerous racks and a mannequin for your staffs and robes. The tower features an exterior viewing platform, which allows for roof access and a vista.
Addition: North Wing—Storage Room
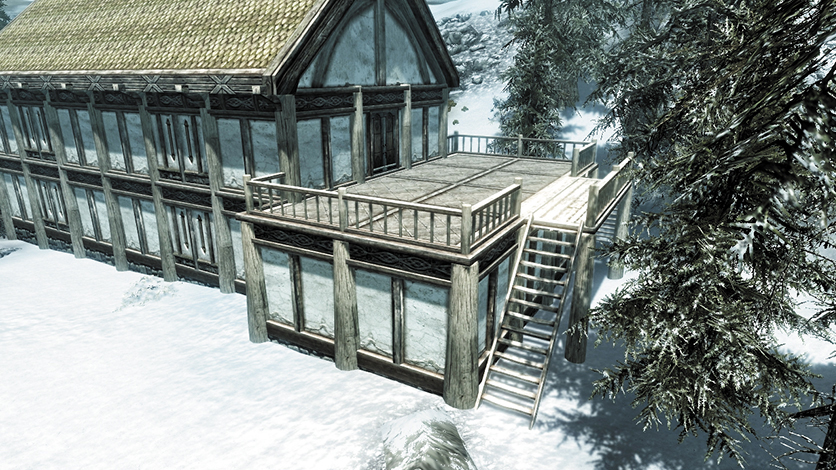
If you have an overabundance of items and need additional places to keep them, construct the storage room. The multitude of chests and cases gives you plenty of places to store and organize your items; you no longer need shove everything in one place. Think about the bedrooms (west) and armory (east), as the upper porch can be extended if you pick those two additions as well.
Addition: North Wing—Trophy Room
After a titanic struggle with a particularly fearsome foe, you may want to display your conquest as a trophy. If so, this room is for you (consult the Trophies section below for all the different, life-sized effigies you can create). Choose this extension if simple “wolf heads on a wall” aren’t showcasing your true hunting prowess.
Addition: North Wing—Alchemy Laboratory
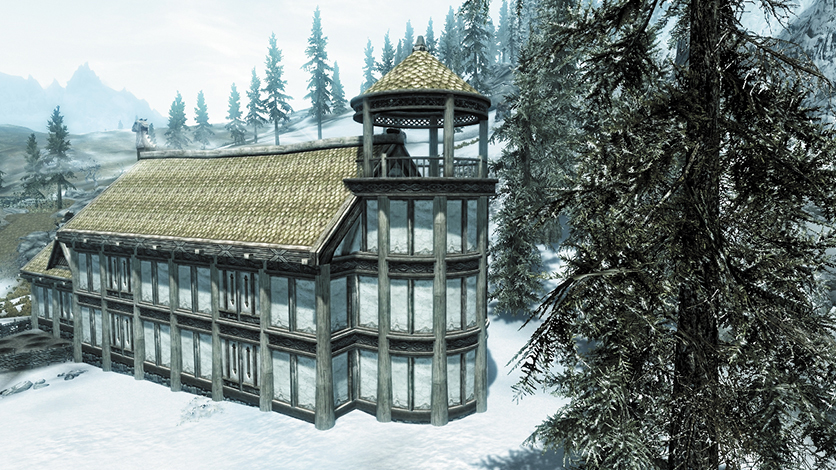
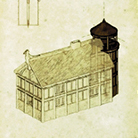
Featuring the same imposing elements as the Enchanter’s Tower, this addition provides a three-floor chamber of solace for an Alchemist, including an alchemy lab and storage for your potions and ingredients. The tower features an exterior viewing platform, too, which allows for roof access and a vista.
Addition: East Wing—Armory
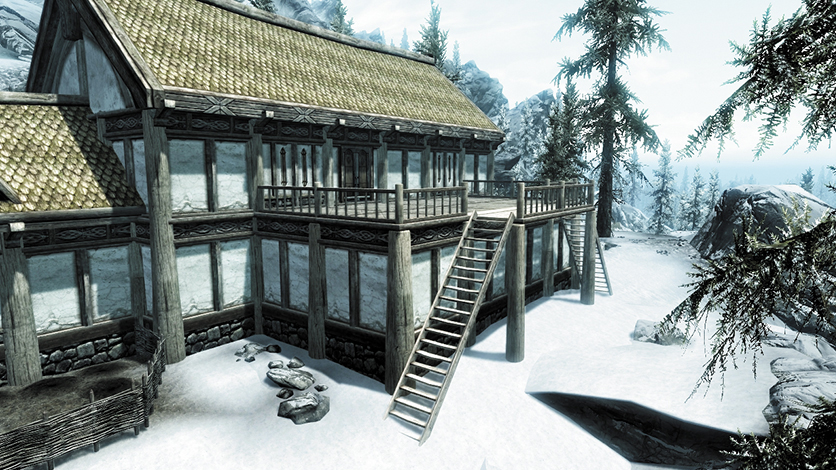
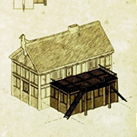
Perfect for adventurers with a penchant for weapon and apparel collecting. Use the anvil or the forge in the cellar, then hang your martial collections throughout the mounts, cases, and mannequins in this chamber. Think about the bedrooms (west) and storage room (north), as the upper porch can be extended if you pick those two additions as well.
Addition: East Wing—Kitchen
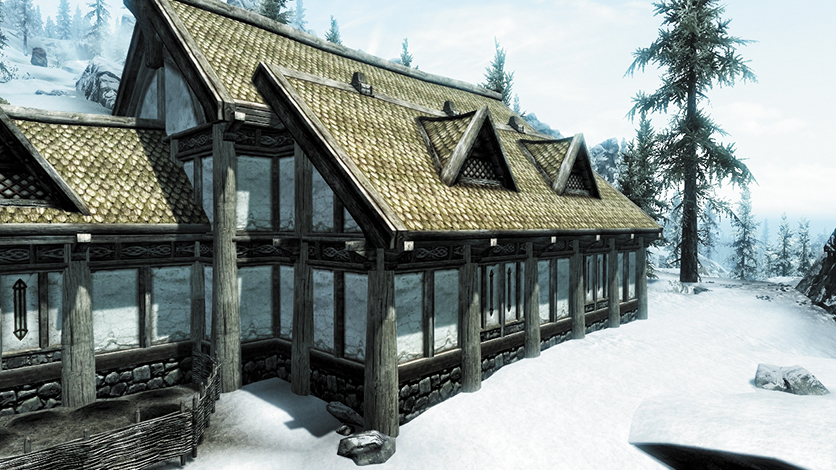
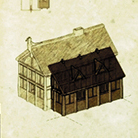
Chefs who crave the latest in technology should consider this kitchen, which allows you to prepare food in a brand-new device called an “oven”! Apparently, these are all the rage in Solitude and allow you to use baking recipes. For those who cook their own meals, this is the pinnacle of Nordic cuisine preparation.
Addition: East Wing—Library
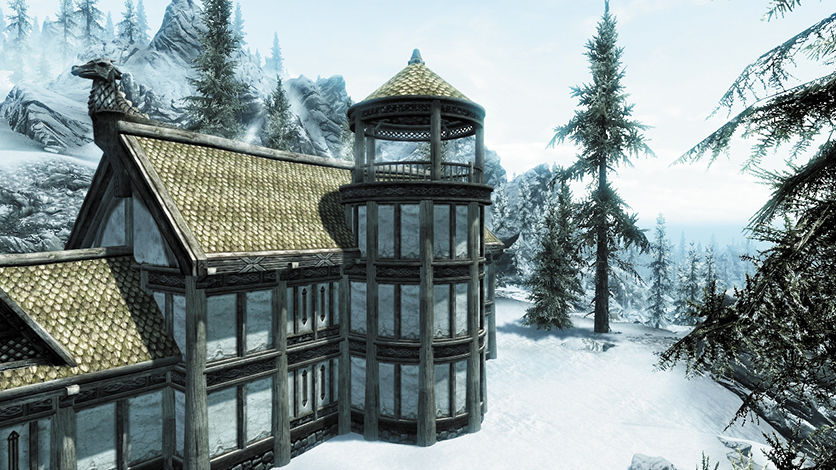
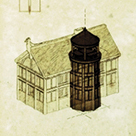
Have you run out of space for your rare Lusty Argonian Maid first editions? Then create this imposing tower, which has more bookcases than you can hope to fill and a certain ambience those scholars familiar with the great book repositories of Skyrim will crave. Can you gather and display every book in Skyrim? Alphabetically?
Part 5: Architectural Improvements (Tables)
The following tables provide an exhaustive list of the items needed to create the structural elements of your home.
Drafting Table: Options
- Small house layout
- Main hall
- Addition: West Wing
- Bedrooms
- Greenhouse
- Enchanter’s Tower
- Addition: North Wing
- Storage room
- Trophy room
- Alchemy laboratory
- Addition: East Wing
- Armory
- Kitchen
- Library
- Remodel house into entryway
- Add/remove workbenches for each room
Carpenter’s Workbench
Main Hall
| Components | Produces | Notes |
|---|---|---|
| 1 Iron Fittings, 1 Sawn Log, 1 Lock, 2 Hinges, 2 Nails | Main Hall, Door | |
| 4 Sawn Logs, 16 Nails, 8 Clay | Main Hall, First-Level Walls | |
| 6 Quarried Stone | Main Hall, Floor | |
| 4 Sawn Logs, 30 Quarried Stone | Main Hall, Foundation | |
| 25 Nails, 2 Sawn Logs | Main Hall, Roof | |
| 10 Sawn Logs | Main Hall, Roof Framing | |
| 6 Sawn Logs, 10 Nails | Main Hall, Second-Floor Supports | |
| 12 Nails, 8 Clay, 4 Sawn Logs | Main Hall, Second-Level Walls | |
| 16 Sawn Logs, 20 Nails | Main Hall, Wall Framing |
Outbuildings
| Components | Produces | Notes |
|---|---|---|
| 1 Sawn Log | Animal Pen | |
| 2 Sawn Log, 1 Nail, 2 Straw | Apiary | Lakeview Manor only |
| 2 Quarried Stone, 1 Iron Ingot, 1 Sawn Log | Armorer Workbench | |
| 3 Quarried Stone, 3 Sawn Logs, 4 Nails | Fish Hatchery | Windstad Manor Only |
| 1 Sawn Log | Garden | |
| 1 Quarried Stone, 1 Sawn Log, 1 Iron Fittings | Grindstone | |
| 2 Quarried Stone, 2 Sawn Logs, 2 Iron Fittings | Mill | Heljarchen Hall only |
| 2 Iron Fittings, 5 Iron Ingots, 6 Clay, 4 Quarried Stone | Smelter | |
| 3 Sawn Logs, 5 Nails | Stable |
Small House
| Components | Produces | Notes |
|---|---|---|
| 1 Iron Fittings, 1 Sawn Log, 1 Lock, 2 Hinges, 2 Nails | House, Door | |
| 4 Quarried Stone | House, Floor | |
| 1 Sawn Log, 10 Quarried Stone | House, Foundation | |
| 10 Nails, 1 Sawn Log | House, Roof | |
| 6 Sawn Logs | House, Roof Framing | |
| 6 Sawn Logs, 10 Nails | House, Wall Framing | |
| 2 Sawn Logs, 8 Nails, 4 Clay | House, Walls |
West Wing: Bedrooms
Cellar
| Components | Produces | Notes |
|---|---|---|
| 8 Sawn Logs, 50 Quarried Stone | Cellar |
| Components | Produces | Notes |
|---|---|---|
| 3 Iron Fittings, 3 Sawn Logs, 3 Locks, 6 Hinges, 6 Nails | Bedrooms, Doors | |
| 4 Quarried Stone | Bedrooms, Floor | |
| 2 Sawn Logs, 10 Quarried Stone | Bedrooms, Foundation | |
| 4 Quarried Stone, 1 Sawn Log | Bedrooms, Roof | |
| 7 Sawn Logs, 8 Nails | Bedrooms, Wall Supports | |
| 3 Clay, 1 Sawn Log | Bedrooms, Walls |
West Wing: Greenhouse
| Components | Produces | Notes |
|---|---|---|
| 2 Iron Fittings, 2 Sawn Logs, 2 Locks, 4 Hinges, 4 Nails | Greenhouse, Doors | |
| 4 Quarried Stone | Greenhouse, Floor | |
| 2 Sawn Logs, 10 Quarried Stone | Greenhouse, Foundation | |
| 8 Nails, 1 Sawn Log | Greenhouse, Roof | |
| 4 Sawn Logs | Greenhouse, Roof Framing | |
| 8 Sawn Logs, 8 Nails | Greenhouse, Wall Supports | |
| 3 Clay, 1 Sawn Log | Greenhouse, Walls |
West Wing: Enchanter’s Tower
| Components | Produces | Notes |
|---|---|---|
| 3 Iron Fittings, 3 Sawn Logs, 3 Locks, 6 Hinges, 6 Nails | Enchanter’s Tower, Doors | |
| 1 Sawn Log, 3 Clay | Enchanter’s Tower, First-Floor Walls | |
| 4 Quarried Stone | Enchanter’s Tower, Floor | |
| 2 Sawn Logs, 8 Quarried Stone | Enchanter’s Tower, Foundation | |
| 10 Sawn Logs, 10 Nails | Enchanter’s Tower, Main Supports | |
| 1 Sawn Log, 4 Quarried Stone | Enchanter’s Tower, Roof | |
| 1 Sawn Log, 6 Nails | Enchanter’s Tower, Roof Canopy | |
| 4 Sawn Logs, 12 Nails | Enchanter’s Tower, Second-Floor Supports | |
| 2 Sawn Logs, 6 Clay | Enchanter’s Tower, Second-Floor Walls |
North Wing: Alchemy
| Components | Produces | Notes |
|---|---|---|
| 3 Iron Fittings, 3 Sawn Logs, 3 Locks, 6 Hinges, 6 Nails | Alchemy Laboratory, Doors | |
| 1 Sawn Log, 3 Clay | Alchemy Laboratory, First-Floor Walls | |
| 4 Quarried Stone | Alchemy Laboratory, Floor | |
| 2 Sawn Logs, 8 Quarried Stone | Alchemy Laboratory, Foundation | |
| 10 Sawn Logs, 10 Nails | Alchemy Laboratory, Main Supports | |
| 1 Sawn Log, 4 Quarried Stone | Alchemy Laboratory, Roof | |
| 1 Sawn Log, 6 Nails | Alchemy Laboratory, Roof Canopy | |
| 4 Sawn Logs, 12 Nails | Alchemy Laboratory, Second-Floor Supports | |
| 2 Sawn Logs, 6 Clay | Alchemy Laboratory, Second-Floor Walls |
North Wing: Storage Room
| Components | Produces | Notes |
|---|---|---|
| 3 Iron Fittings, 3 Sawn Logs, 3 Locks, 6 Hinges, 6 Nails | Storage Room, Doors | |
| 4 Quarried Stone | Storage Room, Floor | |
| 2 Sawn Logs, 10 Quarried Stone | Storage Room, Foundation | |
| 4 Quarried Stone, 1 Sawn Log | Storage Room, Roof | |
| 7 Sawn Logs, 8 Nails | Storage Room, Wall Supports | |
| 3 Clay, 1 Sawn Log | Storage Room, Walls |
North Wing: Trophy Room
| Components | Produces | Notes |
|---|---|---|
| 2 Iron Fittings, 2 Sawn Logs, 2 Locks, 4 Hinges, 4 Nails | Trophy Room, Doors | |
| 4 Quarried Stone | Trophy Room, Floor | |
| 2 Sawn Logs, 10 Quarried Stone | Trophy Room, Foundation | |
| 8 Nails, 1 Sawn Log | Trophy Room, Roof | |
| 4 Sawn Logs | Trophy Room, Roof Framing | |
| 8 Sawn Logs, 8 Nails | Trophy Room, Wall Supports | |
| 3 Clay, 1 Sawn Log | Trophy Room, Walls |
East Wing: Armory
| Components | Produces | Notes |
|---|---|---|
| 3 Iron Fittings, 3 Sawn Logs, 3 Locks, 6 Hinges, 6 Nails | Armory, Doors | |
| 4 Quarried Stone | Armory, Floor | |
| 2 Sawn Logs, 10 Quarried Stone | Armory, Foundation | |
| 4 Quarried Stone, 1 Sawn Log | Armory, Roof | |
| 7 Sawn Logs, 8 Nails | Armory, Wall Supports | |
| 3 Clay, 1 Sawn Log | Armory, Walls |
East Wing: Kitchen
| Components | Produces | Notes |
|---|---|---|
| 2 Iron Fittings, 2 Sawn Logs, 2 Locks, 4 Hinges, 4 Nails | Kitchen, Doors | |
| 4 Quarried Stone | Kitchen, Floor | |
| 2 Sawn Logs, 10 Quarried Stone | Kitchen, Foundation | |
| 8 Nails, 1 Sawn Log | Kitchen, Roof | |
| 4 Sawn Logs | Kitchen, Roof Framing | |
| 8 Sawn Logs, 8 Nails | Kitchen, Wall Supports | |
| 3 Clay, 1 Sawn Log | Kitchen, Walls |
East Wing: Library
| Components | Produces | Notes |
|---|---|---|
| 3 Iron Fittings, 3 Sawn Logs, 3 Locks, 6 Hinges, 6 Nails | Library, Doors | |
| 1 Sawn Log, 3 Clay | Library, First-Floor Walls | |
| 4 Quarried Stone | Library, Floor | |
| 2 Sawn Logs, 8 Quarried Stone | Library, Foundation | |
| 10 Sawn Logs, 10 Nails | Library, Main Supports | |
| 1 Sawn Log, 4 Quarried Stone | Library, Roof | |
| 1 Sawn Log, 6 Nails | Library, Roof Canopy | |
| 4 Sawn Logs, 12 Nails | Library, Second-Floor Supports | |
| 2 Sawn Logs, 6 Clay | Library, Second-Floor Walls |
Part 6: Home Is Where the Hearth Is (Advice)
Furnish your grand manor with fine furniture or complete clutter.
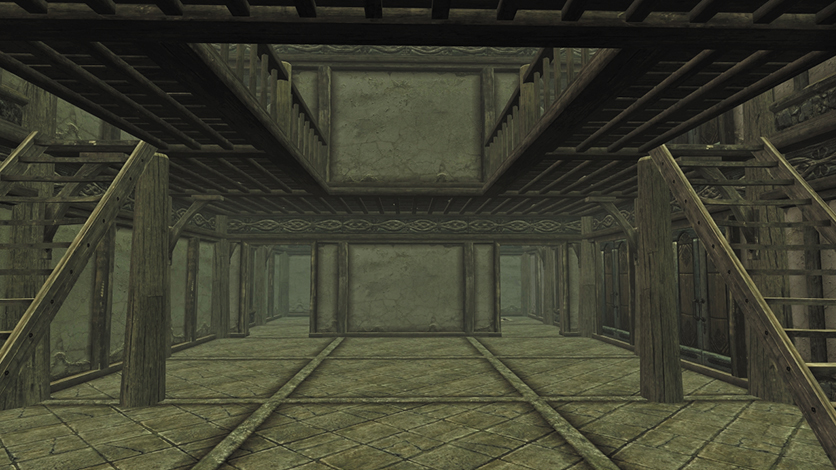
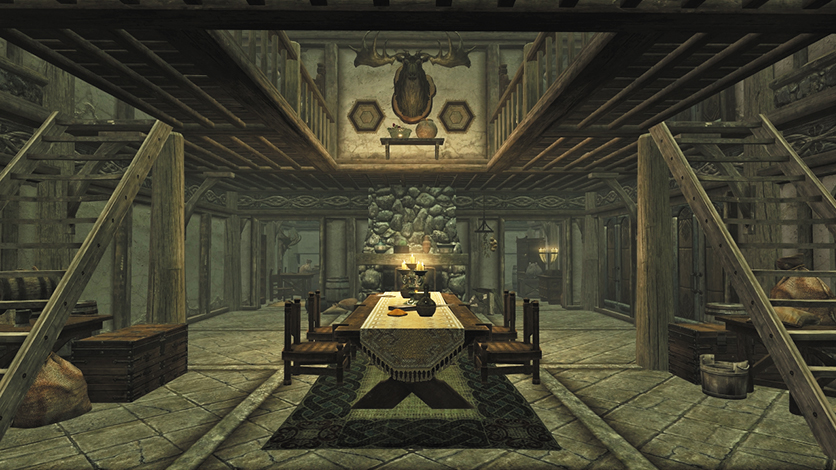
Turn a bare floor and walls (1) into an inviting interior for yourself and your family (2).
Now that the outside of your manor has been covered, it’s time to head inside. Poke around inside your dwelling, and you’ll notice it’s rather sparse, with only a chest and workbench to be found in the small house and another workbench in each addition. The moment you complete the small house, you can furnish it with objects. This involves the use of the small interior workbench. Step over to it and inspect the menu. You have a variety of objects (such as containers, furniture, shelves, and the like) that you can construct in the same way as the structure you’re standing in—by collecting components.
The tables that follow reveal every interior object you can create for each room. If you don’t see them in your Workbench menu, it usually means you need to create other objects first. Continue to choose and create objects until the room you’re in is staged to your satisfaction or you’ve constructed every furnishing available (remember that your main hall has more than one workbench). The actual components needed vary wildly: While locks and fittings can be easily crafted at any forge, you may need to scour Skyrim for other items.
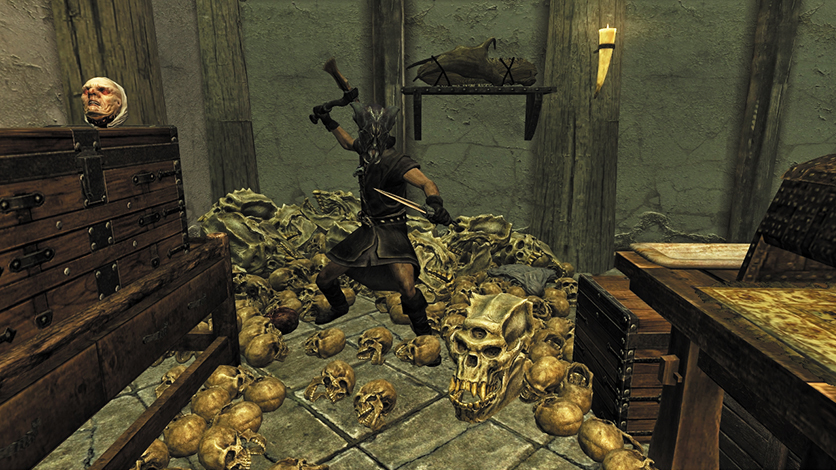
Some of the more unhinged Skyrim adventurers decorate their rooms entirely in refuse, scavenged bric-a-brac, and even gore and body parts. These people aren’t well.
Some of the objects you make have particular properties; for example, some rooms include crafting stations such as cooking pots or alchemy labs. Mounted heads require the pelt of a slain animal. You can sit on chairs and sleep in beds. Wardrobes, chests, bookcases, and safes can be stuffed with items you’ve collected. Mannequins and racks hold your apparel and weapons. Lighting is important to the ambience of your room. Trophies are displays even more impressive than mounted heads. Cellar shrines can be built and blessings received from them.
Part 7: Home Is Where the Hearth Is (Tables)
The following tables list the items needed to create different furnishings in your home.
Small House
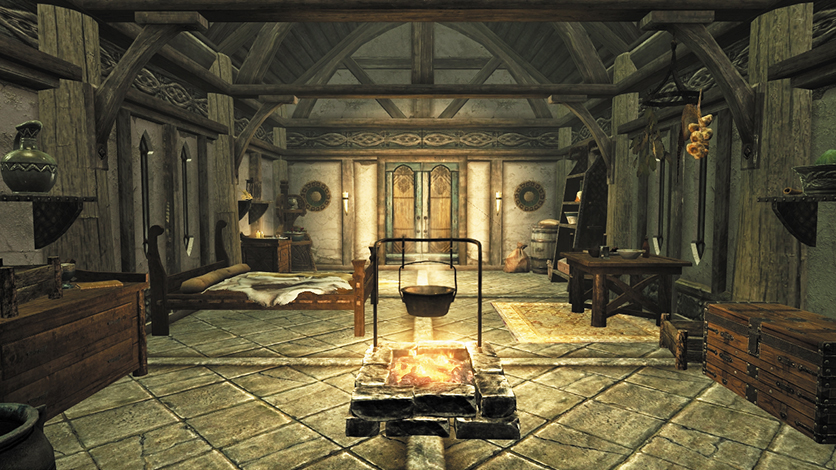
The perfect dwelling for one. If a bigger manor is in your future, your furnishings are repositioned in the entryway improvement instead.
| Components | Produces | Number |
|---|---|---|
| 1 Sawn Log, 1 Nail, 1 Iron Ingot | Barrels | |
| 1 Sawn Log, 3 Nails | Corner Shelf | |
| 2 Sawn Logs, 2 Nails, 4 Leather Strips, 2 Straw | Double Bed | |
| 1 Sawn Log, 3 Nails, 1 Iron Fitting | Dresser | |
| 1 Sawn Log, 2 Nails | End Table | |
| 1 Quarried Stone | Firepit | |
| 1 Iron Ingot, 1 Iron Fitting | Hanging Rack | |
| 2 Sawn Logs, 4 Nails | Square Table and Chairs | |
| 2 Sawn Logs, 4 Nails, 1 Glass, 1 Hinge | Tall Shelf with Display Case | |
| 1 Iron Fitting, 1 Goat Horn | Wall Sconces (2) | x2 |
| 1 Sawn Log, 1 Nail | Wall Shelves (3) |
Entryway
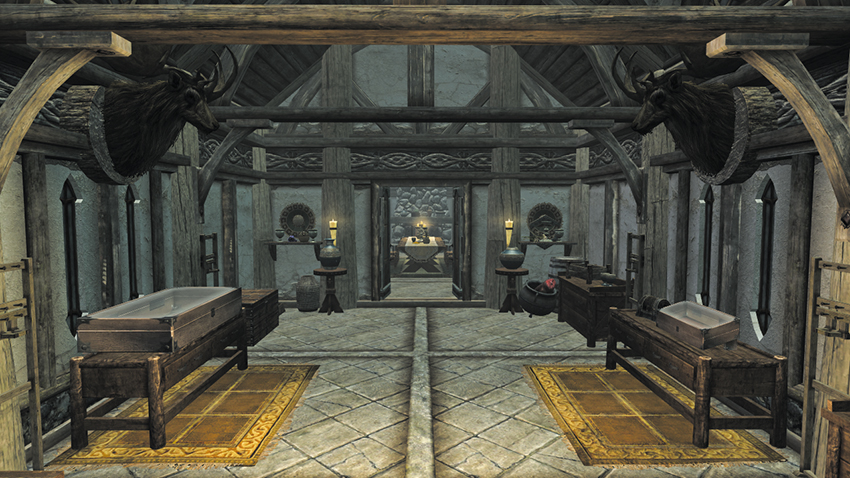
A more suitable entrance to your manor. Remember that the exterior sconces give your home a welcoming light on the outside.
| Components | Produces | Number |
|---|---|---|
| 1 Sawn Log, 1 Nail, 1 Iron Ingot | Barrels | |
| 1 Sawn Log, 3 Nails | Corner Shelf | |
| 2 Sawn Logs, 4 Nails, 1 Hinge, 1 Glass | Display Case on Low Table | x2 |
| 1 Sawn Log, 3 Nails, 1 Iron Fitting | Dresser | |
| 1 Sawn Log, 2 Nails | Low Table | |
| 1 Leather Strip, 1 Bear Pelt | Mounted Bear Head | |
| 1 Deer Hide, 1 Large Antler, 1 Leather Strip | Mounted Elk Head | x2 |
| 1 Leather Strips, 1 Sabre Cat Pelt, 2 Sabre Cat Teeth | Mounted Sabre Cat Head | |
| 1 Leather Strip, 1 Sabre Cat Snow Pelt, 2 Sabre Cat Teeth | Mounted Snowy Sabre Cat Head | |
| 1 Leather Strip, 1 Wolf Pelt | Mounted Wolf Head | |
| 2 Sawn Logs, 4 Nails | Night Tables (2) | |
| 1 Iron Fitting, 1 Goat Horn | Wall Sconces (2) | x3 |
| 1 Sawn Log, 1 Nail | Wall Shelves (2) | |
| 2 Sawn Logs, 2 Iron Fittings | Weapon Racks (2) | x2 |
Main Hall: Main Room
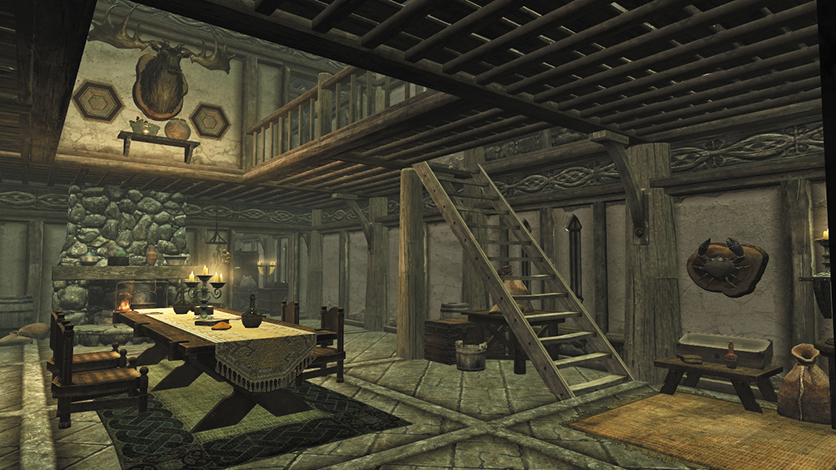
The largest room in your manor is dominated by a warm hearth, a long dining table for banquets, and two crafting stations.
| Components | Produces | Number |
|---|---|---|
| 1 Sawn Log, 2 Nails, 1 Glass, 1 Quicksilver Ingot, 1 Iron Ingot | Alchemy Lab | |
| 1 Sawn Log, 1 Nail, 1 Glass, 1 Moonstone Ingot, 1 Iron Ingot, 1 Filled Grand Soul Gem, 1 Gold Ingot | Arcane Enchanter | |
| 1 Sawn Log, 1 Nail, 1 Quarried Stone | Armor Mannequin | |
| 1 Sawn Log, 1 Nail, 1 Iron Ingot | Barrels | |
| 1 Sawn Log, 1 Nail | Chair | |
| 2 Iron Ingots, 2 Iron Fittings | Chandelier, Large | |
| 1 Sawn Log, 1 Nail, 1 Iron Fitting, 2 Hinges, 1 Lock | Chest | x2 |
| 1 Sawn Log, 3 Nails | Corner Shelf | x2 |
| 3 Sawn Logs, 5 Nails | Dining Table and Chairs | |
| 2 Nails, 1 Sawn Log, 1 Hinge, 1 Glass | Display Case | |
| 2 Sawn Logs, 4 Nails, 1 Hinge, 1 Glass | Display Case on Low Table | |
| 1 Sawn Log, 4 Quarried Stone | Fireplace | |
| 1 Deer Hide, 1 Large Antler, 1 Leather Strip | Mounted Elk Head | |
| 1 Leather Strip, 1 Goat Hide | Mounted Goat Head | |
| 1 Leather Strip, 2 Horker Tusks | Mounted Horker Head | |
| 1 Leather Strip, 2 Mudcrab Chitin | Mounted Mudcrab | |
| 1 Leather Strip, 4 Slaughterfish Scales | Mounted Slaughterfish | |
| 1 Sawn Log, 2 Nails | Square Table | x2 |
| 2 Sawn Logs, 4 Nails | Tall Shelf | |
| 1 Iron Fitting, 4 Nails, 2 Sawn Logs, 1 Hinge | Tall Wardrobe | |
| 1 Sawn Log, 1 Nail | Wall Shelves (2) | |
| 2 Sawn Logs, 2 Nails | Wall Shelves (4) | |
| 1 Iron Fitting, 2 Nails, 1 Sawn Log | Wardrobe, Small | |
| 1 Sawn Log, 1 Nail, 1 Iron Ingot | Washbasin on Stand |
Main Hall: Bedrooms
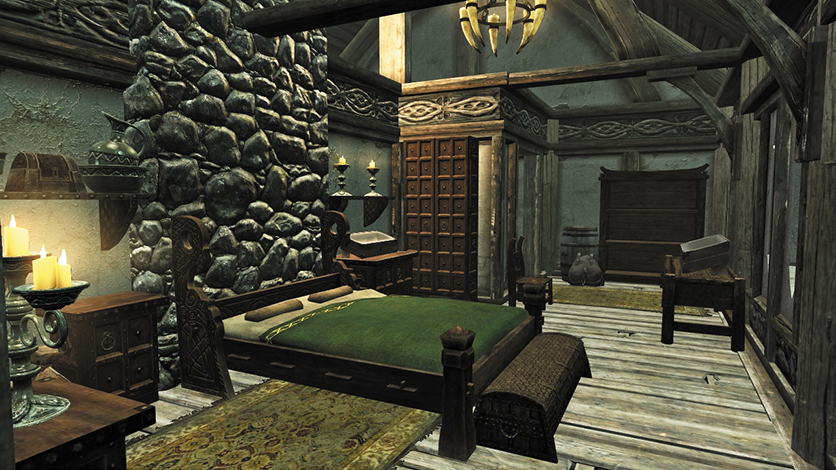
Placing beds here is obvious, but it also gives you (and your family) places to sleep: Staring at the cold dead eyes of a mounted elk head.
| Components | Produces | Number |
|---|---|---|
| 1 Sawn Log, 1 Nail | Chair | |
| 1 Iron Ingot, 3 Goat Horns, 1 Iron Fitting | Chandelier, Small | x2 |
| 1 Sawn Log, 1 Nail, 1 Iron Fitting, 2 Hinges, 1 Lock | Chest, Long | |
| 2 Sawn Logs, 4 Nails, 1 Iron Fitting | Cupboard | |
| 2 Sawn Logs, 4 Nails, 1 Iron Fitting | Cupboard | |
| 2 Sawn Logs, 4 Nails, 1 Hinge, 1 Glass | Display Case and Shelf | |
| 1 Iron Fitting, 4 Nails, 2 Sawn Logs, 1 Hinge, 1 Glass | Display Case and Small Wardrobe | |
| 2 Sawn Logs, 4 Nails, 1 Hinge, 1 Glass | Display Case on Low Table | |
| 2 Sawn Logs, 2 Nails, 4 Leather Strips, 2 Straws | Double Bed | |
| 1 Sawn Log, 3 Nails, 1 Iron Fitting | Dresser | |
| 2 Sawn Logs, 4 Nails | End Tables (2) | |
| 1 Deer Hide, 1 Large Antler, 1 Leather Strip | Mounted Elk Head | |
| 1 Leather Strip, 1 Sabre Cat Snow Pelt, 2 Sabre Cat Teeth | Mounted Snowy Sabre Cat Head | |
| 1 Leather Strip, 1 Wolf Pelt | Mounted Wolf Head | x2 |
| 1 Sawn Log, 1 Nail, 2 Leather Strips, 1 Straw | Single Bed | x2 |
| 2 Sawn Logs, 4 Nails | Tall Bookshelf | |
| 2 Sawn Logs, 4 Nails | Tall Shelf | |
| 2 Sawn Logs, 4 Nails, 1 Glass, 1 Hinge | Tall Shelf with Display Case | |
| 1 Iron Fitting, 4 Nails, 2 Sawn Logs, 1 Hinge | Tall Wardrobe | x2 |
| 1 Sawn Log, 1 Nail | Wall Shelves (3) | |
| 2 Sawn Logs, 2 Nails | Wall Shelves (4) | |
| 1 Sawn Log, 1 Iron Fitting | Weapon Plaque |
Main Hall: Back Room
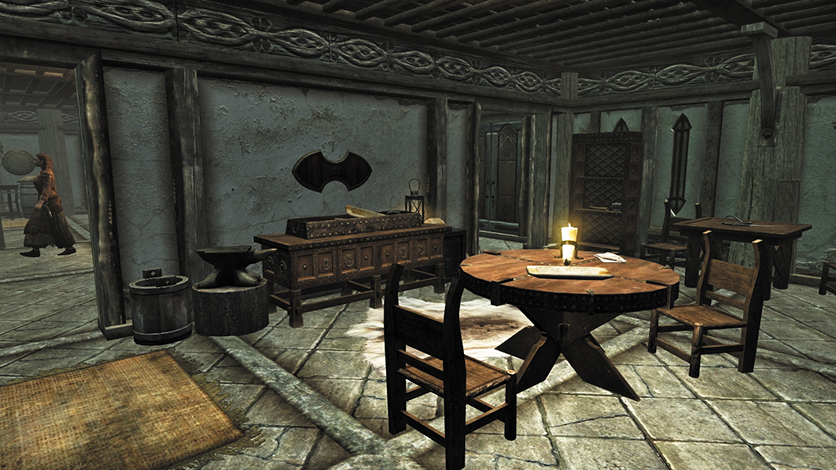
Note the anvil (allowing quicker smithing than heading outside), the safe and storage areas, and a trapdoor down to the cellar, if built.
| Components | Produces | Number |
|---|---|---|
| 1 Sawn Log, 1 Nail, 1 Iron Ingot | Barrels | |
| 4 Iron Ingots, 1 Sawn Log | Blacksmith Anvil | |
| 2 Sawn Logs, 4 Nails, 1 Iron Fitting | Cupboard | |
| 1 Iron Fitting, 2 Nails, 1 Sawn Log | Desk | |
| 1 Iron Fitting, 4 Nails, 2 Sawn Logs, 1 Hinge, 1 Glass | Display Case and Small Wardrobe | |
| 1 Large Antler, 1 Leather Strip | Mounted Elk Antlers | |
| 1 Leather Strip, 4 Slaughterfish Scales | Mounted Slaughterfish | |
| 2 Sawn Logs, 4 Nails | Round Table and Chairs | |
| 1 Lock, 1 Hinge, 3 Steel Ingots | Safe | |
| 2 Sawn Logs, 4 Nails | Square Table and Chairs | |
| 2 Sawn Logs, 4 Nails | Tall Shelf | |
| 1 Sawn Log, 1 Nail | Wall Shelves (2) | |
| 1 Iron Fitting, 2 Nails, 1 Sawn Log | Wardrobe, Small | |
| 1 Sawn Log, 1 Iron Fitting | Weapon Plaque |
West Wing: Bedrooms
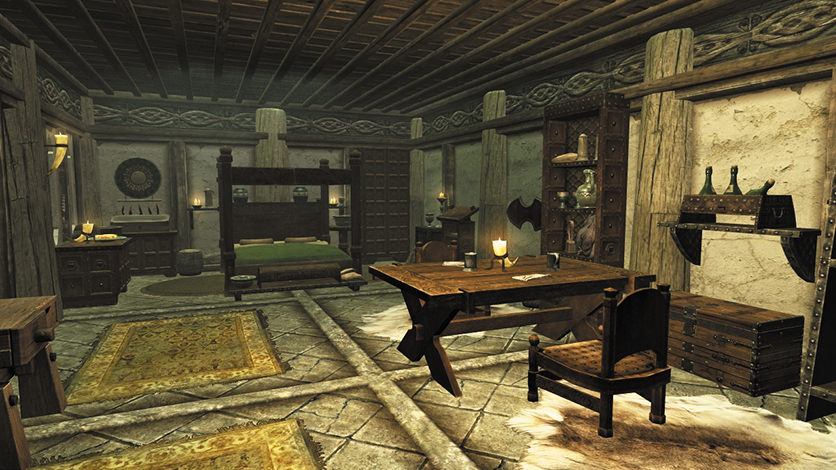
Your spouse and children will prefer these more luxurious accommodations, although they aren’t required if you’ve built the bedrooms in your main hall. But there’s plenty of storage here, too.
| Components | Produces | Number |
|---|---|---|
| 1 Sawn Log, 1 Nail | Bench | x3 |
| 1 Sawn Log, 1 Nail | Chair | |
| 1 Sawn Log, 1 Nail, 1 Iron Fitting, 2 Hinges, 1 Lock | Chest | |
| 1 Sawn Log, 1 Nail, 1 Iron Fitting, 2 Hinges, 1 Lock | Chest, Long | |
| 1 Sawn Log, 1 Nail, 2 Leather Strips, 1 Straw | Child’s Bed | x2 |
| 1 Sawn Log, 1 Nail, 1 Iron Fitting, 2 Hinges, 1 Lock | Child’s Chest | x2 |
| 2 Sawn Logs, 4 Nails, 1 Hinge, 1 Glass | Display Case and Shelf | |
| 1 Iron Fitting, 4 Nails, 2 Sawn Logs, 1 Hinge, 1 Glass | Display Case and Small Wardrobe | |
| 2 Sawn Logs, 2 Nails, 4 Leather Strips, 2 Straws | Double Bed | |
| 1 Sawn Log, 2 Nails | Low Table | x3 |
| 1 Leather Strip, 1 Bear Pelt | Mounted Bear Head | |
| 1 Leather Strip, 2 Mudcrab Chitin | Mounted Mudcrab | |
| 1 Lock, 1 Hinge, 3 Steel Ingots | Safe | |
| 1 Sawn Log, 3 Nails | Small Shelf | |
| 2 Sawn Logs, 4 Nails | Square Table and Chairs | |
| 2 Sawn Logs, 4 Nails | Table with Benches | |
| 2 Sawn Logs, 4 Nails | Tall Shelf | x2 |
| 1 Iron Fitting, 4 Nails, 2 Sawn Logs, 1 Hinge | Tall Wardrobe | |
| 1 Iron Fitting, 1 Goat Horn | Wall Sconces (2) | x2 |
| 1 Sawn Log, 1 Nail | Wall Shelves (2) | |
| 1 Sawn Log, 1 Nail | Wall Shelves (3) | |
| 1 Iron Fitting, 2 Nails, 1 Sawn Log | Wardrobe, Small | x2 |
| 1 Sawn Log, 1 Nail, 1 Iron Ingot | Washbasin on Stand | x2 |
| 1 Sawn Log, 1 Iron Fitting | Weapon Plaque |
West Wing: Greenhouse
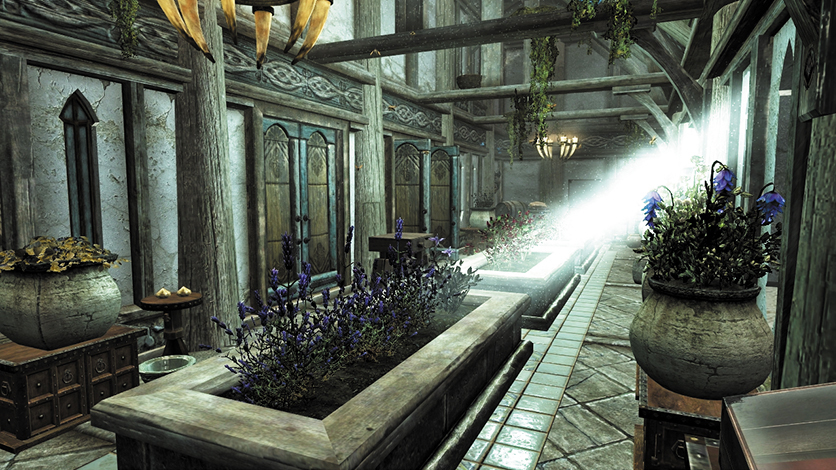
The planters are unique to this room, as you can place food and ingredients in them for cultivation and eventual harvesting.
| Components | Produces | Number |
|---|---|---|
| 1 Sawn Log, 1 Nail, 1 Iron Ingot | Barrels | x2 |
| 1 Iron Ingot, 3 Goat Horns, 1 Iron Fitting | Chandelier, Small | x2 |
| 2 Sawn Logs, 4 Nails, 1 Iron Fitting | Cupboard | x2 |
| 2 Nails, 1 Sawn Log, 1 Hinge, 1 Glass | Display Case | |
| 2 Sawn Logs, 4 Nails, 2 Hinges, 1 Iron Fitting, 2 Glasses | Display Case and Cupboard | x2 |
| 2 Clay, 2 Quarried Stone, 1 Sawn Log | Large Planter | x3 |
| 1 Leather Strip, 1 Goat Hide | Mounted Goat Head | x2 |
| 1 Leather Strip, 2 Mudcrab Chitin | Mounted Mudcrab | x2 |
| 2 Sawn Logs, 4 Nails | Night Tables (2) | x2 |
| 2 Sawn Logs, 1 Iron Fitting, 4 Nails, 2 Clay | Small Planter with Cupboard | x6 |
| 2 Nails, 1 Sawn Log, 1 Hinge, 1 Glass | Tall Shelf | |
| 2 Sawn Logs, 2 Nails | Wall Shelves (4) |
West Wing: Enchanter’s Tower
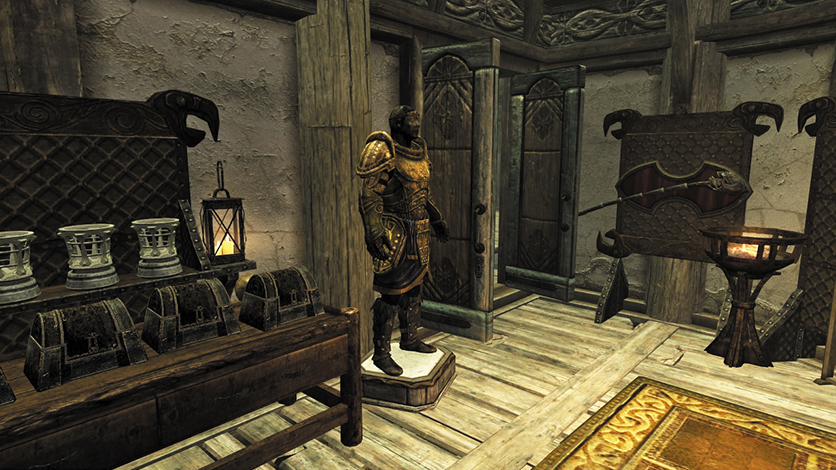
Although the conditions can be cramped, you’re able to place an Arcane Enchanter in here and can access the turret platform and view.
| Components | Produces | Number |
|---|---|---|
| 1 Sawn Log, 1 Nail, 1 Glass, 1 Moonstone Ingot, 1 Iron Ingot, 1 Filled Grand Soul Gem, 1 Gold Ingot | Arcane Enchanter | |
| 1 Sawn Log, 1 Nail, 1 Quarried Stone | Armor Mannequin | |
| 2 Iron Ingots | Brazier | x2 |
| 1 Sawn Log, 1 Nail | Chair | |
| 1 Sawn Log, 1 Nail, 1 Iron Fitting, 2 Hinges, 1 Lock | Chest | x2 |
| 2 Sawn Logs, 4 Nails, 1 Iron Fitting | Cupboard | |
| 2 Sawn Logs, 4 Nails, 1 Hinge, 1 Glass | Display Case on Low Table | |
| 1 Sawn Log, 2 Nails | End Table | |
| 1 Leather Strip, 1 Goat Hide | Mounted Goat Head | |
| 2 Sawn Logs, 4 Nails | Tall Shelf | x2 |
| 1 Iron Fitting, 1 Goat Horn | Wall Sconce | |
| 1 Sawn Log, 1 Nail | Wall Shelf | |
| 1 Sawn Log, 1 Iron Fitting | Weapon Plaque | |
| 2 Sawn Logs, 2 Iron Fittings | Weapon Racks (3) |
North Wing: Storage Room
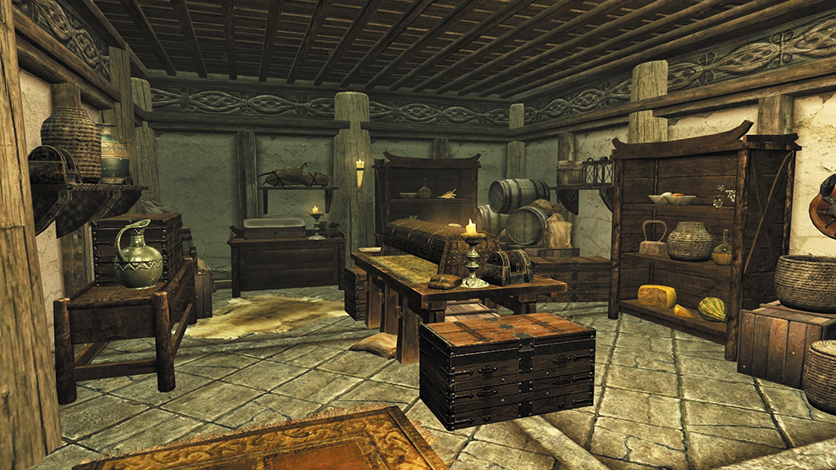
This is the place to store all your items! To avoid confusion, pick particular storage vessels to hold specific item types.
| Components | Produces | Number |
|---|---|---|
| 1 Sawn Log, 1 Nail, 1 Iron Ingot | Barrels | x3 |
| 1 Sawn Log, 1 Nail | Bench | x2 |
| 1 Sawn Log, 1 Nail, 1 Iron Fitting, 2 Hinges, 1 Lock | Chest | x7 |
| 2 Sawn Logs, 4 Nails, 1 Iron Fitting | Cupboard | x2 |
| 2 Sawn Logs, 4 Nails, 1 Hinge, 1 Glass | Display Case and Shelf | |
| 1 Iron Fittings, 4 Nails, 2 Sawn Logs, 1 Hinge, 1 Glass | Display Case and Small Wardrobe | |
| 1 Sawn Log, 3 Nails, 1 Iron Fitting | Dresser | |
| 1 Sawn Log, 2 Nails | End Table | x2 |
| 2 Sawn Logs, 4 Nails, 2 Hinges, 1 Iron Fitting, 1 Lock | Large Table with Chest | |
| 1 Sawn Log, 2 Nails | Low Table | x2 |
| 1 Leather Strip, 1 Goat Hide | Mounted Goat Head | |
| 1 Leather Strip, 2 Mudcrab Chitin | Mounted Mudcrab | |
| 1 Leather Strip, 1 Wolf Pelt | Mounted Wolf Head | |
| 1 Lock, 1 Hinge, 3 Steel Ingots | Safe | |
| 2 Sawn Logs, 4 Nails | Table with Benches | |
| 2 Sawn Logs, 4 Nails, 2 Hinges, 2 Glasses | Table with Display Cases | |
| 2 Sawn Logs, 4 Nails | Tall Shelf | |
| 1 Iron Fitting, 1 Goat Horn | Wall Sconces (2) | x2 |
| 1 Sawn Log, 1 Nail | Wall Shelves (2) | x4 |
| 1 Sawn Log, 1 Nail, 1 Iron Ingot | Washbasin on Stand | x2 |
North Wing: Trophy Room
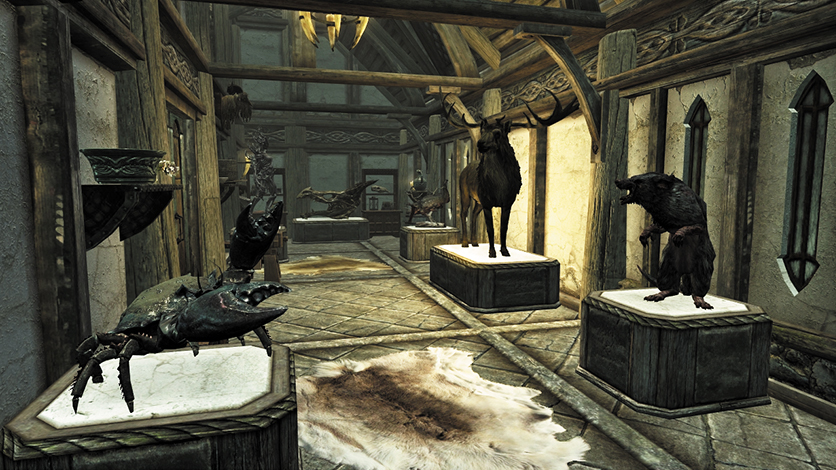
This is the only room where life-size models of enemies you’ve encountered can be constructed: Check the Trophies table below.
| Components | Produces | Number |
|---|---|---|
| 1 Sawn Log, 1 Nail, 1 Iron Ingot | Barrels | |
| 1 Iron Ingot, 3 Goat Horns, 1 Iron Fitting | Chandelier, Small | |
| 1 Sawn Log, 1 Nail, 1 Iron Fitting, 2 Hinges, 1 Lock | Chest | |
| 2 Sawn Logs, 4 Nails, 1 Iron Fitting | Cupboard | x4 |
| 2 Sawn Logs, 4 Nails, 1 Hinge, 1 Glass | Display Case and Shelf | |
| 1 Leather Strip, 1 Goat Hide | Mounted Goat Head | |
| 1 Leather Strip, 2 Horker Tusks | Mounted Horker Head | |
| 1 Sawn Log, 2 Nails | Night Table | |
| 2 Sawn Logs, 4 Nails | Tall Shelf | |
| 1 Quarried Stone, 1 Sawn Log, 2 Clay | Trophy Base, Large | x3 |
| 1 Quarried Stone, 1 Sawn Log, 1 Clay | Trophy Base, Small | x4 |
| 1 Iron Fitting, 1 Goat Horn | Wall Sconces (2) | |
| 1 Sawn Log, 1 Nail | Wall Shelves (2) | x2 |
North Wing: Alchemy Laboratory
A second Alchemy Lab is available here. There’s a lack of room but there are three floors, including an exterior roof turret.
| Components | Produces | Number |
|---|---|---|
| 1 Sawn Log, 2 Nails, 1 Glass, 1 Quicksilver Ingot, 1 Iron Ingot | Alchemy Lab | |
| 1 Sawn Log, 1 Nail, 1 Iron Ingot | Barrels | x2 |
| 1 Iron Ingot, 3 Goat Horns, 1 Iron Fitting | Chandelier, Small | |
| 1 Sawn Log, 1 Nail, 1 Iron Fitting, 2 Hinges, 1 Lock | Chest | |
| 1 Sawn Log, 1 Nail, 1 Iron Fitting, 2 Hinges, 1 Lock | Chest | |
| 2 Sawn Logs, 4 Nails, 1 Iron Fitting | Cupboard | |
| 1 Iron Fitting, 4 Nails, 2 Sawn Logs, 1 Hinge, 1 Glass | Display Case and Small Wardrobe | x2 |
| 1 Sawn Log, 2 Nails | End Table | |
| 2 Sawn Logs, 4 Nails | End Tables (2) | |
| 1 Iron Ingot, 1 Iron Fitting | Hanging Rack | x2 |
| 1 Leather Strip, 2 Mudcrab Chitin | Mounted Mudcrab | |
| 1 Lock, 1 Hinge, 3 Steel Ingots | Safe | x2 |
| 1 Sawn Log, 3 Nails | Small Shelf | |
| 2 Sawn Logs, 4 Nails | Tall Shelf | |
| 1 Iron Fitting, 1 Goat Horn | Wall Sconce | |
| 1 Iron Fitting, 1 Goat Horn | Wall Sconces (2) | x3 |
| 1 Sawn Log, 1 Nail | Wall Shelf | |
| 1 Sawn Log, 1 Nail | Wall Shelves (2) | |
| 1 Sawn Log, 1 Nail, 1 Iron Ingot | Washbasin on Stand |
East Wing: Armory
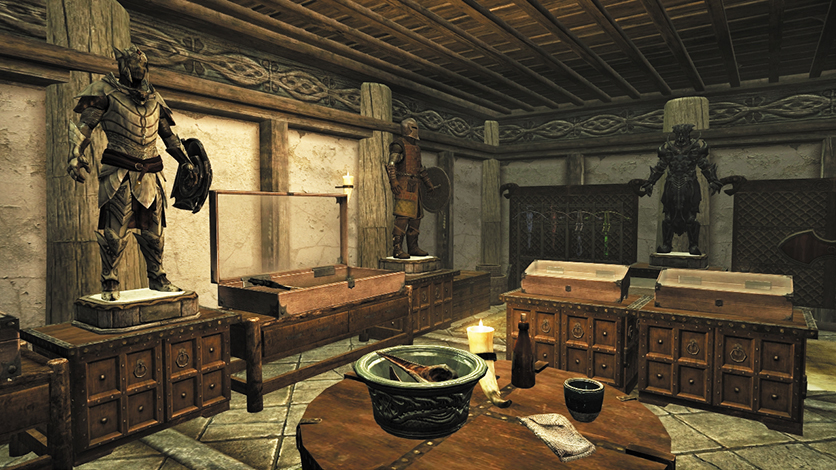
Another option for those who refuse to throw anything away. Have you collected every type of weapon? Then display them here!
| Components | Produces | Number |
|---|---|---|
| 2 Leather Strips, 1 Sawn Log, 4 Straws | Archery Targets (2) | |
| 3 Sawn Logs, 5 Nails, 1 Quarried Stone, 1 Iron Fitting | Armor Mannequin with Cupboard | x5 |
| 1 Sawn Log, 1 Iron Ingot, 2 Quarried Stone | Armorer Workbench | |
| 1 Sawn Log, 1 Nail | Bench | x2 |
| 1 Sawn Log, 1 Nail, 1 Iron Fittings, 2 Hinges, 1 Lock | Chest | x2 |
| 2 Sawn Logs, 4 Nails, 1 Iron Fitting | Cupboard | |
| 2 Sawn Logs, 4 Nails, 2 Hinges, 1 Iron Fitting, 2 Glasses | Display Case and Cupboard | x2 |
| 2 Sawn Logs, 4 Nails, 1 Hinge, 1 Glass | Display Case on Low Table | x2 |
| 1 Sawn Log, 3 Nails, 1 Iron Fitting | Dresser | x2 |
| 1 Sawn Log, 1 Iron Fitting, 1 Quarried Stone | Grindstone | |
| 1 Iron Ingot, 3 Goat Horns | Lamp Stand | x2 |
| 1 Leather Strip, 1 Bear Pelt | Mounted Bear Head | |
| 1 Leather Strip, 2 Horker Tusks | Mounted Horker Head | |
| 1 Leather Strip, 1 Sabre Cat Pelt, 2 Sabre Cat Teeth | Mounted Sabre Cat Head | |
| 1 Leather Strip, 1 Wolf Pelt | Mounted Wolf Head | |
| 1 Sawn Log, 2 Nails | Round Table | |
| 1 Sawn Log, 2 Nails | Square Table | |
| 1 Leather Strip, 1 Sawn Log | Tanning Rack | x2 |
| 1 Iron Fitting, 1 Goat Horn | Wall Sconces (2) | x3 |
| 1 Sawn Log, 1 Nail, 1 Iron Ingot | Washbasin on Stand | |
| 1 Sawn Log, 1 Iron Fitting | Weapon Plaque | x2 |
| 3 Sawn Logs, 4 Iron Fittings | Weapon Racks (4) | x2 |
East Wing: Kitchen
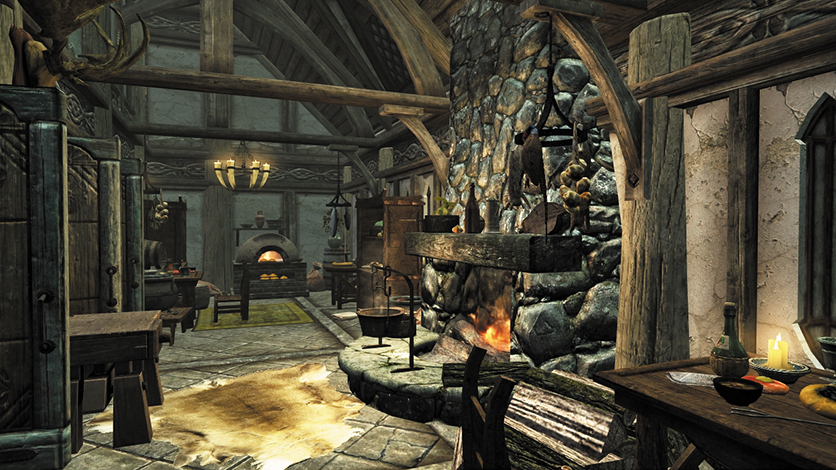
The oven is a unique crafting station. With it, you can experiment with baking recipes for bread, dumplings, and the fabled sweetroll!
| Components | Produces | Number |
|---|---|---|
| 1 Sawn Log, 1 Nail, 1 Iron Ingot | Barrels | x2 |
| 1 Iron Ingot, 3 Goat Horns, 1 Iron Fitting | Chandelier, Small | x2 |
| 2 Sawn Logs, 4 Nails, 1 Iron Fitting | Cupboard | x3 |
| 1 Sawn Log, 4 Quarried Stone | Fireplace | |
| 1 Iron Ingot, 1 Iron Fitting | Hanging Rack | x4 |
| 1 Sawn Log, 2 Nails | Low Table | x2 |
| 1 Antler (Large), 1 Leather Strip | Mounted Elk Antlers | |
| 1 Leather Strip, 2 Horker Tusks | Mounted Horker Head | |
| 2 Clay, 3 Quarried Stone | Oven | |
| 1 Sawn Log, 2 Nails | Round Table | |
| 2 Sawn Logs, 4 Nails | Square Table and Chairs | x2 |
| 2 Sawn Logs, 4 Nails | Tall Shelf | |
| 1 Iron Fitting, 1 Goat Horn | Wall Sconces (2) | |
| 1 Sawn Log, 1 Nail | Wall Shelf | |
| 1 Sawn Log, 1 Nail, 1 Iron Ingot | Washbasin on Stand |
East Wing: Library
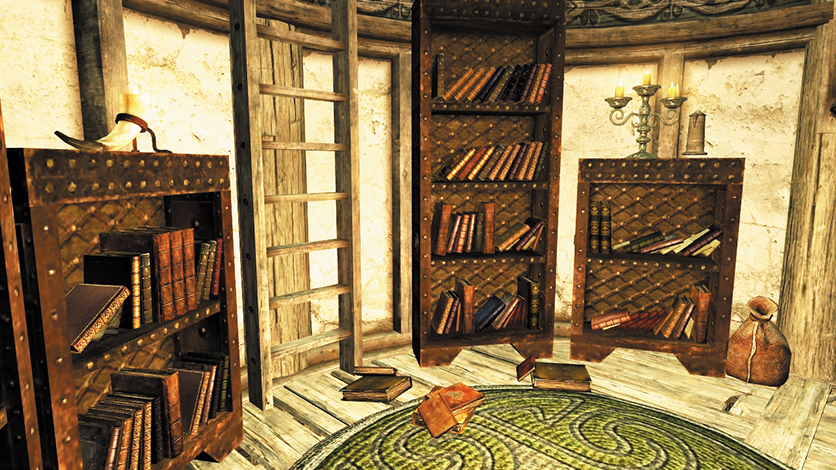
You want every book you’ve collected to be displayed in alphabetical order, right? Then you’ll have to manually sort them!
| Components | Produces | Number |
|---|---|---|
| 2 Sawn Logs, 4 Nails | Bookshelf | x4 |
| 1 Sawn Log, 1 Nail | Chair | |
| 1 Iron Ingot, 3 Goat Horns, 1 Iron Fitting | Chandelier, Small | |
| 1 Sawn Log, 1 Nail, 1 Iron Fitting, 2 Hinges, 1 Lock | Chest | x2 |
| 1 Sawn Log, 3 Nails | Corner Shelf | |
| 1 Iron Ingot, 3 Goat Horns | Lamp Stand | |
| 1 Sawn Log, 2 Nails | Night Table | |
| 2 Sawn Logs, 4 Nails | Tall Bookshelf | x5 |
| 1 Iron Fitting, 1 Goat Horns | Wall Sconce |
Cellar
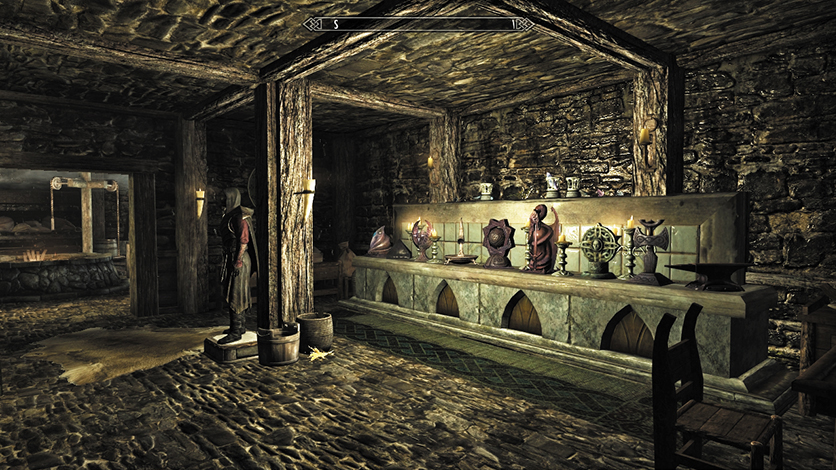
Masses of storage, a full forge, and a shrine to every one of the Nine Divines means the cellar should definitely not be overlooked.
| Components | Produces | Number |
|---|---|---|
| 1 Leather Strip, 1 Sawn Log, 2 Straws | Archery Target | |
| 1 Sawn Log, 1 Nail, 1 Quarried Stone | Armor Mannequin | |
| 1 Sawn Log, 1 Iron Ingot, 2 Quarried Stone | Armorer Workbench | |
| 1 Sawn Log, 1 Nail, 1 Iron Ingot | Barrels | x4 |
| 1 Iron Fitting, 1 Iron Ingot, 2 Sawn Logs, 5 Quarried Stone | Blacksmith’s Forge | |
| 1 Sawn Log, 1 Nail, 1 Iron Fitting, 2 Hinges, 1 Lock | Chest | x3 |
| 1 Leather Strip, 1 Sawn Log, 2 Straws | Child’s Practice Dummy | |
| 2 Nails, 1 Sawn Log, 1 Hinge, 1 Vampire Dust | Coffin | |
| 1 Sawn Log, 3 Nails | Corner Shelf | x2 |
| 2 Sawn Logs, 4 Nails, 1 Hinge, 1 Glass | Display Case on Low Table | |
| 1 Sawn Log, 2 Nails | End Table | x2 |
| 1 Sawn Log, 1 Iron Fitting, 1 Quarried Stone | Grindstone | |
| 1 Sawn Log, 2 Nails | Low Table | |
| 1 Sawn Log, 1 Nail, 1 Iron Ingot, 2 Quarried Stone | Mead Barrels (2) | |
| 1 Leather Strip, 1 Bear Pelt | Mounted Bear Head | x2 |
| 1 Large Antler, 1 Leather Strip | Mounted Elk Antlers | |
| 1 Deer Hide, 1 Small Antler, 1 Leather Strip | Mounted Elk Head | |
| 1 Leather Strip, 1 Sabre Cat Snow Pelt, 2 Sabre Cat Teeth | Mounted Snowy Sabre Cat Head | |
| 5 Locks, 5 Hinges, 15 Steel Ingots | Safe (5) | x2 |
| 2 Clay, 2 Quarried Stone, 1 Sawn Log | Shrine Base | |
| 1 Amulet of Akatosh, 1 Iron Ingot, 1 Flawless Amethyst, 1 Corundum Ingot | Shrine of Akatosh | |
| 1 Amulet of Arkay, 1 Orichalcum Ingot, 1 Silver Ingot, 1 Iron Ingot | Shrine of Arkay | |
| 1 Iron Ingot, 1 Amulet of Dibella, 1 Orichalcum Ingot, 1 Quicksilver Ingot | Shrine of Dibella | |
| 2 Ebony Ingots, 1 Amulet of Julianos | Shrine of Julianos | |
| 2 Moonstone Ingots, 1 Amulet of Kynareth, 1 Flawless Sapphire | Shrine of Kynareth | |
| 1 Amulet of Mara, 1 Silver Ingot, 2 Malachite Ingots | Shrine of Mara | |
| 1 Quicksilver Ingot, 1 Amulet of Stendarr, 1 Steel Ingot, 2 Silver Ingots | Shrine of Stendarr | |
| 1 Amulet of Talos, 1 Steel Ingot, 1 Dragon Bone, 1 Dragon Scales | Shrine of Talos | |
| 1 Amulet of Zenithar, 1 Steel Ingot, 2 Gold Ingots | Shrine of Zenithar | |
| 2 Iron Fittings, 5 Iron Ingots, 6 Clay, 4 Quarried Stone | Smelter | |
| 2 Sawn Logs, 4 Nails | Square Table and Chairs | |
| 1 Sawn Log, 1 Leather Strip | Tanning Rack | |
| 1 Iron Fitting, 1 Goat Horn | Wall Sconce | |
| 1 Iron Fitting, 1 Goat Horn | Wall Sconces (2) | x4 |
| 1 Sawn Log, 1 Nail | Wall Shelves (2) | x2 |
| 1 Sawn Log, 1 Nail | Wall Shelves (3) | |
| 1 Sawn Log, 1 Nail, 1 Iron Ingot | Washbasin on Stand | |
| 1 Sawn Log, 1 Iron Fitting | Weapon Plaque | x2 |
| 4 Sawn Logs, 5 Iron Fittings | Weapon Racks (5) |
Trophies
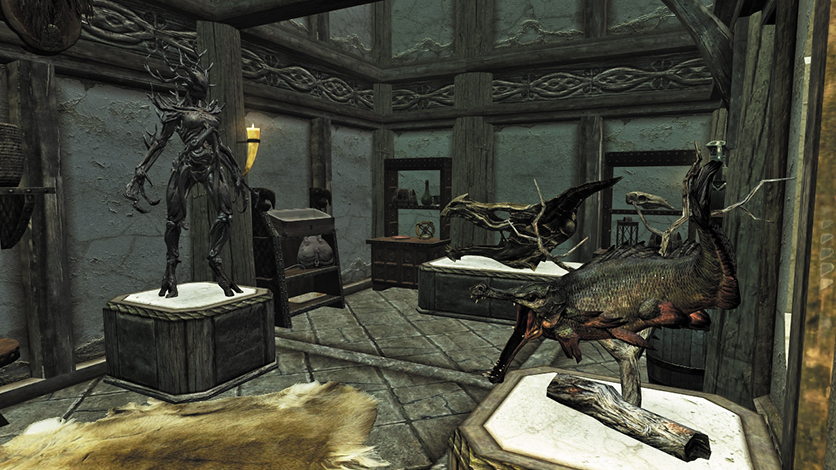
You can only construct trophies in the trophy room addition. Why not create “sets” of creatures (such as “animals” with a bear, cave bear, deer, sabre cat, and wolf)?
Large Trophy Base
| Components | Produces |
|---|---|
| 1 Straw, 2 Bear Claws, 1 Bear Pelt | Bear |
| 1 Straw, 2 Bear Claws, 1 Cave Bear Pelt | Bear |
| 1 Straw, 3 Chaurus Chitin | Chaurus |
| 1 Cow Hide, 1 Straw | Cow |
| 1 Deer Hide, 1 Large Antler, 1 Straw | Deer |
| 1 Dragon Bone | Dragon Skull |
| 5 Bone Meal, 1 Draugr Sword, 1 Straw | Draugr |
| 5 Dwemer Scrap Metal | Dwarven Sphere |
| 1 Falmer Sword, 2 Falmer Ears | Falmer |
| 1 Troll Fat, 1 Troll Skull, 1 Straw | Frost Troll |
| 2 Frostbite Venom, 1 Straw | Frostbite Spider |
| 2 Horker Tusks, 2 Straws | Horker |
| 1 Sabre Cat Pelt, 2 Sabre Cat Teeth, 1 Straw | Sabre Cat |
| 1 Snow Bear Pelt, 2 Bear Claws, 1 Straw | Snow Bear |
| 1 Troll Skull, 1 Straw, 1 Troll Fat | Troll |
| 1 Wolf Pelt, 1 Straw | Wolf |
Small Trophy Base
| Components | Produces |
|---|---|
| 5 Bone Meal, 1 Ancient Nord Bow, 1 Straw, 6 Ancient Nord Arrows | Draugr |
| 2 Dwemer Scrap Metal, 1 Petty Soul Gem | Dwarven Spider |
| 1 Falmer Sword, 2 Falmer Ears | Falmer |
| 1 Goat Hide, 2 Goat Horns, 1 Straw | Goat |
| 2 Hagraven Claws, 6 Hagraven Feathers, 1 Straw | Hagraven |
| 1 Ice Wolf Pelt, 1 Straw | Ice Wolf |
| 3 Mudcrab Chitin | Mudcrab |
| 1 Skeever Tail, 1 Charred Skeever Hide, 1 Straw | Skeever |
| 1 Skull, 5 Bone Meal, 1 Ancient Nord Bow, 1 Ancient Nord Arrow | Skeleton |
| 1 Straw, 3 Slaughterfish Scales | Slaughterfish |
| 1 Sawn Log, 1 Taproot | Spriggan |
Part 8: Home Security Part 1— Hiring a Steward
How to keep your properties properly manned by hiring help.
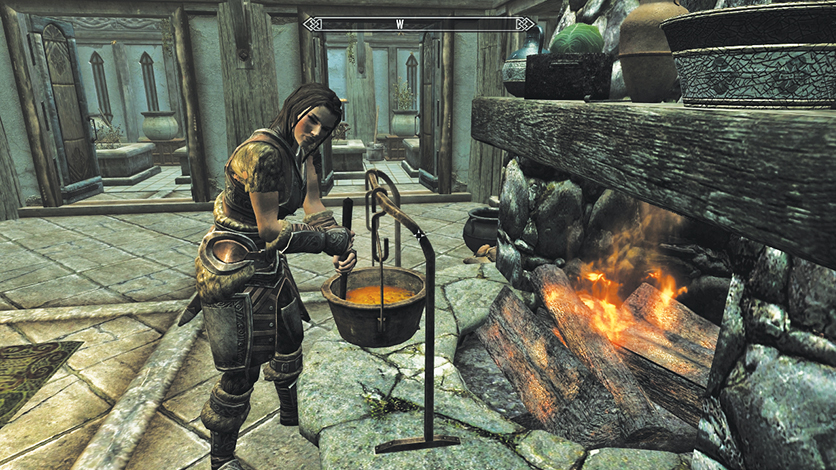
A Steward (in this case, Lydia) is an invaluable servant and helper.
Are the rigors of adventuring and running one or more houses making you weary? Then it might be time to hire a Steward to manage one of your properties (if you have multiple manors, be sure to pick the one most in need of help). Almost any Follower you can take on your adventures can fill this role. Complete any task or quest they require you to, and then agree to bring them on your travels. Head back to your home and (provided you’ve built the main hall) mention that you’d like them to be your Steward. They agree, and start right away (without payment!). The benefits of having a Steward are as follows:
House Improvements
When speaking with your Steward, you can request that they make the following improvements to your house (which are here the next time you return):
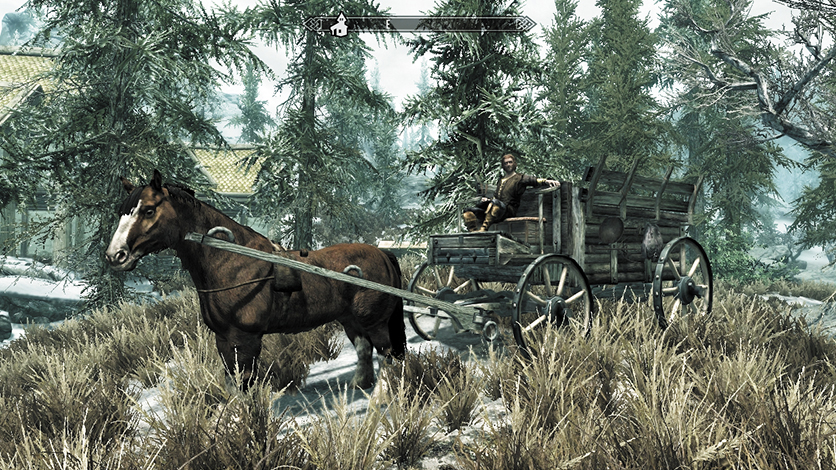
Carriage (500 gold): A horse and carriage are parked at your house. The driver is an amiable fellow and offers to drive you to any settlement in Skyrim, just like a carriage driver in any of the major cities. However, he doesn’t charge you and can trundle to any settlement (village, town, or Hold capital).
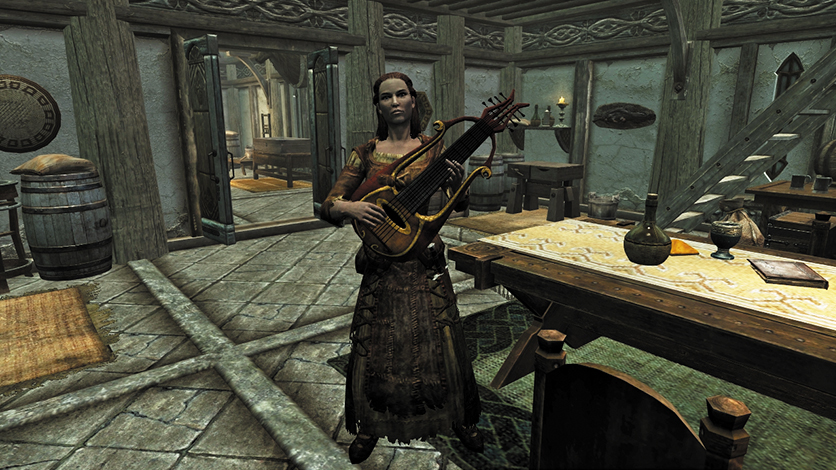
Bard (1,500 gold): A musician well versed in singing and playing the drums, lute, and flute can be found inside your home. Ask him or her to play a variety of tunes on any of those instruments, or sing ditties at your pleasure.
Horse (1,000 gold): Provided you’ve built the stables, a horse is waiting for you on your return. This horse belongs to you and will return to your house if you decide to leave it for another steed.
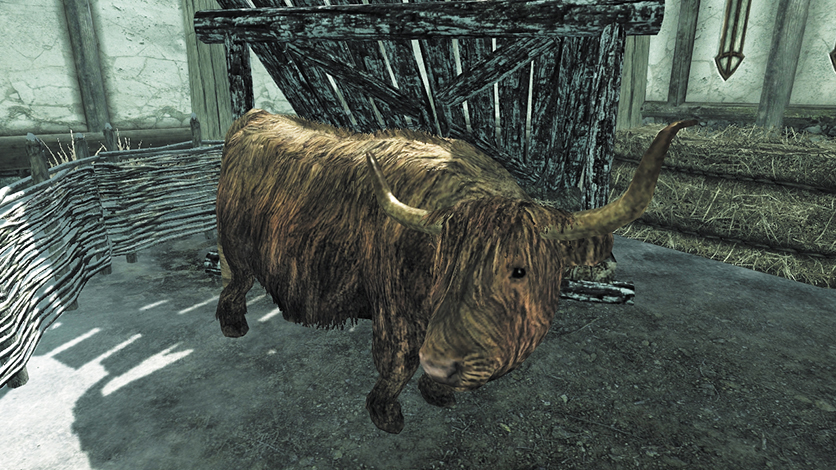
Cow (200 gold) and Chicken (25 gold): Provided you built an animal pen, a cow and (up to) three chickens are waiting on your return. Keep them or slaughter them for food.
Building Materials
You can make a request for building materials. Your Steward then goes off to gather the following based on your choices:
- Lumber (Sawn Wood): 20 for 200 gold
- Stone (Quarried Stone): 20 for 100 gold
- Clay: 20 for 20 gold
These are added to the chest next to the carpenter’s workbench when you return.
House Furnishings
You can also ask your Steward to furnish each room of your abode, instead of you collecting the components and crafting the objects yourself. The rooms are furnished progressively over time, so when you return on subsequent occasions, you’ll witness more trinkets, tables, and other bric-a-brac added. Be patient! The costs are listed below:
| Area of House to Furnish | Cost (Gold) | Number |
|---|---|---|
| Small House | 1,000 | |
| Entryway | 1,000 | |
| Main Hall* | 3,500 | |
| West Wing Addition: Bedrooms | 2,000 | |
| West Wing Addition: Greenhouse | 1,500 | |
| West Wing Addition: Enchanter’s Tower | 2,500 | |
| North Wing Addition: Storage Room | 1,000 | |
| North Wing Addition: Trophy Room | 1,500 | |
| North Wing Addition: Alchemy Laboratory | 2,500 | |
| East Wing Addition: Armory | 2,000 | |
| East Wing Addition: Kitchen | 1,500 | |
| East Wing Addition: Library | 1,500 |
Other Antics
After appointing a Follower as your Steward, you can still ask them to follow you whenever you need their services. Your Steward also has a good idea where to purchase straw and glass (two compounds you need for home improvements that aren’t available through foraging). Listen to the location and head to that vendor, remembering to return later should you run out.
Part 9: Home Security Part 2— Having a Housecarl
How to keep your properties properly manned by receiving a guard.
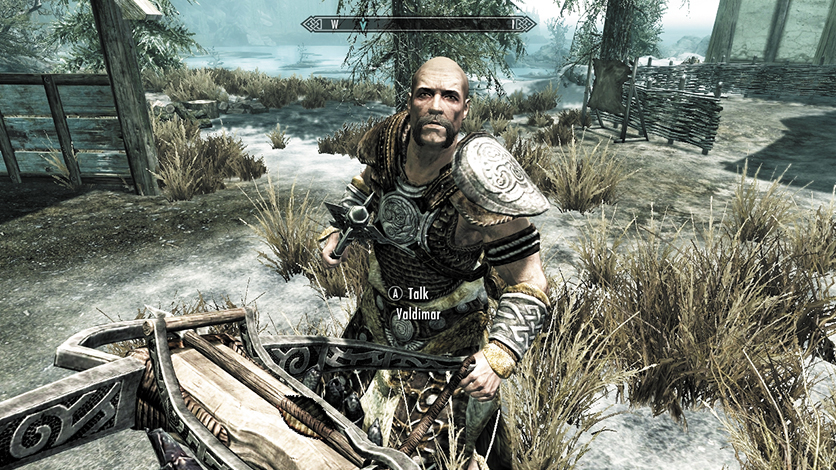
A Housecarl (in this case, the fearsome Valdimar) is an invaluable guardian.
Are the roving bands of bandits and other wilderness creatures taking a toll on your compound? Then it’s wise to receive a Housecarl who can help repel them and provide peace of mind as you leave on your adventures. In order to obtain a Housecarl, you need to complete the following:
- Return to the Jarl of the Hold you have a property in and speak to them. Agree to complete any of the series of tasks the Jarl requires you to (these are part of the Thane Tasks or Jobs for the Jarls).
- When you return from successfully finishing these jobs, head into the Jarl’s Longhouse and the Housecarl will be waiting to greet you. Is the Housecarl not there? Then continue finishing more jobs for the Jarl until one appears.
Once you’ve built the main hall of your dwelling, the Housecarl automatically travels to your abode and lives at your house.
- Housecarls can also be hired as your Stewards, too.
- Finally, your Housecarl is protective over any family members: Should bandits attack your dwelling while your spouse is inside, your Housecarl guards the door and prevents the foes from kidnapping him or her. For these reasons, it is well worth having a Housecarl at each of your three construction projects.
Available Housecarls
The following Housecarls are available, depending on your home’s location:
Hjaalmarch Hold: Valdimar
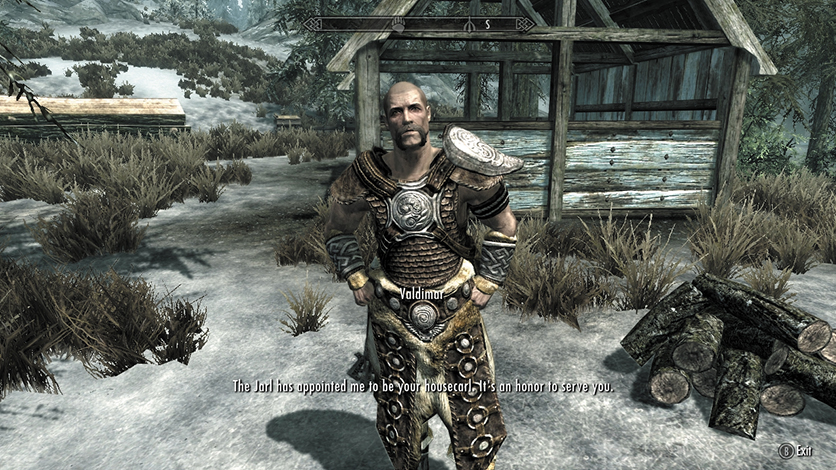
A Nord male adept in mace and spell combat.
The Pale: Gregor
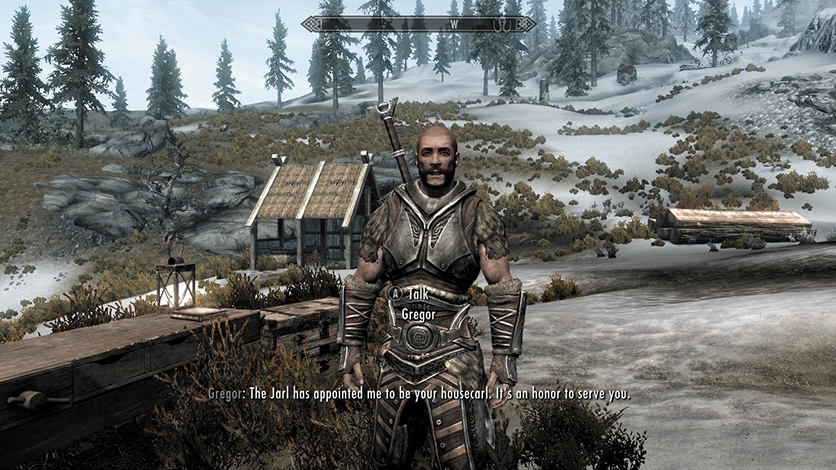
A Nord male adept in two-handed combat.
Falkreath Hold: Rayya
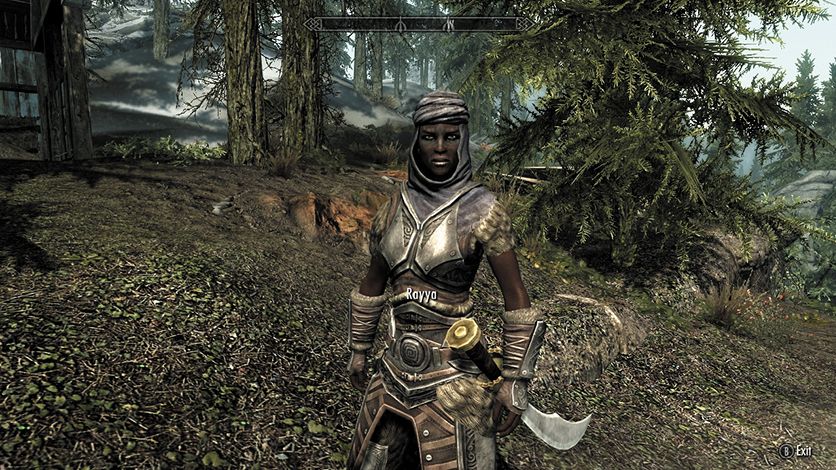
A Redguard female adept in dual-wielding combat.
Part 10: Happy Families—Spouse and Children
Complete your bliss with a doting spouse and adopted child.
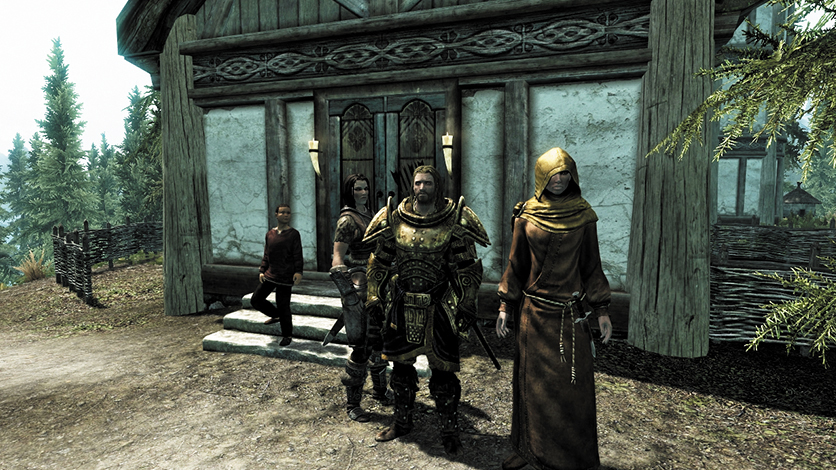
The sprawling Lakeview Manor, with residents, including wife and children.
There’s no point in crafting a rambling mansion without someone to share it with! Aside from your Steward, Housecarl, bard, carriage driver, and livestock, you can further improve your life by getting married, adopting a child, and asking your family to move in alongside you.
Spouse: Complete Temple Quest: The Bonds of Matrimony. Once married, be sure your house has a bed in it (a small house is fine, but a main hall or furnished bedroom also works). Then tell your wife or husband to join you at your house, and they move there. Switch to a different abode as you wish.
Adopted Children: Complete Hearthfire Quest: Adoption. Once you wish to have a child in your care, be sure your house has a main hall or bedroom addition furnished with two single beds and a dresser. This satisfies the requirements for adoption. Then you (or your spouse) can tell the child to move to the house. How the little tyke behaves in your abode relates to the Adoption Quest.
Part 11: Radiant Quests—Get Off My Land!
Combating undesirables who dare trespass on your property.
Life should be a breeze with a compound in the marsh, woods, or tundra and with an item collection to rival any Khajiit Caravan. But you must still be on your guard, as unwanted visitors sometimes make their presence felt.
The Cow Clobbering Giant*
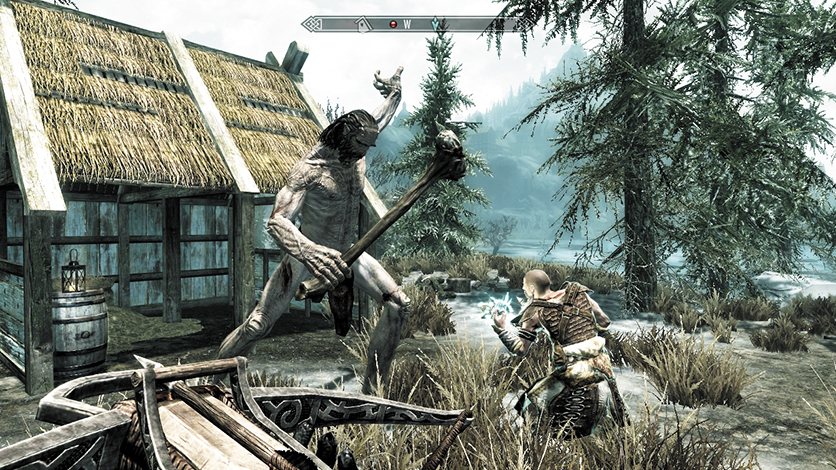
If you’ve bought yourself a shaggy cow for your compound, prepare to intercept a wandering giant who is on course for clobbering (and possibly eating) your prized heifer. Defeat the giant, or face losing your farm animal.
Wolves at Your Door*
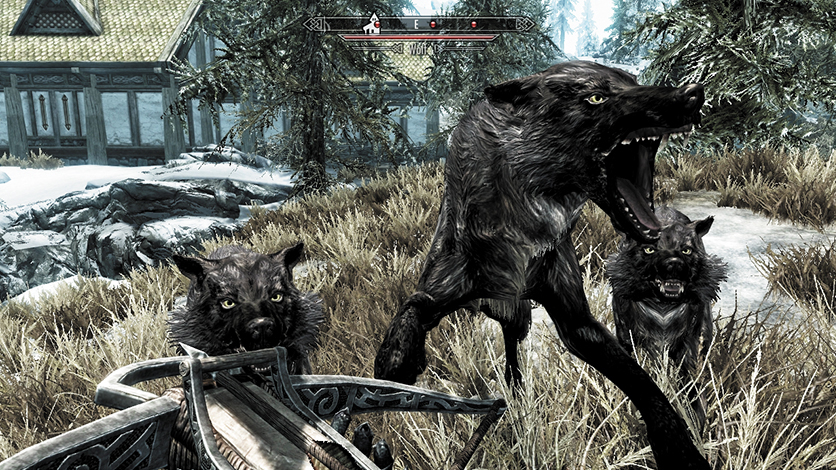
If you’ve purchased chickens for your homestead, prepare to defend them viciously from a pack of hungry wolves. Expect up to three wolves to be skulking around your property when you return from your travels. Deal with them, or face a chickenless future!
Skeever Infestation*
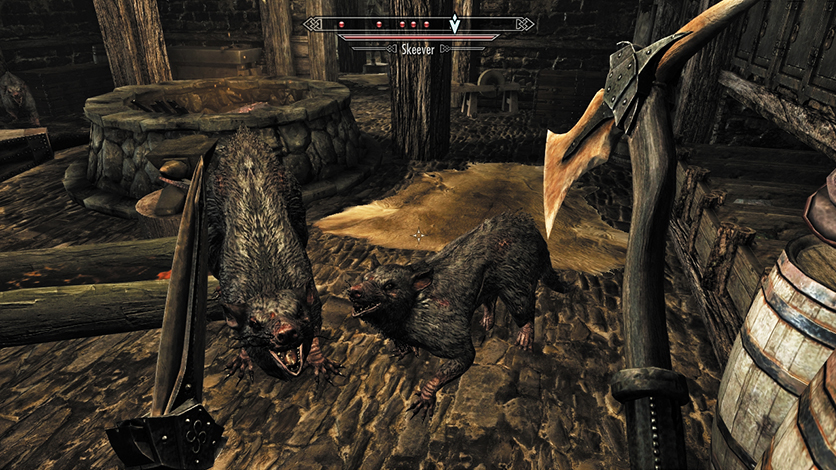
Once you’ve dug down and built a cellar under your main hall, there’s a [random] chance that when you head down to inspect it next, you’ll find between one and four Skeevers living there. Your Steward, spouse, and child all comment on the vermin, saying they’ve heard noises from the cellar: The source of those sounds should be eradicated forthwith.
However, be judicious in your Skeever removal, as one of them is actually quite tame and isn’t hostile to you at all. If you keep the tame Skeever, it scurries around the cellar without causing you consternation (and you won’t need to worry about this problem reoccurring). However, if you slay it and all the other Skeevers, expect the infestation to return at a random point in the future.
Bandit Attack: Trespassers*
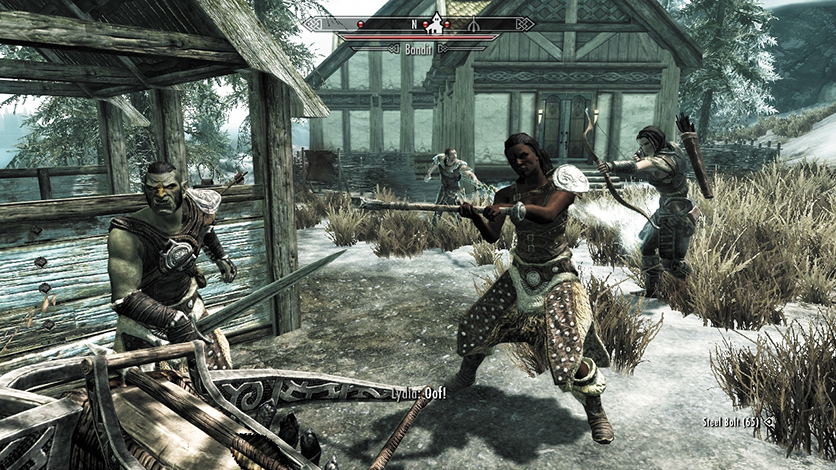
If you leave your premises, you may return to find three bandits (including a chief) mooching around your house. If you have a Housecarl, they are already engaged in combat against these foes. The bandits appear only if your structure has three or more rooms (so an entryway, main hall, and one or more additions). Simply slay these trespassers.
Bandit Attack: Kidnappers*
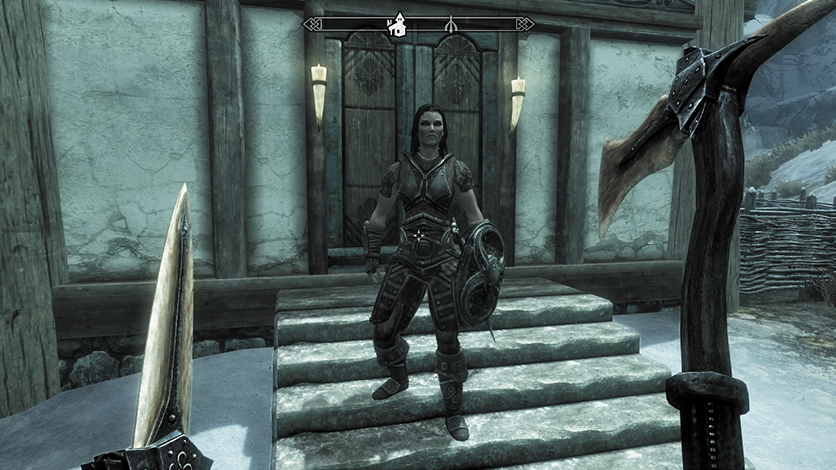
Bandits are becoming much more troublesome in your area, and your spouse is in danger of being kidnapped by them! Like the other bandit attack, this also occurs if you have a home with three or more rooms, but you also need a spouse living with you and no Housecarl (as your Housecarl guards the front door of the home and prevents this from happening). Either way, this [randomly occurring] quest will happen only once. When you return to your home, a bandit is waiting close to the front door. They stop and hand over a ransom letter. If you attack the bandit on sight, the note is on the corpse. Read it for the second objective.
- Objective: Read the bandit’s ransom note for [your spouse]
- Objective: Rescue [your spouse] from [a random bandit dungeon]
Rescue your betrothed by applying one of the following plans:
- Storm the bandit dungeon, and slay everyone and everything you aren’t married to. This is your only option if you slew the bandit at your house. In fact, kill any bandit and all will turn on you.
- Enter into negotiations with Rochelle the Red, the Bandit Chief who waits for you at the dungeon’s entrance (provided you took the ransom letter from the bandit’s hand, not their corpse). She has several options to ponder. You can:
- Pay the ransom (the amount varies). Your spouse is then released to you (or travels back to the house). The bandits remain peaceful unless you enter the dungeon.
- (Persuade) Use your charm and guile to insist that your spouse be freed. If successful, your spouse is then released to you (or travels back to the house). The bandits remain peaceful unless you enter the dungeon.
- (Intimidate) Use your brawn to insist that your spouse be returned. If successful, your spouse is then released to you (or travels back to the house). The bandits remain peaceful unless you enter the dungeon.
- Tell the chief you haven’t the money to pay them. This doesn’t sit well with the kidnappers, and all of them become hostile.
Just wandering off without choosing a plan causes the bandits to become hostile. Whatever you choose, find your spouse, release them, exit the dungeon, and return to your previously tranquil existence.