
Elder Scrolls V: Skyrim Guide The Atlas Hold 9: The Rift
Hold Capital: Riften
Related Quests
Main Quest: A Cornered Rat
Main Quest: Alduin’s Wall
Civil War Quest: Reunification of Skyrim
Civil War Quest: Compelling Tribute
Side Quest: Promises to Keep
Side Quest: Unfathomable Depths
Temple Quest: The Bonds of Matrimony
Temple Quest: The Book of Love
Dark Brotherhood Quest: Innocence Lost
Dark Brotherhood Quest: The Silence Has Been Broken
Dark Brotherhood Quest: Breaching Security
Dark Brotherhood Quest: Where You Hang Your Enemy’s Head...
Thieves Guild Quest: A Chance Arrangement
Thieves Guild Quest: Taking Care of Business
Thieves Guild Quest: Loud and Clear
Thieves Guild Quest: Dampened Spirits
Thieves Guild Quest: Scoundrel’s Folly
Thieves Guild Quest: Speaking With Silence
Thieves Guild Quest: The Pursuit
Thieves Guild Quest: Trinity Restored
Thieves Guild Radiant Quest: No Stone Unturned (Vex)
Thieves Guild Radiant Quest: No Stone Unturned (x2)
Thieves Guild Radiant Quest: Reparations
Thieves Guild Radiant Quest: Shadowmarks*
Thieves Guild Radiant Quest: Moon Sugar Rush*
Thieves Guild Radiant Quest: Armor Exchange*
Thieves Guild Radiant Quest: Larceny Targets (the Ragged Flagon)*
Thieves Guild Radiant Quest: Larceny Targets (Mercer’s House)*
Thieves Guild Additional Jobs: The Numbers Job
Thieves Guild Additional Jobs: The Fishing Job
Thieves Guild Additional Jobs: The Bedlam Job
Thieves Guild Additional Jobs: The Burglary Job
Thieves Guild Additional Jobs: The Shill Job
Thieves Guild Additional Jobs: The Sweep Job
Thieves Guild Additional Jobs: The Heist Job
Thieves Guild City Influence Quest: Silver Lining
Thieves Guild City Influence Quest: The Dainty Sload
Thieves Guild City Influence Quest: Imitation Amnesty
Thieves Guild City Influence Quest: Summerset Shadows
Thieves Guild City Leadership Quest: Under New Management
Dungeon Activity (Riften Jail)
Miscellaneous Objective: Innkeeper Rumors (the Bee and Barb)
Miscellaneous Objective: Innkeeper Rumors (the Ragged Flagon)
Miscellaneous Objective: The Lover’s Requital* (Sibbi Black-Briar)
Miscellaneous Objective: Under the Table* (Romlyn Dreth)
Miscellaneous Objective: Few and Far Between* (Ingun Black-Briar)
Miscellaneous Objective: Spread the Love* (Dinya Balu)
Miscellaneous Objective: Sealing the Deal* (Talen-Jei)
Miscellaneous Objective: Ice Cold* (Marise Aravel)
Miscellaneous Objective: Distant Memories* (Brand-Shei)
Miscellaneous Objective: Grimsever’s Return* (Mjoll the Lioness)
Miscellaneous Objective: Stoking the Flames* (Balimund Iron-Boar)
Miscellaneous Objective: Caught Red-Handed* (Svana Far-Shield)
Miscellaneous Objective: Pilgrimage* (Alessandra)
Miscellaneous Objective: Hunt and Gather* (Wylandriah)
Miscellaneous Objective: Special Delivery* (Bolli)
Miscellaneous Objective: Bring It!* (Harrald)
Miscellaneous Objective: Truth Ore Consequences* (Hafjorg)
Miscellaneous Objective: Ringmaker* (Madesi)
Miscellaneous Objective: Bloody Nose* (Hofgrir Horse-Crusher)
Miscellaneous Objective: Toying with the Dead* (Vekel the Man)
Miscellaneous Objective: Shardr and Sapphire* (Shadr)
Miscellaneous Objective: Jarl’s Quest Part 1: Helping Hand* (Wujeeta)
Miscellaneous Objective: Jarl’s Quest Part 2: The Raid* (Wujeeta, Jarl Laila)
Miscellaneous Objective: Jarl’s Quest Part 3: Supply and Demand* (Jarl Laila)
Miscellaneous Objective: Erasing Vald’s Debt* (Maven Black-Briar)
Miscellaneous Objective: Gissur’s Revenge* (Gissur)
Miscellaneous Objective: Shavari the Assassin* (Shavari)
Favor (Activity): The Gift of Charity* (Gissur)‡
Favor (Activity): The Gift of Charity* (Snilf)
Favor (Activity): The Gift of Charity* (Edda)
Thane Quest: Thane of The Rift*
Habitation Type: Hold Capital (Major)
Crafting
Alchemy Labs (5)
Arcane Enchanter
Forge
Grindstones (4)
Tanning Racks (3)
Workbenches (2)
Services
Follower: Mjoll the Lioness [40/47]
Follower: Marcurio [41/47]
Follower: Iona [42/47]
House for Sale: Honeyside [5/5]
Marriage Prospect: Mjoll the Lioness [52/62]
Marriage Prospect: Balimund [53/62]
Marriage Prospect: Gelka [54/62]
Marriage Prospect: Marcurio [55/62]
Marriage Prospect: Romlyn Dreth [56/62]
Marriage Prospect: Iona [57/62]
Trader (Apothecary): Elgrim [11/12]
Trader (Apothecary): Herluin Lothaire [12/12]
Trader (Bartender): Talen-Jei [3/5]
Trader (Bartender): Vekel the Man [4/5]
Trader (Blacksmith): Balimund [28/33]
Trader (Blacksmith): Arnskar Ember-Master [29/33]
Trader (Blacksmith): Vanryth Gatharian [30/33]
Trader (Fence): Tonilia [6/10]
Trader (Fletcher): Syndus [3/3]
Trader (Food Vendor): Ungrien [9/9]
Trader (General Store Vendor): Marise Aravel [13/19]
Trader (General Store Vendor): Brand-Shei [14/19]
Trader (General Store Vendor): Grelka [15/19]
Trader (General Store Vendor): Bersi Honey-Hand [16/19]
Trader (Innkeeper): Keerava [14/15]
Trader (Jeweler): Madesi [2/2]
Trader (Spell Vendor): Wylandriah [12/12]
Trainer (Archery: Master): Niruin [3/3]
Trainer (Light Armor: Expert): Grelka [3/3]
Trainer (Lockpicking: Master): Vex [1/2]
Trainer (Pickpocket: Master): Vipir [2/3]
Trainer (Smithing: Expert): Balimund [3/3]
Trainer (Sneak: Master): Delvin Mallory [2/3]
Collectibles
Larceny Target: Bust of the Grey Fox [6/7]
Skill Book [Lockpicking]: Advances in Lockpicking [A1/10]
Skill Book [Lockpicking]: Advances in Lockpicking [A2/10]
Skill Book [Lockpicking]: Surfeit of Thieves [C2/10]
Skill Book [One-Handed]: Fire and Darkness [B2/10]
Skill Book [Pickpocket]: Beggar [B1/10]
Skill Book [Pickpocket]: Beggar [B2/10]
Skill Book [Pickpocket]: Purloined Shadows [C2/10]
Skill Book [Smithing]: The Armorer’s Challenge [E2/10]
Skill Book [Speech]: A Dance in Fire, v7 [C2/10]
Skill Book [Two-Handed]: Words and Philosophy [E2/10]
Unique Item: The Bond of Matrimony [80/112]
Unique Item: Madesi’s Silver Ring [81/112]
Unique Item: Gloves of the Pugilist [82/112]
Unique Item: Thieves Guild Armor [83/112]
Unique Item: Thieves Guild Boots [84/112]
Unique Item: Thieves Guild Gloves [85/112]
Unique Item: Thieves Guild Hood [86/112]
Unique Item: Amulet of Articulation [87/112]
Unique Item: Guild Master’s Armor [88/112]
Unique Item: Guild Master’s Boots [89/112]
Unique Item: Guild Master’s Gloves [90/112]
Unique Item: Guild Master’s Hood [91/112]
Unique Item: Thieves Guild Armor (Improved) [92/112]
Unique Item: Thieves Guild Boots (Improved) [93/112]
Unique Item: Thieves Guild Gloves (Improved) [94/112]
Unique Item: Thieves Guild Hood (Improved) [95/112]
Unique Weapon: Chillrend [61/80]
Unique Weapon: Alessandra’s Dagger [62/80]
Unique Weapon: Steel Sword [63/80]
Unique Weapon: Dravin’s Bow [64/80]
Unusual Gem: [23/24]
Special Objects
Business Ledger
Civil War: Map of Skyrim
Shrine of Arkay [12/12]
Shrine of Dibella [8/8]
Shrine of Mara [5/5]
Shrine of Talos [16/17]
Chest
Potions aplenty
Loose gear

 Lore: City Overview
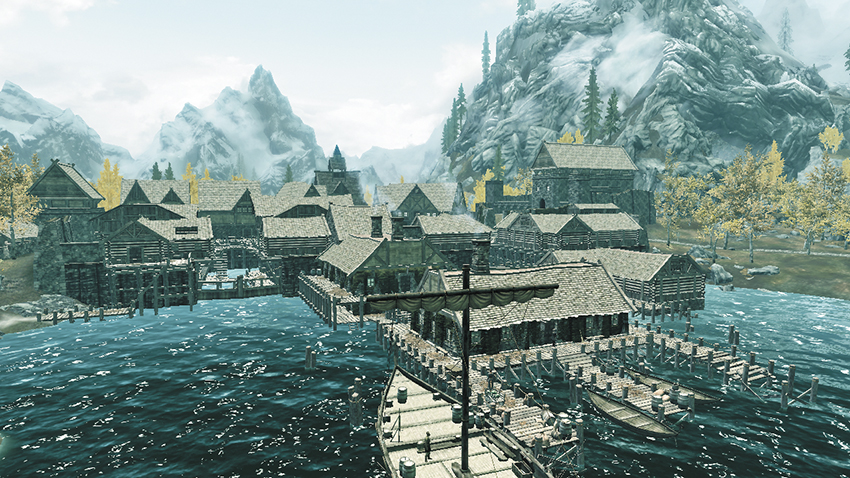
Riften is situated in the southeastern corner of the Rift, at the eastern end of Lake Honrich, with a good portion of the city actually spilling over the water atop large wooden piers. The entire city is bisected by a large canal that used to serve as access for small cargo boats but has lately fallen into disrepair and decay thanks to the lack of trade during the Civil War. But don’t think that Riften isn’t a bustling center of commerce; the Black-Briar Meadery has almost a monopoly on the sale and distribution of a Nord’s favorite pastime: drinking.
However, the city of Riften is a paradox. The city is located in the beautiful Autumnal Forest region of Skyrim, and that beauty has encroached upon the city, in the form of wondrous foliage and generally pleasant weather. But most of the structures in Riften are wooden, and the city has a sort of old, run-down feel, which often takes visitors by surprise. Not that this bothers the people who live there, who see Riften for what it truly is—a bustling, energetic city with a strong economy fueled by hard-working fishermen and mead makers. The residents also understand that the city is, for all intents and purposes, owned and operated by the Maven Black-Briar, and in order to survive and thrive, everyone needs to adhere to her rules.
Important Areas of Interest
Dryside
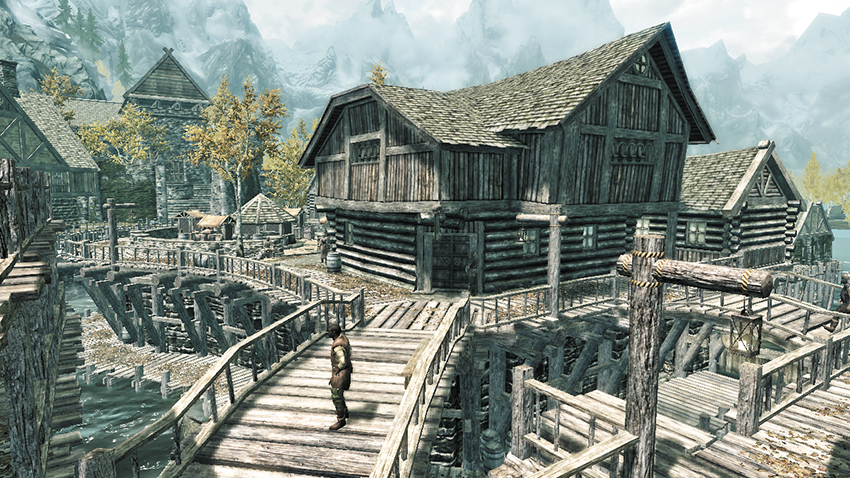
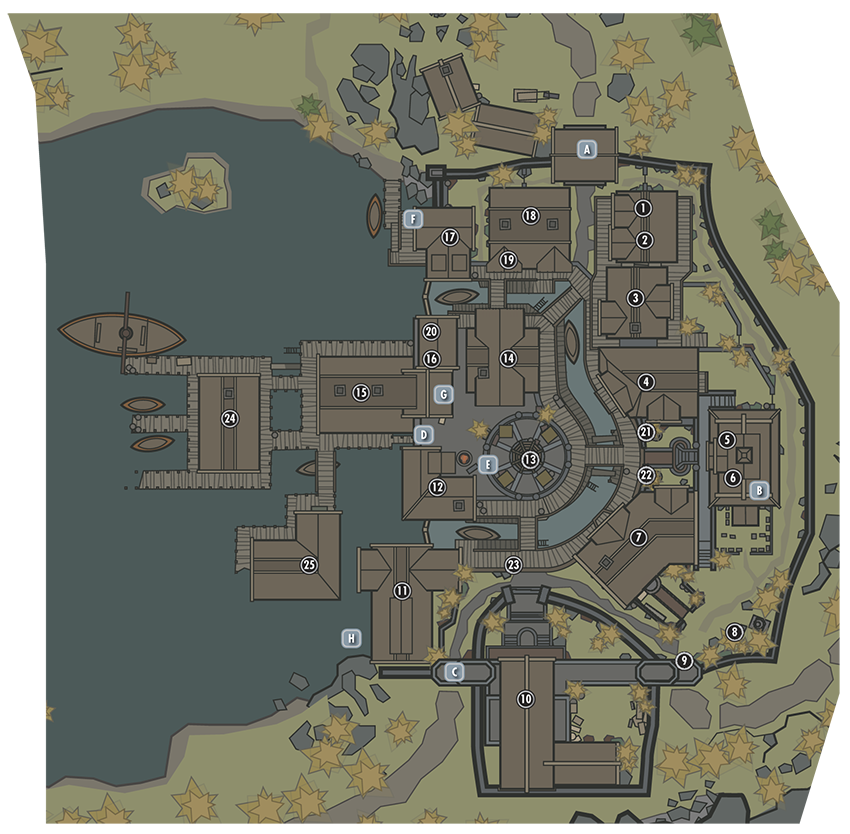
The eastern edge of the city (which isn’t built over the waters of Lake Honrich) is called Dryside. The bulk of the town is located on Dryside and is split by Riften’s canal. Most of the more affluent homes are located on the eastern side of the canal, while most of Riften’s shops and the marketplace are located on the western side. The southern portion of the city is dominated by Mistveil Keep and the jail.
 North Gate
The main gate of Riften, located along the northern wall, sees the most traffic of the city’s three entrances. Foil the Riften guard’s feeble attempts at shaking you down for money. Then speak with Maul, a gruff man waiting just inside the gates.
 Bolli’s House
- Bolli Trout-Purse
- Nivenor
This three-floor structure is one of the more impressive houses in Riften, which speaks to Bolli’s station. The Note you’ll find on the bedside cabinet reveals Bolli’s marriage isn’t as successful.
- Shadowmark: “Loot”
- Note: Requested Report
- Chest
 Aerin’s House
- Mjoll the Lioness
- Aerin
Aerin’s home is small but tall, featuring three floors.
- Follower: Mjoll the Lioness [40/47]
- Marriage Prospect: Mjoll the Lioness [52/62]
- Loose Gear
 Snow-Shod Manor
- Vulwulf Snow-Shod
- Nura Snow-Shod
- Asgeir Snow-Shod
This three-floor wooden structure is the house of Clan Snow-Shod, a wealthy and influential family of Nord that owns the Snow-Shod Farm outside Riften. But even though the Clan has direct ties to the city’s economy, it’s their interest and involvement in the Civil War that really has people talking....
- Shadowmark: “Loot”
- Loose gear
 Riftweald Manor (Locked: Special)
This property is owned by the current Guild Master of the Thieves Guild and is a fine structure. Mercer has cleverly integrated an isolated section of the Ratway into the sublevels of his home, which contains his private valued possessions. This hideaway includes a minivault, a study, and escape routes. Mercer Frey has paid several bandits to act as guards here and has given them the order to kill intruders.
Outside, the front and back doors are barred from the inside, and the back grounds are locked by three gates, two requiring a key and the other locked (Expert). You usually enter here during Thieves Guild Quest: The Pursuit and must shoot a mechanism to release a wooden ramp leading to an upper entrance (Expert). This cannot be done at any other time; exploration inside occurs only during or after this quest.
Riftweald Manor (Interior)
Upper Floor: A storage room leads to a landing, a smaller storage closet, and Mercer’s bedroom. The door’s bar in the landing can’t be budged.
Ground Floor: A large living and dining room dominates this area, along with an adjacent foyer. The doors’ bars here can’t be removed either. The foyer table has a note mentioning the mechanism construction that has recently taken place outside. It is next to the front door (barred and sealed) that you find a suspicious cabinet leading to Mercer Frey’s secret chambers.
Cellar: The cellar, accessed from the dining room, is a small area filled with foodstuffs.
- Note: To the Owner
- Chest
- Potions
Secret Cellar: Accessed via the false back panel of the suspicious cabinet on the ground floor (which can be closed using the pull bar on the other side). Watch for numerous traps as you navigate the sewer passages; there’s a spear trap in front of you, triggered by a pressure plate. The next room has fire traps blasting up from the floor.
Puzzle Solution: Look at the floor and the nozzle holes where the fire blasts up from. These are divided into tiles. Each tile has a diamond shape; the fire traps that are activated are darker than those that are empty; simply step on the lighter-colored diamonds to avoid all fire damage.
There’s a dart trap in the water-logged corridor (pressure plate) leading to a chest. At the corridor with the swinging blade and battering ram traps, dash between the blades and step left into the alcove. Wait for the battering ram to swing, then sprint to the left of the low chandelier, dodging the remaining blades. At the door, look down and unlock the trap trigger (Expert) or face darts when you open the door.
- Danger! Battering Ram Trap, Dart Trap, Fire Trap, Spear Trap, Swinging Blade Trap
- Chest
Mercer’s Secret Study: There is a wealth of loot here, including an excellent weapon in a display case (Expert). The note from “R” is likely to be from Legate Rikke in Solitude. The exit tunnel leads to the Ratway Vaults, which connects back to the Warrens and the Ragged Flagon. Note the Shadowmark before you drop down into the Vaults.
- Shadowmark: “Danger”
- Mercer’s Plans
- Skill Book [Sneak]: The Red Kitchen Reader
- Unique Weapon: Chillrend [61/80]
- Note: Many thanks
- Chest
- Larceny Target: Bust of the Gray Fox [6/7]
 Temple of Mara
- Maramal
- Dinya Balu
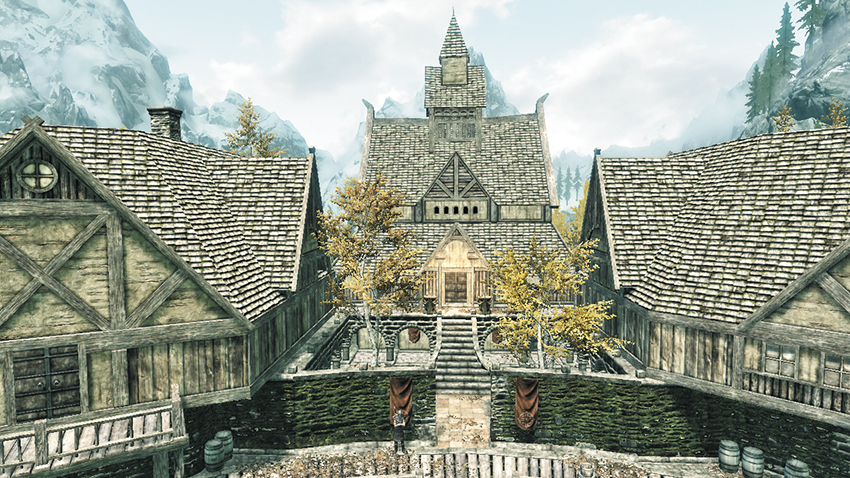
The Temple of Mara offers services to the people of Riften and is devoted to the worship of Mara, one of the Nine Divines and the recognized goddess of love. It is here that weddings are held (Side Quest: The Bonds of Matrimony). You can get a Blessing at the altar or at two smaller shrines on either side of the main chamber. The first Note is from Anuriel warning of disturbances in the Hall of the Dead. The second Note is from Talen-Jei, regarding his forthcoming wedding. The cellar has some food and drink, and an entrance to the Hall of the Dead.
- Unique Item: The Bond of Matrimony [80/112]
- Shrine of Mara [5/5]
- Note: Reports of a Disturbance
- Note: Argonian Ceremony
- Potions
 Hall of the Dead
Alessandra
The Riften Hall of the Dead has two levels, underneath the Temple of Mara. The ground floor serves as a Shrine of Arkay; the bottom, underground level is actually a series of catacombs that contain some of Riften’s most important dead. Connected to the mausoleum is a graveyard, containing even more of the city’s departed. There are two entrances: from the outside under the Temple of Mara balcony and via the cellar inside the Temple. Inside, there are numerous skeletons from which you can remove a few coins, bone meal, and skulls.
- Unique Weapon: Alessandra’s Dagger [62/80]
- Shrine of Arkay [12/12]
 The Ragged Flagon: Cistern Entrance
The secret entrance to the Ragged Flagon, Cistern, becomes available during the Thieves Guild Quest: Loud and Clear and becomes a world map marker (making it simple to return to the Guild). It can’t be opened until then but provides a quicker return route to Brynjolf and Mercer Frey, instead of navigating the Ratway. Note the Shadowmark on the coffin (which you press to open) and on the surrounding Hall of the Dead entrance walls. If you’re exiting from the Cistern, use the pull chain to open the coffin.
- Shadowmark: “The Guild”
 Black-Briar Manor
- Maven Black-Briar (Imperial Jarl)
- Hemming Black-Briar (Imperial Steward)
- Sibbi Black-Briar
- Ingun Black-Briar
Black-Briar Manor is the home of the Black-Briar family, the wealthiest, most powerful family in all of Riften. The Black-Briar family are the owners of the Black-Briar Meadery, and as such control much of Riften’s economy. It is accessed via the front door (note the Shadowmark), a leap over the garden fence, and through the back gate (Expert). Inside, the foyer end table has a Note regarding the loss of a mead shipment, and the rest of the ground floor has a dining table full of food and other stored items.
- Shadowmark: “Protected”
- Note: Regarding your Loss
- Potions
Cellar: There are three doors, two of which are unlocked. One leads to a small bedroom. One leads to a larger bedroom with an Alchemy Lab and a number of ingredients to steal. The third door (Expert) leads to a tiny chamber where the Black Sacrament has been performed. There is a letter from Maven here; she is unhappy with Astrid (from the Dark Brotherhood) about the lack of action regarding an assassination Maven requested!
- Crafting: Alchemy Lab
- Note: To the Brotherhood
- Potions
Upper Floor: Check the shelves in the hallway for a book on the Gaulder legends. On the bedside table are two letters, each containing a different tone from two business acquaintances. There is an exit onto an upper exterior balcony (a quick escape if need be!).
- Business Letters (2)
- Chest
 Shrine of Talos
Nura Snow-Shod
Talos is worshipped openly when the Stormcloaks are in control of the city. When they are not, the shrine has less of a presence. Nura Snow-Shod is usually found here during the day, tending the Shrine.
- Shrine of Talos [16/17]
 Dead Gate
The Dead Gate is so named for the number of people who died there thanks to repeated bandit raids of the city. The gate is now completely boarded up and no longer in use.
 Mistveil Keep
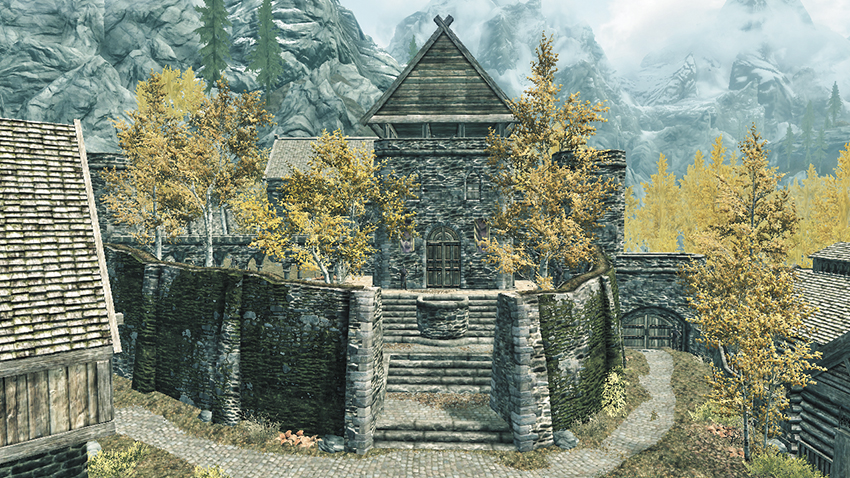
 The following leaders of Riften are loyal to the Stormcloaks at the start of the Civil War.
Jarl Laila Law-Giver
Laila is a fervent supporter of the Stormcloaks, strongly believing that the Empire can do nothing but steal the heritage of their city away if they come to power. She firmly believes in the old ways of Skyrim and is steeped in its traditions and mannerisms. Even though she rules quite a corrupt city, she is blissfully unaware of the more nefarious goings-on in town thanks to her Steward, Anuriel, who has been known to accept bribes and payoffs from the seedier inhabitants of Riften.
Harrald
Harrald is the youngest son of Laila Law-Giver. He is largely indifferent to the events of the Civil War but sides with the Stormcloaks because his mother does. This situation has driven a wedge between Saerlund and Harrald, who constantly chide each other for their stances on the situation.
Saerlund
Saerlund is the oldest son of Laila Law-Giver. When he publicly spoke in favor of the Imperial forces in the Civil War, Laila refused to recognize him as heir. There is a great deal of hostility between the two now, although Saerlund still lives in the Keep. Should Laila ever become exiled due to the Empire gaining control of Riften, Saerlund will remain behind and live in the Keep in defiance of his mother’s beliefs.
Anuriel (Steward)
Anuriel’s devotion to her Jarl is a guise for her true nature as a corrupt and greedy individual. She readily accepts bribes from influential people in the city and is extremely clever at covering her tracks (even if it means making loose ends disappear). She has no desire to actually become the Jarl, seeing her position as a stronger link to her corrupt ties. She has gained some reputation as someone not to be trifled with.
Unmid Snow-Shod (Housecarl)
Unmid is the second to youngest child of Vulwulf Snow-Shod. He has dedicated his life to the art of combat, becoming highly adept at all sorts of martial weaponry. Due to this incredible talent, he was hired as the Housecarl. On more than one occasion, Unmid has proved he cannot be bested in combat and has even put down several attempts on the Jarl’s life. Unmid’s single weakness is his infatuation for Anuriel, the Jarl’s Steward.
Wylandriah (Court Wizard)
She spends most of her day in her laboratory performing experiments and only makes herself available to the Jarl when specifically summoned. She seems always scatterbrained, but this is an act, as Wylandriah would prefer to be doing her experimentation rather than matters of court. By acting this way, she believes people leave her to herself most of the time (which is true).
Gonnar Oath-Giver
 The following residents of Riften arrive to take control of this city, once this Hold has fallen during the Civil War.
Maven Black-Briar, Imperial Jarl
As matron of the Black-Briar family and a powerful businesswoman, Maven is virtually unapproachable and elitist. She’s cold, ruthless and calculating—and also well connected within the Empire and Skyrim alike. If the Empire takes control of Riften in the Civil War, Maven (thanks to powerful friends in Cyrodiil) is installed as the Imperial Jarl. She will also fill her court with family and allies.
Hemming Black-Briar, Imperial Steward
Hemming Black-Briar is the only son of Maven Black-Briar, and heir to family fortune. He is being groomed by Maven as a sort of protégé... someone to eventually take her place not only running the Meadery, but to also dabble in the same corrupt activities. Hemming is often an errand-boy, and has come to admire his mother’s ways and fervently defends her whenever a family squabble should arise.
Maul (Housecarl)
Maul is a close friend of Hemming Black-Briar; when he was ambushed by bandits, Maul dove into the fray to save him. Ever since then, they have been partners in crime, with Maul assisting Hemming in his more nefarious activities assigned by Maven Black-Briar. He does not live within Riften, as he wants his identity to remain anonymous. Maul’s brother is Dirge, part of the security at the Ragged Flagon.
Mistveil Keep (Exterior)
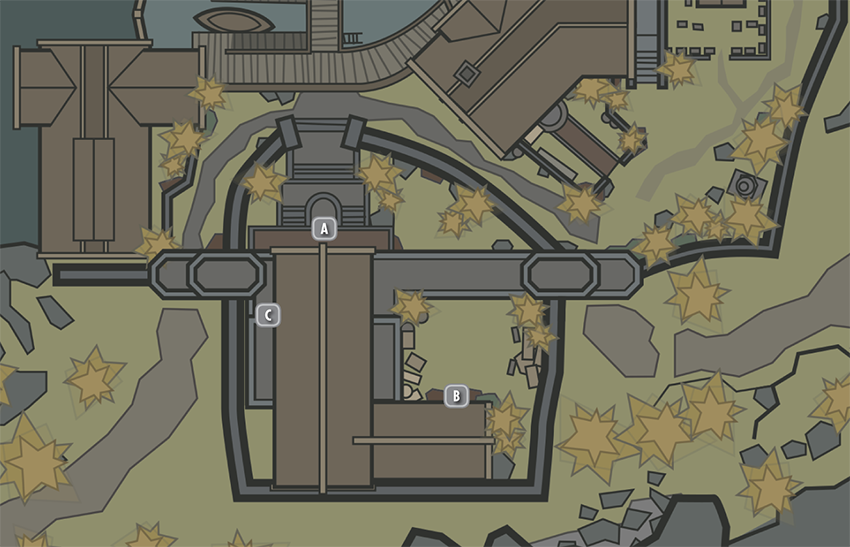
Door to Mistveil Keep
Door to Mistveil Keep Barracks
 Door to Riften Jail
This ominous stone keep is where Jarl Laila Law-Giver lives and rules, but this important building also contains the city’s jail and barracks. The barracks are to your left (southeast) and the jail to the right (southwest) of the main door into the Keep, with the banners on each side. This is where the majority of the city’s guards reside.
Mistveil Keep (Interior)
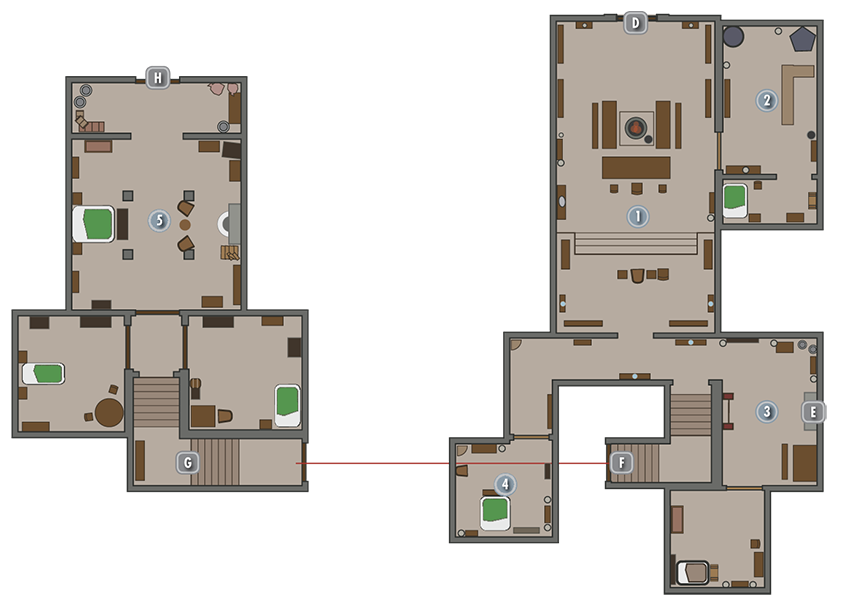
 Door to Riften
Banquest Hall and Throne Room
Guards, the Jarl, and her entourage are seated here. There’s enough food here to feed a small army.
- Chest (2)
Wylandriah’s Enchantments
The Court Wizard can usually be found here, in this two-room chamber off the Banquet Hall, which houses her shop and bed.
- Crafting: Alchemy Lab, Arcane Enchanter
- Trader (Spell Vendor): Wylandriah [12/12]
- Weapons, Apparel, Scrolls, Books, Misc
- Chest
- Potions aplenty
- Loose gear
War Room and Armory
Gonnar Oath-Giver is plotting from this location (which was once a pantry) at the start of the Civil War. Open one door to head into the Barracks, and open the other into a bedroom armory filled with weapons.
- Civil War: Map of Skyrim
- Chest
- Loose gear
 Door to Mistveil Keep Barracks
Anuriel’s Room
Located at the far end of the ground-floor corridor, this room has a number of precious gems and necklaces and a letter regarding the imprisonment of Sibbi Black-Briar. Head to this location during the Civil War Quest: Compelling Tribute (Imperials).
- Note: Sibbi Black-Briar
- Chest
 Door to Mistveil Keep Jarl’s Quarters
Mistveil Keep Jarl’s Quarters
 Door to Mistveil Keep
Upstairs Bedrooms
There are three doors at the top of the stairs, each leading to a bedroom. Check for the following, and a door from the Jarl’s bedroom to a covered balcony offering views of Riften:
- Skill Book [Lockpicking]: Surfeit of Thieves [C2/10]
- Unusual Gem: [23/24]
- Display Cases [Adept] (3)
- Chests (3)
- Potions
- Loose gear
 Door to Riften
Mistveil Keep Barracks (Exterior)
A large yard where guards (and sometimes Harrald) come to practice.
Mistveil Keep Barracks (Interior)
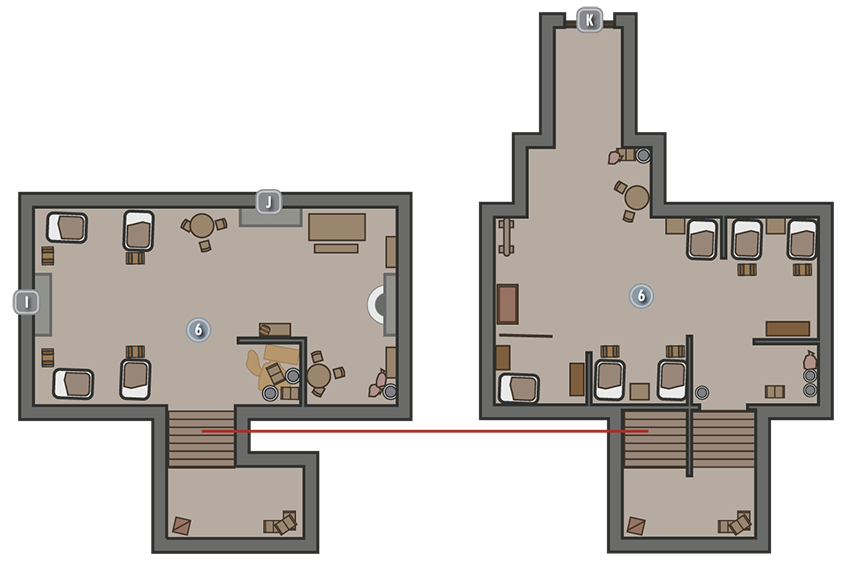
 Door to Mistveil Keep
Barracks Interior (Upper and Lower)
A large number of guards (and mead bottles) are inside this two-floor structure. The Riften Guards are well equipped and numerous. The lower exits lead out to the training yard and into Mistveil Keep. The upper exit leads out onto crenellations above the yard.
- Skill Book [Two-Handed]: Words and Philosophy [E2/10]
- Chests (8)
- Loose gear
 Door to Riften
 Door to Riften
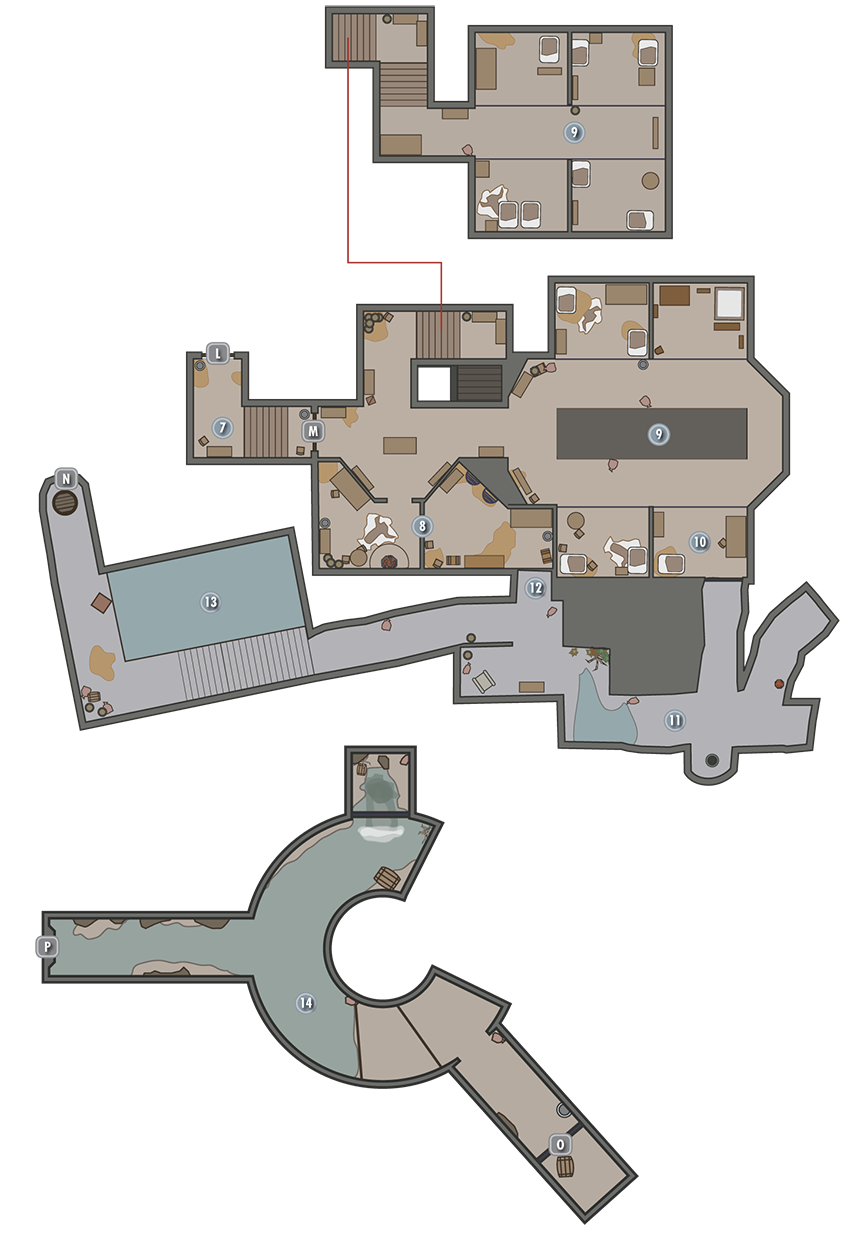
Riften Jail
Threki
Sibbi Black-Briar
Molgrom Twice-Killed
 Door to Riften
Jail Entrance
A jailor stops you from heading into the jail if you’re visiting, unless you can persuade or bribe your way past him.
 Door to Jail [Expert]
Jail Offices
Inside, you can find the jail office on the right, with the evidence room just beyond; both are a bit of a mess. Note the sewer wall opening close to the chests, though you can’t do anything with it from this side.
Cells (Upper and Lower)
The cells are on two separate levels, with Sibbi Black-Briar and Threki the Innocent imprisoned on the top floor and Molgrom Twice-Killed on the lower level. All of the cell doors are locked (Adept). A Skill Book sits atop a barrel in a dark nook above the stairs.
Prisoner Cell (Upper Southeast)
If you get imprisoned here, you can pick the lock on your cell door and sneak out—just keep an eye on the patrolling guard and time your movements to slip by them.
Or better yet, note the Shadowmark and the broken shackle on the wall in your cell. Pull the shackle and a secret passage in the wall creaks open!
 Sealed-Off Ratway Section
 Sewer Grate
Escape through this sealed-off section of the Ratway, which is filled with debris, and push open the sewer grate to retrieve your belongings from the evidence room.
 Flooded Chamber
Then head down the passage into a section of unexplored sewers. Fight any Skeevers you see, check the flooded area for a chest, and continue through the hatch into a second section of sewers.
 Grate to Sewer
 Grate to Riften Jail
 Sewer Flue
 Grate to Skyrim
Follow the rushing water to the exit (checking behind the grate for a Black Soul Gem), which leads you out to the edge of Lake Honrich, near the South Gate and Riften Warehouse: the Sewer Gate (Location [H] on the main Riften Map). Note that you can only escape this way once: after doing so, the guards seal the passage and remove the shackle.
- Danger! Bear Trap (2)
- Shadowmark: “Escape Route”
- Skill Book [Lockpicking]: Advances in Lockpicking [A1/10]
- Evidence Chest
- Prisoner Belongings Chest
- Chest
- Potions
- Loose gear
Honorhall Orphanage
Grelod the Kind
Constance Michel
Francois Beaufort
Samuel
Runa Fair-Shield
Hroar
The Honorhall Orphanage is home to several orphaned young boys and girls whose parents have been lost to anything from fishing accidents, to battle, to the general harshness of life. The institution is privately funded by Maven Black-Briar. The interior is on a single floor. Enter via the dining room and pantry. A side bedroom has a Skill Book by the bed. Through the main dormitory (with three empty chests) where the orphans sleep is a small room with child-sized shackles and Grelod’s office. There are also doors leading to a small garden, which is more of a prison yard.
- Skill Book [Pickpocket]: Purloined Shadows [C2/10]
The Scorched Hammer
Balimund
Asbjorn Fire-Tamer
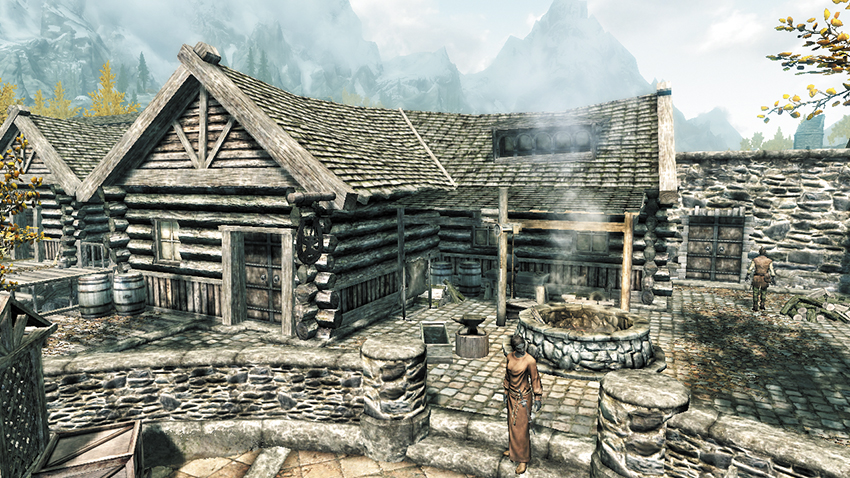
The blacksmith shop is situated adjacent to the marketplace. The resident smithy, Balimud, has set up his forge and workshop outside the building within a covered overhang.
- Shadowmark: “Loot”
- Crafting: Forge, Grindstone, Tanning Rack, Workbench
- Marriage Prospect: Balimund [53/62]
- Trader (Blacksmith): Balimund [28/33]
- Weapons, Apparel, and Misc
- Trainer (Smithing: Expert): Balimund [3/3]
- Skill Book [Smithing]: The Armorer’s Challenge [E2/10]
- Unique Weapon: Steel Sword [63/80]
Inside, the house is modest, and the food of the day are leeks. At the back of the dwelling are two bedrooms, one with a safe and some weapons. In the cellar are a large amount of Ingots and other ingredients for crafting, although these must be stolen.
- Crafting: Grindstone, Tanning Rack
- Business Ledger
- Safe
- Strongbox (Apprentice)
- Loose gear
Dock Gate
Between the Black-Briar Meadery and the Blacksmith’s is the western gate leading to and from the dock. This actually exits out into Skyrim and Lake Honrich.
Marketplace
Edda
Snilf
Brandish Begin-Again
Marise Aravel
Madesi
Grelka
The marketplace is the central area of Riften. There are a number of small stalls set up that sell items during the day, mostly foodstuffs and trinkets. At night, the stalls are packed closed and locked. Several beggars live here as well on bedrolls off to the sides of the plaza in a thicket of trees. They are too weak to handle life in the Ratway, so they huddle here or in Beggar’s Row instead.
- Trader (General Store Vendor): Marise Aravel [13/19]
- Apparel, Food, Ingredients, Misc
- Trader (General Store Vendor): Brand-Shei [14/19]
- Weapons, Apparel, Potions, Misc
- Trader (General Store Vendor): Grelka [15/19]
- Weapons, Apparel, Potions, Food, Misc
- Trader (Jeweler): Madesi [2/2]
- Apparel, Misc
- Trainer (Light Armor: Expert): Grelka [3/3]
- Marriage Prospect: Grelka [54/62]
- Unique Item: Madesi’s Silver Ring [81/112]
- Brand-Shei’s Strongbox (Requires Key)
- Brynjolf’ Satchel (Requires Key)
- Grelka’s Stall Sliding Door (Expert)
- Grelka’s Strongbox
- Madesi’s Stall Sliding Door (Novice)
- Madesi’s Strongbox (Novice)
- Loose Gear
The Bee and Barb
Keerava, the innkeeper
Talen-Jei
Louis Letrush
Marcurio
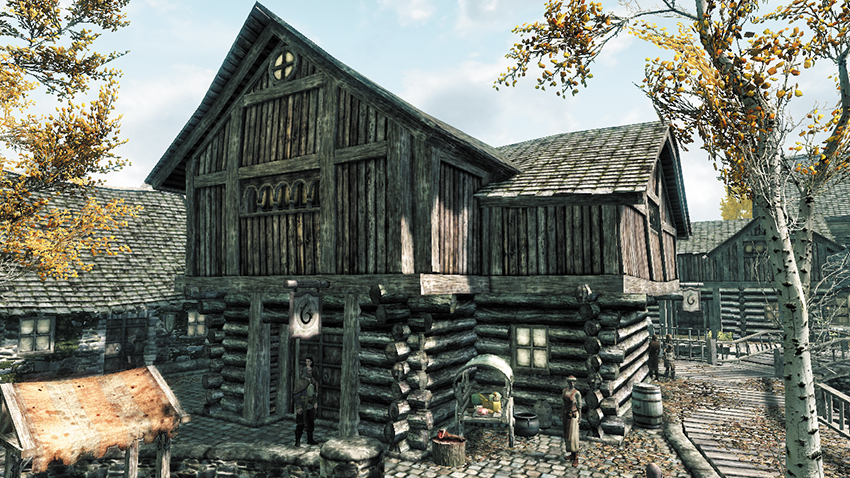
The Bee and Barb is a large tavern and inn, and while it easily accommodates the entire town, the establishment is especially dedicated to serving those who work in Riften’s fishing and mead-making industries. Almost everyone important (outside of the Jarl’s entourage) come to drink here. You’ll also find Marcurio the Hireling, the unpleasant Sapphire, and the seedy Louis Letrush. Brynjolf hangs out here prior to beckoning you to join his Thieves Guild, but only at night. Maramal sometimes comes in here from the Temple of Mara; he has delivered a note to Talen-Jei upstairs to confirm the forthcoming Argonian wedding. Also upstairs are rooms to rent and a locked door (Apprentice) to Keerava’s bedroom and business ledger, along with the strongbox. The cellar has a large amount of stored food, wine, and mead.
- Shadowmark: “Loot”
- Follower: Marcurio [41/47]
- Marriage Prospect: Marcurio [55/62]
- Trader (Bartender): Talen-Jei [3/5]
- Trader (Innkeeper): Keerava [14/15]
- Room for the Night, Food
- Innkeeper Rumors
- Business Ledger
- Note: Mara Smiles Upon You!
- Strongbox (Apprentice)
 Black-Briar Meadery
Overseer Indaryn
Ungrien
Niluva Hlaalu
Romlyn Dreth
Valindor
The Black-Briar Meadery, owned and operated by the Black-Briar family for generations, produces almost all of Skyrim’s mead and employs many of Riften’s residents. The honey for the mead comes from Goldenglow Estate, on the small island on Lake Honrich, to the west of Riften. The Meadery can be accessed from Dryside or Plankside. Inside, the small shop front has a couple of Notes revealing a no-nonsense attitude to working here and some coin under the bed. Head into the back, along the two-floor high balcony above the mead distillery, to Indaryn’s bedroom, which has a note from Maven to read.
Descend to the next balcony level, where the workers eat. The door at the far end of the lower balcony leads to Plankside. Down on the distillery floor are two large vats and a chest. You can also spend 10 gold for each bottle of Black-Briar Mead you want to purchase from the underhanded Romlyn Dreth. As these are worth 25 gold, you can make a little money selling it on. The locked chest requiring a key is a reward for Miscellaneous Objective: The Lover’s Requital*.
- Trader (Food Vendor): Ungrien [9/9]
- Black-Briar Mead
- Marriage Prospect: Romlyn Dreth [56/62]
- Note: Attention Employees!
- Note: Note From Maven
- Note: To Be Read Immediately!
- Chest (Requires Key)
- Potions
 Pawned Prawn
Drifa
Bersi Honey-Hand
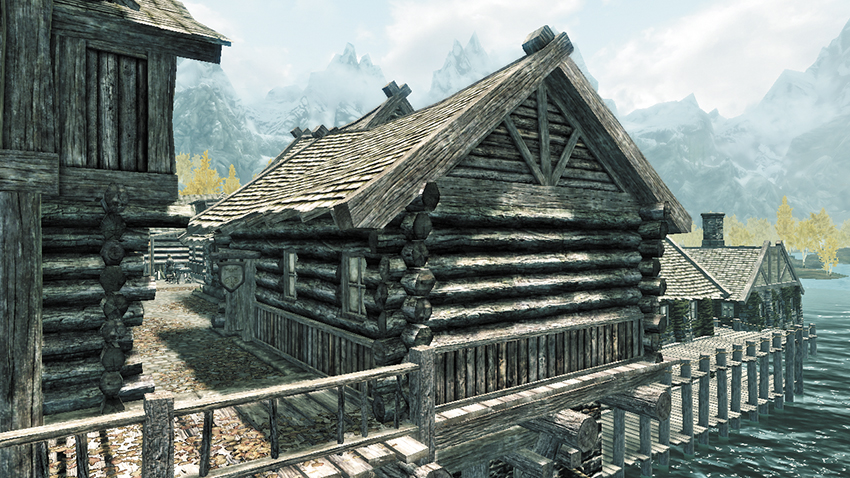
The Pawned Prawn is a small pawnshop and general store. Inside, there’s a Note from Wilhem (the innkeeper in Ivanstead) regarding his fears of Shroud Hearth Barrow. Purchase from Bersi. During Thieves Guild Quest: Taking Care of Business, a dwarven pot is on display here. Behind Bersi is a chest, and downstairs in the cellar are stocked shelves of food and drink and a safe to crack. The couple’s bedroom is at the back, with a strongbox.
- Trader (General Store Vendor): Bersi Honey-Hand [16/19]
- Weapons, Apparel, Potions, Food, Books, Misc
- Business Ledger
- Safe (Adept)
- Strongbox (Apprentice)
- Chest
- Potions aplenty
- Loose gear

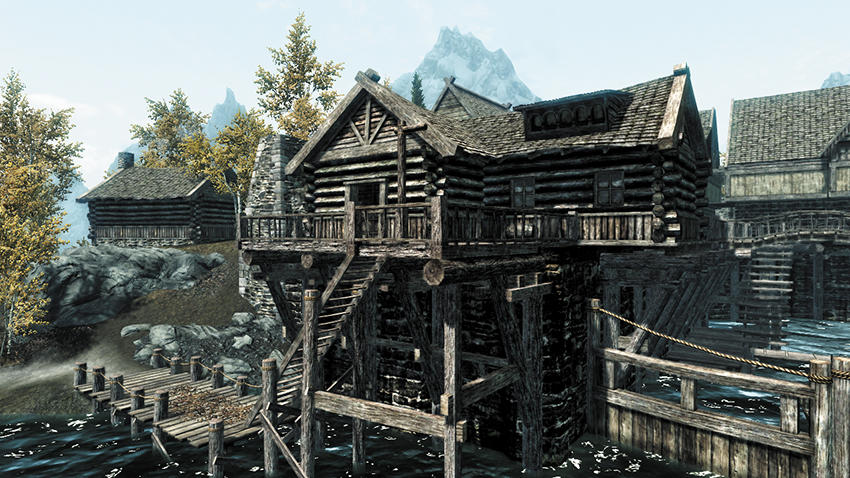
 [HF.08] Honeyside
Related Quests
- Thane Task: Thane of the Rift
- Hearthfire Task: Adoption
Crafting
- Alchemy Lab
- Arcane Enchanter
- Cooking Pot
Collectibles
- Skill Book [Enchanting]
Miscellaneous
- Area is locked
- Chest
- Loose gear
- Potions aplenty
This dwelling is currently empty, save for a Skill Book that sits at the bottom of a leaning shelf in the basement. It features entrances from both Plankside and Dryside, enabling you to head to and from Riften without using the gates. Should you become the Thane of the Rift (by completing Favors for the Jarl), you can purchase this abode from Jarl Laila Law-Giver’s Steward, Anuriel. Consult the Thane Quests for more information. Should you wish to purchase the children’s bedroom, it replaces the Enchanting Laboratory.
- Follower: Iona (Housecarl) [42/47]
- House for Sale [5/5]
- Marriage Prospect: Iona [57/62]
- Skill Book [Enchanting]: Enchanter’s Primer
Purchase Price: 8,000 gold
Jarl: Jarl Laila Lawgiver or Jarl Maven Black-Briar
Steward: Anuriel or Hemming Black-Briar
Available Decorations
- Alchemy Laboratory (1,000 gold)
- Bedroom (600 gold)
- Children’s Bedroom (550 gold)
- Enchanting Laboratory (1,000 gold)
- Garden (800 gold)
- Kitchen (500 gold)
- Porch (400 gold)
Total cost: 12,750 gold
 Haelga’s Bunkhouse
Haelga
Svana Far-Shield
Fastred
Bassianus Axius
Haelga’s Bunkhouse provides long-term lodging for anyone who can keep up the rent and mostly caters to the fishermen and mead makers of Riften. There’s something of a theme with many of the people who reside at the Bunkhouse: they do brutal, backbreaking work, and they’re prone to abusing either alcohol or Skooma. It is a large building and has private rooms as well as a larger barracks-like common area with food on the tables. During Thieves Guild Quest: Taking Care of Business, a Statue of Dibella is on display on the bookcase in the main room. On the counter is a Note regarding an “experience” an anonymous patron had with Haelga. Behind the counter is Haelga’s room, where she takes “clients” and writes in her ledger. Upstairs is a Skill Book, near the dormitory-style bedrooms, smaller bedroom, and storage room. More importantly is a Shrine of Dibella in Haelga’s bedroom.
- Skill Book [Pickpocket]: Beggar [B1/10]
- Business Ledger
- Shrine of Dibella [8/8]
- Note: Until Next Time
Dryside: Canal Level
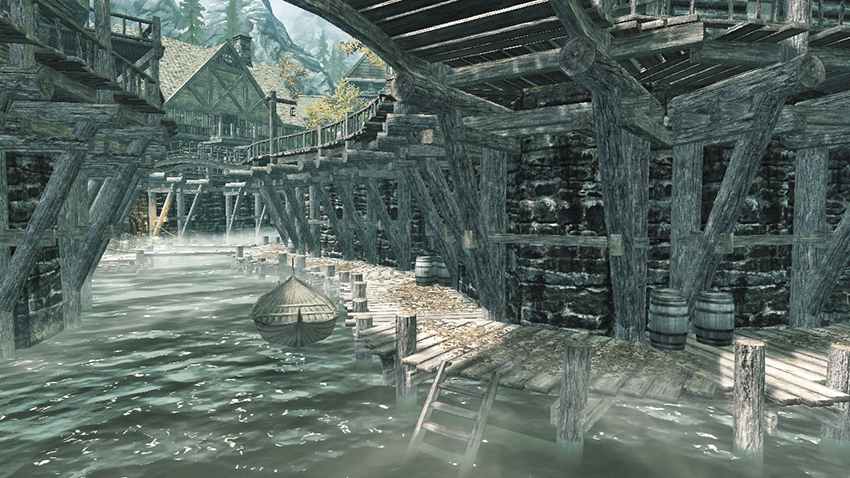
Aside from an old Alchemist’s shop tucked away under the main thoroughfare, this less-desirable and impoverished part of town is damp, dark, and the entrance to the Ratway. It isn’t plagued by violence, just those down on their luck.
 Beggar’s Row
When the beggars of Riften aren’t hanging around the marketplace, they rest here. There’s little to entice you, unless you like collecting cabbage.
- Shadowmark: “Empty”
- Skill Book [Speech]: A Dance in Fire, v7 [C2/10]
 Elgrim’s Elixirs
Elgrim
Hafjorg
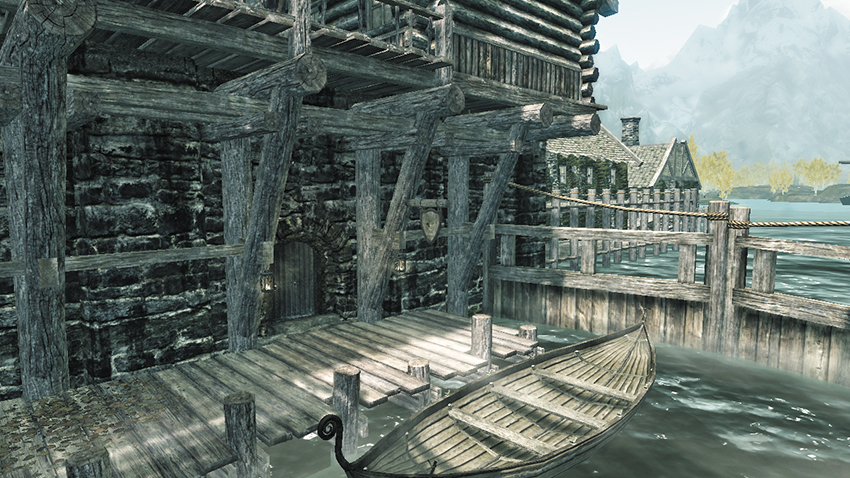
Elgrim’s Elixers is Riften’s lone apothecary. As it is located in the cramped and dangerous confines of the Canal Level, Elgrim’s Elixers usually caters to the members of the Thieves Guild and other unsavory types and specializes in poisons. The shop is filled with potions and ingredients. Find a Skill Book hidden inside a woven basket that sits atop the tall shelf near the fireplace. Behind the store is a bedroom, along with an alchemy chest belonging to Ingun Black-Briar, a strongbox, and a ledger. Favor Quest: Few and Far Between (given by Ingun) must be completed in order to open the Alchemy Chest here.
- Shadowmark: “Loot”
- Crafting: Alchemy Lab
- Trader (Apothecary): Elgrim [12/12]
- Potions, Food, Ingredients, Books
- Skill Book [Alteration]: Reality & Other Falsehoods
- Business Ledger
- Ingun’s Alchemy Chest (Requires Key)
- Strongbox (Adept)
- Potions aplenty
 Marise Aravel’s House
A homely hovel, with a good amount of food, this is where Marise the marketplace trader makes do.
- Shadowmark: “Loot”
 Valindor’s House
This is the dwelling of Valindor, who works part-time at the Meadery. This modest two-room chamber has little but food and a couple of books to steal.
- Shadowmark: “Loot”
 Romlyn Dreth’s House
The home of another Meadery worker, Romlyn’s residence remains drab, even with a roaring fire.
- Potions
Ratway (Entrance)
This is the initial entrance to the large underground sewer system where the Thieves Guild’s tentacles have contracted to.
Plankside
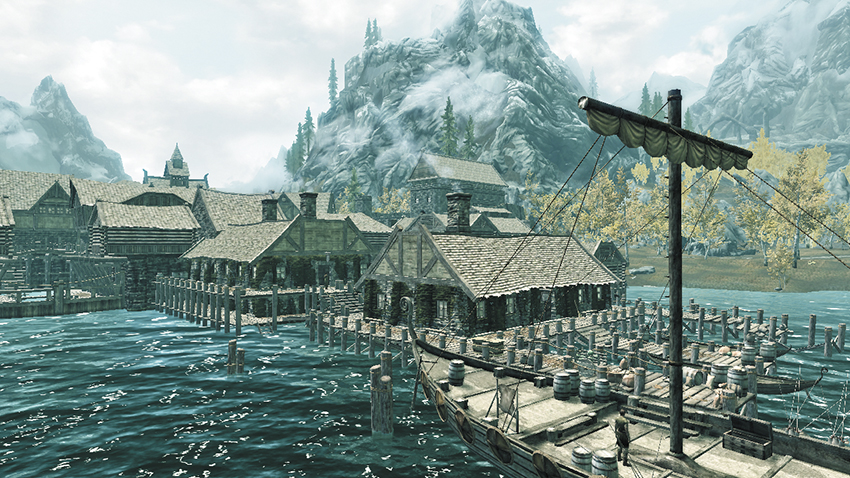
The western edge of the city, known as Plankside, is actually built on the waters of Lake Honrich and serves as the city’s center of mead production and distribution (which is, in fact, integral to Riften’s economy) and its fishing industry (Riften’s secondary economy). The buildings here have been built on wooden docks, and the district is very old and ramshackle. There are three main docks projecting from Plankside, one owned completely by Black-Briar Meadery and the other two used for general commerce and fishing boats.
Honeyside (East Entrance)
This is the entrance to the House for Sale. Once you purchase Honeyside, you can enter and exit from this location instead of using any of the Dryside gates.
 Riften Fishery
Tythis Ulen
Wujeeta
From-Deepest-Fathoms
Exterior: The structure has two entrances, locked during the night (Adept). There are fishing boats moored at the adjacent docks too; one has a tanning rack, and there are a number of fish barrels you can steal from.
- Crafting: Tanning Rack
Interior: The Riften Fishery is owned by Bolli Trout-Purse and is the center of all fishing in and around Riften. Inside, sections of the floor have been removed, allowing direct access to a salmon hatchery where the cellar used to be. But the fishery also serves as a general cleaning, storing, and processing area for all the fish that are caught on Lake Honrich. Most of the people who work in the Fishery reside at Haelga’s Bunkhouse. There’s an office off the balcony surrounding the hatchery with the following items:
- Business Ledger
- Note: Things to Do
- Strongbox (Apprentice)
Black-Briar Meadery (East Entrance)
This entrance is used by the Dryside Meadery for loading and off-loading. It is an alternate entrance into the establishment.
Dock Gate (East Entrance)
This allows quick and easy access to and from the blacksmith’s and the marketplace; it is an often-overlooked gate.
 Riften Warehouse (Locked: Requires Key)
Sarthis Idren
Orini
The large wooden building served as a warehouse and general storage facility for the Fishery but hasn’t been used in years. It is firmly sealed. Instead, the main floor is musty, with old furniture scattered about. Another locked door (requires Key) down in the cellar leads to a Skooma and Moon Sugar den. To enter the Warehouse, consult the Jarl of Riften and begin her Favor: The Raid. Sarthis Idren and his accomplice Orini guard their makeshift Skooma lab. It can only be accessed by key during this quest (obtained from the Jarl)
- Sarthis’s Satchel
Sewer
This is where you arrive if you decide to escape from Riften Jail using the sewer escape route detailed at that location.
Ratway
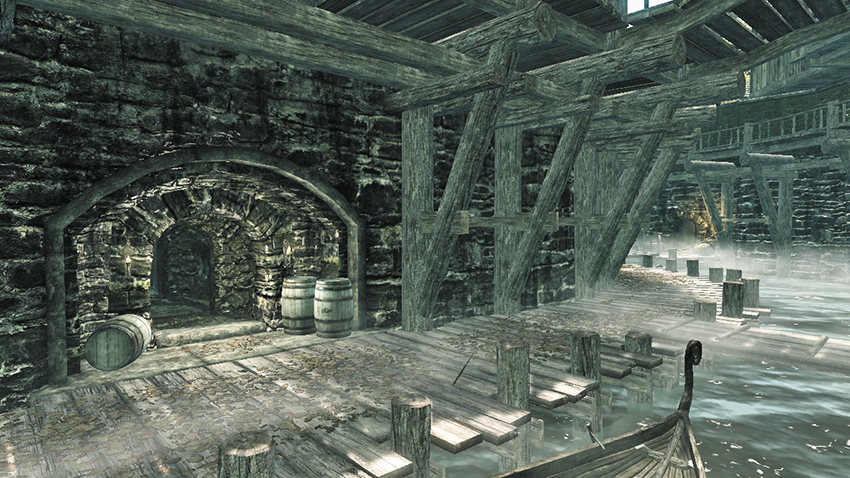
The Ratway is the area that runs beneath all of Riften. Comprised of interconnected basements and half-flooded sewer tunnels and dominated by a huge cistern in the center, the Ratway is a small city within a city. It is here that Riften’s Thieves Guild plies its trade and the riffraff make their home.
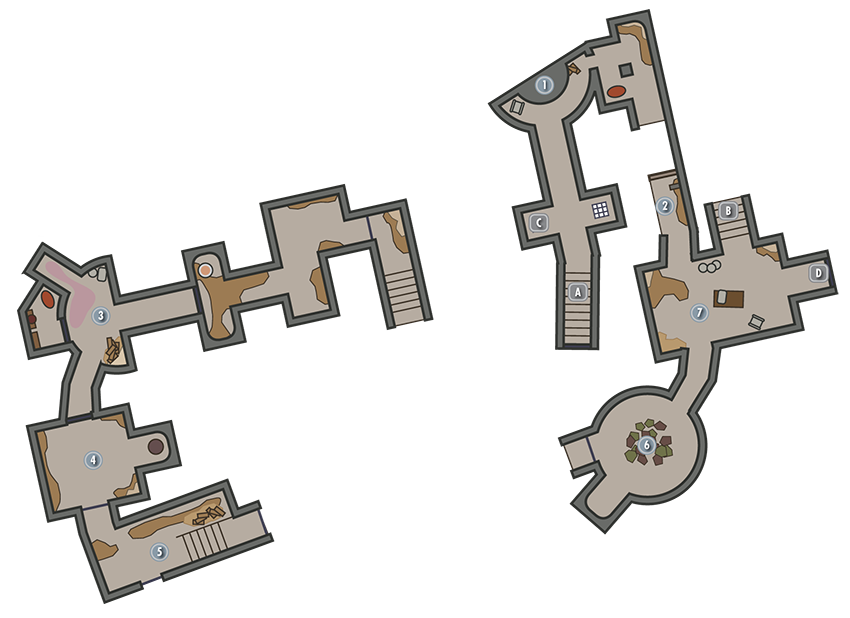
The Ratway
Door to Riften
Muggers’ Tunnel
A pair of thugs prowl this initial tunnel (which has two side grates so you can peer down to Location [2]). Dodge or slay Hewnon Black-Skeever and Drahff.
The Bridge
The lever to lower this bridge is on the opposite (south) side, on the upper balcony. Approach it once you’ve finished initial explorations. Look up in the tunnel to the west, and you can see the tunnel grates from Location [1].
Locked Gate (Expert)
Unlock this for a shortcut to the Ragged Flagon entrance (Location [7]), and the bridge balcony.
Trapped Door (Apprentice)
The door at the end of the tunnel to the west is trapped. Unlock the trap trigger or face two spears in your chest from the left. Back up to avoid them just after opening the door, if you didn’t disarm the trap.
- Danger! Spear Trap
Gian’s Oily Ooze
This junction room has a Skeever and a madman named Gian the Fist to contend with. Use an arrow to drop the oil lamp and start a fire, or find other ways to defeat anyone attacking you.
- Danger! Oil Lamp Trap, Oil Pool Trap
- Unique Item: Gloves of the Pugilist [82/112]
Bear Trap Chamber
A low ceiling and bear traps on this paved floor await you. Gian’s Alchemy Lab is in one alcove.
- Danger! Bear Trap (4)
- Crafting: Alchemy Lab
The Drunkard’s Steps
Pass the mead barrel and watch for a pressure plate on the left side of the steps, as this triggers a battering ram in your back. Stay right instead.
- Danger! Battering Ram Trap!
Battleaxe Glade
A shaft of light allows plants to grow in this circular chamber.
- Loose gear
Ragged Flagon Entrance
Beware of lowlife attacks here. Lower the bridge from the balcony if you haven’t done it already, enabling a quick exit back to Riften, when necessary. Check the table for a Skill Book. Skill Book [Pickpocket]: Beggar [B2/10]
Door to the Ragged Flagon
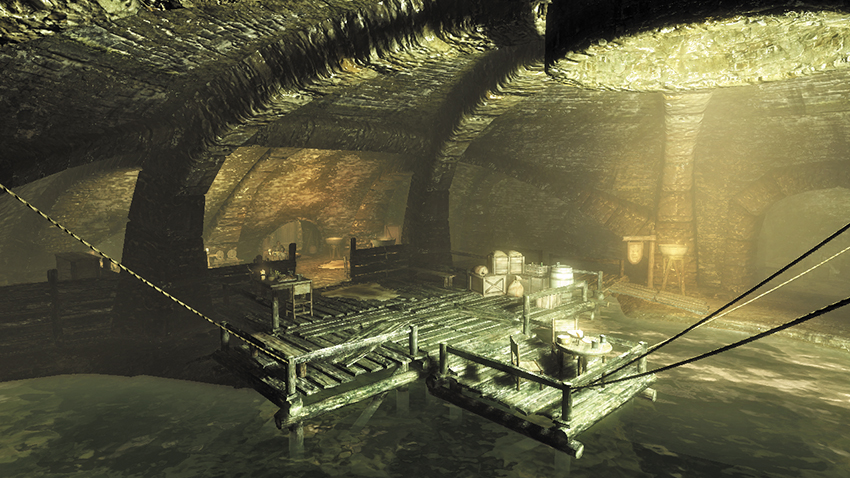
The Ragged Flagon (Map Not Shown)
The following notable inhabitants of the Ragged Flagon and Cistern arrive during the Thieves Guild Quests:
Guild Master: Mercer Frey
Guild Second: Brynjolf
Guild Third: Delvin Mallory, Vex
Guild Member: Dirge, Vipir the Fleet, Niruin, Sapphire, Cynric Endell, Thrynn, Rune, Garthar, Ravyn Imyan
Guild Vendor: Vekel the Man, Syndus, Herluin Lothaire, Arnskar Ember-Master, Vanryth Gatharian
Guild Fence (Riften): Tonilia
The Ragged Flagon is the seediest, most dangerous tavern in all of Skyrim. It is located beneath the Riften city streets and serves as a meeting place for the province’s criminal element. Strangers are not usually welcome, fights and even deaths are not uncommon, and most people in the place on any given night are involved in criminal activity in some capacity. It would be wise to enter here once you’ve befriended a thief named Brynjolf. One of the tables also contains a couple of notes, and there are two exits—one into the Vaults and a secret storage cabinet with a false back that opens up into the entrance to the Cistern. There’s limited loot. The storage cabinet (requires Key) is opened by Brynjolf when he walks you into the Cistern.
- Trader (Apothecary): Herluin Lothaire [12/12]
- Apparel, Potions, Misc
- Trader (Bartender): Vekel the Man [4/5]
- Trader (Fence): Tonilia [6/10]
- Weapons, Apparel, Potions, Misc
- Trader (Fletcher): Syndus [3/3]
- Weapons, Apparel, Misc
- Trader (Blacksmith): Arnskar Ember-Master [29/33]
- Weapons, Apparel, Misc
- Trader (Blacksmith): Vanryth Gatharian [30/33]
- Weapons, Apparel, Misc (Armor mending)
- Trainer (Archery: Master): Niruin [3/3]
- Trainer (Lockpicking: Master): Vex [1/2]
- Trainer (Pickpocket: Master): Vipir [2/3]
- Trainer (Sneak: Master): Delvin Mallory [2/3]
- Unique Item: Thieves Guild Armor [83/112]
- Unique Item: Thieves Guild Boots [84/112]
- Unique Item: Thieves Guild Gloves [85/112]
- Unique Item: Thieves Guild Hood [86/112]
- Unique Item: Amulet of Articulation [87/112]
- Unique Item: Guild Master’s Armor [88/112]
- Unique Item: Guild Master’s Boots [89/112]
- Unique Item: Guild Master’s Gloves [90/112]
- Unique Item: Guild Master’s Hood [91/112]
- Unique Item: Thieves Guild Armor (Improved) [92/112]
- Unique Item: Thieves Guild Boots (Improved) [93/112]
- Unique Item: Thieves Guild Gloves (Improved) [94/112]
- Unique Item: Thieves Guild Hood (Improved) [95/112]
- Note: A Warning
- Note: Timely Offer
- Chest
The Ragged Flagon: Cistern
This more secretive and expansive main sewage hub is the stronghold for the Thieves Guild. It is only accessible once Brynjolf leads you here during Thieves Guild Quest: Loud and Clear.
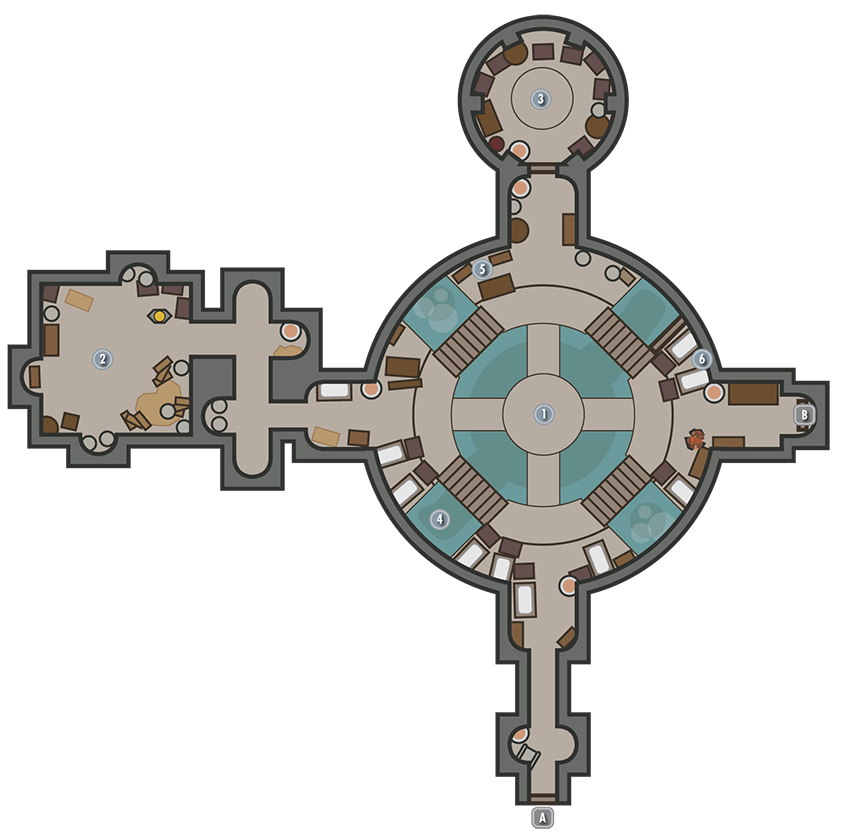
Door to Ragged Flagon
Ladder to Riften
This brings you up and through the mausoleum and into the small graveyard attached to the Hall of the Dead. When you first access this location, it is added to your world map, allowing quicker Fast-Travel back here between Thieves Guild Quests.
Main Cistern Chamber
Once you’re a member, Guild chests are free for the opening. Otherwise they are inaccessible. These containers are also safe to store items in; deposit inventory items you wish to keep and return for them later. You should also read up on Shadowmarks by taking one of the books in this area. On Mercer Frey’s table is a note regarding a tense relationship between the Guild and the East Empire Company. Near the ladder exit is a cupboard with another note, concerning the search for Rune’s parents.
- Crafting: Grindstone
- Business Ledger
- Note: East Empire Connection
- Note: No Word Yet
- Guild Chests (7)
- Loose gear
Training Chamber
Pass the Alchemy Lab to reach this location. Niruin the master archer is usually practicing here. There are a variety of training chests to unlock, too, if you want to practice (and increase your Lockpicking skill). A Skill Book that rests on a barrel can help you quickly achieve the same.
- Crafting: Alchemy Lab
- Skill Book [Lockpicking]: Advances in Lockpicking [A2/10]
- Note: Training Chests
- Guild Chest
- Chest (Locked: Novice)
- Chest (Locked: Apprentice)
- Chest (Locked: Adept)
- Chest (Locked: Expert)
- Chest (Locked: Master)
- Loose gear
The Guild Vault
The entire wealth of the Thieves Guild is located in this chamber, which is firmly sealed and only unlocked during the Thieves Guild Quests.
- Loose gear
Shrine of Nocturnal
This shrine appears after you complete Thieves Guild Quest: Darkness Returns. The shrine provides the Blessing of Nocturnal, which adds +10 to your Sneak skill.
- Ability: Blessing of Nocturnal
Guild Leader’s Office
This area of the Cistern contains two trophy shelves that help you track how many Radiant Quests you’ve completed. They also display all of the Larceny Targets you’ve found (see the Thieves Guild chapter for the details). The Crown of Queen Barenziah also appears here once all of the gems have been found and the crown located (Thieves Guild Side Quest: No Stone Unturned). Once you become Guild Leader (by completing the Thieves Guild quest line and all of the City Influence Quests), the Tribute Chest will appear at the base of the desk.
Your Bed
There is a bed here that is available for you to use whenever you wish.
The Ratway Vaults
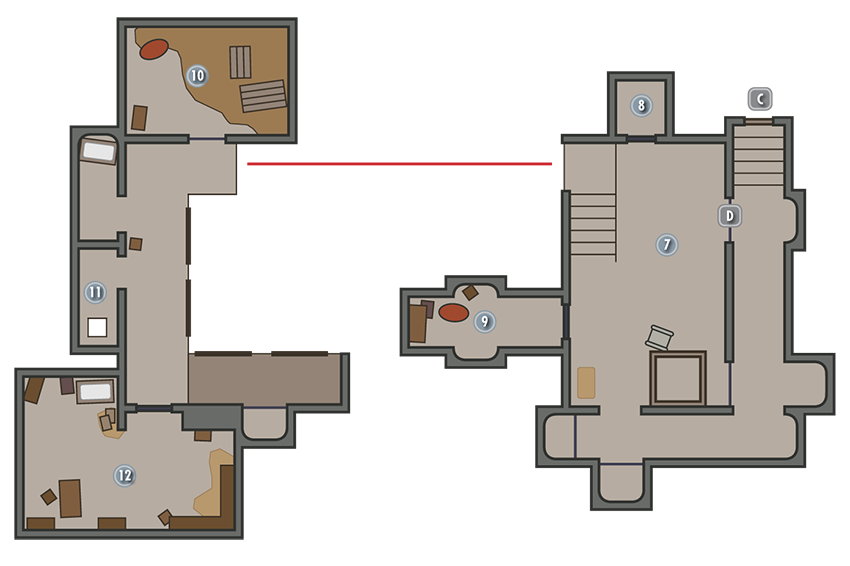
Door to the Ragged Flagon
- Shadowmark: “The Guild”
Hub Level and Balconies
You can drop down here, or follow the tunnels that weave through this central location.
Door to Riftweald Manor
You can only drop down from here, which leads to an alcove close to the Hub Level.
- Shadowmark: “Danger”
Dead Nord’s Campfire
The trip wire on the trapped doorway releases swinging flails. This has a campfire, a dead Nord, and Skeevers.
- Danger! Flail Traps
Spiral Steps
- Loose gear
Hub Level Gratings Tunnel
One of the side alcoves has an oil lamp you can drop on enemies below.
- Danger! Oil Lamp Trap
The Old Forge
- Crafting: Workbench
- Chest
- Loose gear
Vagrant’s Hideout
Beyond this table and collection of loot is a corridor leading to the bottom of the Hub Level.
- Shadowmark: “Loot”
- Chest
- Chest (Apprentice) (2)
- Loose gear
Door to the Ratway Warrens
There’s oil on the floor and a potion to grab on your way here.
The Ratway Warrens
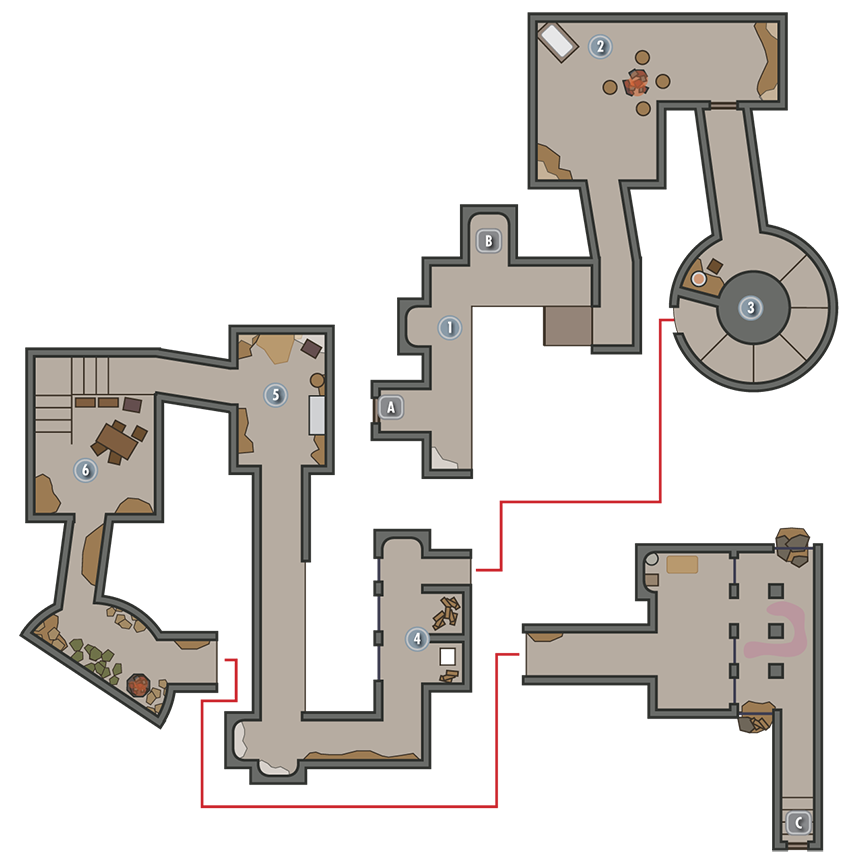
Door to the Ratway Vaults
Door to Warrens Hub Chamber (Apprentice)
Hub Chamber
All of the tunnels and cells in this location lead to and from this central location.
- Unique Weapon: Dravin’s Bow [64/80]
Hefid’s Cell (Locked: Apprentice)
This leads to a tiny dark cell where a maniac named Hefid the Deaf is babbling incoherently. She may have valuables on her corpse.
Salvianus’s Cell
A man named Salvianus regales you with past talks. He may be an Imperial officer driven mad by war. He’s no pushover if you decide to attack.
- Chest
- Loose gear
Knjakr’s Cell
A mad chef is holed up in this cell.
- Crafting: Grindstone
Murder Hole
You can strike Salvianus from up above if you wish from here.
Esbern’s Hideout
This secure underground chamber is the hiding place of Esbern, the Blades chronicler. You can only open the reinforced door during Main Quest: The Cornered Rat. Once inside, check through the multitude of books and a chest.
- Skill Book [One-Handed]: Fire and Darkness [B2/10]
- Chest