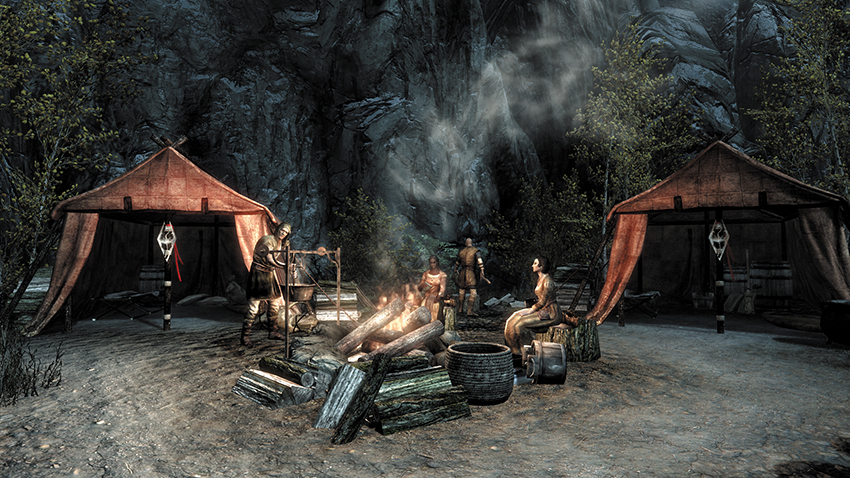
Elder Scrolls V: Skyrim Guide Essentials Training
Training Part 2: Combat, Development, and Crafting
This section explores the vast array of actions and activities you can perform in Skyrim. We provide advice on how to improve your character as you level up and give you crucial tactical details on all facets of combat and exploration (including Shouts). We also thoroughly explain Crafting systems.
Character Advancement
Leveling Advice
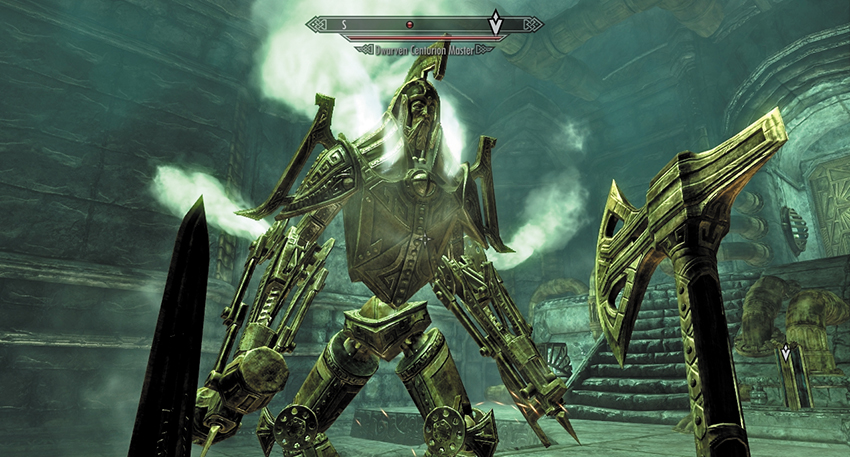
Tactically level up during a particularly frightening combat, as shown.
As your skills increase, you gradually make progress toward gaining a level. There are several aspects of this process worth taking a closer look at:
- Improve what you use: The skills you use will improve naturally as you use them. There is no need to go out of your way to improve a skill you never plan to use; this doesn’t level your character any faster and won’t make your character any stronger or more effective.
- Use what you improve: When selecting perks, be sure you’re ready to take full advantage of them. For example, don’t purchase Adept-level Magic perks until you have Adept-level spells to cast. Don’t take Enchanting perks unless you’re planning on enchanting something in the immediate future.
- Patience and perks: If you aren’t sure which perk to choose when you level up or if find yourself a few skill points away from a perk you really want, it is usually better to save the choice for later. This gives you more flexibility and allows you to change your mind. Remember, once you select a perk, you can’t take it back!
- Tactical leveling: Leveling up fully restores your Health, Magicka, and Stamina. This can literally save your life if you find yourself bereft of potions during a difficult battle. For example, if you gain a level while exploring a dungeon, you may want to wait and level up during the final (or most difficult) fight. Conversely, there’s no point in hoarding levels; once you begin leveling up, you must claim all of the levels you’ve earned.
Combat Improvement
By now, you should have skills that aid you in dispatching enemies through melee, ranged, or magical attacks. This section offers advice on maximizing your combat potential no matter how you decide to fight your foes.
General Advice
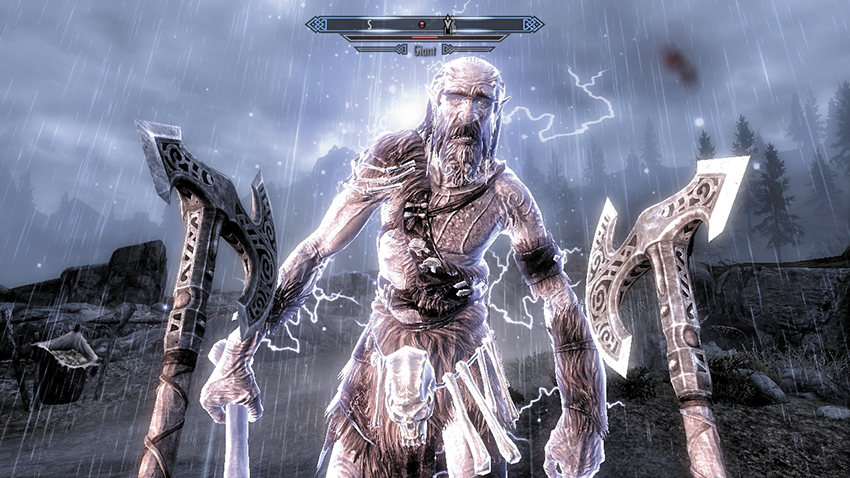
Don’t overlook your Shouts or powers; they can win the fight for you!
As you set off to explore the realm, you may be overwhelmed with the choices you can make. But remember this sage advice, and you’ll thrive in the wilds of Skyrim:
- Conserve your resources: Your three statistics—Health, Magicka, and Stamina—are all resources you need to conserve. If you sprint into battle (using Stamina), recast your spells right before heading into battle (Magicka), or push on after a difficult battle without pausing to recover your Health, you’re at a disadvantage. Stop and wait for a moment (optionally swigging down a potion) to ensure all three stats have recovered fully before you continue.
- Remember your Shouts and powers: While most of your attention will be on the weapons, spells, or shield in your hands, remember that you have a third option at your disposal. Shouts and powers are among your most devastating abilities: They don’t cost anything to use, and they can dramatically turn the tide of battle in your favor. Make sure to Favorite them, and always know which one you have equipped. Then call on them whenever you need some additional offensive firepower.
- Consumable consumption: Do you find yourself struggling against a particularly troublesome set of foes? Then stop, rummage around in your inventory, and see if you have an item that might help. This could be a healing or fortifying potion, a poison for your weapon, or a scroll with a powerful magic effect. Don’t hoard scrolls; use them!
- Active effects: It’s easy to forget about the Brain Rot you contracted a few hours ago or not to notice when a blessing or buff has worn off. Check the Active Effects list in the Magic menu periodically to ensure you know what is ailing or enhancing you.
- The Favorites menu: This menu allows you to quickly switch between weapons and spells, and it pauses time when you open it, without blocking your view. This gives you a moment to consider your next move.
- Save early, save often! Although the game saves your progress automatically, it’s always prudent to save before trying something dangerous, like running down a hallway lined with swinging blades or investigating that ominous-looking tomb.
- Tuning in the difficulty: The System > Settings > Gameplay menu allows you to change the game’s difficulty at any time—even during combat—which you should try if you’re really struggling or if you’re having too easy a time.
Melee Combat
To maximize your potential in melee combat, choose a weapon you like, learn its rhythm, improve the associated perks, and try to find (or forge) the most potent version of it that you can. If you have problems effectively bringing down foes, be sure you know how to respond to and counter their attacks.
- Choose your weapon: Early in your adventure, try out a variety of weapons and combat styles and see what works best for you. Do you prefer one- or two-handed weapons? If you enjoy wielding a one-handed weapon, do you want a shield, spell, or another weapon in your free hand? Then figure out whether daggers (fast, lowest damage), swords, axes, or maces (slow, highest damage) are your favorite. By learning what you’re most comfortable wielding, you can choose the perks that complement that style.
- The rhythm of combat: Once you’ve settled on a weapon or combat style, practice your tactics. Remember that you and your opponent have a regular attack, a power attack (holding the Attack button down for a slower but more damaging strike), a block (raising your shield or weapon to deflect an enemy blow), and a bash (hitting your foe with a shield or the flat of a weapon). Try to get a feel for how long it takes you to perform these actions with your chosen weapon and how long it takes for your enemies to do the same. As your sense of timing improves, you can better decide whether to attack or defend during a fight, and choose your tactics more strategically.
- Observe and counter: Combat involves more than just attacking. You can take down enemies faster and more effectively by observing their actions and choosing the appropriate counter.
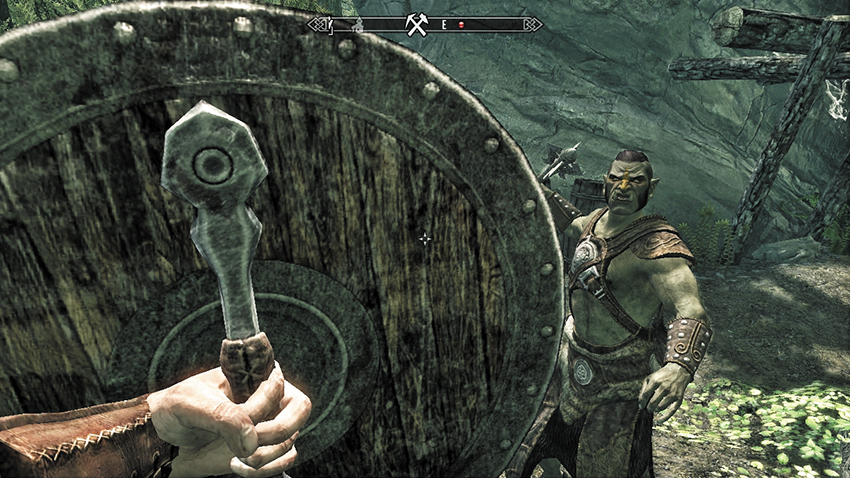
Block if your enemy uses a regular attack.
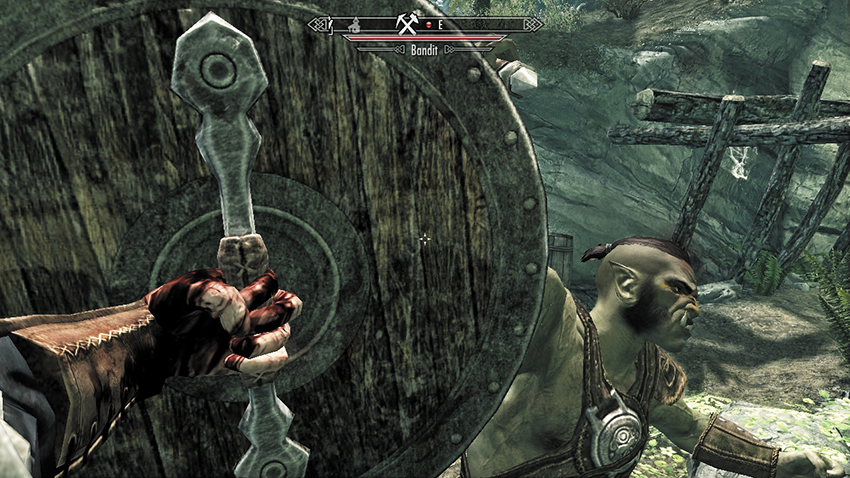
Bash if your enemy uses a power attack to quickly interrupt and stagger them.
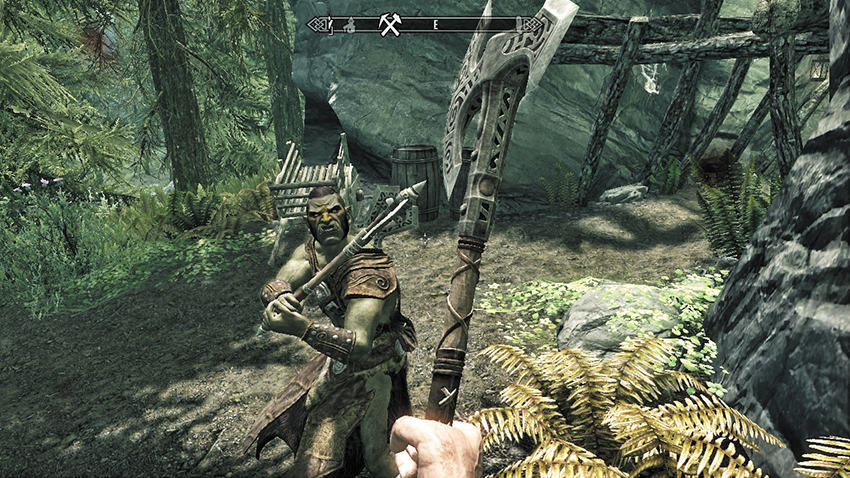
Power attack if your enemy is blocking to break their block and stagger them.
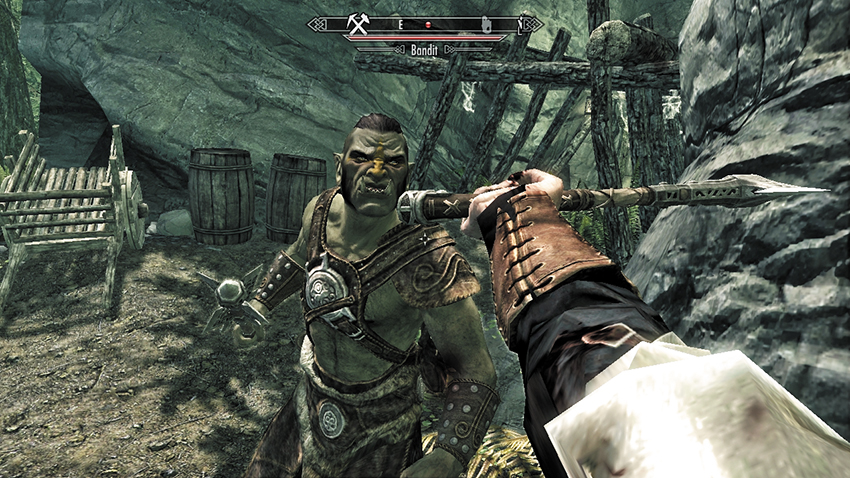
Attack swiftly if your enemy is staggered to cut them down.
Wearing a Cloak: The Destruction line of Cloak spells (Flame, Frost, and Lightning) are ideal if you plan to engage in close combat—even if you’re primarily a warrior with little interest in magic. These spells allow you to damage enemies with both your weapons and the cloak’s magical effects, without requiring much attention (or Magicka expenditure). Cloak spells also don’t damage your Followers, so there’s no need to worry in close quarters.
Ranged Combat
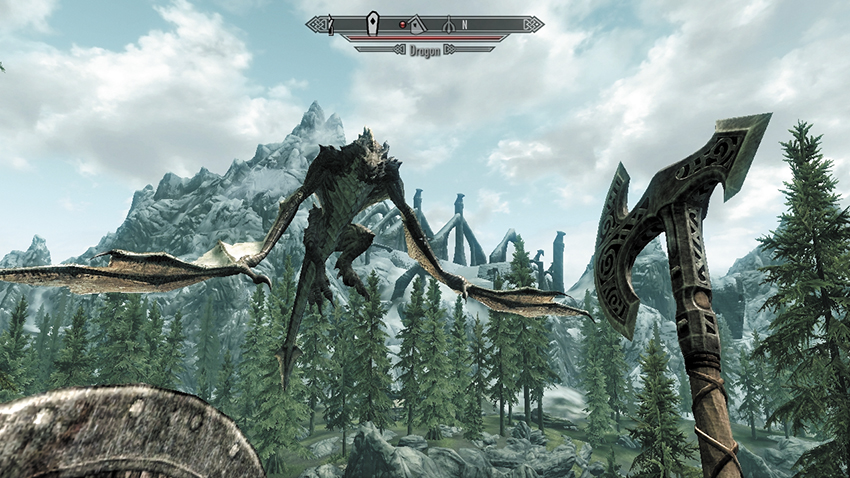
A Dragon attack: If you focus only on melee combat, your options against dragons are limited.
Whether you’re an accomplished archer or learning how to fire an arrow for the first time, it’s always worth keeping ranged combat in mind.
- The backup bow: It always pays to keep a bow and some arrows on hand, even if you don’t plan on specializing in it. You never know when you might encounter a dragon or need to soften up a particularly difficult foe from range.
- Arrow gathering: Be sure to grab arrows at every opportunity. Since they have no weight, there’s no reason not to take and keep every arrow you can find. There’s nothing more frustrating than running out of arrows in the middle of a dungeon, especially if you’re focused on archery.
- Remember to bash: Don’t forget that you can bash with your bow. This usually gives you enough time to fire off one more shot or to sprint away while your enemy recovers so you can line up and fire again.
- Perks of power: Archery perks have a significant effect on your ranged combat repertoire, giving you the ability to zoom in, slow time, and stagger enemies after a successful hit. Just relying on archery can be a very satisfying way to play and can make hunting certain skittish animals, such as elk and deer, a lot easier.
- Ranged combat only: Rarely, you may encounter a foe that can’t be reached by melee weapons. On these occasions, a bow and arrow is imperative, unless you have a ranged spell.
Combat Tactics
- Get the gear: Be sure you’re searching for the correct gear. If you plan to focus on archery, dual-wielding, or another aggressive combat style, then offense is your best defense: Look for enchanted weapons and armor that increase your damage-dealing potential. It is often worth wearing a “weaker” piece of armor if it carries an enchantment that helps your damage output.
- Prepare poisons: Poisons are a great way of quickly increasing your damage potential. Keeping some poisons on hand (via Favorites) is an excellent way to deal with heavily armored warriors or mages using Wards. Even if your weapon doesn’t strike for maximum damage, the poison will.
- Speed and sidestepping: Use speed to your advantage. When wearing light armor or robes, you’re more agile than most of your opponents. This allows you to sidestep their power attacks (and then counter) or to sprint away if you need some space to recover and regroup.
- Staggering attempts: A staggered enemy is much easier to cut down with a flurry of attacks. Power attacks and bashes stagger most foes, but look for other effects that can achieve this, too, such as the Unrelenting Force Shout.
Magic-Based Combat
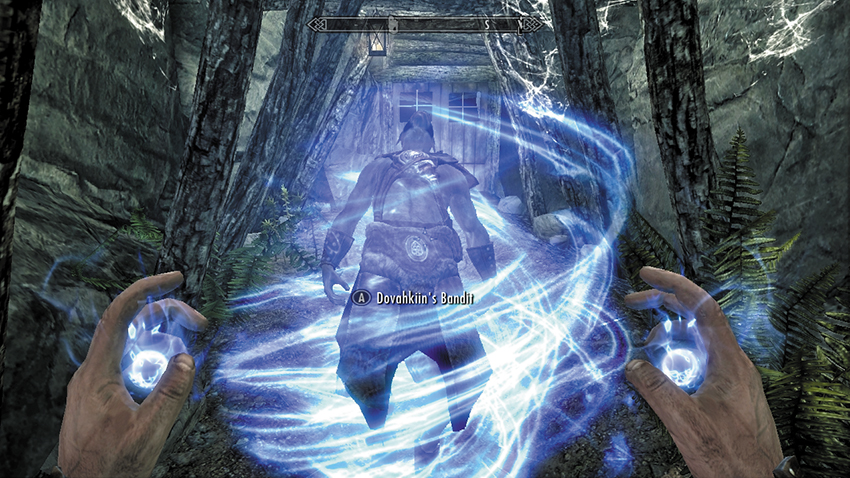
The dead rise again: There’s something satisfying about raising recently slain enemies to attack their own!
The five schools of magic offer a wide range of offensive and defensive spells to help crush your foes, shield yourself, or augment other combat styles.
The blended approach: In Skyrim, you don’t have to be a “pure” mage to enjoy spellcasting. Any warrior can benefit from a conjured ally, healing spell, or elemental cloak, and thieves can especially appreciate the benefits of Invisibility. Even if you don’t plan to focus on magic, look for spells that can enhance your combat style.
Spell-casting Rank perks: Each school of magic has a series of “Rank” perks (Novice, Apprentice, Adept, Expert, and Master) that dramatically decrease the cost of spells from that school. These perks are critical to your ability to effectively use spells from that school and should be a top priority for any serious mage.
Offensive Spells
Know your area of effect: Many spells damage anything in a wide area. While you can’t be hurt by your own spells, your Followers can be, so use them with care to avoid any unintended consequences. On the other hand, if your only Follower is a summoned Atronach, use spells that match their element at will, since they’re immune to them.
Set your own traps: Rune traps allow you to turn the environment to your advantage. Set one in a narrow space enemies will have to run through or drop one in a hall you can retreat past if combat goes poorly. In a pinch, you can also cast them directly at an enemy, although your other spells are much more cost-effective.
Raising the walls: Though initially somewhat weak, Wall spells become dramatically more powerful at higher levels. Cast them at the feet of a waking Draugr to kill it before it can finish standing up, or back down a hall as you cast a wall out in front of you. Any enemies that advance will blindly race through your death zone.
Conjuring up companions: Be sure to summon a creature or raise a zombie before heading into any major battle. When summoning a creature, pick the one that’s best for your situation. Do you need the ranged offense of a Flame Atronach or the melee toughness of a Frost Atronach? When raising a zombie from those you’ve recently slain, pick someone you haven’t looted already; even zombies are more powerful when well armed and armored.
Defensive Spells
Know your defenses: Both the Restoration line of Ward spells and the Alteration line of Flesh spells offer defensive options for spellcasters. Wards require concentration (tying up a hand) and have a per-second cost, but they are more effective against spells. Flesh spells have a higher initial cost but don’t require concentration. Use Wards when fighting mages, Flesh spells against melee foes, or both in large or mixed combats where you need the extra protection.
Be ready with healing: There are a variety of healing spells to choose from; some heal a large amount of Health at once, while others heal over time at a reduced cost. Most heal only you, but some can heal your Followers as well. Learn a variety of these spells (and flag each of them as Favorites) to be prepared for any situation.
Learn spells for specific situations: Delving into a Draugr crypt? Then pick up a Turn Undead or Detect Dead spell. Exploring a shipwreck? Then grab Waterbreathing to make your diving stress-free. Whatever your need, you can probably find a spell to make your exploration easier or more entertaining.
Stealth-Based Combat
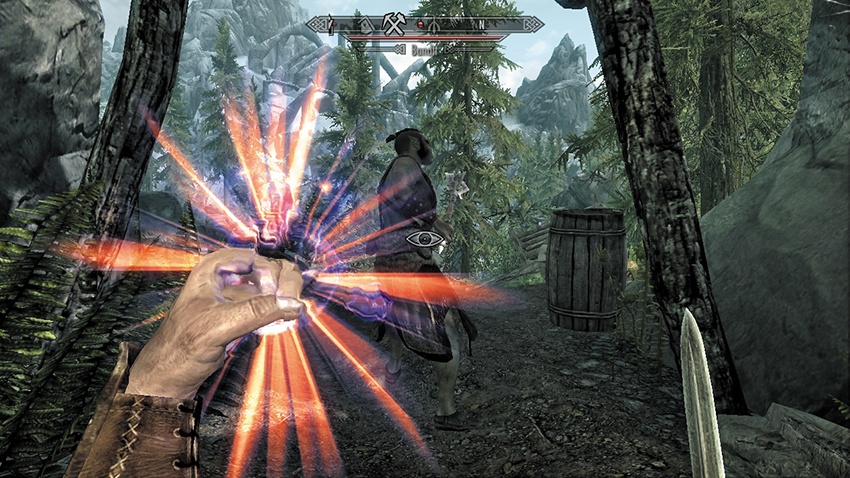
A stab in the dark (and the back): Stealthy adventurers seek to slay any foe with a swift attack their enemies never see coming.
Those who lurk in the shadows, hoping to sneak past enemies or a guard undetected, would do well to heed the following advice:
- Gain the right perspective: It’s dramatically easier to Sneak using third-person view, since you can see patrolling enemies more easily than in first-person.
- Stay hidden: Line of sight is by far the biggest factor in determining whether an enemy can see you. Stay hidden behind walls or cover to remain out of sight. And it goes without saying that using Stealth mode (crouching) is imperative.
- Seek magical aid: Invisibility and Muffle conceal you from your enemies’ sight and hearing, making it much easier to sneak by unnoticed. Learn these spells, collect Invisibility potions, and look for Muffle-enchanted gear to improve your chances of a successful stealth experience. Then give the same augmentations to your Followers. Otherwise, lurk alone.
- Draw out your foes: Enemies leave their posts to investigate sounds, such as an arrow impact. Place your shot carefully, and you can draw them out into the open, giving you a chance to perform a Sneak attack, fire a second arrow (this one into the enemy himself), or slip by undetected.
- Lure foes into traps: For an even more devious twist, shoot an arrow near a trap, and the enemy that goes to investigate may blunder into it and set it off. Combine this with a well-placed Rune Trap spell to create your own kill zones!
Choosing Favorites
The Favorites System means less time spent rummaging through your inventory and more time spent in battle. It allows you to rapidly swap between your preferred weapons, spells, and outfits more easily and to quickly ready a power, potion, or scroll when necessary. Because it takes the hassle out of managing your inventory, it also helps you fight more effectively: you won’t hesitate to change your gear when you can do so in a matter of seconds.
Here is some additional advice on selecting the most effective Favorites:
- Melee combat: Keep your weapon (or weapons) of choice in your Favorites menu. If you use a one-handed weapon, tag a shield as well. If you have enchanted weapons that you only use occasionally (such as weapons with Soul Trap or Paralyze enchantments), those are good choices as well.
- Ranged combat: Always keep a bow in your Favorites list—even mages may need to fall back on it when battling dragons. If you’re primarily focused on Archery, you may want to Favorite specific types of arrows as well—your weakest for dispatching standard enemies and your best for dragons or a particularly dangerous boss.
- Spellcasting: Tag your favorite offensive and defensive spells, including your best Healing spell. Warriors should tag a Cloak spell to make sure they remember to cast it; Thieves should tag Invisibility and Muffle, and mages should tag all the key elements of their arsenal.
- Shouts and powers: Don’t forget to add Shouts and powers to your Favorites list! Your Racial power and Standing Stone power are both essential. Also tag the Shouts you use most frequently.
- Armor and outfits: Depending on your play style, you may find it helpful to Favorite armor or sets of clothing as well. Thieves in particular may find it useful to Favorite a set of armor or clothing to use when sneaking and another to switch back to if you’re discovered!
- Items: Tag a set of healing potions as a Favorite so you can quickly swig them in combat without frantically fiddling with the inventory during a fraught battle. Warriors may want to do the same with stamina potions and mages with Magicka potions.
- Activities: Don’t forget to Favorite items depending on your current activity. If you’re exploring a dungeon, you may want to Favorite a torch or staff for light. When hunting for a hidden treasure, Favorite the treasure map for quick reference.
Shouts and Other Powers
The Nords have long practiced a unique, spiritual form of magic known as “the Way of the Voice.” Nords consider themselves to be the children of the sky, and their breath and voice are their vital essence. Through the use of the Voice, this power can be articulated into a Thu’um, or Shout. Use Shouts to sharpen blades, strike enemies at a distance, or command time to stand still. Masters of the Voice are known as Tongues, and their power is legendary. The most powerful Tongues cannot speak without causing destruction and must remain gagged at all times, communicating through sign language and the scribing of runes.
The Rule of Thu’um
A Shout is the utterance of one or more Words of Power in order to achieve a specific magical effect. Each Shout has a unique effect, such as summoning or commanding a creature, striking foes with a blast of force to stun or disarm them, or calling down a powerful lightning storm. You should frequently use these powerful special abilities; as the Dragonborn, you have an incredible gift that few heroes have ever possessed!
There are some important general points to remember regarding Shouts:
- Each Shout consists of three Words of Power.
- You will learn the vast majority of these Words by absorbing them, one at a time, from Word Walls found throughout Skyrim. A few Shouts are also taught to you during the Main Quest, mostly by the Greybeards of High Hrothgar. You always collect Words of Power in the order of the three-word final phrase, so it doesn’t matter which Word Wall you visit first.
- After you learn a Word, you must unlock it, which requires a Dragon Soul. You can only obtain Dragon Souls by slaying dragons. Since the return of the dragons only begins in earnest after Main Quest: Dragon Rising, you must complete that quest in order to begin unlocking Words and using Shouts.
- You need one Dragon Soul for each Word you want to unlock. You can begin using a Shout after learning and unlocking only its first Word, but each additional Word allows you to invoke a more powerful version of the Shout.
- Do you know all three Words for five Shouts? Then you’ll need to slay and absorb the souls of 15 dragons to fully unlock them all. That’s a tall order, so consider carefully which Shouts you really need, and spend your Dragon Souls wisely. For example, the Aura Whisper Shout (which tracks a foe’s movement) is great for an assassin but is less useful for a berserker who simply charges into the fray.
- Shouts can be added to your Favorites, making switching between them (and employing them for different situations) quick and easy.
- Each Shout has up to three levels, corresponding to the Words of Power you’ve unlocked:
- Level 1: Tap the button. One word. Exhale. This is the weakest Shout but takes the shortest amount of time to recharge.
- Level 2: Briefly hold, then release the button. Two words. Inhale, then exhale. This is the midlevel Shout.
- Level 3: Hold the button. Three words. Inhale, inhale, then exhale. This is the highest level Shout and the most powerful, but it takes the longest to recharge.
- The longer you hold the Shout button, the more powerful the shout. When you bellow a Shout, you drain your Thu’um (Shouting power), which slowly rebuilds across your compass. When the compass changes from a pulsing blue back to its regular gray, you can Shout again.
A Shout Example: Frost Breath
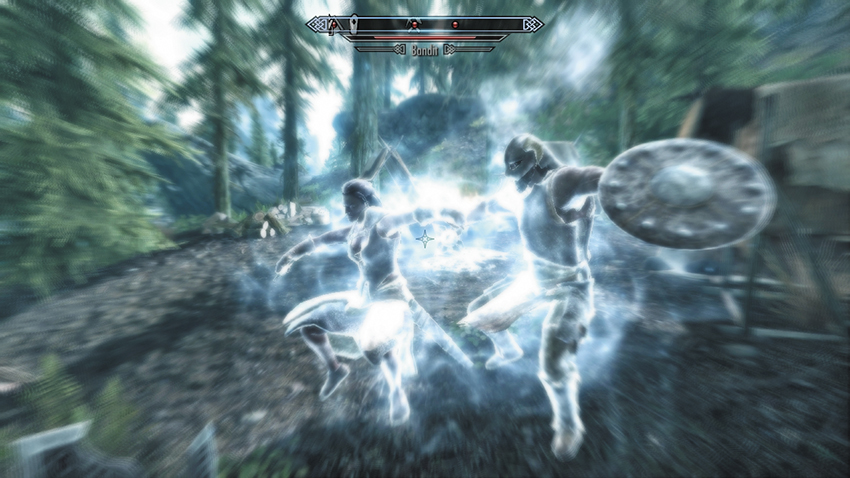
You begin by learning “Fo” (Frost), the first Word of this Shout, from a Word Wall. After scouring the lands for the second syllable “Krah” (Cold) and the third syllable “Diin” (Freeze), you spend three Dragon Souls to unlock all three Words. You can now use the weak, average, or strong version of this Shout.
Weak Shout: Bellow “Fo!” by tapping the Shout button.
Medium Shout: Bellow “Fo, Krah!” by briefly holding the Shout button, then releasing it.
Strong Shout: Bellow “Fo, Krah, Diin!” by holding the Shout button.
Words to Live By
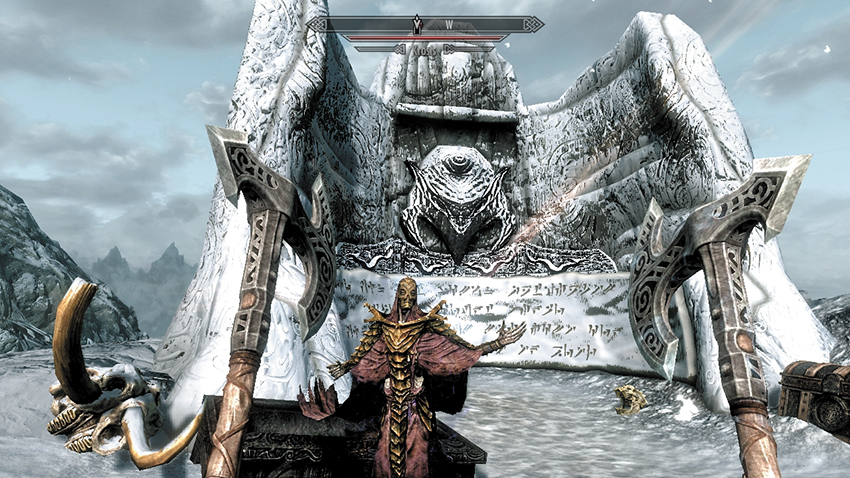
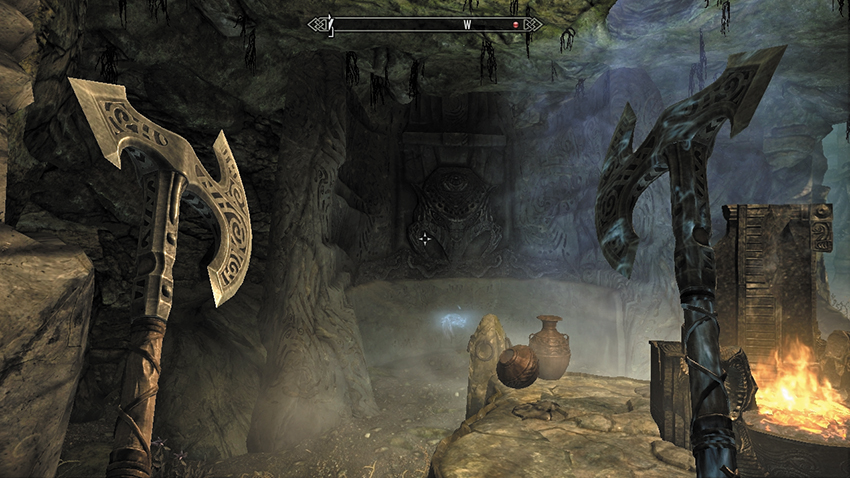
Some Word Walls are set in Skyrim’s exterior, such as this Wall at Shearpoint.
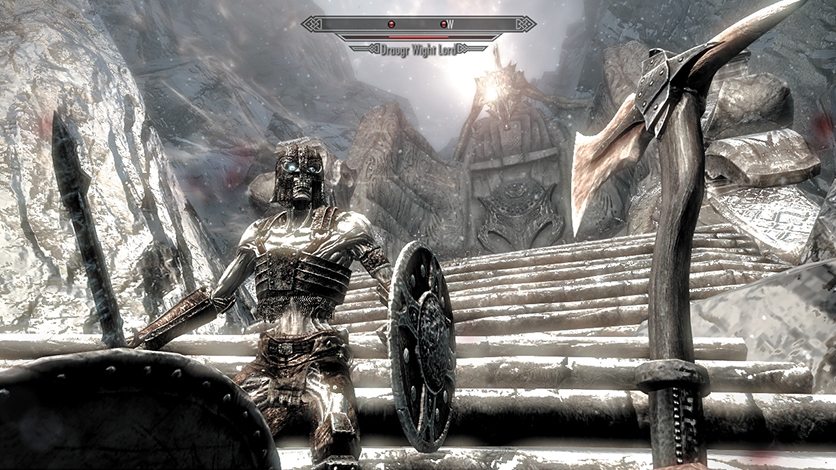
But most Word Walls are hidden in long-forgotten dungeons, such as the Wall in Labyrinthian.
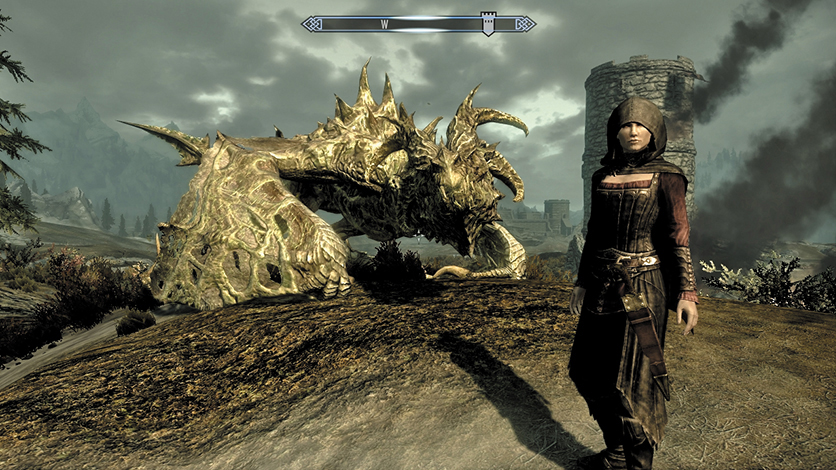
Dawnguard and Dragonborn Word Walls are sometimes new to Skyrim’s exterior, such as this Wall at Arcwind Point.
But most are learned during or after your time in other realms or during specific quests, such as this dragon summon in the Soul Cairn.
This section lists all of the available Shouts. Each Shout’s name is followed by its three Words, the locations where you can learn them, any quests related to those locations, and some notes and tips on using each Shout. A complete table of Shouts with detailed statistics appears at the end of this section.
Animal Allegiance
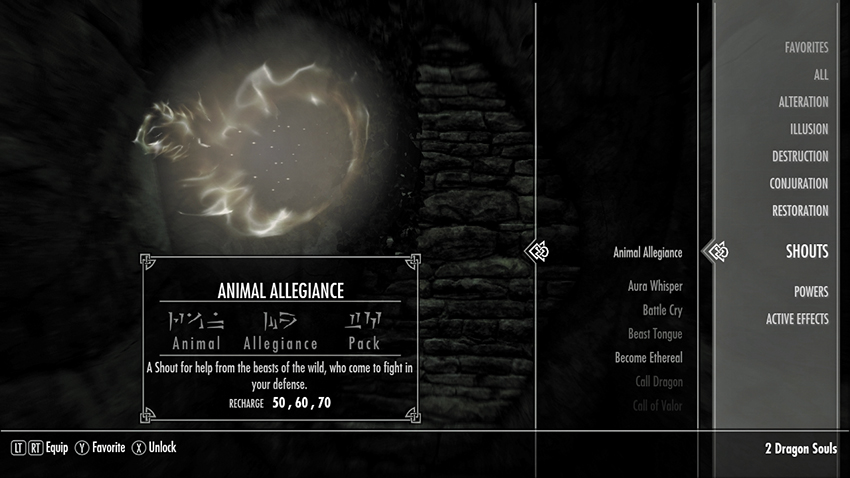
- Words of Power: Raan (Animal), Mir (Allegiance), Tah (Pack)
- Word Wall Locations:
- Angarvunde (the Rift): Dungeon Quest: Medresi Dran and the Wandering Dead
- Ancient’s Ascent (Falkreath Hold): This is a dragon lair.
- Ysgramor’s Tomb (Winterhold Hold): The Companions Quest: Glory of the Dead
- Description: A Shout for help from the beasts of the wild, who come to fight in your defense.
- Notes: This Shout “charms” all nearby animals, who fight for you for a short time. You can attack them without breaking this effect, so it’s easy to kill them before the Shout wears off. Note that this Shout does not affect summoned creatures (like Familiars) or creatures already under the control of someone else (like animals controlled by Spriggans).
Aura Whisper
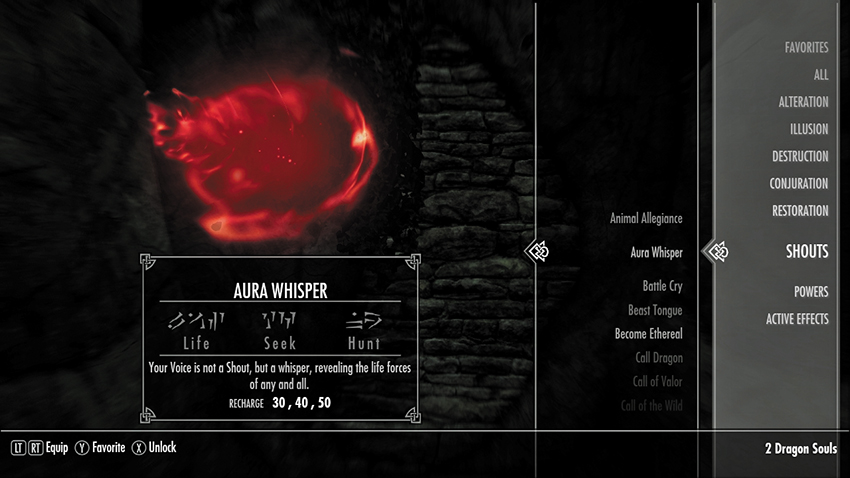
- Words of Power: Laas (Life), Yah (Seek), Nir (Hunt)
- Word Wall Locations:
- Northwind Summit (the Rift): This is a dragon lair.
- Valthume (the Reach): Dungeon Quest: Evil in Waiting. This is a dragon priest’s lair.
- Volunruud (the Pale): Dark Brotherhood Quest: The Silence Has Been Broken; Dungeon Quest: Silenced Tongues
- Description: Your Voice is not a Shout but a whisper, revealing the life forces of any and all.
- Notes: For a short time, this Shout allows you to see an aura around all living or undead creatures, even through walls. The Shout is silent, so it won’t create a sound that would cause enemies to detect you. Great for thieves, archers, and assassins!
Battle Fury
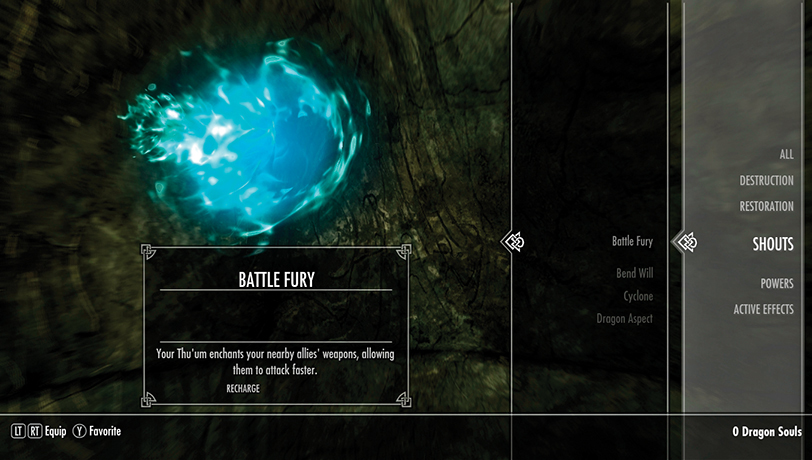
- Words of Power: Mid (Loyal), Vur (Valor), Shaan (Inspire)
- Word Wall locations: Vahlok’s Tomb (Solstheim): Only accessible during Solstheim Side Quest: Lost Legacy.
- Description: Your Thu’um enchants your nearby allies’ weapons, allowing them to attack faster.
- Notes: This Shout increases the attack speed of your allies, including followers and summoned creatures. The second and third words increase its potency, allowing your companions to attack up to 70% faster-- and thus do up to 70% more damage for its duration. A great choice if you find yourself with several followers, or ally with a high-damage melee follower.
Become Ethereal
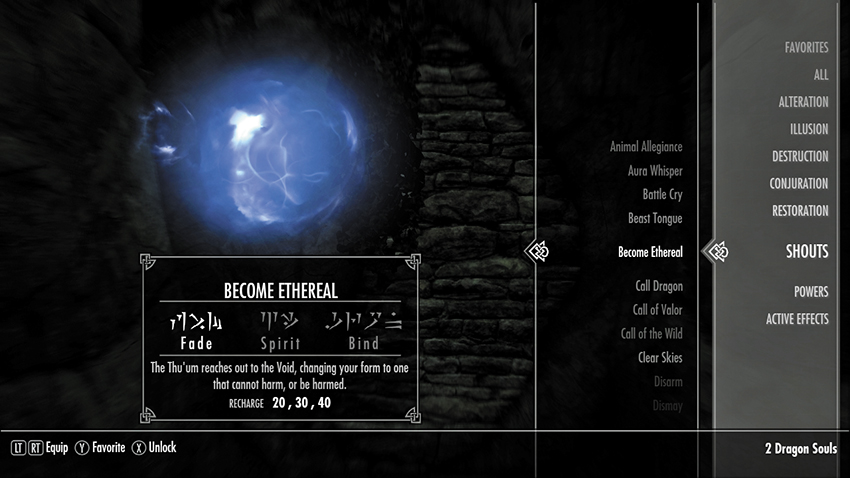
- Words of Power: Feim (Fade), Zii (Spirit), Gron (Bind)
- Word Wall Locations:
- Ironbind Barrow (Winterhold Hold) Lost Valley Redoubt (the Reach)
- Ustengrav (Hjaalmarch): Main Quest: The Horn of Jurgen Windcaller
- Description: The Thu’um reaches out to the Void, changing your form to one that cannot harm or be harmed.
- Notes: While Ethereal, you are invulnerable, you can’t attack or cast spells, and you recover Magicka and Stamina. This Shout gives you a few seconds to safely retreat or reposition yourself during a difficult battle. You can also use it to bypass most traps without fear of taking damage.
Bend Will
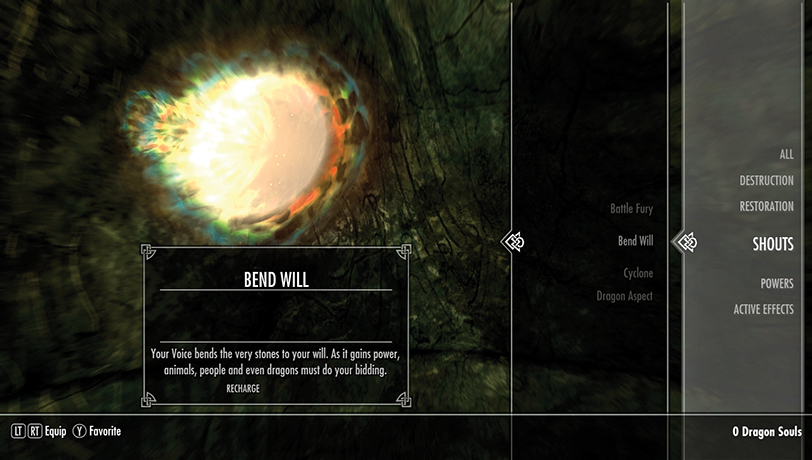
- Words of Power: Gol (Stone/Earth), Hah (Mind), Dov (Dragon)
- Word Wall locations:
- Saering’s Watch (Solstheim): The first Word of this Shout is always learned here.
- Hermaeus Mora (Apocrypha): The second and third Words of this Shout are always learned from this Daedric Prince, during Dragonborn Main Quest: The Gardener of Men.
- Description: Your voice bends the very stones to your will. As it gains power, animals, people, and even dragons must do your bidding.
- Notes: The first Word of this Shout is used during Dragonborn Main Quest: Cleansing the Stones to remove the traces of Miraak’s construction around the ancient All-Makers Stones of Solstheim. The second Word forces those around you (neutral characters and creatures) to ally themselves against an enemy you’re fighting for 30 seconds. But the third Word of this Shout is the most precious, enabling you to tame and ride dragons!
Call Dragon
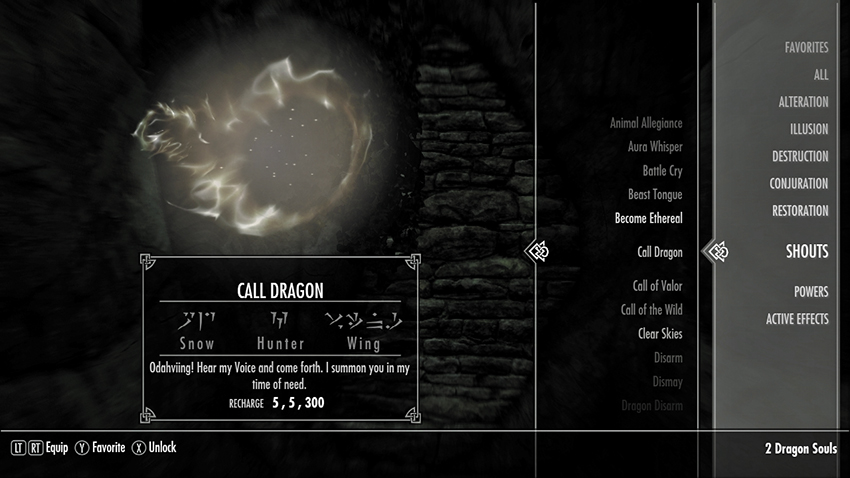
- Words of Power: Od (Snow), Ah (Hunter), Viing (Wing)
- Word Wall Locations:
- None. You learn this Shout during Main Quest: The Fallen.
- Description: Odahviing! Hear my Voice and come forth. I summon you in my time of need.
- Notes: This Shout summons the dragon Odahviing to battle during Main Quest: The Fallen. After you complete the main quest, you can summon Odahviing to aid you (in most exterior areas). Note that this Shout has no effect unless all three words are used.
Call of Valor
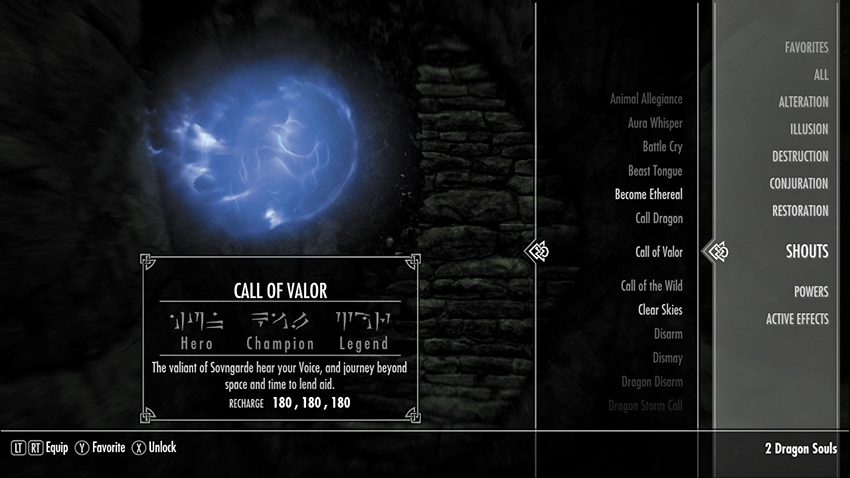
- Words of Power: Hun (Hero), Kaal (Champion), Zoor (Legend)
- Word Wall Locations: None. You learn this Shout at the end of the main quest.
- Description: The valiant of Sovngarde hear your Voice, and journey beyond space and time to lend their aid.
- Notes: Each level of this Shout summons a different hero from Sovngarde, each with unique equipment and abilities. Choose the one that best meets your needs for the current battle.
- “Hun” summons Gormlaith Golden-Hilt, who wields a bow, sword, shield, and a few Shouts.
- “Hun, Kaal” summons Felldir the Old, who wields a greatsword and has a number of damaging Shouts.
- “Hun, Kaal, Zoor” summons Hakon One-Eye, who wields a battle-ax and uses melee Shouts.
Clear Skies
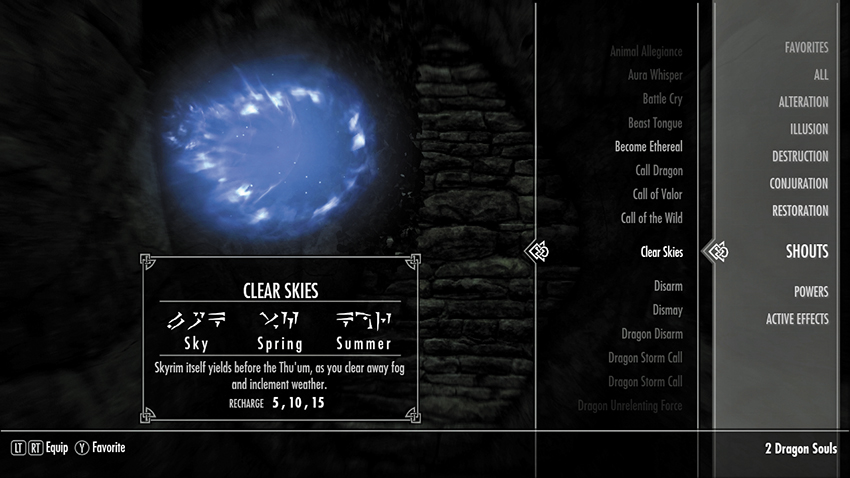
- Words of Power: Lok (Sky), Vah (Spring), Koor (Summer)
- Word Wall Locations:
- None. You learn this Shout from the Greybeards during Main Quest: The Throat of the World.
- Description: Skyrim itself yields before the Thu’um, as you clear away fog and inclement weather.
- Notes: This clears the weather and disperses fog, and it dispels poison gas traps.
Cyclone
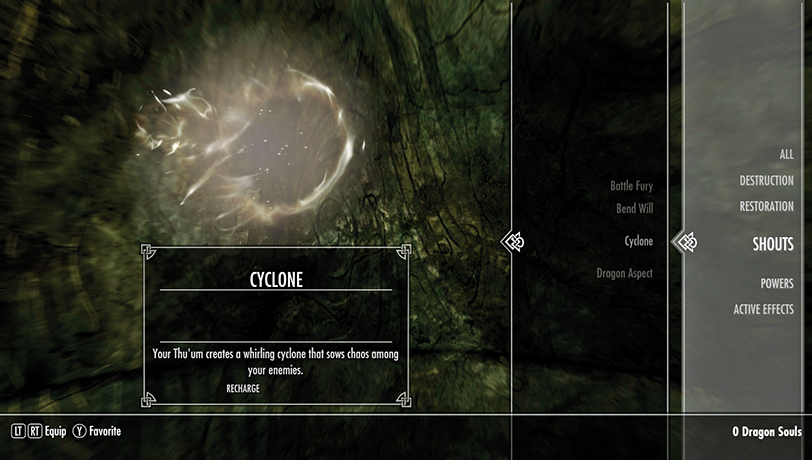
- Words of Power: Ven (Wind), Gaar (Unleash/Release), Nos (Strike)
- Word Wall locations:
- Benkongerike (Solstheim) White Ridge Barrow (Solstheim) Kolbjorn Barrow (Solstheim): During Solstheim Side Quest: Unearthed
- Description: Your Thu’um creates a whirling cyclone that sows chaos among your enemies.
- Notes: This Shout conjures up a maelstrom of wind that departs your presence, striking enemies and throwing them up into the skies, where they’re inflicted with blasts of wind and damage as they land. The pain caused and range increases as you learn the Words. This is helpful when facing foes you wish to keep from close combat (like Giants) or multiple foes bunched together.
Disarm
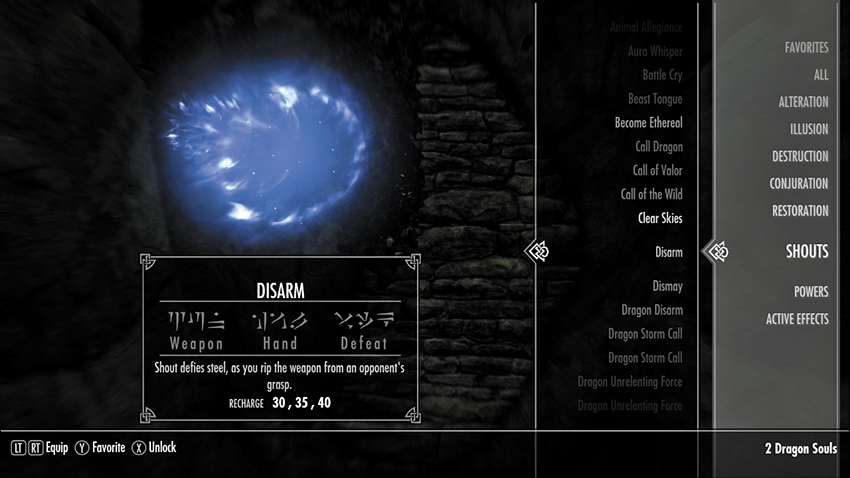
- Words of Power: Zun (Weapon), Haal (Hand), Viik (Defeat)
- Word Wall Locations:
- Eldersblood Peak (Hjaalmarch): This is a dragon lair. Silverdrift Lair (the Pale) Snow Veil Sanctum
- (Winterhold Hold): Thieves Guild Quest: Speaking with Silence
- Description: Shout defies steel as you rip the weapon from an opponent’s grasp.
- Notes: This Shout only affects enemies up to a specific level, with higher levels of the Shout allowing you to disarm higher-level foes. Refer to the chart at the end of this section for details. Note that some enemies cannot be disarmed.
Dismaying Shout
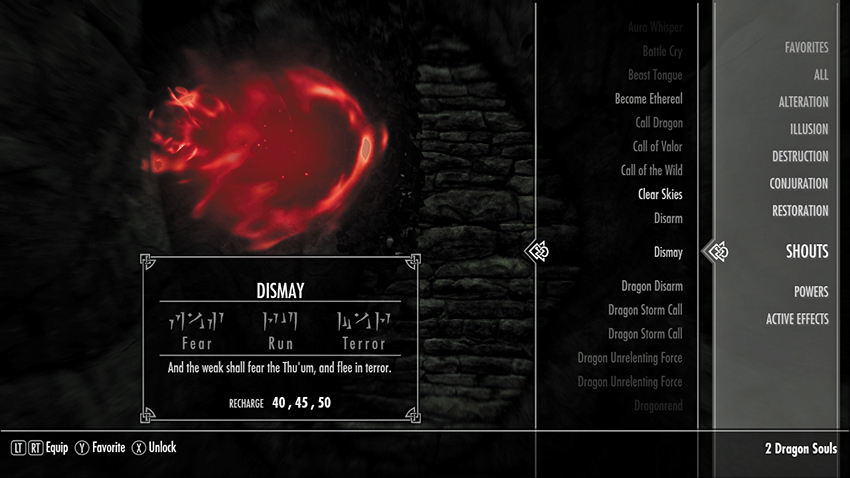
- Words of Power: Faas (Fear), Ru (Run), Maar (Terror)
- Word Wall Locations:
- Dead Crone Rock (the Reach): Daedric Quest: Pieces of the Past Labyrinthian (Hjaalmarch): In Shalidor’s Maze Lost Tongue Overlook (the Rift): This is a dragon lair.
- Description: And the weak shall fear the Thu’um, and flee in terror.
- Notes: This Shout only affects enemies up to a specific level, with higher levels of the Shout allowing you to affect higher-level foes. See the chart at the end of this section for details.
Dragonrend
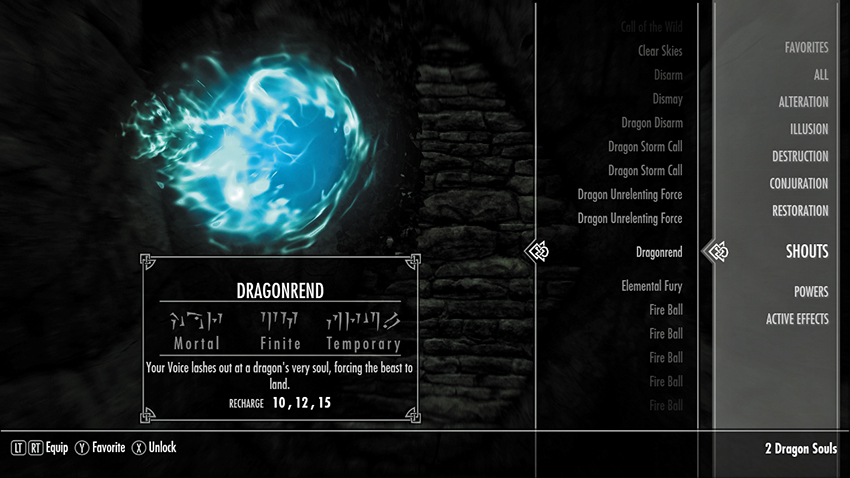
- Words of Power: Joor (Mortal), Zah (Finite), Frul (Temporary)
- Word Wall Locations: None. You learn this shout during Main Quest: Alduin’s Bane.
- Description: Your Voice lashes out at a dragon’s very soul, forcing the beast to land.
- Notes: This Shout is extremely useful for fighting Alduin or other dragons if you prefer to face them in melee combat.
Dragon Aspect
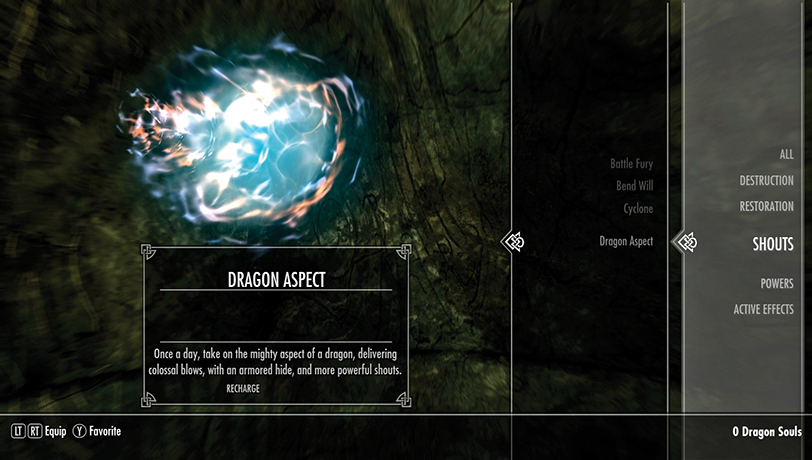
- Words of Power: Mul (Strength), Qah (Armor), Diiv (Wyrm)
- Word Wall locations:
- Raven Rock Mine (Solstheim): During Solstheim Side Quest: The Final Descent Temple of Miraak (Solstheim): During Dragonborn Main Quest: The Temple of Miraak Waking Dreams of a Starless Sky (Apocrypha): During Dragonborn Main Quest: At the Summit of Apocrypha
- Description: Once a day, take on the mighty aspect of a dragon, delivering colossal blows and possessing an armored hide and more powerful Shouts.
- Notes: You are bound in ethereal armor for 300 seconds, and once you learn two or three Words, an Ancient Dragonborn appears by you when your Health is reduced to half or lower. Your Armor Rating (+25) and Power Attacks are increased (+25%), and at two Words, +25% Fire and Frost Resistance is available, as well as an increased Armor Rating (+100). The third Word reduces your Shout regeneration time by 20%. You may use this powerful Thu’um only once per day.
Elemental Fury
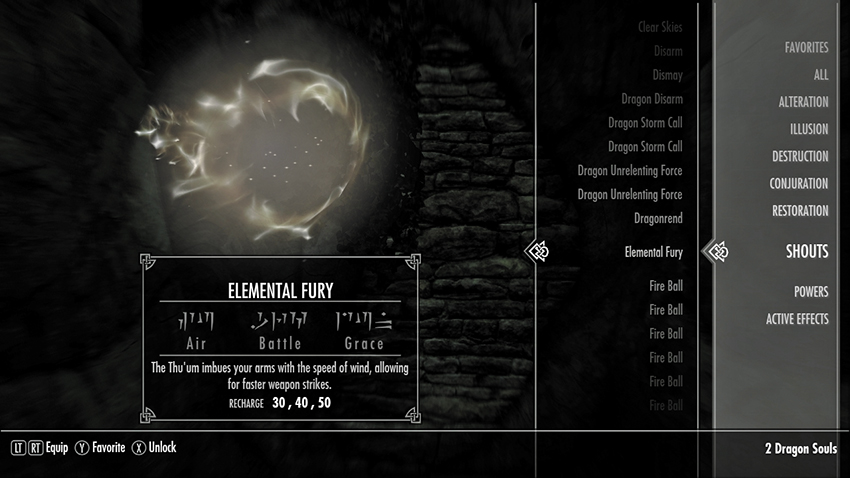
- Words of Power: Su (Air), Grah (Battle), Dun (Grace)
- Word Wall Locations: Dragontooth Crater (the Reach): This is a dragon lair. Kilkreath Ruins (Haafingar): Daedric Quest: The Break of Dawn Shriekwind Bastion (Falkreath Hold)
- Description: The Thu’um imbues your arms with the speed of wind, allowing for faster weapon strikes.
- Notes: This Shout lasts only a short time, but increases your damage output by 30-70%. Time it well, and you can do some serious damage.
Fire Breath
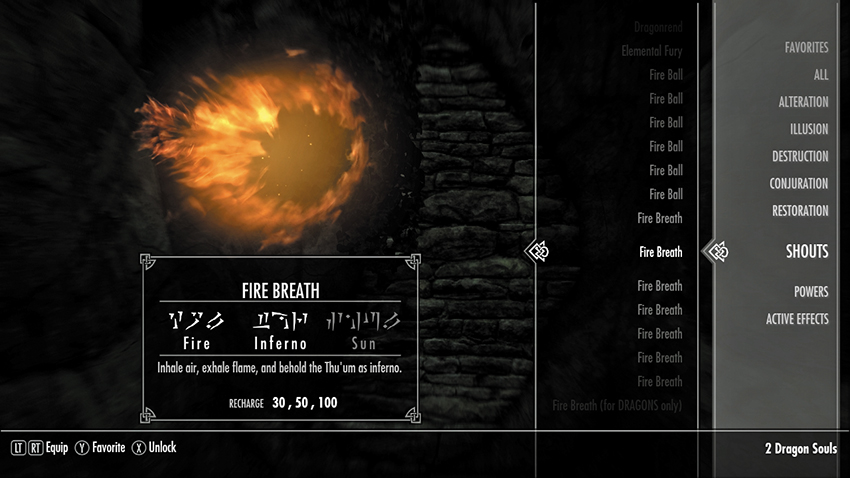
- Words of Power: Yol (Fire), Toor (Inferno), Shul (Sun)
- Word Wall Locations: Dustman’s Cairn (Whiterun Hold): The Companions Quest: Proving Honor Sunderstone Gorge (Falkreath Hold) Throat of the World (Whiterun Hold): Main Quest: The Throat of the World.
- Description: Inhale air, exhale flame, and behold the Thu’um as inferno.
- Notes: Fire Breath does high damage in a quick burst and sets enemies on fire. Great against foes already susceptible to fire damage (such as Vampires or Frost Atronachs).
Frost Breath
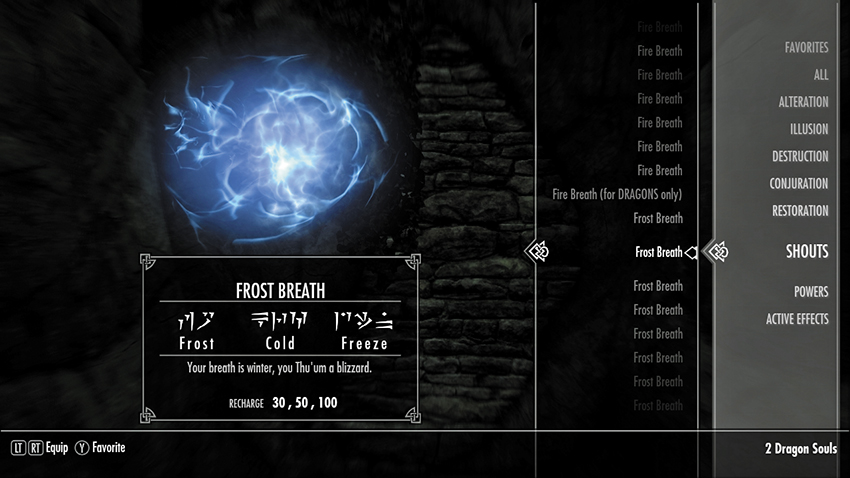
- Words of Power: Fo (Frost), Krah (Cold), Diin (Freeze)
- Word Wall Locations: Bonestrewn Crest (Eastmarch): This is a dragon lair. Folgunthur (Hjaalmarch): Side Quest: Forbidden Legend Skyborn Altar (Hjaalmarch): This is a dragon lair.
- Description: Your breath is winter, you Thu’um a blizzard.
- Notes: Frost Breath does about the same damage over time as Fire Breath but slows your enemies instead of setting them on fire. If your foes are more susceptible to frost than flame (such as Fire Atronachs), or if you can take advantage of the slowing effect, this is a good choice.
Ice Form
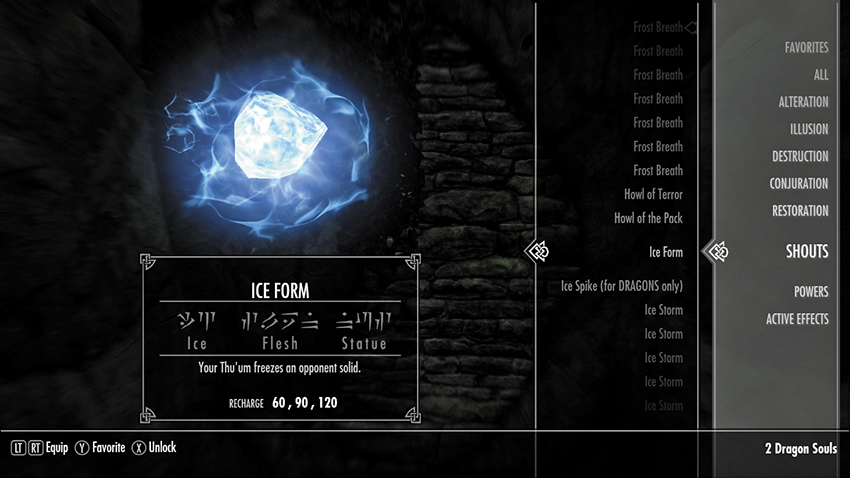
- Words of Power: Iiz (Ice), Slen (Flesh), Nus (Statue)
- Word Wall Locations: Frostmere Crypt (the Pale): Dungeon Quest: The Pale Lady Mount Anthor (Winterhold Hold): This is a dragon lair. Saarthal (Winterhold Hold): College of Winterhold Quest: Under Saarthal; Side Quest: Forbidden Legend
- Description: Your Thu’um freezes an opponent solid.
- Notes: This Shout takes the form of a wave of frost that freezes your enemies solid. Foes struck by this Shout are encased in ice and effectively paralyzed, and they take frost damage over time. If an enemy encased in ice is struck by an attack, the ice shatters, allowing them to recover. Use this Shout to take one or more foes out of the fight temporarily or to buy yourself a few free attacks before they can recover.
Kyne’s Peace
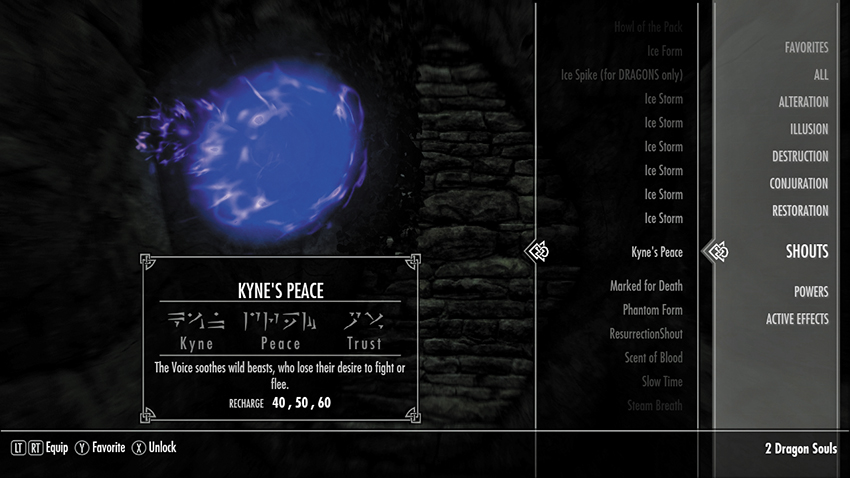
- Words of Power: Kaan (Kyne), Drem (Peace), Ov (Trust)
- Word Wall Locations: Ragnvald (the Reach): This is a dragon priest’s lair. Rannveig’s Fast (Whiterun Hold) Shroud Hearth Barrow (The Rift): Dungeon Quest: Wilhelm’s Scream
- Description: The Voice soothes wild beasts, who lose their desire to fight of flee.
- Notes: This Shout only affects wild animals, with the radius and duration of the Shout increasing at higher levels. This allows you to navigate animal dens without fighting or pacify a pack of animals before picking them off one by one.
Marked for Death
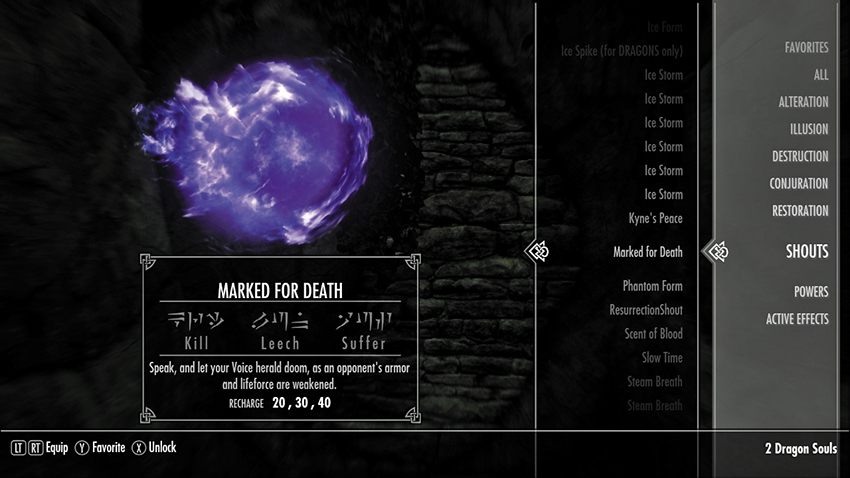
- Words of Power: Krii (Kill), Lun (Leech), Aus (Suffer)
- Word Wall Locations: Autumnwatch Tower (the Rift): This is a dragon lair. Dark Brotherhood Sanctuary (Falkreath Hold) Forsaken Cave (the Pale): Side Quest: The White Phial
- Description: Speak, and let your Voice herald doom, as an opponent’s armor and life force are weakened.
- Notes: This Shout saps your foes’ armor and causes damage over time, allowing you to kill them more quickly. Good to use on bosses.
Slow Time
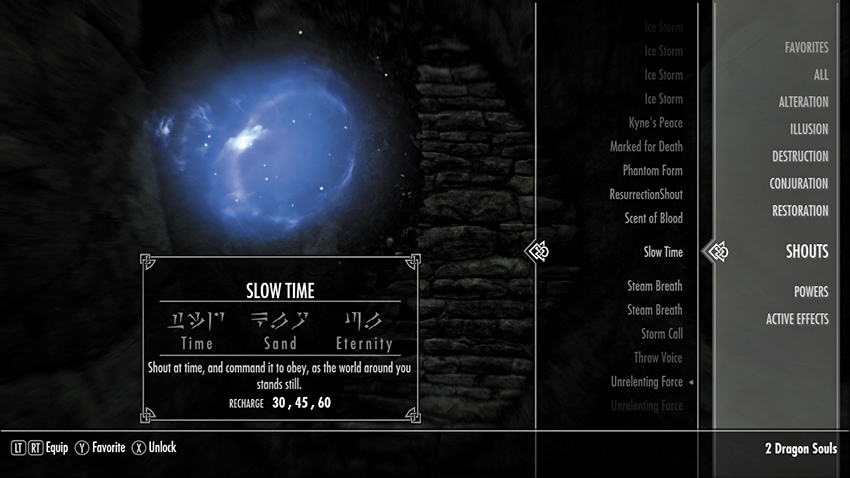
- Words of Power: Tiid (Time), Klo (Sand), Ul (Eternity)
- Word Wall Locations: Hag’s End (the Reach): Dark Brotherhood Radiant Quest: The Feeble Fortune Korvanjund (The Pale): Civil War Quest: The Jagged Crown Labyrinthian (Hjaalmarch): College of Winterhold Quest: The Staff of Magnus; this is a Dragon Priest’s lair.
- Description: Shout at time, and command it to obey, as the world around you stands still.
- Notes: This Shout buys you extra time, which you can use for any purpose: to rush in and assault a helpless enemy, to line up a perfect sniper shot, or to easily outrun any foe. Incredibly useful!
Soul Tear
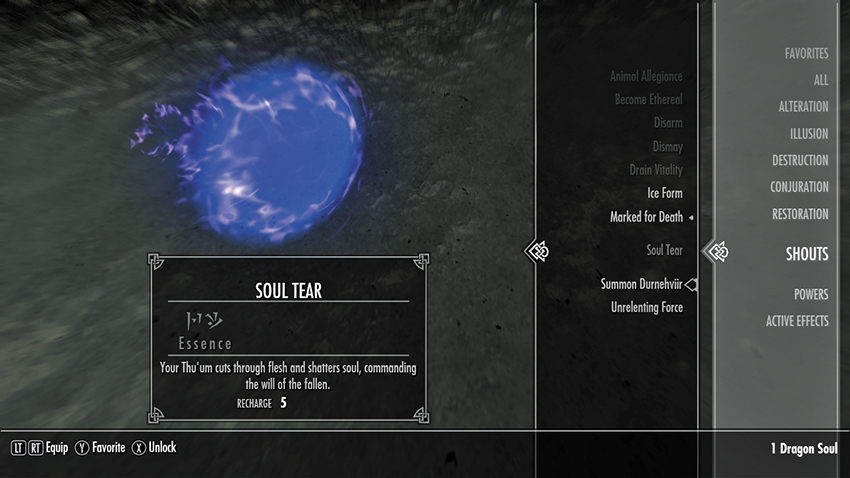
- Words of Power: Rii (Essence), Vaaz (Tear), Zol (Zombie)
- Word Wall Locations: None, the Soul Tear is learned one Word at a time, every time you succeed in summoning Durnehviir to Tamriel using the Summon Durnehviir Shout (below). Summon this dragon three times to learn all three words, expend three Dragon Souls, and claim this Shout as your own. Consult Side Quest: Durnehviir for more information.
- Description: Your Thu’um cuts through flesh and shatters souls, commanding the will of the fallen.
- Notes: Does 300 damage, soul-traps your target, and reanimates slain foes for 60 seconds. A truly devastating Shout, and one that can critically wound even the hardiest of foes. Slain foes are resurrected within the Shout’s blast radius and can augment your fighting prowess considerably. However, this Shout has no effect until you learn all three words. Simply yelling “Rii vaaz!” may get you funny looks but no devastating combat victories.
Storm Call
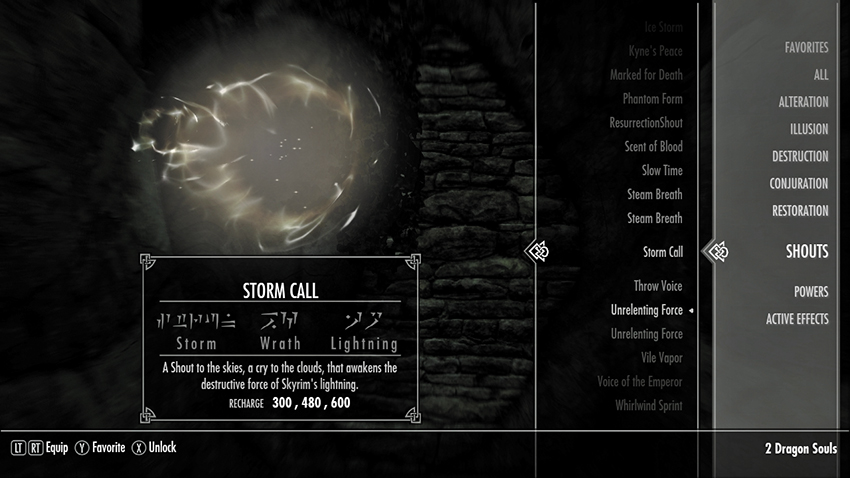
- Words of Power: Strun (Storm), Bah (Wrath), Qo (Lightning)
- Word Wall Locations: Forelhost (the Rift): This is a Dragon Priest’s lair. High Gate Ruins (the Pale): This is a Dragon Priest’s lair. Skuldafn (Other Realm): Main Quest: The World-Eater’s Eyrie. This is a Dragon Priest’s lair.
- Description: A Shout to the skies, a cry to the clouds, that awakens the destructive force of Skyrim’s lightning.
- Notes: Summons a thunderstorm with powerful lightning that lashes out at anything and anyone. Only works outdoors. It’s fantastic against dragons, but be careful—the lightning can and will kill civilians and your Followers.
Summon Durnehviir
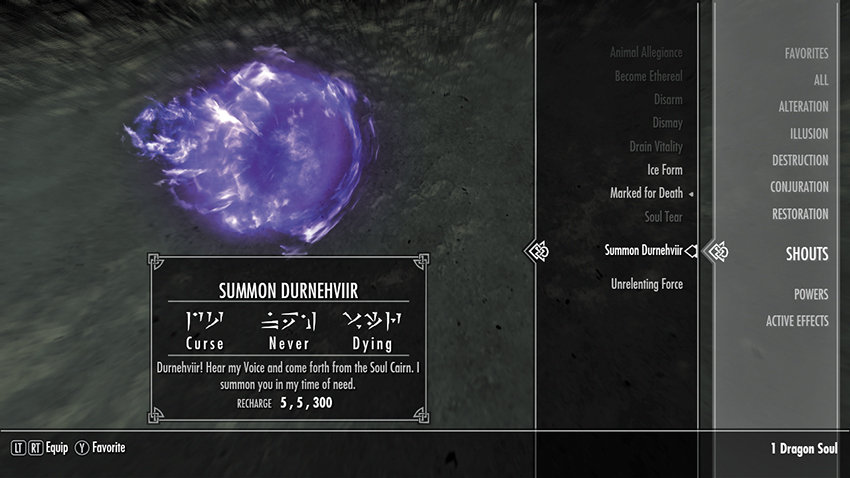
- Words of Power: Dur (Curse), Neh (Never), Viir (Dying)
- Word Wall Locations: None. You must enter the Soul Cairn, defeat Durnehviir in combat, meet this undead dragon as you depart the Boneyard, and learn all three Words from him so you can summon him in Tamriel. See Side Quest: Durnehviir for more information.
- Description: Durnehviir! Hear my voice and come forth from the Soul Cairn. I summon you in my time of need.
- Notes: Remember to expend three Dragon Souls to learn all parts of the Word and summon the dragon. Simply yelling “Dur neh!” won’t break the bonds holding the dragon in the Soul Cairn. In addition to summoning a powerful dragon to fight for you, this Shout also advances your pact with Durnehviir: each time you summon him, he teaches you the next Word of the Soul Tear Shout (above).
Throw Voice
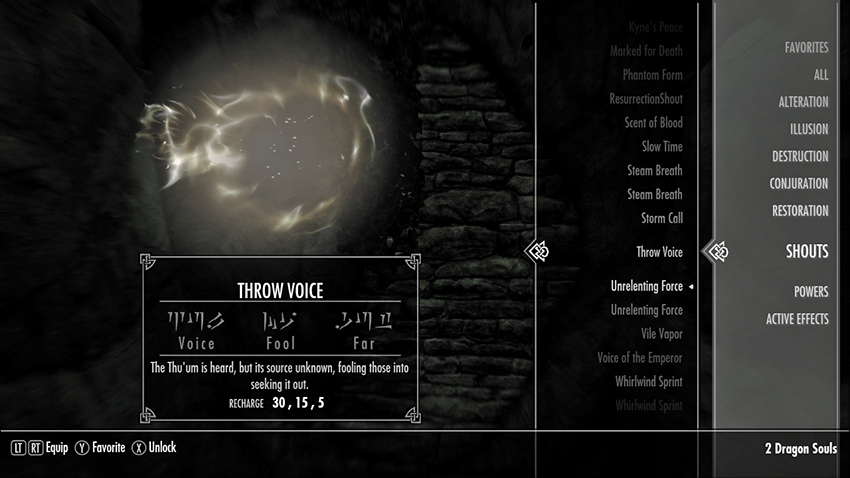
Words of Power: Zul (Voice), Mey (Fool), Gut (Far)
- Word Wall Locations: Shearpoint (the Pale): This is a dragon lair and a Dragon Priest’s lair.
- Description: The Thu’um is heard, but its source unknown, fooling those into seeking it out.
- Notes: This Shout produces no sound at your location, instead throwing your voice to the target. Enemies will detect the sound and investigate, allowing you to lure them away from their posts or into traps or other hazards. This is immensely useful when sneaking. Throw Voice is unique in that its Word Wall teaches you all three Words of the Shout.
Unrelenting Force
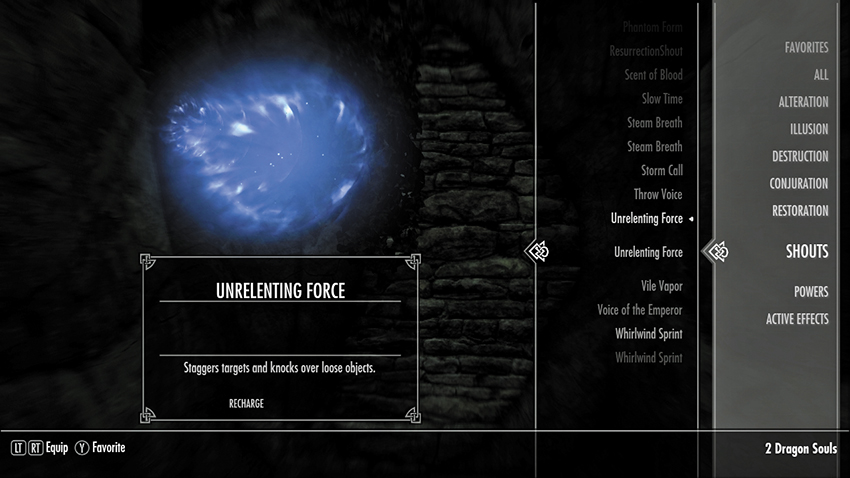
- Words of Power: Fus (Force), Ro (Balance), Dah (Push)
- Word Wall Locations: Bleak Falls Barrow (Falkreath Hold): Main Quest: Bleak Falls Barrow; Side Quest: The Golden Claw High Hrothgar (Whiterun Hold): Main Quest: The Way of the Voice. You learn both the second and third Words from the Greybeards.
- Description: Your Voice is raw power, pushing aside anything—or anyone—who stands in your path.
- Notes: This Shout staggers enemies or sends them flying, and does some light damage. Aim carefully to push your foes into traps, or follow up with a swift melee or ranged attack to take advantage of the stagger.
Whirlwind Sprint
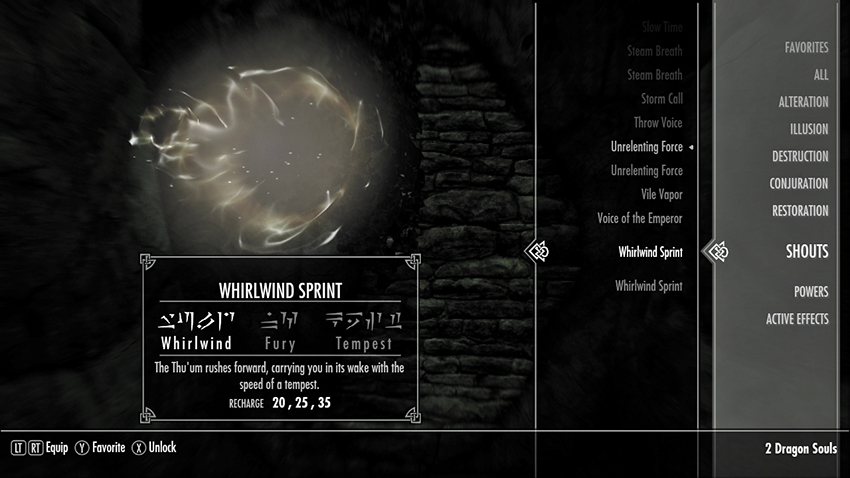
- Words of Power: Wuld (Whirlwind), Nah (Fury), Kest (Tempest)
- Word Wall Locations: Dead Men’s Respite (Hjaalmarch): The Bards College Quest: Tending the Flames High Hrothgar (Whiterun Hold): Main Quest: The Way of the Voice. Learned from the Greybeards. Volskygge (Haafingar): This is a Dragon Priest’s lair.
- Description: The Thu’um rushes forward, carrying you in its wake with the speed of a tempest.
- Notes: This surge forward is useful for reaching otherwise-inaccessible ledges or platforms.
The Shouting Table
The following table provides a summary of all the Shouts and their effects:
| Shout Name | Word | Rebuild Time | Description | Quest / Special Restrictions |
|---|---|---|---|---|
| Animal Allegiance | Raan | 50 | Command Animal, Small Radius, Max Lv20, 30s | |
| Animal Allegiance | Mir | 60 | Command Animal, Medium Radius, Max Lv20, 45s | |
| Animal Allegiance | Tah | 70 | Command Animal, Large Radius, Max Lv20, 60s | |
| Aura Whisper | Laas | 30 | Detect Life & Undead, 10s | |
| Aura Whisper | Yah | 40 | Detect Life & Undead, 20s | |
| Aura Whisper | Nir | 50 | Detect Life & Undead, 30s | |
| Battle Fury | Mid | 30 | Allies attack 30% faster, 15s | Learned during Dragonborn Side Quest: Lost Legacy |
| Battle Fury | Vur | 40 | Allies attack 50% faster, 15s | Learned during Dragonborn Side Quest: Lost Legacy |
| Battle Fury | Shaan | 50 | Allies attack 70% faster, 15s | Learned during Dragonborn Side Quest: Lost Legacy |
| Become Ethereal | Feim | 20 | Ethereal, 8s | |
| Become Ethereal | Zii | 30 | Ethereal, 13s | |
| Become Ethereal | Gron | 40 | Ethereal, 18s | |
| Bend Will | Gol | 10 | Command Stones | Learned at Saering’s Watch |
| Bend Will | Hah | 90 | Command Mortals (30s), or Stones | Learned during Dragonborn Main Quest: The Gardener of Men |
| Bend Will | Dov | 90 | Command Dragons, Mortals, or Stones | Learned during Dragonborn Main Quest: The Gardener of Men |
| Call Dragon | Od | 5 | --No effect-- | Learned during Main Quest: The Fallen |
| Call Dragon | Ah | 5 | --No effect-- | Learned during Main Quest: The Fallen |
| Call Dragon | Viing | 300 | Summons Odahviing | Learned during Main Quest: The Fallen |
| Call of Valor | Hun | 180 | Summons Gormlaith Golden-Hilt, 1m | Learned during Main Quest: Epilogue |
| Call of Valor | Kaal | 180 | Summons Felldir the Old, 1m | Learned during Main Quest: Epilogue |
| Call of Valor | Zoor | 180 | Summons Hakon One-Eye, 1m | Learned during Main Quest: Epilogue |
| Clear Skies | Lok | 5 | Clear Skies, 25s | Learned during Main Quest: The Throat of the World |
| Clear Skies | Vah | 10 | Clear Skies, 40s | Learned during Main Quest: The Throat of the World |
| Clear Skies | Koor | 15 | Clear Skies, 60s | Learned during Main Quest: The Throat of the World |
| Cyclone | Ven | 20 | Small Cyclone, 20 Damage/s | |
| Cyclone | Gaar | 40 | Medium Cyclone, 40 Damage/s | |
| Cyclone | Nos | 60 | Large Cyclone, 60 Damage/s | |
| Disarm | Zun | 30 | Disarm, Max Lv12 | |
| Disarm | Haal | 35 | Disarm, Max Lv20 | |
| Disarm | Viik | 40 | Disarm, Max Lv30 | |
| Dismay | Faas | 40 | Fear, Max Lv7 | |
| Dismay | Ru | 45 | Fear, Max Lv15 | |
| Dismay | Maar | 50 | Fear, Max Lv24 | |
| Dragonrend | Joor | 10 | Force Dragons to land; 15s | Learned during Main Quest: Alduin’s Bane |
| Dragonrend | Zah | 12 | Force Dragons to land; 18s | Learned during Main Quest: Alduin’s Bane |
| Dragonrend | Frul | 15 | Force Dragons to land; 22s | Learned during Main Quest: Alduin’s Bane |
| Drain Vitality | Gaan | 30 | Absorb Stamina; 5/s, 30s | |
| Drain Vitality | Lah | 60 | Absorb Magicka & Stamina; 5/s, 30s | |
| Drain Vitality | Haas | 90 | Absorb Health, Magicka, & Stamina; 5/s, 30s | |
| Dragon Aspect | Mul | 5 | Once per day for 5m, +25 Armor, +25% Power Attack Damage. | Learned in Raven Rock Mine |
| Dragon Aspect | Qah | 5 | Once per day for 5m, +25% Fire and Frost Resistance, +75 Armor, +25% Power Attack Damage, Summons an Ancient Dragonborn if your health falls below 50%. | Learned during Dragonborn Main Quest: The Temple of Miraak |
| Dragon Aspect | Diiv | 5 | Once per day for 5m, Increased Shout Effectiveness, Shouts recover 20% faster, +25% Fire and Frost Resistance, +100 Armor, +25% Power Attack Damage, Summons an Ancient Dragonborn if your health falls below 50%. | Learned during Dragonborn Main Quest: At the Summit of Apocrypha |
| Elemental Fury | Su | 30 | Increase Attack Speed (1.3x), 15s | |
| Elemental Fury | Grah | 40 | Increase Attack Speed (1.5x), 15s | |
| Elemental Fury | Dun | 50 | Increase Attack Speed (1.7x), 15s | |
| Fire Breath | Yol | 30 | Fire Breath; 50 Fire Damage | |
| Fire Breath | Toor | 50 | Fire Breath; 70 Fire Damage | |
| Fire Breath | Shul | 100 | Fire Breath; 90 Fire Damage | |
| Frost Breath | Fo | 30 | Frost Breath, Frost Damage 10/s for 5s, Slow | |
| Frost Breath | Krah | 50 | Frost Breath, Frost Damage 14/s for 5s, Slow | |
| Frost Breath | Diin | 100 | Frost Breath, Frost Damage 18/s for 5s, Slow | |
| Ice Form | Iiz | 60 | Ice Form Paralyze, Frost Damage 2/s, 15s | |
| Ice Form | Slen | 90 | Ice Form Paralyze, Frost Damage 2/s, 30s | |
| Ice Form | Nus | 120 | Ice Form Paralyze, Frost Damage 2/s, 60s | |
| Kyne’s Peace | Kaan | 40 | Calm Animal, Small Area, Max Lv20, 60s | |
| Kyne’s Peace | Drem | 50 | Calm Animal, Medium Area, Max Lv20, 120s | |
| Kyne’s Peace | Ov | 60 | Calm Animal, Large Area, Max Lv20, 180s | |
| Marked for Death | Krii | 20 | -25 Armor, Damage Health 1/s, 60s | |
| Marked for Death | Lun | 30 | -50 Armor, Damage Health 2/s, 60s | |
| Marked for Death | Aus | 40 | -75 Armor, Damage Health 3/s, 60s | |
| Slow Time | Tiid | 30 | Slow Time (70%), 8s | |
| Slow Time | Klo | 45 | Slow Time (80%), 12s | |
| Slow Time | Ul | 60 | Slow Time (90%), 16s | |
| Soul Tear | Rii | 5 | --No effect-- | Learned during Dawnguard Side Quest: Durnehviir |
| Soul Tear | Vaaz | 5 | --No effect-- | Learned during Dawnguard Side Quest: Durnehviir |
| Soul Tear | Zol | 90 | Soul Tear, 300 Damage & Reanimate slain foes for 60s | Learned during Dawnguard Side Quest: Durnehviir |
| Storm Call | Strun | 300 | Call Storm, 60s | |
| Storm Call | Bah | 480 | Call Storm, 120s | |
| Storm Call | Qo | 600 | Call Storm, 180s | |
| Summon Durnehviir | Dur | 5 | --No effect-- | Learned during Dawnguard Main Quest: Beyond Death |
| Summon Durnehviir | Neh | 5 | --No effect-- | Learned during Dawnguard Main Quest: Beyond Death |
| Summon Durnehviir | Viir | 300 | Summons Durnehviir | Learned during Dawnguard Main Quest: Beyond Death |
| Throw Voice | Zul | 30 | Throw Voice | |
| Throw Voice | Mey | 15 | Throw Voice | |
| Throw Voice | Gut | 5 | Throw Voice | |
| Unrelenting Force | Fus | 15 | Unrelenting Force (Weak), 2 Damage | Learned in Bleak Falls Barrow. |
| Unrelenting Force | Ro | 20 | Unrelenting Force (Med), 5 Damage | Learned during Main Quest: The Way of the Voice |
| Unrelenting Force | Dah | 45 | Unrelenting Force (Strong), 10 Damage | Learned during Main Quest: The Way of the Voice |
| Whirlwind Sprint | Wuld | 20 | Whirlwind Sprint (Short) | |
| Whirlwind Sprint | Nah | 25 | Whirlwind Sprint (Med) | |
| Whirlwind Sprint | Kest | 35 | Whirlwind Sprint (Long) |
Other Powers and Abilities
Powers
As Dragonborn, Shouts are your most numerous type of power, but there are many other powers and abilities that you can acquire during your time in Skyrim. These are listed in the following table, and include:
- Racial powers, also described in this chapter.
- Standing Stone powers, also described in this chapter.
- Vampire powers, also described in this chapter.
- Werewolf powers, also described in this chapter.
- Sacred Stone powers, also described in this chapter.
- Apocrypha powers, also described in this chapter.
- Nightingale powers, also described at the end of the Thieves Guild questline.
- A Dark Brotherhood power, your reward for Dark Brotherhood Quest: Bound Until Death.
All Powers are found in the Magic > Powers part of your Inventory Menu. Equip a power by assigning it to the button or key you use for your Dragon Shout.
| Name | Description | Use | Associated Location, Quest, or Race |
|---|---|---|---|
| Adrenaline Rush | Stamina regenerates 10x faster for 60 seconds. | Once per day | Redguard racial power |
| Ancestor’s Wrath | For 60 seconds, opponents that get too close take 8 points per second of fire damage. | Once per day | Dark Elf racial power |
| Battle Cry | Targets flee for 30 seconds. | Once per day | Nord racial power |
| Berserker Rage | You take half damage and do double damage for 60 seconds. | Once per day | Orc racial power |
| Command Animal | Make an animal an ally for 60 seconds. | Once per day | Wood Elf racial power |
| Dragonskin | Absorb 50% of the Magicka from hostile spells for 60 seconds. | Once per day | Breton racial power |
| Highborn | Regenerate Magicka faster for 60 seconds. | Once per day | High Elf racial power |
| Histskin | Invoke the power of the Hist to recover health ten times faster for 60 seconds. | Once per day | Argonian racial power |
| Night Eye | Improved night vision for 60 seconds. | Unlimited times per day | Khajiit racial power |
| Voice of the Emperor | Calms nearby people for 60 seconds. | Once per day | Imperial racial power |
| Name | Description | Use | Associated Location, Quest, or Race |
|---|---|---|---|
| Bones of the Earth | Caster ignores 80% of all physical damage for 30 seconds | Single use, then must be reacquired at the Earth Stone | Earth Stone Power (Solstheim) |
| Conjure Werebear | Summons a werebear for 60 seconds wherever the caster is pointing | Single use, then must be reacquired at the Beast Stone | Beast Stone Power (Solstheim) |
| North Wind | Target takes 20 points of frost damage for 10 seconds, plus stamina damage | Single use, then must be reacquired at the Wind Stone | Wind Stone Power (Solstheim) |
| Root of Power | Spells cost 75% less Magicka for 60 seconds. | Single use, then must be reacquired at the Tree Stone | Tree Stone Power (Temple of Miraak, Solstheim) |
| Sun Flare | A 100-point fiery explosion centered on the caster, inflicting more damage to closer targets. | Single use, then must be reacquired at the Sun Stone. | Sun Stone power (Solstheim) |
| Waters of Life | Heals everyone close to the caster 300 points. | Single use, then must be reacquired at the Water Stone | Water Stone power (Solstheim) |
| Name | Description | Use | Associated Location, Quest, or Race |
|---|---|---|---|
| The Ritual Stone | Temporarily reanimates corpses in the immediate area. | Once per day | Activate the Ritual Standing Stone |
| The Serpent Stone | Target is paralyzed for 5 seconds and takes 25 points of damage over 5 seconds. | Once per day | Activate the Serpent Standing Stone |
| The Shadow Stone | Invisibility for 60 seconds. Activating an object or attacking will break the spell. | Once per day | Activate the Shadow Standing Stone |
| The Tower Stone | Unlock any expert or lower lock once per day. | Once per day | Activate the Tower Standing Stone |
| Name | Description | Use | Associated Location, Quest, or Race |
|---|---|---|---|
| Embrace of Shadows | You can become invisible. Improved night vision for 180 seconds. | Once per day | Vampire power |
| Vampiric Drain | Absorb a set number of points of health per second from the target. | Unlimited times per day | Vampire Lord Power |
| Vampire Lord | Transform into a Vampire Lord. Use the Revert Form power to change back. | Unlimited times per day | Vampire Lord power |
| Vampire’s Seduction | Creatures and people up to Level 8 won’t fight for 30 seconds. | Once per day | Vampire power |
| Vampire’s Servant | Reanimate a dead body to fight for you for 60 seconds. | Once per day | Vampire power |
| Vampire’s Sight | Improved night vision for 60 seconds. | Unlimited times per day | Vampire power |
| Name | Description | Use | Associated Location, Quest, or Race |
|---|---|---|---|
| Beast Form | Take on the form of a werewolf. | Once per day | Werewolf power |
| Ring of Hircine | Take on the form of a werewolf. | Once per day | Werewolf power |
| Totem of Brotherhood | Summons two wolf spirits to aid in battle | Unlimited times per day | Werewolf power (Reward from Companions Radiant Quest: Totems of Hircine) |
| Totem of Fear | Casts Fear against nearby enemies | Unlimited times per day | Werewolf power (reward from Companions Radiant Quest: Totems of Hircine) |
| Totem of the Hunt | Casts a Detect Life spell. | Unlimited times per day | Werewolf power (Reward from Companions Radiant Quest: Totems of Hircine) |
| Name | Description | Use | Associated Location, Quest, or Race |
|---|---|---|---|
| Bardic Knowledge | Summons a spectral drum that plays for 300 seconds, improving Stamina Regen for you and nearby allies | Unlimited times per day | Black Book: Untold Legends |
| Black Market | Summons a Dremora merchant for 15 seconds | Unlimited times per day | Black Book: Untold Legends |
| Secret Servant | Summons a Dremora butler for 15 seconds to carry your excess items | Unlimited times per day | Black Book: Untold Legends |
| Mora’s Agony | Summons a field of writhing tentacles that poisons foes | Once per day | Black Book: The Hidden Twilight |
| Mora’s Boon | Fully restores your Health, Stamina, and Magicka | Once per day | Black Book: The Hidden Twilight |
| Mora’s Grasp | Freezes the target between Oblivion and Tamriel for 30 seconds, making them immune to all damage. | Once per day | Black Book: The Hidden Twilight |
| Secret of Arcana | Spells cost no Magicka for 30 seconds | Once per day | Black Book: Filament and Filigree |
| Secret of Protection | You take half damage for 30 seconds from all physical attacks and most magical attacks | Once per day | Black Book: Filament and Filigree |
| Secret of Strength | Power attacks cost no Stamina for 30 seconds | Once per day | Black Book: Filament and Filigree |
| Name | Description | Use | Associated Location, Quest, or Race |
|---|---|---|---|
| Breath of Nchuak | Draws upon stamina to release a scorching blast of steam that deals 15 points of damage per second. | Unlimited times per day | Reward from collecting Unique Item: Visage of Mzund from Fahlbtharz (Solstheim) |
| Nightingale Strife | Instantly absorb 100 points of Health from the target. | Once per day | Reward from Thieves Guild Quest: Darkness Returns. |
| Nightingale Subterfuge | People and creatures in the spell’s area of effect will attack anyone nearby for 30 seconds. | Once per day | Reward from Thieves Guild Quest: Darkness Returns. |
| Shadowcloak of Nocturnal | For 120 seconds you automatically become invisible while sneaking. | Once per day | Reward from Thieves Guild Quest: Darkness Returns. |
| Summon Karstaag | Summon Karstaag to fight for you for 120 seconds. | You may use this ability only three times and only while outdoors | Reward from Solstheim Side Quest: Karstaag’s Resurrection* |
| Summon Spectral Assassin | Summons the ghost of the legendary assassin Lucien Lachance to fight by your side, until he’s defeated. | Once per day | Reward from Dark Brotherhood Quest: Bound Until Death. |
Abilities
Most special abilities are offered as rewards for quests or for performing specific actions. They typically appear in your Active Effects list. Note that some are presented explicitly (with dialogue and/or onscreen text), while others may not be. A few are not visible to you at all, so learn when you can obtain them and how long they last. These are listed in the following table and include:
- Permanent Abilities (Nonskill Perks)
- Racial Abilities (innate to each race)
- Standing Stone Abilities (Skyrim’s Standing Stones)
- Temporary Abilities (Buffs)
- Blessings (and Disease Curing): From shrines (see next section)
| Name | Description | Associated Quest or Special Instructions |
|---|---|---|
| Agent of Dibella | +10% melee damage to the opposite sex. | Temple Quest: The Heart of Dibella |
| Agent of Mara | +15% Resist Magic. | Temple Quest: The Book of Love |
| Ahzidal’s Genius | +10 Enchanting while wearing four or more Relics of Ahzidal. | Solstheim Side Quest: Unearthed |
| Ancient Knowledge | +25% Armor if wearing all Dwarven armor. Your Smithing skill increases 15% faster. | Side Quest: Unfathomable Depths |
| Archmage’s Authority | Better prices from members of the College (50% Enthir, 10% others). | College of Winterhold Quest: The Eye of Magnus |
| Assassin’s Aegis | +25% Armor if wearing all Dark Brotherhood Armor. | Dark Brotherhood Quest: Sanctuary |
| Boethiah’s Blessing | You are able to move more quietly, and close opponents receive 5 poison damage per second. | Wear Ebony Mail |
| Blessing of the Stag Prince | Receive additional Health and Stamina while the Bow of the Stag Prince is equipped (increases as you slay more animals). | Equip Glass Bow of the Stag Prince (Solstheim) |
| Deathbrand Instinct | +100 Armor if wearing all Deathbrand Armor. | Solstheim Side Quest: Deathbrand |
| Dragon Infusion | You take 25% less melee damage from dragons. | Blades (Other Faction) Quest: Dragon Research |
| Eternal Spirit | While ethereal, you recover health 25% faster. | Greybeards (Other Faction) Quest: Meditations on the Words of Power |
| Force Without Effort | You stagger 25% less, and foes stagger 25% more. | Greybeards (Other Faction) Quest: Meditations on the Words of Power |
| Gift of the Gab | Your Speech skill increases 15% faster. | Bards College (Other Faction) Quest: Tending the Flames |
| Nightingale’s Aegis | +25% Armor if wearing all Nightingale Armor. | Thieves Guild Quest: Trinity Restored |
| Prowler’s Profit | Chance of finding additional gems in chests. | Thieves Guild Quest: No Stone Unturned |
| Sailor’s Repose | Healing spells restore 10% more health. | Dungeon Quest (Frostflow Lighthouse): What Lies Beneath |
| Sinderion’s Serendipity | When you make a potion, you have a 25% chance of creating a second, duplicate potion. | Side Quest: A Return to Your Roots |
| The Fire Within | Your Fire Breath Shout deals 25% more damage. | Greybeards (Other Faction) Quest: Meditations on the Words of Power |
| Name | Description | Notes |
|---|---|---|
| Resist Disease (Argonian) | Your Argonian blood is 50% resistance to disease. | Argonian race |
| Waterbreathing | Your Argonian lungs can breathe underwater. | Argonian race |
| Magic Resistance | Your Breton blood grants 25% resistance to magic. | Breton race |
| Resist Fire | Your Dunmer blood gives you 50% resistance to Fire. | Dark Elf race |
| Highborn | High Elves are born with 50 additional Magicka. | High Elf race |
| Imperial Luck | Anywhere gold coins might be found, Imperials always seem to find a few more. | Imperial race |
| Khajiit claws | Inflict 4x unarmed damage. | Khajiit race |
| Resist Frost | Your Nord blood gives you 50% resistance to Frost. | Nord race |
| Resist Poison (Redguard) | Your Redguard blood gives you 50% resistance to poison. | Redguard race |
| Champion of the Night | Illusion spells cast by a vampire are 25% more powerful | Vampire race |
| Resist Disease (Vampire) | Your vampiric blood gives you 100% resistance to disease. | Vampire race |
| Resist Disease (Werewolf) | Your beast blood gives you 100% resistance to disease. | Vampire race |
| Resist Poison (Vampire) | Your vampiric blood gives you 100% resistance to poison. | Vampire race |
| Resist Disease and Poison | Your Bosmer blood gives you 50% resistance to disease and poison. | Wood Elf race |
| Name | Description | Notes |
|---|---|---|
| The Apprentice Stone | Those under the sign of the Apprentice recover Magicka faster but are more susceptible to Magicka damage. | 100% Magicka regeneration, 100% weakness to Magicka |
| The Atronach Stone | Those under the sign of the Atronach absorb a portion of incoming spell damage and have a larger pool of Magicka but recover it more slowly. | 50% Spell Absorption, +50 Magicka, Magicka regenerates 50% slower |
| The Lady Stone | Those under the sign of the Lady regenerate Health and Stamina more quickly. | Regenerate health and stamina 25% faster |
| The Lord Stone | Those under the sign of the Lord are more resistant to both Magicka and physical damage. | 50 Armor, 25% Magic Resistance |
| The Lover Stone | Those under the sign of the Lover always feel a Lover’s Comfort (all skills improve faster). | Learn all skills 15% faster |
| The Mage Stone | Those under the sign of the Mage will learn all Magic skills 20% faster. | Learn Mage skills 20% faster |
| The Steed Stone | Those under the sign of the Steed can carry more and do not suffer a movement penalty from armor. | 100 extra carrying capacity; no movement penalty is applied due to armor; equipped armor is weightless |
| The Thief Stone | Those under the sign of the Thief will learn all Stealth skills 20% faster. | Learn Thief skills 20% faster |
| The Warrior Stone | Those under the sign of the Warrior will learn all combat skills 20% faster. | Learn Warrior skills 20% faster |
| Name | Description | Associated Activity |
|---|---|---|
| Blood of the Ancients | Your Vampiric Drain spell absorbs Magicka and Stamina from your victim for several days. | Dawnguard Main Quest: The Bloodstone Chalice, then drink from the Bloodstone Chalice |
| Tainted Blood of the Ancients | Your Vampiric Drain spell absorbs Magicka and Stamina from your victims for 1 day, but at the cost of 30 less health. | Dawnguard Main Quest: The Bloodstone Chalice, drink from the Bloodspring in Redwater Den |
| Dragonslayer’s Blessing | +10% Critical Hit Chance vs. Dragons; lasts 5 days. | Blades (Other Faction) Quest: Dragonslayer’s Blessing |
| Voice of the Sky | Animals will neither attack nor flee from you; lasts 1 day. | Complete the Pilgrimage of the Seven Thousand Steps (Secondary Location [6.x]) |
| Rested | All skills improve 5% faster; lasts 8 hours. | Sleep in any bed |
| Well Rested | All skills improve 10% faster; lasts 8 hours. | Sleep in a bed you own or rent. |
| Vampiric Blood Rested | 10% Resist Magic; lasts 8 hours. | Vampire only; sleep in any coffin |
| Lover’s Comfort | All skills improve 15% faster; lasts 8 hours. | Sleep in the same location as your spouse. |
| Father’s Love | Healing spells and potions add 25% extra health; lasts 8 hours. | Male adventurer. Hearthfire: Adopt a child |
| Mother’s Love | Healing spells and potions add 25% extra health; lasts 8 hours. | Female adventurer. Hearthfire: Adopt a child |
| The Gift of Charity | +10 Speech; lasts 1 hour. | Give a coin to any beggar. |
Diseases
Catching a Disease: Dirty Vermin!
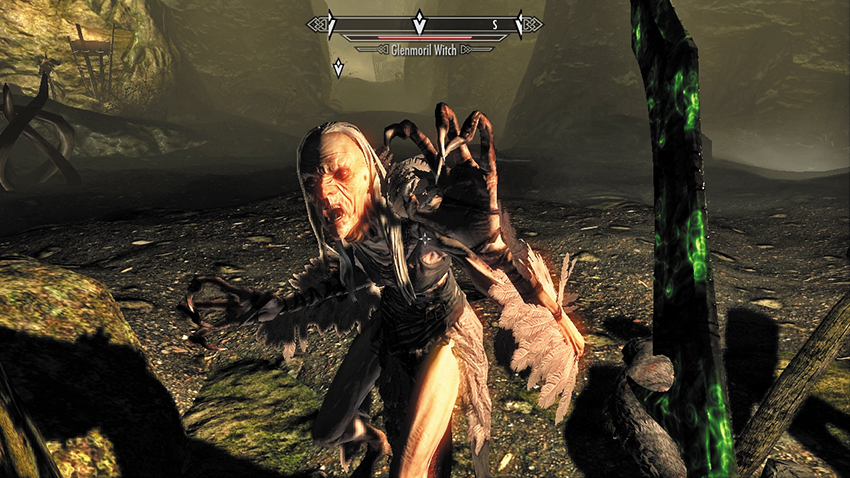
Clawed by a Hagraven? Then you may have Brain Rot!
Adventuring is dangerous, especially when battling diseased foes. Every time one of these enemies strikes you, there is a chance that you may contract the disease they carry. If you have a resistance to disease (thanks to your race or equipment), this chance is lessened, but under most circumstances, the chance of catching something is around 5% to 10% per wound you suffer. The following table lists the possible diseases, their effects, and how you can contract them.
| Name | Effect | Contracted From |
|---|---|---|
| Ataxia | Lockpicking & Pickpocket 25% harder | Traps, Skeevers |
| Bone Break Fever | -25 Stamina | Traps, Bears |
| Brain Rot | -25 Magicka | Traps, Hagravens |
| Droops | 15% less effective with melee weapons. | Ash Hoppers |
| Rattles | Stamina recovers 50% slower | Traps, Chaurus |
| Rockjoint | 25% less effective with melee weapons | Traps, wolves, foxes |
| Sanguinare Vampiris | -25 Health, progresses to vampirism | Vampires |
| Witbane | Magicka recovers 50% slower | Traps, Sabre Cats |
Curing a Disease: By Potion
Drinking a Cure Disease potion is the fastest and easiest way to rid yourself of pox. You can buy these potions in many shops, find them in the wild, or make them yourself.
Curing Disease: The Shrines of Skyrim
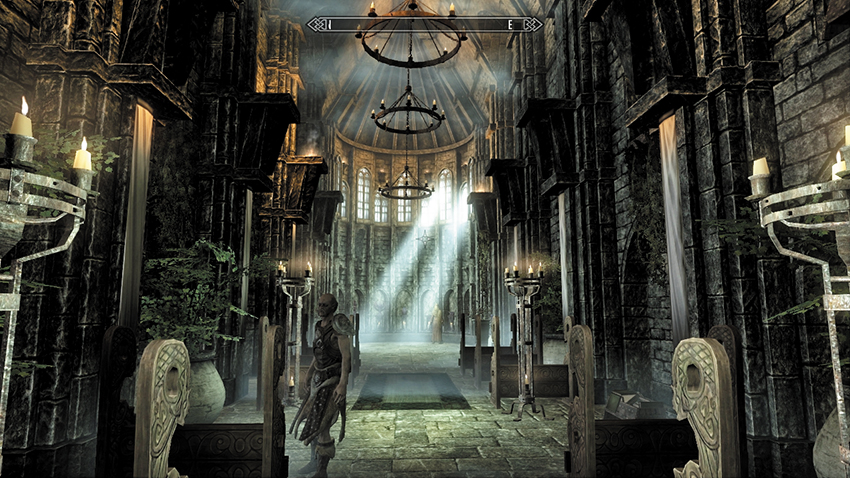
The Temple of the Eight Divines in Solitude. Only Talos—outlawed by the Thalmor—is not worshiped here.
Most people in Skyrim follow the religion of the Divines. Shrines to the Divines can be found throughout the land: in cities, in settlements, and in the wilderness. Their locations are detailed throughout the Atlas. Praying at a Shrine cures any diseases you may have and confers a unique blessing that lasts eight hours. Only one blessing can be active at a time; praying at a different Shrine will remove any prior blessings.
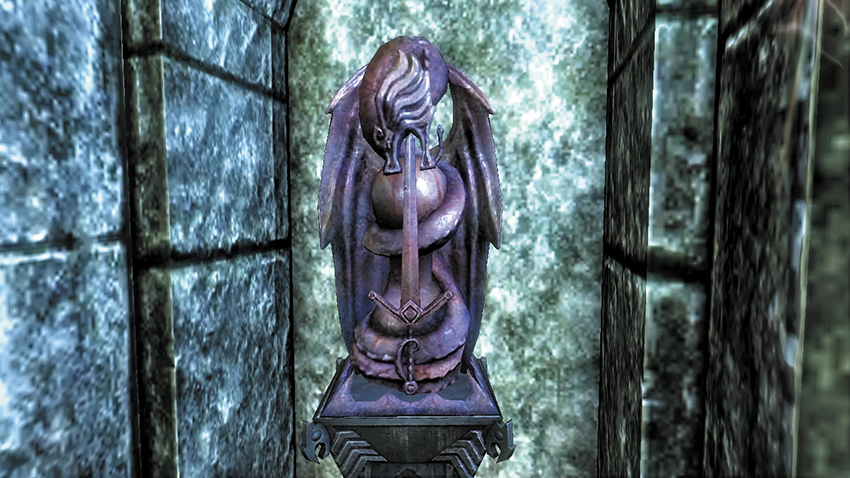
Akatosh: Cure all diseases, +10% Magicka Regeneration Rate
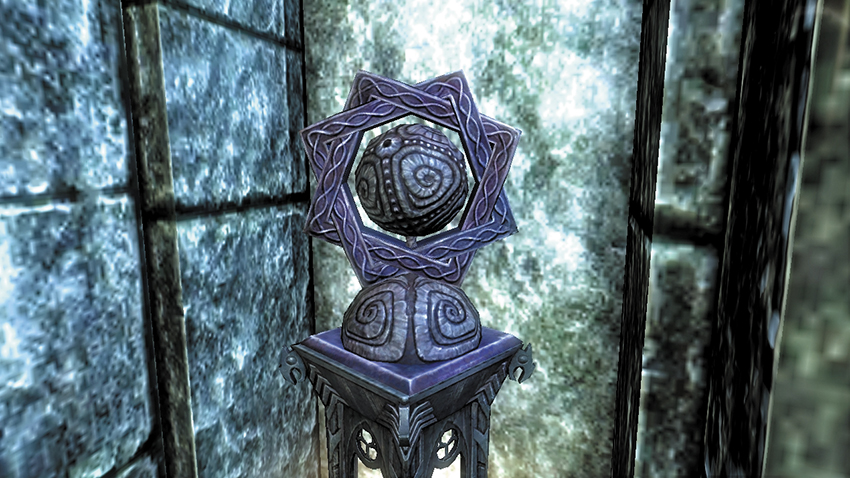
Arkay: Cure all diseases, +25 Health
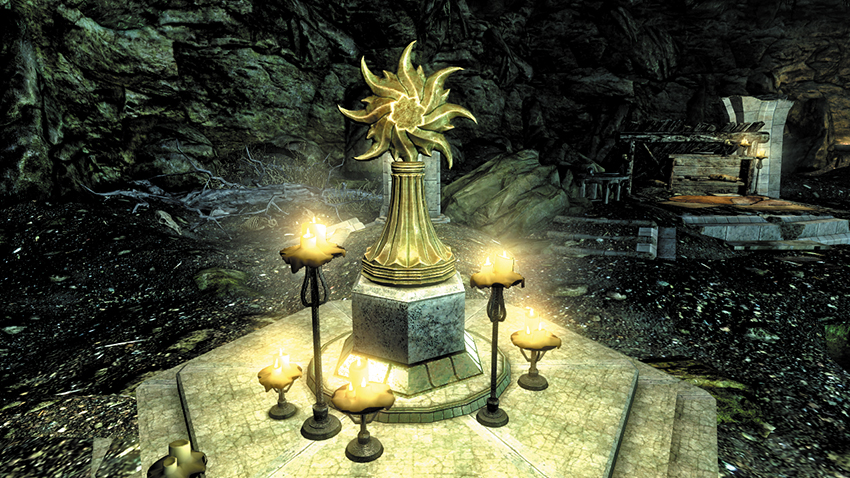
Auriel: Cure all diseases, +10 Archery
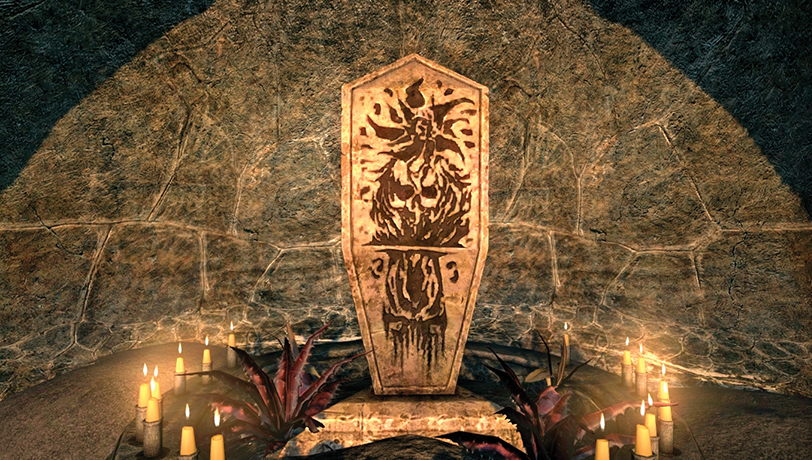
Azura: Cure all diseases, +10 Magic Resistance
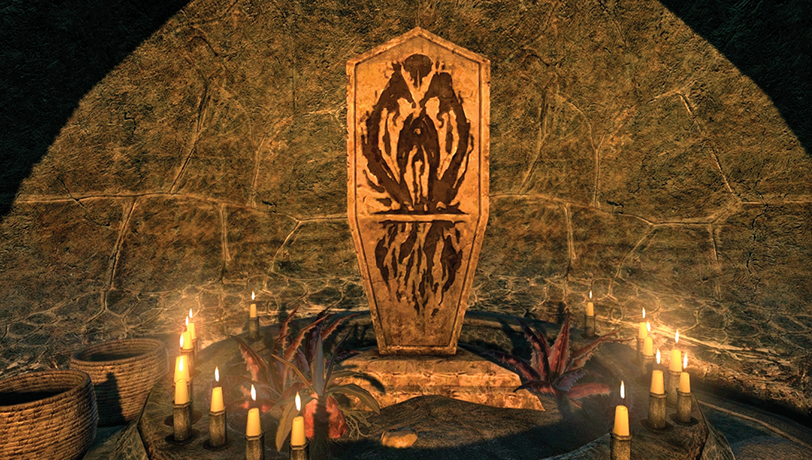
Boethiah: Cure all diseases, +10 One-Handed damage
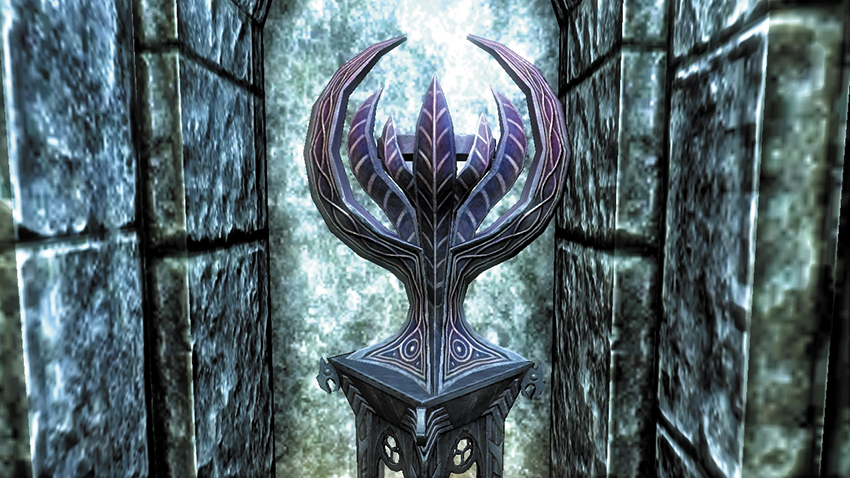
Dibella: Cure all diseases, +10 Speechcraft
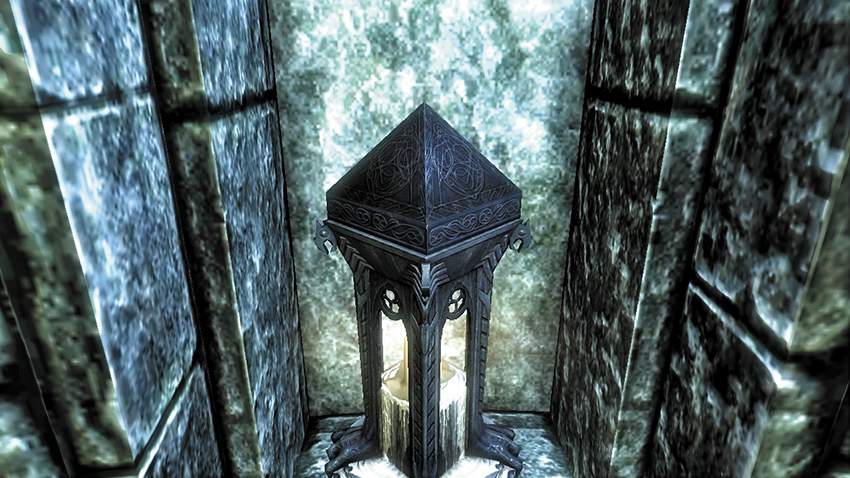
Julianos: Cure all diseases, +25 Magicka
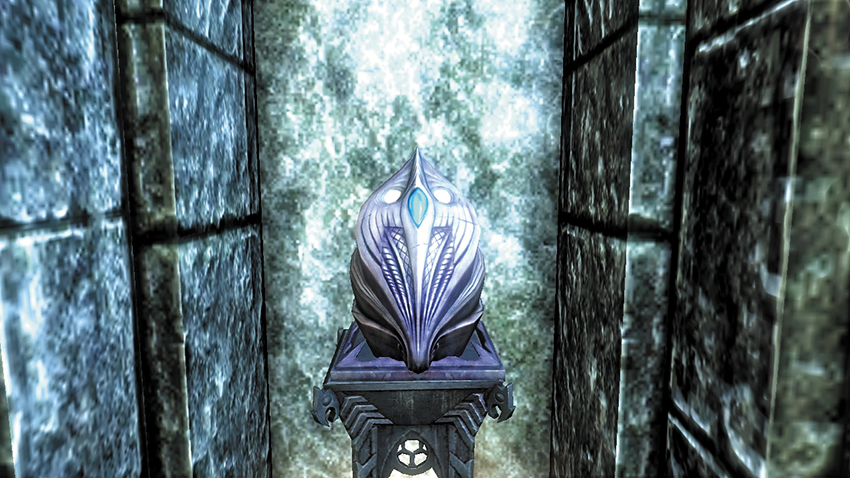
Kynareth: Cure all diseases, +25 Stamina
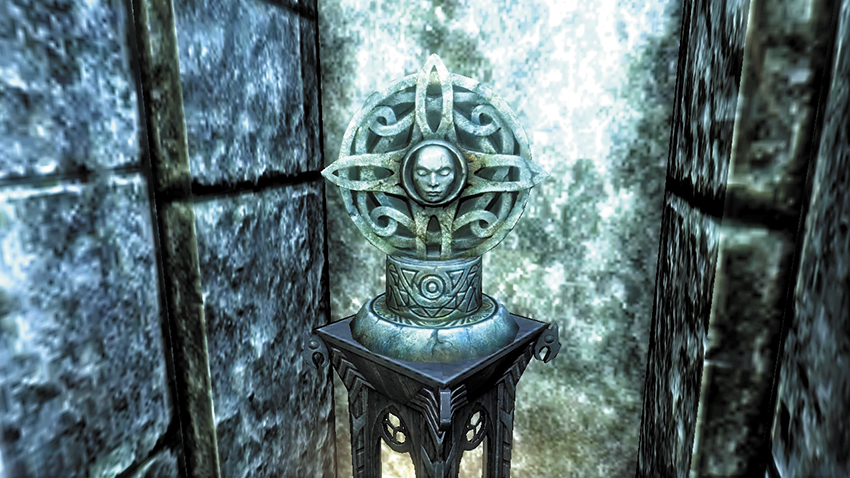
Mara: Cure all diseases, +10% healing effects
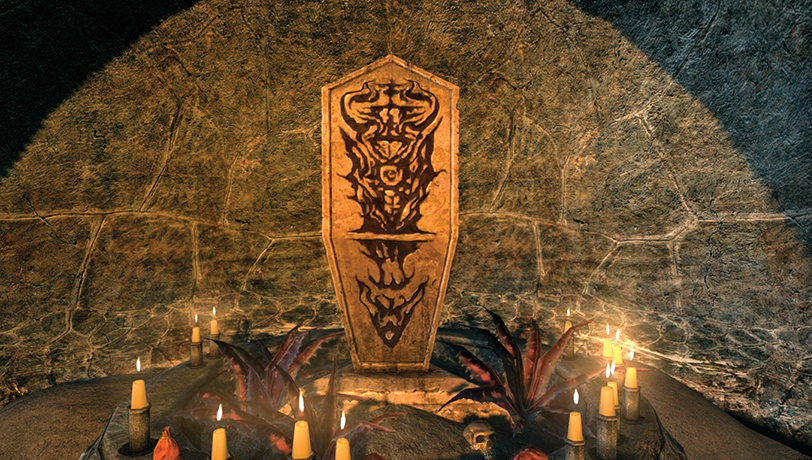
Mephala: Cure all diseases, +10 Better Prices (Bartering)
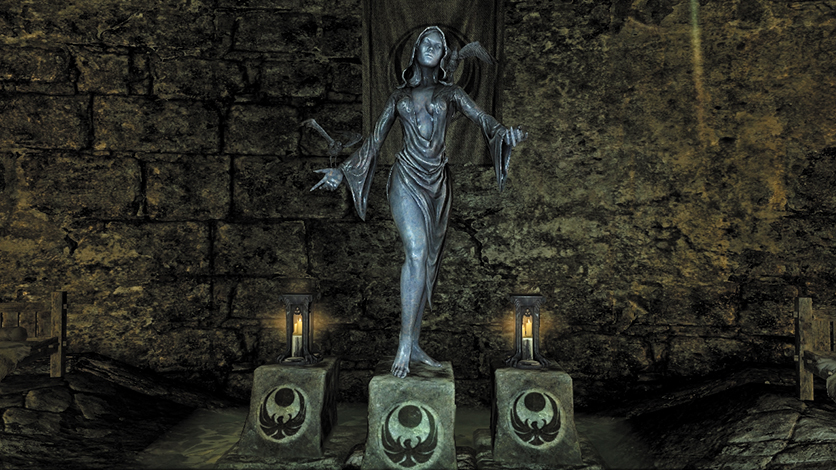
Nocturnal: Cure all diseases, +10 Sneak
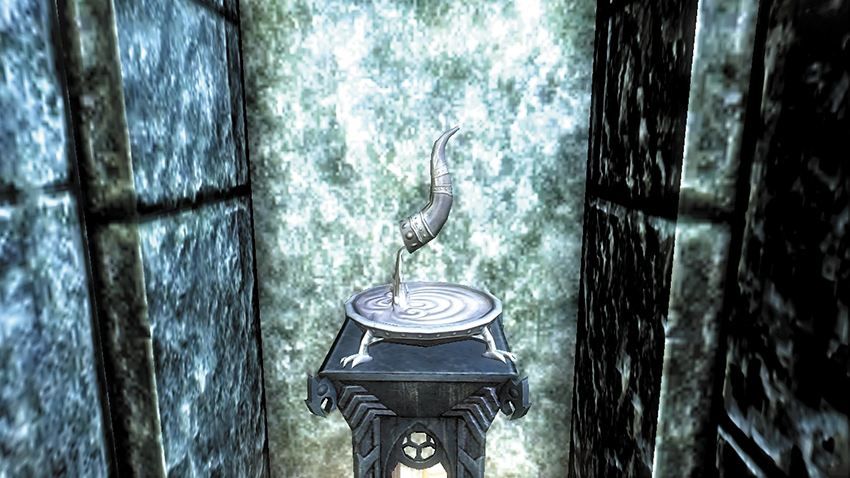
Stendarr: Cure all diseases, +10% blocking effectiveness
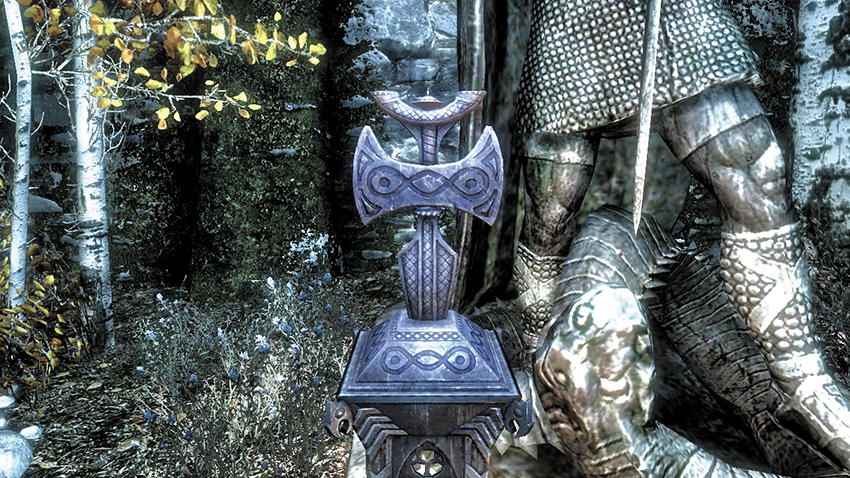
Talos: Cure all diseases, +20% Shout recovery
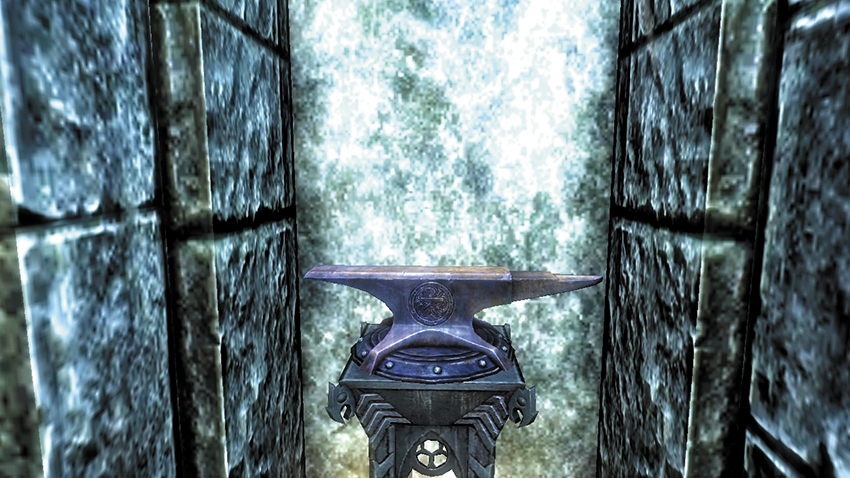
Zenithar: Cure all diseases, 10% better prices (bartering)
Curing Disease: Additional Shrines of Skyrim
You can also receive blessings at two rare shrines if you know where to look:
- Shrine to Auriel: There are only two of these shrines believed to exist in the whole of Skyrim. One is found at the great Chantry of Auri-el, a Snow Elf Sanctuary within Darkfall Cave. The other is in the Inner Sanctum, at the pinnacle of the Forgotten Vale. Check the Atlas for exact location information.
- Shrine to Nocturnal: This is an effigy of Nocturnal herself, found in the Ragged Flagon Cistern area once you complete Thieves Guild Quest: Darkness Returns.
Curing Disease: Shrines of Solstheim
If you visit the dusty realm of southern Solstheim and dock at Raven Rock, you can inspect and enter the town’s temple. Inside are shrines to Daedric entities worshipped by the Dunmer: Azura, Boethiah, and Mephala. Check the Atlas for exact location information.
Curing Disease: Other Means
The Vigilants of Stendarr are a relatively new religious order. Zealous followers of the god of justice and mercy, they seek to wipe out abominations like vampires and werewolves and to purge the land of Daedra worship. If you encounter them in one of their strongholds (like the Hall of the Vigilant [3.09] or Stendarr’s Beacon [9.46]), or elsewhere in the wilderness, you can ask them to cure your diseases.
Vampirism
Contracting Vampirism
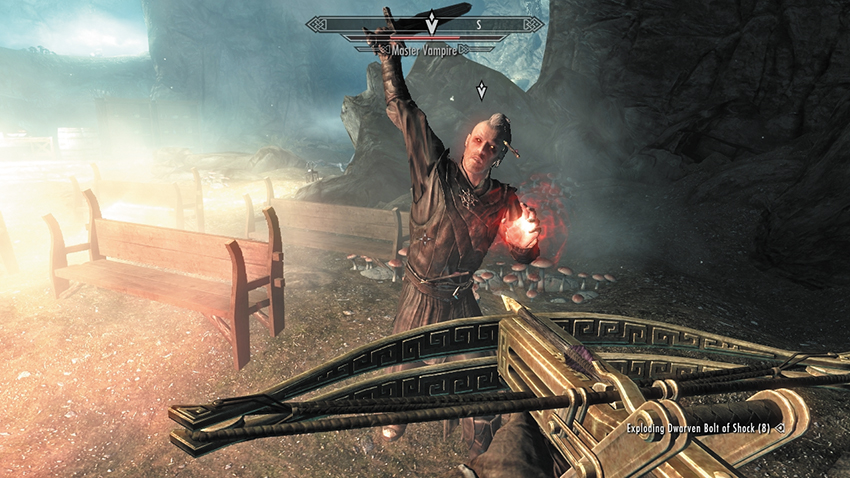
A Vampire, attacking with Drain Life. Note the distinct complexion and garb.
Facing those who feed on the blood of the living presents several perils. In addition to their terrifying visage, zombified thralls, and skill at both melee and magical combat, vampires have a unique Drain Life ability. This can rapidly sap your health while restoring theirs each time it strikes you, and it gives you a 10 percent chance of contracting Sanguinare Vampiris, a disease that will eventually cause you to join their ranks.
After any battle with vampires, check your Active Effects list. If you see Sanguinare Vampiris, quickly drink a Cure Disease potion or make haste to a shrine for healing. As the disease runs its course, you’ll receive a message at twilight that reads, “You feel a strange thirst as the sun sets,” and you’ll receive a second notification the following dawn that says, “You feel weaker as the sun rises.” After three days of this, the disease takes over completely, and you transform into a vampire!
Remember that being infected by a “regular” vampire leads only to normal Vampirism. To become a Vampire Lord, you must be bitten by Lord Harkon or a member of his bloodline (see below).
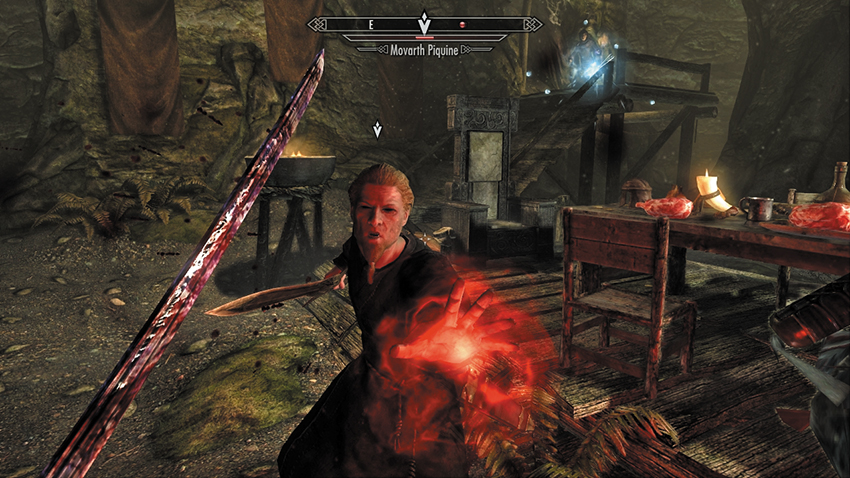
Wanting to give yourself over to this disease? Then seek out a Vampire habitat, such as Movarth’s Lair, in Hjaalmarch Hold.
Stages of Vampirism
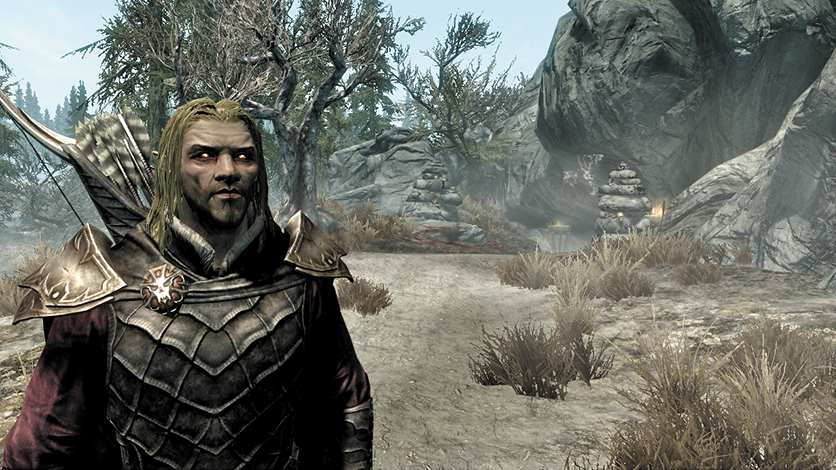
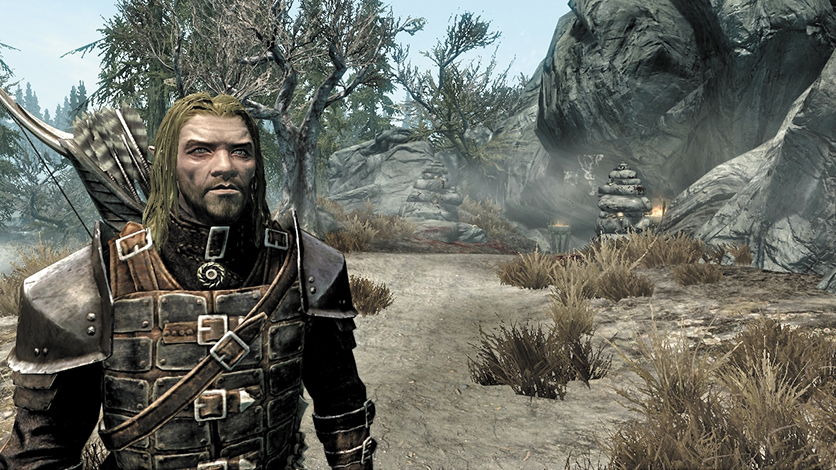
Becoming a vampire (before and after) changes your appearance dramatically.
As a vampire, you must feed on human blood! Vampirism has four distinct stages, based on how long it has been since you last fed. The more time has elapsed, the more severe the advantages and disadvantages of this condition become. To survive as a vampire, you should know exactly what these benefits and drawbacks are.
Advantages
- Immune to disease: You are completely immune to disease. Any diseases you had upon becoming a vampire are instantly cured.
- Immune to poison: You are completely immune to all forms of poison.
- Champion of the Night: Illusion spells that you cast are 25 percent more powerful.
- Nightstalker’s Footsteps: You are 25 percent harder to detect while Sneaking.
- Resist Frost: The stage of your vampirism adds to your Frost Resistance:
- Stage 1 vampirism: Resist Frost 20%
- Stage 2 vampirism: Resist Frost 30%
- Stage 3 vampirism: Resist Frost 40%
- Stage 4 vampirism: Resist Frost 50%
Disadvantages
Hatred: Citizens of Skyrim and guards will not recognize you as a vampire but may (25 percent of the time) remark that you’re looking distinctly “pale” or “hungry.” However, even when vampirism has fully consumed you, they will not attack you on sight.Weakness to Sunlight: When outdoors between the hours of 5:00 a.m. and 7:00 p.m., your Health, Magicka, and Stamina will not regenerate. Their maximum values are also reduced:
- Stage 1 vampirism: Health, Magicka, and Stamina are reduced by 15 points.
- Stage 2 vampirism: Health, Magicka, and Stamina are reduced by 30 points.
- Stage 3 vampirism: Health, Magicka, and Stamina are reduced by 45 points.
- Stage 4 vampirism: Health, Magicka, and Stamina are reduced by 60 points.
Weakness to Fire: The stage of your vampirism also gives you a Weakness to Fire:
- Stage 1 vampirism: Weakness to Fire 20%
- Stage 2 vampirism: Weakness to Fire 30%
- Stage 3 vampirism: Weakness to Fire 40%
- Stage 4 vampirism: Weakness to Fire 50%
Powers
As your vampirism progresses, you gain an increasingly powerful set of additional abilities.
Stage 1 Vampirism
- Vampire’s Sight: For one minute, you can see better in dark environments. Use this power as often as you like. It has no cost.
- Vampiric Drain: A special Destruction spell, Vampiric Drain absorbs 2 Health per second from your target.
- Vampire’s Servant: Once per day, you can reanimate a dead creature to fight for you for 60 seconds. Only works on creatures of Level 6 or less.
Stage 2 Vampirism
All powers from Stage 1, plus:
- Vampire’s Seduction: Creatures and people up to Level 10 won’t fight or flee for 30 seconds.
- Vampiric Drain: Increases to 3 Health drained per second.
- Vampire’s Servant: Now affects creatures of Level 13 or lower.
Stage 3 Vampirism
All powers from Stages 1 and 2, plus:
- Vampiric Drain: Increases to 4 Health drained per second.
- Vampire’s Servant: Now affects creatures of Level 21 or lower.
Stage 4 Vampirism
All powers from Stages 1, 2, and 3, plus:
- Embrace of Shadows: Once per day, you can invoke this power to gain Vampire’s Sight and Invisibility for 3 minutes.
- Vampiric Drain: Increases to 5 Health drained per second.
- Vampire’s Servant: Now affects creatures of Level 30 or lower.
Un-Living as a Vampire
Maintaining Vampirism: Resting
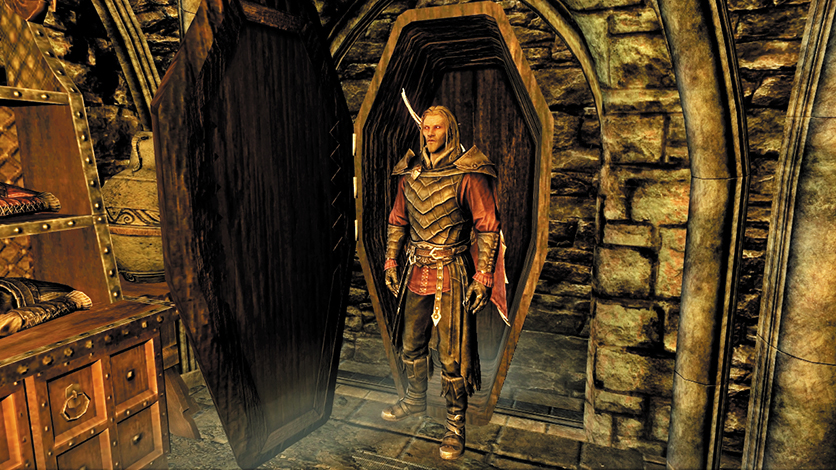
Tomb, sweet tomb: Gain an additional benefit from sleeping in a coffin.
All vampires may use coffins to sleep in. There are benefits for sealing yourself away in a wooden tomb:
- Sleeping in a coffin grants you all your usual resting bonuses.
- You receive the Vampiric Blood bonus: This grants you 10 percent Magic Resistance for 12 hours.
Vampires can also sleep in a bed as most humans do, and they receive the usual resting bonuses. However, the Vampiric Blood bonus will not be given. If you aren’t a vampire but want to see what the inside of a coffin looks like, you can sleep in one but you only receive the usual resting bonuses.
Maintaining Vampirism: Feeding
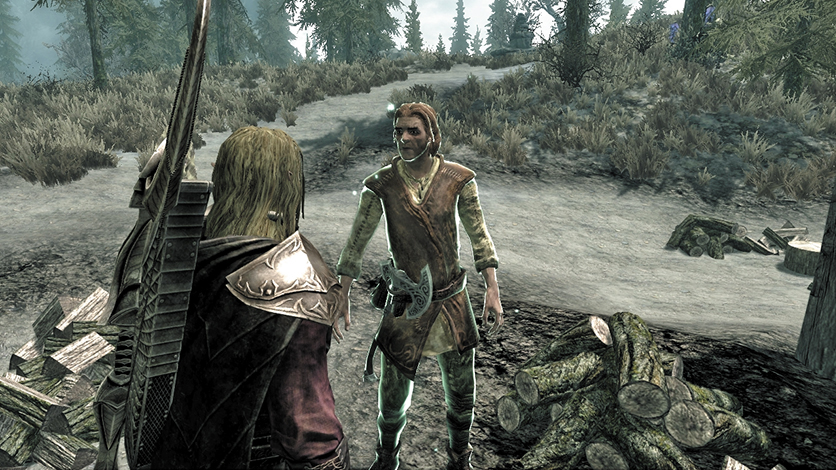
Feed your insatiable appetite using Vampire’s Seduction.
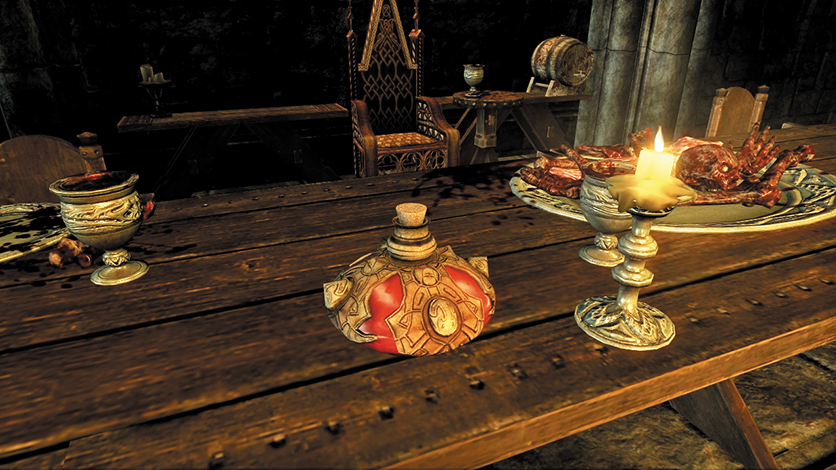
Locate these ornate potions of blood as a bottled alternative to fresh blood.
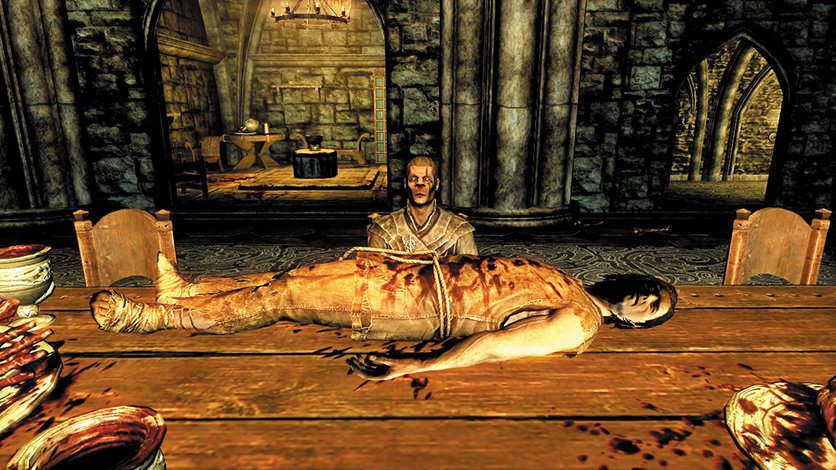
The Vampire’s “Cattle” of Castle Volkihar are here to serve you and your thirst.
As a vampire, you can stave off the disadvantages of your new form by feeding. Feasting on the blood of the living can be tricky. There are four basic approaches:
- Sleeping Victims: Find a sleeping human (citizens and guards tend to be the easiest, though a sleeping soldier, bandit, or warlock will work as well); then activate them to feed on their blood. Doing so reverts your disease back to Stage 1.
- Vampire’s Seduction: If you succeed in using this power on a person, you can feed on them even if they’re awake. This tactic works well on civilians, as all but the weakest foes are too high a level for Vampire’s Seduction to affect them.
- Blood Potion: As an alternative to feeding, you can also drink a Blood Potion, which has the same effect. Alas, these are rare; only a handful can be found in Castle Volkihar, although you may receive a few more as rewards for the Vampire Radiant Quests. They can’t be Crafted.
- Vampire Cattle: If you join with the vampires of Castle Volkihar, one of the benefits is a supply of “cattle,” thralls kept in squalid conditions and brought out during feasting sessions. You can sate your hunger on them whenever you wish, without fear or shunning.
Feeding Is Frowned Upon: Criminality
It is important to know how the guards of each Hold are likely to treat you if you’re caught feeding. In general, the following applies:
- If you feed on a citizen or guard and the victim detects you, this is seen as a Crime (Bounty +40).
- If you feed on a citizen or guard and someone else (who isn’t a friend or ally) detects you, the same Bounty accrues.
There are some exceptions, however:
- If your Sneak skill is high enough, you may not be detected.
- If your victim is under the influence of Vampire’s Seduction, they won’t consider your teeth and slobbering a crime. However, if someone else (not a friend or ally) sees you, the Bounty increase occurs.
- If you’re feeding on the Vampire Cattle in Castle Volkihar, they won’t object to your bloodthirsty appetite.
Life as a Vampire

The life of a vampire is far less arduous if the lands are plunged into permanent darkness....
Aside from the panic and hostility you may create during bouts of bloodletting hunger, the main problems you encounter are your weaknesses to sunlight and fire. Minimize these risks by exploring subterranean catacombs and dungeons during the daytime, and prowl the countryside at night. You may also want to draw on the power of the Lady Stone (see Standing Stones), which helps to offset the lack of normal Health or Stamina regeneration during daylight.
However, once you’ve completed the Dawnguard Main Quest and are able to notch a Bloodcursed Arrow to Auriel’s Bow and fire it into the sun, you can create a perpetual darkness across Skyrim, effectively negating the ill effects of daylight entirely!
As a vampire, you receive several bonuses that improve your stealth abilities, making vampirism a blessing for Thieves, Archers, and Assassins. You will also find it significantly easier to explore Falmer Hives (since you’re immune to the poisons that they, their Chaurus, and their spiders use), Nordic Ruins (since the Draugr use Frost Magic almost exclusively), and Vampire Lairs (since you no longer need fear contracting the disease). You also have a dramatic advantage when fighting frost-breathing dragons, though you have a corresponding weakness to fire-breathing dragons. Keep some potions of Fire Resistance on hand, just in case!
Princes Among the Undead: Volkihar Vampires
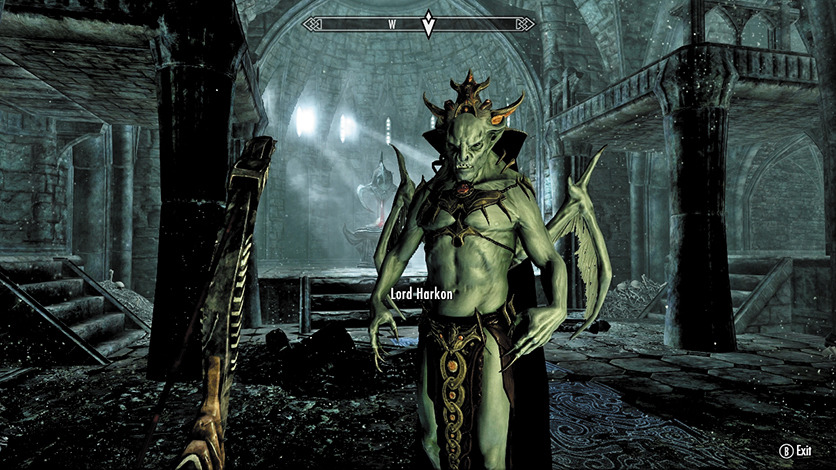
A Volkihar Vampire Lord, in all his powerful glory.
Lord Harkon is the progenitor of the Volkihar Vampire bloodline. If, during the course of the Dawnguard Main Quest, you agree to accept his “gift,” his bite imbues you with an incredible and terrifying new aspect: In addition to all the standard effects of vampirism, Volkihar Vampires can assume the powerful Vampire Lord Form.
Becoming a Volkihar Vampire
During Dawnguard Main Quest: Bloodline, you’ll enter Castle Volkihar for the first time and gain an audience with Lord Harkon. A conversation with the vampire king ends with Harkon offering you the power of vampirism. Accept, and you ally yourself with the vampires and become a Volkihar Vampire. This is the usual way to achieve this transformation for the first time.
If you were already a werewolf, Harkon’s gift purges you of Lycanthropy. If you desire to become a werewolf again, speak with Aela the Huntress of the Companions, and consult the Werewolf section later in this chapter.
Lord Harkon’s daughter, Serana, can also turn you into a Volkihar Vampire under certain conditions. This is helpful if you side with the Dawnguard but later want to rule the night as a Volkihar nightstalker!
During Dawnguard Main Quest: Chasing Echoes, if you aren’t a vampire, Serana offers to turn you into a Volkihar Vampire so you’re able to enter the Soul Cairn without suffering any ill effects. This is one more way to transform.
After you complete Dawnguard Main Quest: Kindred Judgment, Serana will turn you into a Volkihar Vampire if you request it, provided you haven’t ordered Serana to cure herself of vampirism.
You can be cured of this strain of vampirism, too. If you crave it again, speak to Harkon or Serana to restore your Volkihar Vampire powers.
Vampire Lord Form
Overview

Fear strikes Falkreath Hold as a Vampire Lord flits silently across the still water of Lake Ilinalta....
Becoming a floating, eight-foot demonic vampire with incredible powers is certainly helpful when dealing with enemies, but it has its drawbacks—for example, you won’t be bartering at shops. But there are some important elements to this form you must be aware of:
- Remember that “base” vampires don’t have the correct bloodline to call upon the power of the Vampire Lord Form, so don’t expect to become a Lord if you’ve been infected by them. You must become a Volkihar Vampire in order to use this ability.
- The Vampire Lord Form is a transformation state, much like the Beast Form for Werewolves. You access it in the Magic menu by selecting Magic > Powers > Vampire Lord. It’s a good idea to make this a Favorite so you can quickly call upon it in the midst of combat. You continue to exist in your Vampire Lord form for as long as you wish (unlike Beast Form). To transform back, access your Favorites menu, select “Revert Form,” and invoke it.
You are fortunate that, upon returning to your regular form, all the weapons, armor, spells, and powers you’ve equipped are automatically reinstated.
Vampire Lord: Advantages
Your imposing posture and terrifying form are the least of your advantages as a Volkihar Vampire. When in Vampire Lord Form:
- You retain all of the advantages associated with being a vampire (including the immunity to poison and disease and a resistance to frost).
- You gain a Water Walking ability, enabling you to walk (or float) across the surface of any body of water. You’re unable to swim while in this form.
- Finally, you receive an impressive number of enhancements to your statistics, based on your level:
| Level | Attack Bonus | Health Bonus | Magicka Bonus | Stamina Bonus | Armor Bonus |
|---|---|---|---|---|---|
| Level 10 or below | 0 | 50 | 40 | 0 | 100 |
| Levels 11–15 | 5 | 75 | 60 | 10 | 125 |
| Levels 16–20 | 10 | 100 | 80 | 20 | 150 |
| Levels 21–25 | 15 | 125 | 100 | 30 | 175 |
| Levels 26–30 | 20 | 150 | 120 | 40 | 200 |
| Levels 31–35 | 25 | 175 | 140 | 50 | 225 |
| Levels 36–40 | 30 | 200 | 160 | 60 | 250 |
| Levels 41–45 | 35 | 225 | 180 | 80 | 275 |
| Level 45 and up | 40 | 250 | 200 | 100 | 300 |
Vampire Lord: Disadvantages
Your gangly frame and penchant for striking fear into the hearts of citizens across Skyrim can also be a hindrance. Here are the key problems associated with this form:
- You retain all of the disadvantages of being a “base” vampire (including weaknesses to fire and sunlight).
- You can’t loot any corpses you slay.
- You can’t pick up or use any items you find. Since this includes keys, you may find your progress blocked in some dungeons.
- You can’t equip or use any of your normal weapons, spells, items, equipment, Shouts, or powers.
- Your towering frame may have trouble fitting through some narrow passages and doors.
- You can’t speak with anyone, even your own vampire brethren.
- Citizens of Skyrim are terrified of you; some of them flee, while the battle-hardened, brave, or foolish may stand their ground and attack you.
- If anyone sees you transform to or from a Volkihar Vampire, the transformation is considered a Major Crime. Consult the Crime and Punishment section.
Vampire Lord: Powers
While in Vampire Lord Form, you have a variety of powers at your disposal. Most give you an advantage in combat and are divided into the following categories:
Abilities
These are general or basic movement options and strikes:
- Revert Form: This allows you to change back to your human form.
- Ascend and Descend: Press Sneak to switch between ground and hovering states. While on the ground, you can attack with powerful claws and bite attacks. When hovering, you can invoke Blood Magic spells (such as Drain Life). You can use Night Powers in either form.
- Melee Attacks: When standing on the ground, you can rend the flesh of your foes with powerful claw attacks. Inflict a killing blow on your enemy with a power attack, and you perform a bite that devours them, snuffing out their life and draining their lifeblood.
- Blood Magic: Your left and right hands, when hovering, allow you to cast Blood Magic spells.
- You have innate knowledge of two Blood Magic spells: Drain Life and Raise Dead.
- Additional Blood Magic spells can be unlocked by selecting Vampire Lord Perks (see below).
- Drain Life is always equipped in your right hand and doesn’t change. You can, however, choose any Blood Magic Spell to equip in your left hand (via the Favorites menu).
- Night Powers: These special states are available no matter your combat state:
- You have innate knowledge of two Night Powers: Bats and Vampire’s Sight.
- Additional Night Powers can be unlocked by selecting Vampire Lord Perks (see below).
- You can change the Night Power you are using through the Favorites menu.
Blood Magic: Drain Life
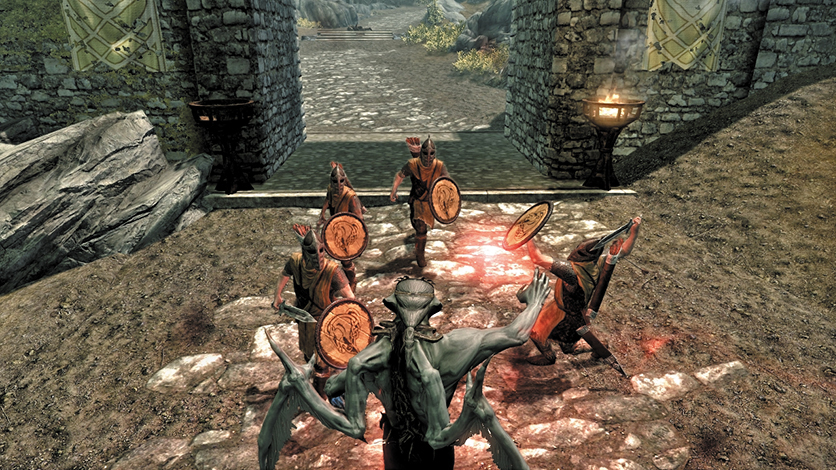
Suck the very life force from your foes to replenish your own.
Volkihar Vampires are particularly adept at draining the life essence from their foes; their Drain Life is significantly more powerful than the spell a “base” vampire uses. It has additional benefits too:
- It automatically increases in strength based on your level.
- Instead of a close-range concentration spell, it is now a long-range projectile spell that affects all targets near the point of impact.
- It now affects undead. Only Daedra and Dwarven Automatons are immune to it.
- You can empower it even further by drinking from the Bloodstone Chalice, an artifact you fill during the Dawnguard Main Quest of the same name. This effect, Blood of the Ancients, wears off after a few days. The following table details how powerful Drain Life can become:
| Drain Life Progression | Drain Life | Drain Life w/ Blood of the Ancients | Magicka Cost |
|---|---|---|---|
| Level 10 or below | Inflicts 50 Damage and absorbs 15 Health from all targets in range. | Also absorbs 15 Magicka and Stamina. | 18 |
| Levels 11–20 | Inflicts 70 Damage and absorbs 17.5 Health from all targets in range. | Also absorbs 17.5 Magicka and Stamina. | 18 |
| Levels 21–30 | Inflicts 90 Damage and absorbs 20 Health from all targets in range. | Also absorbs 20 Magicka and Stamina. | 18 |
| Levels 31–40 | Inflicts 120 Damage and absorbs 22.5 Health from all targets in range. | Also absorbs 22.5 Magicka and Stamina. | 18 |
| Level 41 and up | Inflicts 150 Damage and absorbs 25 Health from all targets in range. | Also absorbs 25 Magicka and Stamina. | 18 |
Blood Magic: Raise Dead

The recently slain rise again to serve you!
Reanimating the corpses of the recently slain to act as your guard is a powerful spell, one you should employ to turn the tide of combat in your favor. Unlike a base vampire, the power of your Raise Dead spell depends on your level, not how recently you have fed or how powerful the spell is in your regular form. The following table details how powerful Raise Dead can become:
| Raise Dead Progression | Raise Dead | Magicka Cost |
|---|---|---|
| Level 10 or below | Reanimates a dead body to fight for you. Works on targets up to Level 8. | 50 |
| Levels 11–20 | Reanimates a dead body to fight for you. Works on targets up to Level 16. | 50 |
| Levels 21–30 | Reanimates a dead body to fight for you. Works on targets up to Level 24. | 50 |
| Levels 31–40 | Reanimates a dead body to fight for you. Works on targets up to Level 30. | 50 |
| Level 41 and up | Reanimates a dead body to fight for you. Works on targets up to Level 36. | 50 |
Blood Magic: Other Spells
Summon gargoyles to tear foes asunder with terrible punishment.
If giving the dead life to do your bidding isn’t your main method of foe disposal, you can also learn the following Blood Magic spells by obtaining perks (see below). These take the place of the Raise Dead spell in your left hand, although you can switch between them at any time. The following table lists all of the Blood Magic spells you can learn:
| Blood Magic Spell | Prerequisites | Description | Magicka Cost |
|---|---|---|---|
| Vampiric Grip | Vampiric Grip Perk | Pulls a living creature toward you, then chokes them, absorbing 5 Health/second. Once released, your target is sent flying. | 65 per second |
| Summon Gargoyle | Summon Gargoyle Perk | Summons a gargoyle for 60 seconds. | 50 |
| Improved Summon Gargoyle | Summon Gargoyle Perk, Amulet of the Gargoyle Item | Summons two gargoyles. One lasts for 60 seconds, the other for 30 seconds. | 50 |
| Corpse Curse | Corpse Curse Perk | Paralyzes a living creature. | 100 |
Night Powers
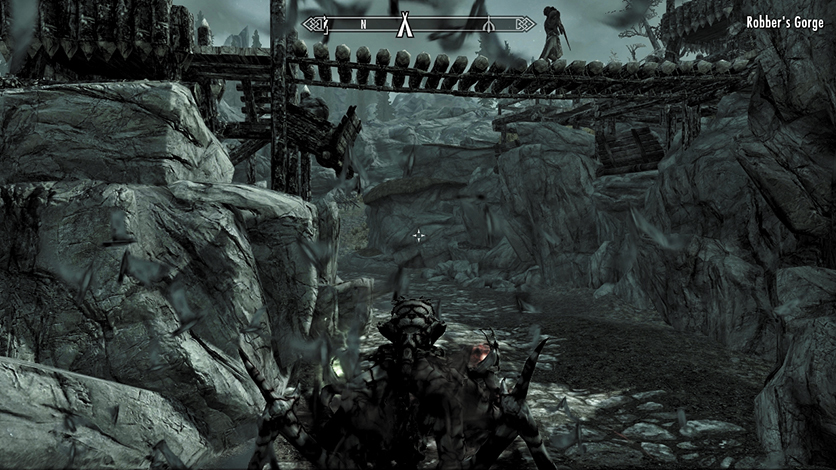
Night Powers such as Bats are helpful when the tide of combat turns against you.
As if your astonishing array of abilities wasn’t enough, you also have a number of Night Powers you can use in a more defensive posture during combat and switch between at any time. You begin with the Bats and Vampire’s Sight Powers and can learn the rest as perks. The following table reveals all of the Night Powers you can acquire.
| Night Power | Prerequisites | Use Limit | Description |
|---|---|---|---|
| Bats | None | Up to twice per 30 seconds. | You transform into a swarm of bats that surges forward, then re-forms at your destination. |
| Improved Bats | Amulet of Bats Item | Up to twice per 30 seconds. | Your swarm of bats absorbs 15 Health/second from nearby enemies. |
| Vampire’s Sight | None | None | Nighteye for 60 seconds. |
| Detect All Creatures | Detect All Creatures Perk | None | Sends out a brief pulse that reveals all creatures for two seconds. This affects all creatures, including the living, undead, Daedra, and automatons. |
| Mist Form | Mist Form Perk | 60-second cooldown | You transform into a cloud of mist. For 15 seconds, you are invulnerable and unable to attack or be attacked. During this time, your Health, Magicka, and Stamina regenerate rapidly. |
| Supernatural Reflexes | Supernatural Reflexes Perk | 60-second cooldown | Slows time for 10 seconds. |
| Night Cloak | Night Cloak Perk | Continuous | While in Vampire Lord Form, you are surrounded by a cloud of bats that absorb 4 Health/second from all nearby enemies. This power is always active. |
Vampire Lord Perks: The Path of Undeath
- Constellation: Path of the Volkihar
- Available Perks: 11
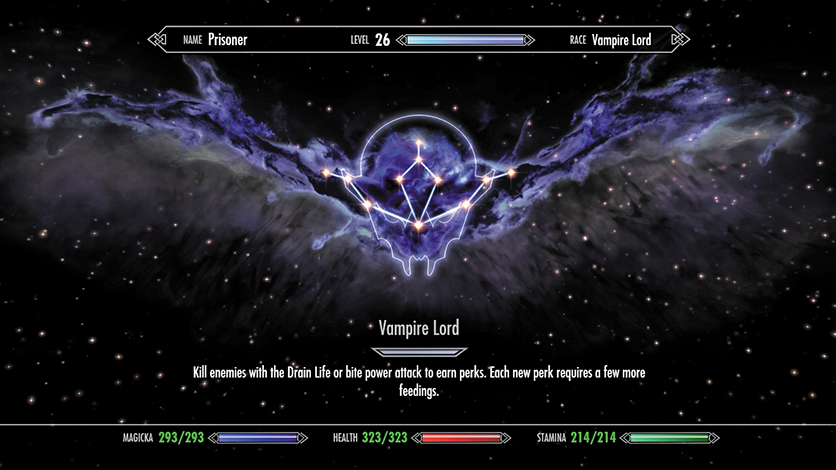
When Lord Harkon instructs you in the use of your new Vampire Lord Form, he mentions that as you drain the lifeblood from your foes, your power as a Vampire Lord will grow. He is correct in this assessment: While in Vampire Lord Form, press your Character Menu button to access the Vampire Lord Perk Constellation (shown above).
Acquiring Vampire Lord Perks
Unlike the Skill Perks you normally gain through leveling up, Vampire Lord Perks are awarded based on draining the life from your foes: Every time you slay an enemy with your Drain Life spell or Bite power attack, you progress one step toward your next perk point. There are 11 Vampire Lord Perks you can obtain, and each requires progressively more kills:
| Perk | Lives Drained |
|---|---|
| 1 | 5 |
| 2 | 7 |
| 3 | 9 |
| 4 | 11 |
| 5 | 13 |
| 6 | 15 |
| 7 | 17 |
| 8 | 19 |
| 9 | 21 |
| 10 | 23 |
| 11 | 25 |
So, in order to acquire all of the Vampire Lord Perks, you must defeat 165 foes in the manner previously described. Most Vampire Lord Perks give you new Blood Magic or Night Power abilities, increasing the power and versatility of your Vampire Lord Form. The following sections detail all of the perks.
1. Power of the Grave
- 50 point bonus to Health, Magicka, and Stamina as a Vampire Lord.
You must select this perk to unlock any of the others, so it is a given that you receive this. It makes you much more hardy in combat, as you’re able to last longer and absorb more punishment before fleeing or calling upon your Night Powers.
2. Detect All Creatures
- Night Power: Detect all creatures, even Dwarven Automatons
- Requires: Power of the Grave
As adventuring in enclosed spaces can sometimes be tricky, this forewarns you of foes. Note that you can quickly change into this form, detect foes, and switch back to a regular shape and deal with enemies in a more stealthy manner if you wish.
3. Mist Form ★
- Night Power: Transform into an invulnerable mist, while Health, Magicka and Stamina regenerate.
- Requires: Detect All Creatures
Mist Form gives you a way out of almost any dangerous situation. You can use this power at any time, even (and especially) if you find yourself out of Magicka. This effectively gives you double the amount of time to thwart your foes, with an invulnerable period of regeneration in the middle!
4. Supernatural Reflexes
- Night Power: Everything slows down while you move faster.
- Requires: Mist Form
This is useful if you wish to quickly move away from a battle or slow time while you bombard an enemy with Drain Life, or if you need to (for example) catch a dragon on the ground and bombard it with attacks before it takes off again. Beware the one-minute cooldown afterward, though.
5. Blood Healing
- Killing a person with a power attack bite restores all your health.
- Requires: Power of the Grave
Aside from being delicious, this perk enables you to effectively use enemies as health potions while increasing the usefulness of your bite attack. Be sure you time your bite attack to finish off a foe, so judge their heath accordingly before you drop in for a bite.
6. Unearthly Will
- Night Powers and Blood Magic cost 33 percent less
- Requires: Power of the Grave
With Magicka costing one-third less than previously, you can combine this with other bonuses (such as the Blood of the Ancients) to really elongate the time you can cast any of your spells. This is especially beneficial to spells that are used continuously, such as Vampiric Grip.
7. Poison Talons
- Melee attacks do 20 points of poison damage
- Requires: Blood Healing or Unearthly Will
Initially, you might have refrained from melee attacks, as they lack the potency of your spells. Not so anymore; now your claw attacks are more impressive (and their damage cumulative). Judge when enemies are low on health before dashing in for a claw and a bite to finish.
8. Night Cloak ★
- In combat you are surrounded by a cloud of bats that feed on enemies within melee range.
- Requires: Poison Talons
Night Cloak slowly but steadily drains health from your foes and transfers it to you. While this will rarely kill enemies outright, it does make a difference, and over time, the constant health absorption makes you significantly more resilient.
9. Vampiric Grip ★
- Blood Magic: Can pull a creature to you from a distance and do choking damage once it’s close.
- Requires: Power of the Grave
Vampiric Grip is a versatile spell with several powerful uses. The enemy you grab with it is effectively paralyzed, taking them out of the fight for the duration of combat. You can sustain the Grip to choke your foe to death or release it to send them flying; this is perfect for quickly flinging away a pesky melee enemy or for “clustering” your foes into groups that you can hit with a Drain Life spell. For even more carnage, throw your enemies off cliffs or into traps!
10. Summon Gargoyle ★
- Blood Magic: Can conjure a gargoyle to fight for you
- Requires: Vampiric Grip
Summon Gargoyle conjures a tough, powerful ally. In addition to dealing and taking damage for you, gargoyles are also important for crowd control, since you can become overwhelmed if surrounded by too many foes. The Amulet of the Gargoyle, which causes this spell to summon a second gargoyle, is well worth the effort to acquire. Consult Vampire Faction Quest: Amulets of Night Power for more details.
11. Corpse Curse
- Blood Magic: Target is paralyzed
- Requires: Power of the Grave
Handy if you have an extremely powerful foe without ranged attacks (such as a giant), but even an enemy with magic or breath attacks can be stuck while you drain the life from them. More useful against single foes than groups.
Curing Vampirism
Regardless of whether you’re a “base” or Volkihar Vampire, there are but two ways to cure yourself of this affliction:
- You can contract Lycanthropy. The blood ritual that transforms you into a werewolf will cure any diseases you have, even full-blown Vampirism. Of course, you now have other, more hairy problems to contend with....
- Or, you can visit a mage named Falion in Morthal, the Hold Capital of Hjaalmarch, and complete Side Quest: Rising at Dawn.
Lycanthropy
Lycanthropy
Contracting Lycanthropy
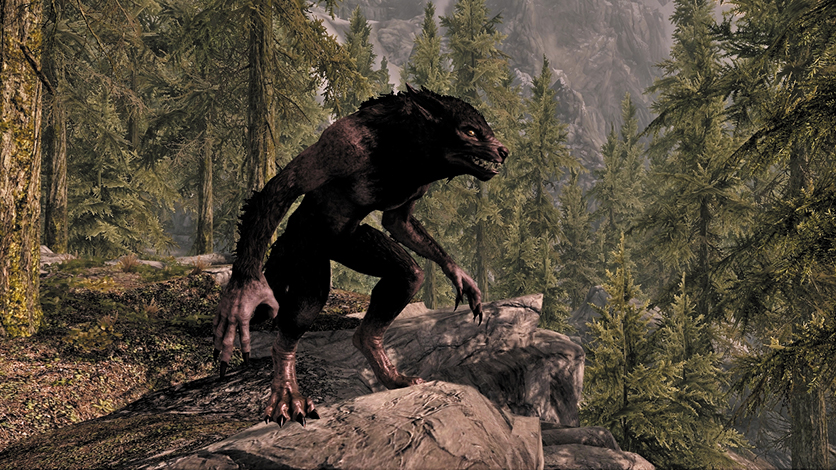
A ferocious werewolf, a powerful and sinewy predator.
Werewolves are lycanthropes: men and women who can transform into powerful, wolflike creatures. Some see this as a blessing, a way of drawing on the strength and ferocity of their inner beast. Some see it as a curse, a twisting of their wills and nature. And for some, it is simply a way of life.
Lycanthropy can only be contracted as part of the blood ritual that occurs during the Companions Quest: The Silver Hand. Your first transformation is particularly violent, causing you to prowl the streets of Whiterun as the inhabitants of the city flee for their lives. Soon you black out, and from this point on, you are more fully able to control your animal nature.
Beast Form
When you become a werewolf, you acquire a new power known as Beast Form. This allows you to transform into a werewolf once per day. Once transformed, you remain a werewolf for 2.5 minutes of real time. You can extend this time by approaching a corpse and activating it to feed on it. This restores 50 points of Health and gives you another 30 seconds of time as a werewolf.
The Werewolf Form is a transformation state. You access it in the Magic > Powers > Beast Form Menu. It’s a good idea to make this a Favorite ability you can quickly call upon.
Advantages of Beast Form include:
- Your maximum Health increases by 50 points (previously 100) but does not regenerate.
- Your maximum stamina increases by 100.
- You have a faster sprint speed.
- Wolves will treat you as an ally and won’t attack you.
- Any crimes you commit as a werewolf don’t count against your “normal” self, with one caveat (below).
But there are some disadvantages as well:
- You can’t loot any corpses you slay.
- You can’t pick up or use any items you find. Since this includes keys, your progress may be blocked in some dungeons.
- You can’t equip or use any of your normal weapons, spells, items, equipment, Shouts, or powers.
- Your large, hulking form may have trouble fitting through some narrow passages.
- You can’t speak with anyone, even your own Companions brethren.
- Citizens of Skyrim are terrified of you; some of them flee, while the battle-hardened, brave, or foolish stand their ground and attack you.
- If anyone sees you transform to or from a beast, the transformation is considered a major Crime. Consult the Crime and Punishment section.
Powers
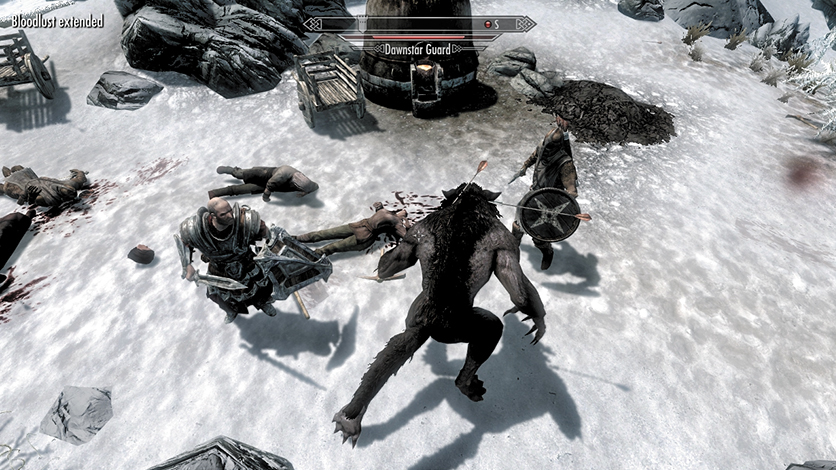
Your focus is to kill, feed, kill again, and prolong your bloodlust.
As a werewolf, you gain an impressive array of combat-related bonuses.
Improved Combat Skills: While in Beast Form, your powerful claw attacks deal massive damage, and your toughened hide resists blows. Your damage and armor bonuses increase based on your level:
| Level | Attack Damage | Armor |
|---|---|---|
| Base | 20 | 0 |
| Levels 11–15 | 25 | 50 |
| Levels 16–20 | 35 | 100 |
| Levels 21–25 | 45 | 150 |
| Levels 26–30 | 50 | 200 |
| Levels 31–35 | 55 | 250 |
| Levels 36–40 | 60 | 300 |
| Levels 41–45 | 70 | 350 |
| Level 45 and over | 80 | 400 |
Immunity to Disease: You are completely immune to all diseases in both normal and Beast Form. Among other things, this protects you from Sanguinare Vampiris (the Vampire Disease), allowing you to fight Vampires without having to worry about contracting the condition yourself.
As an additional bonus, when you first become a werewolf, any diseases you had at the time will be cured. This includes both Sanguinare Vampiris and full-blown Vampirism. You can’t be both a werewolf and a vampire at the same time.
Increased Dexterity: In Beast Form, you can sprint on all-fours at an impressively fast pace, and jump much farther than normal.
Restless Blood: As a Werewolf, you can never receive a bonus for being Rested.
Werewolf Powers: While in Beast Form, you can call upon a special set of Werewolf-exclusive Powers, called Howls. You can use these as often as you like while your transformation lasts. Your default howl strikes fear (literally) into the hearts of men. However, by completing The Companions Radiant Quest: Totems of Hircine, you can acquire Totems that allow you to exchange this Howl for a different Power. You can change Howls as often as you like, though only one can be active at a time.
Many of your Werewolf Perks improve the potency and effects of your howls. Here are all of the howls you can attempt:
| Howl | Requires Totem | Requires Perk | Effect |
|---|---|---|---|
| Howl of Terror | None (Default) | None | Creatures and people up to Level 20 flee for 30 seconds. |
| Improved Howl of Terror | None (Default) | Totem of Terror | Creatures and people up to Level 30 flee for 30 seconds. |
| Howl of the Hunt | Totem of the Hunt | None | Detect Life in a moderate range for 60 seconds. |
| Howl of the Predator | Totem of the Hunt | Totem of the Predator | Detect Life in a large range for 60 seconds; indicates enemy awareness. |
| Howl of Brotherhood | Totem of Brotherhood | None | Summons two wolves for 60 seconds. |
| Howl of the Ice Brothers | Totem of Brotherhood | Totem of Ice Brothers | Summons two Ice Wolves for 60 seconds. |
| Howl of the Moon | Totem of Brotherhood | Totem of the Moon | Summons two Werewolves for 60 seconds. |
Ring of Hircine: During Daedric Quest: Ill Met By Moonlight, you are given the cursed Ring of Hircine. While the curse has no effect on most humans, if worn by a Lycanthrope, it can cause you to randomly shift into your Beast Form! It is wise to complete this Quest or risk revealing your beast form at an inopportune moment! The curse is lifted at the end of the Quest.
The Ring of Hircine (whether cursed or not) allows you to assume Beast Form one additional time per day.
Living as a Werewolf
You are fortunate that your Shield-Brothers and Sisters in the Companions are there to help you come to terms with your new Beast Form and that this strain of Lycanthropy is not affected by the waxing and waning of the moons. Therefore, it is quite possible to take full advantage of the powers of the wolf for the remainder of your adventure. Call upon your Beast Form when the speed and strength of the wolf are to your benefit or when facing a multitude of weaker foes.
Werewolf Perks: The Path of the Lycanthrope
- Constellation: Path of the Moon
- Available Perks: 11
When you speak with Aela the Huntress for the first time after completing the Companions Quest: Blood’s Honor (with the Dawnguard add-on installed), she mentions that the more you feed, the more your power as a werewolf will grow. She is correct in this advice: While in Werewolf Form, press your Character Menu button to access the Werewolf Perk Constellation (shown above).
Acquiring Werewolf Perks
Unlike the Skill Perks you normally gain through leveling up, Werewolf Perks are awarded after feeding on your foes: Every time you feed on a corpse while in Beast Form, you make progress toward your next perk. There are 11 Werewolf Perks to obtain, and each requires progressively more feedings:
| Level | Attack Damage |
|---|---|
| 1 | 5 |
| 2 | 7 |
| 3 | 9 |
| 4 | 11 |
| 5 | 13 |
| 6 | 15 |
| 7 | 17 |
| 8 | 19 |
| 9 | 21 |
| 10 | 23 |
So, in order to acquire all of the Werewolf Perks, you must defeat 165 foes in the manner previously described. About half of these perks improve your Howls; see the Werewolf Powers table (above) for details. The complete list of perks is as follows:
1–4: Bestial Strength (4 Ranks) ★
- Rank 1: Do 25% more damage as a werewolf
- Rank 2: Do 25% more damage as a werewolf (+50% total)
- Rank 3: Do 25% more damage as a werewolf (+75% total)
- Rank 4: Do 25% more damage as a werewolf (+100% total)
This significantly increases your attack damage, doubling it at the perk’s highest rank (25/50/75/100%). This perk is essential to using Beast Form effectively against higher-level foes, as you’re able to tear through them, feed, maintain your bloodlust, and regain your health, without fear of being overwhelmed.
5: Totem of Ice Brothers
- Werewolf Totem of Brotherhood howl calls Ice Wolves.
Consult the Bestiary for the specific differences between wolves and Ice Wolves. This perk is useful only if you have the Totem of Brotherhood. The more entities on your side, the better, and toughened Ice Wolves are excellent at helping you polish off your meals.
6: Totem of the Moon
- Werewolf Totem of Brotherhood howl calls Werewolves.
This perk is useful only if you have the Totem of Brotherhood. With two additional werewolves by your side for a minute of obscene bloodletting, your pack can really tackle a large group of foes or a few extremely troublesome enemies.
7: Totem of the Predator
- Werewolf Totem of the Hunt howl has extended range and shows whether the targets are not in combat, out searching, or actively in combat.
This perk is only useful if you have the Totem of the Predator. If you’d like to extend your feeding frenzy without reverting back, and no enemies are presenting themselves, this is helpful in getting your bearings, especially as you have no map as a werewolf. Of course, you could always plan your assault by remembering where a populated area is or reconnoitering it first and figuring out where to find “snacks” along the route!
8: Totem of Terror
- Werewolf Howl of Terror affects even higher level creatures.
This allows your default Howl of Terror to affect creatures of up to Level 30, rather than 20. Make sure you can easily follow the foe you’re frightening, as a fleeing foe who doesn’t end up as dinner is almost worse than one who betters you in combat! Use this when you need to scatter your foes so you can concentrate on one at a time and not be overwhelmed.
9: Animal Vigor
- 100 point bonus to Health and Stamina in Beast Form.
This obviously makes you much tougher in combat, allowing you to do more damage and absorb significantly more punishment before succumbing to your wounds.
10: Gorging ★
- Feeding heals twice as much Health.
This is a critical perk for high-level werewolves. Since feeding is the only way you can replenish your health, being able to draw double the health you recover from a single corpse may mean the difference between life and death.
11: Savage Feeding ★
- Able to feed off most dead creatures. Feeding off creatures instead of people only provides half the extended time.
This enables you to feed on nonhuman creatures like gargoyles and spiders. This makes Beast Form significantly more viable in creature- and undead-heavy dungeons, like Draugr crypts, vampire lairs, and the ruined sections of Castle Volkihar. Note that you still can’t feed on small creatures, like hares or foxes, or on highly magical ones like Dwarven Automatons or Atronachs.
Curing Lycanthropy
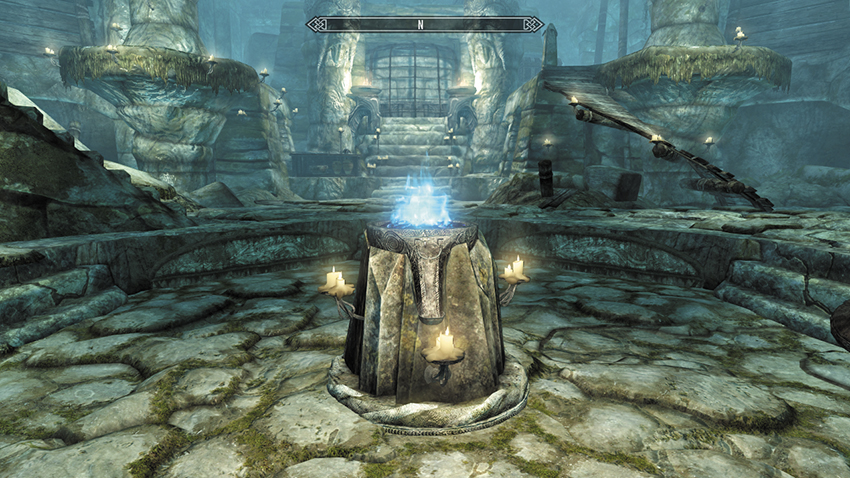
The Tomb of Ysgramor, where you can free yourself from the beast within.
After completing the Companions Quest: The Silver Hand, if you decide that a hairy alter ego with razor-sharp claws isn’t how you want to spend your nights, you can rid yourself of this burden in one of two ways:
- Finish the Companions Radiant Quest: Purity. You can complete this only once, so if you contract Lycanthropy a second time (see below), you can’t use this method to cure yourself again. As a part of that quest, you must cut off the head of a Glenmoril Witch, bring it into the depths of the Tomb of Ysgramor, draw the spirit of the wolf from your body, and defeat it. Once the ritual is complete, your cure is permanent, and you cannot contract Lycanthropy again.
- Or, you can agree to allow Lord Harkon or Serana to transform you into a Volkihar Vampire. Unlike standard vampirism (which is contracted through Sanguinare Vampiris, a disease werewolves are immune to), their transformation will work on you and has the side effect of removing your Lycanthropy as well.
After being cured of Lycanthropy, if you later change your mind, you can speak to Aela the Huntress and ask her to restore your beast blood. You can do this only once. This transformation will, again, cure you of vampirism in the process.
Crime and Punishment
While exploring the nine Holds of Skyrim, there are bound to be points in your adventure where you commit a crime and have a bounty placed on your head. Whether this is a petty theft from a citizen of Markarth or an all-out assault on the city guard of Riften, it is prudent to learn the laws that govern crime and punishment...and how you can bend them to your advantage!
Criminal Activities and Holds
Perhaps the most important lesson to learn is that each of the nine Holds keeps their own record of crimes and bounties. You may be wanted in Haafingar Hold, but your bounty doesn’t transfer to neighboring Hjaalmarch, where you may still be considered a model citizen.
Your actions are only considered criminal if they affect a nonhostile character or their property. Defending yourself is never a crime. So feel free to fight back if:
- You were attacked first and the attack was unprovoked.
- You have agreed to a duel or brawl during a conversation.
- You’re attacking an enemy, regardless of who attacked first.
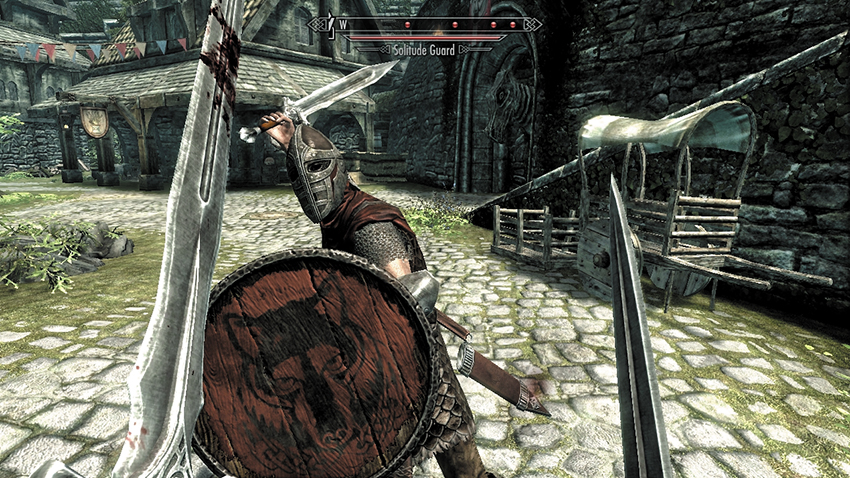
Usual Crimes
The following evidence indicates the usual categories of crimes that you’re likely to commit and what bounty this places on your head:
| Crime | Bounty |
|---|---|
| Trespassing; entering an area that is off-limits. Depending on the level of security, you will often be warned and given a chance to leave peacefully before the crime is triggered. | 5 gold |
| Pickpocketing a guard or civilian and being spotted. Just looking at their inventory is not a crime; you have to actually take something. | 25 gold |
| Theft; swiping an item marked “Steal.” | Half the item’s value |
| Theft; stealing a horse. You acquire this bounty each time you mount the stolen horse. | 50 (each time) |
| Assault; attacking a guard or civilian with your fists, weapons, or spells. | 40 |
| Murder; killing a guard or civilian. | 1,000 |
| Escaping from jail after being imprisoned. | 100 |
Unusual Crimes
The following list includes the more unspeakable ways you can incur a bounty:
| Crime | Bounty |
|---|---|
| (Vampirism): Feeding on the blood of a guard or civilian and being spotted. | 40 |
| (Vampirism): Once you reach Stage 4 and become a full-fledged vampire, all guards and civilians will be hostile to you. Fighting back against them is considered a crime, and bounty accumulates as normal. With Dawnguard, Stage 4 Vampirism is no longer a crime, but transforming into a Vampire Lord is. | |
| (Lycanthropy): Transforming to or from Beast Form in sight of a guard or civilian. | 1,000 |
| (Lycanthropy): While in werewolf form, all guards and civilians will be hostile. However, fighting back against them is not considered a crime (since they don’t recognize you), and bounty will not accumulate. | |
| (Cannibalism): Eating a corpse while wearing the Ring of Namira is considered assault. | 40 |
Witnesses and Retaliation
Crimes are only a problem if you’re seen committing them. The bounties you receive are noticed by witnesses, and depending upon the situation, you may wish to “silence” anyone who sees your less-than lawful activities. For example, if you assault a citizen of Riften (+40 Bounty) and then kill them before they can report the assault (+1,000 Bounty), as long as nobody is around to witness the murder, your bounty will be cleared. Naturally, attempts to increase and then remove your bounty can fail spectacularly; if you’re spotted attempting to kill a guard by three other guards, expect them to respond with lethal force!
If you allow too much time to pass, the witnesses will report the crime, and killing them will no longer reduce your bounty. So act quickly if you plan to take out the witnesses.
With this in mind, retaliating for a crime is worth doing only when as few people as possible are watching you (and ideally, none). It is easier to try this within buildings where you can easily see onlookers. If your crime is nonviolent (e.g., stealing), try entering without being noticed or at night, when people are likely to be sleeping.
Guard Actions and Reactions
Reactions: When a guard sees you commit a crime or hears a call for help from a witness, they attempt the following:
- For minor crimes, such as pickpocketing, theft, or trespassing, they attempt to arrest you.
- For major crimes, such as assault or murder, they attack you. If you yield (sheathe your weapon), they will attempt to arrest you.
- For severe crimes, such as escaping from jail, vampirism, or Lycanthropy, they simply attack.
Your actions: If a guard attempts to arrest you, and you successfully avoid the initial arrest (e.g., by sprinting to an exit gate or hiding in a building), you can attempt the following:
- With a low bounty (less than 3,000 gold), you can wait a day or so for the situation to calm down, then return to the scene of the crime and turn yourself in. You’re then arrested.
- With a high bounty (more than 3,000 gold), you should avoid civilization altogether. Wander in the wilderness for a few days, and a bounty collector will eventually approach you and offer to pay off your debt to society. Don’t wait for him, just keep moving.
Preventing Prison Time
The way you interact with guards greatly affects the price you have to pay for your crimes. Once in dialogue, your options are as follows. You can:
1. Pay a fine equal to your bounty, if you have the gold. Any stolen items are confiscated, and you are moved to the jail exit.
2. Agree to go to jail, where you can serve your time or attempt to escape. See below for more details on your options once in jail.
3. Resist arrest, if you wish to battle your way out of the location. This is also what happens if you try to back out of dialogue with any guard.
4. Bribe the guard. This option is only available if you aren’t currently trespassing and one of the following conditions holds:
- You have committed only minor crimes and have the Speech skill’s Bribery perk.
- You are a member of the Thieves Guild.
- You haven’t bribed or persuaded another guard in the past 24 hours.
If you pay the bribe, it stops the current pursuit, and you’re able to keep any stolen items. However, your bounty is still in effect, and if you speak to any guard again, you’ll turn yourself in, and the guard will attempt to arrest you.
5. Persuade the guard. If you have a Speech skill of 75 or higher, you’re not currently trespassing, you’ve committed only minor crimes, and you haven’t bribed or persuaded another guard in the past 24 hours, you can convince the guard to overlook your crimes. The option only appears once all of these conditions have been met.
Persuasion works just like a bribe: It stops the current pursuit, and you’re able to keep any stolen items. However, your bounty is still in effect, and if you speak to the same (or any other) guard again, you’ll turn yourself in, and the guard will attempt to arrest you.
However, you don’t have to pay for a persuasion, making it a cheaper option if you can meet the skill requirement.
6. Pay off the guard, if you’re a member of the Thieves Guild and you’ve completed the City Influence Quest for the Hold that you’ve committed the crime in.
There are four City Influence Quests, for Solitude (Haafingar), Markarth (the Reach), Whiterun (Whiterun Hold), and Windhelm (Eastmarch).
The Thieves Guild is based in Riften (the Rift), so you only need to be inducted into the guild (during Thieves Guild Quest: Loud and Clear) in order to pay off the guards there.
The other four Holds do not have City Influence Quests, so this option is not available in Morthal (Hjaalmarch), Dawnstar (the Pale), Winterhold (Winterhold Hold), or Falkreath (Falkreath Hold).
The price to pay off the guard is always half your current bounty. This removes the entire bounty and allows you to keep any stolen items in your possession, so it’s always the best option if you can afford it.
7. Invoke Thane’s Privilege. This is only available if you’re the Thane of a particular Hold.
You can be a Thane of any or all of the Holds provided you’ve completed the appropriate Thane task.
If your bounty is less than 2,000, you can remind the guards of your social standing to convince them to overlook your deeds. This only works once per Hold, so save it for some pretty devious activities!
8. Civil War: As the civil war rages on, Holds will fall to either the Imperial or Stormcloak factions.
If your faction takes control of a Hold, any bounty you may have accrued in that Hold is wiped out due to the change in government. Time this correctly, and you can get up to all kinds of mayhem, flee a Hold just before your side takes control of its capital, and then return after your misdemeanors are forgotten!
Incidentally, you can also become a Thane of the newly installed Jarl, giving you an additional use of the Thane’s Privilege claim, if you’re so inclined.
Serving Prison Time
A loose wall results in a lucky escape from certain prisons.
But for those caught in Markarth, no one escapes Cidhna Mine....
If you choose (willingly or otherwise) to be taken to jail, your entire inventory and stolen items are confiscated and moved to the jail’s belongings chest and evidence chest, respectively. You are then placed in a cell with a single lockpick in your inventory. At this point, you can:
1. Serve out your sentence:
- Interact with the bed in your cell and serve your time.
- In Markarth’s Cidhna Mine, you must interact with the pickaxe instead to serve your time.
Serving your sentence wipes out any progress toward your next skill increase in several randomly chosen skills. The number of skills that are penalized is determined by your bounty. For example, a petty crime like stealing a single potion might reset only one skill, while a murder or two will likely reset all of them!
Note that you only lose progress toward your next skill increase—your skills don’t actually decline, and you don’t lose any progress toward the next level from skills that have already increased. So this sentence is relatively light, especially at low levels.
After serving your sentence, you are moved to the jail’s entrance, and your inventory is returned. Any items you’ve stolen remain inside the jail’s evidence chest. Naturally, you can reenter the jail and steal them back if you want (and you’re competent enough).
2. Or, you can try to escape. Your prospects vary depending on where you’re imprisoned:
Solitude (Haafingar), Whiterun (Whiterun Hold), and Riften (the Rift) have large jails with several guards. While you can always pick the lock on your cell door and sneak out if you’re up to the challenge, the cells in each of these cities also have secret escape routes that you can use to sneak out undetected, as long as you’re careful. This only works once for each jail (the next time you’re imprisoned in that Hold, the guards have sealed the escape route). Don’t forget to grab your items from the jail’s belongings chest on your way out, which you can usually reach via a convenient hole in the wall from the escape passage.
Raven Rock (Solstheim): The Bulwark Jail has an interesting fireplace grating that leads to an ash and cobweb-lined passage that will take you to a second grate (under the belongings chest, allowing you to snag your stuff). This drops you down to a stone tunnel dug by Draugr that ends at a door to Coldcinder Cave.
Morthal (Hjaalmarch), Dawnstar (the Pale), and Falkreath (Falkreath Hold) have rudimentary jails. Pick the lock and fend off a single jailer to make your escape. But do this quickly before reinforcements arrive, and don’t forget to reclaim your items on your way out!
Winterhold (Winterhold Hold) has a jail known as the Chill, which is well away from the settlement, among the icebergs of the Sea of Ghosts. As befits the city home to the College of Winterhold, the Chill features Frost Atronach “jailors.” Force your way past them, then swim across the freezing waters and ice floes to reach dry land and complete your escape. Your inventory is not confiscated in this jail, so don’t worry about looking for a belongings chest.
Windhelm’s jail is rather basic, but it has two attentive jailors, and the belongings and evidence chests are upstairs in one corner of the city guard barracks. Try to escape here, and expect to have a real fight on your hands.
Markarth’s jail is Cidhna Mine. No one escapes Cidhna Mine....
Crime and the Guilds
All of the above rules apply to every Hold in Skyrim, with the exception of locations owned and operated by the major guilds. The Companions of Whiterun, the mages of the College of Winterhold, the Thieves Guild of Riften, and the Dark Brotherhood have all developed very particular ways of dealing with crime among their own members. For example, the Dark Brotherhood only cares about assaults you inflict upon other members and imposes a fixed fine for such actions. Consult their appropriate quests later in this book for all the information.
Kinect Support (Xbox 360 only)
For adventurers with a Kinect, there are several unique actions and commands you can employ without normal controller use. These are designed to help you more thoroughly immerse yourself in the action. The following section details all the different commands, along with tips on using Shouts, managing your inventory, and so on:
When Kinect is disabled:
- Right Bumper Button: Shout/Powers
When Kinect is enabled:
- Right Bumper Button: Enable Dragon Language Shouts
- Left Bumper Button and Right Bumper Button: Shout/Powers
Gameplay
These are usable only during gameplay:
- Quick Items: Opens the Inventory menu
- Quick Magic: Opens the Magic menu
- Quick Stats: Opens the Stats menu
- Quick Map: Opens the Map menu
- Quick Save: Quick-saves the game
- Quick Load: Quick-loads the game
- New Save: Saves the game into a new save slot
- Pause Game: Pauses the game
Character Menu
This is usable only in the Character menu.
- Items: Opens the Inventory menu
- Magic: Opens the Magic menu
- Skills: Opens the Skills menu
- Map: Opens the Map menu
Favorites Menu
This is usable only in the Favorites menu.
- Assign [hot key command]: Sets the selected item to the spoken hot key
- Health Potion
- Magicka Potion
- Stamina Potion
- Poison
- Sword
- Mace
- Axe
- Dagger
- Bow
- Shield
- Dual-Wield Left
- Dual-Wield Right
- Soul Trap
- Greatsword
- Battle-axe
- Warhammer
- Fire Spell
- Frost Spell
- Lightning Spell
- Ward Spell
- Ritual Spell
- Bound Weapon
- Summon Spell
- Armor Spell
- Calm Spell
- Frenzy Spell
- Healing Spell
- Light
Hot Key Equipping
This is usable only during gameplay and equips a [hot key command] (such as Summon Spell or Heath Potion) that you have previously assigned in the Favorites menu:
- Equip [hot key command]: Equips item in the default hand
- Equip Left [hot key command]: Equips item in the left hand, if possible.
- Equip Right [hot key command]: Equips item in the right hand, if possible.
- Equip Dual [hot key command]: Equips the item in both hands, if possible.
- Equip Sword and Shield: Equips the item with the Sword hot key in the right hand and the item with the Shield hot key in the left hand.
- Also: Equip Mace and Shield, Equip Axe and Shield, Equip Dagger and Shield.
- Equip Dual Weapons: Equips the item with the DualWieldLeft hot key in the left hand and the item with the DualWieldRight hot key in the right hand.
Follower Commands
There are usable only during gameplay and are valid only if you have a Follower.
- Ally Follow Me does the same thing.
- Ally Wait Here does the same thing.
- Ally Items does the same thing.
- Ally Open: Commands your ally to open the container/door you’re looking at.
- Ally Stand: Commands your ally to stand at the spot you’re looking at.
- Ally Retrieve: Commands your ally to pick up the item you’re looking at.
- Ally Attack: Commands your ally to attack the character or enemy you’re looking at.
- Ally Interact and Ally Use do the same thing.
Using Shouts
You are now able to use Shouts in three different ways during gameplay:
- Shout Names (or English Names): Without pressing any buttons, you can just say the name of the Shout. For example, if you say “Unrelenting Force,” that Shout is used. This uses the highest level of the Shout you have unlocked.
- Dragon Language Shouts: By holding down the Right Bumper Button, you unlock Dragon Language mode. While holding the button, you can say one, two, or three Words of a Shout to trigger that shout. “Fus,” “Fus Ro,” and “Fus Ro Dah” will all trigger their corresponding power levels (but remember, you can only use the Words you’ve unlocked).
- Button Pressing: While Kinect is enabled, the Left and Right Buttons together can be used to trigger Shouts or Powers without the use of voice commands, if you prefer.
- Unrelenting Force: “Fus Ro Dah”
- Dismaying Shout: “Faas Ru Maar”
- Become Ethereal: “Feim Zii Gron”
- Whirlwind Sprint: “Wuld Nah Kest”
- Elemental Fury: “Su Grah Dun”
- Clear Skies: “Lok Vah Koor”
- Fire Breath: “Yol Toor Shul”
- Dragonrend: “Joor Zah Frul”
- Call of Valor: “Hun Kaal Zoor”
- Call Dragon: “Od Ah Viing” (no first- or second-level variations of this Shout)
- Animal Allegiance: “Raan Mir Tah”
- Aura Whisper: “Laas Yah Nir”
- Disarm: “Zun Haal Viik”
- Marked for Death: “Krii Lun Aus”
- Frost Breath: “Fo Krah Diin”
- Storm Call: “Strun Bah Qo”
- Kyne’s Peace: “Kaan Drem Ov”
- Slow Time: “Tiid Klo Ul”
- Throw Voice: “Zul Mey Gut”
- Ice Form: “Iiz Slen Nus”
- Drain Vitality: “Gaan Lah Haas”
- Soul Tear: “Rii Vaaz Zol”
- Summon Durnehviir: “Dur Neh Viir”
- Battle Fury: “Mid Vur Shaan”
- Bend Will: “Gol Hah Dov”
- Cyclone: “Ven Gaar Nos”
- Dragon Aspect: “Mul Qah Diiv”
- (no first- or second-level variations of this Shout)
Inventory Menu
This is usable only in the Inventory menu. The Inventory Sorting commands are unique to Kinect and make deciding what to sell (or drop) a snap.
- [Category name]: Opens the menu to that category
- Favorites
- All
- Weapons
- Apparel
- Also: Armor
- Potions
- Scrolls
- Food
- Ingredients
- Books
- Keys
- Miscellaneous
- Sort by Name: Sorts the item list by name, increasing. If the list is already sorted by name increasingly, it sorts it decreasingly.
- Sort by Weight: Sorts the item list by weight, decreasing. If the list is already sorted by weight decreasingly, it sorts it increasingly.
- Sort by Value: Sorts the item list by value, decreasing. If the list is already sorted by value decreasingly, it sorts it increasingly.
- Close Menu: Closes the menu
Barter Menu
This is usable only in the Barter menu.
- Vendor categories: Opens the item list for the spoken vendor category.
- Their Items
- Their Weapons
- Their Apparel
- Their Potions
- Their Scrolls
- Their Food
- Their Ingredients
- Their Books
- Their Keys
- Their Miscellaneous
- Player categories: Opens the item list for the spoken player category.
- My Items
- Also: All
- My Weapons
- Also: Weapons
- My Apparel
- Also: Apparel, Armor
- My Potions
- Also: Potions
- My Scrolls
- Also: Scrolls
- My Food
- Also: Food
- My Ingredients
- Also: Ingredients
- My Books
- Also: Books
- My Keys
- Also: Keys
- My Miscellaneous
- Sort by Name
- Sort by Value
- Sort by Weight
- Close Menu
Container Menu
This is only usable in the Container menu.
- Container categories: Opens the item list for the spoken container category.
- Their Items
- Their Weapons
- Their Apparel
- Also: Their Armor
- Their Potions
- Their Scrolls
- Their Food
- Their Ingredients
- Their Books
- Their Keys
- Their Miscellaneous
- Player categories: Opens the item list for the spoken player category.
- My Items
- Also: All
- My Weapons
- Also: Weapons
- My Apparel
- Also: Apparel, Armor
- My Potions
- Also: Potions
- My Scrolls
- Also: Scrolls
- My Food
- Also: Food
- My Ingredients
- Also: Ingredients
- My Books
- Also: Books
- My Keys
- Also: Keys
Managing Your Loot Limit
When looking at a chest, corpse, or other container, use the command “Loot Items” to take all of the items with a value-to-weight ratio greater than or equal to your Loot Limit. This is less complicated than it sounds, as it’s mimicking what you do naturally when trying to decide whether it’s really worth lugging that heavy armor or iron sword back to a settlement to sell or craft. Plus, you can set a limit depending on how much you want to carry by saying the following:
- “Set Loot Limit 0” (default): The most restrictive setting. You’ll take only weightless items (gold, arrows, keys, notes, some quest items).
- “Set Loot Limit 5”: The most permissive setting. You take virtually all items, including some steel weapons (and up), steel armor (and up), and pretty much everything else.
- “Set Loot Limit 10”: At a 10:1 ratio, you’ll start to leave more items. This is the highest limit at which you can still expect to get most Alchemy ingredients.
- “Set Loot Limit 25”: At a 25:1 ratio, you begin to exclude midlevel items like Elven weapons and steel plate armor.
- “Set Loot Limit 50”: At a 50:1 ratio, you take very little, leaving behind even glass weapons and ebony armor. This is the highest limit at which you’ll take Skill Books.
- “Set Loot Limit 100”: At 100:1 ratio, even some Daedric and Dragonplate items will be passed over.
Other loot limit commands:
- Sort by Name
- Sort by Value
- Sort by Weight
- Close Menu
Magic Menu
This is usable only in the Magic menu.
- [Category name]: Opens menu to that category.
- Favorites
- All
- Alteration
- Illusion
- Destruction
- Conjuration
- Restoration
- Shouts
- Powers
- Active Effects
- Also: Effects
Map Menu
This is usable only in the Map menu. Use Map Menu Commands to navigate more quickly. The “Quest Marker” command is especially helpful in finding your next destination without having to scroll around. When you’re done there, say the name of a Hold Capital to quickly jump back to town:
- [City name]: Centers the camera on that city. You can say:
- Windhelm
- Falkreath
- Dawnstar
- Morthal
- Solitude
- Markarth
- Riften
- Whiterun
- Winterhold
- Player: Centers camera on the player.
- Also: Where Am I
- Waypoint: Centers camera on player-set marker, if applicable.
- Quest Marker: Centers camera on active quest target. Saying it multiple times will cycle through targets.
- Also: Quest
Stats Menu
This is usable only in the Stats menu.
- [Skill name]: Instantly sets the camera to center on that skill’s perk tree. All the skills are accounted for:
- One-Handed
- Two-Handed
- Archery
- Block
- Smithing
- Heavy Armor
- Light Armor
- Pickpocket
- Lockpicking
- Sneak
- Alchemy
- Speech
- Alteration
- Conjuration
- Destruction
- Illusion
- Restoration
- Enchanting