
Elder Scrolls V: Skyrim Guide The Atlas Solstheim: Southern Ash Lands
Primary Locations
[S.S01] Earth Stone
Related Quests
- Dragonborn Main Quest: Dragonborn
- Dragonborn Main Quest: Cleansing the Stones
Recommended Level: 25
Habitation: All-Maker Stone
- Bralsa Drel
- Cindiri Arano
- Dreyla Alor
- Fethis Alor
- Glover Mallory
- Lurker
- Milore Ienth
- Redoran Guard
- Rims Llervu
Special Area
- Standing Stones
Miscellaneous
- Area is Locked
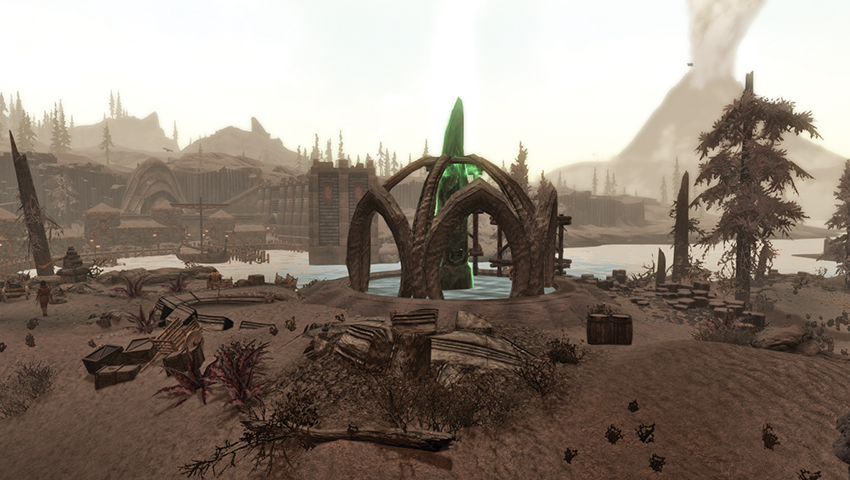
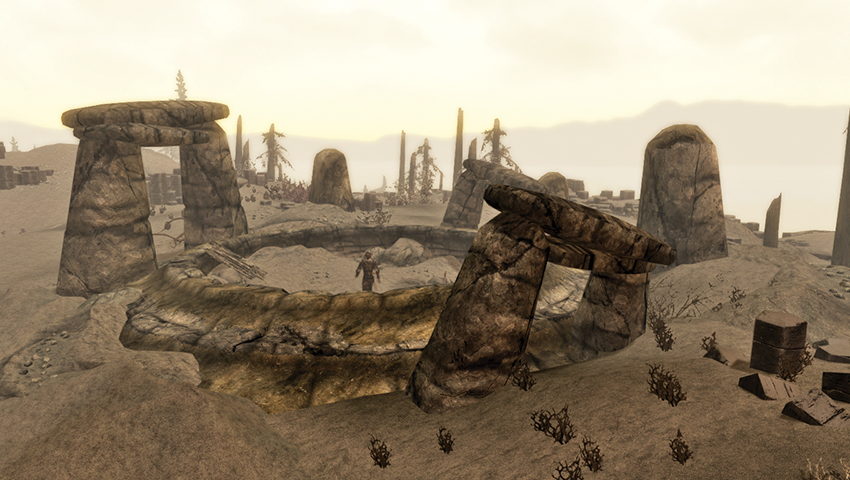
This is one of the All-Maker Stones, nestled just outside and southwest of Raven Rock. You may meet the Dunmeri mage Neloth here in the initial stages of the Dragonborn Main Quest, before he moves to Tel Mithryn. Currently, the stone’s power is being siphoned by Miraak, and stone arches are constructed by enthralled town citizens and Redoran Guards. At various times, Bralsa Drel, Cindiri Arano, Dreyla Alor, Fethis Alor, Glover Mallory, Milore Ienth, and Rims Llervu work here, and their quests aren’t accessible until the stone is cleansed. The Bend Will Shout is required to remove the trance the population is under and to cleanse the stone of Miraak’s influence. When this happens, expect a Lurker to appear, along with a second Lurker down by the water’s edge.
- Pickaxe
- Power: Bones of the Earth
[S.S02] Bloodskal Barrow
Related Quests
- Solstheim Side Quest: The Final Descent
Recommended Level: 10
Habitation: Reaver Camp
- Reaver
Crafting
- Alchemy Lab (2)
- Cooking Pot (2)
- Tanning Rack (3)
- Wood Chopping Block
Underground Connection
Miscellaneous
- Area is locked
- Chest
- Potions
- Loose gear
Exterior
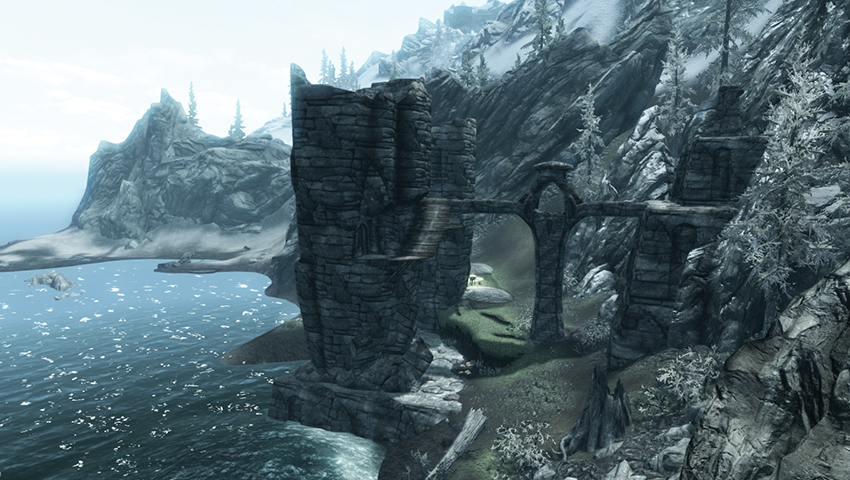
At the foot of the sharp, rocky slopes north of Raven Rock is the entrance to a Draugr tomb, now controlled by Reavers. There are two towers on the beach, one connected by an ancient stone bridge to the barrow interior.
Northern Tower
Expect around six Reavers as you investigate the ruins, heading for the lit torch at the base of the northern tower. This leads up to a second-floor stone bridge to the next tower and a wooden ramp up to sleeping quarters.
Southern Tower
Cross the stone bridge to reach a bed, chest, and steps up to a table with potions and an exit ramp that leads to the main stone bridge leading into Bloodskal Barrow. Or, continue into the tower, checking a living area with a cooking pot and a few bits of Chitin armor. Climb the stairs up to the roof. Here, you can find an Alchemy Lab, three tanning racks, and some books. Up more steps is a rickety wooden platform back to the otherwise inaccessible roof chamber of the Northern Tower.
- Crafting: Alchemy Lab, Cooking Pot, Tanning Rack (3)
- Chest
- Potions
Northern Tower (Return)
Drop down and check the bed, chest [Adept], and scrawled note on the table.
- Chest [Adept]
- Scrawled Note
Interior
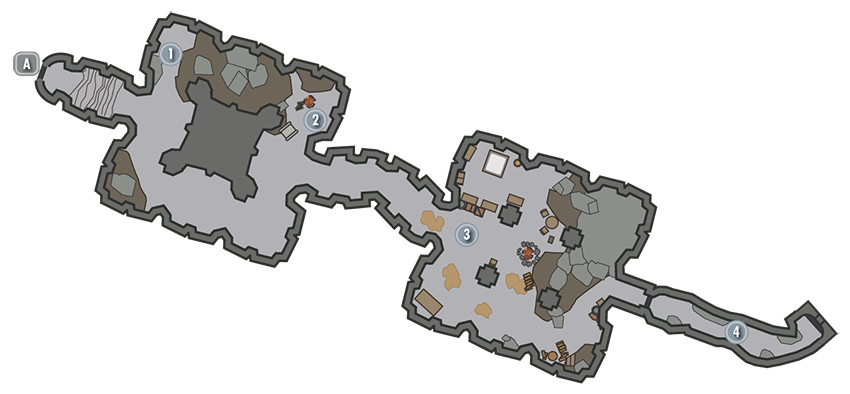
 Door to Solstheim
 Corpses Fresh and Fetid
The initial part of this Draugr crypt, now overrun by three or four Reavers, has a couple of strewn corpses with common clothing on their backs.
- Reaver
 Corpse Fire
The Reavers have been burning the dead.
 Reaver Camp
Expect the majority of the combat to occur here. Check the area for a bed, assorted books and food, coin purses, and the following:
- Crafting: Alchemy Lab, Cooking Pot, Wood Chopping Block
- Chest
- Book: Deathbrand
 Secret Tunnel (from Raven Rock Mine)
The barrow ends at a rock wall that looks like it may move. It is activated via a pull chain on the opposite side: This is actually the exit from Raven Rock Mine. You must complete Solstheim Side Quest: The Final Descent to fully explore this area
[S.S03] Old Attius Farm
Related Quests
- Solstheim Side Quest: March of the Dead
Recommended Level: 20
Habitation: Farm
- Ash Spawn
- Captain Veleth
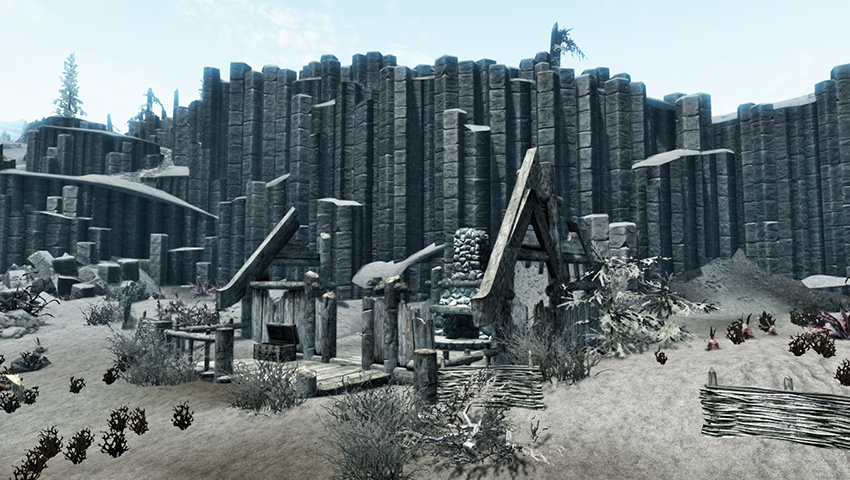
The first time you come across this decrepit structure by the Sea of Ghosts, Captain Veleth is valiantly fighting off three Ash Spawn, as Solstheim Side Quest: March of the Dead begins. Nearby is a slain Redoran Guard, who has some Bonemold Armor you can take if you wish.
- Bonemold Armor
[S.S04] Kolbjorn Barrow
Related Quests
- Solstheim Side Quest: Black Book: Filament and Filigree
- Solstheim Side Quest: Unearthed
Recommended Level: 50
Dungeon: Draugr Crypt
- Ahzidal
- Albino Spider
- Draugr
- Miner
- Poison Spider
- Ralis Sedarys
Special Area
- Black Book: Filament and Filigree
- Word Wall: Cyclone [DB3/3]
Crafting
- Cooking Spit
Dangers
- Battering Ram Trap
- Magic Caster Trap
- Rockfall Trap
- Swinging Blade Trap
Puzzle
- Nordic Puzzle Pillars
- Rotating Walls
Services
- Follower: Ralis Sedarys [DB5/7]
Collectibles
- Unique Item: Ahzidal (Mask) [DB21/31]
- Unique Item: Ahzidal’s Armor of Retribution [DB22/31]
- Unique Item: Ahzidal’s Boots of Waterwalking [DB23/31]
- Unique Item: Ahzidal’s Gauntlets of Warding [DB24/31]
- Unique Item: Ahzidal’s Helm of Vision [DB25/31]
- Unique Item: Ahzidal’s Ring of Arcana [DB26/31]
- Unique Item: Ahzidal’s Ring of Necromancy [DB27/31]
- Unique Item: Skull (Runic) [DB28/31]
- Unique Weapon: Hoarfrost [DB5/11]
Miscellaneous
- Area is locked
- Chest
- Potions
- Loose gear
Exterior
This location constantly changes throughout Solstheim Side Quest: Unearthed. The first time you arrive, a Dunmer named Ralis Sedarys is digging at a half-buried barrow entrance. The Journal of Ralis Sedarys, volume 19, is near a hay pile.
Phase 1: There are a few miner tents and Ralis is on-site, moaning about Draugr.
Phase 2: There is a cooking spit, two more tents, and Ralis lamenting the constant Draugr threat.
Phase 3: There are more tents, at least one living miner, and Ralis in one of his moods again.
Phase 4: The camp is more like a small settlement now, with numerous tents and several murdered miners. Optionally make a point to enter Ralis’s tent, and read some of his journals. Volume 23 is most illuminating.
- Crafting: Cooking Spit
- Chest
- Kolbjorn Guard
- Miner
- Ralis Sedarys
- The Journal of Ralis Sedarys, volumes 19–23
Interior
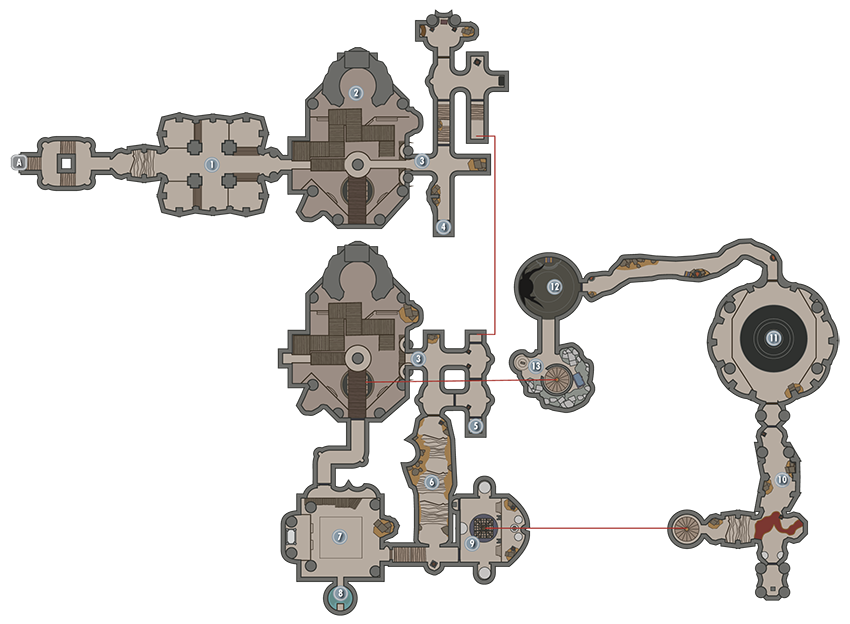
Door to Solstheim
Accessible from Phase 1 onward.
Entryway and Initial Burial Chamber
Phase 1: Expect at least six Draugr to contend with, both in the entryway and from the four raised corners of the burial chamber. Locate the main altar in the center of the burial chamber, and study the red skull. Lift it from its pressure plate, and a rotating wall arch ahead of you grinds open.
Phase 2: In the entryway, take the first right to claim a chest at the dead end. Expect another Draugr ambush as you enter the burial chamber, including archers firing down at you from the four raised corners of the chamber.
Phase 3: Be prepared for two Draugr to rush you just inside the entrance. A third, more powerful foe awaits you in the chamber below.
Phase 4: Unchanged.
- Chest (3) [1 = Novice, 1 = Adept]
- Loose gear
- Draugr
- Unique Item: Skull (Runic) [DB28/31]
Central Chamber
Phase 1: This chamber has almost completely collapsed and is filled with ash and rubble. However, a set of unique boots awaits you on the pedestal in the center of the room.
Phase 2: It looks like Ralis and the miners have made some progress here. A tough Draugr archer attacks from the circular platform in the center; strike with ranged spells or attacks to take him down quickly.
Phase 3: By now, most of the room has been excavated, although the Word Wall is still inaccessible (you can hear it but not reach it). Another Draugr awaits you on the central bridges.
Phase 4: Descend and approach the Word Wall, learning the Word of Power before continuing and optionally taking the short route back to the sacrificial chamber (Location [7]).
- Draugr
- Unique Item: Ahzidal’s Boots of Waterwalking [DB23/31]
- Word Wall: Cyclone [DB3/3]
,
, and
 Draugr Crypt
Phase 1: Inaccessible.
Phase 2: You must search these crypts for the corpses of two dead miners, Bradyn and Mireli. Bradyn is found on the lower floor to your left (west). He’s quite dead. Kill three Draugr and then venture farther (northwest) into the crypt, yanking the pull chain on the candlelit alcove ahead of you. This opens a rotating door to your right (east), exposing a tough Draugr to tackle. Pull a second chain in this new chamber’s alcove, which opens a rotating door to the southwest, behind you. This leads to the upper crypt and another Draugr to tackle. Optionally, step on the tripwire to trigger the battering ram trap (which often kills the Draugr), or slay it yourself. Avoid the pressure plate that sets off the magic caster trap, pluck the Soul Gem from the pedestal, then move to the portcullis puzzle with four handles to the right of it.
Puzzle Solution: The top handle releases only the first portcullis. The second releases darts, so ignore it. The third and fourth handles release the remaining portcullises, so pull them and continue up.
As you enter the upper crypt, the portcullis slam shut, trapping you in a small crypt with four Draugr. Deal with them, then examine the splattered remains of Mireli. Take the letter to her mother if you wish. Locate the seeming dead end to the northeast (Location [4]), hunting for a low handle to your right, which slides open a secret alcove allowing you to pick up Ahzidal’s Ring of Necromancy!
Phase 3: Bring death to the Draugr inside this now fully excavated crypt. Head to the middle level where a sarcophagus has been uncovered (a Draugr bashes its way out to meet your blades), and an iron door [Expert] has been unsealed. Pick this lock to reach a hidden antechamber with spiders to crush and a chest to pilfer. Continue down the stairs (avoiding the traps if you didn’t deal with them earlier), then continue back around to the chamber where you found Bradyn on your first visit. A new tunnel has been opened here, leading to a room with an iron door. Instead of continuing through it, kill the dormant Draugr in this room, then locate a wall chain in the alcove nearby. Yank it to expose a hidden room to the northeast (Location [5]) where Ahzidal’s Gauntlets can be found. Taking them sets off a dart trap, so step back quickly to avoid being hit. Then head back and continue through the iron door.
Phase 4: Unchanged.
- Draugr
- Albino Spider
- Poison Spider
- Bradyn (Deceased)
- Mireli (Deceased)
- Mireli’s Letter to Mother
- Potions
- Emerald Geode
- Chest (2)
- Loose Gear
- Danger! Battering Ram Trap
- Danger! Dart Trap
- Danger! Magic Caster Trap
- Unique Item: Ahzidal’s Ring of Necromancy [DB27/31]
- Unique Item: Ahzidal’s Gauntlets of Warding [DB24/31]
 Grand Staircase and Corridor
Phase 1: Inaccessible.
Phase 2: Inaccessible.
Phase 3: Just inside the stairwell, hit the tripwire, then stop, allowing the rockfall trap to remove Draugr threats ahead of you. At the intersection, turn southeast, then continue up the steps and into a large sacrificial chamber.
Phase 4: After passing through the sacrificial chamber, descend the steps back to the intersection, where the other end of the corridor has been unblocked. Continue into the Throne Chamber (Location [9]).
- Draugr
- Danger! Rockfall Trap
 ,
,
 Sacrificial Chamber and Antechamber
Phase 1: Inaccessible.
Phase 2: Inaccessible.
Phase 3: Expect to face about five Draugr in this chamber, with several bursting out of the sarcophagi on the walls. Before you leave, check the room for dead miners and guards, then look to the left (northeast), into a small antechamber with a pedestal (Location [8]), upon which rests a ring. You can use the Telekinesis spell to pull the ring to you, or open the portcullis by running across the central pressure plates so they all activate. You have only a few seconds to do this before they reset, so aim carefully and make sure to sprint. Claim Ahzidal’s Ring of Arcana from the pedestal, then optionally swim down into the water for some minor loot. To leave, head up the side steps in the sacrificial room and yank a chain to open the portcullis, watching for a subsequent blade trap and another chain that opens a quicker way back to the central chamber.
Phase 4: On your final visit to Kolbjorn Barrow, cross the Central Chamber’s bridge and approach the hallway with the blade traps. A pair of Draugr will charge at you; pull the chain above the door to trigger the trap and cut them down. Then pull it again and proceed into the Sacrificial Chamber, where three more Draugr await you. Deal with them, then continue down the stairs into the corridor (Location [6]).
- Draugr
- Danger! Swinging Blade Trap
- Unique Item: Ahzidal’s Ring of Arcana [DB26/31]
 Throne Chamber
Phase 1: Inaccessible.
Phase 2: Inaccessible.
Phase 3: Inaccessible.
Phase 4: Head down to a throne chamber with three Draugr to slay as they rise from their seats. After that, ponder a small puzzle:
Puzzle Solution I: A suit of armor rests behind a barred arch. Face north and south and pull each chain to rotate the wall so a whale petroglyph is exposed in opposite alcoves. Behind the two thrones are rotating pedestals. Shift both of them to Whale and pull the lever between them. The bars retract, allowing you to grab Ahzidal’s Armor.
Puzzle Solution II: Your progress is stalled. To continue, you must open the central trapdoor. In front of it is a carving with two Hawk petroglyphs. Turn the pedestals so they are both Hawks, pull the lever, and the trapdoor opens.
- Unique Item: Ahzidal’s Armor of Retribution [DB22/31]
 Lower Crypts
Phase 1: Inaccessible.
Phase 2: Inaccessible.
Phase 3: Inaccessible.
Phase 4: Descend the spiral steps, passing the scattered potions on the ceremonial table, then move into the lower crypts. Remove a Draugr to the right of the entrance before setting the floor ahead ablaze (via magic or a falling oil lamp shot by your bow). This helps remove the four Draugr in the main corridor and minimizes the damage from the forthcoming puzzle if you make a mistake. Turn right (north east).
Puzzle Solution: Ahead is a portcullis with a chain and two petroglyph pedestals. If you pull the chain, a fire trap engulfs you. Instead, turn the pedestals so the Serpent petroglyph points at the ground marking on each pedestal. This is the third of the puzzles, and two Serpents is the only remaining pair that hasn’t been chosen. Pull the chain and claim Ahzidal’s Helm. Watch for another fire trap as you take it!
Pass the sarcophagus with the Stalhrim deposit and move to the door opposite (southwest).
- Potions
- Loose gear
- Stalhrim deposit
- Unique Item: Ahzidal’s Helm of Vision [DB25/31]
 Ahzidal’s Chamber
Phase 1: Inaccessible.
Phase 2: Inaccessible.
Phase 3: Inaccessible.
Phase 4: You enter the chamber just as Ralis finishes his dark ritual and the Dragon Acolyte Priest Ahzidal rises from the seal in the center of the room. Expect a constant stream of Draugr to pour from the wall crypts, with Ahzidal raising them to fight anew as combat progresses. Concentrate your attack on Ahzidal, countering his fire-based attacks and using the columns around the chamber as cover. When the fighting is over, check the ashes for his mask.
- Draugr
- Ahzidal
- Follower: Ralis Sedarys [DB5/7]
- Unique Item: Ahzidal (Mask) [DB21/31]
- Unique Weapon: Hoarfrost [DB5/11]
 Hermaeus Mora’s Chamber
Phase 1: Inaccessible.
Phase 2: Inaccessible.
Phase 3: Inaccessible.
Phase 4: Leave Kolbjorn Barrow via the gap in the sarcophagus to the southwest, passing a large chest in the tunnel before reaching a pull chain and allowing access into a strange and terrible chamber. Here you find an effigy of Hermaeus Mora, another huge chest and assorted items, and a fabled Black Book. This begins Solstheim Side Quest: Black Book: Filament and Filigree.
- Chest (2)
- Loose gear
- Potions
- Black Book: Filament and Filigree
 Rotating Staircase
Phase 1: Inaccessible.
Phase 2: Inaccessible.
Phase 3: Inaccessible.
Phase 4: Exit to the northeast, checking a Stalhrim deposit before activating a lever to summon a rotating staircase up to your level. Ascend, emerging in the central chamber.
- Stalhrim deposit
[S.S05] Wreck of the Strident Squall
Related Quests
- Solstheim Regional Activity: Tome Raider*
Recommended Level: 10
Habitation: Reaver Camp
- Reaver
Crafting
- Cooking Pot
Collectibles
- East Empire Strongbox [DB25/33]
Miscellaneous
- Chest
- Loose Gear
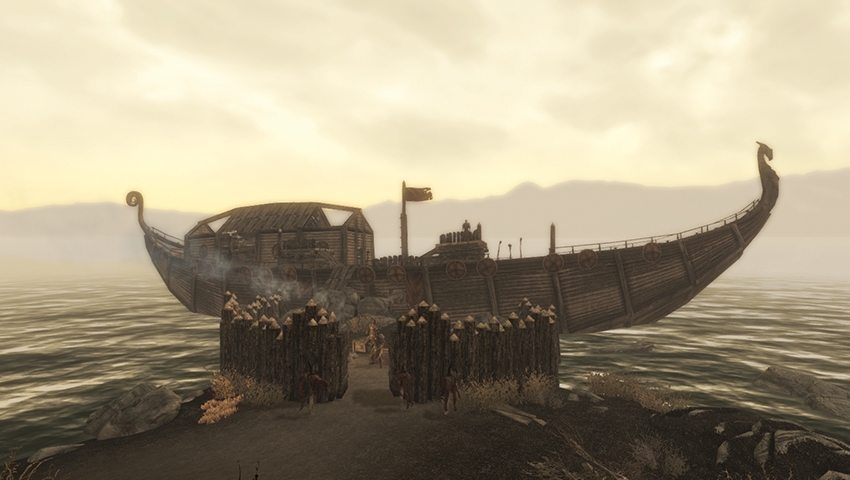
A band of five Reavers has succeeded in reinforcing the ruins of this merchant ship, constructing a walled encampment, with flayed and buried bodies of the previous crew on poles to put off potential invaders. On deck are battlements and the entrance to the wreck proper, with a chest [Adept] and sleeping rolls. Down into the hold, expect shelves with an East Empire Strongbox [Expert], a couple of skeletons, and steps leading underwater. Drowned in the bottom of the hold are an Alchemist, an Argonian, and in the otherwise-sealed area, a Redguard with a scimitar and knapsack. The hold also has a large chest that holds a special folio needed for a Regional Activity.
- Chest (2) [1 = Adept]
- Cooking Pot
- East Empire Strongbox [Expert] [DB25/33]
- East Empire Pendant
- Heart Stone
- The Lusty Argonian Maid Folio Edition
[S.S06] Hrodulf’s House
Recommended Level: 20
Habitation: Hunter Camp
- Ash Spawn
- Reaver
Puzzle
- Secret Bookcase Door
Collectibles
- East Empire Strongbox [DB26/33]
Miscellaneous
- Area is locked
- Chest
- Potions
- Loose gear
Exterior
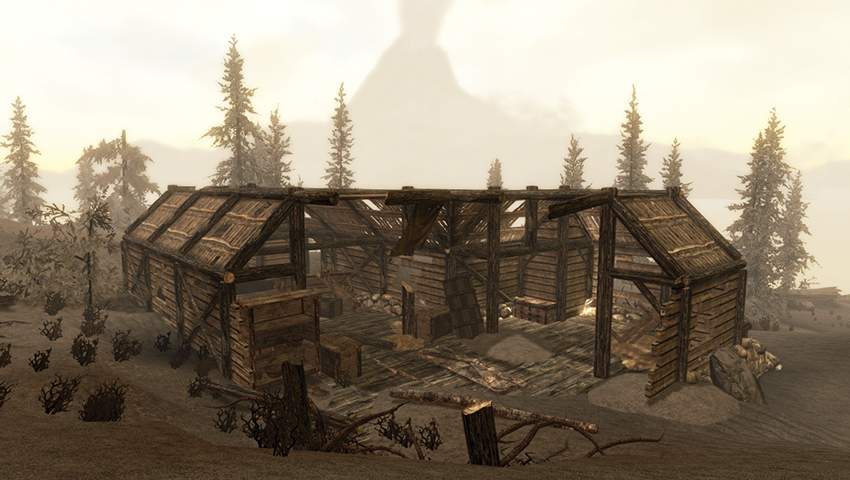
This hunter’s hovel appears to have recently caught fire from the ashen rain that falls from Red Mountain’s rumbling eruptions. As you explore this dwelling, expect two Ash Spawn to appear and attack. Find two Heart Stone deposits just east of the structure. By the missing wall where the Ash Spawn enter is an East Empire Strongbox [Expert], and opposite (south) is a chest and trapdoor into Hrodulf’s House (cellar). The corpse of the resident, who appears to have been killed by Reavers, is on the shore directly south of here, at Secondary Location [S.SI] Hrodulf’s Last Stand.
- Heart Stone (2)
- East Empire Strongbox [Expert] [DB26/33]
- East Empire Pendant
Interior
Two Reavers are chatting about their kills near a letter on the table, which was from Hrodulf’s lover Bjornolfr. The cellar hold’s Hrodulf’s Journal, which hints at a hidden location off this chamber. There are scattered books and a bookshelf to activate, which opens a hidden tunnel to a Dwemer antechamber where Bjornolfr’s corpse lies. Search the corpse for a bloodstained letter.
- Letter
- Hrodulf’s Journal
- Potions aplenty
- Chest
- Dwarven Metal Ingot (3)
- Bloodstained Letter
[S.S07] Brodir Grove
Recommended Level: 10
Habitation: Bandit Camp (Reaver)
- Reaver
Crafting
- Cooking Pot
- Grindstone
Dangers
- Bear Trap
Collectibles
- East Empire Strongbox [DB27/33]
- Unique Weapon: Stormfang [DB6/11]
Miscellaneous
- Chest
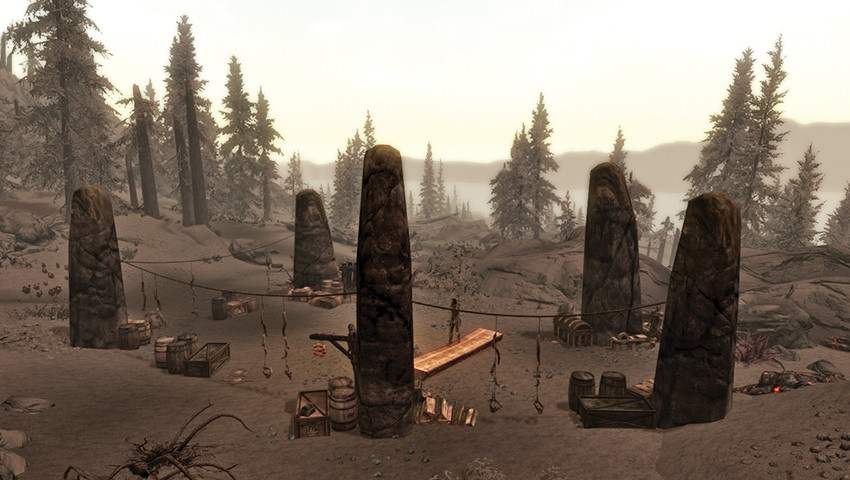
A circle of stones (without any magical abilities) stands near the edge of the woods northwest of Highpower Tower, within which is a Reaver camp. Expect three foes, the most troublesome of which is carrying a unique weapon: Stormfang. Watch for a bear trap in front of the large chest, look for various plant ingredients to pick, and claim the following:
- Chest (2)
- Cooking Pot
- East Empire Strongbox [Expert] [DB27/33]
- East Empire Pendant
- Grindstone
- Ore: Heart Stone (3)
- Unique Weapon: Stormfang [DB6/11]
[S.S08] Kagrumez
Related Quests
- Solstheim Side Quest: The Challenges of Kagrumez*
Recommended Level: 25
Dungeon: Dwarven City
- Dwarven Automaton
- Reaver
Services
- Follower: Steadfast Dwarven Sphere [DB6/7]
- Follower: Steadfast Dwarven Spider [DB7/7]
Dangers
- Trial Chamber
Puzzle
- Dwarven Puzzle
Collectibles
- Kagrumez Resonance Gem [DB4/5]
- Kagrumez Resonance Gem [DB5/5]
- Unique Weapon: Dwarven Black Bow of Fate [DB7/11]
Miscellaneous
- Area is locked
- Chest
- Loose gear
- Lots o’ gold
Exterior
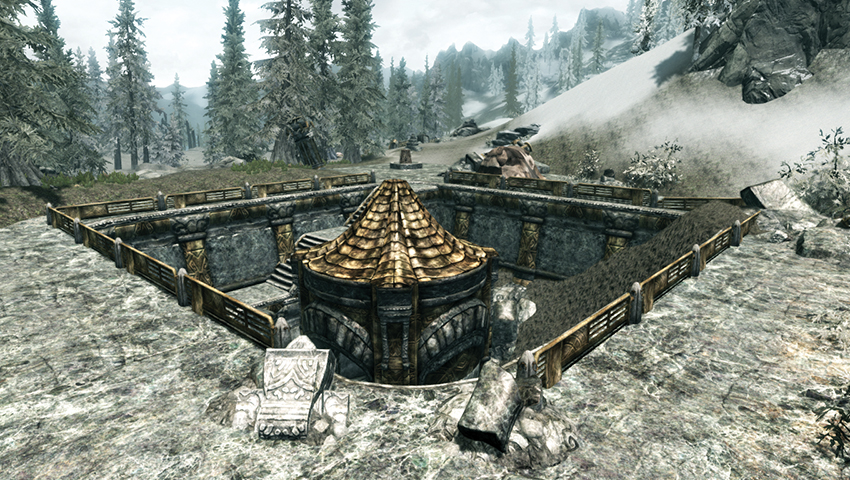
A dead Dunmeri mage is sprawled inside his tent, near a knapsack and a few dwarven parts. Otherwise, this area is desolate. The real entrance to Kagrumez is below. Excavation and rock slides have decimated one of the walls; there’s a chest among the stonework. Activate the elevator to head inside.
- Chest
- Raleth Eldri (Deceased)
Interior
Elevator to Solstheim
Corridor to the Golden Door
This is the entrance chamber, with dwarven metal and parts to take.
Trial Chamber
As you enter, a Reaver is talking about things coming out of the walls and suggests they return with more men. Another replies they have the mettle to slay a few spiders, before claiming the treasure of Kagrumez. Search the leader’s corpse for two Kagrumez Resonance Gems; you need these to activate the strange pedestal receptacle in the middle of the chamber, which begins the forthcoming trials. There is a small journal to read, too, offering hints at what is to come.
- Kagrumez Resonance Gem [DB4/5]
- Kagrumez Resonance Gem [DB5/5]
- Raleth Eldri’s Notes on Kagrumez
Trial 1: Automaton Attack
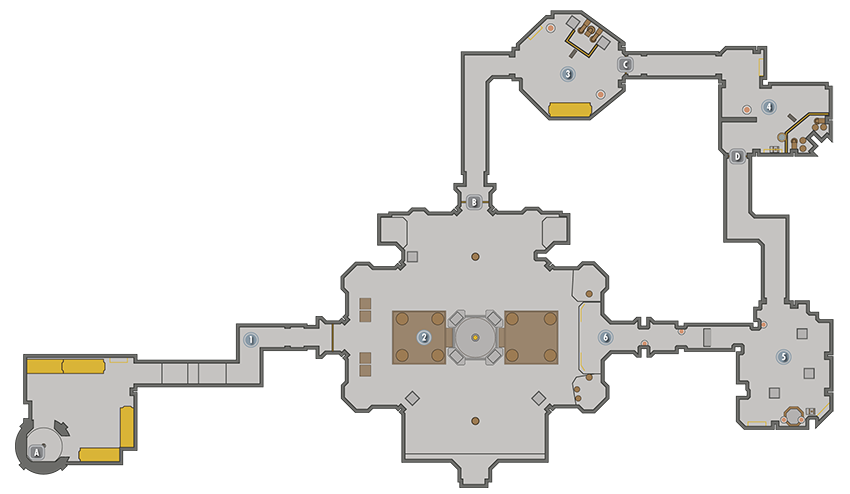
The resonance receptacle receives any Kagrumez Resonance Gems you wish to insert, and you can remove them without any problems. Look to the northern gate (Location B). Above it is a resonance marker, a golden plate with the fourth and ninth holes covered. Return to the receptacle and place the gems in that pattern to begin. You will face Dwarven Spiders (3) and Dwarven Ballistas (3).
Trial 2: Flame and Fireproof Spheres
In Location 3, locate the gate on the east wall (Location C). Above it is a resonance marker with the second, eighth, and ninth holes covered. Place the gems, and the trial begins. Two flame gouts shoot vertically, while steam blasts between the walls on the east and west sides. Toward the north and south edges of the arena are rotating fire pedestals that activate when you move near them; therefore, stay on the outer edges or the middle of the arena when fighting. You must defeat Dwarven Spiders (5) and Tempered Spheres (2), which are immune to fire damage.
Trial 3: A Short, Sharp Shock
In Location 4, locate the gate southwest of the room (Location D). Above it is a resonance marker with the first, fifth, seventh, and ninth holes covered. Place the gems to begin your final trial. The chamber fills ankle-deep in water, with islands in the center and around the edges. As you navigate the water, expect shock damage (which is extra-nasty if you’re in the water) from Tempered Spheres (2), Dwarven Ballistas (2), and Dwarven Spiders (3).
 Northern Gate
Spider Storeroom
Head through the northern gate and up the passage. Among shelves of ingots is a lever that opens a strange cage. Inside is an automaton that acts in the same way as an Animal Companion. It can fight alongside you or “go home” (which is here).
- Dwarven Metal Ingot (15)
- Follower: Steadfast Dwarven Spider [DB6/7]
 Eastern Gate
Sphere Storeroom
This is another storage chamber with a chest and a lever to pull. This reveals a new automaton to control, the Steadfast Dwarven Sphere! Choose this or the Spider to aid you, if you wish.
- Chest
- Follower: Steadfast Dwarven Sphere [DB7/7]
 Southwestern Gate
Upper Chamber
Head up to a long hall. Among the other treasures is the Dwarven Black Bow of Fate, an impressive haul for your final prize.
- Chest
- Flawless Diamond
- Diamond (2)
- Gold Ingot (7)
- Unique Weapon: Dwarven Black Bow of Fate [DB7/11]
Viewing Balcony
Although you can use Whirlwind Sprint to access balconies overlooking the trial chamber, they lead nowhere. This location has two stone seats but little else.
[S.S09] Ramshackle Trading Post
Recommended Level: 10
Habitation: Trading Post
- Falas Selvayn
Services
- Trader (General Goods): Falas Selvayn [DB10/16]
Collectibles
- East Empire Strongbox [DB28/33]
- Unique Weapon: Glass Bow of the Stag Prince [DB8/11]
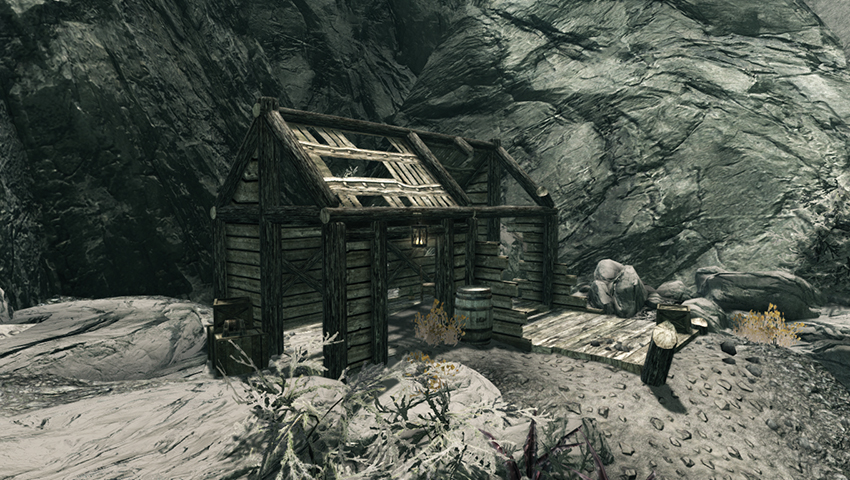
What looks to be an abandoned (and certainly ruined) trading post is actually still used by Falas Selvayn. Enter the structure, looking for an arrow that pins a note to the northwest corner wall. It reads “Meet me here at midnight.” Just outside is an East Empire Strongbox [Expert]. Falas turns up just after midnight (stay away from the location, then return to meet him). He remains here until around 4:00 a.m. Purchase (or pickpocket) a unique bow from him.
- East Empire Strongbox [Expert] [DB28/33]
- East Empire Pendant
- Trader (General Goods): Falas Selvayn [DB10/16]
- Unique Weapon: Glass Bow of the Stag Prince [DB8/11]
[S.S10] Highpoint Tower
Related Quests
- Solstheim Side Quest: Old Friends
Recommended Level: 20
Dungeon: Ash Spawn Lair
- Ash Spawn
- Flame Cloaked Spider
- Albino Spider
- Niyya
- Ildari Sarothril
Crafting
- Alchemy Lab
- Arcane Enchanter
Dangers
- Magic Caster Trap
- Rune Trap
Collectibles
- Unique Item: Telvanni Robes [DB29/31]
Miscellaneous
- Area is locked
- Chest
- Potions
- Loose gear
- Lots o’ gold
Exterior
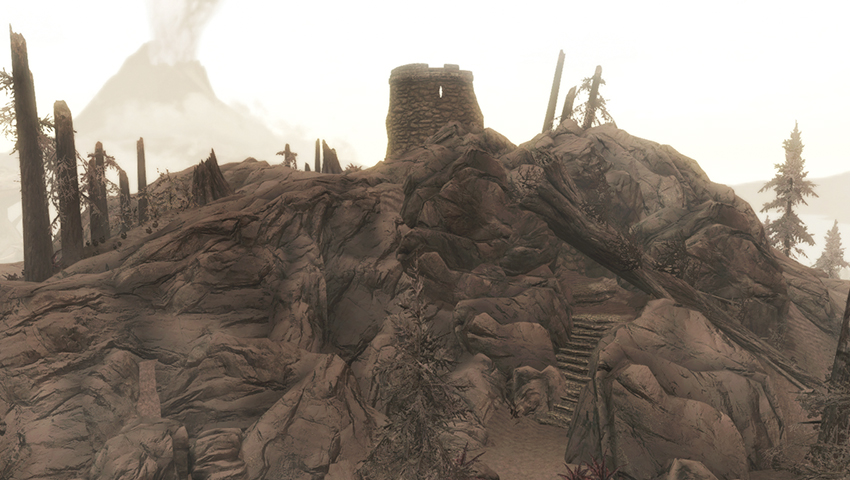
Highpoint Tower is a lonely ruin with commanding views of the southern ashlands. The exterior is devoid of life, aside from the hated Ash Spawn. The tower turret has a chest you can scramble up to (use the lip edge to maneuver around) and a deposit of Heart Stone. But the entrance is under the tower, cunningly hidden and guarded by Ash Spawn. To find it, stay below the rocky area around the tower and move clockwise around until you’re slightly north of the location, facing south. A group of Ash Spawn are lurking near the dying pine trees and trama roots. Defeat the foes, locate the roughly hewn steps in the rocks that wind up to the southeast, and approach the stone tunnel entrance to the tower.
- Chest
- Heart Stone Deposit
Interior
Door to Solstheim
This is firmly sealed until the aforementioned Side Quest is active.
Tower Chamber
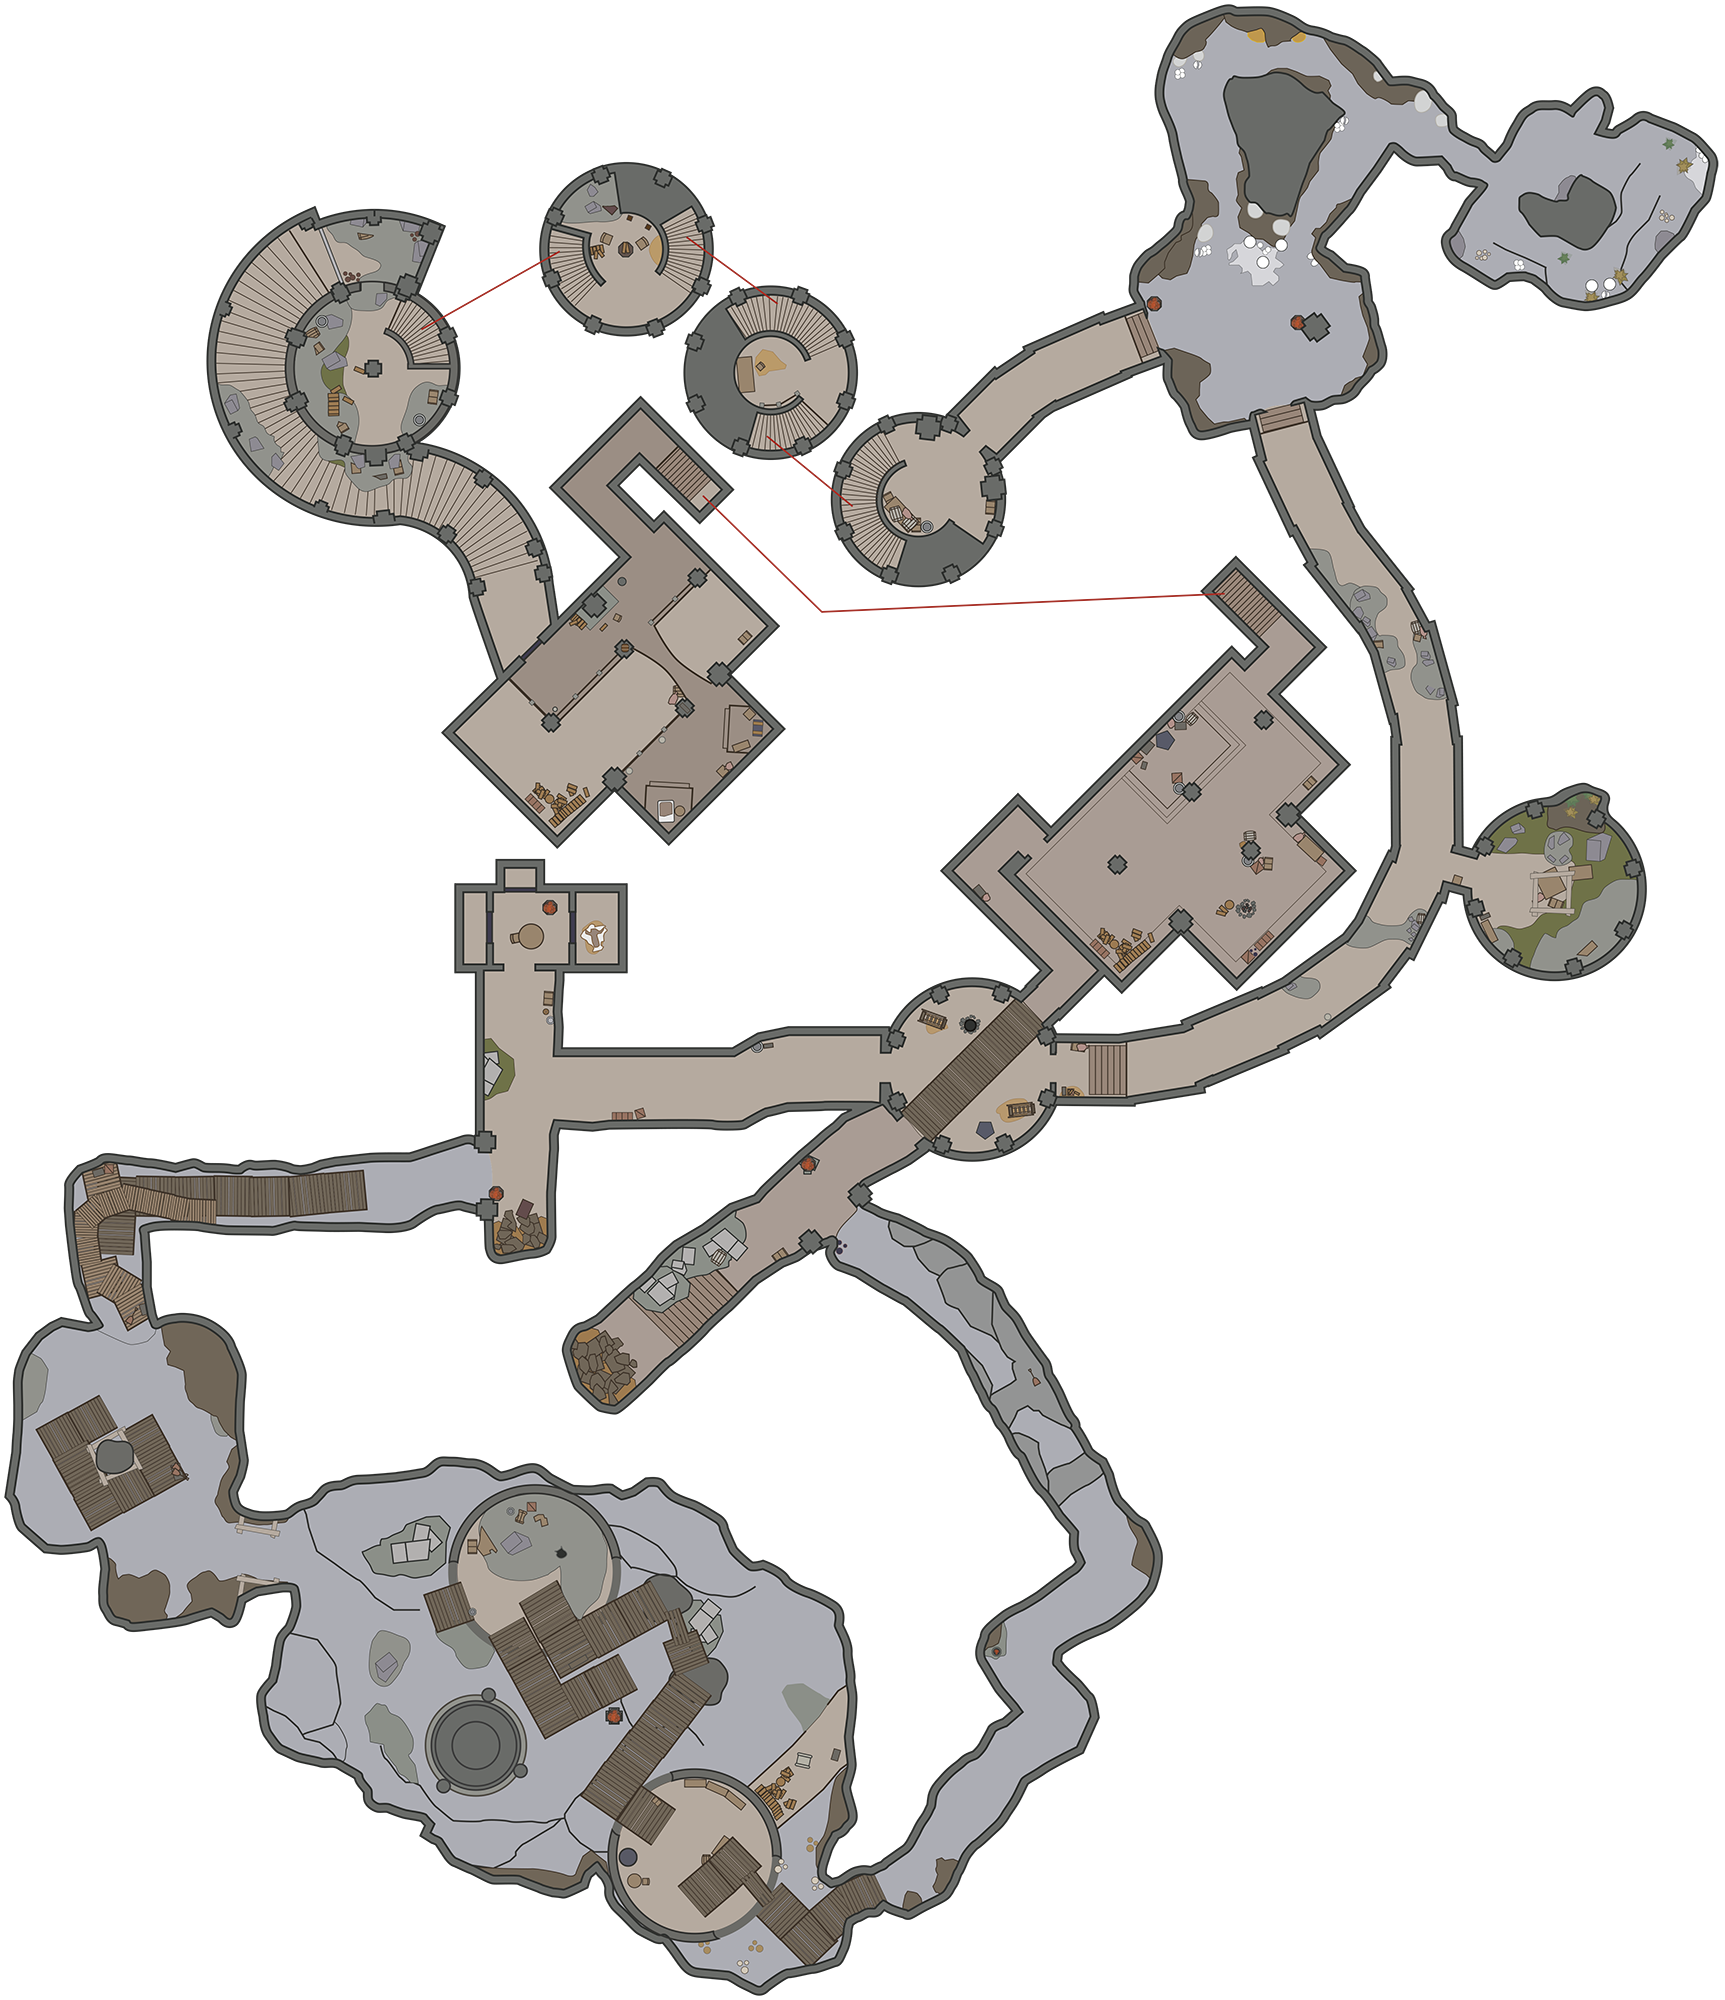
The entrance area is half filled with rubble and ash; there’s little of worth here or in the caved-in entrance to the south. Head down three levels of spiral steps, pausing at the table two floors down to secure the first of Ildari’s Journals.
- Ildari’s Journal, vol. I
Rocky Cave and Low Caverns
A curved stone tunnel leads into a rocky cave attached to the base of the tower structure with numerous revolting egg sacs to your left (southwest). These burst as you head toward them, so slay any Flame Cloaked or Albino Spiders here or in the small cavern with the ruby geode deposits. The low caverns have more geodes and scattered bones.
- Amethyst Geode
- Emerald Geode
- Ruby Geode (2)
- Sapphire Geode
- Flame Cloaked Spider
- Albino Spider
Curved Stone Tunnel
Move north into the next section of tunnel, plucking the Soul Gem from its focusing cradle so it doesn’t spit shock bolts at you. Head past the partial collapse and Ash Spawn waiting to repel you. Rush the next magic caster trap and halt the electrical damage before continuing east to the tunnel exit.
- Danger: Magic Caster Trap
- Ash Spawn
Circular Side Chamber
Check here for more foes, scattered iron ingots, and a bird’s nest.
- Ash Spawn
Circular Torture Room and Bridge
Watch the fire rune on the ground in the roughly circular chamber with the Arcane Enchanter and woodcutter’s axe. You return here when navigating the wooden bridge above.
- Crafting: Arcane Enchanter
- Danger: Rune Trap
Dungeon Passage
Head east down the large dungeon passage, watching for a wall rune at the far end. To the right (south) is a small dead-end passage with cells. To the left (north) is a blocked area and bowl torch. A gap to the right (east) allows access into a mine area. Grab the flawless diamond and coin purses protruding from a half-buried chest in the ceiling!
- Flawless Diamond
- Danger: Rune Trap
Cells
One still has a prisoner inside: Niyya. If you unlock her door [Adept], she tells you Ildari sealed her and other miners into these cells and used them in her experiments. Ildari seems quite deranged. Just how deranged is detailed in the second of her journals, found on the table in the jail area. The other two cells [Novice] have prisoners a little too bony to be of any use to you.
- Ildari’s Journal, vol. II
- Niyya
Orichalcum Mine Workings
Drop down into the mine where veins of gold, Orichalcum, and sapphire ore are located. Then head northwest, under the three hanging lanterns, and prepare for fraught combat.
- Gold Vein
- Orichalcum Ore (3)
- Sapphire Geode (2)
Summoning Battlements (Lower)
A small fortification built within a large cave. Ildari Sarothril appears atop the battlements: She’s not the friendly sort, as indicated by the minions she summons before fleeing. She conjures an Ash Guardian, and three or four Ash Spawn also join in the throng.
- Ash Guardian
- Ash Spawn
Dead-End Mine Shaft
If you collect toadstools and cheese, prepare to be pleased.
Summoning Battlements (Upper)
Climb the wooden scaffold steps surrounding the old fort, passing the summoning circle and an apothecary satchel. Cross to the interior of a partially ruined tower where Ildari yelled at you from. Drop down and inspect the shelves and room, grabbing any items you wish. The area has potions; ingredients; several books of interest, including Ahzidal’s Descent, Deathbrand, and Ildari’s third journal; and a strongbox (not made by the East Empire Company).
- Crafting: Alchemy Lab
- Book: Ahzidal’s Descent
- Book: Deathbrand
- Ildari’s Journal, vol. III
- Potions
- Strongbox
Mine Fissure
Cross to the exit and southwest tunnel that winds up and turns into a fissure with Ash Spawn appearing as you progress.
Castle Corridor
The only way is to the right (southwest), over a bridge (above Location [5]). There’s a chest at the opposite end, in the rubble, already opened.
- Potions
- Loose gear
 Ildari Sarothril’s Chamber
This chamber is a grand, two-story hall where Ildari resides. Face her ice storms and thunderbolts in an epic battle, watching for her fast healing and other possible magical enhancements. Long-range attacks may be easier, as fighting on the narrow bridge to her balcony bedroom is tricky. When she finally drops to her knees, race in and rip her heart out, finally ending her malicious ways for good. Search her corpse for robes and a staff. The room also contains a variety of ingredients and loose gear.
- Crafting: Arcane Enchanter, Wood Chopping Block
- Chest
- Loose gear
- Potions
- Ildari Sarothril
- Heart Stone
- Unique Item: Telvanni Robes [DB29/31]
 Barred Archway Exit
Activate the lever near the small bridge, and a barred archway opens, allowing you to exit via a long second tower staircase.
 Secret Exit
A pull chain here opens a section of wall leading back to the initial tower chamber.
[S.S11] Fort Frostmoth
Related Quests
- Solstheim Side Quest: March of the Dead
- Solstheim Side Quest: The Great Solstheim Strongbox Hunt*
Recommended Level: 25
Dungeon: Military Fort
- Ash Spawn
- General Falx Carius
Collectibles
- East Empire Strongbox [DB29/33]
- Unique Weapon: Champion’s Cudgel [DB9/11]
Miscellaneous
- Area is locked
- Chest
- Potions
- Loose gear
Exterior
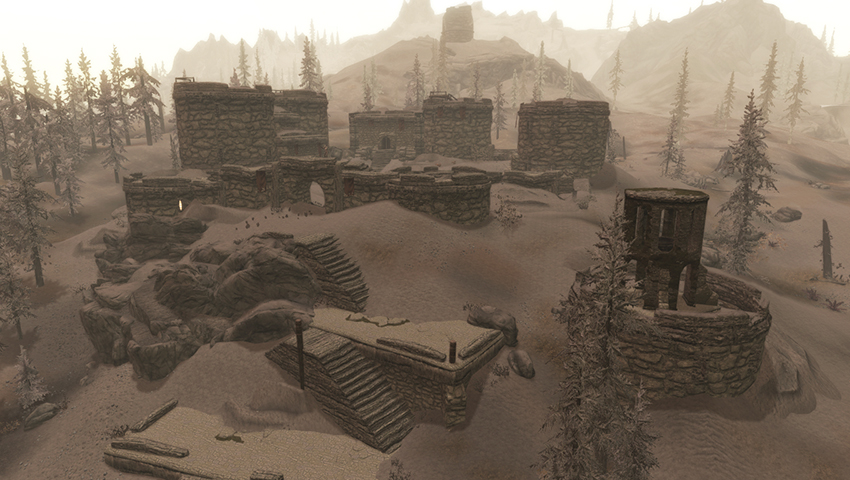
This was once a sizable Imperial garrison, where unruly soldiers were sent as penance. Now it is a ghostly shell. Ash Spawn patrol the walls, and the booming voice of General Falx Carius instructs his minions to attack. Expect around six foes to contend with along the battlements and in the southeast tower (where you find skeletal remains and a knapsack). To the south is a sunken Nord merchant boat with a few mead barrels and a skeleton, and a three-tiered harbor wall with steps up to the main southern entrance.
The fort proper is half buried by the ash, and there are numerous gaps in the battlements that allow you into the central courtyard. The western tower is accessible, with a foe at the top and a good vantage point for long-range attacks. But the most intact sections of the fort lie along the north and west walls. The north wall door is accessible only from the inside, leaving you with one entrance—to the west. Heading inside is the only way to reach the western and northern rooftops, where you find a chest along the western side.
- Chest
- Ash Spawn
Interior
Door to Solstheim
Western Entrance Corridor
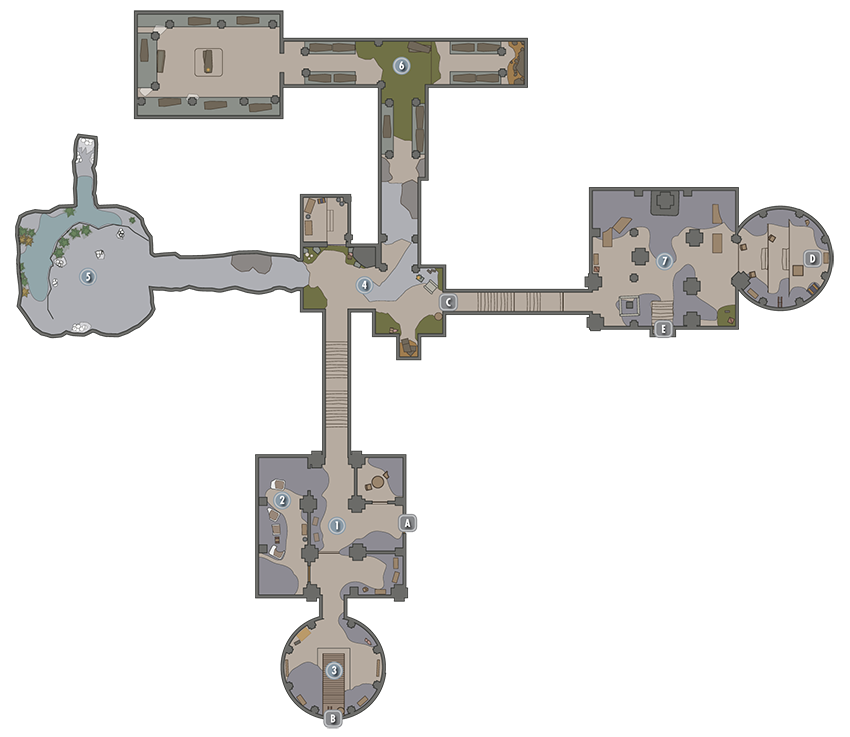
The choking ash is everywhere, as are three or four Ash Spawn to contend with, throughout Locations 1, 2, and 3. Adjacent to the door is a small guard chamber with a couple of potions. Move to the main north-south corridor and check the nearby small armory to the southeast for Imperial equipment, some books, and an East Empire Strongbox [Expert]
- Ash Spawn
- Potions
- Book: The Legend of Red Eagle
- East Empire Strongbox [Expert] [DB29/33]
- East Empire Pendant
- Loose gear
Imperial Barracks
The ruined remains of beds and imperial equipment are located here. Watch out for the foe and the chest [Adept].
- Ash Spawn
- Chest [Adept]
Training Room
A ramp to a ladder and trapdoor allows access to the western roof, where you’ll find a chest. The room has scattered items and a few potions.
- Ash Spawn
- Potions
Trapdoor to Solstheim
Ruined Hallway
Including the steps down you’ve taken to reach here, there are five separate exits and one blocked-off alcove in this chamber, along with two Ash Spawn. There’s scattered equipment and a cobwebbed entrance to the west. There’s a locked cell door [Master] to the north (you can also unlock it with the Fort Frostmoth key, found in Location [6]). Inside is a chest, some hidden moon sugar, and a variety of drinks. The other exit north leads down to the crypt. To the east is a wooden door requiring the Fort Frostmoth Key to open (which is in the crypt). To the south, a wall has fallen on the skeletal remains of Maximian Axius, with a letter and knapsack nearby. Check the knapsack for three more letters.
- Ash Spawn
- Loose Gear
- Chest
- Maximian’s Knapsack
- A Letter to Selina, I–IV
Geode Chamber
Five nasty little spiders guard seven egg clusters in this gloomy rock cave, with Heart Stone and ruby geodes to mine afterward.
- Albino Spider
- Flame Cloaked Spider
- Jumping Flame Spider
- Heart Stone Deposit (2)
- Ruby Geode (3)
Crypt
Face Ash Spawn in this narrow crypt lined with Imperial coffins, with two stacked atop each other at the chamber’s west end. Aside from a chest and a few potions, there’s a knapsack with a key inside that opens the wooden door to the east in Location [4]. Ildari’s Journal is atop the coffins, detailing Neloth’s old apprentice Ildari Sarothril and her attempts to raise the dead (for more about Ildari, see Solstheim Side Quest: Old Friends).
- Ash Spawn
- Chest
- Potions
- Knapsack
- Fort Frostmoth Key
- Ildari’s Journal
- Loose Gear
Wooden Door [Requires Key]
Use the Fort Frostmoth Key to open this door.
General Falx Carius’s Chamber
If you’re here for Solstheim Side Quest: March of the Dead, the resurrected remains of the general fight you here, along with four Ash Spawn minions. There’s a chest, some books, and potions to obtain.
- Ash Spawn
- Book: Ahzidal’s Descent
- Book: Deathbrand
- Chest
- General Falx Carius
- Unique Weapon: Champion’s Cudgel [DB9/11]
Trapdoor to Solstheim
This leads up to the roof for a quick escape.
 Door to Solstheim [Requires Key]
Use the Fort Frostmoth Key to open this door.
[S.S12] Ashfallow Citadel
Related Quests
- Solstheim Side Quest: Served Cold
- Solstheim Side Quest: The Great Solstheim Strongbox Hunt*
Recommended Level: 25
Dungeon: Military Fort
- Mirri Severin
- Morag Tong
- Tilisu Severin
- Vendil Severin
Crafting
- Alchemy Lab
- Arcane Enchanter
Dangers
- Bear Trap (5)
- Swinging Wall Trap (3)
- Spear Trap (2)
Collectibles
- East Empire Strongbox [DB30/33]
Miscellaneous
- Area is locked
- Chest
- Potions
- Loose gear
Exterior
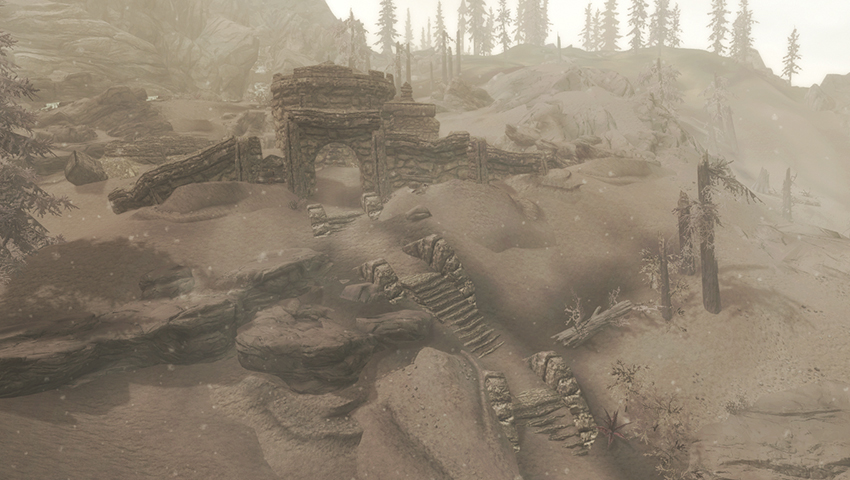
An old Imperial fort now controlled by the Morag Tong (an ancient assassins guild from Morrowind who pray to Mephala), Ashfallow Citadel is an unassuming ruin from the outside. The fort is half buried in ash, and enemies prowl only the stone battlements if Solstheim Side Quest: Served Cold is active. Stone piles stained with blood and bone dissuade you from exploration, but aside from the steep ground, there’s little to threaten you here (until you enter).
- Morag Tong
- Heart Stone Deposit (2)
Interior
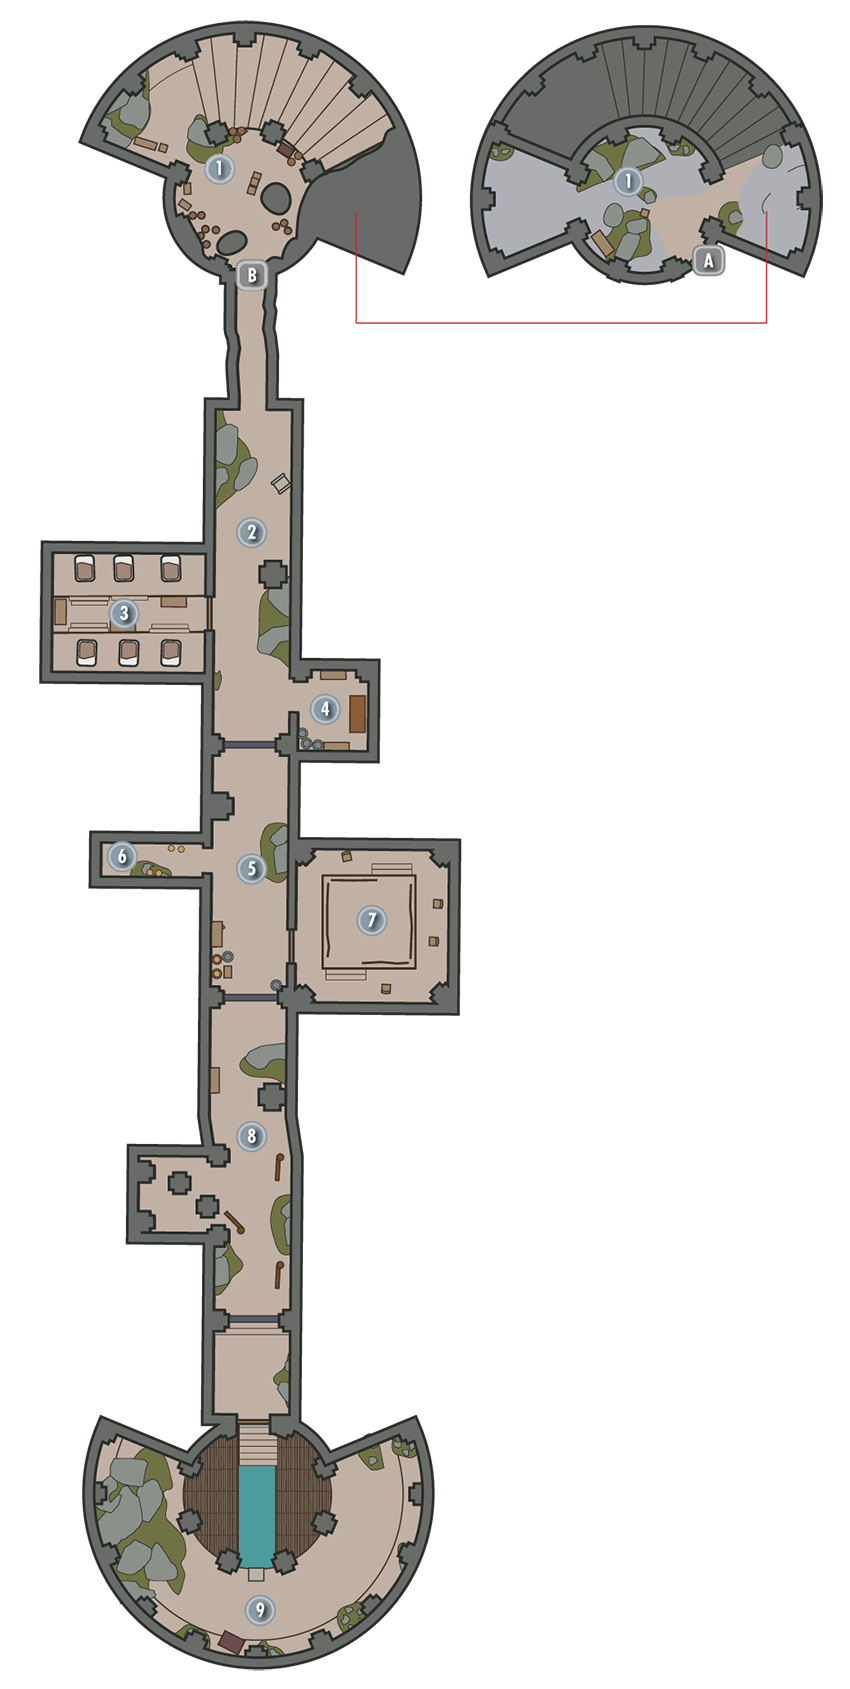
Door to Solstheim
Tower Room
Check the bookshelf to your left (west), where an East Empire Strongbox [Expert] sits on the middle shelf. There’s a skeleton to loot and steps down to the north. These lead to a storage room with a chest and a narrow tunnel, which is sealed unless Solstheim Side Quest: Served Cold is active. Morag Tong appears only during this quest.
- Morag Tong
- East Empire Strongbox [Expert] [DB30/33]
- East Empire Pendant
- Chest
Rock Wall Entrance
There are no levers or chains to pull; this rock wall only recedes during Solstheim Side Quest: Served Cold.
Dungeon Corridor (Part 1)
This corridor is filled with pull chains to remove the numerous iron bars preventing your progress. Ahead is an open door to your right (west) and a bookcase of books.
- Morag Tong
Assassins’ Dormitory
Clear this dormitory of assassins and any other foes you find. Grab any books, chitin, or Morag Tong armor you wish, then head back to the main corridor.
- Loose gear
- Safe [Adept]
Magic Preparation Nook
Locate a small chamber with an Alchemy Lab, Arcane Enchanter, books, potions, and a pull chain by the entrance. Yank the chain to remove the bars.
- Morag Tong
- Crafting: Alchemy Lab, Arcane Enchanter
- Potions
- Loose gear
Dungeon Corridor (Part 2)
Note the three Morag Tong assassins you must kill. Don’t pull the chain on the left wall (it raises the bars behind you). Farther down the corridor is another barred area and a bookcase.
- Morag Tong
- Book: Ahzidal’s Descent
Bear Trap Passage
Watch out for bear traps before you reach another chain. Pull that, which removes the first set of bars farther down the corridor.
- Danger! Bear Trap (5)
Training Room.
Outside this door is a third chain, which opens the next part of the corridor. Inside is a training ring and some loose gear. If you didn’t kill Mirri Severin back in Raven Rock, she will confront you here.
- Mirri Severin
- Morag Tong
- Loose gear
Dungeon Corridor (Part 3)
In the next part of the corridor are eight pressure plates linked to three separate swinging wall traps and two wall spear traps, so take extreme care as you tread forward. The safest way to reach the two pull chains in the alcove to your right (west) is to look down and avoid all pressure plates; maneuver past the alcove, turn right, and edge between the left wall of the alcove and a swinging trap. Watch for more plates as you look for two pull chains, both on the pillars in this alcove. They open the two remaining bars.
- Danger! Swinging Wall Trap (3)
- Danger! Spear Trap (2)
Vendil Severin’s Quarters
Ignore the pull chain to your right, just before the final arched entrance, as this simply raises the bars directly behind you, cutting off your only retreating route. You must slay Vendil Severin, along with his fellow assassins, including Tilisu, if she still lives. When Vendil finally yields, check his corpse for the key to his manor in Raven Rock.
- Tilisu Severin
- Vendil Severin
- Severin Manor Key
- Morag Tong
- Chest
[S.S13] Vahlok’s Tomb
Related Quests
- Solstheim Side Quest: Lost Legacy
Recommended Level: 30
Dungeon: Draugr Crypt
- Corrupted Shade
- Draugr
- Thartan
- Vahlok the Jailor
Special Area
- Word Wall: Battle Fury [DB1/3]
- Word Wall: Battle Fury [DB2/3]
- Word Wall: Battle Fury [DB3/3]
Dangers
- Flamethrower Trap
Puzzle
- Nordic Puzzle Door
- Nordic Puzzles
Miscellaneous
- Area is locked
- Chest
- Loose gear
- Lots o’ gold
Exterior
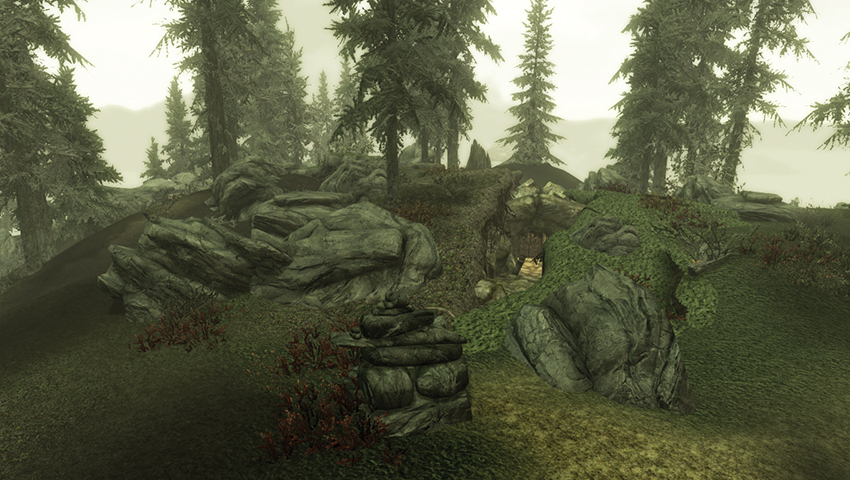
Recent seismic activity has uncovered a crack in the earth southeast of Thirsk Mead Hall. During Solstheim Side Quest: Lost Legacy, Tharsten, the historian in Skaal Village, asks you to explore it with him. Your journey takes you to the previously hidden door to Vahlok’s Tomb.
Interior
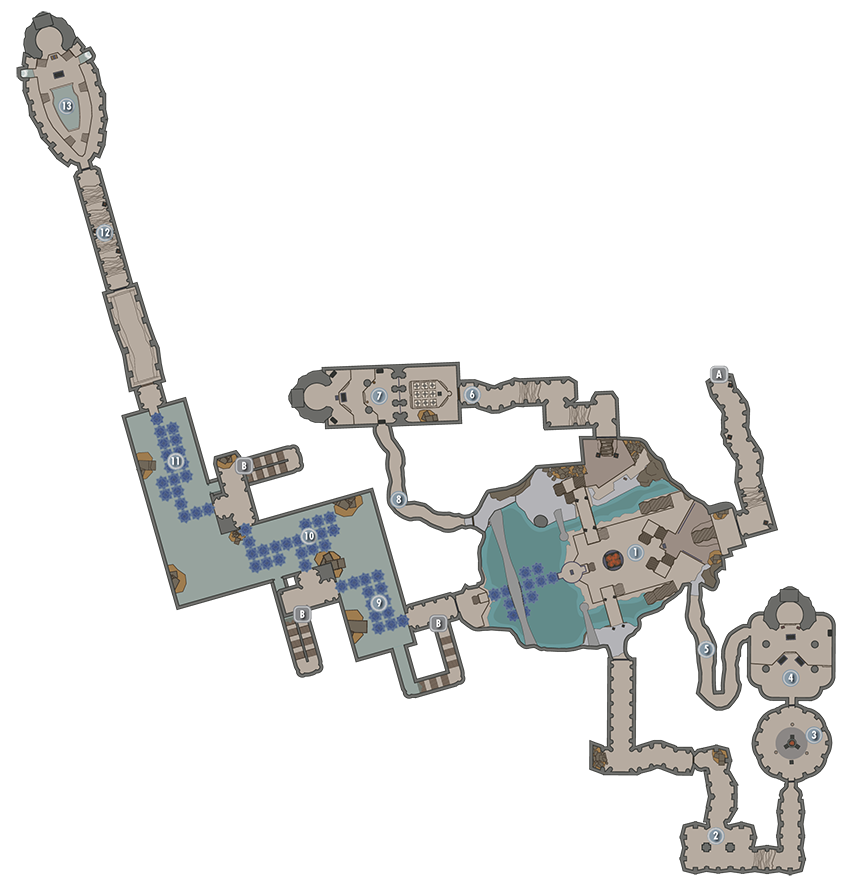
Door to Solstheim
Main Entrance Chamber
This grand chamber allows access to the two separate “wings” of this dungeon, as well as the final series of chambers ahead (west) of you. Move to the pedestal, where Tharstan reads off a cryptic riddle: “A sacrifice will bring you closer to that which you seek.” At the glowing grating on the lower stone plateau, there are corpses strewn about the floor here.
Puzzle Solution: Locate one of the dead Draugr and pick it up (manually, press and hold down the button or key), and then drag it onto the glowing grating. Move to the pedestal with the inscription and pull the switch. The grating opens, and the corpse tumbles into the fire below. Ceremonial torches flicker into life on either side of the stone plateau, and portcullis to the left (south) and right (north) open. You’re able to head in either direction.
There are also two chests to discover, low down on the northern bank by the water and underwater, just below the cage.
Main Entrance Chamber (Return): After you’ve explored both “wings” of the dungeon, return here and move to the cage on the western side of the fiery stone plateau. Inspect the indentations. These circular keyholes require you to place each of the Amethyst Claw halves into them, unlocking the cage in front of you. Pull the handle on the cage’s pedestal, and a series of ethereal blue platforms appears, creating a path to the ledge and door on the opposite wall. Follow the snaking path to the far ledge, drop down onto the dungeon passage heading west, and pass a barred door.
- Tharstan
- Chest (2)
Draugr Crypt (South)
Open the iron door and move into a Draugr crypt, where you have company. Slay four or five Draugr, then climb the steps to the east, encountering one or two more Draugr before reaching a pull chain and barred archway. Pull the chain.
- Draugr
Nordic Puzzle Chamber (South)
The exit arch opposite is currently sealed with a portcullis. Inside the chamber are three pillars around a central cylinder with colored runes that glow with unnatural light.
Puzzle Solution: The central pillar has three sides, all different-colored. Each side has a different weapon resting on or nearby its own pedestal:
There is a green side with an Ancient Nord Bow.
There is a blue side with a Staff of Flames.
There is a red side with an Ancient Nord Sword.
The three smaller pillars have “impact stones” encased into them. These activate (glowing and changing color to match the part of the central pillar opposite) when a particular weapon is used to strike any part of the smaller pillar. However, the type of weapon is important:
Use the Ancient Nord Bow (or any other bow) and fire an arrow at the small pillar opposite the green side, so it lights up green.
Use the Staff of Flames (or any other staff) and unleash it at the small pillar opposite the blue side, so it lights up blue.
Use the Ancient Nord Sword (or any other blade) and slash at the small pillar opposite the red side, so it lights up red.
The portcullis raises.
Draugr Guardians Chamber (South)
A particularly nasty Draugr rises from his central coffin, flanked by two lesser Draugr who break free of their nearer tombs. Inspect the Draugr corpses (the most troublesome of which is carrying the left half of an Amethyst Claw), pry open two chests, and gain a Word of Power.
- Chest (2)
- Amethyst Claw (left half)
- Word Wall: Battle Fury [DB1/3]
Exit Tunnel (South)
Leave through the gap in one of the western sarcophagi. Pull the chain at the end of the tunnel and step back into the initial grand chamber.
Nordic Puzzle Chamber (North)
Enter a short tunnel heading north. Turn left (west) as the tunnel winds down, past a chest, and into a rather puzzling chamber. Ahead are three archways, each with spears preventing your progress. Inspect the raised pedestal near a group of nine pressure plates:
Puzzle Solution: Simply step onto the first plate in the near-right corner and sidestep left, zigzagging so you tread on each of the nine pressure plates only once. This is deceptively simple, as long as you don’t step on any plate more than once before all are stepped on, and you don’t miss any plates. Once you step on the ninth and last plate, the spears retract and progress is possible.
Draugr Guardians Chamber (North)
A powerful and troublesome Draugr clambers from his central coffin, joined by two lesser Draugr who smash out of the nearer tombs. Inspect the Draugr corpses (the most dangerous of which is holding the right half of an Amethyst Claw), wrench open the chest, and obtain a Word of Power.
- Chest
- Amethyst Claw (right half)
- Word Wall: Battle Fury [DB2/3]
Exit Tunnel (North)
Leave through the gap in one of the southern sarcophagi. Pull the chain at the end of the tunnel and step back into the initial grand chamber.
Barred Door
Ethereal Platforms and Waterlogged Chamber
At the far end of the short tunnel is another pedestal and a handle. As expected, this releases another set of platforms, so quickly stand and follow each of them across the large waterlogged chamber to the upper tunnel across from you.
- Potion
Ethereal Platforms and Waterlogged Chamber
This leads to another set of platforms, each set moving a little faster than the previous.
- Emerald
Ethereal Platforms and Waterlogged Chamber
Then comes a final set, moving so quickly you really need to run most of the time to reach the final ledge and double wooden doors.
Hall of Stories and Nordic Puzzle Door
Through the doors is a Hall of Stories and a Nordic Puzzle Door at the far end.
Puzzle Solution: Those adventurers familiar with such a puzzle will think the rings on this door correspond to a key on the palm of the claw the door opens. Not so this time! The palm of the Amethyst Claw is blank! While you’re scratching your head, Tharstan arrives and studies the door, then heads to the wall carvings to ascertain a combination. Among the etchings are the following clues:
- “A breeze, or maybe it’s wind.” This refers to the Hawk, to be moved on the outer ring.
- “The night sky, and the moon.” This refers to the Wolf, to be moved on the middle ring.
- “Something to do with fire, and scales.” This refers to the Dragon, to be moved on the inner ring.
Vahlok’s Chamber.
This is a high-status ceremonial tomb. As you edge forward, the stone sarcophagus ahead of you cracks open and the Dragon Priest Vahlok the Jailer frees himself to face you!
The battle is frantic and all the more tricky if you don’t combat Vahlok’s mainly fire-based attacks. Expect him to use Firebolt, Flame Cloak, Flames, and Incinerate and to summon a Flame Atronach. Also watch for fire damage from the pressure plates dotted around the tomb; stay on the edges of the walkways or in the water, moving to the Word Wall to keep them from triggering.
- Danger! Flamethrower Trap
- Vahlok
- Chest
- Word Wall: Battle Fury [DB3/3]
[S.S14] Nchardak
Related Quests
- Dragonborn Main Quest: The Path of Knowledge
- Solstheim Side Quest: The Challenges of Kagrumez*
Recommended Level: 25
Dungeon: Dwarven City
- Dwarven Ballista
- Dwarven Centurion
- Dwarven Sphere
- Dwarven Spider
- Krosulhah
- Neloth
- Reaver
Special Area
- Black Book: Epistolary Acumen
Dangers
- Danger! Dart Trap
- Danger! Dwarven Fire Pillar Trap
- Danger! Dwarven Piston Trap
- Danger! Dwarven Thresher
- Danger! Swinging Wall Trap
Puzzle
- Dwarven Puzzle
Collectibles
- Kagrumez Resonance Gem [DB3/5]
Miscellaneous
- Area is locked
- Chest
- Loose Gear
Exterior
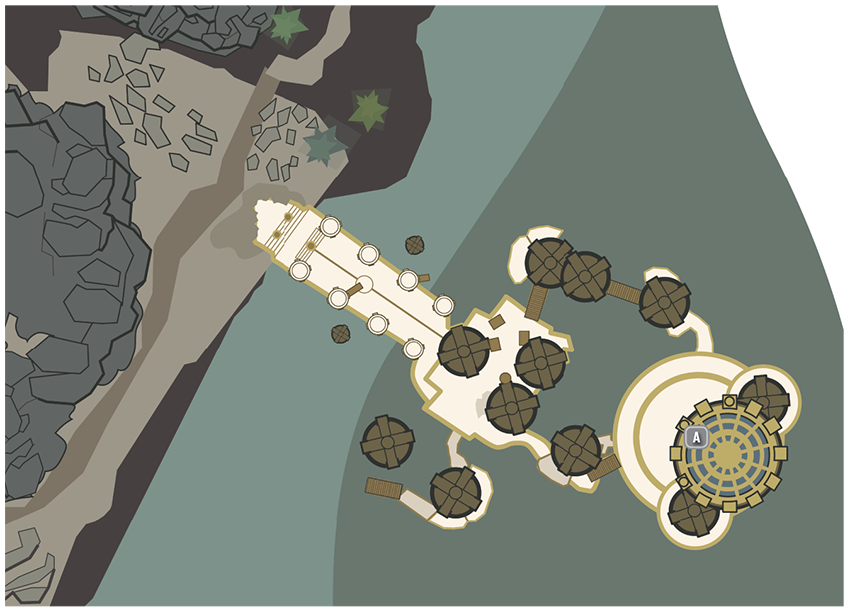
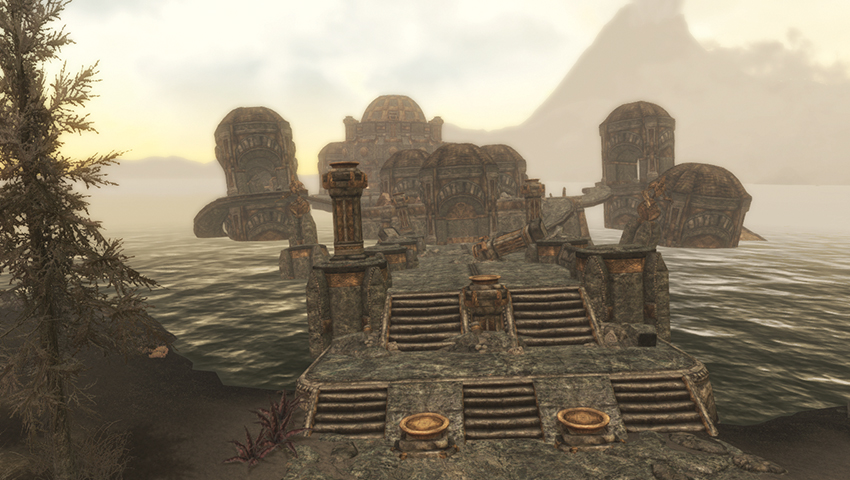
The Dwarven city of Nchardak was built on a series of platforms extending out into the Sea of Ghosts. Thousands of years of disuse, not to mention the cataclysmic Red Year, have decimated the ruin, causing most of it to sink into the sea. Only the tops of a few towers and the walkways connecting them still rise above the waterline. Many are tilted at precarious angles or have been ruined entirely, but a few, such as the domed Reading Room, remain intact.
Joined by Neloth, you can walk across the platforms that wind from the shore to the Reading Room, fending off some nuisance Reavers. Watch for long-range bowmen from upper platforms as you go. You can head to the left or right series of walkways (check one tower to the south for a Chest [Novice], and one underwater to the north [Expert]). Although they look precarious, they both lead to the main domed platform where the Reaver leader awaits. Inspect the control switch to the left of the door.
- Reaver
- Chest (2) [1 = Novice, 1 = Expert]
- Crafting: Cooking Pot, Tanning Rack (2)
- Loose gear
To Nchardak Reading Room
Interior: Nchardak Reading Room
Door to Solstheim
Neloth opens this door during Dragonborn Main Quest: The Path of Knowledge.
Reading Room Repository
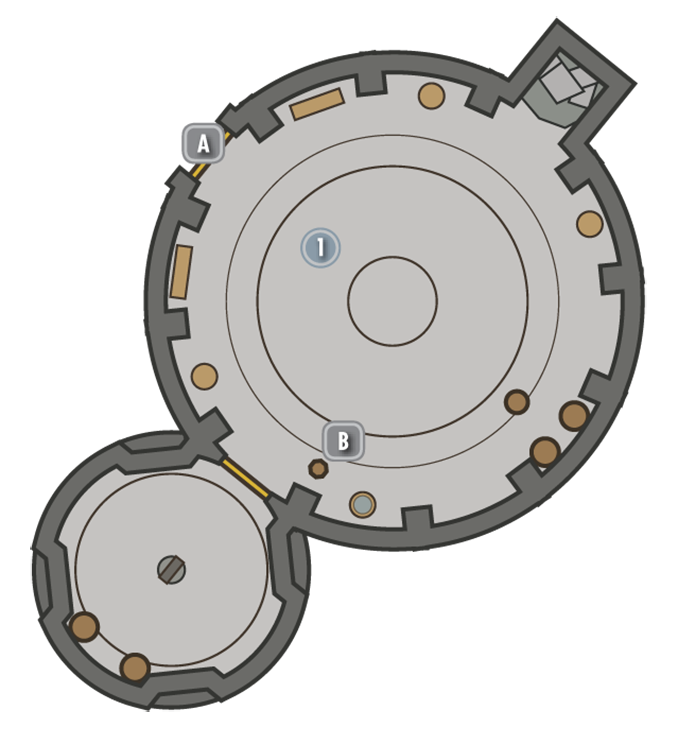
First Visit: The Black Book is located in the center of this circular chamber. You can only retrieve it once you have solved the puzzle below and restored the steam to this room. The button on the gold pedestal opens the gold and glass cage and raises the book up.
Return Visit: If you’ve correctly placed the cubes, Neloth tells you it worked and that the steam is once again flowing to this room. He presses the button (unless you beat him to it) and four shafts of light illuminate the complex lock, releasing the tome!
- Black Book: Epistolary Acumen
Elevator to Nchardak Great Chamber
Neloth will use his Control Cube to unseal this door, allowing you to descend into the Great Chamber.
Interior: Nchardak Great Chamber
Elevator to Nchardak Reading Room
Fallen Passage
This sloped corridor and ramp leads to the main section of the Great Chamber. Check under one ramp for a partly submerged chest [Expert].
- Chest [Expert]
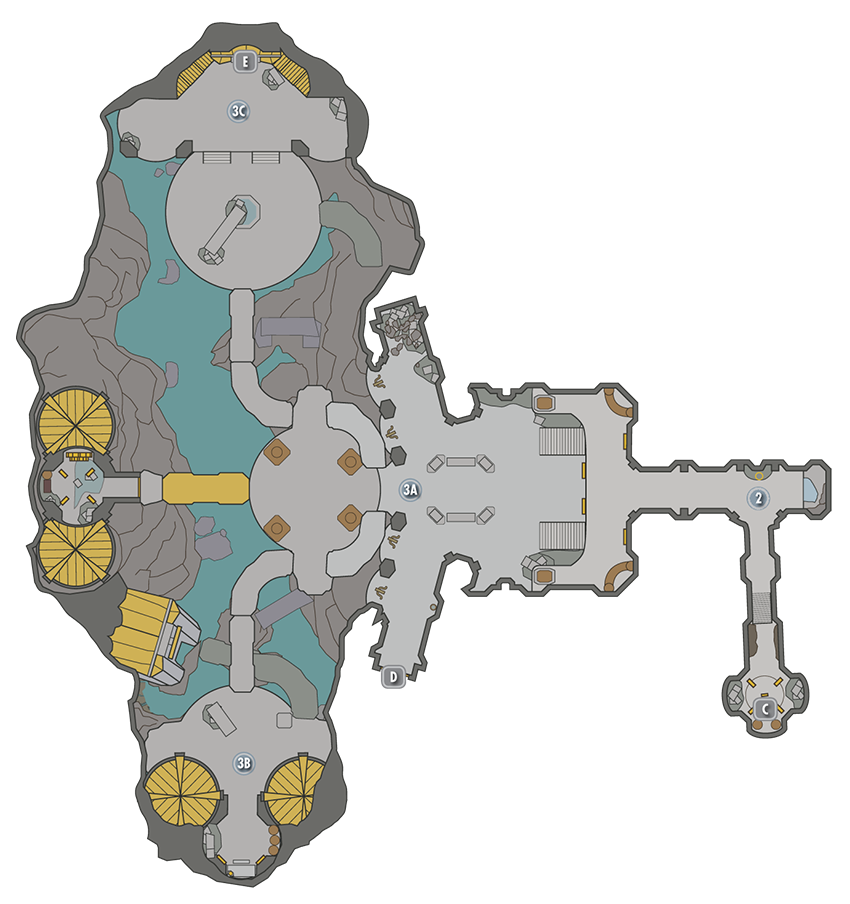
3A) Great Chamber (Promontory)
3B) Great Chamber (South)
3C) Great Chamber (North)
First Visit: The promontory you reach has a view of a vast, waterlogged chamber. In front of you are two blue-colored control switches. When Dwemer Cubes are placed on these pedestals, the water level falls. You only have Neloth’s Cube, so you must investigate the Nchardak Workshop before you can proceed.
Second Visit: You now have a total of four cubes. The fifth cube is beyond a door to the north, but to access it, you must drain the entire room. Place a cube on each of the blue pedestals and leave them there. Retaliate as a small group of Dwarven Automatons attacks, then follow Neloth down into the drained Great Chamber.
Second Visit (Location 3B): Great Chamber (South): To the south is a Sphere to battle, a chest [Novice], and a blue control pedestal. Slot in a cube, lowering the water still more, and head down a curved platform to a door and red pedestal to the west. Open the door via the pedestal, claim the items from a chest inside, and optionally wander the floor of the chamber for a second chest [Apprentice]. Then return and grab the cube to continue.
Second Visit (Location 3C): Great Chamber (North): As you reach the northern part of the chamber, work with Neloth to defeat the two ballistas. Then place a cube into the red control switch, opening the gate to the Nchardak Aqueduct.
- Dwarven Spider
- Dwarven Sphere
- Dwarven Ballista
- Chest (3) [1 = Novice, 1 = Apprentice]
- Malachite Ore Vein (4)
- Loose gear
Third Visit (Location 3C): Great Chamber (Boiler Control Pedestals): Retrieve one cube from the blue pedestal on the overlook, then place the remaining four into the Boiler Control pedestals. The giant gold drawbridge lowers. Face the Centurion here or use the huge chamber to drop it from afar. The Centurion was guarding a small alcove with a treasure chest. Make sure all four boiler pedestals are still active (you shouldn’t be carrying any cubes) and return to the Reading Room.
- Dwarven Sphere
- Dwarven Centurion
- Chest
- Loose Gear
Door to Nchardak Workshop
Door to Nchardak Aqueduct
Interior: Nchardak Workshop
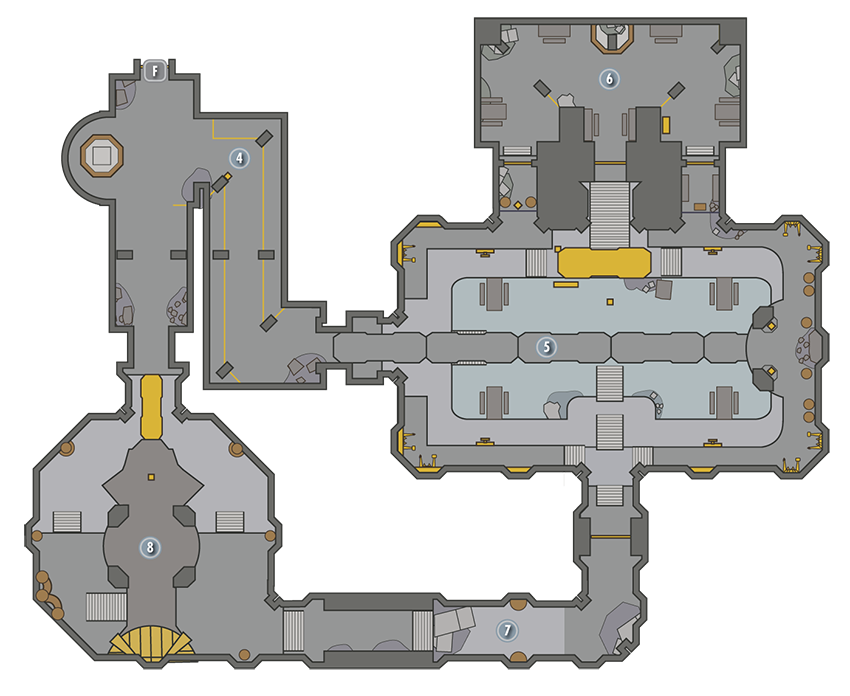
 Door to Nchardak Great Chamber
Dwemer Fire Corridor
A few paces down the winding corridor to the left (southeast) is a pedestal with a second Control Cube. Take the cube, and the blasting fire trap ahead of you subsides, but Dwarven Spiders and Spheres are released.
- Dwarven Spider
- Dwarven Sphere
- Dwemer Control Cube
- Danger! Dwarven Fire Pillar Trap
- Loose gear
The Great Workshop
Check the half-flooded chamber. To the left (north) behind a barred wall is another cube. You can’t reach it yet, so stay on the bridge and move to the opposite (eastern) side where there are two blue pedestals. Slot one (not both) of your cubes into either pedestal; they lower the water level, exposing the waist-deep water of the ground floor.
Head down to the ground floor, and locate the red pedestal in the water on the northern side, below the small gold bridge. Place your only cube into this pedestal (you automatically remove it again), and a set of stone steps behind the bridge grind into place. Climb up to the gold bridge, optionally dealing with the Centurion who awakens if you step on the western platform. You can ignore the second red pedestal (as this simply raises and lowers the bridge), and bound up the steps you just created to reach the gold door in the north wall.
- Dwarven Spider
- Dwarven Sphere
- Dwarven Centurion
- Loose Gear
Workshop Annex
A small, reasonably wide chamber with two secondary areas around and to the right (north, leading to a door and chest [Adept]), and left (south), leading to a new Control Cube (behind the barred wall you couldn’t get to earlier). Take the cube, slay the Dwarven Spiders that emerge, and retrieve the Control Cube from one of the two blue pedestals you left earlier. This raises the water level still more, which is handy, as this is the only way to traverse the next chamber. Head south toward the gold door.
- Dwemer Control Cube
- Dwarven Spider
- Dwarven Sphere
- Chest [Adept]
- Loose Gear
Collapsed Passage
The only way to reach the other end of this passage is to retrieve all three of the cubes in this area, which raise the water level high enough for you to swim across to the other side.
Ballista Balcony and Bridge
Beware of Spheres and hardy Dwarven Ballistas. Find your next Control Cube in a rubble-filled alcove to the north. As expected, the Centurion behind you clanks into life when you take it. Hurry up and around the steps to the balcony atop the flooding room. Place a cube in the red control switch, lowering a bridge and allowing you to escape this chamber.
- Dwemer Control Cube
- Dwarven Sphere
- Dwarven Ballista
- Dwarven Centurion
Interior: Nchardak Aqueduct
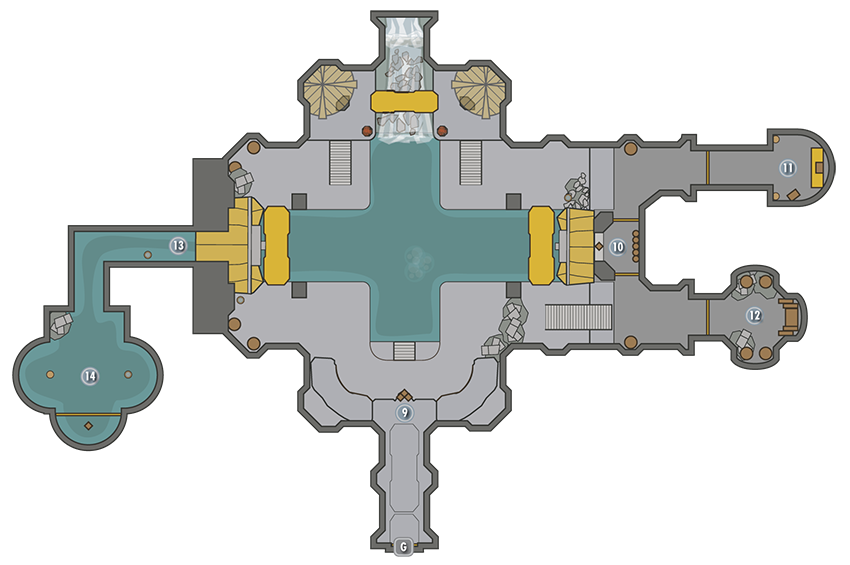
 Door to Nchardak Great Chamber
Aqueduct Bridge Controls
All three gold bridges must be lowered to reach a pump activator. Locate the three red pedestals above the entrance corridor, and activate the left and right pedestals to lower all three bridges. There’s a chest [Apprentice] behind the stone-surrounded waterfall, by the middle bridge.
- Dwarven Sphere
- Chest [Apprentice]
Aqueduct Overlook
This balcony overlooks the entire chamber. Place (and leave) a cube in the blue pedestal here, lowering the water level below.
North Side Chamber
You can reach this side chamber by carefully climbing across the roof of the Overlook or by swimming up once you have retrieved the final cube. Insert a cube into the control switch here to open the door. The room beyond contains a lone Ballista and a Kagrumez Resonance Gem, which is necessary for Solstheim Side Quest: The Challenges of Kagrumez*.
- Dwarven Ballista
- Chest
- Loose Gear
- Kagrumez Resonance Gem [DB3/5]
South Side Chamber
The gate to this chamber is sealed, and there’s no Control Switch nearby. So how do you open it? It actually opens only when the bridges are in their initial positions. Unless you used Whirlwind Sprint to reach the Overlook (instead of solving the bridge puzzle), don’t bother with it for now. Instead, wait until you retrieve the final cube, then swim up to the bridge controls and reset them. You can then swim over to this chamber and claim the chest within.
- Chest
Aqueduct Waterlogged Corridor
The gold door at the chamber’s far (west) end is accessible now that the water has drained. Open it using the red control switch.
Aqueduct Sunken Chamber
Beware of floor plates so you aren’t stabbed by the wall trap and rotating blades in the next room. Activate the red control switch to open the gold gate, and claim your last cube. Stand to the side when you do, or you’ll be pierced by numerous darts.
- Danger! Swinging Wall Trap
- Danger! Dwarven Piston Trap
- Danger! Dwarven Thresher
- Danger! Dart Trap
- Dwemer Control Cube
- Loose Gear
[S.S15] Sun Stone
Related Quests
- Dragonborn Main Quest: Cleansing the Stones
Recommended Level: 25
Habitation: All-Maker Stone
- Lurker
- Reaver
- Ulves Romoran
Special Area
- Standing Stones
Miscellaneous
- Area is locked
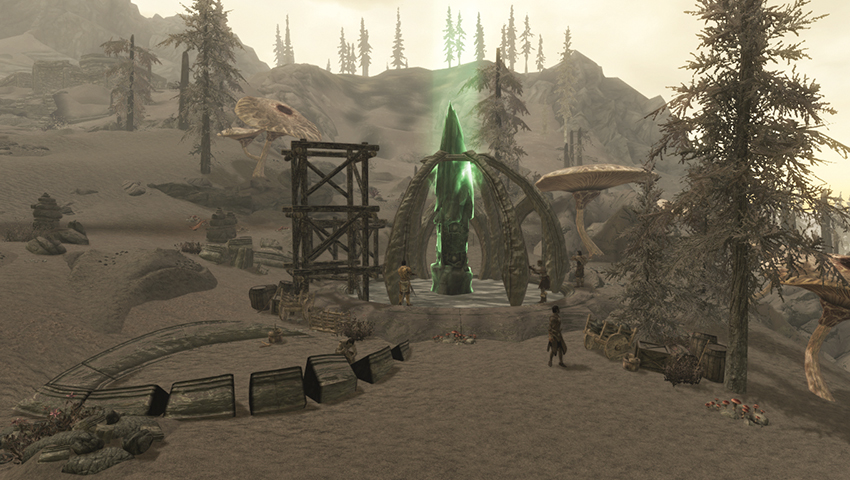
This All-Maker Stone stands near the Dunmer settlement of Tel Mithryn. Currently, its power is being siphoned by Miraak, and stone arches are constructed by both enthralled Reavers and Ulves Romoran from Tel Mithryn (he moves back there once the spell is broken). The Bend Will Shout is required to remove the trance the Reavers are under (after which, they attack the summoned Lurkers and may be hostile) and to cleanse the stone of Miraak’s influence. In addition to the summoned Lurker once the spell is broken, two additional Lurkers are formed down by the water and encroach on this combat. Beware!
- Power: Sun Flare