
Elder Scrolls V: Skyrim Guide The Atlas Blackreach and Other Realms
Primary Locations
Total—6
[10.00] Khajiit Caravans (3)
[10.01] Azura’s Star
[10.02] Blackreach
[10.03] Blue Palace Pelagius Wing
[10.04] Japhet’s Folly
[10.05] Skuldafn
[10.06] Sovngarde
[10.00] Khajiit Caravans
Related Quests
- Dark Brotherhood Quest: Side Contract: Ma’randru-jo
- Thieves Guild Radiant Quest: Moon Sugar Rush* (Ri’saad)
- Miscellaneous Objective: New Moon* (Kharjo)
Habitation: Special
- Ahkari (General Store Vendor; Trainer: Journeyman)
- Atahbah (Fence)
- Dro’marash (Trainer: Speech)
- Kharjo (Follower)
- Khayla (Trainer: Sneak)
- Ma’dran (Fence; General Store Vendor)
- Ma’jhad (Fence; Trainer: Lockpicking)
- Ma’randru-jo
- Ra’zhinda
- Ri’saad (Fence; General Store Vendor)
- Zaynabi (Fence)
Services
- Follower: Kharjo [47/47]
- Trader (Fence): Ri’saad [7/10]
- Trader (Fence): Atahba [8/10]
- Trader (Fence): Ma’jahad [9/10]
- Trader (Fence): Zaynabi [10/10]
- Trader (General Store Vendor): Ri’saad [17/19]
- Weapons, Apparel, Potions, Food, Ingredients, Misc
- Trader (General Store Vendor): Ahkari [18/19]
- Weapons, Apparel, Potions, Food, Ingredients, Misc
- Trader (General Store Vendor): Ma’dran [19/19]
- Weapons, Apparel, Potions, Food, Ingredients, Misc
- Trainer (Lockpicking: Expert): Ma’jhad [2/2]
- Trainer (Pickpocket: Journeyman): Ahkari [3/3]
- Trainer (Sneak: Journeyman): Khayla [3/3]
- Trainer (Speech: Journeyman 1): Dro’marash [4/4]
Crafting
- Tanning Rack
Collectibles
- Chest(s)
- Potions
- Loose gear
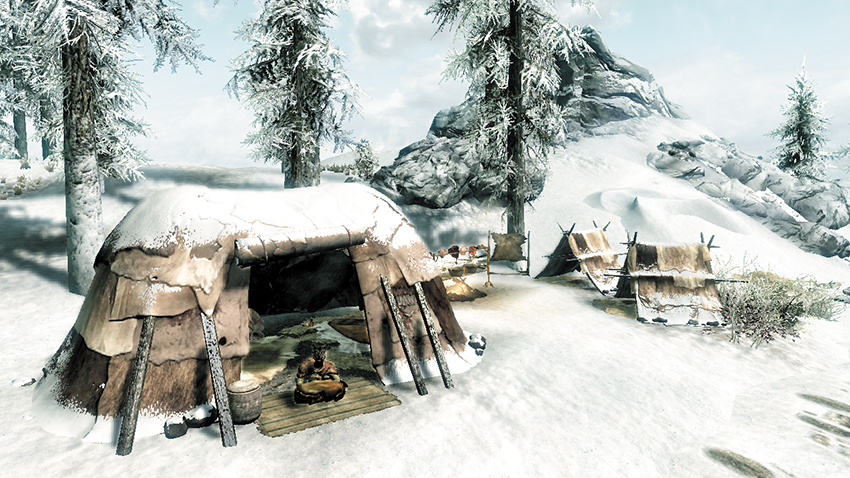
Three Khajiit caravans wander Skyrim, traveling from town to town and offering various goods and services. Each caravan is made up of an owner and his entourage, and each caravan travels its own route between two major cities. Caravans will pause to do business with you while on the move but are more commonly found outside of Skyrim’s larger capital cities, where they make camp for brief periods. Befriending each of the three savvy caravan owners can lead to special benefits!
Ri’saad’s Caravan
Ri’saad is the patriarch of the Khajiit caravan merchants. He’s the richest of the three and enjoys the best trade route, with exclusive contracts among Skyrim’s wealthiest cities. Ri’saad’s route takes him from Markarth [5.00] to Whiterun [6.00] and back again. Ri’saad offers a fine selection of wares, and Khayla can train you to be more stealthy.
- Crafting: Tanning Rack
Ahkari’s Caravan
Ahkari has the monopoly on the north-south Dawnstar [3.00] to Riften [9.00] run—a very profitable passage. Speak with Ahkari to buy and sell a variety of goods or to receive training lessons in Pickpocket. Dro’marash can help you hone your Speech skill, while Kharjo will offer to serve as a Follower after you do him a special favor..
Ma’dran’s Caravan
Ma’dran used to be the poorest of the three Khajiit merchants. Now, with the advent of the Civil War, his business is booming. Ma’dran’s primary goods are weapons and armor, which are in high demand. Speak with Ma’dran to purchase some fresh gear, or pay Ma’jhad to help you improve your Lockpicking skill.
- Ma’dran’s route is unique in that he shares a common stop with Ri’saad’s caravan: Windhelm [7.00]. However, Ma’dran’s route runs from Windhelm [7.00] to Solitude [1.00] instead of to Markarth [5.00].
[10.01] Azura’s Star
Related Quests
- Daedric Quest: The Black Star
Recommended Level: 6
Dungeon: Special
- Dremora Churl
- Malyn Varen
Collectibles
- Unique Item: Azura’s Star [36/112]
- Unique Item: Black Star [26/112]
- Area Is Locked (quest required)
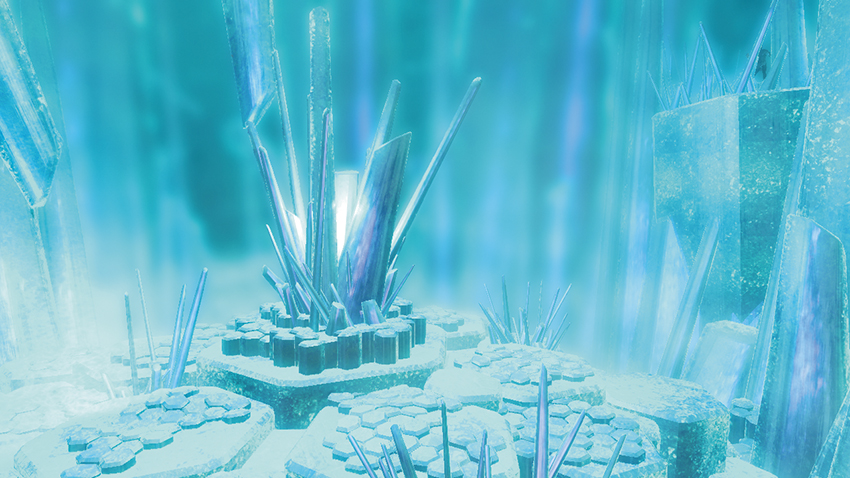
Azura’s Star is a unique location that’s visited only during Daedric Quest: The Black Star. It is, in fact, the interior of the Star of Azura, the Daedric artifact you seek to recover during the quest. The person you seek out to assist you in repairing the Broken Star of Azura determines the reward you’ll receive at the quest’s end: You get Azura’s Star (an infinite Grand Soul Gem) if you turn to Aranea Ienith, and you get the Black Star (an infinite Black Soul Gem) if you seek out Nelacar. Regardless of which person you turn to, you’ll end up entering the star and chasing the nefarious Mayln Varen down a winding, crystalline pathway. Dremora will attempt to intercept you along the way. Defeat Varen when you reach the bottom to purify the star and claim a very valuable keepsake.
[10.02] Blackreach
Crimson Nirnroot
Related Quests
- Main Quest: Elder Knowledge
- Daedric Quest: Discerning the Transmundane
- Side Quest: A Return to Your Roots
- Dungeon Activity
Recommended Level: 18
Dungeon: Dwarven City
- Chaurus
- Dwarven Sphere
- Dwarven Spider
- Giant
- Falmer
- Falmer Servant
- Frost Troll
- Frostbite Spider
- Wisp
- Wispmother
Crafting
- Alchemy Lab
- Arcane Enchanter
- Workbench
Dangers
- Dwarven Ballista Trap (lever)
- Dwarven Thresher Trap (pressure plate)
- Dwarven Thresher Trap (lever)
- Swinging Blade Trap (pressure plates/lever)
Puzzles
- Button Puzzle
Underground Connections
- Alftand [4.13]
- Blackreach Elevator (Alftand) [3.26]
- Blackreach Elevator (Raldbthar) [3.33]
- Mzinchaleft [2.18]
- Mzinchaleft Exterior [2.18]
- Raldbthar [3.32]
- Tower of Mzark [3.15]
Quest Items
- Crimson Nirnroot
- Elder Scroll
- Runed Lexicon
Collectibles
- Skill Book [Alchemy]: De Rerum Dirennis
- Skill Book [Block]: Warrior
- Skill Book [Heavy Armor]: 2920, MidYear, v6
- Skill Book [Smithing]: The Armorer’s Challenge
- Skill Book [Speech]: A Dance in Fire, v6
- Area Is Locked (quest required)
- Chests
- Potions
- Loose gear
- Mineable ore (Corundum)
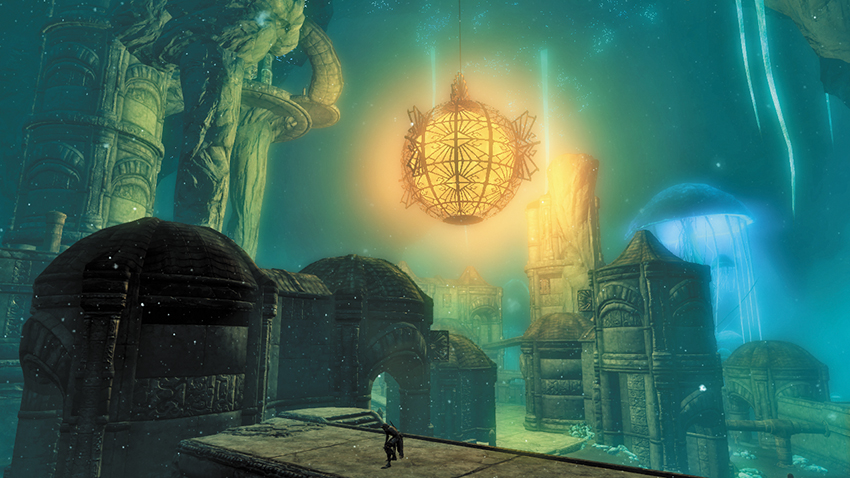
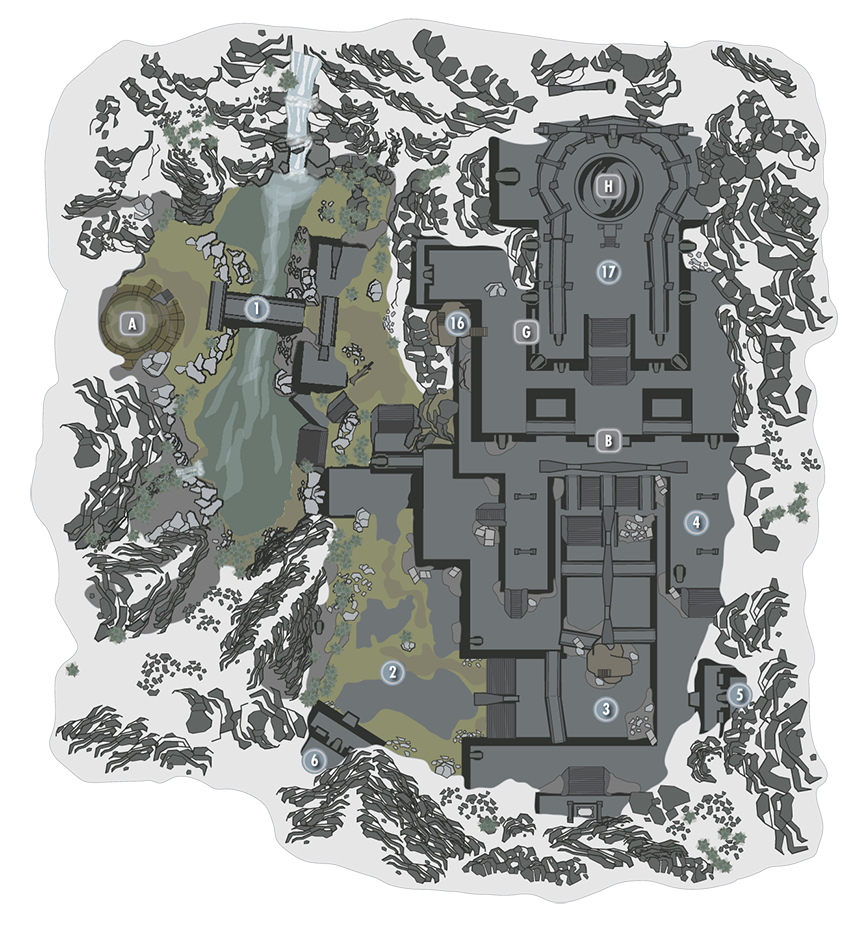
The dwarves’ capital city of Blackreach has been abandoned for ages and now serves as home to vicious Falmer. This great subterranean metropolis houses many secrets for those brave enough to probe its depths. Blackreach features multiple access elevators, but your first visit occurs during Daedric Quest: Discerning the Transmundane, in which you will likely travel through Alftand [4.13]. Therefore, the first time you enter Blackreach, you’ll find yourself at [B], unless you chose one of the alternate routes.
Once you’ve accessed Blackreach, you may use any of the city’s elevators to return to the surface. Some elevators connect to major dwarven ruins across Skyrim, such as Raldbthar [3.32] in the Pale. Others simply lead to lone elevator towers that stand in the wilderness. Ride each of Blackreach’s elevators to open more and more surface connections to Blackreach—this makes moving to and from the great hidden city much easier.
The terrain of Blackreach becomes tumultuous around the edges of the cavern but is otherwise quite level and easy. Expect to face a blend of dwarven security units, Falmer, and various cave dwellers like the Chaurus and Frostbite Spider. Encounters with other, more powerful creatures such as trolls and giants are rare.
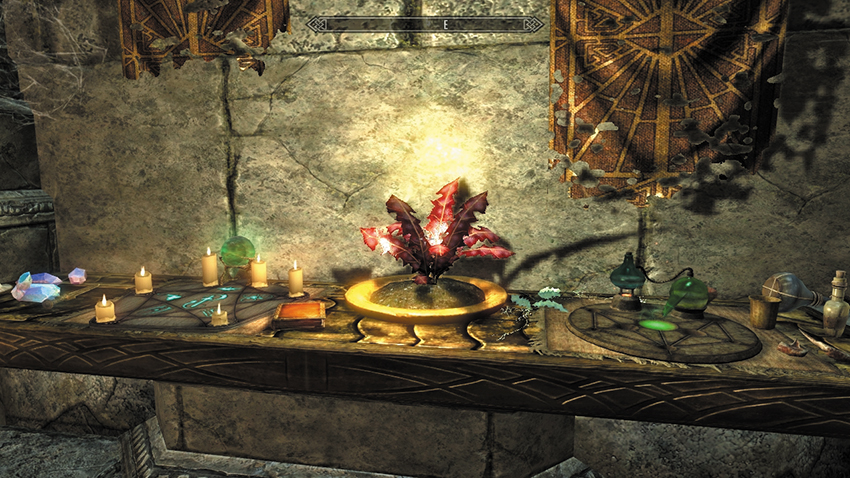
Aside from exploring the Tower of Mzark [10] as part of the “Discerning the Transmundane” quest, you may also collect special Crimson Nirnroots as part of Side Quest: A Return to Your Roots. Around 50 of these special red plants grow throughout Blackreach. Many are labeled on the map provided here in this guide, while others are found inside of Blackreach’s interior points of interest. Use this resource to track them down, then pinpoint their locations by the soft ringing sound each plant produces. Collect the requisite number of Crimson Nirnroot pants to advance the quest.
 Exit to Mzinchaleft Gatehouse [2.18]
 Elevator to Alftand Cathedral [4.13]
 Exit to Blackreach Elevator (Raldbthar) [3.33]
 Exit to Blackreach Elevator (Alftand) [3.26]
 Elevator to Raldbthar Deep Market [3.32]
 Exit to Great Lift AT Mzinchaleft [2.19]
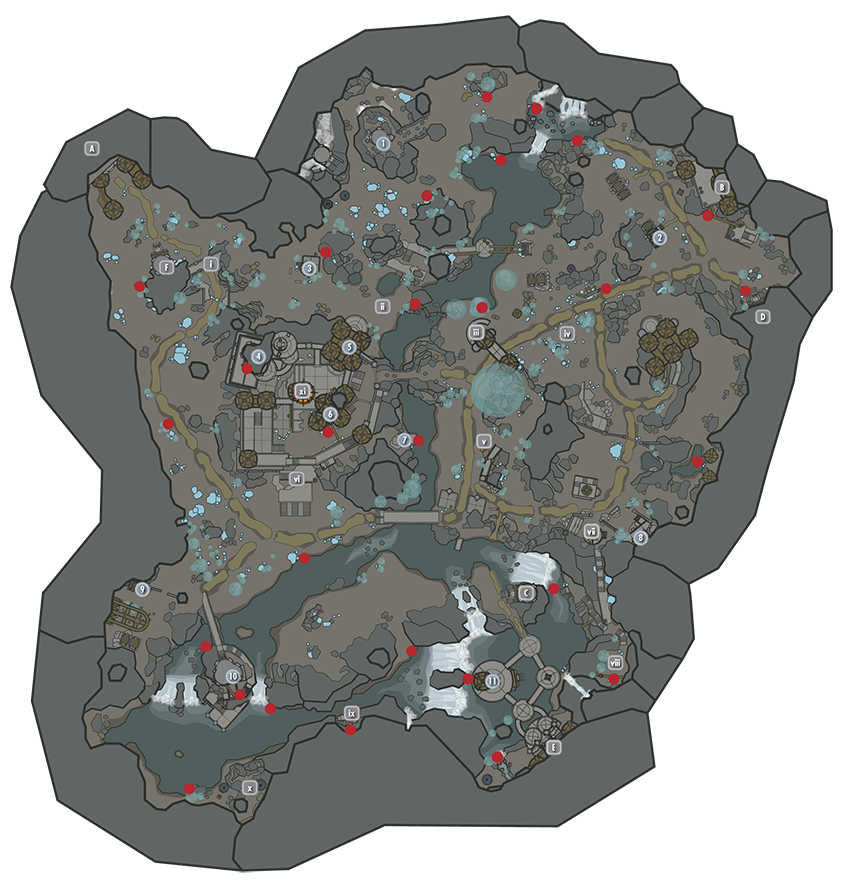
 Reeking Tower
Scale a rocky slope to reach this tall northern tower, then circle around to locate its door. Enter and slay a handful of overgrown Frostbite Spiders on your way to the far elevator, which takes you back out to Blackreach. You’ll find yourself standing near a neighboring tower to the one you entered. Slay a few more spiders out here to cleanse this place.
 Sinderion’s Field Laboratory
This small lab is likely to be your first stop in Blackreach. Claim plenty of loot here and use the crafting stations to prepare yourself for the dangers that lurk in the dark. If you are planning on a long exploration of Blackreach, this is a great place to use as a base camp. Inspect the remains of Sinderion to acquire his informative journal and obtain a new quest that involves collecting Crimson Nirnroot from around Blackreach.
- Crafting: Alchemy Lab, Arcane Enchanter, Workbench
- Crimson Nirnroot
- Skill Book [Alchemy]: De Rerum Dirennis
- Chests (2)
- Knapsack
- Apothecary’s Satchel
- Potions
 Silent Ruin
Enter this small chamber to obtain a Skill Book and some Crimson Nirnroot, but avoid the pressure plate near the throne.
- Danger! Dwarven Thresher Trap (pressure plate)
- Crimson Nirnroot
- Skill Book [Block]: Warrior
- Chest
 Hall of Rumination
The Hall of Rumination is one of three structures located at Blackreach’s city center. Several lowly Falmer and Falmer Servants mill about the main chamber. Slay them and then notice a gate that you can’t seem to open. Pull a lever on the balcony to the east of the gate to open it, but head through the nearby east doors first to secure a sleeping area and a room with a chest. Now go through the west gate and head upstairs to discover another chest. Take the nearby elevator up to a high exterior balcony, looping around to discover some Crimson Nirnroot outside.
- Crimson Nirnroot
- Chests (2)
 Pumping Station
Exit the Debate Hall [6] via its northeast door and cross a walkway to enter this small workshop. The Pumping Station connects to the Silent City Catacombs [7] and houses a handful of poorly armed Falmer Servants. Exit through the northeast door so you may reenter via the northwest door and access a chest on the west balcony.
- Chest
 Debate Hall
Plenty of Falmer and Falmer Servants lurk within the Debate Hall. The main attraction here is the Skill Book that lies on a small table near a skeleton in the east alcove.
- Skill Book [Speech]: A Dance in Fire, v6
 Silent City Catacombs
Nab some Crimson Nirnroot on your way into this sewer network, which lies just east of Blackreach’s city center. Slay a Falmer and loot a chest in the first hall, then jump the pairs of pressure plates in the hall that follow, or use the lever in the nook beyond the gate to trigger the blades and slice up any patrolling enemies. Proceed until you reach a watery chamber, then dive underwater to locate three submerged chests. Proceed through the next passage and slay another Falmer to obtain a useful key. Make your way through the south door to reach the final room, where you find more Falmer and a door that connects to Blackreach’s Pumping Station [5].
- Danger! Swinging Blade Trap (pressure plates/lever)
- Crimson Nirnroot
- Shaman’s Key (Falmer)
- Chests (4)
 War Quarters
This small area sports plenty of beds to rest upon. Complete your circuit through the War Quarters to locate a pair of chests on the entry room’s balcony.
- Chests (2)
 Farm Overseer’s House
This small abode offers you a place to rest and plenty of worthy plunder.
- Chest (Locked: Novice)
- Chest (Locked: Adept)
- Potions
- Loose gear
 Tower of Mzark
This giant tower stands south of Blackreach’s city center and houses an item of tremendous power. Ride up the elevator, then raid a couple of locked chests and inspect a Skill Book in the room at which you arrive. Scale a winding ramp to locate the remains of Drokt—read the nearby journal for some insight. Scale the remainder of the ramp to reach a control panel. Insert the Blank Lexicon into the Lexicon Receptacle, then press the third button from the left until the second button from the left becomes active. Now press the second button from the left until the first button on the left becomes active. Press this button until all of the buttons deactivate. Collect the Transcribed Lexicon from the Lexicon Receptacle and approach the central mechanism to obtain the mysterious Elder Scroll. Proceed through the nearby door and use the elevator beyond to quickly return to the surface of Skyrim.
- Elder Scroll
- Runed Lexicon
- Skill Book [Smithing]: The Armorer’s Challenge
- Chests (Locked: Novice) (2)
- Potions
- Loose gear
 Derelict Pumphouse
Destroy a dangerous Dwarven Spider here, then loot a chest that’s affixed to the wall. Another chest lies underwater; jump the pipes and turn a submerged valve to access the chest, then surface for a moment to snag some Crimson Nirnroot before turning another valve to escape the water.
- Crimson Nirnroot
- Chest
- Chest (Locked: Adept)
Other Blackreach Locations
The following sites don’t have quite as much going on as the aforementioned locations but are still worth exploring:
i) Overpass
This overpass was presumably used to monitor the travel of workers to and from the city.
ii) Wispmother Encounter
Beware of this clearing, where wisps flutter about. A dangerous Wispmother will attack if you draw near. Crimson Nirnroot grows by the planks that span the nearby stream to the east.
- Crimson Nirnroot
iii) Guard Towers
Dwarven soldiers likely watched from these towers as workers traveled to and from the city.
iv) Fungus Field
Blackreach’s giant glowing mushrooms are growing strong here. Find some Crimson Nirnroot growing near the pipes to the north.
- Crimson Nirnroot
v) Sleeping Chaurus
Get the drop on a pair of giant, snoozing Chaurus by sneaking up to this site.
vi) Blackreach City: Main Gate
The gate to the dwarves’ capital city lies here, allowing entry from the south.
vii) Blackreach Arena
It is assumed that Falmer would have been made to fight at the small arena located here. Pulling the nearby lever causes a lethal spinning blade to stick up from the arena’s floor. Collect the Skill Book that rests on the nearby stone table.
- Danger! Dwarven Thresher Trap (lever)
- Skill Book [Heavy Armor]: 2920, MidYear, v6
viii) Troll Den
A pair of vicious Frost Trolls guard a sprig of Crimson Nirnroot on a high ledge here.
- Crimson Nirnroot
ix) Shrine
Find a bit of loot at the small shrine near the water down here, but beware of a Dwarven Sphere that emerges from the wall.
- Crimson Nirnroot
- Potions
x) Falmer Mining Camp
Dispatch a handful of dangerous Falmer here so you may raid the chests that they guard. If you like, mine some Corundum Ore from the vein near the leader’s tent. Crimson Nirnroot grows by the water.
- Crimson Nirnroot
- Chests (2)
- Mineable ore (Corundum)
xi) Vulthuryol’s Gong
Notice the huge glowing orb floating above the Silent City at the center of Blackreach? Hit this distant target with your Unrelenting Force Shout and you’ll summon the dragon Vulthuryol, who will soar out of his hidden lair to rain fire upon the city before setting down on the southern road.
[10.03] Blue Palace Pelagius Wing
Related Quests
- Daedric Quest: The Mind of Madness
Recommended Level: 8
Dungeon: Special
- Sheogorath
- Pelagius the Mad
Collectibles
- Skill Book [Lockpicking]: Surfeit of Thieves [C2/10]
- Unique Weapon: Wabbajack [72/80]
- Area Is Locked (quest required)
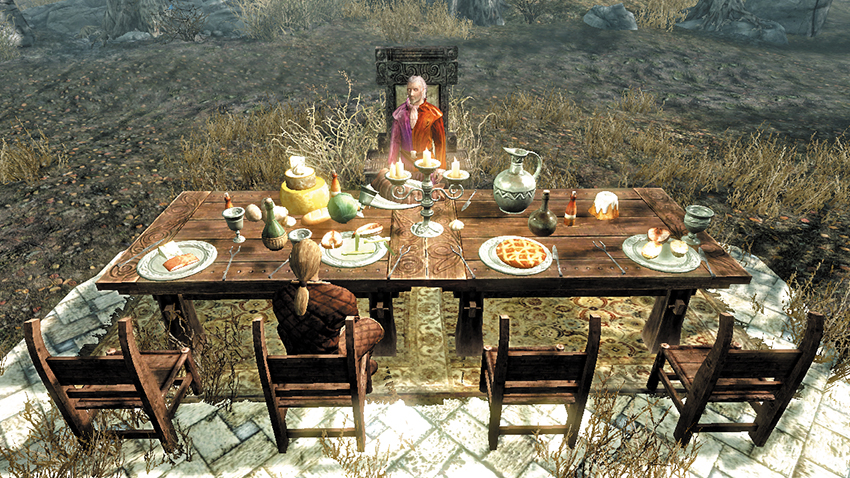
This special section of the Blue Palace in Solitude [1.00] remains locked at all times and is accessible only during Daedric Quest: The Mind of Madness. After a brief exploration of the long-unused wing, you’re soon whisked away to unfamiliar surroundings—the deceptively verdant mind of Emperor Pelagius III! Speak with Sheogorath to advance the quest and receive a unique weapon called the Wabbajack—this is the only thing you can take with you when you leave this unusual place.
Travel down each of the three paths to encounter three very unusual situations, each a reflection of Pelagius’s warped psyche. Use the Wabbajack to solve each of the situations as follows:
Arena: Shoot the spectating soldiers on the arena’s far side, not the combatants.
Pelagius the Tormented: Shoot the sleeping Emperor to spawn a series of progressively more dangerous foes. Defeat them all.
Pelagius vs. Pelagius: Shoot the smaller version of Pelagius (named “Confidence”) to make it grow. Shoot the Imperial Soldier named “Anger” to shrink it. Ensure that Pelagius’s Confidence is as large as can be, then shoot the two specters of Self-Doubt that eventually appear to vanquish them.
Once you’ve returned from Pelagius’s frightening mind, continue your search of the Pelagius Wing to discover a Skill Book on some crates downstairs.
[10.04] Japhet’s Folly
Related Quests
- Side Quest: Rise in the East
Dungeon: Bandit Camp
- Blood Horker
- Haldyn
- Mudcrab
Crafting
- Arcane Enchanter
Dangers
- Swinging Spears (pressure plate)
- Area Is Locked (quest required)
- Chests
- Potions
- Loose gear
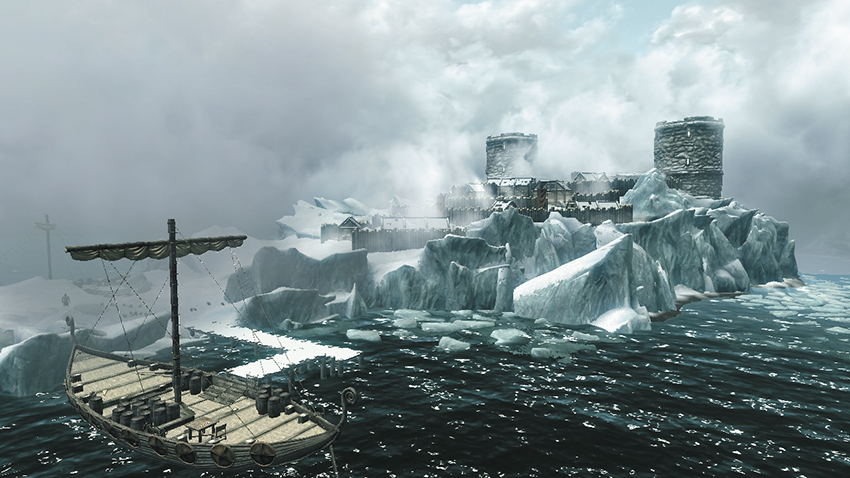
Japhet’s Folly is a special island that only be reached only by ship. You visit Japhet’s Folly during Side Quest: Rise in the East, with the goal of slaying a dangerous mage named Haldyn, who’s raised an impressive pirate base here.
Once you arrive at Japhet’s Folly, leap from your ship and cross the broken ice, heading for the tower that stands atop the nearby glacier. You can’t actually reach the tower—follow your objective marker to locate the entrance to a small cave instead.
Sea Cave
Kill a few Mudcrab in the watery cave, and open a chest in the first cavern. Slay a lone Blood Horker bandit in the stone room you soon reach. Loot a second chest here, then grab the potions on the shelves before heading upstairs to the Japhet’s Folly Towers.
- Chests (2)
- Potions
Japhet’s Folly Towers
Avoid a pressure plate on the first landing as you go upstairs. Eliminate a couple of Blood Horker guards, then raid a chest as you cross a long hall to reach a neighboring tower. If you like, go downstairs to face a few more guards and discover more loot, including a locked chest. Unlock the Expert-level door down here to discover the final resting place of Japhet, whose remains lie next to an informative journal and a large chest. Go upstairs to slay Haldyn, raid his chest, and collect the key he carries. Then backtrack downstairs and use the Japhet’s Folly Key to open the door in the connecting corridor, which leads outside.
- Danger! Swinging Spears (pressure plate)
- Crafting: Arcane Enchanter
- Japhet’s Folly Key (Haldyn)
- Chests (2)
- Chest (Locked: Apprentice)
- Chest (Locked: Expert)
- Potions
- Loose gear
Japhet’s Folly (Exterior)
Step outside to find the island being bombarded by cannon fire—your associates are doing their part! Slay the odd guard and loot a lone chest as you navigate the embattled encampment, but don’t stray too far from the main path or you may be struck by friendly fire. Dispatch the final group of pirates down by the docks, then speak with Adelasia Vendicci to complete your quest and shove off.
- Chest
[10.05] Skuldafn
Related Quests
- Main Quest: The World-Eater’s Eyrie
- Side Quest: Masks of the Dragon Priests*
Recommended Level: 24
Dungeon: Dragon Priest Lair
- Dragon
- Draugr
- Frostbite Spider
- Nahkriin
Dangers
- Dart Trap (pressure plates)
- Oil Lamp Trap (pressure plate)
- Oil Pool Trap
Puzzles
- Nordic Puzzle Door (Diamond Claw)
- Nordic Pillars I
- Nordic Pillars II
Collectibles
- Dragon Claw: Diamond Claw [10/10]
- Dragon Priest Mask: Nahkriin [10/10]
Special Objects
- Word Wall: Storm Call [3/3]
- Area Is Locked (quest required)
- Chest(s)
- Potions
- Loose gear
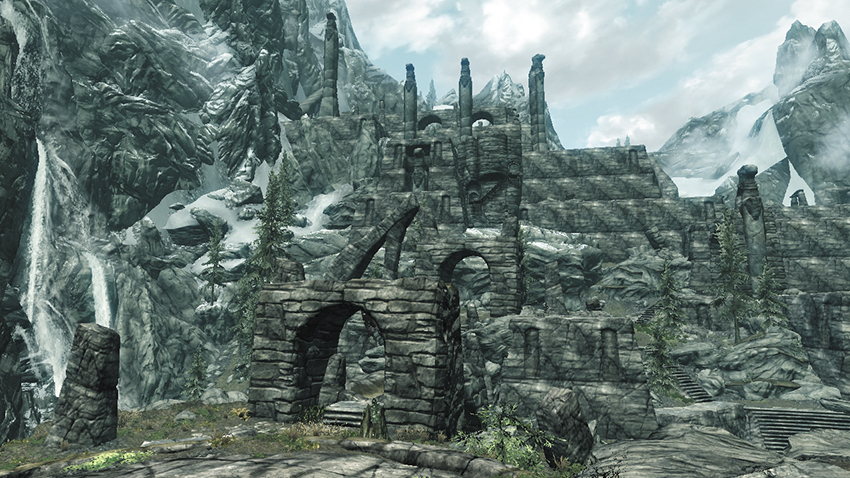
Skuldafn is a special location that lies just outside the bounds of Skyrim’s ninth Hold, the Rift. Once you’ve advanced to Main Quest: The World-Eater’s Eyrie, you’re able to visit Skuldafn by flying on the back of a dragon. Your goal is to access Skuldafn’s portal to Sovngarde [10.06], the legendary underworld of the Nords.
Skuldafn (Exterior)
Odahviing (to Skyrim)
Bridge Entrance
Slay a dragon that ambushes you in Skuldafn’s large exterior ruins, while simultaneously battling multiple Draugr.
Lower Grounds
A second dragon strikes as you near the South Tower, and more Draugr are poised on the walkway beyond the east stairs.
Ruined Tower
Climb an open-air tower to locate a chest beyond the east stairs, then slay more Draugr as you scale the north stairs that follow.
Temple Walkways
If you like, loop around to visit the North Tower, and raid the exterior chest on the table atop the south steps, before entering Skuldafn Temple.
- Chests (2)
Skuldafn South Tower
This simple tower teems with Draugr, but there’s a chest upstairs.
- Chest
Skuldafn North Tower
The North Tower’s similar to its twin—full of undead and housing a chest on its upper level. Head outside through the upstairs door and reenter the tower via the other balcony door to discover a second chest in a small alcove.
- Chests (2)
Door to Skuldafn Temple
Skuldafn Temple (Interior: Section I)
Door to Skuldafn
Entry Hall
The legendary portal to Sovngarde is housed within this temple. Beware of pressure plate traps and Draugr as you explore the cavernous entry hall, looting a chest on the right.
Puzzle Chamber I
Spin the three Nordic pillars so that the two on the outside are mirroring the glyphs on the opposing walls (Snake, Whale). Then spin the central pillar so that its Hawk glyph faces toward the far porcullises. Pull the central lever to raise the Hawk portcullis, then raid the chest beyond. Change the central pillar again so that its Snake glyph is facing the portcullises; then pull the lever a second time to open the Snake portcullis and advance.
Draugr Crypt
Loot another chest at the bottom of the following chamber, then cut through Frostbite Spiders on your way to another room with a second Nordic Pillars Puzzle. Find a fourth chest here.
Puzzle Chamber II
Solve the simple puzzle by spinning the three pillars so that the bottom one shows a Snake, while the upper two show a Whale and a Hawk, matching the glyphs on the walls about the room. Pull the lever to lower the drawbridge that leads deeper into the temple.
- Danger! Dart Trap (pressure plates)
- Chests (4)
Door to Skuldafn Temple
Skuldafn Temple (Interior: Section II)
Door to Skuldafn Temple
Grand Stairs
Loop around the entry room, slaying Draugr on your way to a stairwell.
 Spiral Steps
Beware the pressure plate near the stairwell—stepping on it causes a hanging lamp to fall and ignite the oily floor, while also causing arrows to fly out from the far wall! Go upstairs and raid a chest near more oil and another hanging lamp.
 Oily Hall
Pull the nearby lever to open the north portcullis and sack another chest on your way down an oily hall, but beware another dangerous pressure plate.
 Nordic Puzzle Door
Kill a powerful Draugr in the passage the follows to obtain the Diamond Claw, then use the claw to open the nearby puzzle door (Fox, Moth, Dragon).
 Word Wall Chamber
Approach the Word Wall that follows to gain new power, then proceed toward the door that leads back outside to Skuldafn’s exterior, swiping a few potions from a small embalming chamber along the way.
- Danger! Dart Trap (pressure plate), Oil Lamp Trap, Oil Lamp Traps (pressure plates), Oil Pool Trap
- Dragon Claw: Diamond Claw [10/10]
- Word Wall: Storm Call [3/3]
- Chests (2)
- Potions
- Loose gear
Door to Skuldafn
Skuldafn (Exterior: Temple Apex)
 Door to Skuldafn Temple
 West Tower
Cut down the Draugr outside the temple, then descend the wooden stairs of the west tower to plunder a large chest at the bottom.
 Portal Threshold
Go back up and circle around the temple so you may scale its exterior stairs, at last arriving at the portal to Sovngarde. Slay the mighty Dragon Priest that guards this wondrous site so you may claim its valuable mask and staff. Inspect the Dragon Seal to replace the staff and open the portal once more. Gather your courage and jump into the beam to journey to Sovngarde [10.06]!
- Dragon Priest Mask: Nahkriin [10/10]
- Unique Weapon: Dragon Priest Staff [73/80]
- Chest
- Potion
 Portal to Sovngarde
[10.06] Sovngarde
Related Quests
- Main Quest: Sovngarde
- Main Quest: Dragonslayer
- Main Quest: Epilogue
Recommended Level: 24
Dungeon: Dragon Lair
- Alduin
- Erlendr
- Felldir the Old
- Gormlaith Golden-Hilt
- Hakon One-Eye
- Hero of Sovngarde
- Hunroor
- Imperial Soldier
- Jurgen Windcaller
- Nikulas
- Stormcloak Soldier
- Tsun
- Ulfgar the Unyielding
- Ysgramor
- Area Is Locked (quest required)
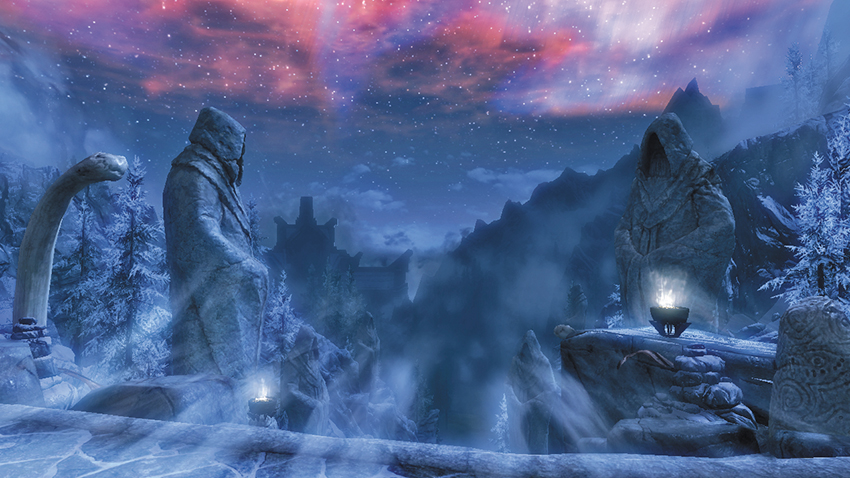
Sovngarde is the storied underworld of the Nords—the place where the greatest Nord heroes go when they die to enjoy an eternity of feasting and merriment. The only way a living mortal can visit this surreal realm is via the portal at Skuldafn [10.05], another special location that can only be visited during Main Quest: The World-Eater’s Eyrie.
Sovngarde (Exterior)
Use the Clear Skies Shout to clear a path through Sovngarde’s misty exterior. You can use Clear Skies to prevent Alduin from devouring the souls lost in the mist (they will aid you in the final battle against Alduin), but don’t bother trying to attack Alduin—he’s protected by his mist. You can turn right or left at the first junction; the steps straight ahead merely lead to an overlook. Wind around the central hill and approach Tsun, the guardian of this place. Defeat him to prove your worth, then cross the Whalebone Bridge and enter the towering Hall of Valor.
Hall of Valor
Skyrim’s greatest heroes stroll the Hall of Valor. Ysgramor himself greets you when you first enter. Enjoy your peek at a true Nord’s idea of paradise, then approach the three heroes of old to learn what you must do to defeat Alduin.